Home>Garden Essentials>How To Plant Seed Garlic

Garden Essentials
How To Plant Seed Garlic
Modified: March 16, 2024
Learn how to plant seed garlic in your garden with our step-by-step guide. Grow healthy, flavorful garlic at home and enjoy the rewards of your own harvest.
(Many of the links in this article redirect to a specific reviewed product. Your purchase of these products through affiliate links helps to generate commission for Storables.com, at no extra cost. Learn more)
Introduction
Garlic is not only a staple in the culinary world but also a versatile and beneficial plant to grow in your garden. Its pungent aroma and distinct flavor add depth to a variety of dishes, making it a beloved ingredient for chefs and home cooks alike. However, garlic is not only valued for its culinary uses; it also offers numerous health benefits and is known for its natural antibacterial and antiviral properties.
If you enjoy the flavor and benefits of garlic, why not take it a step further and grow your own? Planting seed garlic is a rewarding and relatively easy process that can yield a bountiful harvest of fresh, flavorful garlic bulbs. In this article, we will guide you through the steps to successfully plant seed garlic in your garden.
Before we dive into the process, it’s important to understand that there are different types of garlic, each with its own unique flavor profile and growing requirements. The two main types are hardneck garlic and softneck garlic. Hardneck garlic varieties are known for their rich and robust flavors, while softneck garlic varieties are milder and better suited for long-term storage.
Now that we have a general understanding of garlic, let’s move on to the step-by-step process of planting seed garlic. By the end of this article, you’ll have all the knowledge and confidence you need to successfully grow your very own garlic in your garden.
Key Takeaways:
- Planting seed garlic is a rewarding and straightforward process that can yield flavorful bulbs. Choose the right cloves, prepare the soil, and care for the plants to enjoy a bountiful harvest.
- By following the steps to plant seed garlic, you can grow your own flavorful bulbs with health benefits. Enjoy the satisfaction of homegrown garlic in your culinary creations.
Read more: How To Store Garlic For Planting
Step 1: Choosing the Right Garlic Cloves
When it comes to planting seed garlic, selecting the right cloves is crucial for a successful harvest. Here are some key factors to consider:
- Variety: Choose a garlic variety that suits your taste preferences and growing conditions. Hardneck garlic varieties are ideal for regions with colder climates, while softneck varieties thrive in milder climates.
- Size and Quality: Look for large, plump cloves with tight, papery skins. Avoid cloves that appear dry, moldy, or damaged, as they may not produce healthy plants.
- Source: Purchase your garlic cloves from a reputable supplier or local farmer to ensure their quality and authenticity. Avoid using garlic from grocery stores, as they are often treated with chemicals to inhibit sprouting.
- Adaptability: If possible, choose garlic cloves that are adapted to your specific growing region. Locally sourced garlic will have a better chance of thriving in your climate and soil conditions.
It’s important to note that garlic cloves bought from a grocery store are typically not suitable for planting, as they are typically sprayed with growth inhibitors to prevent sprouting. Instead, invest in high-quality seed garlic from a trusted source to ensure optimal results.
Before planting, it’s a good idea to separate the cloves from the bulb, keeping the papery skin intact. This will make it easier to plant them individually and reduce the risk of damaging the cloves.
Now that you have chosen the right garlic cloves for planting, it’s time to prepare the planting area in your garden.
Step 2: Preparing the Planting Area
Preparing the planting area for your seed garlic is crucial to ensure optimal growth and development of the plants. Follow these steps to create the perfect environment for your garlic:
- Select a Suitable Location: Garlic thrives in well-drained soil and requires plenty of sunlight. Choose a location in your garden that receives at least 6-8 hours of direct sunlight daily. Avoid areas prone to waterlogging, as this can cause the garlic bulbs to rot.
- Prepare the Soil: Garlic prefers loose, fertile soil with a pH level between 6.0 and 7.0. Remove any weeds or debris from the planting area and loosen the soil using a garden fork or tiller. Incorporate organic matter, such as compost or well-rotted manure, into the soil to improve its structure and nutrient content.
- Consider Raised Beds: If you have heavy clay soil or poor drainage, consider planting your seed garlic in raised beds. This will ensure better drainage and prevent waterlogging, which can lead to fungal diseases.
- Provide Adequate Drainage: To prevent waterlogging, ensure that the planting area has proper drainage. If the soil tends to retain water, you can improve drainage by incorporating coarse sand or perlite into the soil.
- Clear the Area: Remove any rocks, roots, or large clumps of soil from the planting area, as they can interfere with the growth of the garlic bulbs.
By following these steps, you will create a favorable environment for your seed garlic to flourish. Once the soil is prepared, it’s time to move on to the next step: preparing the garlic cloves for planting.
Step 3: Preparing the Garlic Cloves for Planting
Before you can plant your garlic cloves, it’s important to prepare them properly to ensure successful growth and development. Follow these steps to prepare the garlic cloves for planting:
- Select the Largest and Healthiest Cloves: Choose the largest and healthiest cloves from your seed garlic. These will have the best chance of producing strong, vigorous plants.
- Separate the Cloves: Gently separate the cloves from the bulb, making sure to keep the papery skin intact. Avoid bruising or damaging the cloves, as this can lead to poor plant development.
- Leave the Skins On: Unlike many other plants, garlic cloves should be planted with their papery skins intact. The skins help protect the cloves from drying out and provide nutrients during the early stages of growth.
- Consider Pre-soaking: Some gardeners recommend pre-soaking the garlic cloves in water or a mild organic solution for a few hours before planting. This can help stimulate the cloves and promote faster germination.
It’s worth noting that garlic cloves begin to lose viability as soon as they are separated from the bulb, so it’s best to plant them as soon as possible after preparation.
Once your garlic cloves are prepared, it’s time to move on to the next step: planting them in the prepared soil.
Plant seed garlic in well-drained soil with plenty of organic matter. Break apart the bulbs into individual cloves and plant them 2 inches deep and 4-6 inches apart. Water regularly and mulch to retain moisture.
Step 4: Planting the Garlic Cloves
Now that you have your garlic cloves prepared, it’s time to plant them in the prepared soil. Follow these steps for successful planting:
- Dig Planting Holes: Use a hand trowel or your fingers to dig small holes in the soil. The holes should be about 2-3 inches deep and spaced approximately 4-6 inches apart in rows, with each row spaced about 12-18 inches apart.
- Plant the Cloves: Place each garlic clove in a planting hole with the pointed end facing up and the flat or rounded end facing down. Plant the cloves with the tip about 1-2 inches below the soil surface. Space the cloves evenly and ensure they are not crowded.
- Cover and Mulch: Once all the cloves are planted, gently cover them with soil and lightly firm the soil around them. Then, apply a layer of mulch, such as straw or shredded leaves, to help maintain moisture, control weeds, and protect the garlic plants from extreme temperatures.
- Water: After planting, give the newly planted garlic cloves a thorough watering. The soil should be evenly moist, but not overly saturated, throughout the growing season.
It’s important to note that planting depth and spacing may vary slightly depending on the garlic variety, so refer to the specific guidelines provided with your seed garlic for optimal results.
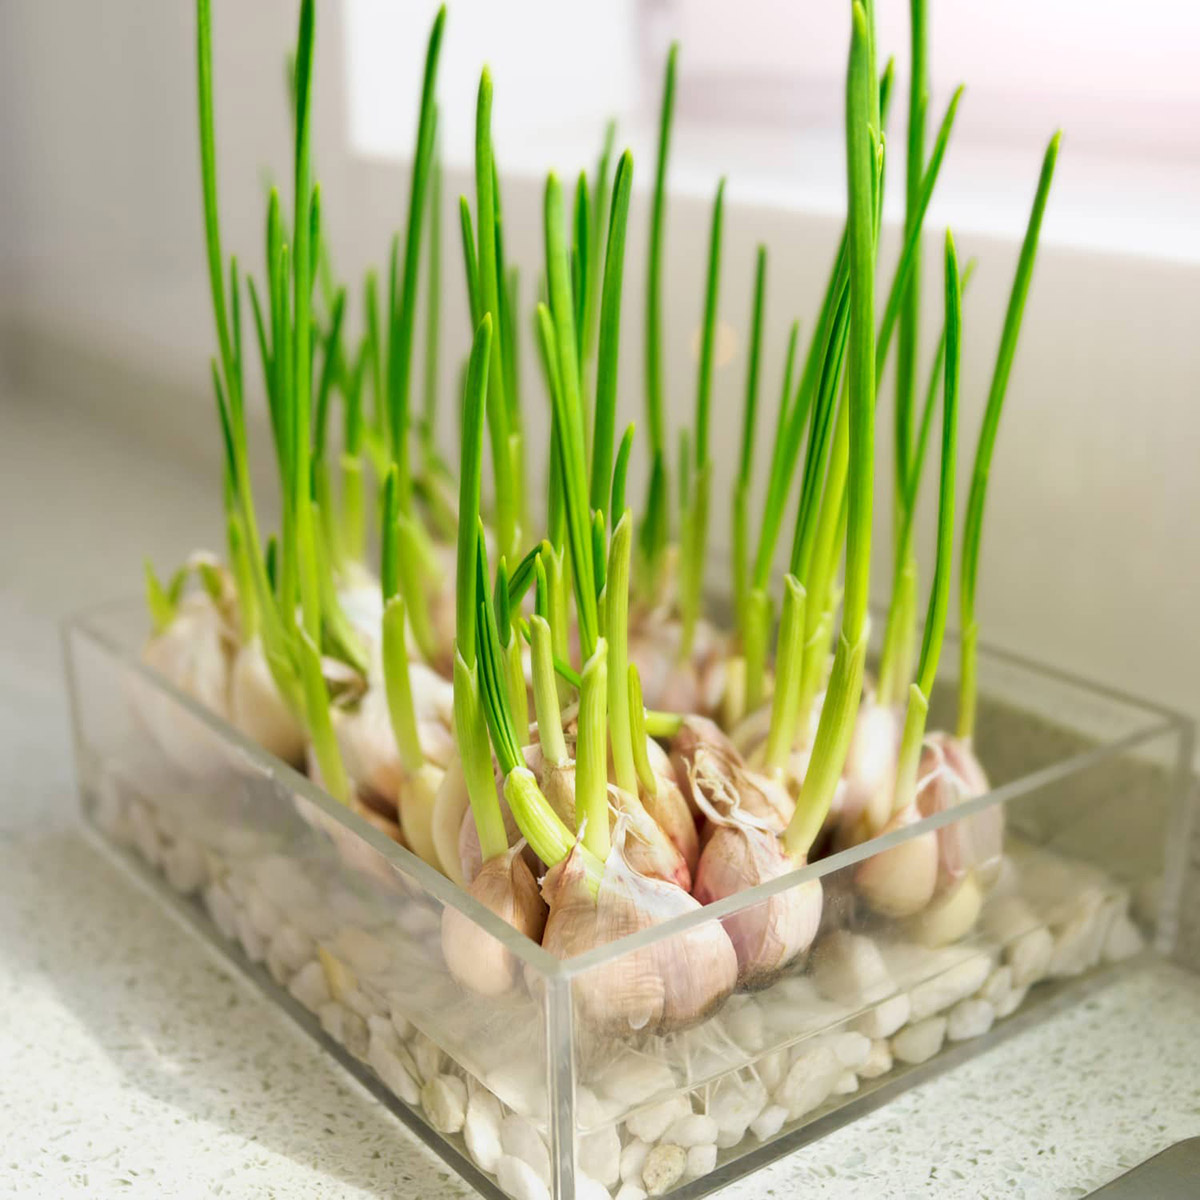
Once the garlic cloves are planted, you can sit back and watch as they begin to sprout and grow. But don’t forget about caring for your seed garlic, which we will discuss in the next step.
Read more: How To Harvest Garlic Seeds
Step 5: Caring for Seed Garlic
Caring for your seed garlic is essential to ensure its proper growth and development. Follow these steps to provide the necessary care for your garlic plants:
- Watering: Garlic plants require regular watering, especially during dry periods. Keep the soil consistently moist but avoid overwatering, as excessive moisture can lead to rot. Aim to provide about 1 inch of water per week, either through rainfall or irrigation.
- Weeding: Keep the area around your garlic plants free from weeds, as they can compete for nutrients and water. Regularly remove any weeds that appear, being careful not to disturb the shallow roots of the garlic plants.
- Fertilizing: Garlic plants benefit from a balanced fertilizer application. About a month after planting, you can apply a slow-release organic fertilizer or a balanced granular fertilizer according to the manufacturer’s instructions. Avoid over-fertilizing, as this can lead to excessive leaf growth and reduced bulb development.
- Mulching: Maintain a layer of mulch around the garlic plants to conserve moisture, suppress weed growth, and regulate soil temperature. Renew the mulch layer as needed to maintain a thickness of 2-3 inches.
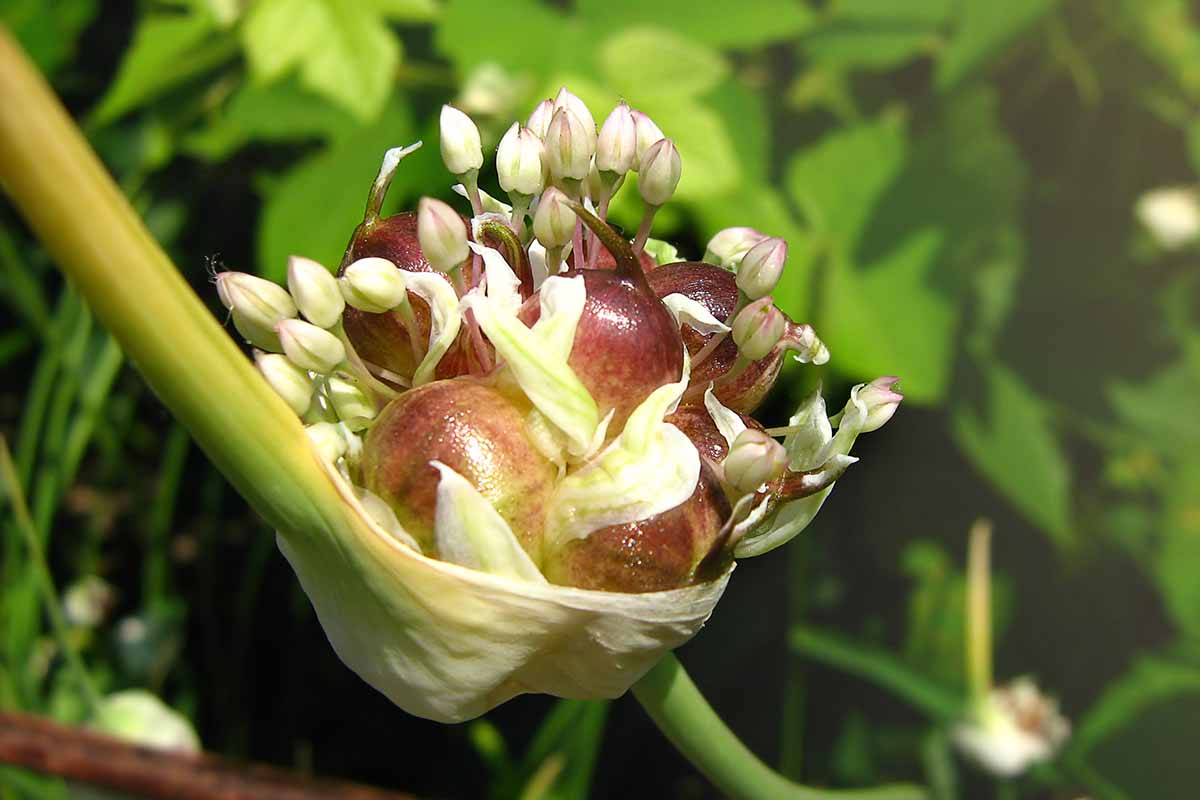
- Scaping (Optional): Hardneck garlic varieties produce a tall, flower stalk called a scape. Some gardeners choose to remove the scapes to redirect the plant’s energy towards bulb development. Scapes are edible and can be used in cooking, so this step can provide both a culinary and gardening benefit.
- Watch for Pests and Diseases: Keep an eye out for common garlic pests such as aphids, onion maggots, and nematodes. If necessary, take appropriate measures to control the pests using organic methods. Additionally, watch for signs of diseases such as white rot or rust, and promptly address any issues to prevent their spread.
By providing these essential care practices, you will help your seed garlic plants thrive and maximize their potential for a bountiful harvest. Now, let’s move on to the final step: harvesting and storing your garlic.
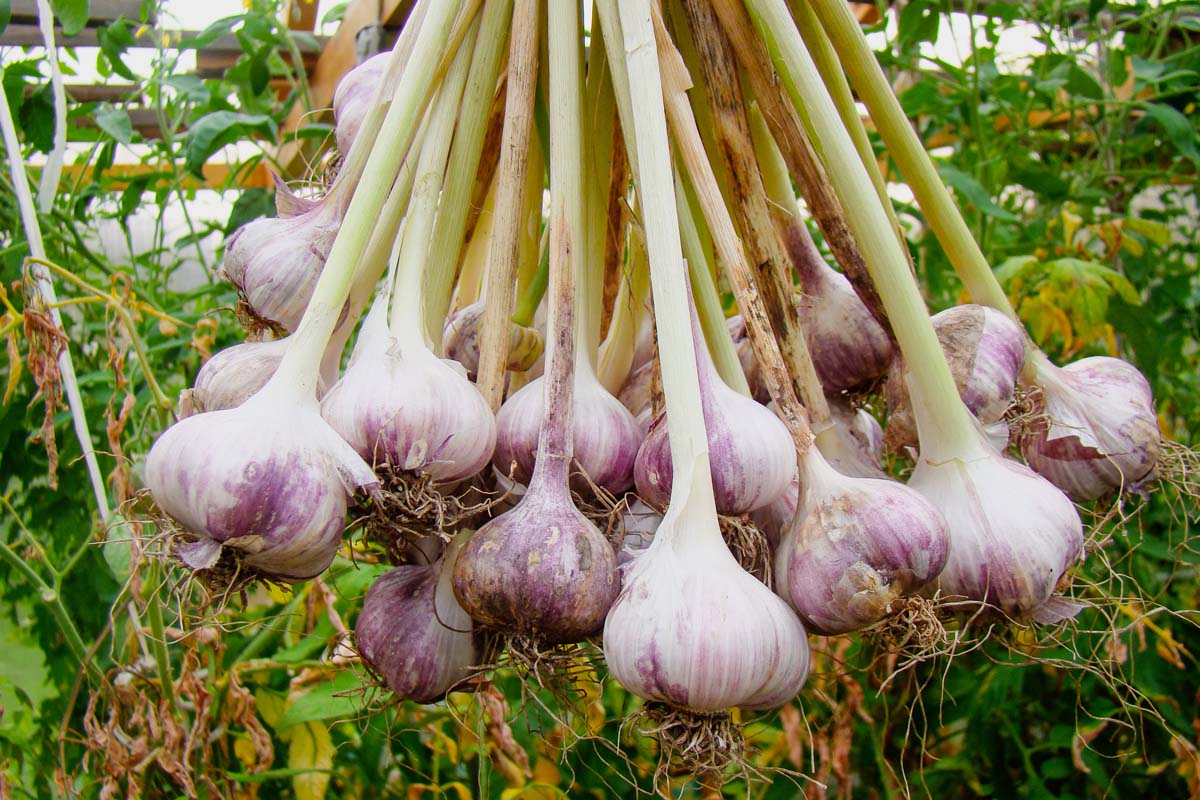
Step 6: Harvesting and Storing Garlic
Harvesting and storing your garlic is the exciting culmination of your efforts. Here’s how to know when it’s time to harvest and how to store your garlic bulbs:
- Knowing When to Harvest: Garlic is usually ready to harvest when the majority of the leaves have turned yellow or brown, and about half of them have dried up. This is typically around late spring or early summer, depending on your location and the variety you planted.
- Harvesting the Bulbs: To harvest garlic, carefully loosen the soil around the bulbs using a garden fork or trowel. Gently lift the bulbs from the ground, being careful not to damage them. Avoid pulling the garlic by the leaves, as this can damage the bulbs.
- Drying and Curing: After harvesting, it’s important to dry and cure the garlic bulbs to extend their shelf life. Lay the harvested bulbs in a single layer in a dry, well-ventilated area out of direct sunlight. Allow them to dry for 2-3 weeks, or until the outer layers feel papery and the bulbs are fully cured.
- Trimming and Cleaning: Once the bulbs are completely dry, trim off the roots and remove any loose or excessive outer layers. Be careful not to remove too many layers, as this can leave the bulbs vulnerable to spoilage during storage.
- Storing Garlic: Store the garlic bulbs in a cool, dry, and well-ventilated location, such as a pantry or cellar. You can keep the bulbs whole or separate them into individual cloves for easy use. Avoid storing garlic in the refrigerator, as the cold temperature can cause premature sprouting or loss of flavor.
When stored properly, garlic can typically last for several months. It’s important to periodically check your stored garlic for any signs of mold or decay, and remove any affected bulbs to prevent them from spoiling the others.
Now that you have harvested and stored your garlic bulbs, you can enjoy the fruits of your labor in your culinary creations. Remember to save a few bulbs for replanting in the next growing season, ensuring a continuous cycle of garlic production in your garden.
Congratulations on successfully planting, growing, and harvesting your own garlic! You now have the knowledge and skills to continue cultivating this versatile and flavorful plant in your garden for years to come.
Conclusion
Planting seed garlic is a wonderful way to experience the joy of growing your own fresh, flavorful bulbs. With the right knowledge and a little bit of care, you can cultivate a thriving garlic crop right in your own backyard. Not only will you have a bountiful harvest of aromatic garlic to enhance your culinary creations, but you’ll also benefit from the health-promoting properties that garlic offers.
Throughout this article, we’ve covered the essential steps to successfully plant seed garlic. We discussed choosing the right garlic cloves, preparing the planting area, and how to properly prepare the garlic cloves for planting. We also explored the process of planting the cloves, caring for the plants, and finally, harvesting and storing your garlic bulbs.
By following these steps and incorporating best practices in your gardening routine, you can achieve a thriving garlic crop year after year. Remember to provide adequate water, maintain weed-free beds, fertilize as needed, and monitor for any pests or diseases that may arise. With proper care and attention, you’ll be rewarded with a flavorful and abundant garlic harvest.
So, why not elevate your gardening experience and embark on the journey of planting seed garlic? Not only will you have the satisfaction of growing your own food, but you’ll also have the pleasure of enjoying the rich flavors and health benefits that fresh garlic brings to your meals.
Get started today, and soon you’ll be reaping the rewards of your own delicious and homegrown garlic crop. Happy gardening!
Frequently Asked Questions about How To Plant Seed Garlic
Was this page helpful?
At Storables.com, we guarantee accurate and reliable information. Our content, validated by Expert Board Contributors, is crafted following stringent Editorial Policies. We're committed to providing you with well-researched, expert-backed insights for all your informational needs.


0 thoughts on “How To Plant Seed Garlic”