Home>Articles>How To Store Golf Cart Batteries In The Winter
Articles
How To Store Golf Cart Batteries In The Winter
Modified: February 23, 2024
Discover the best ways to store your golf cart batteries during the winter season with our informative articles. Proper storage is essential for maximizing battery life and performance.
(Many of the links in this article redirect to a specific reviewed product. Your purchase of these products through affiliate links helps to generate commission for Storables.com, at no extra cost. Learn more)
Introduction
Winter can be a challenging time for golf cart owners, especially when it comes to the storage and maintenance of their batteries. Proper battery storage during the winter months is essential to ensure their longevity and performance when the warmer seasons return. In this article, we will explore why it is important to store golf cart batteries correctly during winter and provide a step-by-step guide on how to do so.
Golf cart batteries are not immune to the harsh conditions of winter. Freezing temperatures, moisture, and prolonged periods of inactivity can all have a detrimental effect on battery life and performance. Neglecting proper storage procedures can lead to reduced battery capacity, slower charging times, and even permanent damage.
By taking the necessary steps to store your golf cart batteries correctly during the winter, you can maximize their lifespan, maintain optimal performance, and avoid costly replacements. So, let us delve into why battery storage during winter is crucial and how you can safeguard your batteries for the long haul.
Key Takeaways:
- Properly storing golf cart batteries in winter is crucial to prevent reduced capacity, slower charging, and sulfation. Follow a step-by-step guide to maximize battery lifespan and performance.
- Regularly checking and maintaining golf cart batteries during winter storage is essential for optimal performance and longevity. Follow additional tips to further extend battery life and ensure reliability.
Read more: How To Store Golf Cart For Winter
Why Proper Battery Storage in Winter is Important
Proper battery storage in winter is essential for several reasons. Firstly, cold temperatures can significantly impact the performance and lifespan of golf cart batteries. When exposed to freezing temperatures, the electrolyte inside the battery can become thicker, which reduces its ability to deliver power. This can result in weaker performance and a shorter driving range for your golf cart.
Additionally, cold weather can cause the battery’s internal chemistry to slow down, reducing its overall capacity. This means that the battery will not be able to hold its charge as effectively or for as long. When spring arrives and you’re ready to hit the fairways again, you may find that your batteries struggle to provide the power needed for a full round of golf.
Inadequate storage can also lead to a phenomenon known as sulfation. Sulfation occurs when the battery is discharged and not recharged for an extended period. During this time, sulfur accumulates on the battery plates, which can harden and reduce the battery’s ability to hold a charge. If this happens, you may find yourself needing to replace your batteries sooner than expected.
Proper battery storage during winter also helps to prevent damage caused by moisture. If batteries are left in a damp environment, water can seep into the battery case, leading to corrosion and potentially rendering the battery unusable. Additionally, batteries that are not properly stored are more susceptible to damage from freezing temperatures, which can cause them to crack or leak.
By taking the time to store your golf cart batteries correctly during the winter, you can mitigate these risks and ensure that your batteries are in optimal condition when the golfing season resumes.
Steps for Properly Storing Golf Cart Batteries in Winter
Properly storing your golf cart batteries during the winter months is crucial for their longevity and performance. Follow these steps to ensure that your batteries are protected and ready to go when the golf season returns:
- Clean the Batteries: Before storing your batteries, make sure to clean them thoroughly. Use a mixture of baking soda and water to remove any dirt or corrosion on the terminals. Rinse with clean water and dry them completely.
- Perform a Charging Cycle: Fully charge your golf cart batteries before placing them in storage. This helps prevent sulfation and ensures that the batteries maintain a healthy charge during their time in storage. Use a battery charger specifically designed for golf cart batteries and follow the manufacturer’s instructions.
- Disconnect the Batteries: Once your batteries are fully charged, disconnect them from the golf cart to prevent any unnecessary discharge. This includes disconnecting the battery cables from both the positive and negative terminals. Inspect the cables for any signs of damage and replace them if necessary.
- Remove the Batteries from the Golf Cart: It is best to remove the batteries from your golf cart for winter storage. This will protect them from any potential damage caused by freezing temperatures or moisture. Follow the manufacturer’s instructions for safely removing the batteries, as each golf cart may have a different process.
- Store Batteries in a Cool, Dry Location: Find a cool, dry place to store your golf cart batteries during the winter. Ideally, the storage area should be temperature-controlled and free from extreme heat or cold. Avoid areas with high humidity or direct sunlight, as this can accelerate the deterioration of the batteries. If possible, use a battery storage box or rack to keep the batteries organized and off the ground.
- Periodically Check the Batteries: While your batteries are in storage, it’s important to periodically check on them and ensure they remain in good condition. This includes checking the battery voltage and inspecting for any signs of damage or leakage. If you notice any issues, take appropriate action to rectify them or seek professional assistance.
By following these steps, you can properly store your golf cart batteries and protect them from the harsh winter conditions. This will help maintain their performance and extend their lifespan, saving you time and money in the long run.
Step 1: Clean the Batteries
Properly cleaning your golf cart batteries is the first essential step in preparing them for winter storage. Over time, batteries can accumulate dirt, corrosion, and other contaminants on their terminals, which can impede their performance and significantly shorten their lifespan. By following these tips, you can ensure that your batteries are thoroughly cleaned and in optimal condition:
- Gather the necessary materials: Before you begin cleaning, gather the following items: baking soda, water, a wire brush or battery terminal cleaner, a bucket, and clean towels.
- Prepare the cleaning solution: Fill the bucket with warm water and add a generous amount of baking soda. Stir the mixture until the baking soda is fully dissolved. The baking soda acts as a mild alkaline solution that helps to neutralize any acidic residue on the battery terminals.
- Turn off the power and remove the batteries: Before you start cleaning, make sure to turn off the power to your golf cart and remove the batteries. This is essential for safety reasons and allows you easier access to the battery terminals.
- Inspect the batteries: Take a moment to visually inspect your batteries for any signs of damage, such as cracks or leaks. If you notice any significant damage, it may be best to replace the battery rather than attempting to clean it.
- Clean the connections: Dip the wire brush or battery terminal cleaner into the baking soda solution and scrub the battery terminals, as well as the cable connectors, to remove any corrosion or dirt. Be sure to pay attention to the positive and negative terminals, ensuring they are completely clean.
- Rinse with clean water: Once the terminals and connectors are clean, rinse them thoroughly with clean water to remove any remaining baking soda residue. This step is crucial to prevent any potential corrosion caused by the baking soda solution.
- Dry the batteries: Use a clean towel or cloth to dry the battery terminals and connectors. Make sure they are completely dry before reattaching the cables or storing the batteries to avoid the risk of corrosion or short circuits.
- Inspect and replace damaged cables: While cleaning the batteries, take the opportunity to inspect the battery cables for any signs of damage, such as fraying or corrosion. If the cables are in poor condition, it is recommended to replace them to ensure a secure and reliable connection.
By following these steps to clean your golf cart batteries, you can remove dirt, corrosion, and contaminants, ensuring optimal performance and prolonging the life of your batteries. Taking the time to clean your batteries before storing them for winter will set a strong foundation for their overall health and performance when you’re ready to hit the fairways again.
Step 2: Perform a Charging Cycle
Performing a charging cycle on your golf cart batteries before storing them for the winter is an essential step to ensure their optimal performance and longevity. This process helps to maintain battery health by preventing sulfation and ensuring that the batteries are fully charged and ready for storage. Follow these guidelines to perform a thorough charging cycle:
- Gather the necessary equipment: To perform a charging cycle, you will need a battery charger designed for golf cart batteries, as well as access to a power source.
- Read the battery charger instructions: Before starting, carefully read the instructions provided by the battery charger manufacturer. Familiarize yourself with the specific charging procedure and safety precautions.
- Connect the charger to the batteries: Once you are ready to begin, connect the battery charger to the golf cart batteries. Ensure that the positive (+) and negative (-) terminals are properly aligned and securely connected.
- Set the charger to the appropriate charging mode: Depending on the type of battery charger you have, you may need to select the appropriate charging mode. This is usually indicated in the charger’s instructions and should be chosen based on the battery type and size.
- Plug in the charger: After setting the charger to the correct mode, plug it into a power source. Make sure the power outlet is compatible with the charger’s voltage requirements.
- Monitor the charging progress: Keep an eye on the battery charger’s display or indicator lights to monitor the progress of the charging cycle. The charging process may take several hours or more, depending on the battery’s condition and size.
- Allow the batteries to charge fully: It is crucial to allow the batteries to charge fully before removing them from the charger. A complete charging cycle helps to minimize sulfation and ensure that the batteries have a healthy charge for the duration of their storage period.
- Disconnect and store the charger: Once the charging cycle is complete, disconnect the charger from the batteries and unplug it from the power source. Store the charger in a dry and safe place until your next use.
Performing a charging cycle before winter storage helps maintain the integrity and longevity of your golf cart batteries. It prevents the accumulation of sulfur on the battery plates, which can negatively affect battery performance and reduce overall capacity. By fully charging the batteries, you ensure they are ready to deliver optimal power when you next take your golf cart out for a spin.
Read more: How To Store Electric Golf Cart For Winter
Step 3: Disconnect the Batteries
Disconnecting the batteries from your golf cart is an important step in preparing them for winter storage. By disconnecting the batteries, you prevent any unnecessary discharge and minimize the risk of damage or corrosion during the dormant period. Follow these guidelines to safely disconnect the batteries:
- Turn off the power: Before you begin, make sure to turn off the power to your golf cart. This ensures that there is no electrical current running through the system, reducing the risk of accidental shocks or short circuits.
- Locate the battery compartment: Depending on the make and model of your golf cart, the battery compartment may be located under the seat, in the front compartment, or in the back. Consult your golf cart’s user manual if you are unsure of the exact location.
- Protect yourself: It is crucial to protect yourself while disconnecting the batteries. Wear protective gloves and safety glasses to shield your hands and eyes from any potential hazards.
- Identify the battery terminals: Take a moment to identify the positive (+) and negative (-) terminals on each battery. The positive terminal is typically marked with a plus sign, while the negative terminal is marked with a minus sign.
- Start with the negative terminal: Begin by disconnecting the negative terminal on each battery. Use a wrench or appropriate tool to loosen the nut or bolt that secures the cable to the negative terminal. Remove the cable from the terminal and set it aside.
- Proceed with the positive terminal: Once the negative terminals are disconnected, repeat the same process for the positive terminals. Loosen the nut or bolt, remove the cable, and set it aside.
- Inspect the cables and terminals: While the batteries are disconnected, take the time to inspect the cables and terminals for any signs of damage, corrosion, or wear. Replace any components that appear to be in poor condition to ensure a secure connection when you reconnect the batteries.
- Secure the cables: To prevent the cables from coming into contact with the battery terminals or other metal surfaces, it is advisable to tape or tie them away. This reduces the risk of accidental sparks or electrical discharge during storage.
By following these steps to disconnect the batteries from your golf cart, you minimize the risk of discharge and potential damage during winter storage. Properly disconnecting the batteries also allows for easy inspection and maintenance of the cables and terminals, ensuring a reliable power source when the golf season resumes.
When storing golf cart batteries in the winter, make sure to fully charge them before storing, and then disconnect them to prevent any power drain. Store them in a cool, dry place and check the charge periodically to prevent them from fully discharging.
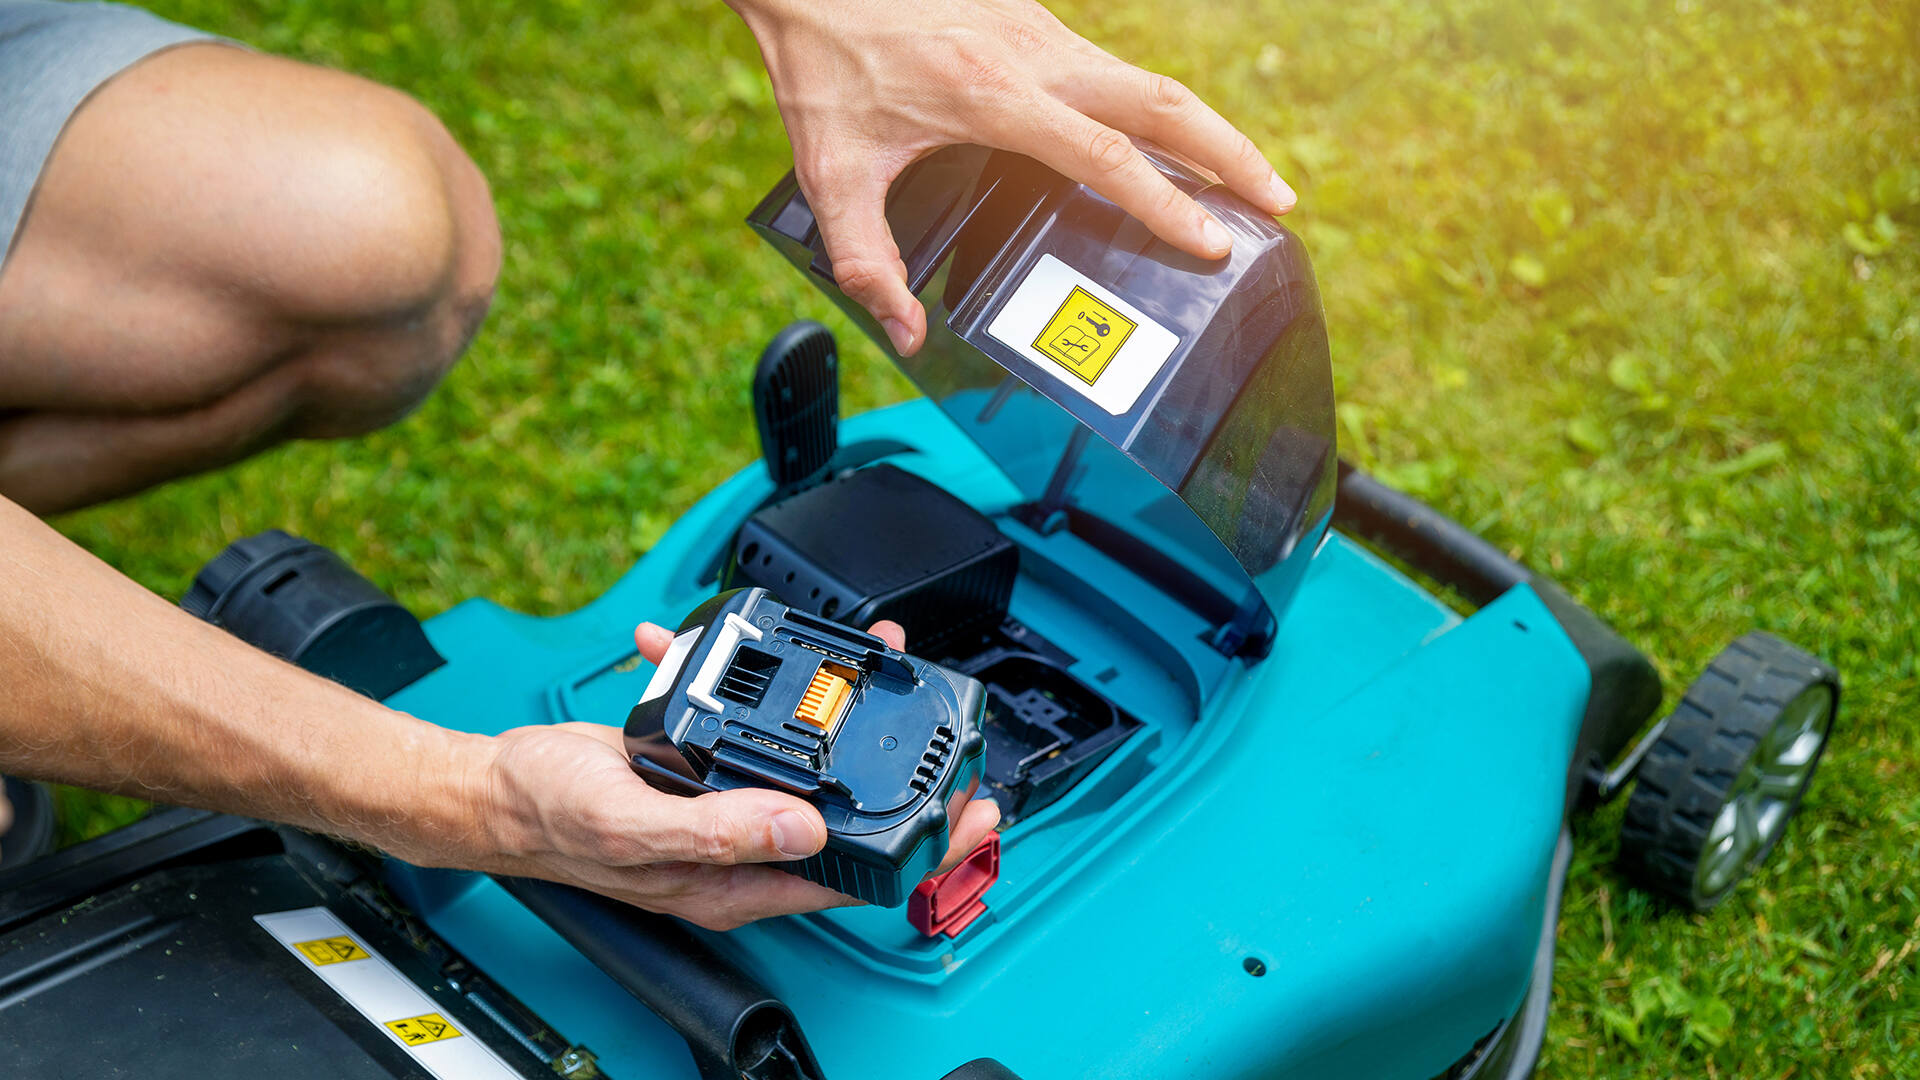
Step 4: Remove the Batteries from the Golf Cart
Removing the batteries from your golf cart is a crucial step in preparing them for winter storage. By taking the batteries out of the golf cart, you protect them from potential damage caused by freezing temperatures, moisture, or other environmental factors. Follow these steps to safely remove the batteries:
- Ensure a safe working environment: Before you begin, make sure you are working in a well-ventilated area with good lighting. Ensure that the golf cart is turned off and parked on a flat surface.
- Refer to the manufacturer’s instructions: Each golf cart model may have specific instructions for removing the batteries. Consult the golf cart’s user manual or contact the manufacturer if you are unsure of the removal process.
- Gather the necessary tools: Prepare the tools you will need, such as a wrench or screwdriver, to help you disconnect any mounting brackets or straps that secure the batteries in place.
- Locate the battery compartment: Identify the battery compartment in your golf cart. In most cases, the battery compartment can be found underneath the seat or in the front or rear of the cart.
- Disconnect the battery cables: Begin by disconnecting the battery cables from each battery. Start with the negative (-) terminal, loosening the nut or bolt and removing the cable. Repeat the process for the positive (+) terminal.
- Remove any mounting brackets or straps: Depending on your golf cart model, there may be mounting brackets or straps holding the batteries in place. Use the appropriate tools to remove these brackets or straps, allowing for easy removal of the batteries.
- Carefully remove the batteries: Lift the batteries out of the golf cart one at a time, using proper lifting techniques to avoid strain or injury. Batteries can be heavy, so it is advisable to have a helper if needed.
- Inspect and clean the battery compartment: While the batteries are removed, take the opportunity to inspect and clean the battery compartment. Remove any debris or corrosion and ensure that the area is clean and dry before you store the batteries.
- Store the batteries properly: After removing the batteries, carefully place them in an appropriate storage container or on a stable surface. Make sure to keep them upright and in a cool, dry location away from direct sunlight or extreme temperatures.
By following these steps to remove the batteries from your golf cart, you ensure their protection during the winter months. Taking the time to safely remove the batteries allows for thorough inspection, cleaning, and proper storage, ultimately prolonging their overall lifespan and ensuring optimal performance when you are ready to use them again.
Step 5: Store Batteries in a Cool, Dry Location
Properly storing your golf cart batteries in a cool and dry location is crucial for their longevity and performance during the winter months. By providing the right storage conditions, you can protect the batteries from temperature extremes, moisture, and other potential damaging factors. Follow these guidelines to ensure your batteries are stored in an ideal environment:
- Select a suitable storage area: Choose a cool and dry location for storing your golf cart batteries. Ideally, the storage area should have a temperature range between 50°F (10°C) and 80°F (27°C). Avoid areas that are prone to extreme temperature fluctuations or high humidity levels.
- Keep the batteries off the ground: Store the batteries on a stable surface that is elevated off the ground. Using a battery storage rack or shelf is ideal as it prevents direct contact with the ground and minimizes the risk of moisture or physical damage.
- Avoid exposure to sunlight: Place the batteries away from direct sunlight or any other sources of heat. Prolonged exposure to sunlight can cause the batteries to overheat and reduce their overall performance and lifespan.
- Protect the batteries from moisture: Ensure that the storage area is dry and well-ventilated, as excess moisture can lead to corrosion and damage to the batteries. Consider using a dehumidifier or moisture-absorbing products to maintain optimal humidity levels.
- Keep the batteries in a secure location: Store the batteries in an area where they are not at risk of being knocked over or damaged. This helps to prevent accidental spills or impacts that could compromise the integrity of the batteries.
- Avoid storing near flammable materials: Keep the batteries away from flammable materials, chemicals, and any potential sources of fire or sparks. This reduces the risk of accidents and ensures the safety of both the batteries and the storage area.
- Label and organize: If you have multiple batteries, it is helpful to label them or create a system to easily identify and track their age or usage. This allows you to rotate them effectively and ensures that you use the appropriate battery when reinstalling them in your golf cart.
- Periodically inspect the batteries: While the batteries are in storage, periodically inspect them for any signs of damage, leakage, or deterioration. If you notice any issues, take appropriate action or seek professional assistance to address the problem.
By following these guidelines, you can ensure that your golf cart batteries are stored in an optimal environment during the winter months. A cool and dry storage location helps to maintain the batteries’ performance and prolongs their overall lifespan, ensuring they are ready for action when the golfing season returns.
Step 6: Periodically Check the Batteries
Periodically checking your golf cart batteries during their winter storage is essential to ensure their well-being and ability to perform when you’re ready to use them again. By conducting regular inspections, you can identify and address any potential issues early on, preventing further damage and ensuring optimal battery health. Follow these guidelines for effectively checking your batteries:
- Establish a schedule: Set a regular schedule for checking your batteries. Monthly or bi-monthly inspections are generally sufficient, but adjust the frequency based on the specific needs of your batteries and storage environment.
- Inspect the battery exterior: Start by visually inspecting the batteries for any signs of damage, such as cracks, leaks, or swelling. If you notice any abnormalities, take appropriate action to address the issue or seek professional assistance if necessary.
- Check the battery voltage: Use a voltmeter or multimeter to measure the voltage of each battery. A healthy battery typically maintains a charge between 12.6 and 12.8 volts. If you notice a significant decrease in voltage, it may indicate a problem such as sulfation or a faulty battery.
- Inspect the battery terminals: Examine the battery terminals for any signs of corrosion, dirt, or loose connections. Clean the terminals if needed using a mixture of baking soda and water or a battery terminal cleaner. Ensure that the terminals are securely connected to the battery cables.
- Verify the battery charge: Use a battery tester or charger to verify the charge level of each battery. This helps to ensure that the batteries are maintaining a healthy charge throughout the storage period. If a battery is significantly discharged, consider recharging it before returning it to storage.
- Monitor for any abnormalities: During your inspections, be alert for any unusual odors, leaks, or other abnormalities that may indicate a battery problem. Pay attention to any changes in the battery’s appearance, performance, or charging behavior.
- Take action if needed: If you identify any issues during your inspections, take appropriate action to address them promptly. This may involve cleaning the terminals, recharging a discharged battery, or seeking professional assistance for more complex problems.
- Keep records: Maintain a record of your battery inspections, noting any observations, actions taken, and relevant dates. This allows you to track the condition and history of each battery and ensures you have a comprehensive record for future reference.
By regularly checking your golf cart batteries during winter storage, you can proactively address any issues that may arise. This helps to maintain battery health, prolong their lifespan, and ensures that your batteries are in optimal condition when you’re ready to hit the fairways once again.
Read more: How To Store A Battery For Winter
Tips for Extending Battery Life During Winter Storage
Properly storing your golf cart batteries during winter is crucial, but there are additional steps you can take to further extend their lifespan and maintain optimal performance. By following these tips, you can ensure that your batteries remain in top condition throughout the winter storage period:
- Top off the charge periodically: While in storage, consider periodically topping off the charge on your batteries. This helps to counteract any slight self-discharge that may occur and ensures that the batteries remain in a healthy state.
- Avoid storing batteries on concrete: Concrete can draw moisture and promote the discharge of batteries. To prevent this, place a wooden or plastic board between the battery and the concrete floor when storing them.
- Keep batteries clean and dry: Regularly inspect and clean the batteries to remove any dust, dirt, or corrosive substances. Make sure they are completely dry before placing them back into storage.
- Avoid freezing temperatures: Ensure that the storage location remains above freezing temperatures. Extreme cold can damage the battery plates and lead to irreversible damage.
- Consider using a battery maintainer: Invest in a battery maintainer, also known as a trickle charger, to keep the batteries at an optimal charge level. These devices provide a low current to maintain the battery’s charge without overcharging it.
- Rotate the batteries: If you have multiple sets of batteries, consider rotating them during storage. This helps to ensure that all batteries receive equal usage and prevent any single battery from deteriorating faster than others.
- Protect against pests: Take measures to protect your batteries from pests, such as mice or squirrels, which may cause damage by chewing on cables or nesting near the batteries. Use deterrents or traps if necessary.
- Avoid overcharging: While long-duration storage might tempt you to keep the batteries continuously charging, it’s essential not to overcharge them. Overcharging can lead to excessive heat generation and reduce the battery’s overall lifespan.
- Periodically exercise the batteries: If possible, periodically exercise your batteries by connecting them to a charger for a short period. This helps to prevent sulfation and keeps the battery plates active.
- Store batteries in a vertical position: Ideally, store your batteries in an upright or vertical position. This reduces the risk of acid spillage and prevents any potential damage that can occur from storing them on their side.
By following these tips, you can ensure that your golf cart batteries stay in peak condition during winter storage. These practices will help extend their lifespan, maintain optimal performance, and ensure that your batteries are ready to deliver reliable power when you’re ready to hit the fairways again.
Conclusion
Proper battery storage during the winter months is vital for ensuring the longevity and performance of your golf cart batteries. By following the steps outlined in this guide, you can protect your batteries from the harsh effects of freezing temperatures, moisture, and inactivity. Taking the time to clean the batteries, perform a charging cycle, disconnect them, remove them from the golf cart, and store them in a cool, dry location will greatly enhance their lifespan and maintain their optimal performance.
Additionally, periodically checking the batteries and following the tips for extending battery life during winter storage will further contribute to their overall health and longevity. By maintaining a regular maintenance schedule, you can identify and address any potential issues, ensuring that your batteries are in optimal condition when you’re ready to hit the fairways in the spring.
Remember to follow the manufacturer’s instructions specific to your golf cart and batteries. Each model may have unique specifications and requirements for winter storage. By adhering to these guidelines, you can maximize the lifespan of your batteries and avoid costly replacements down the line.
Proper battery storage is an investment in the longevity and performance of your golf cart batteries. By taking these steps and implementing the best practices outlined in this guide, you can ensure that your batteries remain in top condition during the winter months, and they will be ready to power your golf cart with optimal performance when you’re ready to enjoy the golfing season once again.
Frequently Asked Questions about How To Store Golf Cart Batteries In The Winter
Was this page helpful?
At Storables.com, we guarantee accurate and reliable information. Our content, validated by Expert Board Contributors, is crafted following stringent Editorial Policies. We're committed to providing you with well-researched, expert-backed insights for all your informational needs.


0 thoughts on “How To Store Golf Cart Batteries In The Winter”