Articles
How To Store A Cart
Modified: December 7, 2023
Learn effective methods for storing a cart with our insightful articles. Keep your cart organized and protected with our expert tips and techniques.
(Many of the links in this article redirect to a specific reviewed product. Your purchase of these products through affiliate links helps to generate commission for Storables.com, at no extra cost. Learn more)
Introduction
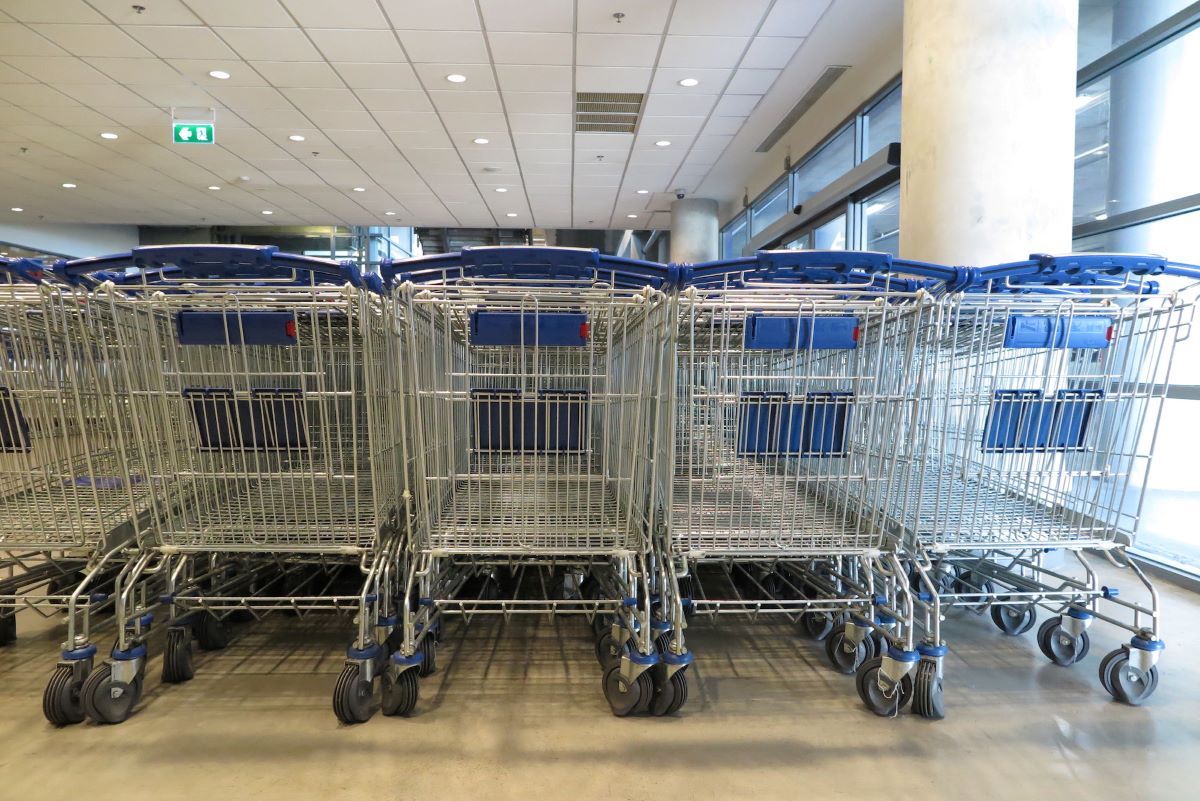
Having a cart can be incredibly convenient for transporting items, whether it’s for grocery shopping, hauling gardening supplies, or even moving heavy objects. However, there may be occasions when you need to store your cart for a certain period of time. Properly storing your cart not only keeps it in good condition but also ensures its longevity and functionality when you need it again.
In this article, we will guide you through the step-by-step process of storing a cart to maintain its quality and functionality. By following these simple steps, you can ensure that your cart remains in excellent condition and ready for use whenever you need it.
Key Takeaways:
- Properly storing your cart involves emptying, cleaning, and protecting it to maintain functionality and longevity. Follow these steps to ensure your cart remains in excellent condition for future use.
- Detach removable parts, protect metal surfaces, and store your cart in a dry, safe location to prevent rust, wear, and damage. By following these steps, you can ensure your cart is ready for use whenever you need it.
Read more: How To Store Golf Cart For Winter
Step 1: Emptying the Cart
The first step in storing a cart is to empty it completely. Remove all items, such as groceries, tools, or any other belongings, from the cart. Check all compartments and pockets to ensure that nothing is left behind.
Emptying the cart serves two purposes: first, it prevents any perishable or sensitive items from being damaged during storage, and second, it allows you to thoroughly clean the cart before storing it.
Ensure that you inspect each compartment and corner of the cart to make sure it is completely empty. This includes removing any loose debris or trash that may have accumulated.
If your cart has any removable inserts or compartments, take them out and empty them as well. This will help prevent any odor or mold growth in those areas.
By thoroughly emptying the cart, you create a clean and blank canvas for the next steps in the storage process.
Step 2: Cleaning the Cart
Once you have emptied your cart, it’s time to give it a thorough cleaning. Cleaning the cart not only keeps it in good condition but also ensures that no dirt or debris remains on the surfaces, which can lead to rust or other damage over time.
Start by wiping down the cart with a damp cloth or sponge to remove any surface dust or dirt. Pay close attention to the handle, wheels, and any other areas where dirt may accumulate.
If your cart has any stubborn stains or sticky residue, mix a mild detergent with warm water and use a soft brush or sponge to scrub the affected areas. Avoid using abrasive cleaners or tools that may scratch or damage the cart’s surfaces.
Once you have cleaned the cart thoroughly, rinse it with clean water to remove any soap residue. It’s essential to ensure that all cleaning agents are thoroughly removed to prevent any potential damage or discoloration.
After rinsing, dry the cart with a clean towel or allow it to air dry completely. This step is crucial to prevent moisture from accumulating, which can lead to rust or mold growth.
By cleaning the cart before storage, you not only maintain its appearance but also ensure that it remains in optimal condition for its next use.
Step 3: Detaching Removable Parts
Many carts have removable parts that can be detached for easier storage. This step is especially important if your cart has any components that may be susceptible to damage or wear when stored for a long period of time.
Start by identifying any detachable parts of your cart. This may include shelves, baskets, trays, or even the wheels. Consult the manufacturer’s instructions or user manual if you are unsure which parts can be removed.
Once you have identified the removable parts, carefully detach them from the cart. Follow any specific instructions provided by the manufacturer to ensure proper handling and avoid any accidental damage. If necessary, use the appropriate tools to remove any screws or bolts holding the parts in place.
After removing the detachable parts, clean them separately following the same cleaning process outlined in Step 2. This will help maintain their condition and prevent any dirt or debris from accumulating while in storage.
Once the removable parts are clean and completely dry, store them in a safe and accessible place. You may consider using a labeled container or a separate storage bag to keep all the parts together and prevent any loss or damage.
Detaching and storing the removable parts separately ensures their protection and allows for more efficient storage of the main cart itself.
Step 4: Protecting Metal Surfaces
If your cart has metal surfaces, it’s important to take steps to protect them from rust and corrosion, especially if you plan to store it in a damp or humid environment. By properly safeguarding the metal surfaces, you can extend the lifespan of your cart and prevent any potential damage.
Start by applying a thin layer of rust-resistant lubricant or metal protectant to the metal surfaces of the cart. This will create a barrier between the metal and moisture, preventing rust formation. Be sure to evenly distribute the protective product, paying special attention to areas that are more prone to rust, such as joints and corners.
After applying the protective solution, use a clean cloth to gently buff the metal surfaces. This will help distribute the product evenly and remove any excess residue.
If your cart has any exposed metal parts that cannot be protected with a lubricant or protectant, consider wrapping them with a soft cloth or foam padding. This will provide an additional layer of protection against scratches or dings while in storage.
Make sure that the metal surfaces are completely dry before storage. This will help prevent any moisture from being trapped and causing rust or corrosion.
By taking these steps to protect the metal surfaces of your cart, you can ensure that it remains in excellent condition throughout its time in storage.
When storing a cart, make sure to clean and dry it thoroughly to prevent rust. Store it in a dry, well-ventilated area to avoid moisture buildup. Cover it with a tarp or protective cover to prevent dust and debris from accumulating.
Step 5: Folding or Collapsing the Cart
If your cart is designed to fold or collapse, this step will allow you to save space and make storage more convenient. Folding or collapsing the cart is particularly useful if you have limited storage space or if you need to transport the cart to a different location.
Refer to the manufacturer’s instructions or user manual to determine the correct method for folding or collapsing your cart. Follow the steps provided to ensure safe and proper handling of the folding mechanism.
Typically, folding or collapsing a cart involves releasing any latches or locks that hold the structure in place. Gently push or pull the designated parts to collapse the cart, making sure to avoid any excessive force that may cause damage.
Once the cart is folded or collapsed, secure it in its folded position. This may involve using built-in straps or fasteners provided by the manufacturer. Ensuring that the cart is properly secured will prevent it from accidentally unfolding or collapsing during storage.
If your cart doesn’t have a folding or collapsing feature, you can proceed to the next step without taking any additional action in this regard.
Folding or collapsing your cart makes storage more efficient, allowing you to save space and easily transport the cart if needed.
Step 6: Wrapping or Covering the Cart
Once your cart is clean, all detachable parts are removed and stored safely, and the metal surfaces are protected, it’s time to wrap or cover the cart for additional protection during storage.
Start by selecting a suitable material to wrap or cover the cart. Ideally, choose a durable and breathable material that will prevent dust, dirt, and moisture from accumulating on the cart. Examples of suitable materials include plastic wrap, blankets, or a cart cover specifically designed for this purpose.
If using plastic wrap, carefully wrap the entire cart, making sure to cover all exposed surfaces. Ensure that the wrap is tight but not too constricting to avoid any potential damage. Secure the plastic wrap with tape or any other fastening method that will keep it in place during storage.
If using blankets or a cart cover, carefully drape the material over the cart, ensuring that all parts are adequately covered. Secure the cover in place with elastic bands or clips to prevent it from slipping off or being affected by environmental factors.
The purpose of wrapping or covering the cart is to provide an extra layer of protection against dust, dirt, and potential scratches while it is stored. This step is particularly important if your cart will be stored in a garage, shed, or any other area where it may be exposed to the elements.
Remember to avoid using materials that can trap moisture, such as plastic bags, as this can lead to mold or mildew growth. Opt for breathable materials that allow air circulation while still providing the necessary protection.
By wrapping or covering your cart, you ensure that it remains in pristine condition and is ready to use when you retrieve it from storage.
Step 7: Storing in a Dry and Safe Location
The final step in storing your cart is finding a suitable location where it will be stored safely and protected from moisture, extreme temperatures, and potential damage. Choosing the right storage area is crucial to ensure the longevity and functionality of your cart.
Start by assessing your options for storage spaces. Ideally, select an area that is dry, well-ventilated, and free from direct sunlight. Moisture can cause rust and mold growth, while excessive heat or cold can damage certain materials in the cart.
If you have a garage or shed, consider storing your cart there. Make sure the space is clean and organized to minimize any potential risks of damage. If the storage area has concrete flooring, placing a moisture-absorbent mat or pallet underneath the cart can provide an additional layer of protection against moisture.
If you don’t have access to a garage or shed, consider using a storage unit or an enclosed area in your home. Ensure that the area is clean and free from any potential hazards that may damage your cart.
When storing the cart, keep it elevated off the ground if possible. This helps to prevent contact with moisture and reduces the risk of damage from pests or rodents.
Finally, ensure that the cart is stored in a safe and secure manner. If necessary, use anchors or straps to secure the cart to prevent it from tipping over or being damaged by any potential accidents.
Regularly check on the stored cart to ensure that it remains in good condition. Inspect for any signs of damage, rust, or pest infestations. Cleaning and maintaining the storage area will contribute to the overall protection and longevity of your cart.
By storing your cart in a dry and safe location, you can rest assured that it will be ready for use whenever you need it, while minimizing the risk of damage or deterioration.
Conclusion
Properly storing your cart is crucial to maintain its functionality and extend its lifespan. By following the step-by-step guide outlined in this article, you can ensure that your cart remains in excellent condition while in storage and ready for use whenever you need it.
Remember to start by emptying the cart and thoroughly cleaning it to remove any dirt or debris. Detach any removable parts and store them separately to prevent damage. Protect the metal surfaces from rust and corrosion by applying a protective solution. If possible, fold or collapse the cart to save space. Wrap or cover the cart with a suitable material to provide an additional layer of protection.
Finally, store the cart in a dry and safe location, ensuring it is secure and elevated off the ground. Regularly check on the cart to ensure it remains in good condition and maintain the storage area to prevent any potential damage.
By following these steps, you can keep your cart in optimal condition, preventing rust, wear, and damage, and ensuring its longevity. Taking the time to properly store your cart will save you future frustration and allow you to enjoy its convenience for years to come.
So, the next time you need to store your cart, remember these steps and take the necessary precautions to ensure its preservation. Happy storing!
Frequently Asked Questions about How To Store A Cart
Was this page helpful?
At Storables.com, we guarantee accurate and reliable information. Our content, validated by Expert Board Contributors, is crafted following stringent Editorial Policies. We're committed to providing you with well-researched, expert-backed insights for all your informational needs.


0 thoughts on “How To Store A Cart”