Articles
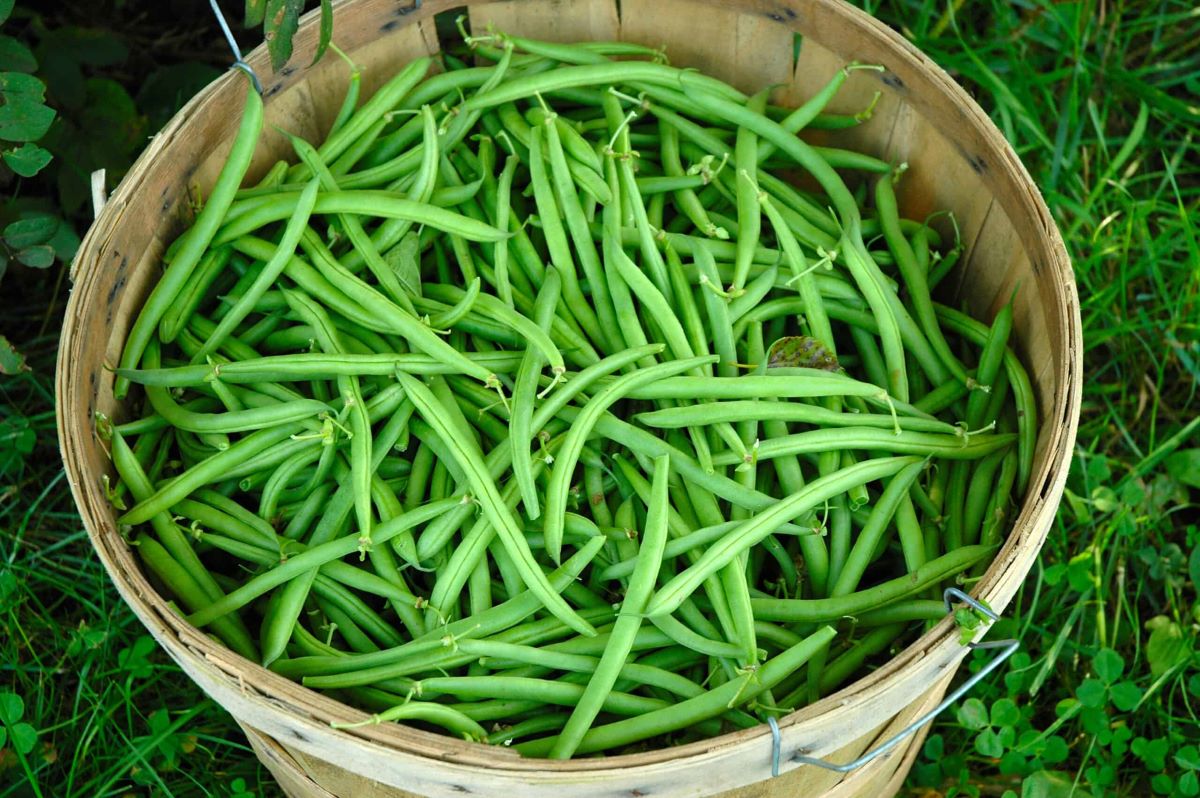
How To Store Green Beans After Harvest
Modified: January 6, 2024
Learn the best methods for storing green beans after harvest with this informative articles. Keep your beans fresh and delicious for longer periods of time.
(Many of the links in this article redirect to a specific reviewed product. Your purchase of these products through affiliate links helps to generate commission for Storables.com, at no extra cost. Learn more)
Introduction
Welcome to the world of green beans! If you’re a gardener or a fan of fresh produce, you know how rewarding it is to grow and harvest your own vegetables. Green beans, also known as snap beans or string beans, are a popular choice due to their delicious taste and nutritional benefits. Once you’ve harvested a bountiful crop of green beans, the next step is to store them properly to maintain their freshness and quality for as long as possible.
In this article, we will guide you through the process of storing green beans after harvest. From cleaning and drying to different storage methods, such as refrigeration, freezing, canning, dehydrating, and vacuum sealing, we’ll explore all the options available to ensure that your green beans stay in top condition until you’re ready to enjoy them.
Proper storage not only helps to preserve the taste and texture of green beans but also allows you to savor the fruits of your labor throughout the year. So, let’s dive in and uncover the secrets to storing green beans like a pro!
Key Takeaways:
- Preserve the freshness and flavor of green beans by following proper harvesting, cleaning, and storage techniques. Choose from refrigeration, freezing, canning, dehydrating, or vacuum sealing to enjoy homegrown green beans year-round.
- Experiment with different recipes and enjoy the vibrant flavors and textures of preserved green beans. Follow key storage tips to ensure optimal freshness and quality, and savor the satisfaction of having homegrown produce at your fingertips.
Read more: How To Store Green Beans
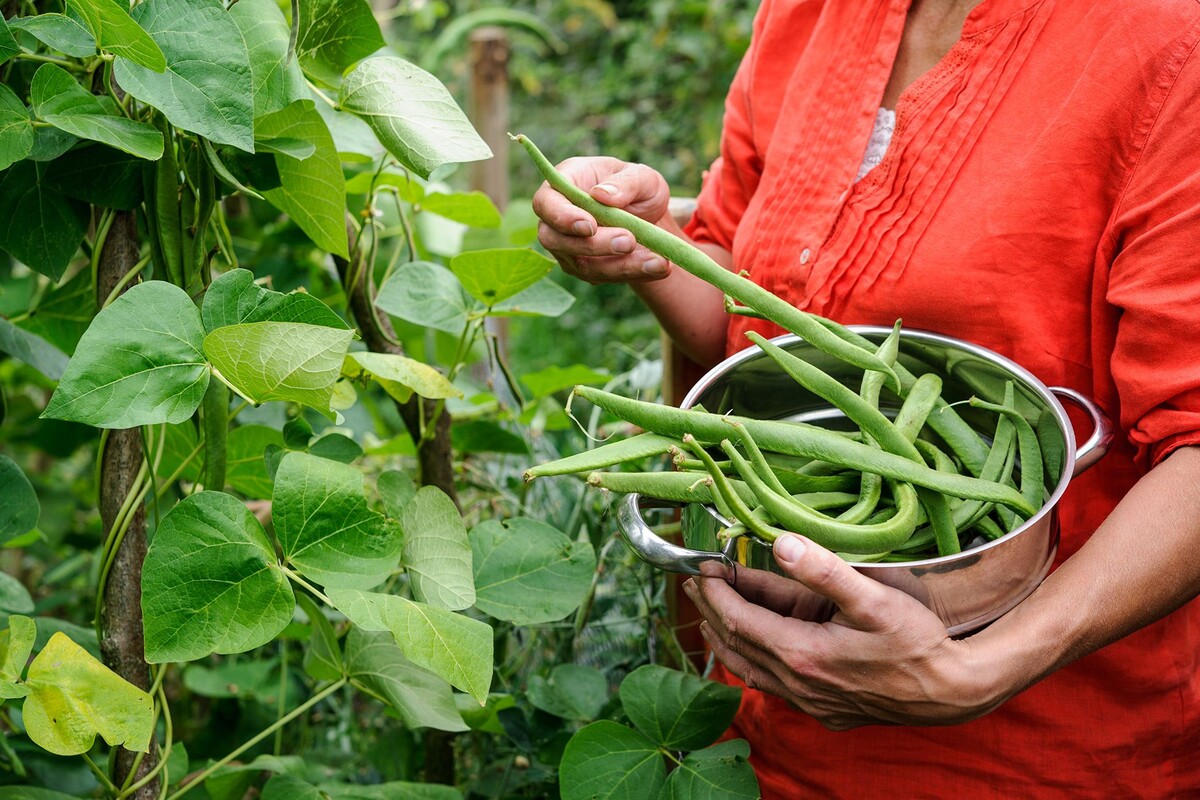
Step 1: Harvesting Green Beans
The first step in storing green beans after harvest is, of course, to harvest them! Green beans are best picked when they are young and tender, before the seeds inside have fully developed. Here’s how to harvest your green beans:
- Choose the right time: Green beans are typically ready for harvest about 50 to 60 days after planting, depending on the variety. Look for beans that are firm, crisp, and have a bright green color.
- Inspect the plants: Examine the plants to identify fully formed bean pods. These are the ones ready for picking.
- Handle with care: When picking the green beans, be gentle to avoid damaging the plants. Hold the stem of the bean pod firmly and snap it off. Alternatively, you can use a pair of garden shears to cut the stem.
- Pick frequently: To encourage continuous production, harvest your green beans regularly, every two to three days. This will also prevent the beans from becoming overripe and tough.
By following these steps while harvesting, you’ll ensure that you gather the freshest green beans for storage. The next step is to prepare them for storage by cleaning and sorting.
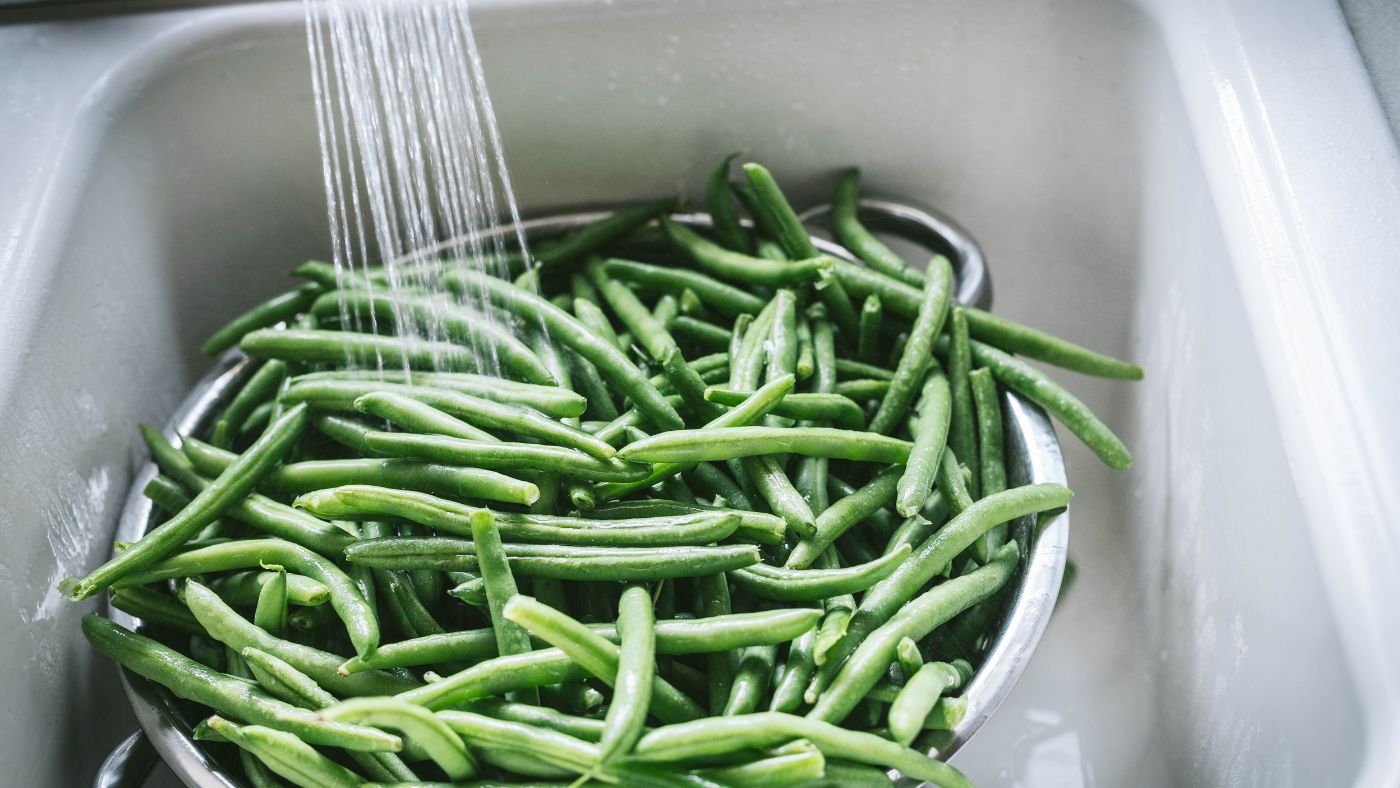
Step 2: Cleaning and Sorting Green Beans
Once you have harvested your green beans, it’s important to clean and sort them before storing. This helps remove any dirt, insects, or debris that may be clinging to the beans. Here’s how to clean and sort your green beans:
- Rinse the beans: Start by rinsing the green beans under cool, running water. Gently rub the beans with your hands to remove any surface dirt.
- Trim the ends: Using a sharp knife or scissors, trim off the ends of the green beans. This step is optional but recommended to remove any dried or damaged parts.
- Sort the beans: Take a closer look at the beans and separate them into two groups – the good beans and the damaged ones. Discard any beans that are discolored, bruised, or have signs of pest damage.
- Remove the strings (if necessary): Some varieties of green beans may have tough, fibrous strings along the edges. If your beans have strings, gently pull them off by starting at one end and working your way to the other.
By cleaning and sorting your green beans, you’re ensuring that only the freshest and healthiest beans make it into storage. Once the beans are cleaned and sorted, it’s time to move on to the next step – drying.
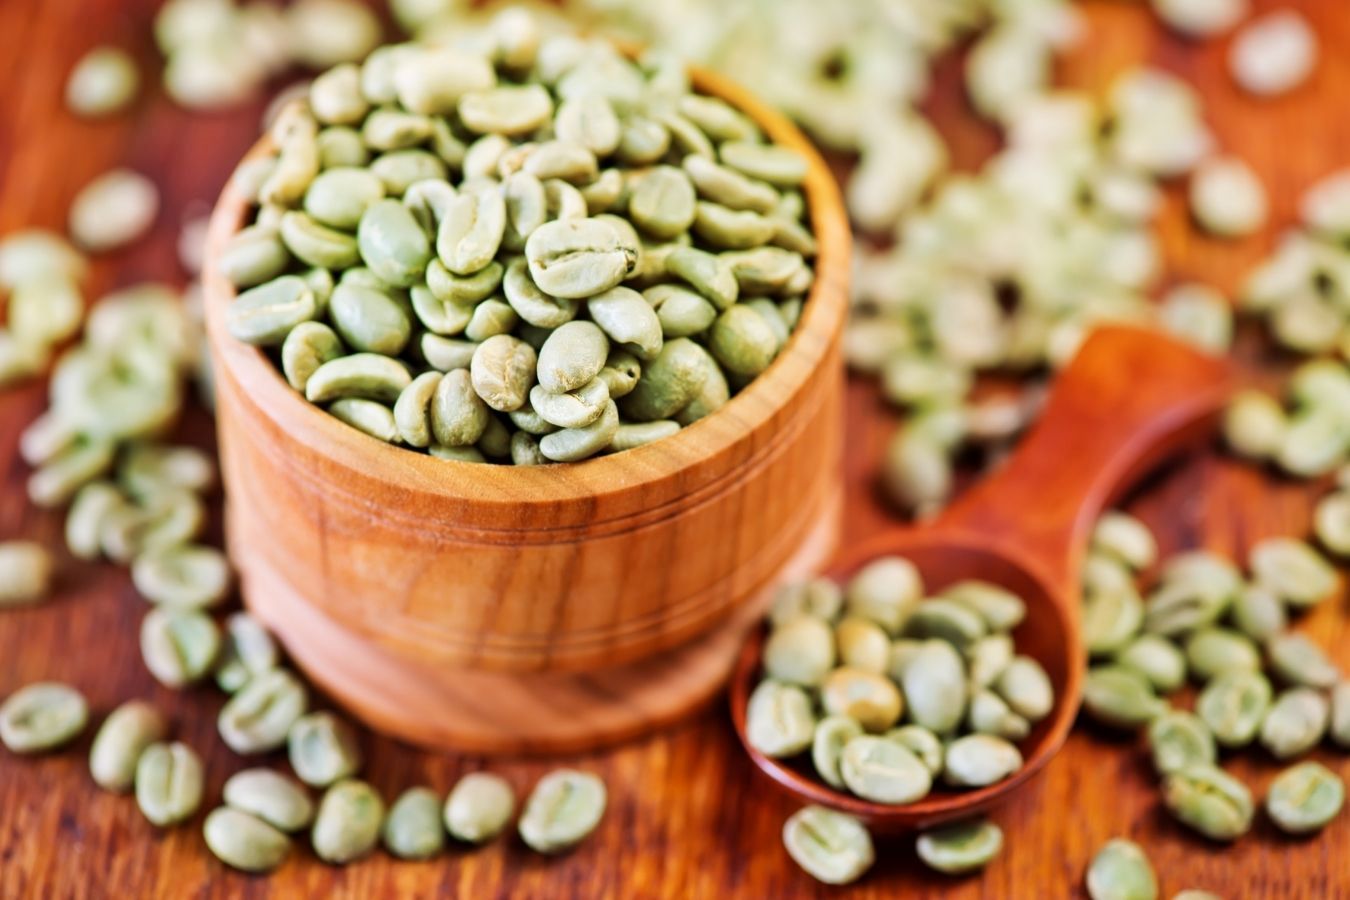
Step 3: Drying Green Beans
Drying green beans is an excellent method for preserving them long-term. The process involves removing the moisture from the beans, which helps to prevent spoilage and extend their shelf life. Here’s how to dry your green beans:
- Air drying: One of the simplest ways to dry green beans is by air drying them. Start by spreading the cleaned and trimmed beans on a clean, dry surface. It’s important to ensure that the beans are spread out in a single layer, with enough space for air circulation.
- Choose a well-ventilated area: Place the green beans in a well-ventilated area with good airflow. This could be a sunny spot in your garden, a patio, or even indoors near an open window. Avoid humid areas, as excess moisture can hinder the drying process.
- Allow for drying time: Let the green beans air dry for about 1-2 weeks, or until they are completely dry. During this time, it’s important to regularly check the beans for any signs of mold or spoilage. If you notice any beans starting to deteriorate, remove them immediately to prevent it from spreading.
- Check for doneness: To check if the green beans are fully dried, simply snap one in half. It should snap cleanly and easily. If you find any beans that are not fully dried, return them to the drying area for a few more days.
- Store in airtight containers: Once the green beans are dry, transfer them to airtight containers, such as glass jars or food-grade plastic bags. Make sure the containers are clean and dry before adding the beans. Label the containers with the date and contents, and store them in a cool, dry place away from direct sunlight.
Dried green beans can be used in various recipes, including soups, stews, and casseroles. When you’re ready to use them, simply rehydrate by soaking them in water for a few hours or overnight before cooking. Drying allows you to enjoy the flavors of your homegrown green beans all year round.
Step 4: Storing Green Beans in the Refrigerator
If you prefer to store your green beans in a more easily accessible location, the refrigerator is a convenient option. While refrigeration won’t preserve green beans for an extended period like other methods, it can help prolong their freshness for up to a week. Here’s how to store green beans in the refrigerator:
- Prepare the beans: Make sure your green beans are clean, dry, and free from any signs of damage. If needed, trim the ends and remove any strings.
- Moisture control: To prevent moisture buildup, line a plastic storage bag or airtight container with a paper towel or a clean, dry cloth. This will help absorb excess moisture and keep the beans dry.
- Place in the refrigerator: Arrange the prepared green beans in the lined storage bag or container. Try to spread them out in a single layer to allow for better air circulation.
- Keep in the crisper drawer: The crisper drawer in your refrigerator provides a slightly higher humidity level than the main compartment, which is ideal for storing vegetables. Place the bag or container of green beans in the crisper drawer.
- Check and use within a week: Regularly check the green beans for any signs of spoilage or mold. Use them within a week for optimal freshness and flavor.
Storing green beans in the refrigerator is a simple way to extend their shelf life and keep them crisp. However, it’s important to note that the quality of the beans will gradually deteriorate over time. If you want to store green beans for a longer period, freezing or canning them is a better option.
Read more: How To Store Potatoes After Harvest
Step 5: Freezing Green Beans
Freezing green beans is a popular method for preserving their freshness and nutritional value. When properly frozen, green beans can retain their quality for up to 12 months. Follow these steps to freeze your green beans:
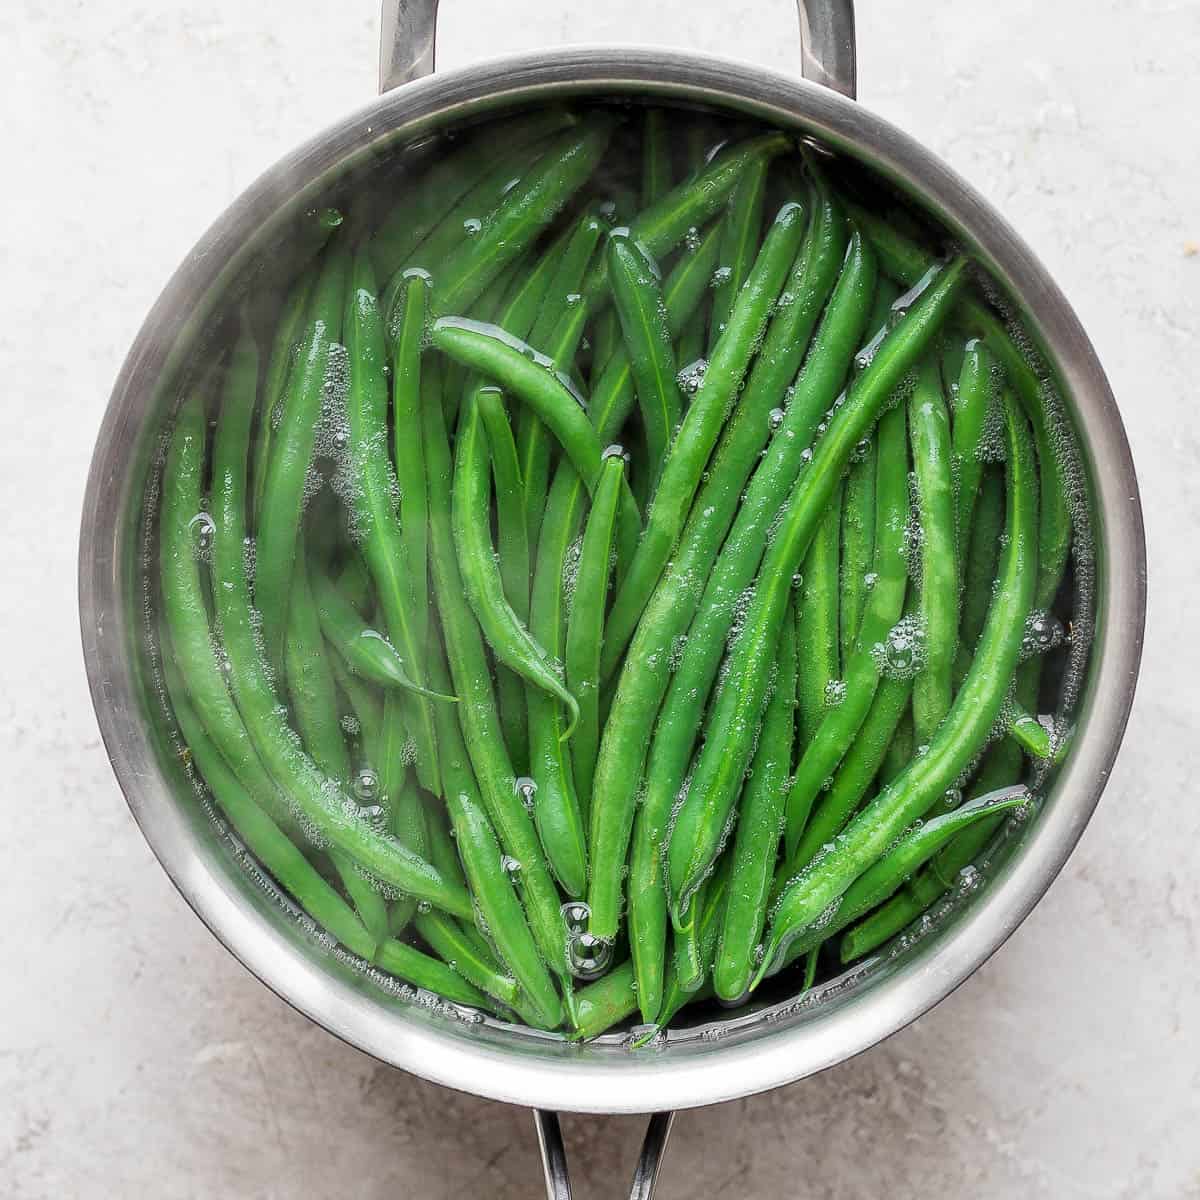
- Blanch the green beans: Blanching involves briefly boiling the green beans to stop enzyme activity and preserve their color and texture. Start by bringing a large pot of water to a rolling boil. Meanwhile, prepare a bowl of ice water.
- Prepare the beans: Wash and trim the ends of the green beans, removing any strings if necessary. Cut the beans into the desired size, such as bite-sized pieces or whole beans.
- Blanch the beans: Submerge the green beans into the boiling water and let them cook for 2-3 minutes. The beans should still be slightly crisp. Using a slotted spoon or tongs, transfer the beans to the bowl of ice water to cool rapidly. Leave them in the ice water for the same duration as the blanching time.
- Drain and dry the beans: Once the beans are cooled, drain them thoroughly and pat them dry using a clean kitchen towel or paper towel. Excess moisture can lead to freezer burn and affect the quality of the frozen beans.
- Package for freezing: Place the blanched and dried green beans into freezer-safe bags or airtight containers. Squeeze out as much air as possible before sealing to minimize freezer burn. Label the containers with the date and contents.
- Freeze the beans: Lay the bags or containers flat in the freezer, allowing them to freeze in a single layer. Once fully frozen, you can rearrange them to maximize space efficiency.
- Use within 12 months: Frozen green beans are best used within 12 months to maintain their taste and quality. Thaw them in the refrigerator overnight before using in your preferred recipes.
By freezing your green beans, you’ll always have a stash of delicious, garden-fresh beans ready to use whenever you need them. Whether for stir-fries, side dishes, or casseroles, frozen green beans are a convenient and versatile option for your culinary adventures.
After harvesting, store green beans in a perforated plastic bag in the refrigerator. They will stay fresh for up to a week. Avoid washing them until ready to use.
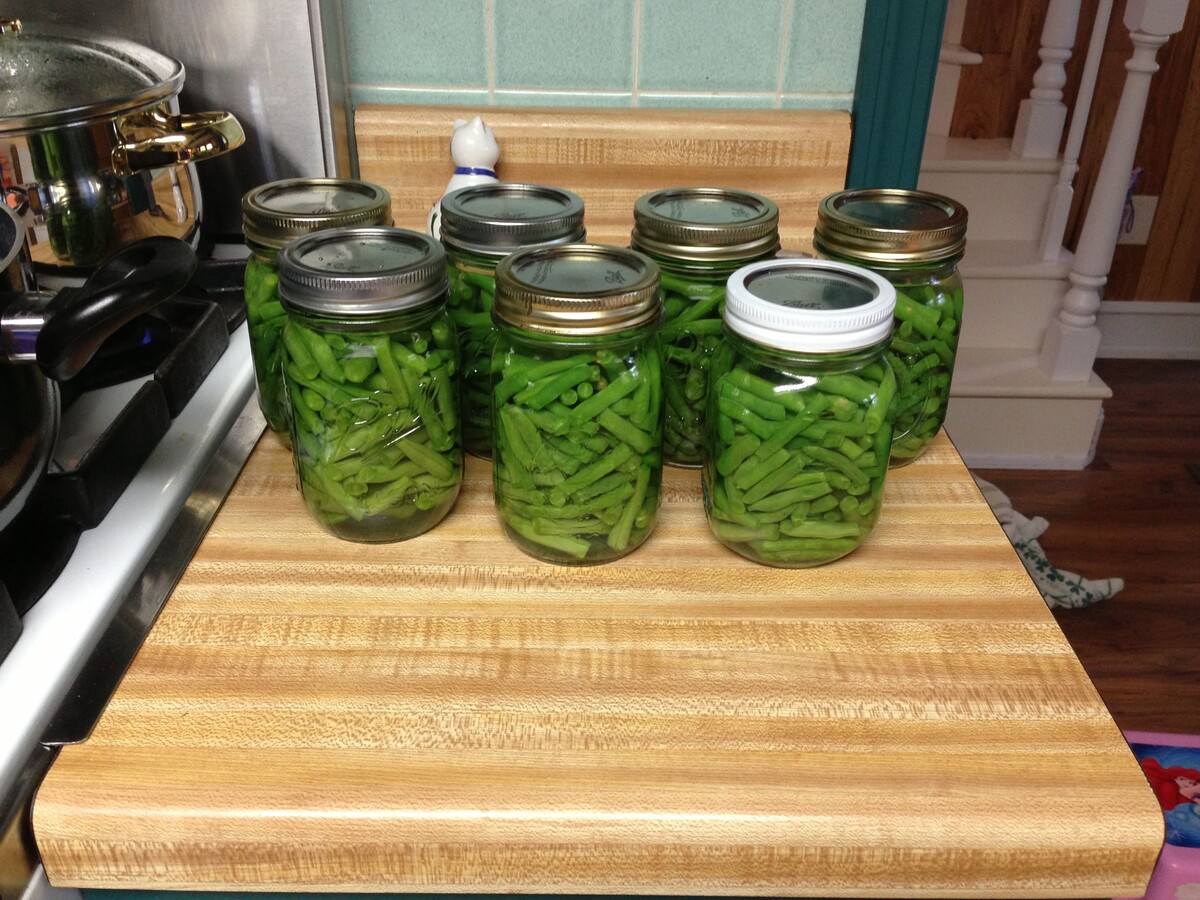
Step 6: Canning Green Beans
Canning green beans is a fantastic preservation method that allows you to enjoy the taste of summer all year round. By following the proper canning process, you can safely store green beans for an extended period without any loss in quality. Here’s how to can green beans:
- Gather canning supplies: Before you begin, ensure you have all the necessary canning supplies, including canning jars, lids, bands, a pressure canner, and a jar lifter.
- Prepare the green beans: Wash and trim the ends of the green beans, removing any strings if necessary. Cut the beans into your preferred size.
- Prepare the canning jars: Wash the canning jars, lids, and bands in hot, soapy water. Rinse them thoroughly. Place the jars in a large pot of water and bring it to a simmer to sterilize them.
- Blanch the beans (optional): While blanching is not necessary for canning green beans, it can help to preserve their color and texture. Blanch the beans in boiling water for 2-3 minutes and immediately transfer them to ice water to cool.
- Fill the jars: Remove the sterilized jars from the simmering water using a jar lifter. Pack the green beans into the jars, leaving about 1 inch of headspace at the top.
- Add liquid (optional): If desired, you can add hot water, broth, or a salt brine solution to the jars to cover the green beans. This helps to enhance the flavor and maintain the beans’ texture during the canning process.
- Seal the jars: Wipe the rim of each jar with a clean, damp cloth to remove any residue. Place the lids on top and screw the bands on until just fingertip tight.
- Process in a pressure canner: Follow the instructions for your specific pressure canner to process the jars of green beans. The processing time and pressure may vary based on your altitude and the size of the jars. A pressure canner is required for canning green beans to ensure safe preservation.
- Store and cool: After processing, carefully remove the jars from the pressure canner and place them on a towel-lined surface. Allow them to cool completely. You may hear a “pop” sound as the lids seal.
- Check the seals: After the jars have cooled, check the seals by pressing the center of each lid. If the lid does not flex up and down, the jar is properly sealed. Any unsealed jars should be refrigerated and used within a few days.
- Label and store: Once the jars are sealed, label them with the date and contents. Store the canned green beans in a cool, dark place. They can last for up to a year.
Canning green beans allows you to preserve the flavors of your homegrown beans and savor them throughout the year. Whether you use them in casseroles, soups, or as a side dish, canned green beans offer a convenient and delicious option for your meals.
Step 7: Dehydrating Green Beans
Dehydrating green beans is a great way to preserve them while concentrating their flavors and nutritional value. Dehydrated green beans make a delicious and crunchy snack or can be rehydrated for use in various recipes. Here’s how to dehydrate green beans:
- Prepare the green beans: Wash the green beans thoroughly and trim the ends. Remove any strings if necessary. Cut the beans into your desired size, such as bite-sized pieces or thin strips.
- Blanch the beans (optional): Blanching is an optional step that can help preserve the color and texture of the green beans. Bring a pot of water to a boil and blanch the beans for 2-3 minutes. Transfer them to an ice bath immediately to cool.
- Preheat the dehydrator: Preheat your dehydrator according to the manufacturer’s instructions. Generally, a temperature of around 125-135°F (52-57°C) is suitable for drying green beans.
- Arrange the beans: Lay the prepared green beans in a single layer on the dehydrator trays. Make sure there is space between the beans for proper airflow and even drying.
- Dehydrate the beans: Place the trays in the dehydrator and allow the beans to dry for 8-12 hours, or until they are completely dry and brittle. Check the beans periodically to ensure they are drying evenly.
- Remove and cool: Once the green beans are dehydrated, remove them from the dehydrator and let them cool completely. They should be crisp and free from any moisture.
- Store in airtight containers: Transfer the dehydrated green beans to airtight containers, such as glass jars or resealable bags. Label the containers with the date and contents. Store them in a cool, dry place away from sunlight.
Dehydrated green beans can be enjoyed as a healthy, crunchy snack or rehydrated for use in soups, stews, or stir-fries. To rehydrate, simply soak the beans in warm water for about 30 minutes until they soften. Drying green beans allows you to enjoy their flavors and nutrients long after the harvest season has ended.
Step 8: Vacuum Sealing Green Beans
Vacuum sealing is a popular method for preserving the freshness and quality of green beans. By removing the air from the packaging, vacuum sealing creates a barrier against moisture, oxidation, and spoilage. Here’s how to vacuum seal green beans:
- Prepare the green beans: Wash the green beans thoroughly and trim the ends. Remove any strings if necessary. You can choose to blanch the beans or leave them raw, depending on your preference.
- Arrange the beans in bags: Before placing the green beans in vacuum-seal bags, it’s important to freeze them briefly. This process is known as flash freezing and helps prevent the beans from crushing during the vacuum sealing process. Spread the green beans in a single layer on a baking sheet and place it in the freezer for about 1-2 hours.
- Vacuum seal bags: Once the green beans are partially frozen, remove them from the freezer and quickly transfer them to vacuum-seal bags. Arrange the beans in a single layer, ensuring they are evenly distributed and not overcrowded.
- Vacuum seal the bags: Follow the instructions on your vacuum sealer machine to seal the bags. Place the open end of the bag into the machine, and activate the vacuum and sealing function. The machine will remove the air from the bag and create an airtight seal.
- Label and store: Once the bags are sealed, label them with the date and contents. Store the vacuum-sealed green beans in the freezer for long-term preservation.
Vacuum-sealed green beans can be kept in the freezer for up to a year. When you’re ready to use them, simply remove the desired portion from the freezer, reseal the remaining beans, and return them to the freezer. Since vacuum sealing removes the air, the beans maintain their freshness, flavor, and nutritional value.
Note: If you don’t have a vacuum sealer machine, you can also use zip-top freezer bags and manually remove the excess air by slowly pressing out as much air as possible before sealing. While this method may not provide the same level of air tightness as a vacuum sealer, it can still help extend the shelf life of your green beans.
Read more: How To Store Peppers After Harvest
Step 9: Using Green Beans from Storage
After properly storing your green beans, it’s time to enjoy the fruits of your labor! Here are some tips for using green beans from storage:
- Thaw frozen beans: If you stored your green beans in the freezer, thaw them in the refrigerator overnight before using. This helps to retain their texture and flavor.
- Rehydrate dried beans: If you dehydrated your green beans, you can rehydrate them before using in recipes. Simply soak the dried beans in water for a few hours or overnight until they become soft and pliable.
- Experiment with different recipes: Green beans are versatile and can be used in a variety of dishes. From stir-fries and salads to soups and casseroles, there are endless possibilities. Get creative and incorporate green beans into your favorite recipes or try new ones you’ve been eager to test.
- Preserve the fresh taste: Green beans are known for their crispness and vibrant flavor. To preserve these qualities, avoid overcooking the beans. Steam or sauté them until they are just tender, ensuring they retain their bright color and a slight crunch.
- Combine with other ingredients: Green beans pair well with a wide range of ingredients. Consider adding them to dishes with garlic, lemon, almonds, onions, tomatoes, or herbs like thyme or basil. Experiment with different flavor profiles and combinations to enhance the taste of your green beans.
- Enjoy them as a side dish: Green beans can make a delicious and nutritious side dish. Simply season them with salt, pepper, and a drizzle of olive oil or melt some butter over them for a classic flavor. Sautéed green beans with garlic and lemon zest also make a delightful accompaniment.
- Cook in larger quantities: If you have an abundance of green beans, consider cooking them in larger batches. You can then portion them into individual servings and freeze for later use. This way, you can easily grab a portion whenever you need a quick and healthy addition to your meals.
Remember, the way you store your green beans can affect their taste and texture. Proper storage and careful preparation will ensure that your green beans taste as fresh and delicious as possible!
Step 10: Tips for Proper Storage
To ensure the longevity and quality of your stored green beans, it’s essential to follow some tips for proper storage. Here are some key tips to keep in mind:
- Choose fresh and healthy beans: Prioritize using fresh green beans for storage. Select beans that are firm, crisp, and have a vibrant green color. Avoid using beans that are discolored, wilted, or have signs of damage.
- Clean and dry thoroughly: Before storing, clean the green beans by rinsing them under cool water. Remove any dirt, debris, or strings. Ensure the beans are completely dry by patting them dry with a clean kitchen towel or using a salad spinner.
- Use proper containers: Select the right containers for your chosen storage method. For refrigeration, use airtight containers or plastic bags. For freezing, use freezer-safe bags or containers. For canning, use canning jars specifically designed for preserving food.
- Label and date: Properly label your containers with the date of storage and the contents. This helps you keep track of the freshness and rotation of your stored green beans.
- Store in ideal conditions: Green beans are best stored in a cool, dry, and dark place. Avoid exposure to direct sunlight, as it can cause the beans to spoil more quickly. For frozen beans, ensure they are kept in a consistently cold freezer.
- Monitor for spoilage: Regularly check your stored green beans for any signs of spoilage, such as mold, off-putting odors, or unusual color changes. Discard any beans that show signs of deterioration to prevent spoilage from spreading to other beans.
- Rotate and use within recommended timeframes: Green beans have different storage lifespans depending on the chosen method. Use your beans within the recommended timeframes to ensure the best quality and flavor. Rotate your storage by using older beans first.
- Consider vacuum sealing for extended freshness: Vacuum sealing removes air and helps to extend the shelf life of green beans. It can be especially beneficial for freezing or long-term storage.
- Experiment with different preservation methods: Try different storage methods to find the one that suits your needs and taste preferences best. Consider canning, freezing, dehydrating, or using a combination of methods for variety.
- Enjoy your preserved green beans: Lastly, make sure to enjoy the fruits of your storage efforts. Incorporate your green beans into various recipes and savor the taste of freshly preserved produce year-round.
By following these tips, you can ensure that your stored green beans stay fresh, flavorful, and ready to be used whenever you desire. Embrace the art of food preservation and enjoy the satisfaction of having homegrown green beans at your fingertips, even outside of the growing season.
Conclusion
Preserving the freshness, flavor, and nutritional value of green beans after the harvest season is a rewarding endeavor. By following the steps outlined in this guide, you can store green beans using various methods such as refrigeration, freezing, canning, dehydrating, and vacuum sealing.
Harvest your green beans at the right time, clean and sort them meticulously, and choose the storage method that works best for your needs. Whether you prefer the convenience of refrigeration, the long-term preservation of freezing, the versatility of canning, the crunchiness of dehydrating, or the air-tightness of vacuum sealing, each method offers its own benefits.
When the time comes to use your stored green beans, ensure they are properly thawed or rehydrated if necessary. Experiment with different recipes and enjoy the vibrant flavors and textures that your preserved green beans have to offer.
Remember to store your green beans in ideal conditions, regularly monitor them for spoilage, and use them within the recommended timeframes for optimal quality. The joy of having homegrown green beans readily available throughout the year is truly worth the effort.
So, whether you maintain a bountiful garden or simply appreciate the taste of fresh produce, follow these storage techniques and enjoy the satisfaction of enjoying the goodness of green beans long after the harvest season.
Frequently Asked Questions about How To Store Green Beans After Harvest
Was this page helpful?
At Storables.com, we guarantee accurate and reliable information. Our content, validated by Expert Board Contributors, is crafted following stringent Editorial Policies. We're committed to providing you with well-researched, expert-backed insights for all your informational needs.

0 thoughts on “How To Store Green Beans After Harvest”