Articles
How To Store Screws And Nails
Modified: May 6, 2024
Learn the best methods for storing articles like screws and nails to keep them organized and easily accessible. Discover tips and tricks for efficient storage solutions.
(Many of the links in this article redirect to a specific reviewed product. Your purchase of these products through affiliate links helps to generate commission for Storables.com, at no extra cost. Learn more)
Introduction
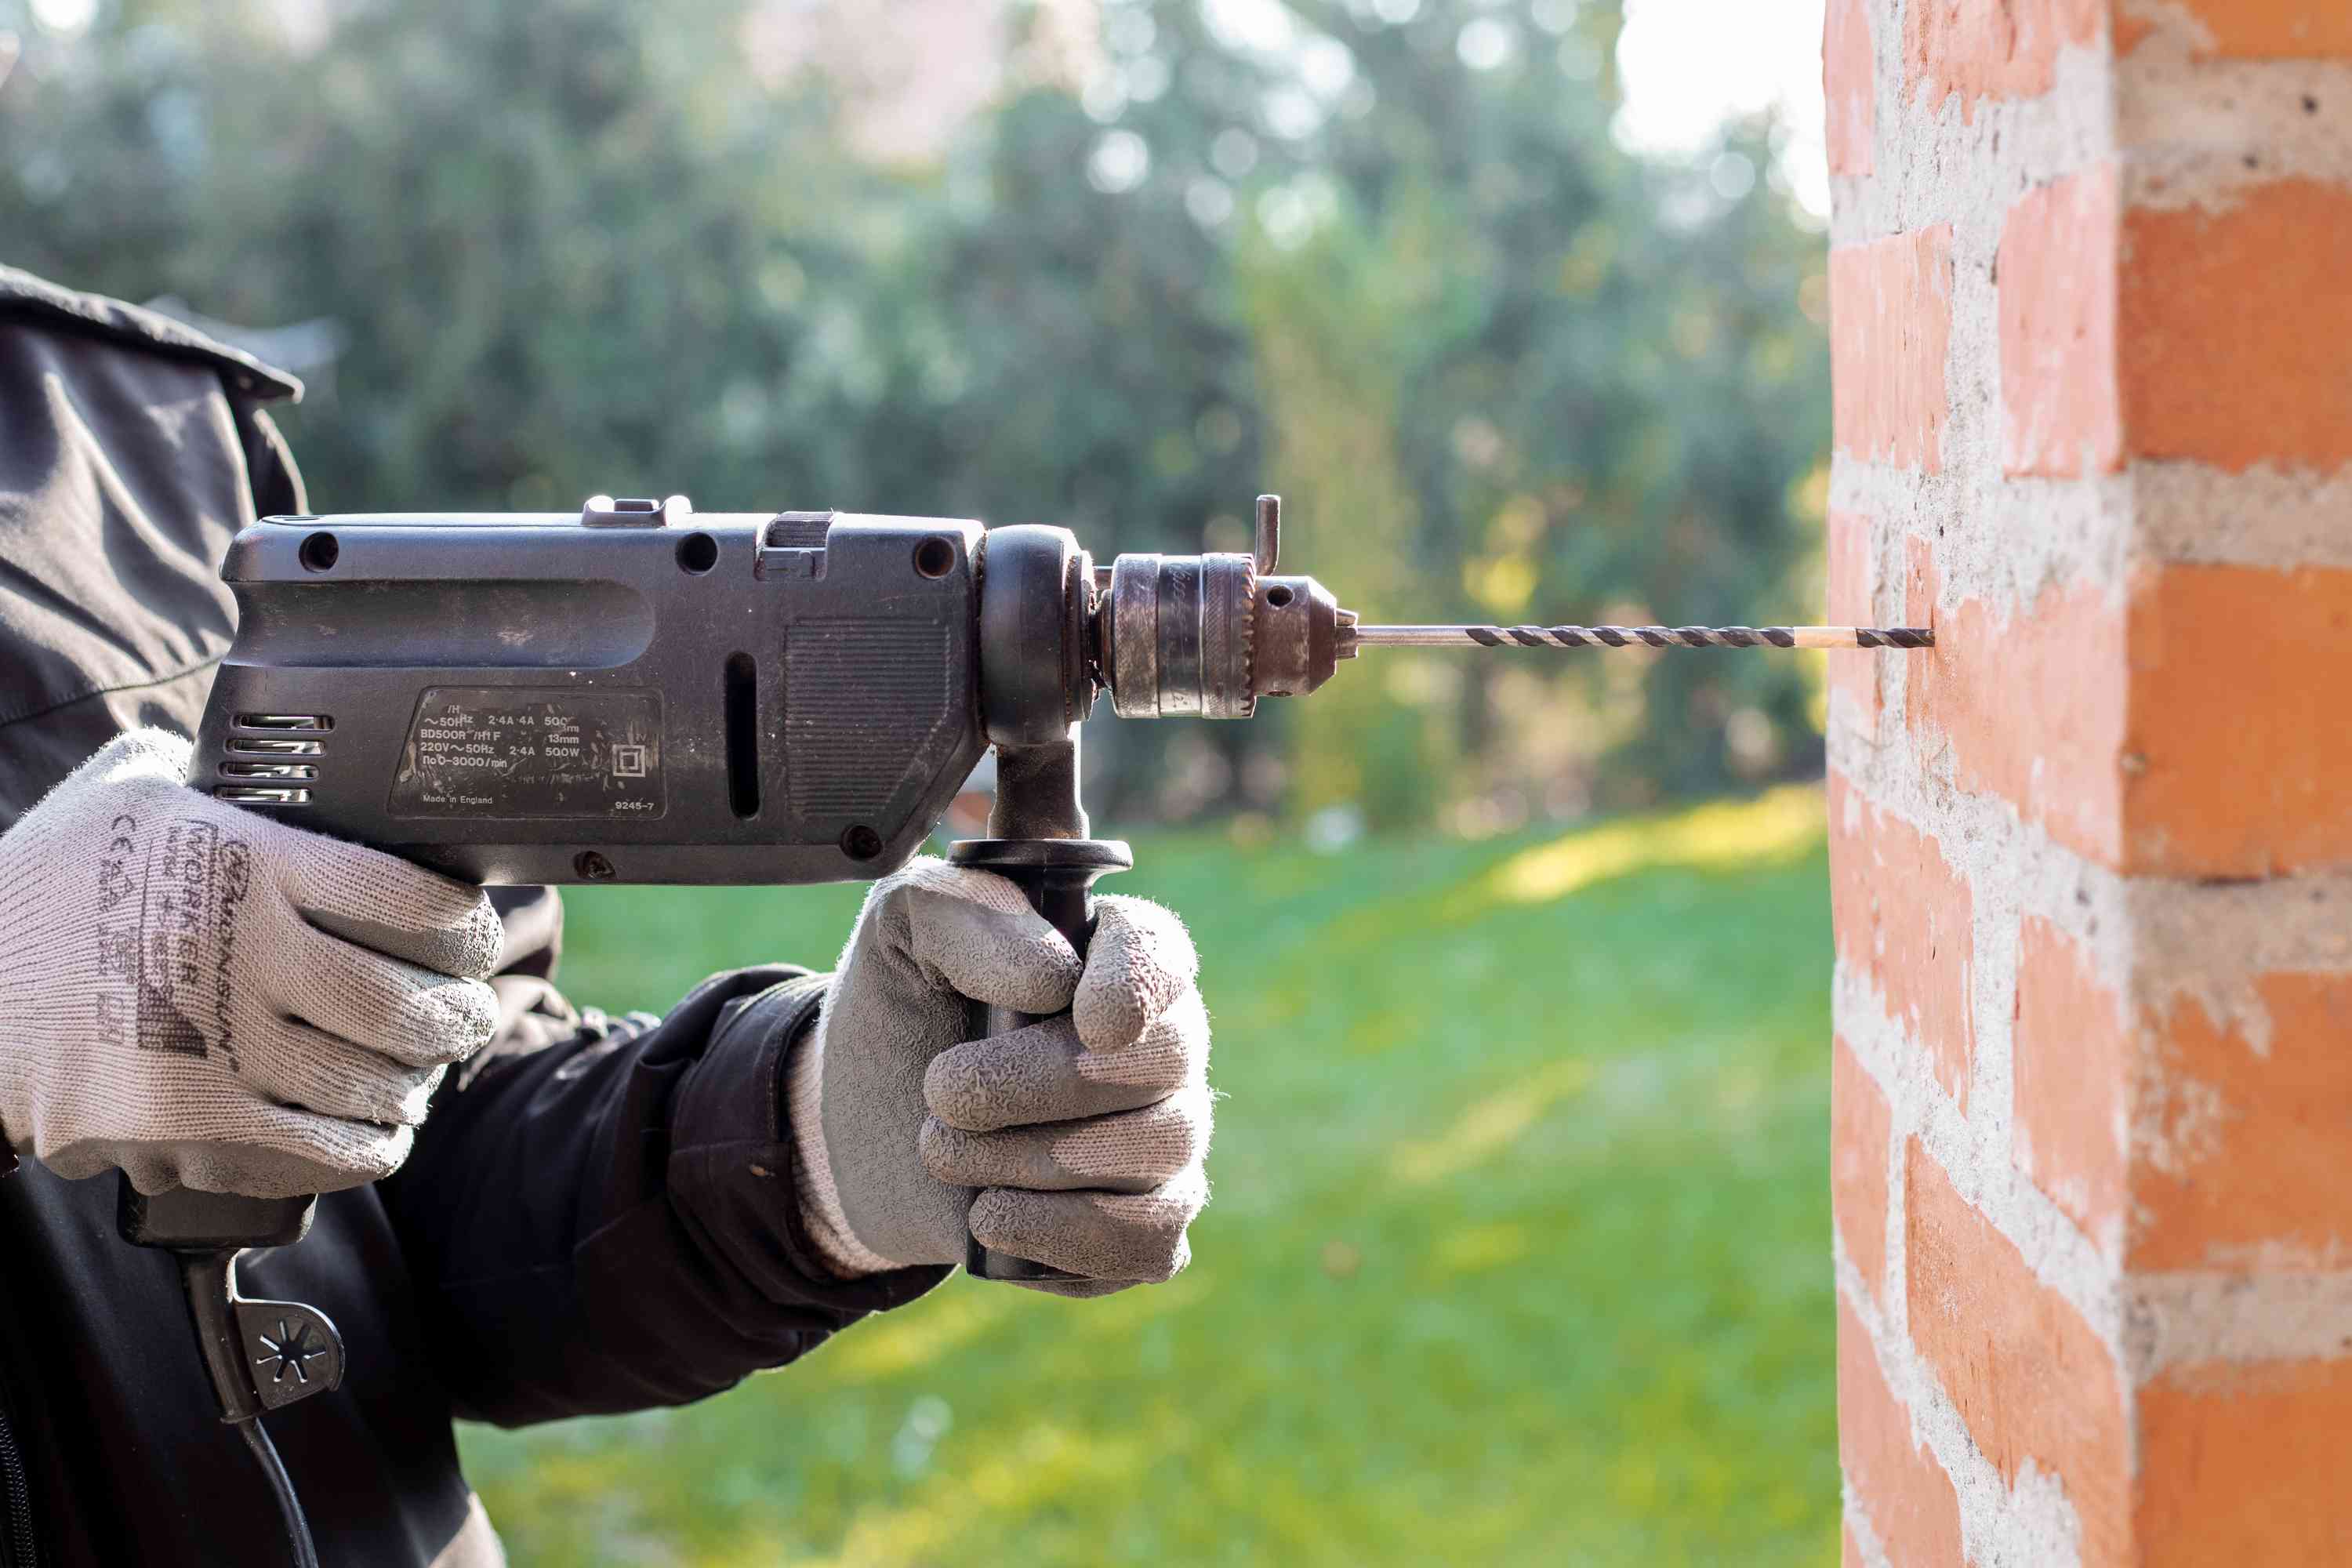
When it comes to DIY projects or professional construction work, screws and nails are essential components that hold everything together. But if not properly stored, these small items can quickly become a source of frustration. Finding the right screw or nail when you need it becomes a time-consuming task, and their condition can deteriorate if exposed to moisture or improper handling.
In this article, we will explore the importance of properly storing screws and nails and provide you with practical tips on how to create an organized and efficient storage system. By implementing these strategies, you’ll save time, money, and effort, ensuring that you always have the right hardware at hand.
Key Takeaways:
- Properly storing screws and nails is crucial for accessibility, protection, cost savings, safety, and improved efficiency. Invest in suitable storage solutions to enhance productivity and reduce frustration.
- Organize and label your screws and nails based on type, size, and categories to save time and effort in locating the right hardware. Maximize space, prioritize safety, and maintain inventory for a streamlined and efficient workspace.
Read more: How To Store Nails And Screws
Importance of Properly Storing Screws and Nails
Properly storing screws and nails is crucial for several reasons.
1. Accessibility: One of the primary advantages of organized storage is easy accessibility. When your screws and nails are neatly arranged and labeled, you can quickly locate the required size and type, saving you valuable time and effort. No more digging through a cluttered toolbox or rummaging through random containers to find the right hardware.
2. Protection: Proper storage protects your screws and nails from damage. Exposing them to moisture, extreme temperatures, or direct sunlight can cause rust or degradation, rendering them useless or weakening their strength. Storing them in a controlled environment ensures their longevity and effectiveness.
3. Cost savings: When screws and nails are not properly stored, they can become damaged or lost. This can result in unnecessary trips to the hardware store to replace them. By keeping them organized, you’ll have a clear inventory of what you already have, helping you avoid unnecessary expenses.
4. Safety: Accidental injuries due to loose or scattered screws and nails are a common occurrence. By having a designated storage system, you reduce the risk of stepping on or tripping over these sharp objects. Proper storage also prevents the risk of spills or accidents caused by loose or unsecured containers.
5. Improved efficiency: When your screws and nails are well-organized, your workflow becomes smoother and more efficient. You can easily access the right hardware, increasing your productivity and reducing project completion time. This organization also allows you to keep track of inventory, preventing shortages or delays in your work.
Overall, properly storing screws and nails is essential for accessibility, protection, cost savings, safety, and improved efficiency. By investing some time and effort into creating an organized storage system, you’ll reap the benefits in terms of increased productivity and reduced frustration.
Factors to Consider Before Storing Screws and Nails
Before you start organizing and storing your screws and nails, there are a few important factors to consider:
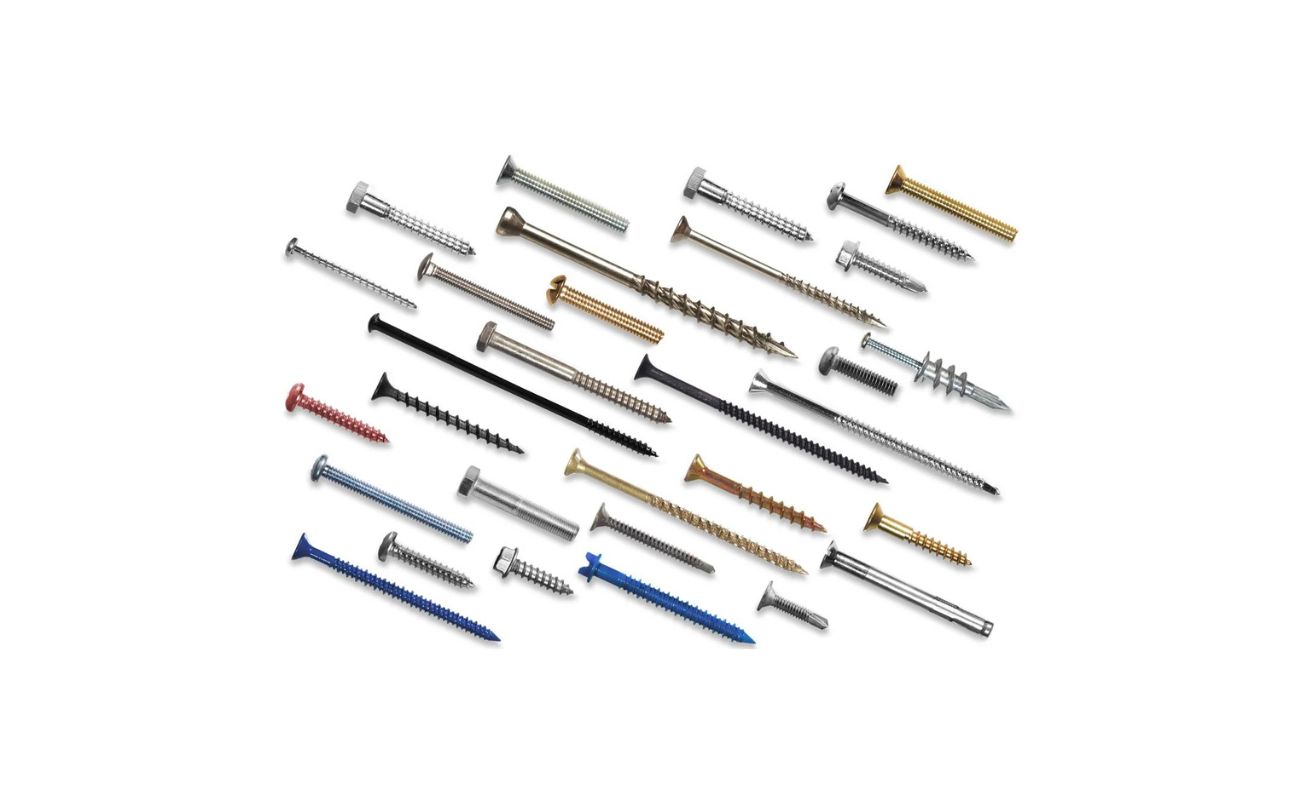
1. Type and Size: Different types of screws and nails require different storage methods. Consider whether you primarily work with wood screws, metal screws, or specialty screws like drywall screws. Similarly, take into account the sizes of the screws and nails you commonly use. This will help you determine the appropriate storage solutions to accommodate your specific needs.
2. Quantity: Assess the quantity of screws and nails you have. If you have a large collection, you may need more extensive storage options, such as cabinets, drawers, or wall-mounted organizers. On the other hand, if you only have a small amount, a simple compartmentalized storage box may be sufficient.
3. Workspace: Evaluate the available space in your workshop, garage, or storage area. Consider the layout and available surfaces for installing storage solutions. Make sure your storage system is designed to fit within the given space without causing any obstructions or hindering your workflow.
4. Portability: If you frequently work on projects outside your regular workspace, you may need to consider portability. Look for portable storage solutions such as toolboxes or carrying cases that allow you to take your screws and nails with you wherever you go. This convenience ensures that you always have the necessary hardware at hand, regardless of your location.
5. Accessibility: Think about how often you use screws and nails and the level of accessibility you require. If you frequently use them, opt for storage options that provide easy access, such as open shelves or wall-mounted racks. If you use them less frequently, consider storage solutions that keep them safely tucked away but easily retrievable when needed.
6. Labeling and Organization: A well-organized storage system includes clear labeling and categorization. Determine how you will label your containers or compartments to easily identify the contents. Additionally, consider organizing your screws and nails by type, size, or project-specific categories, making it easier to locate and retrieve the hardware you need.
By considering these factors, you can make informed decisions about your screw and nail storage. Taking these aspects into account will help you create a storage system that is tailored to your specific requirements, ensuring efficient organization and easy accessibility.
Different Storage Options for Screws and Nails
When it comes to storing screws and nails, there are numerous options to choose from depending on your needs and preferences. Here are some popular storage solutions to consider:
- Compartmentalized Storage Boxes: These are versatile and convenient options for storing screws and nails. These boxes usually come with multiple compartments of various sizes, allowing you to organize your hardware based on type, size, or project.
- Plastic Storage Bins: These larger storage containers with removable dividers offer ample space to store screws, nails, and other small hardware items. The dividers can be adjusted to customize the compartments as per your requirements.
- Wall-Mounted Racks: Ideal for those who want easy accessibility and prefer their hardware to be within reach. Wall-mounted racks come in various designs, such as pegboards or slotted rails, allowing you to hang containers or attach magnetic strips to hold screws and nails.
- Toolboxes and Carrying Cases: Portability is key for those who often work on projects outside their workspace. Toolboxes and carrying cases specifically designed for screws and nails offer compartments that keep your hardware organized and secure on the go.
- Drawer Organizers: If you have extra space in your toolbox, cabinet, or workbench, drawer organizers can be a practical storage solution. These trays or inserts fit perfectly into drawers, helping you separate and store different types and sizes of screws and nails.
- Stackable Storage Bins: These bins come with interlocking lids, allowing you to stack multiple units to maximize vertical storage space. They are great for those who want a compact and space-saving option.
- Rotating Storage Systems: For those with a large collection of screws and nails, rotating storage systems can be a game changer. These systems resemble small towers or carousels with multiple compartments, and they rotate to give you easy access to the required hardware.
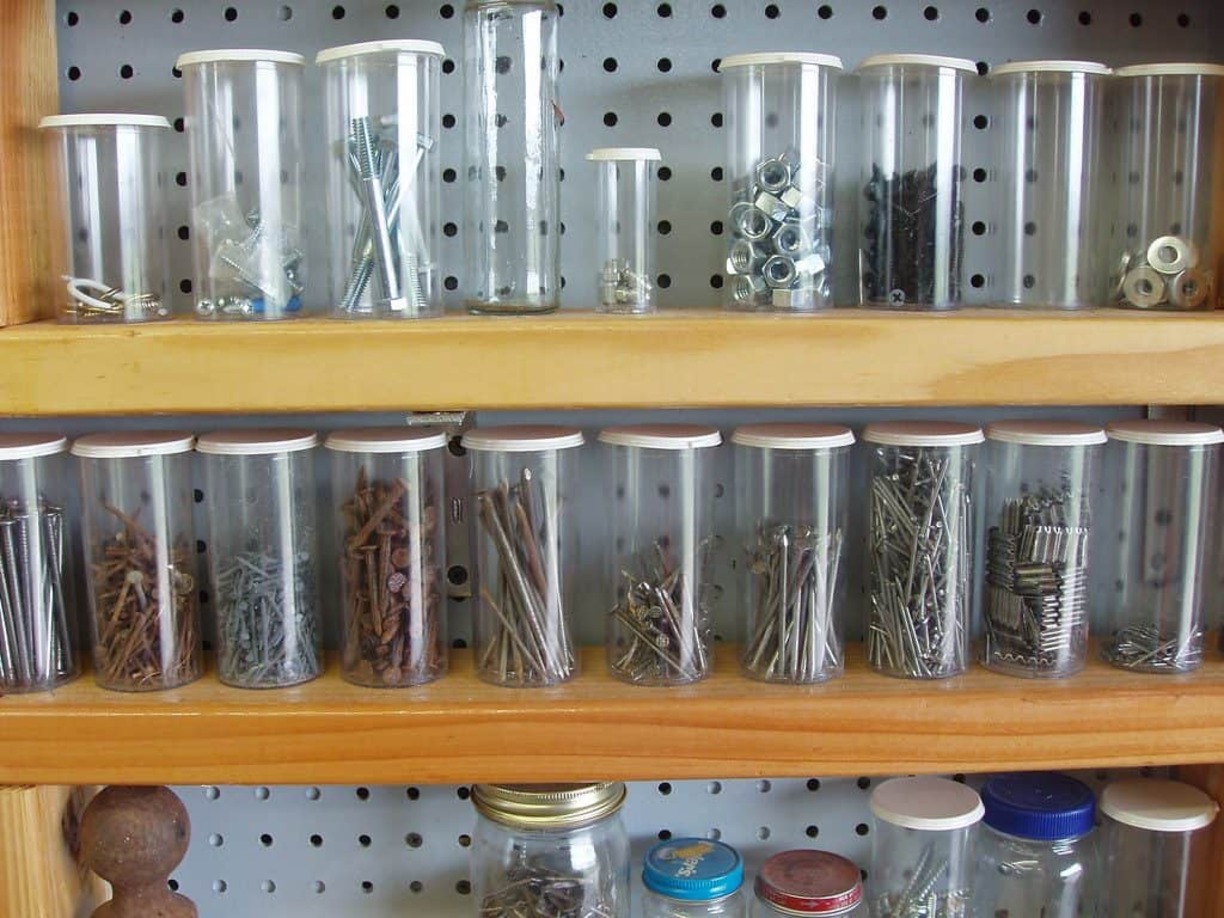
- Transparent Containers: Using clear plastic or glass containers allows you to easily see the contents without opening them. This can save you time and effort when searching for specific screws or nails.
Choose the storage option that best suits your needs, space availability, and preference. You can also combine multiple storage solutions to create a customized setup that efficiently organizes your screws and nails.
Remember, the key is to keep your hardware well-organized, easily accessible, and protected from damage or loss. By investing in suitable storage solutions, you can create a functional and efficient workspace that enhances your productivity and enjoyment of DIY projects or professional work.
Organizing and Labeling Systems for Screw and Nail Storage
Once you have decided on the storage option or options that suit your needs, the next step is to establish an effective organizing and labeling system. Proper organization and clear labeling make it easy to locate and retrieve the screws and nails you need. Here are some strategies to consider:
- Categorize by Type: Sort your screws and nails into separate containers or compartments based on their types. This could include wood screws, metal screws, or specialty screws. By categorizing them, you’ll be able to quickly identify the hardware you require for specific projects.
- Group by Size: Arrange your screws and nails within each category by size. This will help you easily find the right length and gauge required for your project. You can use dividers, small containers, or even separate compartments within a larger storage bin to keep them organized by size.
- Color Coding: Consider using color-coded labels or containers to differentiate between different types or sizes of screws and nails. For example, you could assign red labels to wood screws and blue labels to metal screws, making it visually easier to identify the right hardware quickly.
- Clear Labeling: Make sure to label each storage container or compartment clearly. Whether you use adhesive labels, markers, or a labeling machine, ensure the labels are visible and legible. Include information such as the type, size, and quantity of screws or nails contained within.
- Index or Catalog: If you have a large collection of hardware, consider creating an index or catalog that lists the contents of each storage container. This can be a physical notebook or a digital document, making it easier to search for specific screws or nails when you need them.
- QR Codes or Barcodes: For those who prefer a digital solution, you can utilize QR codes or barcodes for labeling purposes. This allows you to create a digital inventory system, where you can scan the code to retrieve information about the screws or nails stored in each container.
- Update and Re-organize Regularly: As your collection grows or changes over time, periodically review and update your organizational system. Remove any damaged or unusable hardware, and ensure all labels are accurate and up-to-date. This will help you maintain an efficient storage system.
Choose the organizing and labeling system that best fits your needs and preferences. Remember, the goal is to make it easy for you to find the right screw or nail quickly, saving you time and minimizing frustration during your projects.
By implementing a well-organized and clearly labeled system, you’ll have a streamlined workflow and enjoy the benefits of an efficient screw and nail storage area.
Use clear plastic containers or jars to store screws and nails, and label them for easy identification. Keep them in a cool, dry place to prevent rust and deterioration.
Read more: How To Store Screws
Tips for Maximizing Space in your Screw and Nail Storage Area
When it comes to organizing your screw and nail storage area, maximizing space is essential, especially if you have limited workspace. Here are some helpful tips to make the most out of your storage area:
- Utilize Vertical Space: Take advantage of vertical space by using wall-mounted organizers, pegboards, or slotted rails. These storage solutions allow you to hang containers or use hooks to store your screws and nails, keeping them easily accessible while minimizing horizontal space usage.
- Invest in Stackable Storage Solutions: Consider using stackable storage bins or drawers that can be easily stacked on top of each other. This allows you to utilize vertical space effectively and keeps your screws and nails organized and compact.
- Optimize Drawer Space: If you have drawers in your storage area or toolbox, make use of drawer dividers or modular trays to create smaller compartments. This helps you maximize the available space by separating different types or sizes of screws and nails within each drawer.
- Use Adjustable Shelving: If you have large quantities of screws and nails, adjustable shelving units can provide flexibility in arranging your storage containers. You can modify the height of the shelves to accommodate different container sizes, ensuring efficient use of vertical space.
- Consider Compact Storage Systems: Look for storage solutions that are specifically designed to be compact and space-saving. For example, rotating storage systems or small parts organizers with multiple compartments can efficiently store a large number of screws and nails in a limited footprint.
- Utilize Empty Containers: Don’t overlook the space inside empty containers, such as toolboxes or storage bins. Utilize small plastic containers or organizers within these larger containers to further divide and organize your screws and nails.
- Use Magnetic Strips or Trays: Magnetic strips or trays can be attached to walls or the underside of shelves to hold metal screws and nails. This eliminates the need for additional containers and maximizes space utilization.
- Minimize Packaging: Consider transferring screws and nails from their original packaging into small, labeled bags or containers. This helps reduce the amount of space wasted by bulky packaging and allows for more efficient storage.
- Regularly Purge and Reorganize: Periodically assess your screw and nail collection and remove any damaged, corroded, or unused hardware. This not only frees up space but also ensures that you are only storing what you actually need.
By implementing these space-saving tips, you can optimize your screw and nail storage area and make the most efficient use of the available space. Remember, a well-organized storage area not only saves you space but also enhances your productivity and enjoyment of your projects.
Safety Measures for Storing Screws and Nails
Proper storage of screws and nails not only ensures their usability and accessibility but also promotes safety in your workspace. Consider the following safety measures when storing screws and nails:
- Use Secure Containers: Choose storage containers that are sturdy and have secure lids or closures. This prevents any spills or accidents that could result in loose screws or nails causing harm.
- Label Containers Clearly: Properly label your storage containers to ensure that you can easily identify the contents without opening them. Clear labels reduce the likelihood of accidentally grabbing the wrong type or size of hardware and using it inappropriately.
- Keep Screws and Nails Out of Reach: Store your screws and nails in a designated storage area that is out of reach of children or pets. This helps prevent accidental ingestion or injuries caused by mishandling sharp objects.
- Avoid Overstuffing Containers: Do not overload your storage containers with too many screws or nails. Overstuffing can make it difficult to retrieve individual pieces and may result in spills or injuries when trying to extract the hardware.
- Store Flammable Items Away: Keep flammable materials, such as paints, solvents, or fuels, separate from your screw and nail storage area. This reduces the risk of fire or combustion near your hardware collection.
- Protect Against Moisture: Moisture can cause screws and nails to rust or corrode, affecting their integrity and usability. Store your hardware in a dry environment, away from moisture sources, to prevent damage.
- Safely Dispose of Damaged or Unusable Hardware: Regularly inspect your screws and nails for signs of damage or deterioration. Properly dispose of any hardware that is no longer in good condition to prevent accidents or injuries during use.
- Secure Storage for Sharp Objects: If you are using magnetic strips or trays to store metal screws and nails, ensure that they are securely fastened to prevent them from falling and causing injuries.
- Wear Protective Gear: When handling screws and nails, it is advisable to wear protective gloves to prevent cuts, punctures, or splinters. Additionally, protective eyewear can safeguard against any potential eye injuries.
- Regular Maintenance: Periodically check your storage area and containers for any signs of damage or wear. Replace any damaged containers and address any potential safety concerns promptly.
By following these safety measures, you can ensure a secure and hazard-free environment for storing and handling screws and nails. Prioritizing safety in your workspace is crucial to prevent accidents and injuries and promote a safe and efficient working environment.
Maintenance and Inventory Management of Screws and Nails
Proper maintenance and inventory management of your screws and nails are essential to ensure their quality, usability, and overall organization. Here are some tips to help you maintain and manage your inventory effectively:
- Regular Inspection: Routinely inspect your screws and nails for any signs of damage, such as rust, corrosion, or bending. Remove any damaged or unusable hardware from your inventory to prevent accidents or issues during use.
- Clean as Needed: Clean your screws and nails to remove any dirt, debris, or rust that may have accumulated. Use a wire brush or a rust remover solution and a cloth or brush to gently clean the hardware. Ensure they are completely dry before returning them to storage to prevent further corrosion.
- Inventory Organization: Keep track of the types, sizes, and quantities of screws and nails in your inventory. This can be done by creating a spreadsheet, using inventory management software, or maintaining a physical inventory log. Regularly update this inventory record to ensure accurate stock management.
- Implement a First-In, First-Out (FIFO) System: When replenishing your stock, follow a first-in, first-out system. This means using the oldest screws or nails first before utilizing newly purchased or acquired hardware. This helps prevent the accumulation of older and potentially less reliable inventory in your storage.
- Reorder in Advance: Maintain adequate stock levels by reordering screws and nails before you completely run out of certain types or sizes. Anticipate your needs based on project requirements or historical usage to ensure timely replenishment.
- Organize by Project: If you have multiple ongoing projects, consider organizing your screws and nails by project. Label storage containers or compartments for specific project-related hardware, making it easy to locate and retrieve the required items for each project.
- Update Labels: Periodically check and update the labels on your storage containers or compartments to ensure accuracy. Labels should indicate the type, size, and quantity of screws or nails contained within, allowing for efficient inventory management.
- Secure Storage: Store your screws and nails in a secure and controlled environment to prevent damage or loss. Consider using sealed containers or cabinets to protect your inventory from moisture, extreme temperatures, or pests.
- Periodic Inventory Review: Conduct regular reviews of your inventory to identify any discrepancies or issues. This can help you identify overstocked or understocked items and implement corrective actions as needed.
- Dispose of Obsolete Hardware: Remove any obsolete or unused screws and nails from your inventory. These could be types or sizes that are no longer relevant to your current projects or that you no longer use. Dispose of them safely and update your inventory records accordingly.
By implementing these maintenance and inventory management practices, you can ensure the quality and availability of screws and nails in your inventory. Regular maintenance, accurate tracking, and efficient organization will contribute to smooth project execution and prevent unnecessary delays or problems due to insufficient or damaged hardware.
Conclusion
Properly storing screws and nails is essential for a smooth and efficient workflow in DIY projects or professional construction work. By implementing the right storage solutions, organizing and labeling your hardware, and following safety measures, you can enhance accessibility, protect your screws and nails, save money, improve efficiency, and ensure a safe working environment.
Consider the factors such as type, size, quantity, workspace, portability, and accessibility when choosing storage options for your screws and nails. Compartmentalized storage boxes, wall-mounted racks, toolboxes, and stackable storage bins are just a few of the many options available.
Organizing and labeling your screws and nails based on type, size, and other relevant categories will save you time and effort in locating the right hardware. Color-coded labels, clear labeling, and utilizing digital systems like QR codes or barcodes can further streamline your organization process.
Maximizing space in your storage area is crucial, especially if you have limited workspace. Making use of vertical space, stackable storage solutions, and optimizing drawer space will help you efficiently store your screws and nails without sacrificing valuable workspace.
Don’t forget to prioritize safety when storing screws and nails. Use secure containers, label them clearly, keep them out of reach of children and pets, and protect them from moisture and other potential hazards. Regular maintenance, inspection, and the safe disposal of damaged or unusable hardware are also important safety measures to follow.
Lastly, effective inventory management ensures that you have the right screws and nails in stock when you need them. Regular inventory reviews, updating labels, and reordering in advance help you stay organized and avoid running out of essential hardware during critical projects.
By implementing these strategies for properly storing screws and nails, you’ll create a well-organized workspace, enhance efficiency, and reduce the likelihood of accidents or setbacks. Take the time to invest in a reliable storage system and regularly maintain and manage your inventory. The benefits of a streamlined and efficient screw and nail storage area will be evident in the smooth execution of your projects and a more enjoyable working experience.
If you found this guide on storing screws and nails helpful, you'll definitely want to check out our latest articles on enhancing your workspace. For those looking to optimize their workspace further, our review on top picks for hardware storage will surely provide some intriguing options. Similarly, if your toolkit is sprawling out of control, don’t miss our insights on effective tool storage solutions. And for an overhauled approach to tidying up your garage, our creative garage organization ideas will transform it into a model of efficiency and convenience.
Frequently Asked Questions about How To Store Screws And Nails
Was this page helpful?
At Storables.com, we guarantee accurate and reliable information. Our content, validated by Expert Board Contributors, is crafted following stringent Editorial Policies. We're committed to providing you with well-researched, expert-backed insights for all your informational needs.


0 thoughts on “How To Store Screws And Nails”