Home>Furniture>Outdoor Furniture>How To Hide Screws In Decking
Outdoor Furniture
How To Hide Screws In Decking
Modified: March 7, 2024
Learn how to hide screws in decking and achieve a seamless outdoor furniture look. Enhance the appearance of your deck with our easy-to-follow tips and tricks.
(Many of the links in this article redirect to a specific reviewed product. Your purchase of these products through affiliate links helps to generate commission for Storables.com, at no extra cost. Learn more)
Introduction
Welcome to our comprehensive guide on how to hide screws in decking. If you’re a homeowner or DIY enthusiast, you know that visible screws can be quite an eyesore when it comes to the aesthetics of your outdoor space. Fortunately, there are several options available to help you conceal those unsightly screws and achieve a seamless, polished look for your decking.
In this article, we will explore five effective methods for hiding screws in decking. Whether you’re working with wood, composite, or PVC decking materials, these solutions can be adapted to suit your specific needs. So, let’s dive in and discover the techniques that will elevate the appearance of your deck!
Key Takeaways:
- Say goodbye to visible screws on your deck by using methods like countersinking, plug cutters, or hidden fastening systems for a seamless and professional look.
- Get creative with your deck design by painting or staining the screws to blend in or stand out, adding a unique touch to your outdoor space.
Read more: How To Remove Decking Screws
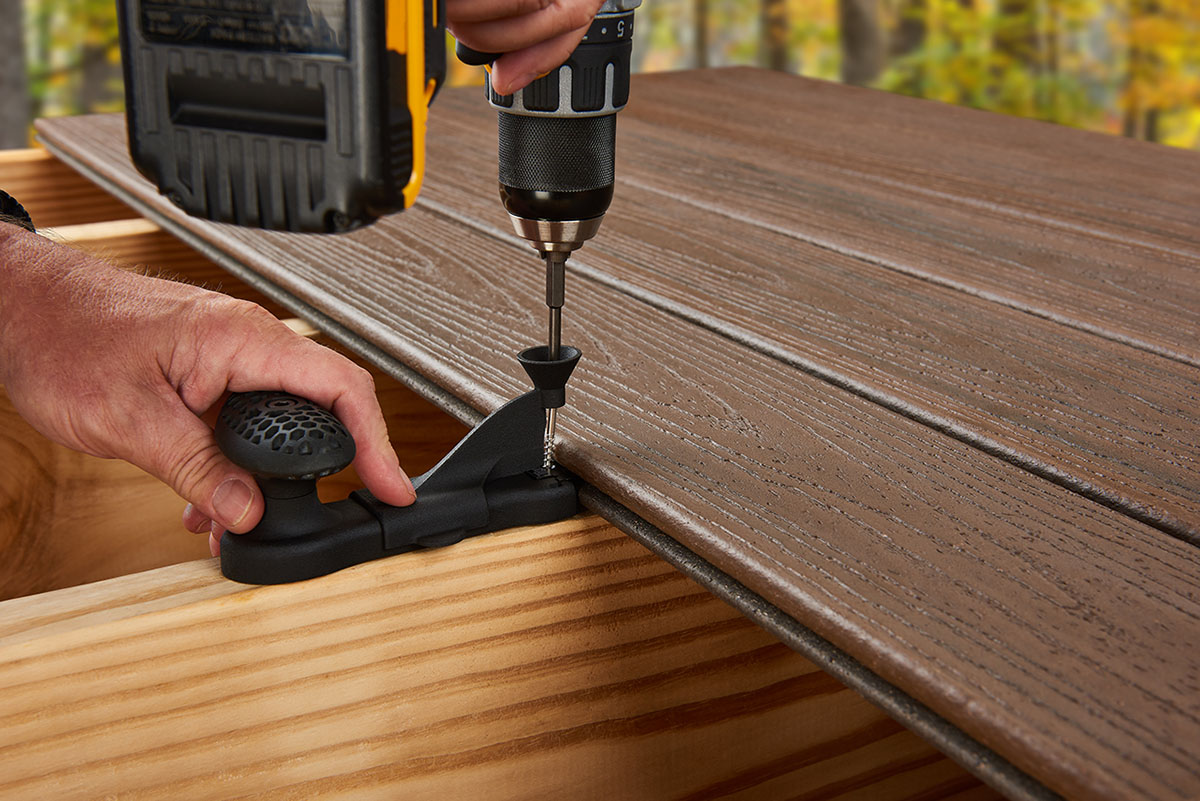
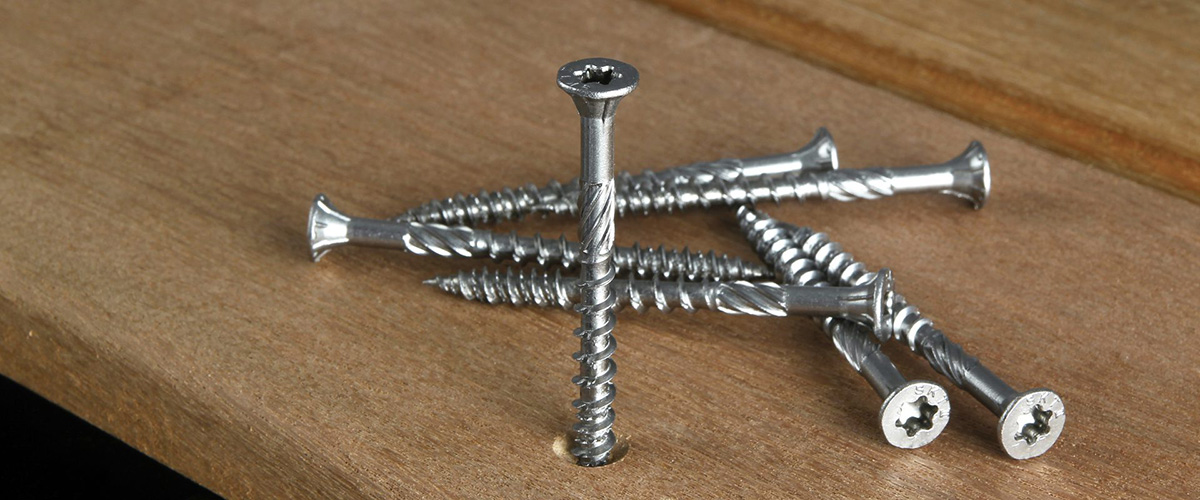
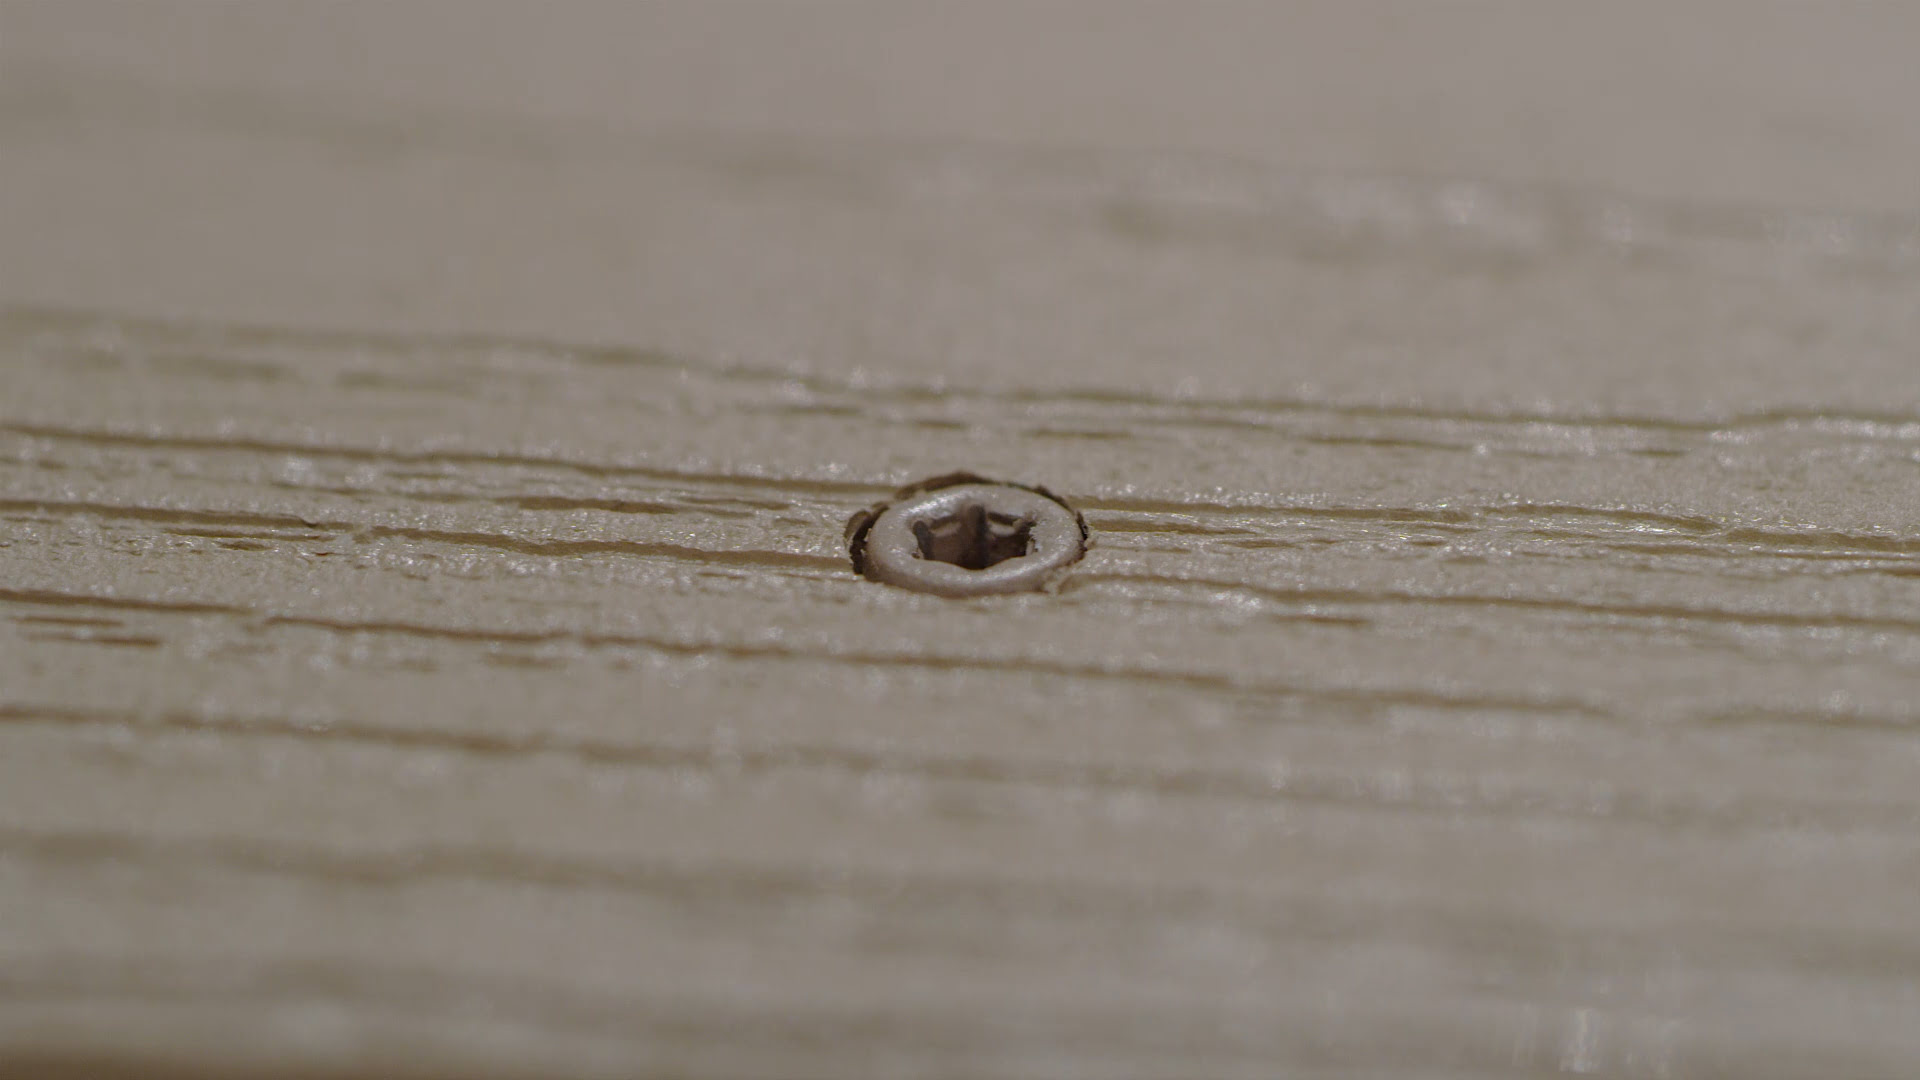
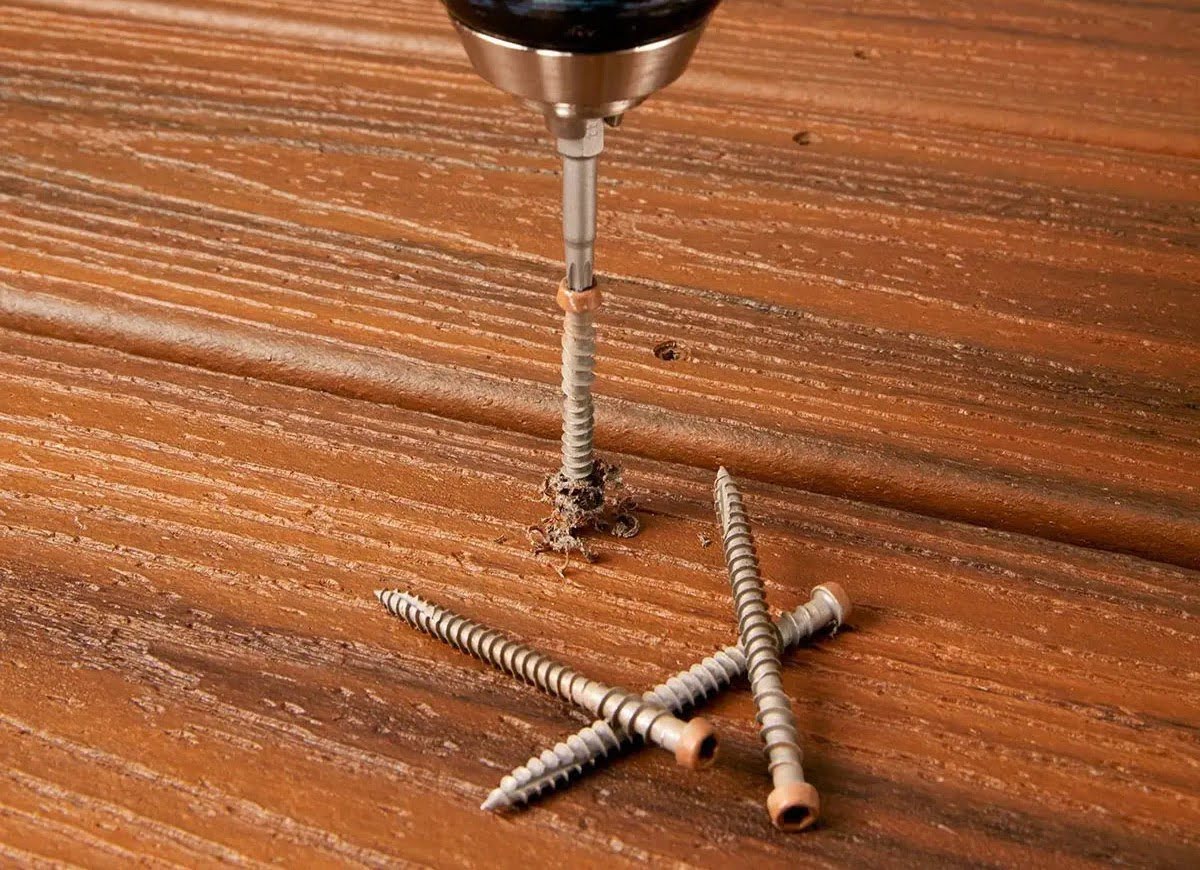
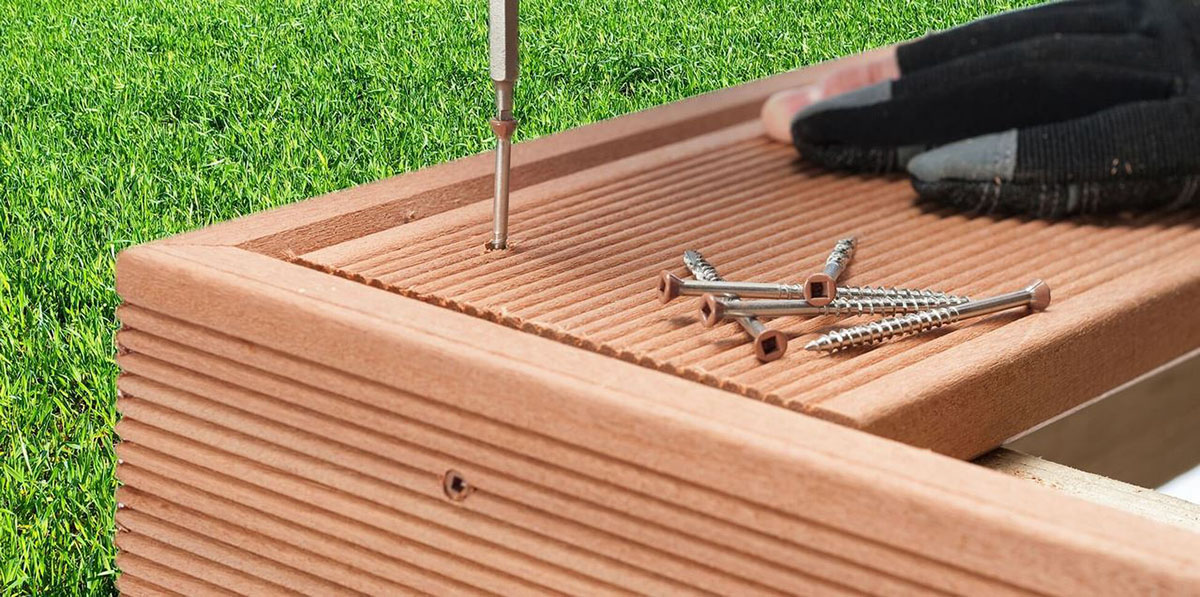
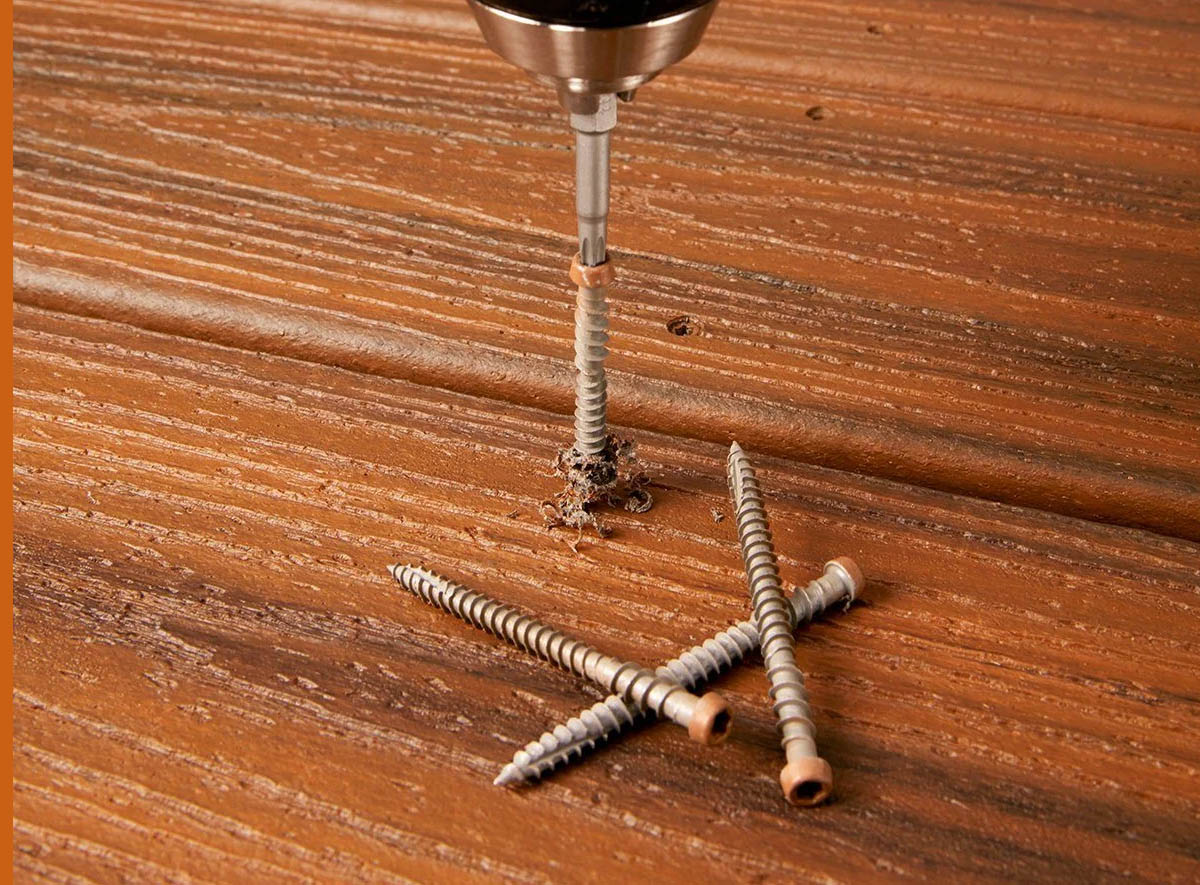
Option 1: Countersink the Screws
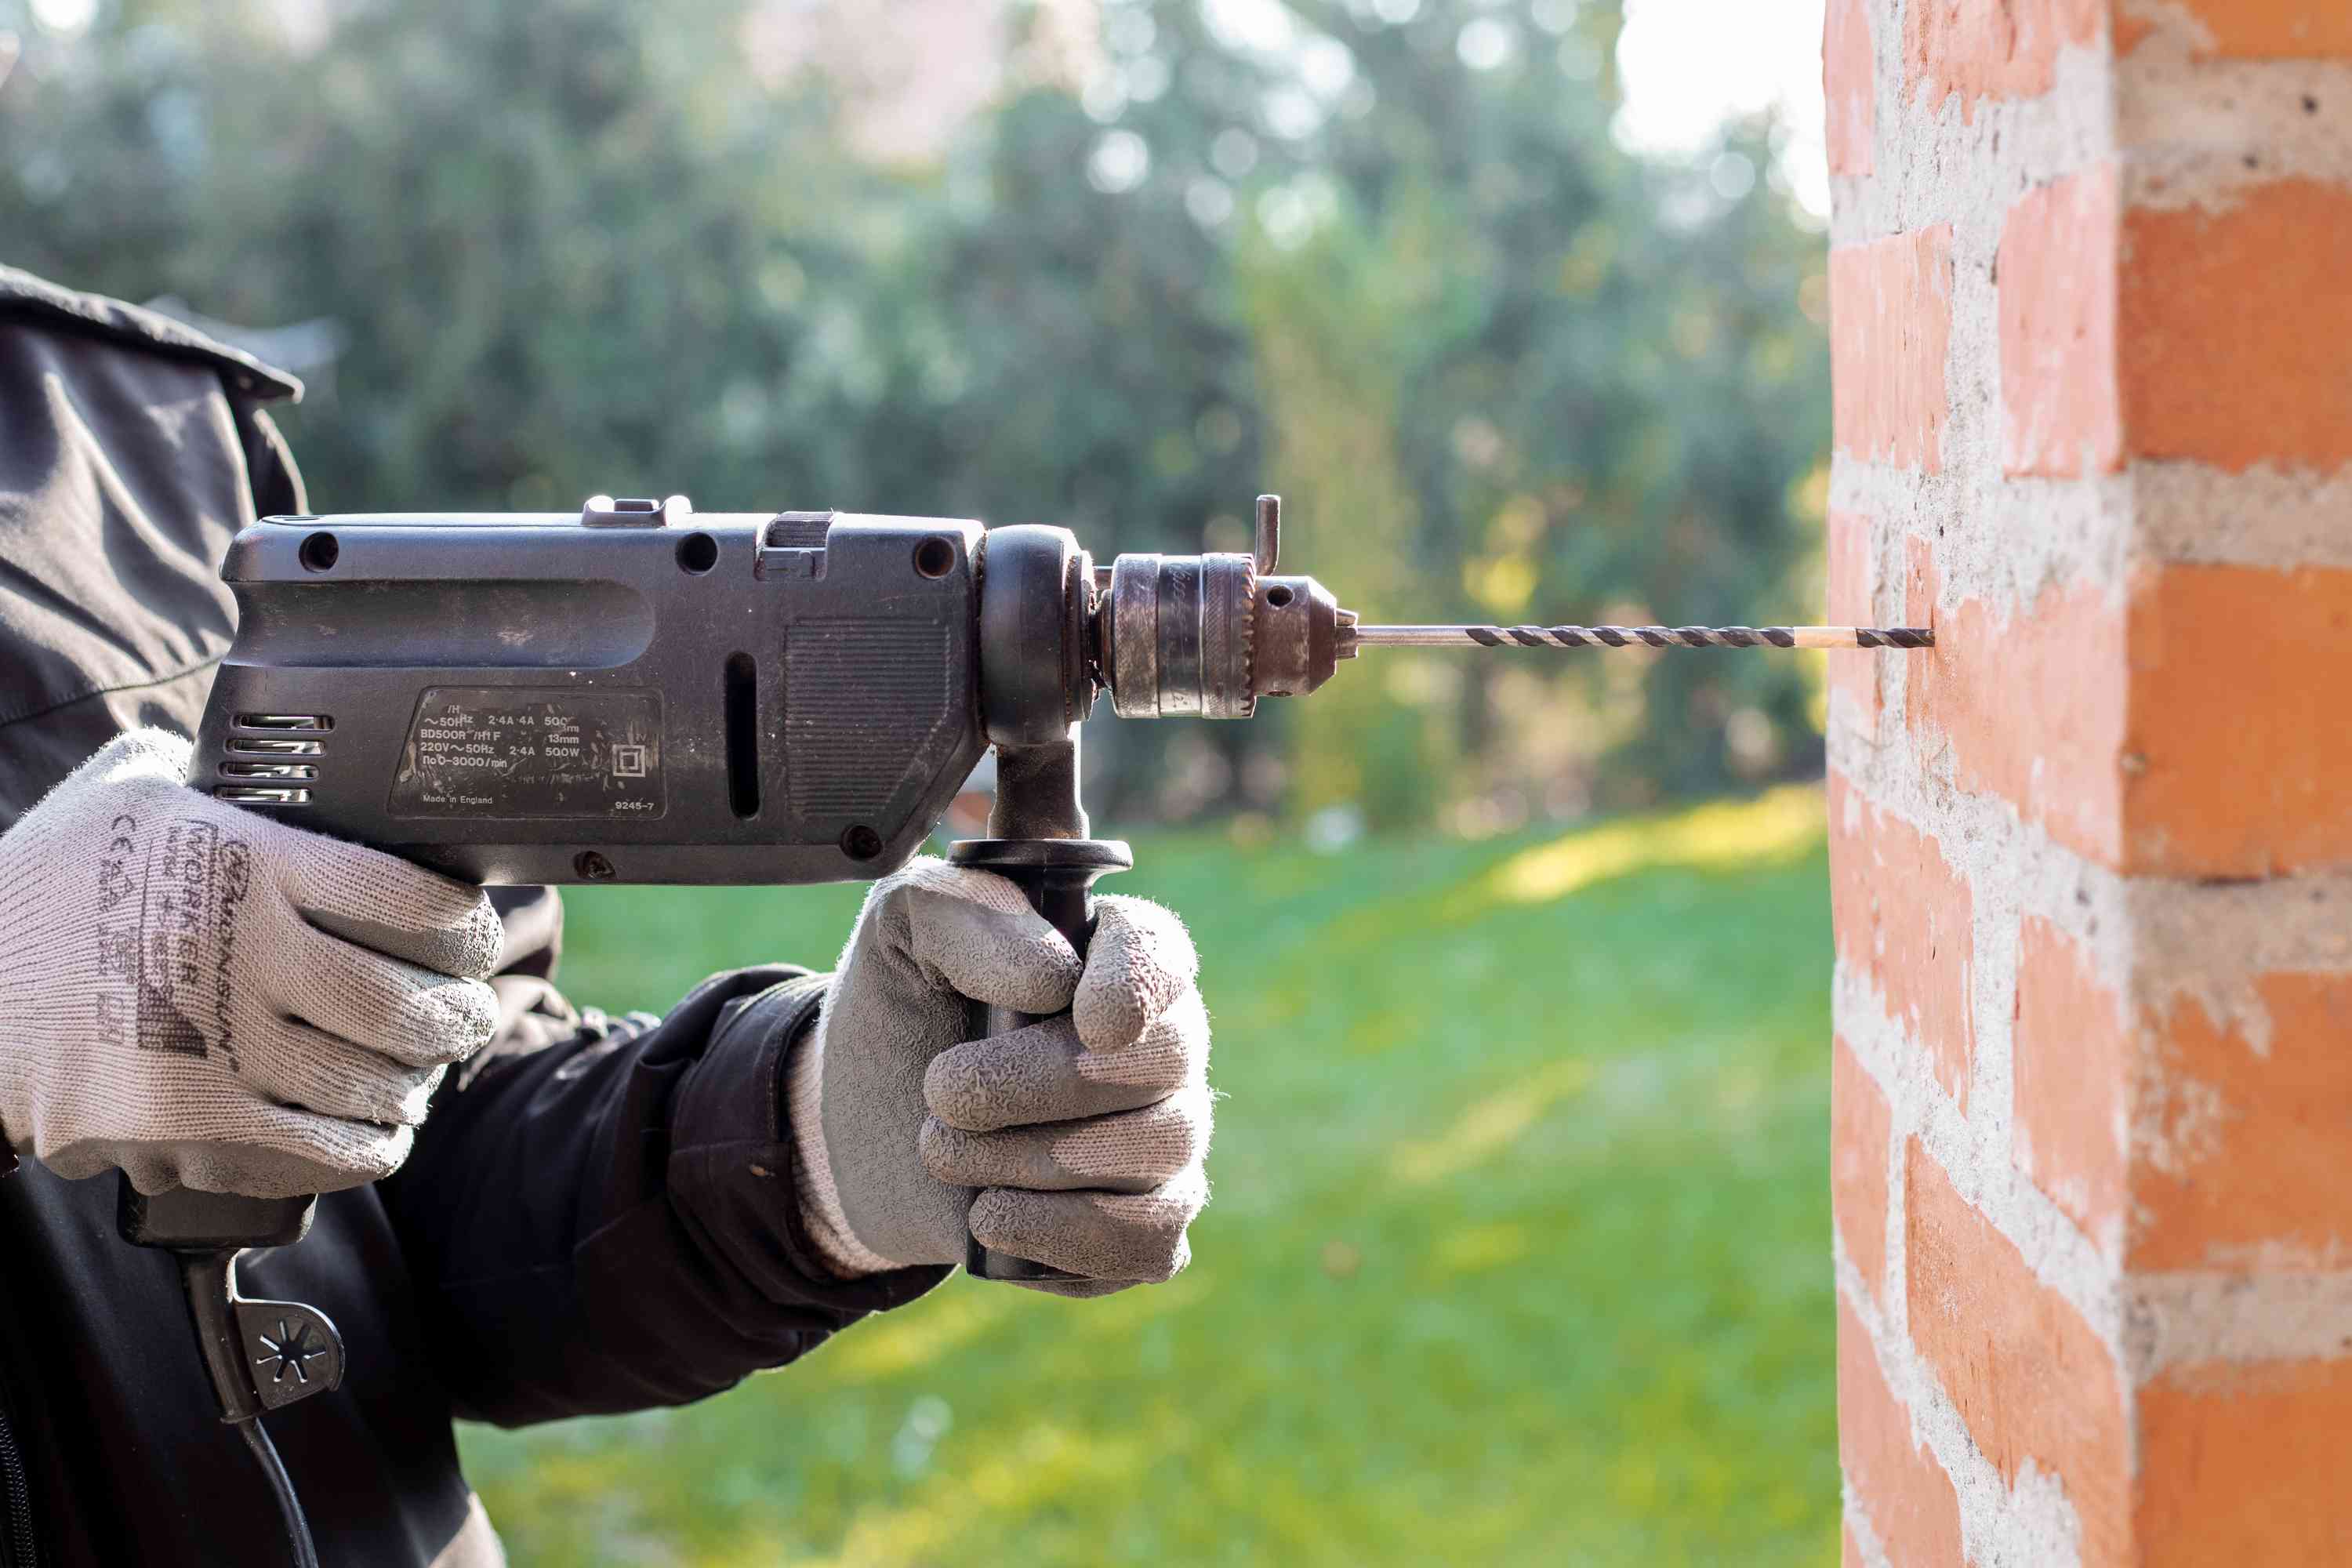
Countersinking the screws is a simple and cost-effective method to hide them on your deck. This technique involves creating a recessed hole for the screw, allowing it to sit flush with the surface of the decking material. This not only eliminates any visible protrusions but also reduces the risk of tripping or snagging on the screw heads.
To countersink screws, you will need a drill with a countersink bit. Start by marking the desired location for the screw on your deck board. Then, using the countersink bit, drill a shallow hole into the deck board, making sure not to go too deep. The goal is to create a hole that is wide enough for the screw head to sit below the surface but not too wide that it compromises the strength of the screw.
Once the hole is drilled, you can drive the screw into place, ensuring that the head is flush with the surface of the deck board. If necessary, you can use a screwdriver or an impact driver to achieve the desired depth.
After the screws are countersunk, you will need to fill the holes with wood filler. This step is essential to achieve a seamless finish. Choose a wood filler that matches the color of your deck board or opt for a clear filler if you have a natural wood finish. Apply the filler using a putty knife, making sure to fill the holes completely. Allow the filler to dry as per the manufacturer’s instructions and then sand it down until it is smooth and level with the surrounding deck surface.
Remember, when countersinking screws, it’s important not to over-tighten them, as this can cause the deck board to split. Take care to strike the right balance between securing the screw and maintaining the integrity of the decking material.
Countersinking is an effective method for hiding screws in decking, but it does require a bit of time and effort. However, the result is a clean and professional-looking deck with no visible screws.
Now let’s move on to our next option: concealing screws with plug cutters.
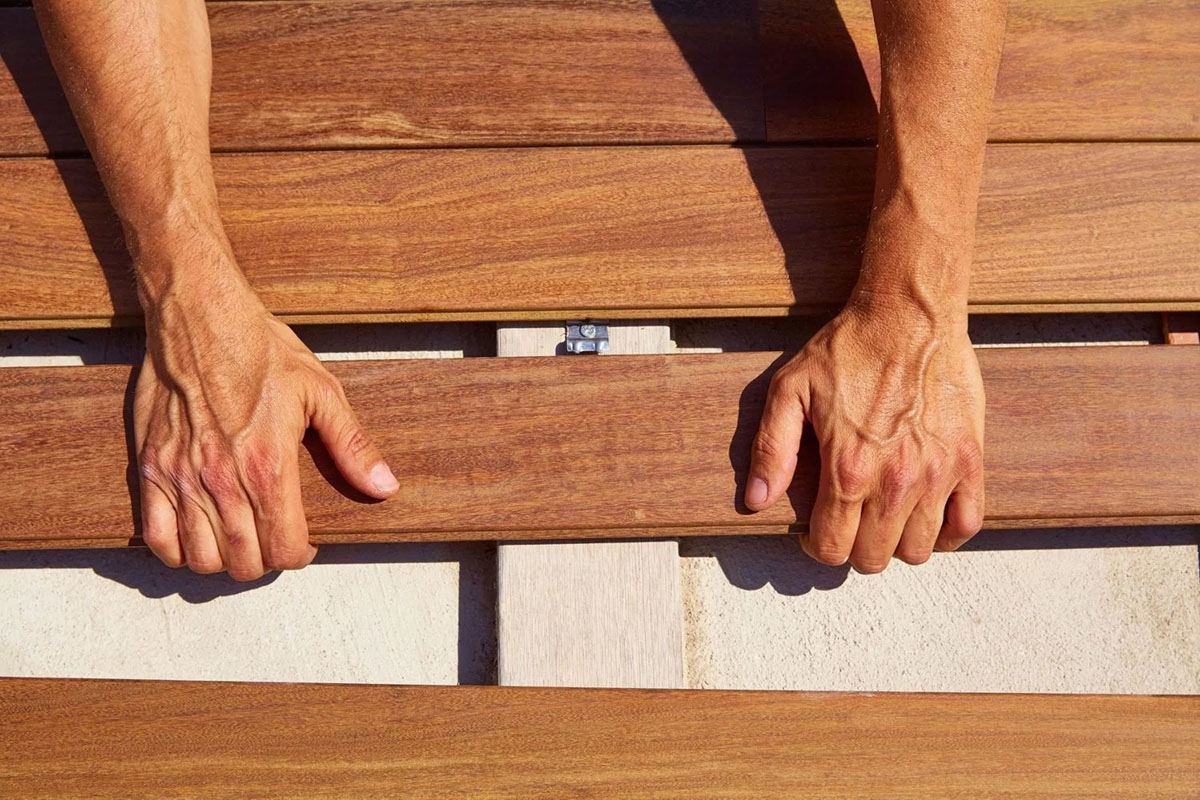
Option 2: Conceal with Plug Cutters
If you’re looking for a more discreet and refined way to hide screws in your decking, using plug cutters is an excellent choice. This method involves creating custom wooden plugs that fit perfectly into the holes left by the screws, effectively concealing them from view.
To begin, you will need a plug cutter set that matches the size of your screws. These plug cutters are specially designed drill bits with a cylindrical shape and a cutting edge on one end. Select a plug cutter that matches the diameter of the screw holes in your decking material.
Before using the plug cutters, it’s important to pre-drill the screw holes to ensure a clean and accurate cut. After pre-drilling the holes, insert the screws into the decking material. Now, using the plug cutter, drill into the decking material directly above the screw heads. Make sure to align the cutter with the grain of the wood for a seamless match.
Once the plugs are cut, remove them from the decking surface. You can use a chisel or a screwdriver to gently pry them out. It’s a good idea to have some extra wooden boards on hand, especially if you’re using a different type of wood for the plugs. This way, you can cut the plugs from the same material as your decking, ensuring a perfect color match.
After removing the plugs, it’s time to insert new ones. Apply a small amount of wood glue to the hole and press the plug into place. Make sure to tap it down until it is flush with the decking surface. Wipe away any excess glue with a damp cloth before it dries.
Once the plugs are in place, you can sand them down until they are level with the surrounding decking material. Be sure to use a fine-grit sandpaper for a smooth finish. After sanding, apply a protective finish to the plugs to match the rest of your decking. This could be a clear sealant or a stain in the color of your choice.
Concealing screws with plug cutters not only provides a neat and sophisticated look but also offers added protection against moisture and the elements. However, keep in mind that this method requires precision and careful attention to detail. Take your time to ensure that the plugs fit perfectly and create a seamless appearance on your deck.
Now, let’s explore option three: using hidden fastening systems.
Option 3: Use Hidden Fastening Systems
If you’re looking for a seamless and professional-looking deck without any visible screws, using hidden fastening systems is a fantastic option. These innovative systems allow you to secure your deck boards without the need for traditional face screws, resulting in a clean and polished finish.
There are several types of hidden fastening systems available, each with its own unique installation method. One popular option is a hidden clip system. These systems usually consist of small metal clips that attach to the sides of the deck boards and are then fastened to the underlying joists using screws or specialized fasteners.
To install a hidden clip system, start by attaching the clips to the sides of each deck board, ensuring that they align with the joists below. Depending on the specific system you choose, the clips may need to be screwed into place or may feature a locking mechanism that securely holds them in position. Once the clips are attached, simply slide the next deck board into place, aligning it with the clips, and gently tap it down with a rubber mallet or a hammer.
Another hidden fastening system option is a groove-cutting method. This technique involves creating a groove along the sides of each deck board using a router or a special groove-cutting tool. The groove allows the boards to be securely fastened to the joists using specialized screws or fasteners that are inserted into the grooves. This method provides a smooth and unblemished surface since the screws are concealed inside the groove.
Using hidden fastening systems offers several benefits beyond the aesthetic appeal. These systems provide a more consistent and secure installation since the boards are held in place from the sides, minimizing the risk of warping or cupping. Additionally, the absence of face screws reduces the chances of moisture penetration, prolonging the lifespan of your deck.
When considering hidden fastening systems, it’s important to research and select a system that is compatible with your decking material. Different systems are designed for use with different types of decking, such as wood, composite, or PVC. Consult the manufacturer’s guidelines to ensure you choose the right system for your specific needs.
Using hidden fastening systems for your deck provides a professional and sleek appearance while maintaining the structural integrity of the boards. However, it’s worth noting that these systems may require additional time and investment compared to traditional screwing methods. But the end result is worth it – a flawless deck surface free from visible screws.
Now let’s move on to option four: camouflaging screws with wood filler.
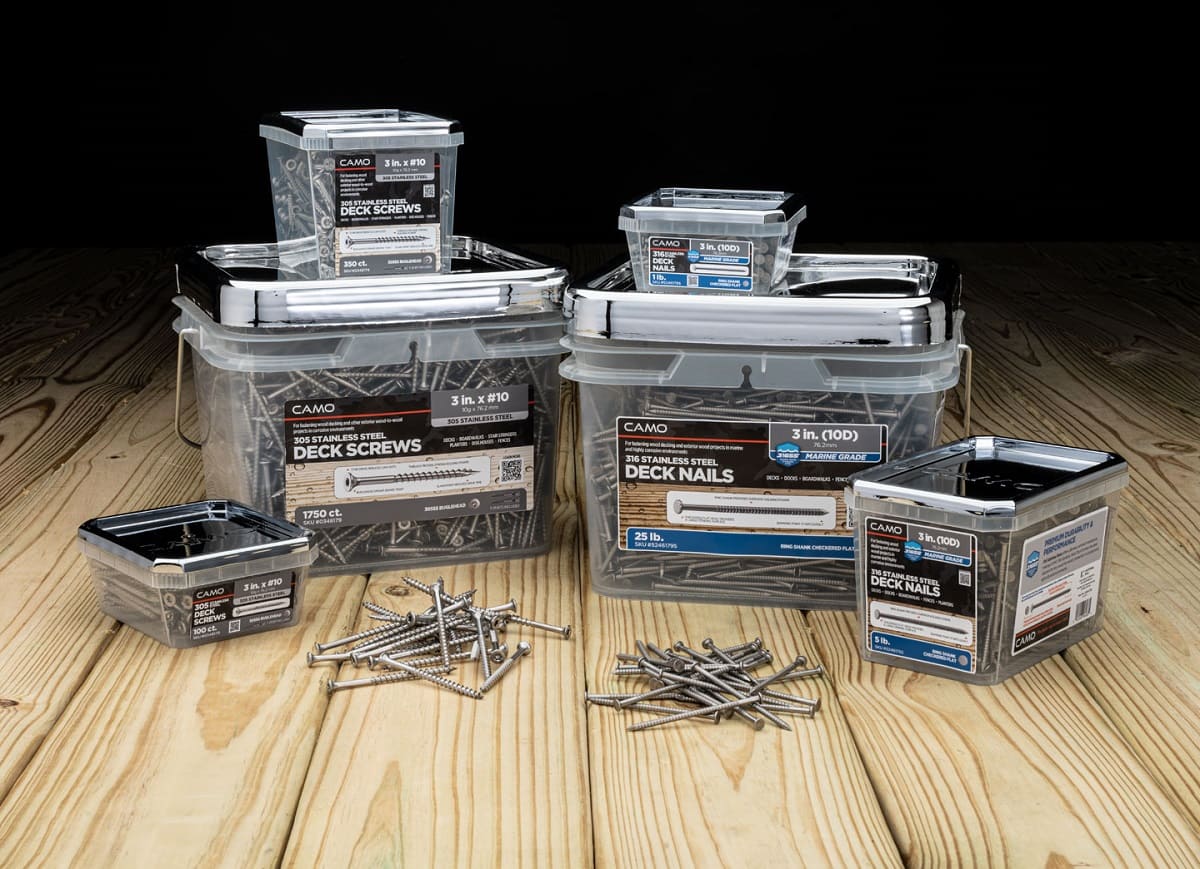
Use a countersink bit to create a hole for the screw head, then cover it with a wood plug or composite deck plug. Alternatively, use hidden fastening systems for a seamless look.
Option 4: Camouflage with Wood Filler
If you’re working with a limited budget or prefer a simpler approach to hiding screws in your decking, camouflaging them with wood filler can be an effective and economical solution. Wood filler is a versatile material that can be used to fill in the holes left by the screws, creating a smooth and cohesive surface.
To begin, gather a high-quality wood filler that matches the color of your decking material. It’s important to select a filler that is designed for outdoor use and is capable of withstanding the elements. Some fillers are specifically formulated for use with different types of wood, such as cedar or pressure-treated lumber, so be sure to choose one that is compatible with your decking material.
Before applying the wood filler, make sure the holes left by the screws are clean and free from any debris. You can use a small brush or compressed air to remove any loose particles. Next, using a putty knife or a small spatula, apply the wood filler to the holes, ensuring that they are completely filled. It’s a good idea to slightly overfill the holes to compensate for any shrinkage that may occur as the filler dries.
Once the filler is applied, smooth it out with the putty knife, ensuring that it is level with the surrounding decking surface. Be sure to follow the manufacturer’s instructions for drying times, as this can vary depending on the specific wood filler you are using. Once the filler is dry, you can lightly sand it to create a seamless finish.
After sanding, it’s important to protect the filled areas with a suitable finish. This could be a clear sealant for a natural look or a stain in the color of your choice to match the rest of your decking. Applying a finish not only enhances the appearance but also helps to protect the wood filler from moisture and UV damage.
Using wood filler to camouflage screws in your decking provides an inexpensive and straightforward solution. However, keep in mind that the filler may require occasional maintenance or touch-ups over time to maintain its appearance. It’s a good idea to periodically inspect your deck and reapply filler as needed.
Now, let’s explore our final option: painting or staining the screws.
Read more: How To Screw Composite Decking
Option 5: Paint or Stain the Screws
If you want to add a touch of creativity to your deck while hiding the screws, painting or staining them can be a unique and visually appealing option. This method allows you to incorporate the screws into the design of your deck, making them blend seamlessly with the decking material or adding a contrasting color for a striking effect.
To begin, you’ll need to select a paint or stain color that complements your decking material and desired aesthetic. If you want the screws to blend in, choose a color that closely matches the decking or the surrounding area. On the other hand, if you want to make a statement, opt for a contrasting color that will draw attention to the screws.
Before painting or staining, it’s important to prepare the screws by ensuring they are clean and free from any dirt or debris. You may use a brush or a damp cloth to wipe them down. For optimal adhesion, lightly sand the screw heads to create a rough surface.
Next, apply a coat of primer specifically formulated for metal or outdoor use to the screw heads. The primer will help the paint or stain adhere better to the surface of the screws and provide a more durable finish. Be sure to let the primer dry completely before proceeding.
Once the primer is dry, you can apply the paint or stain to the screw heads. Use a small brush or a foam brush to carefully coat each screw head, ensuring even coverage. If using a stain, consider applying multiple coats to achieve the desired depth of color. Allow each coat to dry before applying the next one.
After the paint or stain has dried completely, you can evaluate the result and make any necessary touch-ups. If you wish to protect the painted or stained screws and ensure their longevity, consider applying a clear sealant or a topcoat over them. This will help protect against weathering and UV damage, ensuring that the finish stays vibrant and intact for an extended period.
Painting or staining the screws not only hides them but also adds a touch of customization to your deck. Whether you choose to blend the screws with the deck boards or create an eye-catching contrast, this method allows you to showcase your creativity and attention to detail.
To conclude, there are various options available to hide screws in decking, from countersinking and using plug cutters to hidden fastening systems, wood fillers, or painting/staining. Each method offers its own benefits and considerations, so choose the one that fits your budget, skill level, and desired aesthetic. With a little effort and ingenuity, you can transform your deck into a beautiful and seamless outdoor space free from visible screws.
Conclusion
When it comes to decking, the appearance of screws can be a major concern for homeowners and DIY enthusiasts alike. Fortunately, there are several effective methods available to hide screws and achieve a seamless and polished look for your outdoor space.
Countersinking the screws provides a cost-effective solution, allowing you to create recessed holes and fill them with wood filler for a smooth finish. Concealing screws with plug cutters offers a more refined approach, creating custom wooden plugs that perfectly fit into the screw holes. Hidden fastening systems provide a clean and professional look by securing deck boards without visible face screws.
If you’re working on a budget or prefer a simpler approach, camouflaging screws with wood filler can be an economical and effective option. Lastly, painting or staining the screws allows you to incorporate them into your deck design, either blending them with the decking material or creating a contrasting color for added visual interest.
Each method has its own benefits and considerations, so it’s important to choose the one that suits your specific needs and preferences. Consider factors such as budget, skill level, time commitment, and desired aesthetic. Additionally, ensure that you select materials and products that are compatible with your decking material to achieve the best results.
By implementing these techniques, you can elevate the appearance of your deck and create a space that is both visually pleasing and functional. Say goodbye to visible screws and hello to a seamless and beautiful outdoor environment.
Remember, whether you choose to countersink, use plug cutters, hidden fastening systems, wood filler, or paint/stain the screws, it’s essential to pay attention to detail and follow proper installation techniques for the best outcome. Take pride in your deck and enjoy the satisfaction of a job well done!
Frequently Asked Questions about How To Hide Screws In Decking
Was this page helpful?
At Storables.com, we guarantee accurate and reliable information. Our content, validated by Expert Board Contributors, is crafted following stringent Editorial Policies. We're committed to providing you with well-researched, expert-backed insights for all your informational needs.


0 thoughts on “How To Hide Screws In Decking”