
Articles
How To Store Snowball Cookies
Modified: December 7, 2023
Learn the best method to store delicious snowball cookies for maximum freshness. Read our informative articles for expert tips and tricks.
(Many of the links in this article redirect to a specific reviewed product. Your purchase of these products through affiliate links helps to generate commission for Storables.com, at no extra cost. Learn more)
Introduction
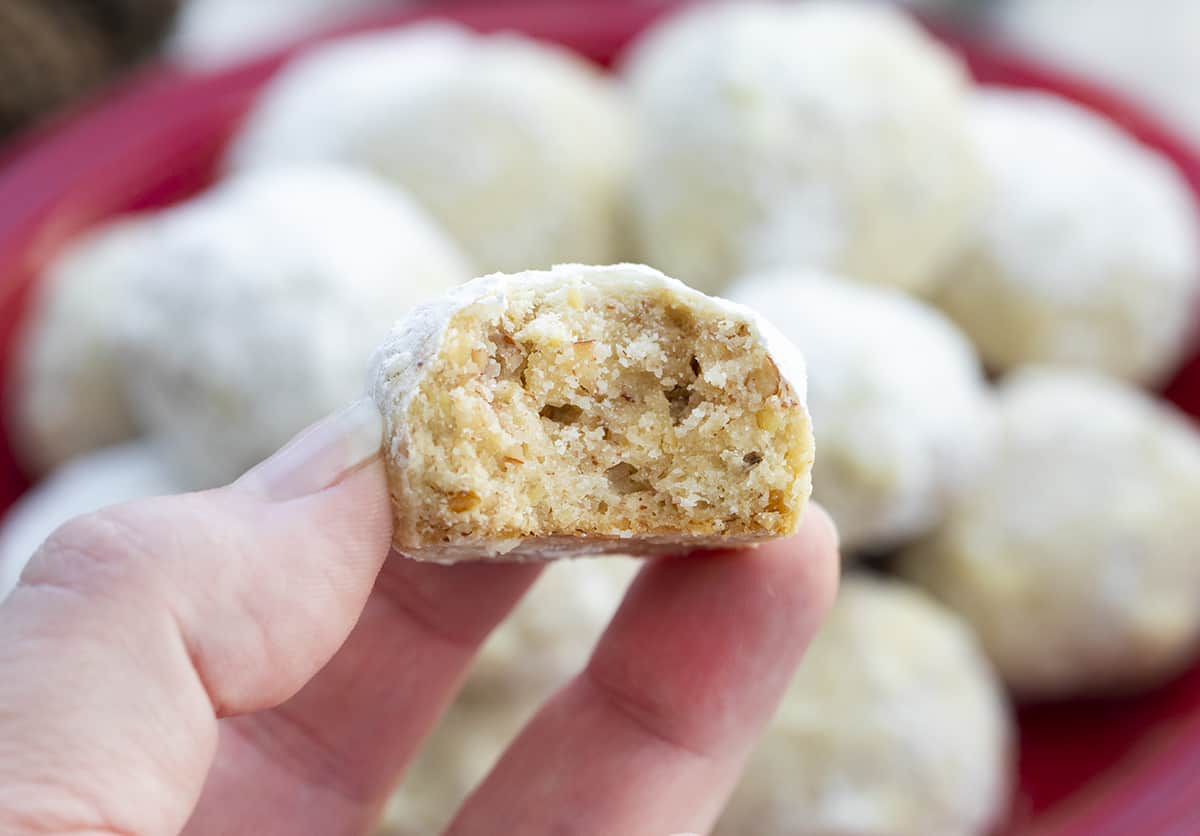
When it comes to homemade treats, snowball cookies are a classic favorite. These delightful little treats are not only delicious but also incredibly easy to make. Also known as Mexican wedding cookies or Russian tea cakes, snowball cookies have a melt-in-your-mouth texture and a delicate buttery flavor.
In this article, we will take you through a step-by-step guide on how to store snowball cookies properly. Whether you are planning to make a big batch ahead of time or want to preserve the leftovers, we have got you covered.
Before we jump into the storing process, let’s quickly go over the essential ingredients you will need to make snowball cookies.
Key Takeaways:
- Properly storing snowball cookies is crucial for maintaining their freshness and texture. Follow the steps outlined in the article to ensure your delightful treats stay delicious for up to a week, or even longer if frozen.
- Get creative with flavors, decorations, and packaging to make your snowball cookies stand out. Experiment with different nuts, extracts, and spices, and consider gifting them in festive packaging for a thoughtful homemade gift.
Read more: How To Store Cookies
Ingredients
Here are the key ingredients you will need to make delicious snowball cookies:
- 1 cup unsalted butter, softened
- 1/2 cup powdered sugar, plus extra for dusting
- 2 teaspoons vanilla extract
- 2 1/4 cups all-purpose flour
- 1/4 teaspoon salt
- 1 cup finely chopped nuts (such as pecans or walnuts)
Note: You can customize this recipe by adding different flavors, such as almond extract or lemon zest, to give your snowball cookies a unique twist.
Step 1: Preparing the Dough
To begin, preheat your oven to 350 degrees Fahrenheit (175 degrees Celsius) and line a baking sheet with parchment paper.
In a large mixing bowl, cream together the softened butter and powdered sugar until smooth and fluffy. This can be done using an electric mixer or by hand with a sturdy spoon. The creaming process ensures that the cookies have a tender texture.
Next, add in the vanilla extract and mix until well combined. The vanilla extract adds a subtle sweetness and aroma to the cookies.
In a separate bowl, whisk together the all-purpose flour and salt. Gradually add the dry ingredients to the butter mixture, stirring until a soft dough forms. It’s important not to overmix the dough, as this can result in tough cookies.
Once the dough comes together, gently fold in the finely chopped nuts. The nuts add a delightful crunch and flavor to the snowball cookies. Feel free to use your favorite nuts or even a combination of different ones.
Once the dough is well mixed, cover the bowl with plastic wrap and refrigerate for about 30 minutes. Chilling the dough helps to firm it up, making it easier to handle and shape into balls.
While the dough is chilling, move on to the next step: rolling the dough into balls.
Step 2: Rolling the Dough into Balls
After chilling the dough, remove it from the refrigerator and let it sit at room temperature for a few minutes to soften slightly. This will make it easier to work with.
Take about a tablespoon of dough and roll it between your palms to form a smooth ball. The size of the balls may vary depending on your preference, but aim for uniformity to ensure even baking.
Place the rolled dough balls onto the prepared baking sheet, leaving a bit of space between them to allow for spreading during baking. If desired, you can lightly press each ball with a fork to create a crosshatch pattern on the surface.
Continue shaping the dough into balls until all the dough has been used. If the dough becomes too soft and sticky, return it to the refrigerator for a few minutes to firm up.
Once all the dough balls are on the baking sheet, transfer it to the preheated oven and bake for about 12-15 minutes, or until the edges are lightly golden. Avoid overbaking to keep the cookies tender and buttery.
Once the cookies are baked to perfection, remove the baking sheet from the oven and let the cookies cool for a few minutes on the sheet. Then transfer them to a wire rack to cool completely before moving on to the next step: storing the cookies.
Store snowball cookies in an airtight container at room temperature for up to 1 week. For longer storage, freeze in a resealable plastic bag for up to 3 months.
Step 3: Baking the Snowball Cookies
Once the cookies are shaped into balls and cooled, it’s time to bake them to bring out their delicious flavors and create that perfect melt-in-your-mouth texture.
Preheat your oven to 350 degrees Fahrenheit (175 degrees Celsius) if you haven’t already done so.
Place the dough balls onto a parchment-lined baking sheet, spacing them about 1 inch apart. The cookies will spread slightly as they bake, so it’s important to give them enough room to expand.
Slide the baking sheet into the preheated oven and bake for approximately 12 to 15 minutes. Keep a close eye on the cookies to ensure they don’t overcook and become dry.
Once the cookies are golden brown around the edges and set in the middle, they are ready to be removed from the oven. The cookies may still feel slightly soft to the touch, but they will firm up as they cool.
Allow the cookies to cool on the baking sheet for a few minutes before transferring them to a wire rack to cool completely. This will ensure that they firm up without sticking to the sheet.
Once the cookies have cooled completely, you can move on to the final step: storing these delightful snowball cookies to enjoy later.
Read more: How To Store Crumbl Cookie
Step 4: Cooling and Storing the Cookies
Properly cooling and storing snowball cookies is essential to maintain their freshness and prevent them from becoming stale. Here’s how you can do it:
1. Allow the cookies to cool completely: After baking, let the cookies cool on a wire rack until they reach room temperature. This will ensure that they are firm and ready for storage.
2. Dust with powdered sugar (optional): Snowball cookies are traditionally coated in powdered sugar, giving them their snowball-like appearance. Once the cookies have cooled, you can gently roll them in powdered sugar to add a touch of sweetness and a beautiful snowy finish.
3. Store in an airtight container: Place the cooled and dusted snowball cookies in an airtight container. This will help to prevent them from absorbing moisture from the air, which can make them go stale. Ensure that the container is tightly sealed to maintain freshness.
4. Layer with parchment paper or wax paper: To prevent the cookies from sticking together, consider adding a layer of parchment paper or wax paper between each cookie layer. This will help maintain their shape and prevent any powder sugar from rubbing off.
5. Store in a cool and dry place: It’s important to store the snowball cookies in a cool and dry location to maintain their texture and flavor. Avoid storing them in areas with high humidity or near sources of heat, as this can cause them to become soft or lose their crispiness.
6. Enjoy within a week: Snowball cookies are best enjoyed within a week of baking when they are at their freshest. Be sure to label the container with the date to keep track of their storage time.
7. Freeze for longer storage: If you want to enjoy snowball cookies beyond one week, you can freeze them in a freezer-safe container or bag. Place the cookies in a single layer, separated by parchment paper, before sealing the container. Frozen snowball cookies can be enjoyed for up to three months, but be sure to thaw them at room temperature before consuming.
Remember, the longer the cookies are stored, the more they may lose their texture and flavor. It’s best to enjoy these delightful treats sooner rather than later!
Tips and Variations
Here are some helpful tips and variations to enhance your snowball cookie-making experience:
- Experiment with different nuts: While pecans and walnuts are commonly used, you can try using almonds, hazelnuts, or even macadamia nuts for a unique twist.
- Add flavor extracts: Aside from vanilla extract, consider adding a touch of almond extract, lemon zest, or orange zest to infuse the cookies with a delightful fragrance.
- Double the recipe: Snowball cookies are incredibly popular, so consider doubling or tripling the recipe if you have a larger gathering or simply want to have plenty of cookies on hand.
- Decorate with drizzles: For an extra touch of indulgence, you can drizzle melted chocolate or caramel over the cooled snowball cookies. This will add a visually appealing and delicious element.
- Customize with spices: Add a pinch of cinnamon, nutmeg, or cardamom to the dough for a warm and aromatic twist on traditional snowball cookies.
- Gift in festive packaging: Snowball cookies make great gifts, especially during the holiday season. Package them in decorative boxes or jars, tied with a ribbon, for a thoughtful homemade gift.
Remember: Be sure to store any nut-free variations separately if you’re accommodating allergies or preferences.
By incorporating some of these tips and variations, you can make your snowball cookies stand out and create a personalized touch that will leave everyone wanting more!
Conclusion
In conclusion, snowball cookies are a delightful treat that is loved by many. They are easy to make and can be enjoyed year-round. By following the steps outlined in this article, you can create perfect, buttery cookies with a melt-in-your-mouth texture.
Remember to cool the cookies completely before storing them in an airtight container. Proper storage will help maintain their freshness and prevent them from becoming stale. If you plan on enjoying them beyond a week, freezing is a great option.
Don’t be afraid to get creative with flavors and decorations. Experiment with different nuts, extracts, and spices to add your own twist to these delicious cookies. They make wonderful gifts for friends and family, especially during special occasions.
So, next time you’re craving a sweet and buttery treat, give snowball cookies a try. Follow the steps and tips in this article, and you’ll be rewarded with a batch of delicious cookies that will melt in your mouth with every bite.
Happy baking and enjoy your scrumptious snowball cookies!
Frequently Asked Questions about How To Store Snowball Cookies
Was this page helpful?
At Storables.com, we guarantee accurate and reliable information. Our content, validated by Expert Board Contributors, is crafted following stringent Editorial Policies. We're committed to providing you with well-researched, expert-backed insights for all your informational needs.











0 thoughts on “How To Store Snowball Cookies”