
Articles
How To Store Sticky Toffee Pudding
Modified: August 23, 2024
Learn how to store sticky toffee pudding and keep it fresh for longer. Read our helpful articles on proper storage techniques for sticky toffee pudding.
(Many of the links in this article redirect to a specific reviewed product. Your purchase of these products through affiliate links helps to generate commission for Storables.com, at no extra cost. Learn more)
Introduction
Welcome to the delightful world of sticky toffee pudding! This classic British dessert is a crowd-pleasing treat that will leave you craving for more. With its moist and gooey texture, paired with a rich and indulgent toffee sauce, sticky toffee pudding is the ultimate comfort food that is perfect for any occasion.
Whether you are hosting a dinner party or simply want to enjoy a cozy night in, learning how to make and store sticky toffee pudding is a skill that will delight your taste buds and impress your guests. In this article, we will guide you through the process of making this delectable dessert and share some tips on how to store it to keep it fresh and delicious.
Before we dive into the recipe, let’s talk about the key ingredients that make sticky toffee pudding so irresistible. You will need:
- 250g pitted dates, finely chopped
- 250ml boiling water
- 1 teaspoon vanilla extract
- 175g all-purpose flour
- 1 teaspoon baking powder
- 1/2 teaspoon baking soda
- 1/4 teaspoon salt
- 100g unsalted butter, softened
- 175g brown sugar
- 2 large eggs
These ingredients come together to create a dense and moist pudding that is bursting with the flavors of dates and caramel. Additionally, you will need some equipment to assist you during the preparation process. Make sure you have the following items on hand:
- 9-inch square baking pan
- Mixing bowls
- Electric mixer or stand mixer
- Saucepan
- Whisk or wooden spoon
Now that you have everything ready, let’s get started on making the delicious toffee sauce that will elevate your sticky toffee pudding to a whole new level of decadence.
Key Takeaways:
- Indulge in the delightful world of sticky toffee pudding! Master the art of making and storing this classic British dessert to impress your guests and savor the sweet, comforting flavors at any time.
- Elevate your sticky toffee pudding experience with creative serving ideas. From drizzling toffee sauce to pairing with ice cream or fruit compote, let your taste buds guide you to endless flavor combinations and indulgent delights.
Read more: How To Store Bread Pudding
Ingredients
Before we begin making the sticky toffee pudding, let’s go over the ingredients you will need:
- 250g pitted dates, finely chopped
- 250ml boiling water
- 1 teaspoon vanilla extract
- 175g all-purpose flour
- 1 teaspoon baking powder
- 1/2 teaspoon baking soda
- 1/4 teaspoon salt
- 100g unsalted butter, softened
- 175g brown sugar
- 2 large eggs
The star ingredient of sticky toffee pudding is the dates. They provide a natural sweetness and a moist texture to the dessert. Make sure to use pitted dates and finely chop them before adding them to the batter.
In addition to the dates, you will need boiling water and vanilla extract to soak the dates and infuse them with flavor. The combination of dates and vanilla creates a heavenly aroma that will fill your kitchen as the pudding bakes.
The dry ingredients for the pudding include all-purpose flour, baking powder, baking soda, and salt. These ingredients are essential for achieving the right texture and structure in the pudding. Measure them accurately to ensure the perfect balance of flavors.
To bring everything together, you will need softened unsalted butter, brown sugar, and eggs. The butter adds richness and moisture, while the brown sugar adds a deep caramel flavor to the pudding. The eggs act as binders, holding the batter together and contributing to the tender texture of the final product.
Now that you have gathered all the ingredients, make sure to check your pantry and refrigerator to make sure you have everything you need. With the ingredients in hand, let’s move on to the next step: preparing the sticky toffee sauce that will transform the pudding into a luscious dessert.
Equipment needed
Before you embark on your sticky toffee pudding journey, gather the necessary equipment to ensure a smooth and enjoyable baking experience. Here’s what you’ll need:
- 9-inch square baking pan: This pan will be used to bake the sticky toffee pudding. The square shape is ideal for creating uniform portions and ensures even baking.
- Mixing bowls: You’ll need a few mixing bowls of different sizes to mix the various components of the pudding, such as the wet and dry ingredients.
- Electric mixer or stand mixer: While not necessary, an electric mixer or stand mixer can make the mixing process easier and more efficient. It will help to cream the butter and sugar and incorporate air into the batter.
- Saucepan: A saucepan is needed to heat and prepare the toffee sauce. Choose a medium-sized saucepan with a thick bottom to prevent the sauce from burning.
- Whisk or wooden spoon: A whisk or wooden spoon will be useful for stirring the batter and combining the ingredients. It’s important to mix the ingredients thoroughly to ensure a smooth and well-incorporated pudding.
- Measuring cups and spoons: Accurate measurements are crucial for a successful recipe. Have a set of measuring cups and spoons on hand to measure the ingredients precisely.
Having the right equipment will not only make the baking process easier but will also help you achieve consistent and reliable results. Before you begin, double-check that you have all the necessary equipment in your kitchen. This will save you time and ensure a seamless baking experience.
Now that you have gathered all the ingredients and equipment, it’s time to dive into the step-by-step process of making sticky toffee pudding. Let’s start by preparing the rich and indulgent toffee sauce that will take this dessert to the next level of deliciousness.
Step 1: Making the toffee sauce
The toffee sauce is an essential component of sticky toffee pudding, providing a luscious and indulgent topping for the moist and rich cake. Here’s how to make the toffee sauce:
- In a medium-sized saucepan, combine 175g of brown sugar, 100g of unsalted butter, and 125ml of heavy cream.
- Place the saucepan over medium heat and stir the mixture continuously until the sugar has dissolved and the butter has melted. This will take about 5 minutes.
- Once the mixture is smooth and well combined, increase the heat to medium-high and bring it to a gentle boil.
- Let the sauce simmer for 2-3 minutes, stirring occasionally to prevent it from sticking to the bottom of the pan.
- Remove the saucepan from the heat and stir in 1 teaspoon of vanilla extract. The aroma of the vanilla will infuse into the sauce, adding a delightful fragrance.
- Allow the toffee sauce to cool slightly before using it. As it cools, it will thicken slightly, creating a smooth and pourable consistency.
Now that you have prepared the heavenly toffee sauce, you are one step closer to enjoying a scrumptious sticky toffee pudding. The rich and velvety sauce will beautifully complement the moist and flavorful cake, creating a dessert that is truly irresistible.
Once the toffee sauce is ready, it’s time to move on to the next step: preparing the pudding batter. Get ready to mix, bake, and indulge in this delectable treat!
Step 2: Preparing the pudding
Now that the toffee sauce is ready, it’s time to dive into the process of preparing the sticky toffee pudding batter. Follow these steps to create a moist and flavorful base for your dessert:
- Preheat your oven to 180°C (350°F) and grease a 9-inch square baking pan with butter or cooking spray. This will prevent the pudding from sticking to the pan.
- In a mixing bowl, combine 250g of finely chopped pitted dates and 250ml of boiling water. Let the mixture sit for about 10 minutes to allow the dates to soften and absorb the water.
- Once the dates have softened, use a fork or potato masher to mash them into a paste-like consistency. This will help distribute the date flavor evenly throughout the pudding.
- In another bowl, whisk together 175g of all-purpose flour, 1 teaspoon of baking powder, 1/2 teaspoon of baking soda, and 1/4 teaspoon of salt. Ensure that the dry ingredients are well incorporated.
- In a separate large mixing bowl, cream together 100g of softened unsalted butter and 175g of brown sugar until light and fluffy. You can use an electric mixer or do this by hand using a wooden spoon.
- Add 2 large eggs to the creamed butter and sugar mixture, one at a time, beating well after each addition. This will help create a smooth and airy batter.
- Next, gradually add the mashed date mixture to the creamed butter and sugar, stirring until well combined.
- Sift the dry ingredients into the date mixture and gently fold them in, being careful not to overmix. This will ensure a tender and light texture in the final pudding.
- Once the batter is well combined, pour it into the greased baking pan, spreading it out evenly with a spatula.
With the pudding batter prepared, it’s time to move on to the exciting step of baking the pudding to perfection. Get ready for your kitchen to be filled with the irresistible aroma of freshly baked sticky toffee goodness!
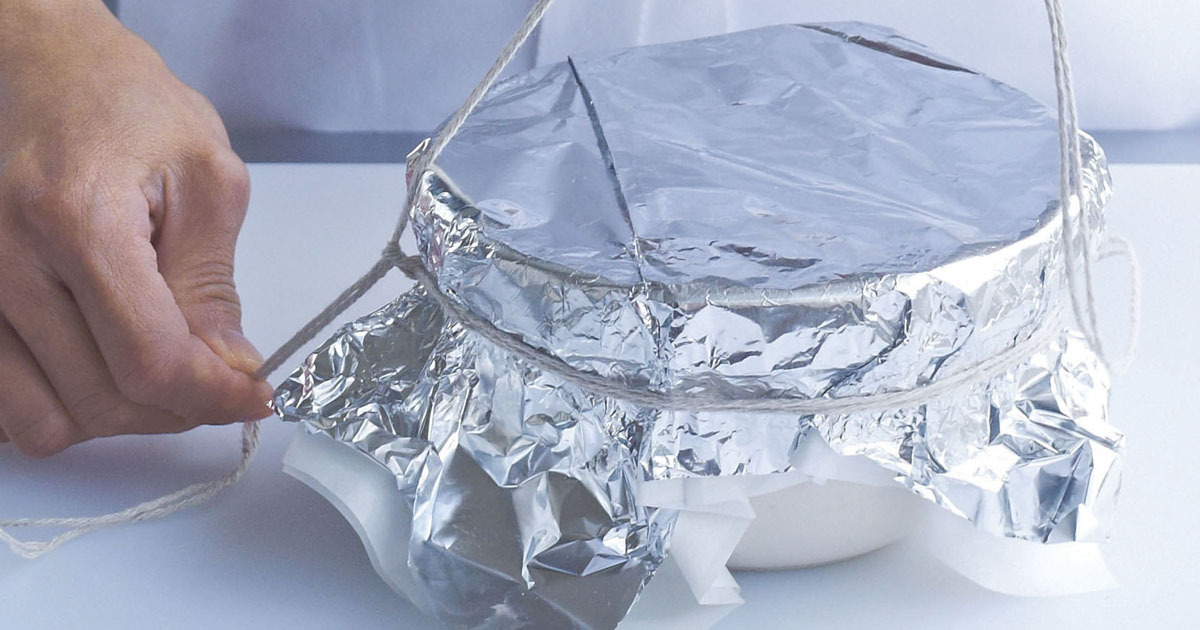
To store sticky toffee pudding, allow it to cool completely, then wrap it tightly in plastic wrap or aluminum foil. Store it in an airtight container in the refrigerator for up to 5 days, or freeze for up to 3 months. Reheat in the microwave or oven before serving.
Read more: How To Store Yorkshire Pudding
Step 3: Baking the pudding
With the pudding batter ready, it’s time to bring it to life by baking it to perfection. Follow these steps to ensure a moist and fluffy sticky toffee pudding:
- Preheat your oven to 180°C (350°F) and make sure the rack is placed in the center.
- Place the prepared pudding batter into the preheated oven and bake for approximately 30-35 minutes. The exact baking time may vary depending on your oven, so keep a close eye on the pudding.
- To check if the pudding is done, insert a toothpick or a skewer into the center. If it comes out clean or with a few moist crumbs clinging to it, then the pudding is ready and perfectly baked.
- Once baked, remove the pudding from the oven and allow it to cool in the pan for about 10 minutes. This will help the pudding to set and firm up slightly.
- After 10 minutes, carefully transfer the pudding to a wire rack to cool completely. This will prevent the pudding from becoming too dense or soggy.
- While the pudding is cooling, you can prepare the serving dishes and get ready to indulge in this delectable dessert.
As the pudding cools, it will continue to set and develop its characteristic sticky and gooey texture. The aroma of the freshly baked cake will fill your kitchen, making it even more difficult to resist. Once the pudding has cooled, it’s time to move on to the final step: storing it to ensure its freshness.
Step 4: Cooling and storing the pudding
Once the sticky toffee pudding has finished baking and cooling, it’s important to handle it with care to preserve its texture and flavor. Follow these steps to properly cool and store your pudding:
- After removing the pudding from the oven, allow it to cool completely on a wire rack. This will ensure that the pudding sets properly and maintains its moistness.
- Once the pudding has cooled, you can choose to serve it immediately or store it for later consumption. If you plan to serve it later, ensure that it has cooled to room temperature before proceeding to the next step.
- To store the pudding, wrap it tightly in plastic wrap or place it in an airtight container. This will help prevent it from drying out and absorbing unwanted odors from the fridge.
- Store the wrapped or containerized pudding in the refrigerator for up to 3-4 days. The cool temperature will help maintain its freshness and prevent spoilage.
- Prior to serving, allow the pudding to come to room temperature. This will help restore its soft and moist texture.
When it’s time to indulge, you have a couple of options. You can enjoy the sticky toffee pudding as is, or warm it up slightly to recreate that freshly baked goodness. To warm the pudding, you can microwave individual portions for a few seconds or place the entire pudding in a preheated oven at a low temperature for 10-15 minutes.
Remember, the longer you store the pudding, the more the flavors will meld together, resulting in an even more delicious and indulgent treat. So feel free to make a batch ahead of time for special occasions or simply to satisfy your craving on a whim.
Now that you know how to cool and store your sticky toffee pudding, it’s time to think about serving suggestions and how to take this delectable dessert to the next level.
Serving suggestions
Sticky toffee pudding is a delightful dessert that can be enjoyed in various ways. Here are some serving suggestions to enhance your experience:
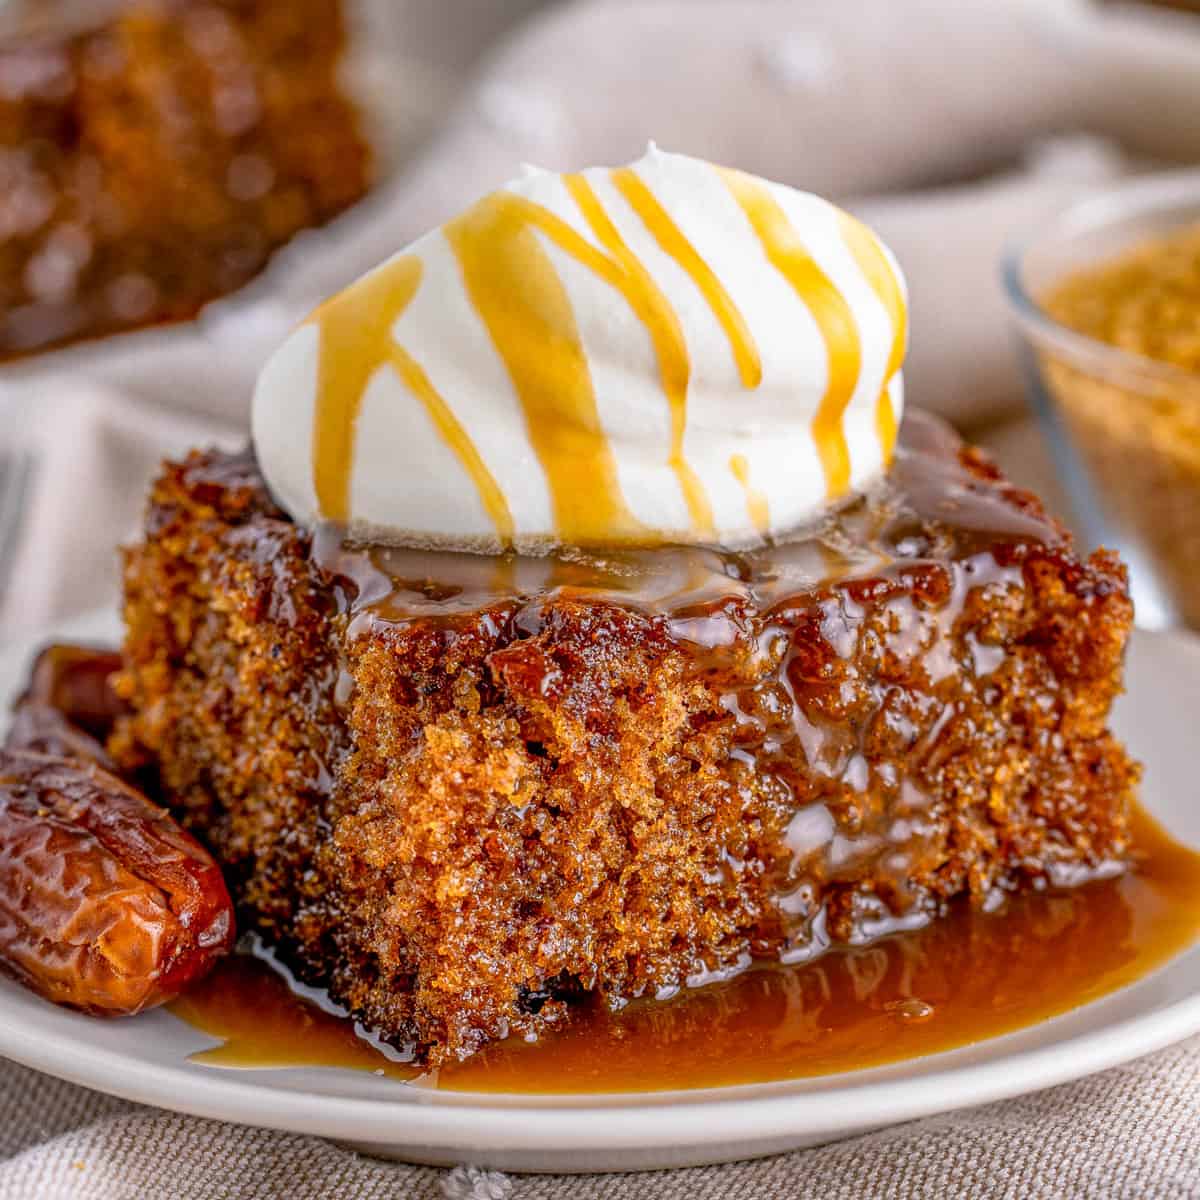
- Classic Style: Serve the sticky toffee pudding warm, drizzled generously with the delicious toffee sauce you prepared earlier. The warm pudding, combined with the rich and velvety sauce, creates a heavenly combination of flavors and textures.
- With Whipped Cream: Top your serving of sticky toffee pudding with a dollop of freshly whipped cream. The light and creamy texture of the whipped cream complements the dense and moist pudding, balancing the richness with a touch of freshness.
- Ice Cream Bliss: For an extra indulgence, serve the warm pudding with a scoop of vanilla ice cream. The contrast of the warm pudding against the cool and creamy ice cream creates a decadent dessert experience that is sure to impress.
- Caramelized Nuts: Garnish your sticky toffee pudding with caramelized nuts, such as pecans or walnuts, for an added crunch and nutty flavor. Simply toss the nuts in a dry pan with a bit of sugar until caramelized, then sprinkle them over the pudding.
- Fruit Compote: Pair the sticky toffee pudding with a fruit compote, such as a warm apple or pear compote. The fruity sweetness and tartness from the compote can cut through the richness of the pudding, creating a harmonious and balanced dessert.
- Chocolate Drizzle: Indulge your chocolate cravings by drizzling some melted chocolate over the sticky toffee pudding. The combination of the toffee and chocolate flavors is a match made in dessert heaven.
Feel free to experiment and get creative with your serving ideas. The versatile nature of sticky toffee pudding allows for various flavor combinations and toppings. Trust your taste buds and explore the endless possibilities!
Now that you have learned how to serve this heavenly dessert, it’s time to wrap up and reflect on your sticky toffee pudding journey.
Conclusion
Congratulations! You have successfully learned how to make and store sticky toffee pudding, a classic British dessert that is sure to delight your taste buds and impress your guests. From preparing the luscious toffee sauce to baking the moist and flavorful pudding, you have mastered the art of creating this indulgent treat.
By understanding the key ingredients and having the necessary equipment on hand, you can confidently embark on your sticky toffee pudding journey. The combination of finely chopped dates, brown sugar, and butter creates a cake that is both sweet and rich in flavor. The toffee sauce adds a touch of decadence, elevating the dessert to a whole new level.
As you bake the sticky toffee pudding, your kitchen will be filled with the mesmerizing aroma of dates, vanilla, and caramel. And once it is perfectly baked, allow it to cool and store it properly to maintain its moistness. The pudding can be stored in the refrigerator for a few days, ready to be enjoyed at any time.
When it’s time to serve, you have a multitude of options to enhance the experience. Whether you choose to drizzle it with more toffee sauce, pair it with ice cream or whipped cream, or add your own unique twist with caramelized nuts or fruit compote, the possibilities are endless. Trust your creativity and let your taste buds guide you.
Sticky toffee pudding is not only a delicious dessert but also a treat that brings people together. The warm and comforting flavors evoke a sense of nostalgia and create memories that last a lifetime. So, gather your loved ones, share a slice of this delightful dessert, and savor the sweet moments.
Now that you have the knowledge and skills to create sticky toffee pudding, it’s time to put them into practice. Embrace the joy of baking, and enjoy the happiness that comes from creating something delicious with your own hands. Have fun, experiment, and indulge in the irresistible charm of sticky toffee pudding.
Happy baking!
Frequently Asked Questions about How To Store Sticky Toffee Pudding
Was this page helpful?
At Storables.com, we guarantee accurate and reliable information. Our content, validated by Expert Board Contributors, is crafted following stringent Editorial Policies. We're committed to providing you with well-researched, expert-backed insights for all your informational needs.







0 thoughts on “How To Store Sticky Toffee Pudding”