Articles
How To Store Unused Seeds
Modified: September 1, 2024
Learn how to properly store unused seeds with our informative articles. Keep your seeds fresh and viable for future planting.
(Many of the links in this article redirect to a specific reviewed product. Your purchase of these products through affiliate links helps to generate commission for Storables.com, at no extra cost. Learn more)
Introduction
Welcome to the wonderful world of gardening! Whether you’re a seasoned green thumb or just starting out, one thing is certain: seeds are the foundation of any successful garden. But what do you do with all those extra seeds you have left over?
Properly storing unused seeds is crucial to preserving their viability and ensuring their future growth. By implementing the right techniques, you can save money, reduce waste, and have a constant supply of high-quality seeds for future planting seasons.
In this article, we will explore the importance of proper seed storage, the factors that can affect seed viability, and provide you with valuable tips on selecting, preparing, and storing your unused seeds. So, let’s dive in and discover how to store your unused seeds like a pro!
Key Takeaways:
- Proper seed storage is essential for preserving viability, saving money, and reducing waste. By selecting, preparing, and organizing seeds, you can ensure a thriving garden for future planting seasons.
- Avoid common mistakes such as inadequate drying and neglecting germination testing to maximize the potential of stored seeds. Proper storage techniques lead to a diverse and bountiful garden year after year.
Read more: How To Store Unused Refrigerator
Importance of Proper Seed Storage
Proper seed storage is vital for maintaining the viability and germination rates of seeds. When seeds are not stored correctly, they can deteriorate quickly, resulting in poor germination or even complete loss of the seeds.
By storing your unused seeds properly, you can extend their shelf life, ensuring that they remain viable for future planting seasons. This is especially important if you have heirloom seeds or rare varieties that may be difficult to replace.
In addition to preserving seed viability, proper storage also allows you to save money. By storing seeds from your own plants or harvests, you can avoid purchasing new seeds each year. This not only cuts down on expenses but also gives you the opportunity to maintain a more diverse and unique collection of seeds.
Furthermore, storing your own seeds allows you to have more control over the quality of your garden. By hand-selecting and saving seeds from your best-performing plants, you can ensure that the next generation of seeds retains the desirable traits that you value, such as disease resistance, flavor, or high yield.
Proper storage also reduces waste. Many gardening enthusiasts end up discarding unused seeds without realizing their potential. By properly storing and organizing your seeds, you can minimize waste and maximize the use of your resources.
Overall, proper seed storage is an essential step in maintaining a thriving garden. It enables you to preserve the integrity of your seeds, save money, exercise control over your garden’s quality, and reduce unnecessary waste. Now, let’s explore the factors that can affect seed viability and how to mitigate them.
Factors Affecting Seed Viability
There are several factors that can impact the viability of seeds and their ability to germinate successfully. Understanding these factors is crucial to ensuring proper seed storage and maximizing the chances of successful germination. Here are some of the key factors:
1. Temperature: Seeds are dormant living organisms, and temperature plays a significant role in their longevity. Extreme temperatures, both high and low, can damage seeds and reduce their viability. It is important to store seeds in a cool, dry environment to maintain optimal conditions for their preservation.
2. Moisture: Excess moisture can lead to mold, rot, and fungal growth, which can quickly destroy seeds. On the other hand, seeds that are too dry can become brittle and lose their viability. It is crucial to strike a balance by storing seeds in a moisture-controlled environment or using proper moisture-resistant containers.
3. Light: Light can stimulate the growth of seeds, causing them to break dormancy and start germinating prematurely. Most seeds, however, require darkness to remain dormant. It is best to store seeds in opaque containers or envelopes that block out light.
4. Oxygen: While seeds require oxygen for germination, excessive oxygen exposure during storage can accelerate the aging process and reduce viability. Airtight containers or storage bags with minimal air space can help minimize oxygen exposure and prolong seed viability.
5. Humidity: High humidity levels can cause seed deterioration by promoting the growth of mold and fungi. It is crucial to store seeds in a low-humidity environment, preferably with a relative humidity of around 30-40%.
6. Genetics: The genetic makeup of seeds can also influence their viability. Some varieties have naturally longer seed viability than others. Understanding the specific characteristics and traits of the seeds you are storing can help you determine the optimal storage conditions.
By considering these factors and controlling the storage environment accordingly, you can help maximize the viability and longevity of your seeds. In the next section, we will discuss how to select and collect seeds for storage.
Selecting and Collecting Seeds for Storage
When it comes to selecting and collecting seeds for storage, it is important to choose high-quality seeds from healthy and mature plants. Here are some tips to help you select and collect the best seeds for storage:
1. Choose Healthy Plants: Select seeds from plants that exhibit excellent growth, disease resistance, and overall vigor. Avoid collecting seeds from weak or diseased plants, as they may pass on undesirable traits to the next generation.
2. Harvest Fully Mature Seeds: Harvest seeds when they are fully mature and have reached their peak ripeness. This ensures that the seeds have developed properly and have the highest chances of successful germination.
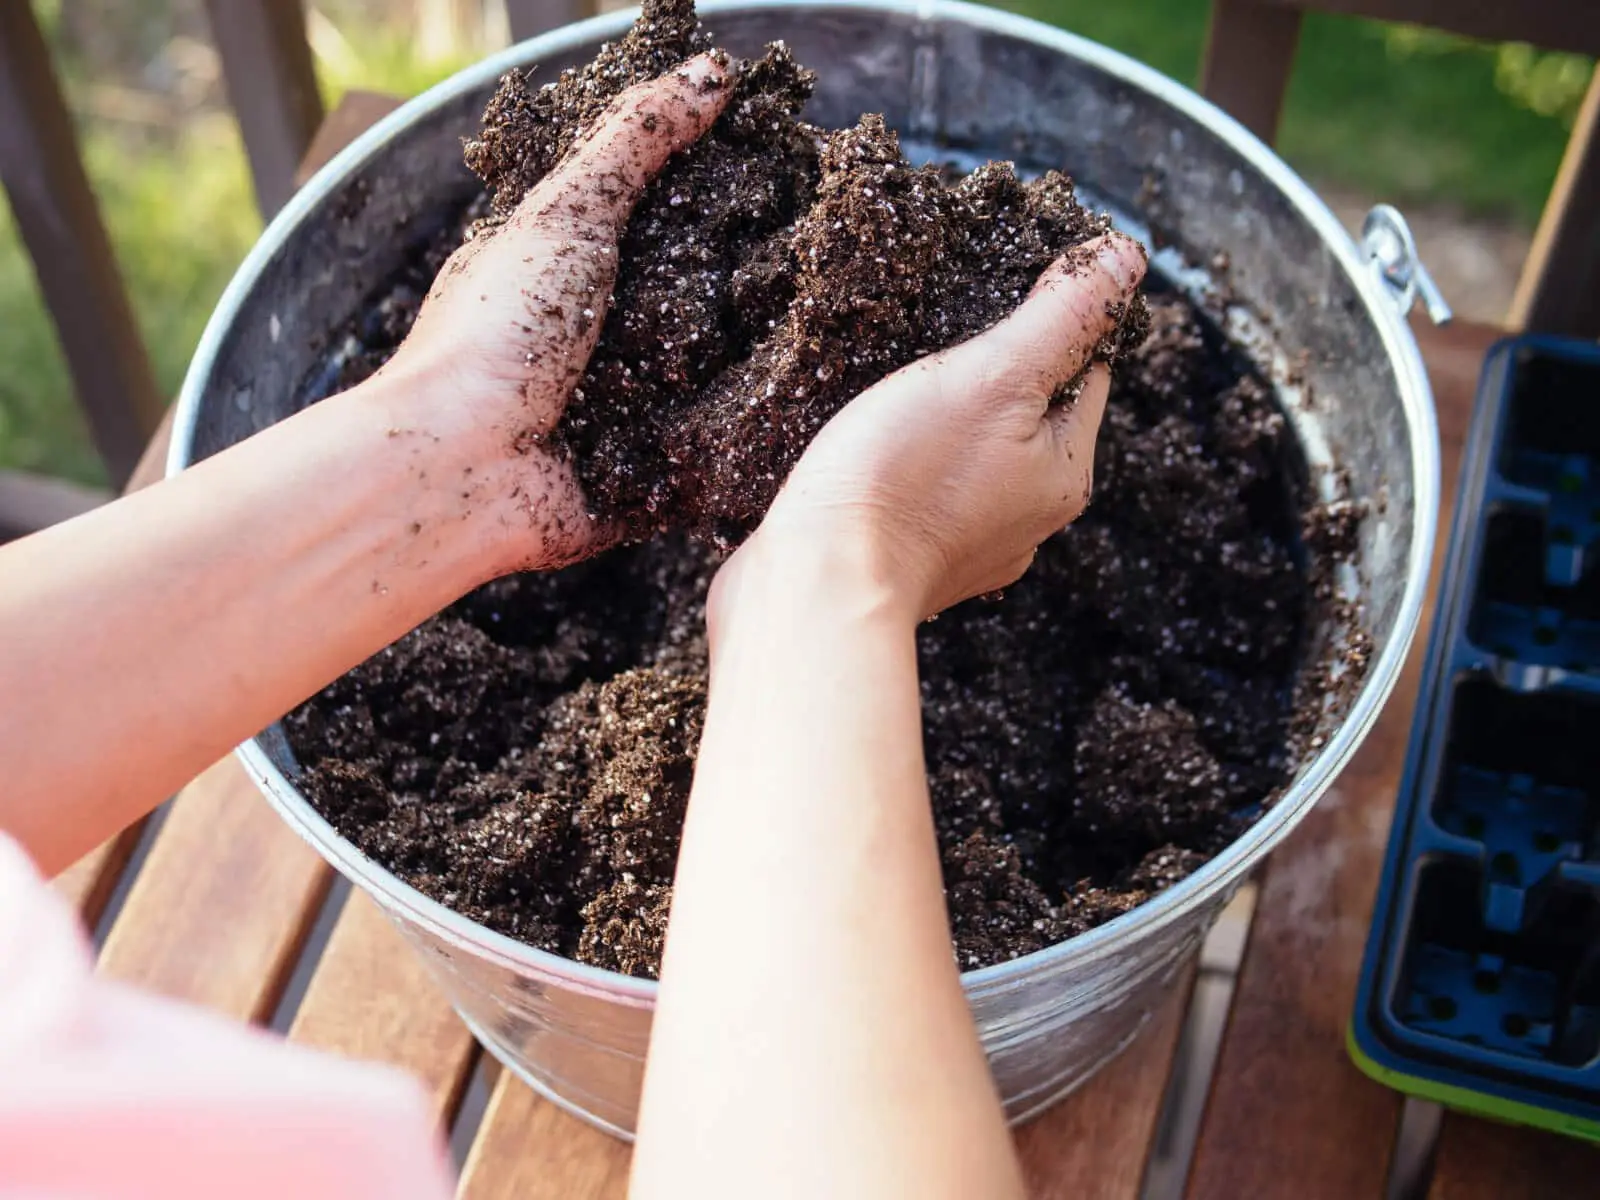
3. Allow Seeds to Fully Dry: After harvesting, make sure to allow the seeds to air dry completely. This helps remove any excess moisture and prevents mold or fungal growth during storage.
4. Practice Seed Selection: In some cases, you may want to save seeds from specific plants that have unique traits or characteristics you wish to preserve. This practice, known as seed selection, enables you to develop a custom seed collection tailored to your preferences.
5. Observe Proper Extraction Techniques: Each plant has specific methods for extracting seeds. Some seeds are easily collected by hand, while others may require gentle shaking, threshing, or winnowing. Research the proper extraction techniques for each plant to ensure you collect the seeds effectively without causing damage.
6. Clean and Separate the Seeds: Once the seeds are harvested, clean them by removing any debris, chaff, or plant matter. It is important to have clean seeds to prevent the growth of mold and fungus during storage. You can use a fine mesh sieve or blow gently to remove any remaining impurities.
7. Label the Seeds: Properly label each seed variety, noting the plant type, variety, and the date of collection. This ensures that you can easily identify and organize your seeds during storage, preventing any confusion or mix-ups.
Remember, the quality of the seeds you select and collect for storage directly impacts their viability and ability to germinate successfully. Taking care and paying attention to detail during the selection and collection process will contribute to a successful gardening experience in the future.
Now that you have selected and collected your seeds, it is important to prepare them for storage. In the next section, we will discuss the steps to prepare seeds for storage.
Preparing Seeds for Storage
Properly preparing seeds for storage is essential to ensure their longevity and viability. Taking the time to prepare your seeds before storing them will greatly increase their chances of successful germination in the future. Here are some steps to follow when preparing seeds for storage:
1. Clean and Dry: Make sure your seeds are clean and free from any debris, excess pulp, or plant matter. This can be done by gently cleaning the seeds using a fine mesh sieve or by rinsing them with water and allowing them to air dry thoroughly. Wet seeds can lead to mold and fungal growth, so it is crucial to ensure they are completely dry before storage.
2. Remove Non-Viable Seeds: Before storing the seeds, inspect them carefully and remove any seeds that appear damaged, diseased, or undeveloped. These non-viable seeds have a lower chance of germination and may negatively affect the storage environment for the healthy seeds.
3. Stratification or Scarification (if applicable): Some seeds, especially those from perennial plants or certain tree species, require stratification (a period of cold exposure) or scarification (breaking or weakening the seed coat) to improve germination rates. Follow specific instructions for these seeds to ensure proper treatment before storage.
4. Consider Treatment for Disease and Pests: If you suspect any seeds might carry diseases or pests, you can treat them with a fungicide or insecticide to eliminate potential problems. However, it is essential to use organic and seed-safe treatments to avoid damaging the seeds or the environment.
5. Drying Agents (optional): You may choose to add drying agents such as silica gel packets or powdered milk to the storage container. These agents help absorb any excess moisture and maintain a low-humidity environment, prolonging the seed viability.
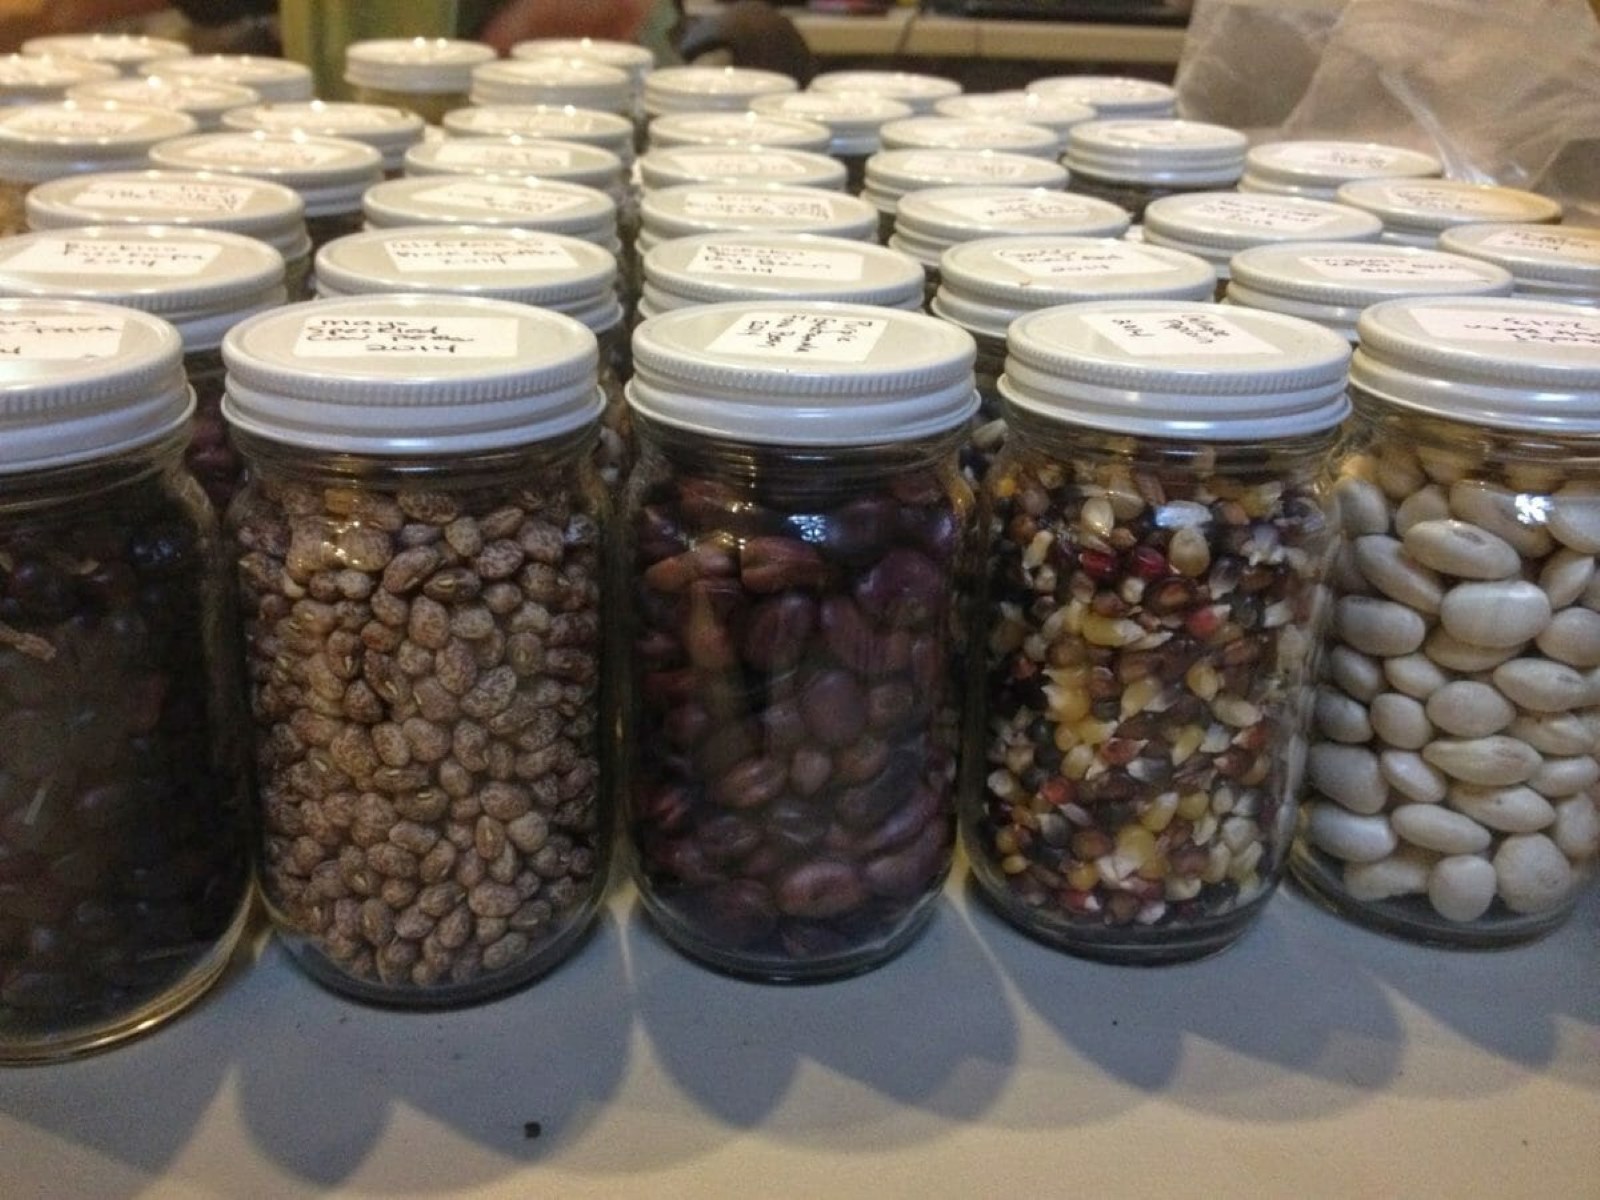
6. Use Airtight Containers: Transfer the prepared seeds to airtight containers, such as glass jars or moisture-resistant seed storage envelopes. These containers prevent moisture, air, and light from reaching the seeds, thus preserving their viability for a longer period.
7. Store in a Cool, Dry, and Dark Place: Find a suitable storage location for your seeds, preferably in a cool, dry, and dark area. A basement, pantry, or refrigerator can work well, as long as the temperature remains consistent and there are no extreme fluctuations.
Remember to always label your containers with the seed type and date of collection to keep them organized. Properly preparing your seeds for storage ensures their longevity and sets the stage for successful germination when you’re ready to plant them in the future.
In the next section, we will delve into the importance of choosing the right containers for seed storage.
Read more: How To Store Unused Paint
Choosing the Right Containers
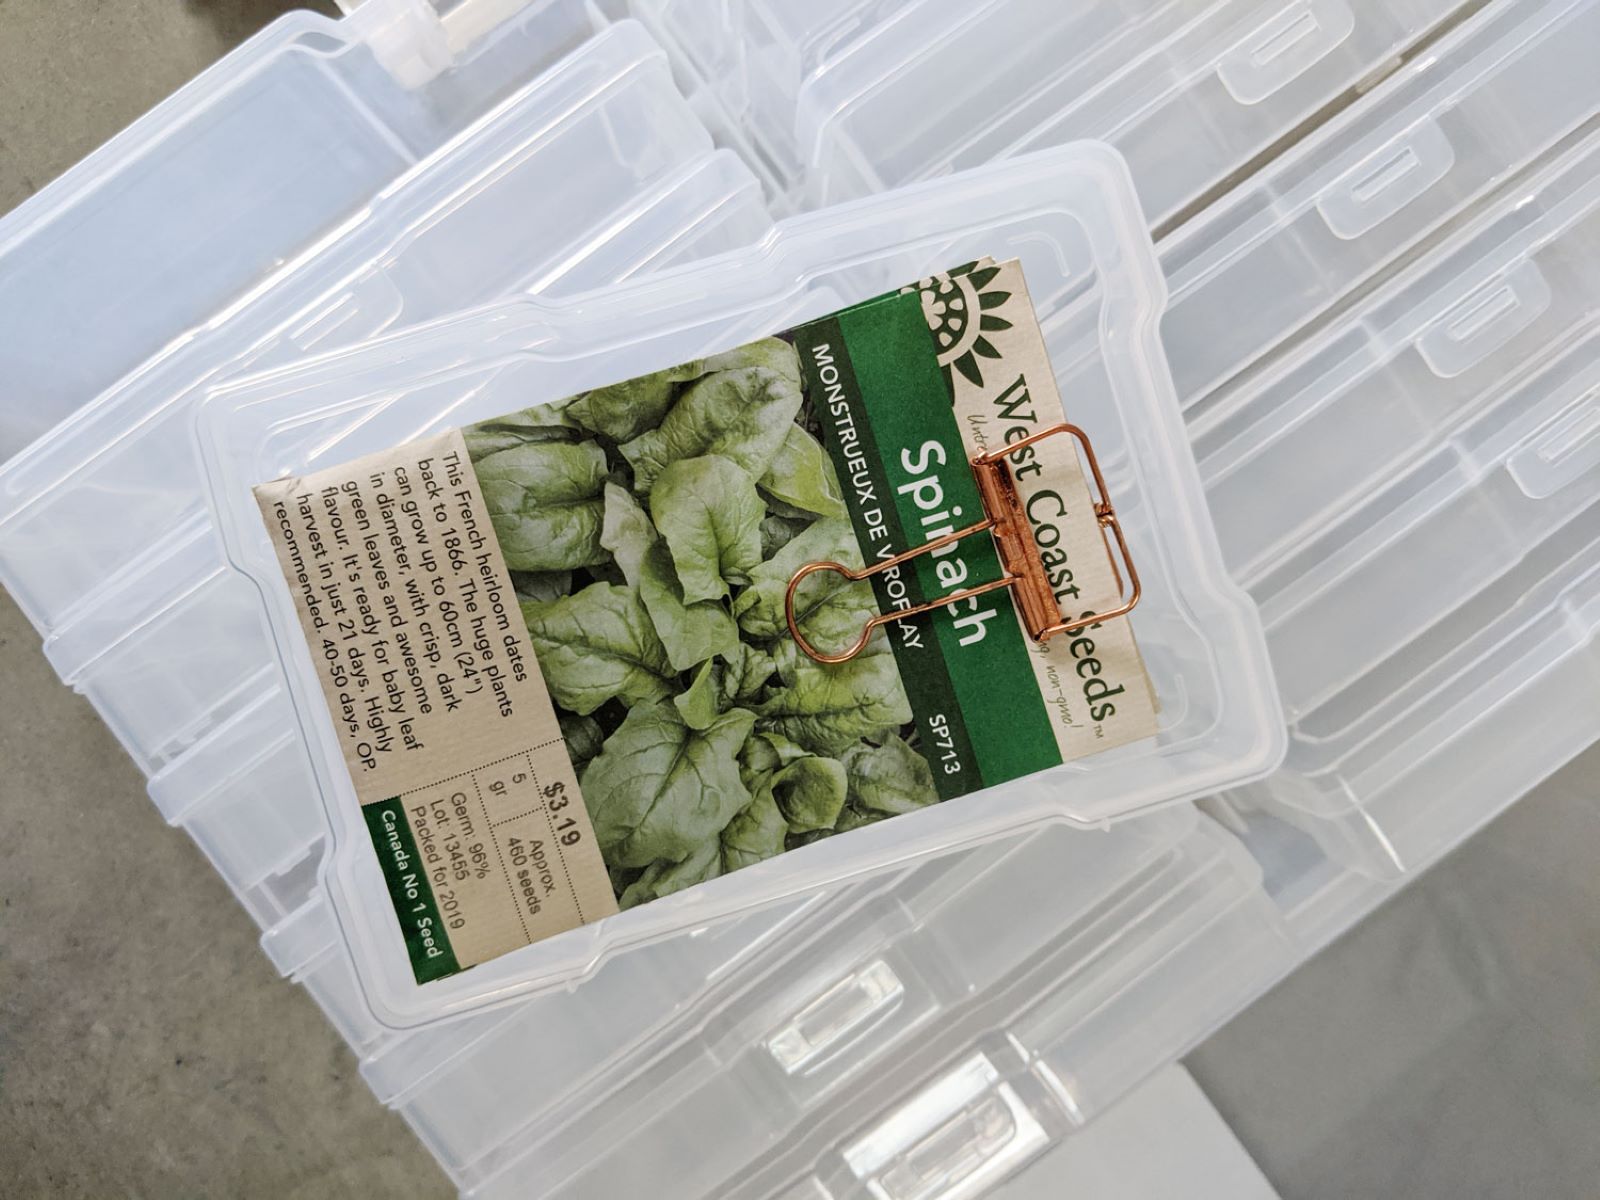
When it comes to storing seeds, choosing the right containers is crucial to maintaining their viability and quality over time. The container you select should provide a protective environment that keeps out moisture, air, and light. Here are some factors to consider when choosing the right containers for seed storage:
1. Airtight: Look for containers that are airtight to prevent any moisture or air from entering. This helps to maintain a stable environment and prevents seeds from deteriorating due to humidity or exposure to oxygen.
2. Moisture-Resistant: Opt for moisture-resistant containers to protect against excessive moisture that can lead to mold or fungal growth. Glass jars with rubber seals, food-grade plastic containers with tight-fitting lids, or specially designed seed storage envelopes are ideal choices.
3. Light-Blocking: Seeds need to be stored in dark environments to prevent premature germination. Choose opaque or dark-colored containers that block out light and keep the seeds in complete darkness. This will help preserve their potential for future growth.
4. Size and Shape: Consider the size and shape of the container in relation to the amount of seeds you are storing. The container should have enough space to comfortably hold the seeds without excessive air pockets. This helps reduce the risk of moisture buildup and maintains optimal storage conditions.
5. Durability: Select containers that are durable and can withstand long-term storage. Fragile or easily breakable containers should be avoided as they can compromise the integrity of the seeds. Ensure that the containers you choose are made from materials that are safe for seed storage and will not leach any harmful chemicals.
6. Label-Friendly: It is essential to label your seed storage containers clearly to keep track of the seed variety, date of collection, and any other relevant information. Choose containers that have a smooth surface or provide ample space for labeling to avoid confusion or mix-ups in the future.
Remember, the right container is key to preserving the vitality of your seeds. By selecting containers that are airtight, moisture-resistant, light-blocking, and properly sized, you create an optimal environment for long-term seed storage.
In the next section, we will delve into creating the ideal storage environment for your seeds.
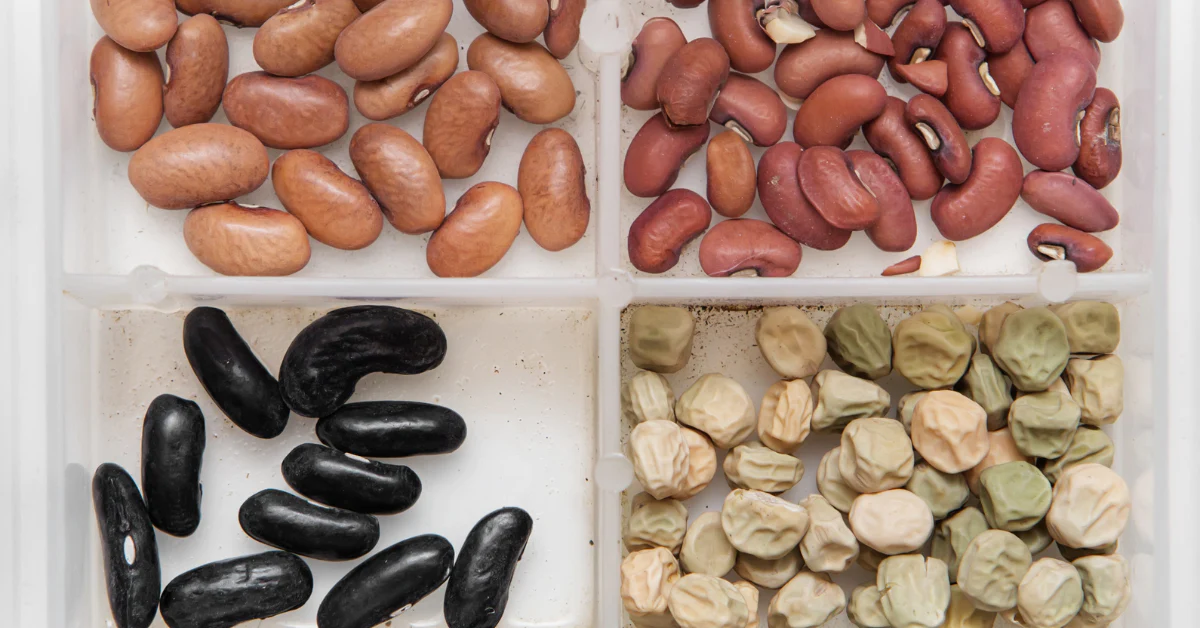
Store unused seeds in a cool, dry place to prevent moisture and mold. Place them in an airtight container, such as a glass jar or plastic bag, and label with the date and type of seed. Keep them away from direct sunlight to maintain their viability.
Creating the Ideal Storage Environment
Creating the ideal storage environment for your seeds is crucial to maintaining their viability and ensuring their long-term preservation. Here are some key aspects to consider when setting up the perfect storage environment:
1. Temperature: The temperature of the storage area is a critical factor in seed longevity. Seeds should be stored in a cool environment, ideally between 32°F (0°C) and 50°F (10°C). Avoid exposing the seeds to extreme temperature fluctuations, as it can damage their viability. A cool and consistent temperature will help slow down the aging process and preserve the seeds for longer periods.
2. Humidity: Moisture can quickly deteriorate seeds, leading to mold, fungal growth, and reduced viability. Aim for a low humidity level of around 30-40% to prevent excess moisture. You can achieve this by using moisture-resistant containers, adding drying agents like silica gel packets, or storing seeds in a location with naturally low humidity.
3. Darkness: Seeds require darkness to remain dormant. Protect them from sunlight and artificial light by storing them in opaque containers or in a dark storage area. Exposure to light can stimulate premature germination and reduce the quality of stored seeds.
4. Ventilation: While it’s important to keep the storage environment airtight, some ventilation is necessary to prevent the buildup of moisture. Ensure that any airtight containers have minimal air space or are equipped with moisture control features, such as desiccant packs or breathable lids. Proper ventilation helps regulate moisture levels and maintain optimal storage conditions.
5. Pest Control: Protect your seeds from pests, such as insects and rodents, by storing them in secure containers. Check for any signs of pest infestations before storing the seeds to prevent contamination or damage to the seed collection.
6. Consistency: Maintaining a consistent environment is key. Avoid exposing seeds to drastic changes in temperature, humidity, or light. Store them in a location that experiences minimal fluctuations to ensure a stable environment for seed preservation.
By focusing on temperature, humidity, darkness, ventilation, pest control, and consistency, you can create an ideal storage environment that promotes seed longevity and preserves their quality over time.
In the next section, we will discuss the importance of monitoring and rotating seeds to maintain their viability.
Monitoring and Rotating Seeds
Monitoring and rotating your stored seeds is an important practice to ensure their viability and maintain a healthy seed collection. Here are some key aspects to consider when it comes to monitoring and rotating your seeds:
1. Regular Inspection: Periodically inspect your stored seeds to check for any signs of damage, mold, or pests. This allows you to catch any issues early on and take necessary actions to prevent further damage or contamination. Conduct a visual examination and discard any seeds that show signs of deterioration.
2. Germination Testing: Conduct germination tests on a sample of your stored seeds to assess their viability. This involves placing a certain number of seeds on a moistened paper towel or in a seed tray and observing their germination rate. If the germination rate is below satisfactory levels, it may be time to replenish your seed collection with fresh seeds.
3. Seed Viability Chart: Maintain a seed viability chart or database to keep track of the longevity and viability of different seed varieties. This information will help you determine how long each type of seed can be stored and when it is time to replace older seeds with fresh ones.
4. Rotate Seeds: To prevent seeds from becoming too old and losing their viability, it is important to rotate your seed collection. Use the older seeds first and replace them with fresh ones each year. This ensures that you always have a batch of viable and high-quality seeds ready for planting.
5. Storage Conditions Adjustment: Regularly monitor the storage conditions for your seeds to ensure they remain optimal. Adjust temperature, humidity, and ventilation as needed to maintain a stable and suitable environment for seed preservation. This may involve relocating your seed storage area or using additional equipment like dehumidifiers or humidity controllers.
6. Documentation: Keep a record of the seed storage conditions, including temperature, humidity levels, and any adjustments made. This documentation will help you track the success of your storage methods and make informed decisions about future storage practices.
By actively monitoring the conditions and viability of your stored seeds, as well as regularly rotating them and making any necessary adjustments, you can maintain a healthy seed collection that is ready for successful germination and produces vibrant and productive plants.
In the next section, we will discuss the importance of labeling and organizing your seed storage to avoid confusion and maximize efficiency.
Labeling and Organizing Seed Storage
Labeling and organizing your seed storage is an essential practice to avoid confusion, ensure easy access to specific seeds, and maintain an efficient gardening process. Here are some tips for labeling and organizing your seed storage:
1. Clear and Legible Labels: Use permanent markers or waterproof labels to clearly mark each container with the seed variety, date of collection, and any other relevant information. Make sure the labels are legible and won’t smudge or fade over time. This helps you identify and locate specific seeds without any guesswork.
2. Alphabetical Order: Arrange your seed containers in alphabetical order to easily find the seeds you need. This systematic organization makes it efficient to locate specific seeds and prevents any unnecessary digging or shuffling through the containers.
3. Categorize by Plant Type: Consider categorizing your seeds by plant type, such as vegetables, herbs, or flowers. This method of organization allows you to group similar seeds together and quickly locate what you need for specific parts of your garden.
4. Separate Annual and Perennial Seeds: If you have a mixture of annual and perennial seeds, it can be helpful to keep them in separate containers or sections. This distinction ensures that you can easily differentiate between seeds that need to be replanted each year and those that will come back seasonally.
5. Use Seed Storage Envelopes or Dividers: Utilize seed storage envelopes or dividers within larger containers to separate individual seed varieties. This helps prevent cross-contamination and provides a neat and organized space for each seed type.
6. Create a Seed Inventory: Keep a record or inventory of your seed collection, noting the seed varieties, quantities, and dates of collection or purchase. This inventory helps you keep track of your available seeds and allows for efficient planning and purchasing in the future.
7. Store Instructions and Notes: Consider including any specific instructions or notes related to each seed variety, such as optimal planting conditions, preferred soil type, or any special considerations. This information can be added to your labeling system or stored separately in a binder or notebook dedicated to your seed storage.
By implementing a clear labeling system and organizing your seed storage, you can easily access and utilize your seed collection, saving time and minimizing any confusion during the planting season. Maintaining an orderly storage system supports efficient gardening practices and ensures a successful outcome for your plants.
In the next section, we will discuss some common mistakes to avoid when it comes to seed storage.
Read more: How To Store Unused Caulk
Common Mistakes to Avoid
When it comes to seed storage, there are some common mistakes that gardeners often make. By being aware of these mistakes, you can avoid them and ensure the long-term viability and success of your stored seeds. Here are a few common mistakes to avoid:
1. Inadequate Seed Drying: Failing to dry seeds properly before storage can lead to mold, fungal growth, and seed deterioration. Ensure that your seeds are thoroughly dried to prevent moisture-related issues. Allow them to air dry completely before storing them in moisture-resistant containers.
2. Excessive Moisture: Moisture is one of the biggest enemies of seed storage. Avoid storing seeds in areas with high humidity, as it can lead to mold, rot, and reduced viability. Use moisture-resistant containers, desiccant packs, or silica gel to maintain a low humidity level and prevent moisture-related damage.
3. Incorrect Storage Temperature: Seeds should be stored in a cool environment to prolong their viability. Avoid storing them in areas subject to extreme temperature fluctuations or high temperatures, as this can damage their viability. Find a cool and consistently cool location, such as a basement or refrigerator, for your seed storage.
4. Lack of Organization: Neglecting to label and organize your seed storage can lead to confusion and difficulty in locating specific seeds when needed. Take the time to label your containers clearly and create an organized system, whether alphabetically or by plant type, to ensure easy access to your seeds.
5. Failure to Rotate Seeds: Using the same batch of seeds year after year can result in reduced viability and lower germination rates. It’s important to rotate your seed collection periodically, using the oldest seeds first and replenishing them with fresh seeds. This helps maintain a healthy and vigorous seed collection.
6. Improper Pest Control: Storing seeds without adequate pest control measures can invite pests like insects and rodents, which can damage your seeds. Ensure that your storage containers are sealed properly and periodically check for any signs of pests. Consider using organic pest control methods to keep your seeds safe.
7. Neglecting Germination Testing: Failing to test the germination rates of stored seeds can result in wasted time and effort if the seeds have lost their viability. Regularly conduct germination tests to assess the quality and viability of your stored seeds. If the germination rate is too low, consider replacing them with fresh seeds.
By avoiding these common mistakes, you can maximize the potential of your stored seeds and ensure successful germination. Taking care in the storage and handling of your seeds will result in a healthy and productive garden for seasons to come.
Now that you are aware of the common mistakes to avoid, let’s conclude with some final thoughts.
Conclusion
Proper seed storage is the key to preserving the viability, quality, and diversity of your unused seeds. By understanding the importance of seed storage and implementing the right techniques, you can save money, reduce waste, and ensure a constant supply of high-quality seeds for future planting seasons.
Throughout this article, we’ve discussed the significance of proper seed storage and explored various factors that affect seed viability. We’ve also provided valuable tips on selecting, preparing, and storing your unused seeds. From choosing the right containers to creating the ideal storage environment, each step plays a critical role in maintaining the longevity of your seeds.
Remember to dry your seeds thoroughly before storage, use moisture-resistant and airtight containers, and store seeds in cool, dark, and consistent conditions. Regularly monitor and rotate your seeds, conduct germination tests, and maintain an organized system to easily access and manage your seed collection.
By avoiding common mistakes such as inadequate drying, excessive moisture, improper storage temperature, lack of organization, and neglecting germination testing, you can ensure the viability and success of your stored seeds.
Proper seed storage allows you to exercise control over your garden’s quality, reduce waste, and save money by utilizing seeds from your own plants or harvests. It also helps you develop a diverse and unique collection of seeds, ensuring a bountiful and thriving garden year after year.
So, take the time to properly store your unused seeds, and you’ll reap the benefits of a flourishing garden that starts from the very foundation of your collection. Happy gardening!
Frequently Asked Questions about How To Store Unused Seeds
Was this page helpful?
At Storables.com, we guarantee accurate and reliable information. Our content, validated by Expert Board Contributors, is crafted following stringent Editorial Policies. We're committed to providing you with well-researched, expert-backed insights for all your informational needs.


0 thoughts on “How To Store Unused Seeds”