Home>Garden Essentials>How To Store Seed Potatoes Until Planting
Garden Essentials
How To Store Seed Potatoes Until Planting
Modified: March 15, 2024
Discover the best way to store seed potatoes in your garden until planting season. Maximize the viability and quality of your potatoes with these expert storage tips.
(Many of the links in this article redirect to a specific reviewed product. Your purchase of these products through affiliate links helps to generate commission for Storables.com, at no extra cost. Learn more)
Introduction
Welcome to the wonderful world of gardening! Whether you are a seasoned gardener or just starting out, the process of growing your own plants and vegetables can be both rewarding and therapeutic. One important aspect of a successful garden is selecting and storing the right materials, such as seed potatoes. In this article, we will guide you through the process of storing seed potatoes until planting time, ensuring that they remain healthy and ready to sprout when the time comes.
Seed potatoes are not your regular potatoes that you buy at the grocery store. They are specially grown and developed to produce vigorous and disease-free potato plants. Properly storing seed potatoes is crucial to maintaining their vitality and ensuring a successful crop. By following the guidelines outlined in this article, you will be well on your way to achieving a bountiful harvest of delicious homegrown potatoes.
When it comes to storing seed potatoes, there are several key factors to consider. These include choosing the right seed potatoes, inspecting them for quality, creating the ideal storage conditions, and implementing proper maintenance techniques. Let’s delve deeper into each of these aspects to ensure that you have a thorough understanding of how to store your seed potatoes effectively.
So, whether you’re planning to grow potatoes in your backyard garden or in containers on your balcony, read on to discover the secrets to storing seed potatoes until planting time. With the right knowledge and a little TLC, you’ll soon be enjoying the fruits of your labor in the form of fresh and delicious homegrown potatoes. Let’s get started!
Key Takeaways:
- Proper storage of seed potatoes is crucial for a successful harvest. Choose high-quality potatoes, maintain ideal temperature and humidity, and protect from light and pests to ensure their viability.
- Regularly inspect and maintain stored seed potatoes to prevent issues like rot, disease, and sprouting. Follow best practices, such as proper cleaning, choosing the right containers, and monitoring storage conditions.
Read more: How To Plant Seed Potatoes
Choosing Seed Potatoes
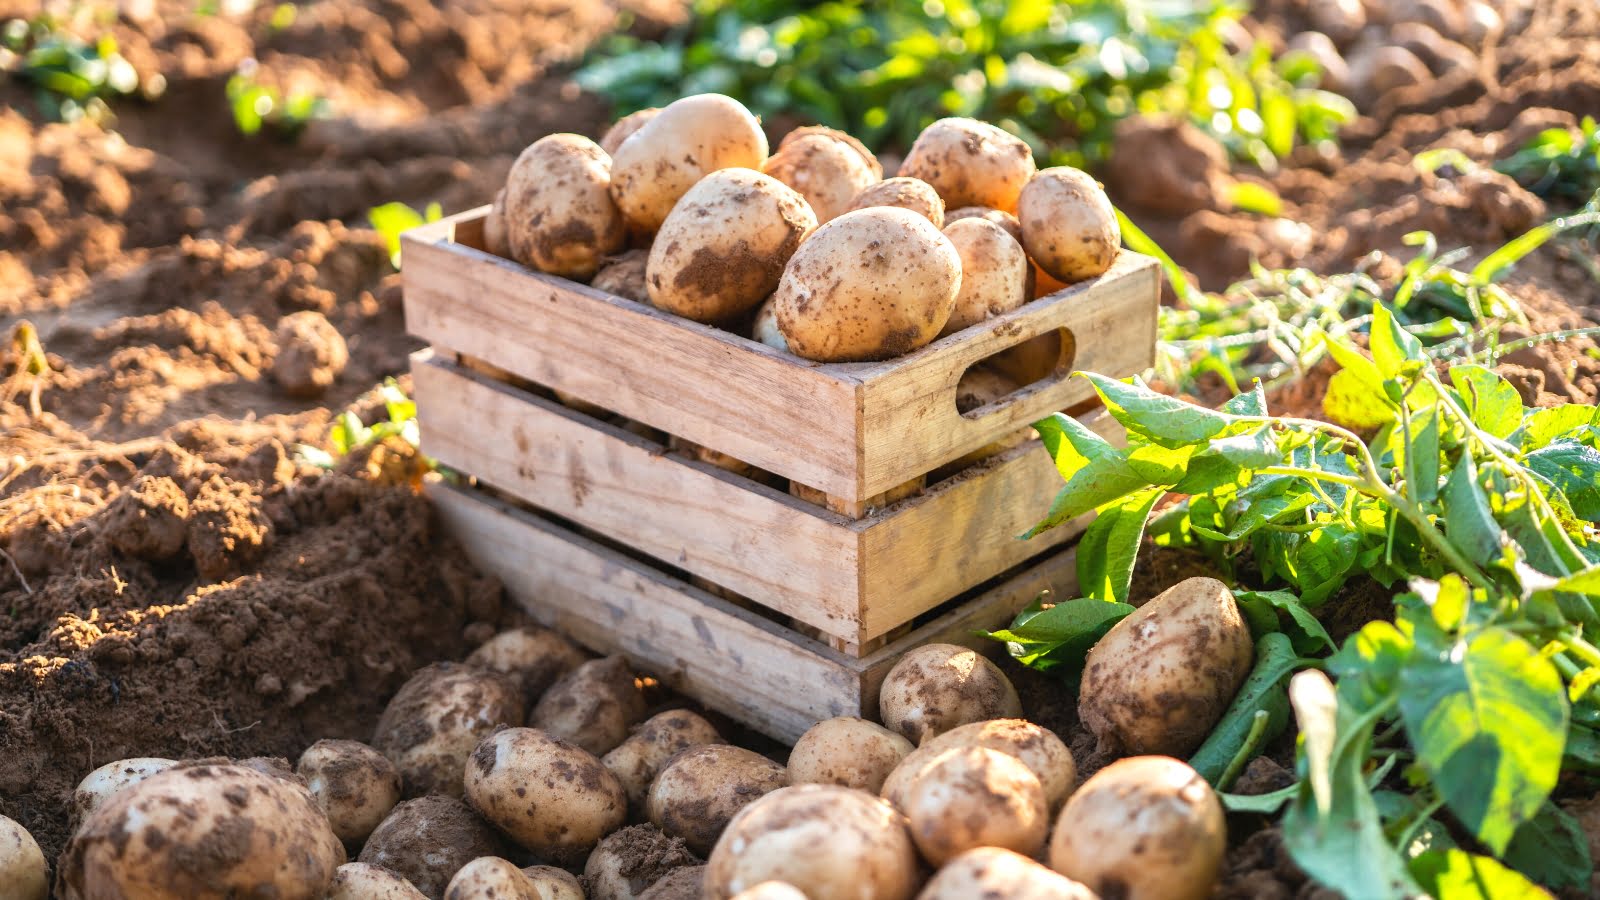
Choosing the right seed potatoes is the first step towards successful storage and a productive potato harvest. It is essential to select high-quality seed potatoes that are free from diseases and have good sprouting potential. Here are some factors to consider when choosing seed potatoes:
- Variety: There are numerous potato varieties available, each with its own unique characteristics. Consider the qualities you desire in your potatoes, such as taste, texture, color, and cooking uses. Research different varieties and choose the ones that best suit your preferences and growing conditions.
- Certified Seed Potatoes: It is recommended to purchase certified seed potatoes from reputable suppliers. Certified seed potatoes undergo rigorous testing to ensure they are disease-free and of high quality. This significantly reduces the risk of introducing pests and diseases to your garden.
- Tuber Size: Select seed potatoes that are of a suitable size for planting. Small potatoes may not have enough energy reserves to support vigorous growth, while overly large ones may result in overcrowded or smaller tubers. Look for seed potatoes that are around 1-2 inches in diameter.
- Healthy Appearance: Inspect the seed potatoes for any signs of diseases or damage. Avoid potatoes with cuts, bruises, or soft spots, as these can serve as entry points for pathogens. Choose potatoes that are firm, plump, and free from blemishes.
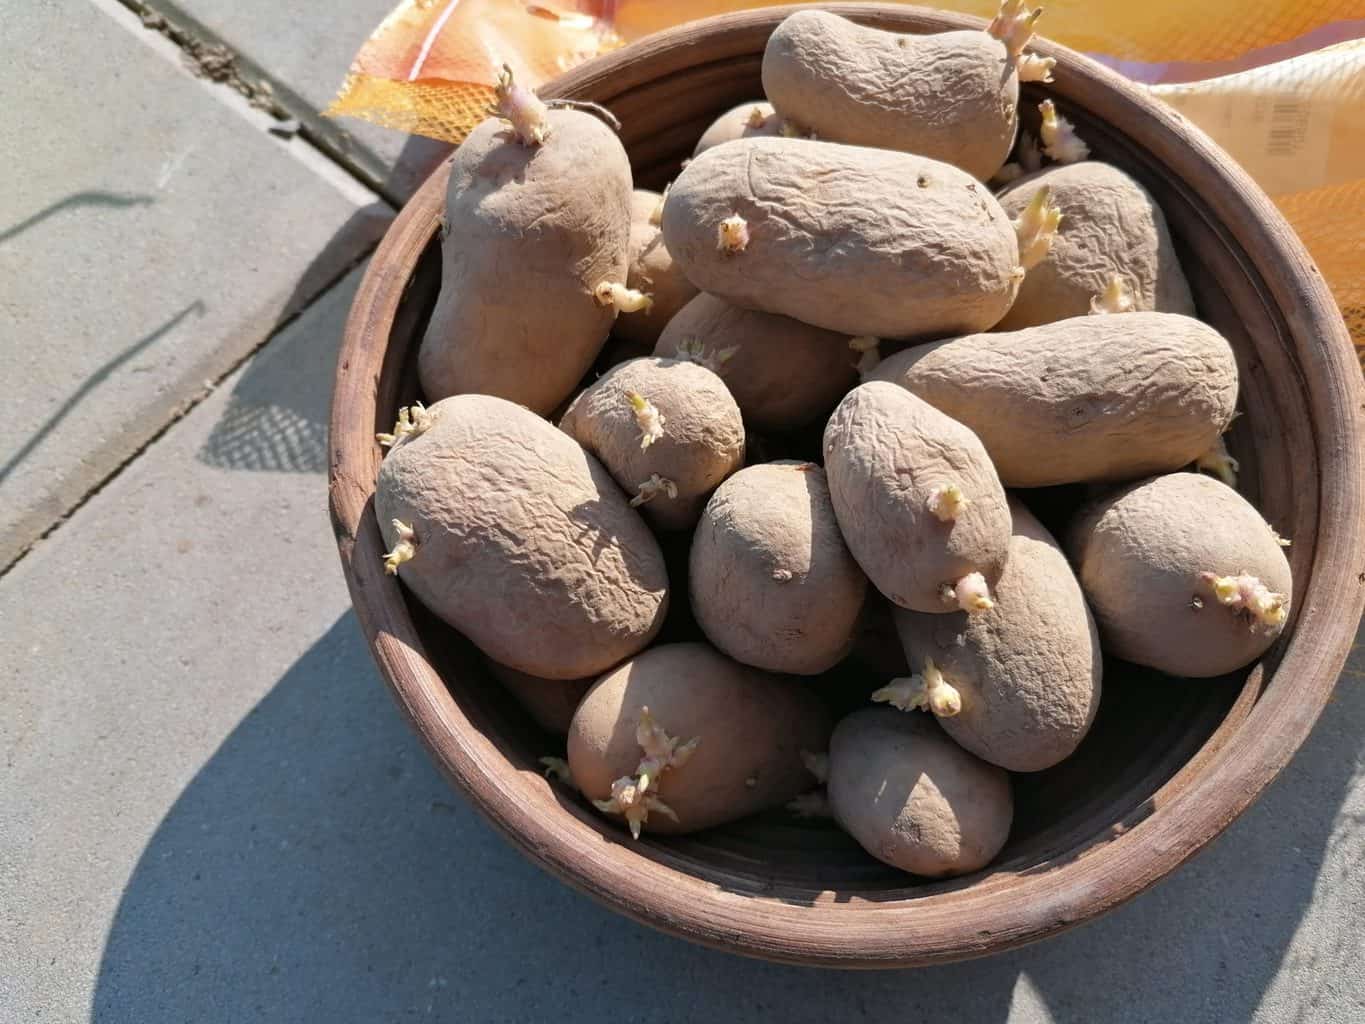
- Sprouting Potential: Check if the seed potatoes have begun to sprout. While not necessary, seed potatoes with pre-sprouted eyes can give your plants a head start. Look for eyes that are slightly elongated and have formed small sprouts.
Remember that the quality of your seed potatoes directly influences the health and vigor of your potato plants. Always choose the best seed potatoes available to ensure a successful potato-growing season.
Selecting Seed Potatoes
Once you have decided on the variety of potatoes you want to grow, it is time to select the best seed potatoes for your garden. Here are some important factors to consider when selecting seed potatoes:
- Quality: Choose seed potatoes that are firm and free from blemishes, cuts, or bruises. Avoid any potatoes that show signs of decay or disease. Opt for seed potatoes that are healthy and robust, as this will increase the chance of a successful crop.
- Size: Look for seed potatoes that are of medium size, generally around 1-2 inches in diameter. Avoid very small potatoes, as they may not have enough energy reserves to produce strong and healthy plants. Similarly, avoid overly large seed potatoes, as they may lead to overcrowding and smaller tubers.
- Sprouting Potential: Seed potatoes with eyes that have started to sprout can give your plants a head start. Look for seed potatoes that have slightly elongated eyes with small sprouts emerging. These sprouts indicate that the potatoes are ready to grow and have a higher chance of successful planting.
- Certified Seed Potatoes: It is advisable to purchase certified seed potatoes from reputable sources. Certified seed potatoes undergo strict quality control measures to ensure they are free from diseases and pests. This reduces the risk of introducing pathogens to your garden and increases the chances of a healthy potato crop.
- Variety: Consider the specific variety of potatoes you want to grow and ensure that the seed potatoes you select match that variety. Different potato varieties have different characteristics such as taste, texture, and cooking uses. Choose the variety that aligns with your preferences and growing conditions.
- Quantity: Determine the number of seed potatoes you need based on the size of your garden and your desired potato yield. As a general rule, each pound of seed potatoes will yield 8-10 pounds of harvested potatoes. However, you can adjust this ratio based on your gardening experience and goals.
By carefully selecting high-quality seed potatoes, you are setting the foundation for a successful potato harvest. Remember to choose seed potatoes that are healthy, of the right size, and have good sprouting potential. With the right selection, you are one step closer to growing delicious, homegrown potatoes in your garden.
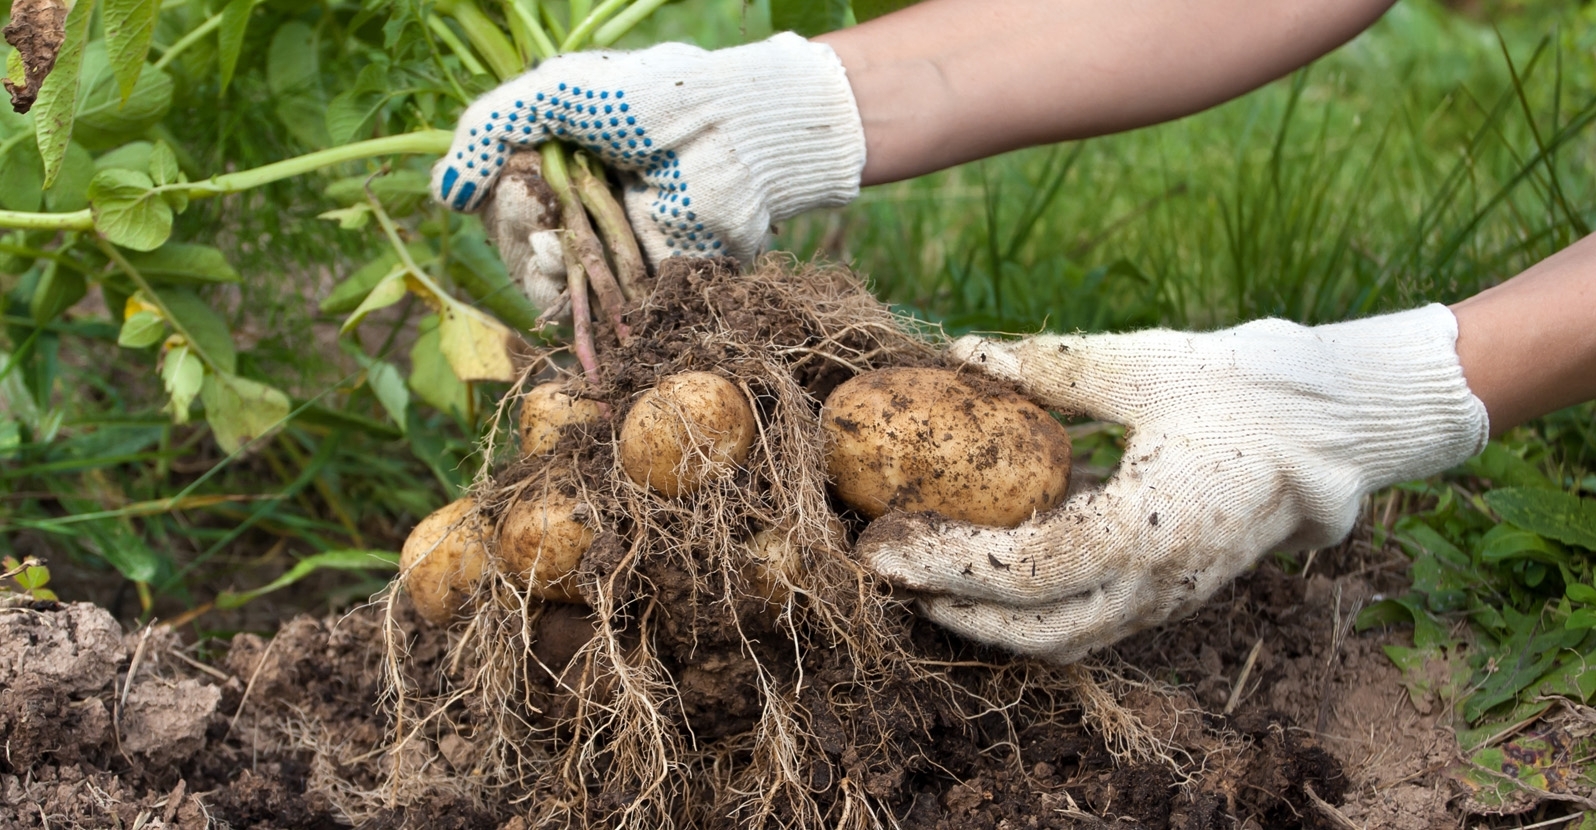
Inspecting Seed Potatoes
Before storing your seed potatoes, it is essential to inspect them thoroughly to ensure that they are healthy and free from any diseases or pests. Here are some steps to follow when inspecting your seed potatoes:
- Examine the Appearance: Carefully look at each seed potato for any signs of damage, including cuts, bruises, or discoloration. Avoid using potatoes with these issues, as they can serve as entry points for pathogens.
- Check for Diseases: Look for any signs of diseases such as bacterial wilt, scab, or leafroll virus. These can affect the health of your potato plants and reduce the yield. If you notice any affected potatoes, separate them from the healthy ones to prevent the spread of disease.
- Inspect for Pests: Check for any insects or larvae that may be present on the seed potatoes. Common pests include wireworms, aphids, and potato beetles. If you find any infested potatoes, remove them and dispose of them properly to prevent infestation in your storage area.
- Sprouting Condition: Take note of the sprouting condition of your seed potatoes. Look for potatoes with well-developed eyes and small sprouts. A few sprouts emerging from the eyes indicate that the potatoes are ready for planting and have good sprouting potential.
- Smell Test: Give your seed potatoes a slight sniff to detect any unusual odors. Potatoes with a foul smell may indicate rot or decay and should be discarded to prevent the spread of diseases in your storage area.
- Isolate Affected Potatoes: If you come across any potatoes showing signs of disease or pests, isolate them from the healthy ones. This will help prevent the spread of pathogens or infestation and ensure the overall health of your seed potatoes.
By conducting a thorough inspection of your seed potatoes, you can identify any issues and take necessary steps to mitigate them. Remember that using healthy and disease-free seed potatoes is crucial for a successful potato-growing season. By taking the time to inspect your seed potatoes, you are setting a solid foundation for a bountiful harvest of delicious homegrown potatoes.
Proper Storage Conditions
Creating the right storage conditions for your seed potatoes is crucial to their long-term viability. Proper storage conditions help prevent sprouting, rotting, and the development of diseases. Here are some key factors to consider when setting up the storage environment for your seed potatoes:
- Temperature: The ideal temperature for storing seed potatoes is between 40°F (4°C) and 50°F (10°C). Avoid temperatures below freezing or above 60°F (15°C), as extreme temperatures can cause damage or premature sprouting.
- Humidity: Maintain a humidity level of 85-90% in your storage area. Potatoes require high humidity to prevent them from drying out. Dry conditions can lead to shriveled potatoes or excessive sprouting.
- Air Circulation: Good air circulation is essential to prevent the buildup of moisture and the development of mold or rot. Make sure there is adequate ventilation in your storage area to promote airflow around the potatoes.
- Light Exposure: Keep your seed potatoes stored in complete darkness. Exposure to light can cause the potatoes to turn green and produce solanine, a natural toxin. This can make the potatoes bitter and inedible.
- Storage Containers: Choose appropriate storage containers for your seed potatoes. Good options include burlap sacks, breathable cloth bags, or ventilated plastic crates. Avoid using airtight containers, as they can trap moisture and promote the growth of mold or rot.
Remember that maintaining proper storage conditions is essential to preserving the quality, sprouting potential, and overall health of your seed potatoes. By providing the right temperature, humidity, airflow, and protection from light, you can ensure that your seed potatoes remain in optimal condition until it’s time to plant them.
Now that you have an understanding of the optimal storage conditions for your seed potatoes, let’s move on to the next steps of preparing them for storage and choosing a suitable location to store them.
Read more: How To Store Bulbs Until Planting
Preparing for Storage
Before you begin storing your seed potatoes, it’s important to take some preparatory steps to ensure their long-term viability. Properly preparing the potatoes for storage helps to minimize the risk of disease, rotting, and sprouting. Here are some essential steps to follow when preparing your seed potatoes for storage:
- Cleaning: Start by gently brushing off any excess soil or debris from the potatoes. Use a soft brush or cloth to remove dirt without damaging the skin. Avoid washing the potatoes, as excessive moisture can lead to rotting.
- Drying: Allow the potatoes to air dry after cleaning. Place them in a single layer on a clean, dry surface for a few hours. This helps to further remove any remaining moisture and prevents the growth of mold or rot.
- Curing (Optional): Curing the seed potatoes for a short period can help improve their storage potential. Place the potatoes in a warm and well-ventilated area with a temperature of around 60-70°F (15-20°C) for about one to two weeks. This process toughens the skin and prepares the potatoes for long-term storage.
- Sprout Prevention: To prevent premature sprouting, you can dust or lightly coat the seed potatoes with a sprout inhibitor or a food-grade mineral oil. This can help extend the dormancy of the potatoes and delay sprouting until planting time.
- Inspect Once More: Before placing the potatoes in storage, give them a final inspection to ensure there are no signs of disease, rot, or pests. Remove any potatoes that appear unhealthy or damaged to prevent the spread of problems to the rest of the batch.
By following these preparatory steps, you are setting the stage for successful storage and preserving the quality of your seed potatoes. Clean and dry potatoes are less prone to disease and rot, while proper curing and sprout prevention techniques help to maintain their viability for a longer period.
Now that your seed potatoes are properly prepared, let’s move on to the next step — choosing a suitable location for storage and learning the best practices for storing your seed potatoes until planting time.
Cleaning and Drying Seed Potatoes
Cleaning and drying your seed potatoes is an essential step to ensure their long-term storage success. Properly cleaning and drying the potatoes help to remove any dirt, pathogens, and excess moisture that can lead to rotting or disease. Here are the steps to follow when cleaning and drying your seed potatoes:
- Gently brush off soil: Start by using a soft brush or cloth to gently remove any excess soil or debris from the potatoes. Be careful not to damage the skin while cleaning.
- Avoid washing: It’s important to avoid washing the seed potatoes unless absolutely necessary. Washing can introduce excess moisture, making them more prone to rot. Only wash if the potatoes are heavily soiled or have stubborn dirt that cannot be removed through brushing.
- Air dry: After cleaning, allow the potatoes to air dry completely. Place them in a single layer on a clean and dry surface, such as a wire rack or a wooden tray. Avoid using paper towels or cloth, as they can trap moisture. Leave the potatoes undisturbed for several hours or overnight to ensure thorough drying.
- Check for moisture: Before storing the seed potatoes, make sure they are completely dry. Check for any residual moisture by gently pressing on the skin. If you feel any dampness, continue drying them until they are completely dry to the touch.
- Avoid direct sunlight: When air drying the potatoes, ensure they are kept in a shady area away from direct sunlight. Exposure to sunlight can cause the potatoes to turn green and produce solanine, a toxic compound.
- Inspect for damage: While cleaning and drying, take the opportunity to inspect the potatoes for any signs of damage, rot, or disease. Discard any potatoes that appear bruised, soft, or show any signs of decay.
By properly cleaning and drying your seed potatoes, you are reducing the risk of rot, disease, and premature sprouting during storage. Remember to handle them with care, avoid unnecessary washing, and ensure thorough drying before moving on to the next steps of storing your seed potatoes.
Now that your seed potatoes are cleaned and dried, it’s time to choose a suitable storage location and learn the best practices for storing them until planting time.
Choosing a Storage Location
Choosing the right storage location for your seed potatoes is crucial to ensure their longevity and quality. The storage area should provide the ideal conditions of temperature, humidity, and airflow to prevent sprouting, rotting, and the development of diseases. Here are some factors to consider when selecting a storage location for your seed potatoes:
- Cool and Dark: Opt for a storage location that is cool and dark. The ideal temperature for storing seed potatoes is between 40°F (4°C) and 50°F (10°C). A cool environment helps to slow down the sprouting process and prolongs the dormancy of the potatoes. Ensure that the area is also free from exposure to sunlight, as light can cause the potatoes to turn green and produce toxic compounds.
- Adequate Ventilation: Good airflow is essential to prevent the buildup of moisture and the growth of mold or rot. Choose a storage area with adequate ventilation to promote air circulation around the potatoes. This can help maintain the right humidity levels and reduce the risk of condensation.
- Stable Temperature: It’s important to select a storage location that maintains a stable temperature. Fluctuating temperatures can be detrimental to the potatoes, leading to sprouting or spoilage. Avoid areas that are prone to extreme temperature changes, such as attics, garages subject to temperature variations, or near heating sources.
- Low Humidity: While humidity is necessary to prevent the potatoes from drying out, excessive moisture can lead to rotting. Choose a storage location with moderate to low humidity levels, ideally between 85% and 90%. High humidity levels can encourage the growth of mold, while low humidity can cause the potatoes to shrivel.
- Pest and Rodent Free: Ensure that the chosen storage area is free from pests and rodents. These critters can cause damage to the potatoes and introduce diseases. Regularly inspect the storage area to ensure there are no signs of infestation and take necessary measures to prevent pests from accessing the potatoes.
- No Strong Odors: Avoid storing the seed potatoes in an area with strong-smelling chemicals or other products. Potatoes are known to absorb odors, and strong smells can affect their taste and quality.
By choosing the right storage location, you can provide the optimal conditions for your seed potatoes, ensuring their long-term viability and quality. Remember to consider temperature, humidity, airflow, and protection from light and pests when selecting the storage area for your potatoes.
Now that you have chosen a suitable storage location, let’s move on to the next steps of storing your seed potatoes and implementing maintenance practices to ensure their well-being until planting time.
Storing Seed Potatoes
Now that your seed potatoes are cleaned, dried, and you have chosen a suitable storage location, it’s time to properly store them until planting time. There are a few different methods you can use to store seed potatoes, depending on your available space and preferences. Here are two common methods for storing seed potatoes: in containers and in bags.
Read more: How To Plant Seed Potatoes In Grow Bags
Storing in Containers:
Using containers is a convenient and space-efficient way to store seed potatoes. Here’s how to do it:
- Select clean and breathable containers, such as wooden crates, plastic bins with ventilation holes, or mesh bags. Avoid airtight containers, as they can trap moisture and lead to rotting.
- Line the bottom of the containers with a layer of straw, shredded paper, or clean dry wood shavings. This helps to cushion the potatoes and provides some insulation.
- Place the seed potatoes in the containers, making sure to leave some space between them. Do not overcrowd the potatoes, as this can lead to bruising and increased moisture buildup.
- Layer additional insulation material like straw, shredded paper, or wood shavings between the potato layers. This helps to maintain a consistent temperature and humidity level.
- Store the containers in a cool, dark, and well-ventilated area, such as a basement or a root cellar. Check regularly for any signs of rot or sprouting and remove any affected potatoes promptly.
Storing in Bags:
Storing seed potatoes in bags is another popular method, especially if you have limited space. Here’s how to do it:
- Choose breathable bags specifically designed for storing potatoes, such as burlap sacks or breathable cloth bags. Avoid using plastic bags, as they can trap moisture and lead to rotting.
- Place a layer of straw, shredded paper, or clean dry wood shavings at the bottom of the bag. This provides cushioning and helps absorb excess moisture.
- Add a portion of seed potatoes to the bag, ensuring that they are not too tightly packed. Leave some space for airflow between the potatoes.
- Continue layering the potatoes, separating each layer with additional insulation material.
- Seal the bags loosely to allow for some airflow while preventing excessive drying or exposure to light. Store the bags in a cool, dark, and well-ventilated area.
- Regularly check the bags for any signs of sprouting, rot, or pest infestation. Remove any affected potatoes to prevent the spread of problems.
Regardless of the method you choose, it’s important to periodically inspect the seed potatoes during storage and promptly address any issues that arise. Regularly check for signs of sprouting, rot, or disease, and maintain a suitable storage environment to ensure the well-being of your seed potatoes until planting time.
By following these storage methods and practicing diligent maintenance, you are giving your seed potatoes the best chance for success, leading to healthy, vigorous plants and a bountiful harvest of delicious homegrown potatoes.
Storing in ContainersStoring seed potatoes in containers is a practical and effective method that allows for easy organization and minimal space requirements. Here is a step-by-step guide on how to store seed potatoes in containers:
- Choose the Right Containers: Select clean and breathable containers for storing your seed potatoes. Options include wooden crates, plastic bins with ventilation holes, or mesh bags. Avoid airtight containers, as they can trap moisture and lead to rotting.
- Prepare the Containers: Line the bottom of the containers with a layer of straw, shredded paper, or clean dry wood shavings. This will provide cushioning for the potatoes and help maintain a consistent environment.
- Place the Seed Potatoes: Carefully arrange the seed potatoes in the container, leaving some space between each potato. Avoid overcrowding, as it can cause bruising and increased moisture buildup.
- Add Insulation Layers: Include additional insulation material, such as straw, shredded paper, or wood shavings, between the layers of seed potatoes. This helps maintain a stable temperature and humidity level.
- Store in the Right Environment: Find a cool, dark, and well-ventilated location for storing the containers. Common options include basements, root cellars, or cool storage rooms. Ensure the storage area maintains a temperature between 40°F (4°C) and 50°F (10°C) to prevent premature sprouting.
- Regularly Check for Issues: Periodically inspect the containers for any signs of rot, sprouting, or disease. Remove any affected potatoes immediately to prevent the spread of issues. Also, monitor the storage conditions and make adjustments if necessary.
Storing seed potatoes in containers provides several advantages. The containers allow for easy organization, making it simple to locate specific varieties when planting season arrives. Additionally, using containers helps protect the potatoes from physical damage and allows for better airflow, reducing the risk of rotting or disease development.
By following these steps and paying attention to storage conditions and regular monitoring, you can ensure the long-term viability and quality of your seed potatoes. With proper storage in containers, you’ll be well on your way to a successful potato-growing season and the joy of harvesting your very own homegrown potatoes.
Storing in Bags
Storing seed potatoes in bags is a popular and space-efficient method that provides good airflow and protection. Here is a step-by-step guide on how to store seed potatoes in bags:
- Choose Breathable Bags: Opt for bags specifically designed for storing potatoes, such as burlap sacks or breathable cloth bags. These bags allow for air circulation and prevent moisture buildup compared to plastic bags.
- Prepare the Bags: Line the bottom of the bags with a layer of straw, shredded paper, or clean dry wood shavings. This layer acts as cushioning for the potatoes and helps absorb excess moisture.
- Add the Seed Potatoes: Carefully place a portion of seed potatoes into the bag, ensuring they are not tightly packed. Leave some space for airflow between the potatoes to prevent bruising and encourage even drying.
- Layer the Potatoes: Continue layering the seed potatoes, separating each layer with additional insulation material like straw, shredded paper, or wood shavings. This helps maintain a stable storage environment.
- Seal the Bags: Loosely seal the bags to allow for some airflow while preventing excessive drying or exposure to light. Avoid sealing the bags too tightly as it can hinder air circulation and lead to moisture buildup.
- Store in the Right Environment: Find a cool, dark, and well-ventilated storage area for the bags of seed potatoes. Basements, root cellars, or cool storage rooms are suitable options. Maintain a temperature between 40°F (4°C) and 50°F (10°C) to prevent premature sprouting.
- Regularly Check for Issues: Periodically inspect the bags for any signs of sprouting, rot, or pest infestation. Remove any affected potatoes promptly to prevent the spread of problems. Check the bags regularly to ensure the storage conditions are stable.
Storing seed potatoes in bags offers several advantages. It allows for flexibility in terms of storage space and enables easy organization of different potato varieties. Bags also provide good ventilation, which helps prevent moisture buildup and reduces the risk of rotting or disease development.
By following these steps and paying attention to storage conditions, you can ensure the long-term viability and quality of your seed potatoes. With proper storage in bags, you’ll be well on your way to a successful potato-growing season and the joy of harvesting your own delicious homegrown potatoes.
Read more: How To Store Lily Bulbs Until Planting
Monitoring and Maintenance
Properly monitoring and maintaining your stored seed potatoes is essential to ensure their long-term viability and to prevent issues such as rotting, sprouting, and disease development. Regular checks and necessary maintenance help to preserve the quality of the potatoes and maximize their potential for successful planting. Here are some key aspects of monitoring and maintaining your stored seed potatoes:
- Regular Inspections: Regularly inspect your stored seed potatoes for any signs of sprouting, rot, or disease. Examine them carefully to identify any issues early on, and promptly remove any affected potatoes to prevent the spread of problems to the rest of the batch.
- Temperature and Humidity Control: Monitor the storage area’s temperature and humidity levels regularly, ensuring they remain within the recommended range for storing seed potatoes. Make any necessary adjustments to maintain the optimal conditions and prevent issues such as excessive drying or moisture buildup.
- Turn and Rearrange: Periodically turn and rearrange the seed potatoes in storage containers or bags. This helps ensure even airflow and prevents localized moisture or temperature variations. It also allows for a visual inspection of each potato and reduces the risk of unnoticed issues.
- Check for Sprouting: Keep an eye on the stored potatoes for any signs of sprouting. If you notice significant sprouting, it may be a sign that the temperature is too high or that the storage period is becoming too long. Remove any excessively sprouted potatoes to prevent them from depleting energy reserves from the other potatoes.
- Pest Control: Regularly check for any signs of pests such as insects or rodents in the storage area. Implement appropriate measures to control and eliminate pests, ensuring they do not damage the potatoes or contaminate them with diseases. Consider using natural pest control methods or consult with professionals if necessary.
- Adequate Air Circulation: Ensure that there is consistent airflow around the stored seed potatoes. Good ventilation helps to prevent moisture buildup, molds, and rot. Check that the storage containers or bags allow for proper air circulation and make adjustments if needed.
- Darkness and Light Exposure: Verify that the storage area remains dark, as exposure to light can cause potatoes to turn green and produce toxins. Regularly examine the storage containers or bags to ensure they are properly sealed and provide adequate protection from light.
By actively monitoring and maintaining your stored seed potatoes, you can address any issues promptly and create optimal conditions for their long-term storage. With regular inspections, appropriate temperature and humidity control, and necessary adjustments, you’ll be able to preserve the quality of your seed potatoes and ensure their readiness for successful planting.
Store seed potatoes in a cool, dark place with good air circulation, like a paper bag in a basement or garage. Avoid storing them near onions or apples, as these can cause them to sprout prematurely.
Checking for Rot or Disease
Regularly checking your stored seed potatoes for rot or disease is crucial to maintain their quality and prevent the spread of pathogens. Early detection enables timely intervention, helping to protect the remaining potatoes and maximize their chances of successful planting. Here are some important steps to follow when checking for rot or disease in your stored seed potatoes:
- Visual Inspection: Examine each potato carefully for any signs of rot, decay, or discoloration. Pay attention to soft or mushy areas, dark spots, or any unusual growths. Rotting potatoes can quickly spread diseases to others, so it’s crucial to identify and remove affected potatoes promptly.
- Check for Mold: Inspect the stored potatoes for any presence of mold. Mold can develop in conditions of excess moisture or poor ventilation. Look for fuzzy or powdery growth on the surface of the potatoes and remove any affected potatoes immediately.
- Smell Test: In addition to visual inspection, use your sense of smell to detect any foul odors. Rotting potatoes typically emit a distinct unpleasant smell. If you notice any strong, unpleasant odors coming from the stored potatoes, it is a clear indication of rot or decay.
- Separate Affected Potatoes: Whenever you find a seed potato showing signs of rot, decay, or disease, isolate it from the healthy potatoes immediately. This prevents the spread of pathogens and helps protect the remaining potatoes from contamination.
- Dispose of Affected Potatoes: Safely dispose of the affected seed potatoes to prevent further contamination. Do not compost them, as the pathogens can survive and spread to other plants. Seal them in a bag and throw them in the garbage or consult local guidelines for proper disposal methods.
- Maintain Proper Storage Conditions: Regularly monitor and maintain the optimal storage conditions for your seed potatoes. Ensure proper temperature, humidity, and ventilation to minimize the risk of rot or disease development. Adjust the storage environment as necessary to prevent conditions that favor pathogens.
- Sanitize Storage Containers: If you discover any signs of rot or disease in your seed potatoes, it is essential to sanitize the storage containers or bags thoroughly before reusing them. Clean the containers with a mild bleach solution or a specialized disinfectant to kill any remaining pathogens.
By diligently checking your stored seed potatoes for rot or disease, you can protect the health of the remaining potatoes and increase the chances of a successful planting. Regular inspections, swift removal of affected potatoes, and maintaining proper storage conditions are key to preserving the quality and vitality of your seed potatoes.
Sprouting Seed Potatoes
Sprouting seed potatoes indicate that they are ready to grow and can be a positive sign for your potato plants. However, proper sprouting management is crucial to ensure the best outcome for your potato crop. Here’s what you need to know about sprouting seed potatoes:
- Preferred Sprouting Conditions: Seed potatoes are more likely to sprout when exposed to warmer temperatures (around 50-70°F or 10-21°C) and higher humidity levels. Take this into consideration when selecting the storage location for your seed potatoes.
- Importance of Controlled Sprouting: Controlled sprouting ensures that the potato plants will develop strong and healthy shoots rather than long and weak ones. Plants with long, weak sprouts are more susceptible to damage during planting and may have a lower chance of healthy growth.
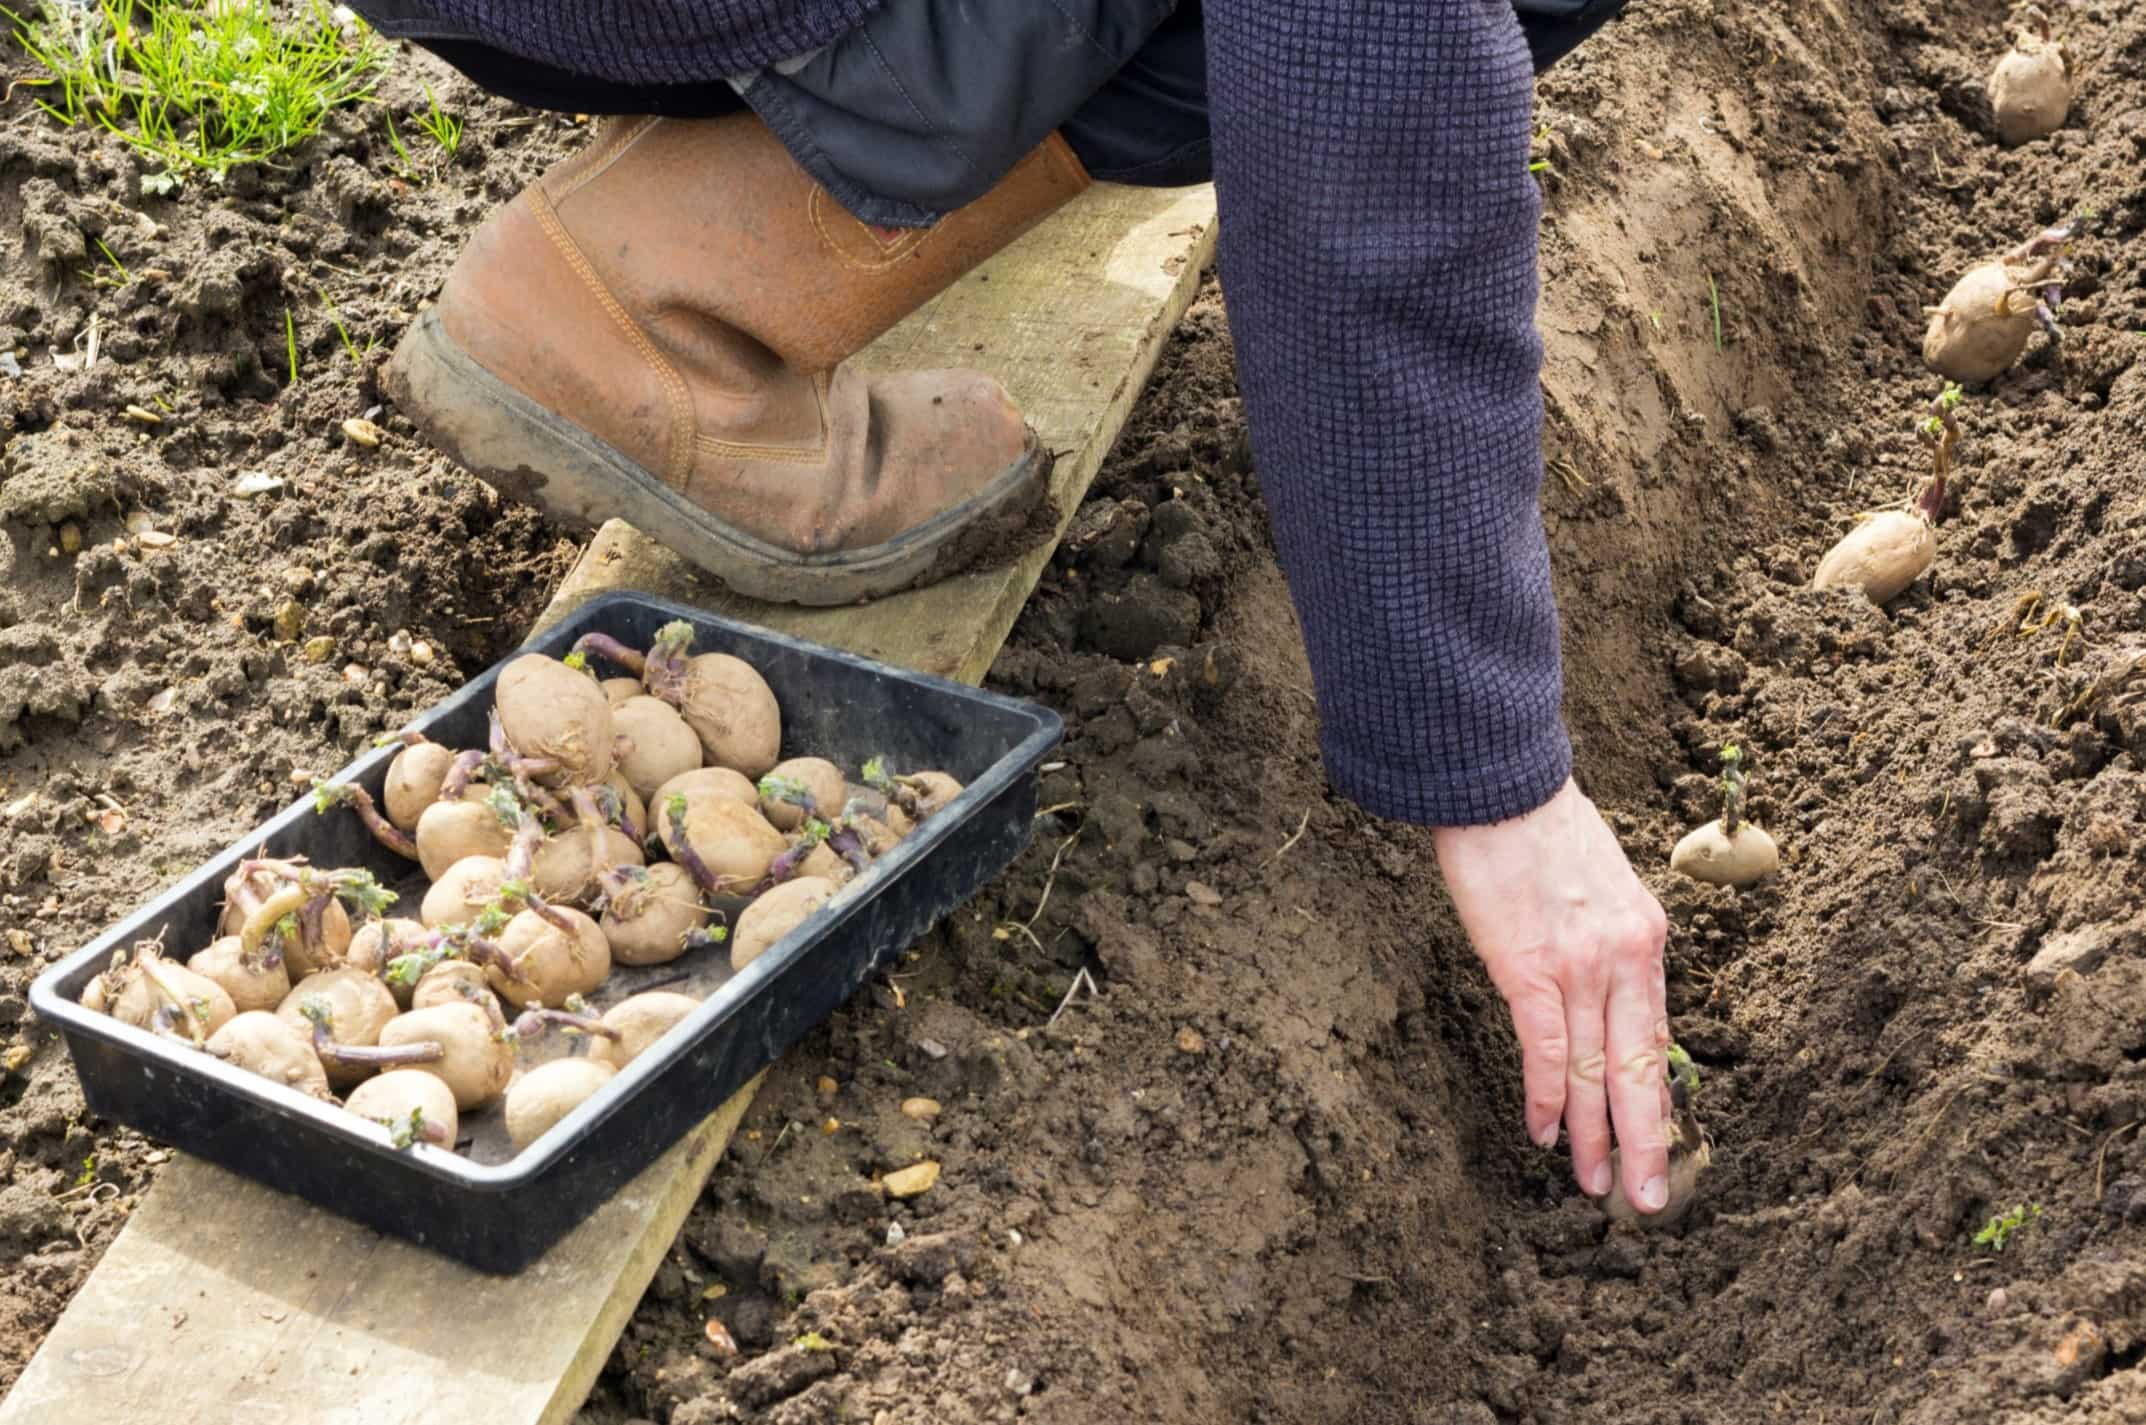
- Chitting or Green Sprouting: Chitting or green sprouting is a common practice for encouraging controlled sprouting. This involves placing seed potatoes in a light and cool environment (around 50°F or 10°C) for a few weeks prior to planting. This encourages shorter, sturdier sprouts to develop.
- Chitting Process: To chit seed potatoes, lay them in a single layer in a tray or egg carton, with the “rose end” (where most eyes are located) facing upwards. Keep the tray in a cool and light area, such as a windowsill, but away from direct sunlight. The sprouts will start to emerge within a few weeks.
- Avoid Excessive Sprouting: While sprouting is beneficial, excessive sprouting can deplete the potatoes’ energy reserves and weaken their vitality. Regularly check for excessive sprouting during storage and remove any potatoes with long, white sprouts. This will prevent the sprouts from becoming too long and weak.
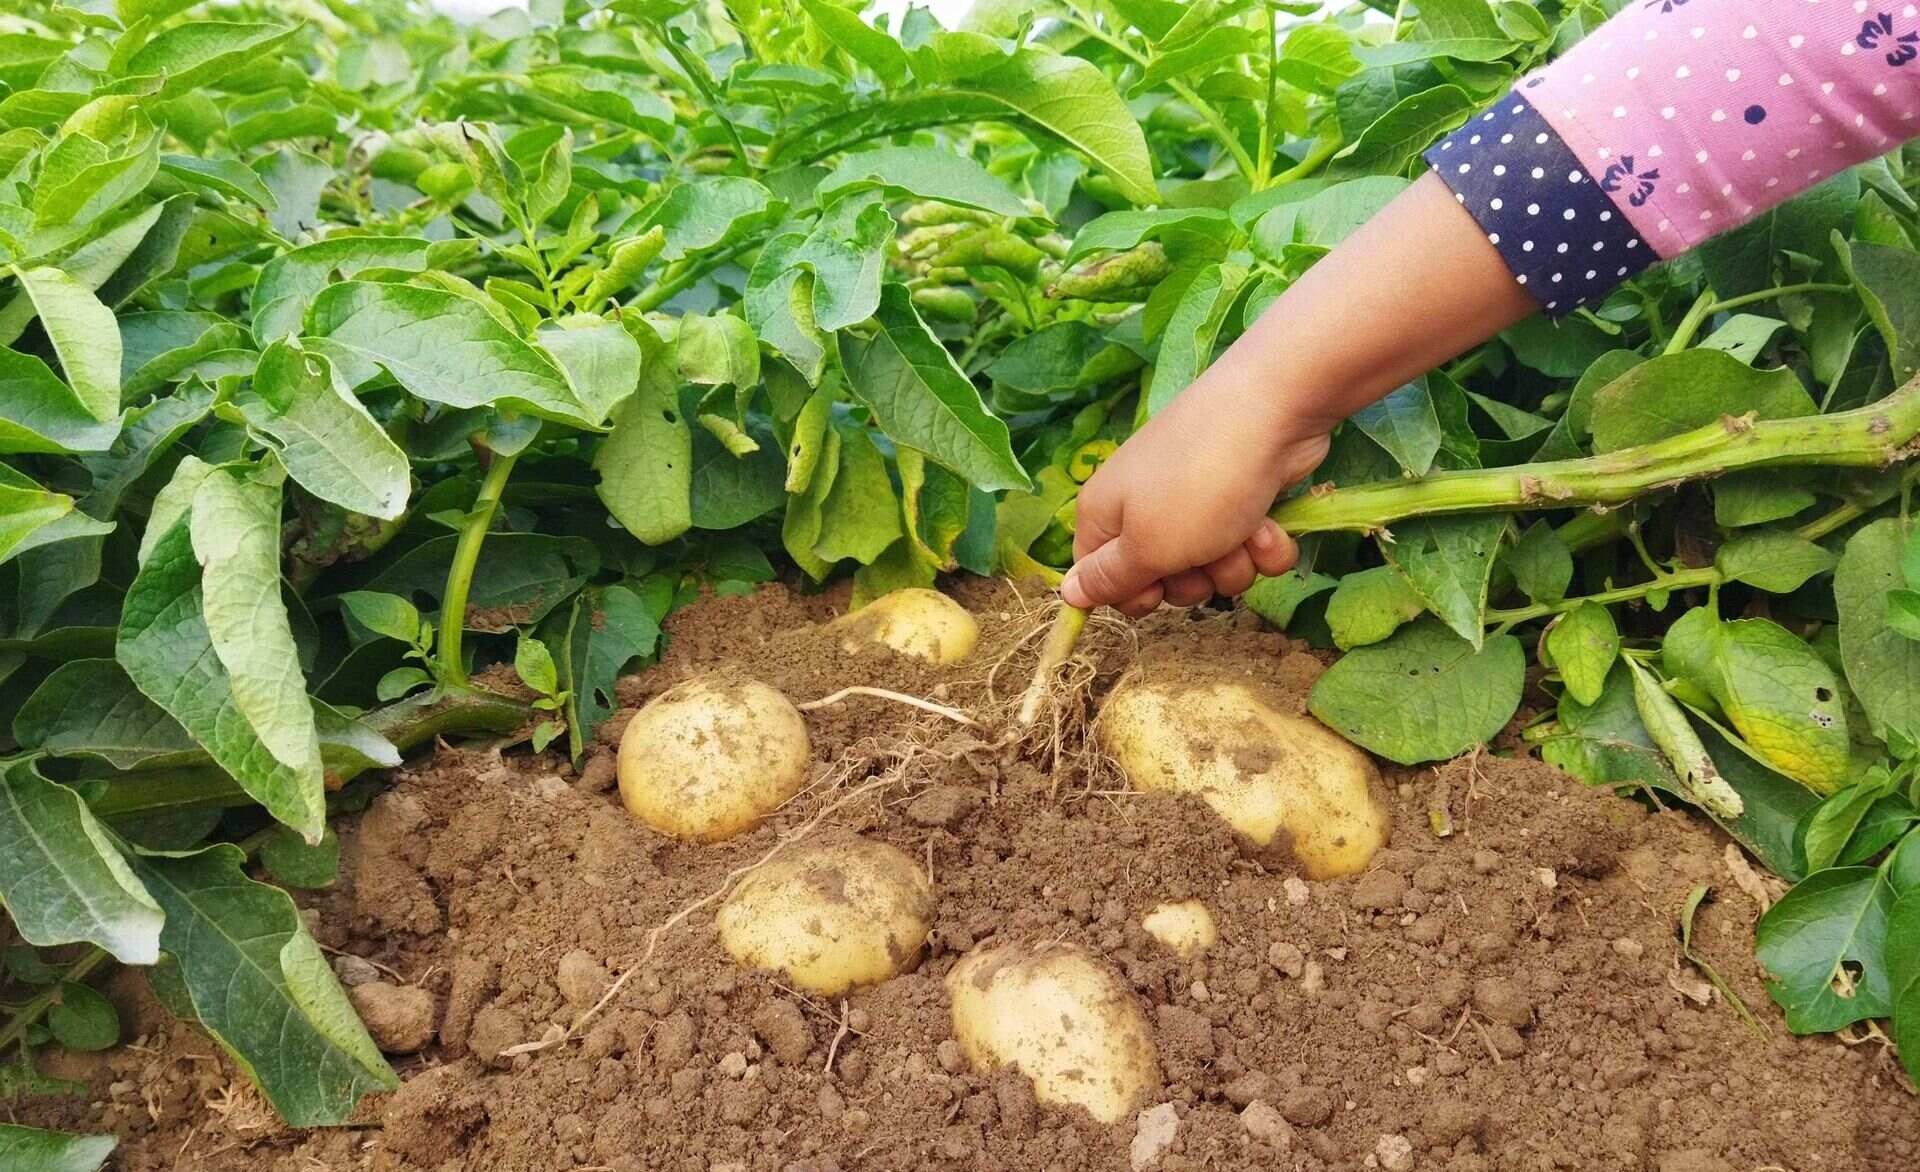
- Planting Time: Plant your sprouted seed potatoes in the ground when the soil temperature reaches approximately 45-50°F (7-10°C). This usually occurs in early spring, but it can vary depending on your location and climate. Planting too early in cold soil can result in slow growth or damage to the plants.
- Planting Technique: When planting sprouted seed potatoes, gently place them in the soil with the sprouts facing up. Ensure that the sprouts are covered with a few inches of soil. This allows the plants to emerge easily and reduces the risk of damaging the sprouts during planting.
- Spacing: Proper spacing between seed potatoes is essential to allow for adequate growth. Plant them about 10-12 inches apart in rows, with rows spaced approximately 24-36 inches apart. This spacing provides sufficient room for the plants to grow and develop tubers.
By understanding how to manage the sprouting process and implementing careful planting techniques, you can give your potato plants the best start possible. Proper sprouting management helps to ensure strong and healthy growth, leading to a successful potato-growing season and a bountiful harvest of delicious homegrown potatoes.
Controlling Temperature and Humidity
Proper temperature and humidity control are key factors in successfully storing seed potatoes and ensuring their long-term viability. Maintaining the ideal conditions for temperature and humidity helps prevent issues such as rot, sprouting, and disease development. Here’s what you need to know about controlling temperature and humidity when storing seed potatoes:
Read more: How Long Until Basil Germinate
Temperature Control:
- Ideal Temperature Range: Seed potatoes should be stored in a cool environment with a temperature range between 40°F (4°C) and 50°F (10°C). This helps slow down the sprouting process and preserves their dormancy. Avoid storing them in excessively cold temperatures, as this can damage the potatoes, or in warmer temperatures, as it can trigger premature sprouting.
- Temperature Fluctuations: Fluctuating temperatures can be detrimental to the storage of seed potatoes. Aim to keep the storage area as consistent as possible, avoiding rapid temperature fluctuations. Extreme temperature changes can lead to stress on the potatoes, affecting their quality and viability.
- Avoid Freezing Temperatures: Ensure that the storage area remains above freezing temperatures at all times. Exposure to freezing temperatures can cause the potatoes to become mushy or develop blemishes, rendering them unusable for planting.
Humidity Control:
- Ideal Humidity Levels: Seed potatoes require relatively high humidity levels to prevent them from drying out. Aim for a humidity range of 85% to 90%. This helps maintain the potatoes’ moisture content and inhibits excessive drying, which can lead to wrinkling and shriveling.
- Condensation: While high humidity is necessary, it is important to strike a balance to avoid excess moisture and condensation. Excessive moisture can promote the growth of molds, fungi, and bacteria, leading to rot. Regularly check for any signs of condensation and adjust the storage environment if necessary.
- Air Circulation and Ventilation: Good air circulation is crucial to maintain appropriate humidity levels and prevent the buildup of moisture. Ensure that the storage area has adequate ventilation or provide airflow around the stored seed potatoes by gently turning and rearranging them periodically.
- Dehumidification Measures: If the storage area becomes excessively humid, consider implementing dehumidification measures to mitigate excess moisture. Methods such as using moisture-absorbing materials like desiccants, placing dehumidifiers, or using fans to improve air circulation can help control humidity levels.
By effectively controlling temperature and humidity during the storage of seed potatoes, you can preserve their quality, prevent premature sprouting or rot, and ensure their viability for successful planting. Regular monitoring of temperature and humidity levels, along with necessary adjustments, is essential to maintaining optimal storage conditions for your seed potatoes.
Protecting from Pests
Protecting your stored seed potatoes from pests is crucial to ensure their quality and prevent damage or contamination. Pests such as insects, rodents, and pathogens can significantly reduce the viability of your potatoes. Here are some effective methods to protect your seed potatoes from pests:
- Storage Area Inspection: Regularly inspect the storage area for any signs of pests or pest activity. Look for evidence of chewed packaging, droppings, or tunnels in the vicinity. Early detection allows for prompt action to prevent further infestation.
- Sanitize the Storage Area: Before storing your seed potatoes, ensure that the storage area is thoroughly cleaned and sanitized. Remove any debris, old packaging, or remnants that may attract pests. Clean the surrounding area to discourage pests from nesting or seeking food sources nearby.
- Proper Packaging: Use pest-resistant packaging materials such as burlap sacks, mesh bags, or other breathable containers when storing seed potatoes. This helps prevent pests from accessing the potatoes while allowing for proper airflow. Avoid using plastic bags or airtight containers, as they can trap moisture and create a conducive environment for pests.
- Seal Entry Points: Inspect the storage area for any gaps, cracks, or openings that pests can use to gain access. Seal these entry points to prevent insects and rodents from infiltrating the storage area and reaching the seed potatoes.
- Natural Pest Deterrents: Implement natural pest deterrents to repel common storage pests. Some options include placing aromatic herbs like lavender, mint, or bay leaves among the stored potatoes. These scents act as natural repellents for insects and rodents.
- Trap and Monitor: Set up traps specifically designed to catch common storage pests such as mice or rats. Place the traps strategically in the storage area, and regularly check and dispose of any captured pests. Monitoring the traps allows you to gauge pest activity and take appropriate action.
- Regular Maintenance: Perform regular maintenance and cleaning of the storage area to prevent the accumulation of dust, debris, or spilled food that can attract pests. This includes cleaning shelving, sweeping the floor, and removing any potential food sources outside the storage area.
- Professional Pest Control: If you experience a significant pest infestation that cannot be managed through preventive measures, consider consulting with professional pest control services. They can provide targeted treatments and guidance to eliminate pests effectively.
By implementing these measures, you can significantly reduce the risk of pests damaging your stored seed potatoes. Regular inspections, proper packaging, and maintaining a clean and pest-free environment are vital in protecting your potatoes and ensuring their quality for successful planting.
Protecting from Light
Protecting your stored seed potatoes from light exposure is essential to maintain their quality and prevent the development of toxic compounds. When potatoes are exposed to light, they can turn green and produce solanine, a natural toxin. Here are some steps to protect your seed potatoes from light:
- Choose a Dark Storage Location: Select a storage area that is naturally dark or can be easily darkened. Basements, cellars, or dark closets are suitable options. Ensure there is no direct sunlight entering the storage area, as even brief exposure to sunlight can cause potatoes to turn green.
- Use Appropriate Packaging: Store seed potatoes in packaging that provides adequate protection from light. Choose breathable bags or containers made from materials such as burlap or mesh. These materials allow for air circulation while shielding the potatoes from light exposure.
- Avoid Transparent Containers: Transparent containers can allow light to reach the potatoes, increasing the risk of greening. Opt for opaque or non-transparent packaging to minimize light penetration.
- Seal Packaging Properly: Ensure that the packaging is properly sealed to prevent any light from entering. Check for any gaps or openings and seal them with tape or ties if necessary.
- Monitor the Storage Area: Regularly check the storage area for any sources of light that may be inadvertently reaching the seed potatoes. Look for cracks, gaps, or other openings that could be allowing light to enter. Make necessary adjustments to block out any potential light sources.
- Inspect Potatoes Regularly: During inspections, pay close attention to the potatoes’ skin color. If you notice any green patches or discoloration, this indicates exposure to light. Remove any green potatoes from storage, as they may contain higher levels of solanine and are best not consumed.
- Proper Handling During Harvest: Minimize light exposure during the harvest process as well. When collecting freshly dug potatoes from the ground, handle them carefully to prevent unnecessary bruising or damage to the skin, which can lead to increased vulnerability to light exposure.
By taking proactive steps to protect your seed potatoes from light exposure, you can ensure their quality and reduce the risk of toxic compound production. By storing them in a dark environment and choosing appropriate packaging, you’ll be safeguarding your seed potatoes and maximizing their potential for a successful potato-growing season.
Read more: How To Store Sprouted Potatoes For Planting
Tips and Tricks for Successful Storage
Proper storage of seed potatoes is essential for maintaining their viability and ensuring a successful potato-growing season. Here are some tips and tricks to help you achieve successful storage and maximize the quality of your seed potatoes:
- Choose Quality Seed Potatoes: Select high-quality seed potatoes from reputable sources. Certified seed potatoes are preferable, as they are tested and proven to be disease-free, increasing the chances of a healthy crop.
- Inspect and Sort Potatoes: Before storing, thoroughly inspect your seed potatoes for any signs of damage, disease, or pests. Separate any damaged or unhealthy potatoes, as they can affect the overall health of the batch.
- Clean and Dry Potatoes: Gently clean the seed potatoes by brushing off excess soil, avoiding washing unless necessary. Allow them to air dry completely before storing to minimize the risk of rotting.
- Control Temperature and Humidity: Maintain a storage temperature between 40°F (4°C) and 50°F (10°C) to prevent premature sprouting and rotting. Keep humidity levels between 85% and 90% to prevent excessive drying or moisture buildup.
- Choose the Right Storage Containers: Opt for breathable containers, such as burlap sacks, cloth bags, or ventilated crates. These containers allow for proper air circulation, reducing the risk of mold or rot.
- Store in a Dark Location: Ensure that the storage area is dark and free from light exposure. Exposure to light can cause potatoes to turn green and produce harmful toxins.
- Regularly Inspect and Maintain: Routinely check your stored potatoes for any signs of sprouting, rot, or disease. Remove any affected potatoes promptly to prevent the spread of problems. Keep the storage area clean and well-maintained to minimize pest infestation.
- Avoid Refrigeration: Avoid storing seed potatoes in the refrigerator, as the low temperature can convert their starch content into sugar. This can negatively impact their flavor and texture.
- Rotate Stock: If you have a large quantity of seed potatoes, consider rotating your stock. Use older potatoes first to ensure you plant the freshest ones in subsequent seasons.
- Plant Healthy Sprouted Potatoes: When it’s time to plant, select seed potatoes with strong, sturdy sprouts. Avoid using potatoes with excessively long or weak sprouts, as they may have reduced vigor.
- Keep Records: Maintain records of your storage conditions, including temperature, humidity, and any issues encountered. This information can be valuable for future reference and refining your storage techniques.
By following these tips and tricks, you can improve your chances of successful storage and maximize the quality and viability of your seed potatoes. With proper storage practices, you’ll be on your way to a great potato harvest and the satisfaction of enjoying delicious homegrown potatoes.
ConclusionStoring seed potatoes until planting time is a critical step in ensuring a successful potato-growing season. By following proper storage techniques, you can maintain the quality, viability, and health of your seed potatoes, giving them the best possible start for robust growth and bountiful harvest.
From choosing the right seed potatoes to inspecting and preparing them for storage, each step is essential in safeguarding the potatoes’ condition. Creating the ideal storage conditions with proper temperature and humidity control, protecting them from light exposure, and implementing pest prevention measures all contribute to the success of your stored seed potatoes.
Regular monitoring and maintenance play a crucial role in identifying and addressing any issues that may arise during storage, such as rot, disease, sprouting, or pest infestation. By staying vigilant and proactive, you can promptly protect the health of your seed potatoes and maintain their long-term viability.
Remember to implement best practices such as cleaning and drying the seed potatoes, choosing appropriate storage containers, and finding a suitable storage location. Additionally, follow the tips and tricks shared in this article, including regular inspections, proper temperature and humidity control, protecting from light, and preventing pests, to maximize the success of your storage endeavors.
With proper care and attention throughout the storage period, you will be rewarded with healthy, vigorous seed potatoes that are ready to be planted. From there, you can look forward to experiencing the joy of a successful potato-growing season and the satisfaction of harvesting your very own homegrown potatoes.
So, get ready to store your seed potatoes with confidence and embark on a rewarding journey of growing delicious, nutritious potatoes in your own garden!
Frequently Asked Questions about How To Store Seed Potatoes Until Planting
Was this page helpful?
At Storables.com, we guarantee accurate and reliable information. Our content, validated by Expert Board Contributors, is crafted following stringent Editorial Policies. We're committed to providing you with well-researched, expert-backed insights for all your informational needs.


0 thoughts on “How To Store Seed Potatoes Until Planting”