
Articles
How To Wax A Floor
Modified: August 31, 2024
Learn the step-by-step process of waxing a floor with our informative articles on floor maintenance and achieve a beautiful, shiny finish.
(Many of the links in this article redirect to a specific reviewed product. Your purchase of these products through affiliate links helps to generate commission for Storables.com, at no extra cost. Learn more)
Introduction
Waxing a floor is a great way to add shine and protection to your hard floors, whether it’s hardwood, vinyl, or laminate. Not only does waxing create a beautiful luster, but it also helps to prevent scratches, stains, and wear over time. However, knowing the proper technique and materials needed can make all the difference in achieving professional-looking results.
In this article, we will guide you through the step-by-step process of how to wax a floor effectively. From preparing the surface to applying the wax and maintaining the finish, we will provide you with expert tips and insights to help you achieve a long-lasting, glossy floor that you can be proud of.
Before we dive into the process, let’s briefly go over the materials you will need. Investing in quality products will ensure a smoother application and better results in the end.
Key Takeaways:
- Proper floor preparation, choosing the right wax, and thorough application are essential for achieving a professional-looking, long-lasting wax finish. Follow the step-by-step process to transform your hard floors into stunning focal points.
- Regular maintenance, such as gentle cleaning, protecting high-traffic areas, and timely touch-ups, is crucial for preserving the beauty and durability of waxed floors. By incorporating these practices, you can enjoy the benefits of a well-maintained wax finish for years to come.
Read more: How To Wax A Floor With A Mop
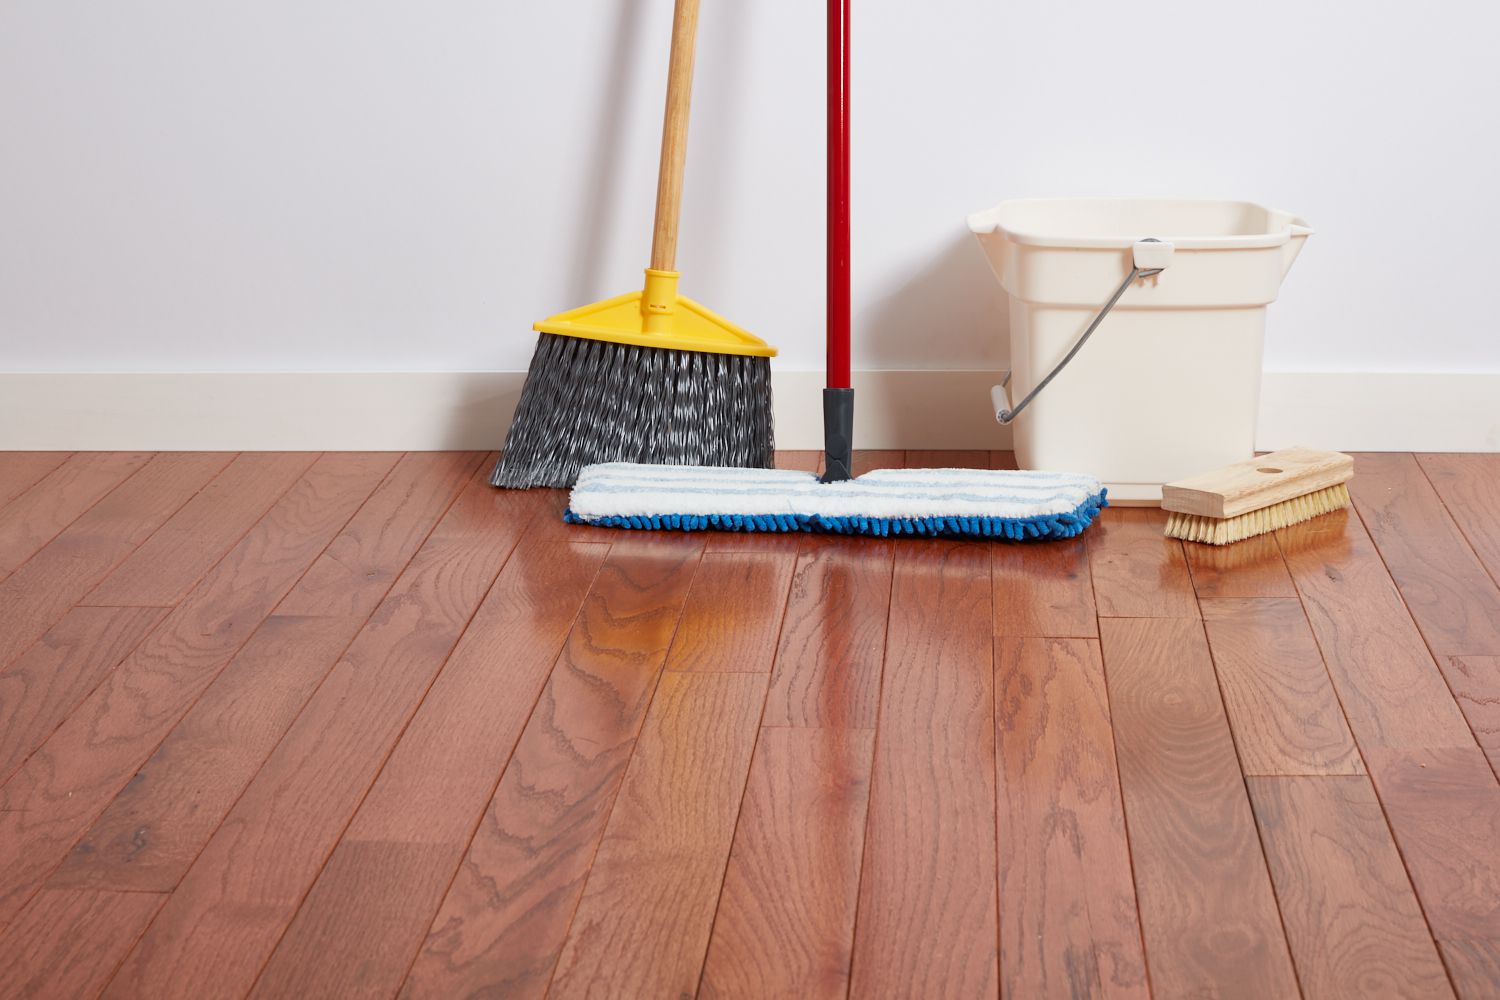
Materials Needed
Before you begin waxing your floor, gather the following materials:
- Microfiber mop or soft-bristle broom
- Vacuum cleaner (if needed)
- Bucket
- Mild detergent or floor cleaner
- Warm water
- Terry cloth mop or wax applicator pad
- Floor wax
- Wax buffing machine or clean, soft cloth
- Protective gloves
Having these materials ready will ensure a smooth and efficient waxing process.
Step 1: Prepare the Floor
Before waxing your floor, it’s important to prepare the surface to ensure optimal adhesion and a long-lasting finish. Follow these steps to properly prepare your floor:
- Clear the area: Remove all furniture, rugs, and any other items from the floor. This will make it easier to clean and wax the entire surface.
- Patch any cracks or holes: Inspect the floor for any cracks, holes, or other damages. Use a floor repair product to fill in these imperfections and allow sufficient time for it to dry.
- Clean the floor: Sweep or vacuum the floor to remove any loose dirt, dust, or debris. This will prevent any particles from getting trapped under the wax and affecting the finish.
- Remove old wax or residue: If your floor has existing wax buildup or residue, you may need to strip it off before applying a new layer. Follow the manufacturer’s instructions for the appropriate wax-stripping product and technique.
- Test a small area: If you’re unsure whether the floor can be waxed, test a small inconspicuous area first to ensure compatibility and avoid any potential damage.
By preparing the floor beforehand, you’ll create a clean and smooth surface, allowing the wax to adhere properly and deliver the best results.
Step 2: Sweep or Vacuum the Floor
Once the floor is prepared, it’s time to thoroughly clean it by sweeping or vacuuming. This step will eliminate any loose dirt, dust, or debris, ensuring that the wax adheres to a clean surface. Follow these guidelines for effective floor cleaning:
- Choose the right tool: Depending on the type of flooring you have, select either a microfiber mop or a soft-bristle broom. Microfiber mops are perfect for capturing fine dust particles, while soft-bristle brooms are ideal for sweeping up larger debris.
- Start from the edges: Begin at one edge of the room and work your way toward the center. This ensures that you cover the entire floor area and don’t miss any spots. Focus on corners, along baseboards, and under furniture where dust tends to accumulate.
- Clear small items: Before sweeping or vacuuming, remove any smaller items such as toys, loose papers, or small objects that may obstruct the cleaning process. This will prevent them from getting swept up or damaging the vacuum cleaner.
- Use a vacuum cleaner attachment (if needed): If there are hard-to-reach areas or if your floor has deep grooves or crevices, use the appropriate attachment on your vacuum cleaner to ensure thorough cleaning.
- Pay attention to corners and edges: Use a small broom or brush to clean the corners and edges of the floor, as these areas can accumulate more dirt and dust over time.
- Dispose of the debris: After sweeping or vacuuming, dispose of the collected dirt and debris in a trash bag or bin. Seal the bag tightly to prevent any dust from escaping.
By sweeping or vacuuming before waxing, you’ll create a clean foundation for the wax to adhere to, resulting in a smooth and polished finish.
Step 3: Remove Any Stains or Spots
Before applying the wax, it’s important to address any stains or spots on the floor surface. Cleaning these blemishes will ensure that the wax adheres evenly and that the final result is flawless. Follow these steps to remove stubborn stains and spots:
- Identify the stains: Carefully inspect the floor for any noticeable stains or spots. Common culprits include food and beverage spills, grease, oil, ink, or pet stains.
- Treat the stains: Depending on the type of stain, use an appropriate cleaning solution to treat the affected area. For general stains, a mild detergent diluted with warm water should suffice. For tougher stains, you may need to use a specialized stain remover recommended for your flooring type.
- Gently scrub the stains: Using a soft-bristle brush or a clean cloth, gently scrub the stained area in a circular motion. Avoid using abrasive scrubbing pads or harsh chemicals that may damage the floor surface.
- Rinse the area: Once the stains have been treated, rinse the area with clean water to remove any residue or cleaning solution. Wipe it dry with a clean cloth.
- Repeat if necessary: For stubborn stains that don’t completely come out, you may need to repeat the cleaning process. Be patient and persistent, as some stains may require multiple treatments to fully remove.
By removing stains or spots before waxing, you’ll ensure a clean and uniform surface for the application of wax, resulting in a polished and blemish-free finish.
Read more: How To Remove Floor Wax From Laminate Floors
Step 4: Choose the Right Wax
Choosing the right wax for your floor is crucial to achieve the desired result. There are various types of floor wax available, each with its own characteristics and suitability for different types of flooring. Here are some factors to consider when selecting the appropriate wax:
- Floor type: Determine the type of flooring you have, whether it’s hardwood, vinyl, laminate, or another material. Different types of flooring may require specific types of wax, so be sure to choose a wax that is formulated for your specific floor type.
- Finish preference: Consider the level of shine or sheen you desire for your floor. Waxes come in different finishes, such as high-gloss, semi-gloss, or matte. Choose a wax that aligns with your aesthetic preference and the overall look you want to achieve.
- Wax type: There are two main types of floor wax: paste wax and liquid wax. Paste wax is more durable and long-lasting, while liquid wax is easier to apply. Consider your personal preference and the level of maintenance you’re willing to commit to when choosing between the two.
- Compatibility: Ensure that the wax you choose is compatible with any previous wax or finish that may be on your floor. Using incompatible waxes can lead to uneven application, adhesion issues, or even damage to the floor surface.
- Manufacturer recommendations: Read the manufacturer’s instructions and recommendations on the wax packaging. They often provide guidance on specific floor types, application techniques, and any additional steps needed for optimal results.
Taking the time to choose the right wax for your floor will ensure that you achieve a beautiful, long-lasting finish that enhances the overall appearance of your space.
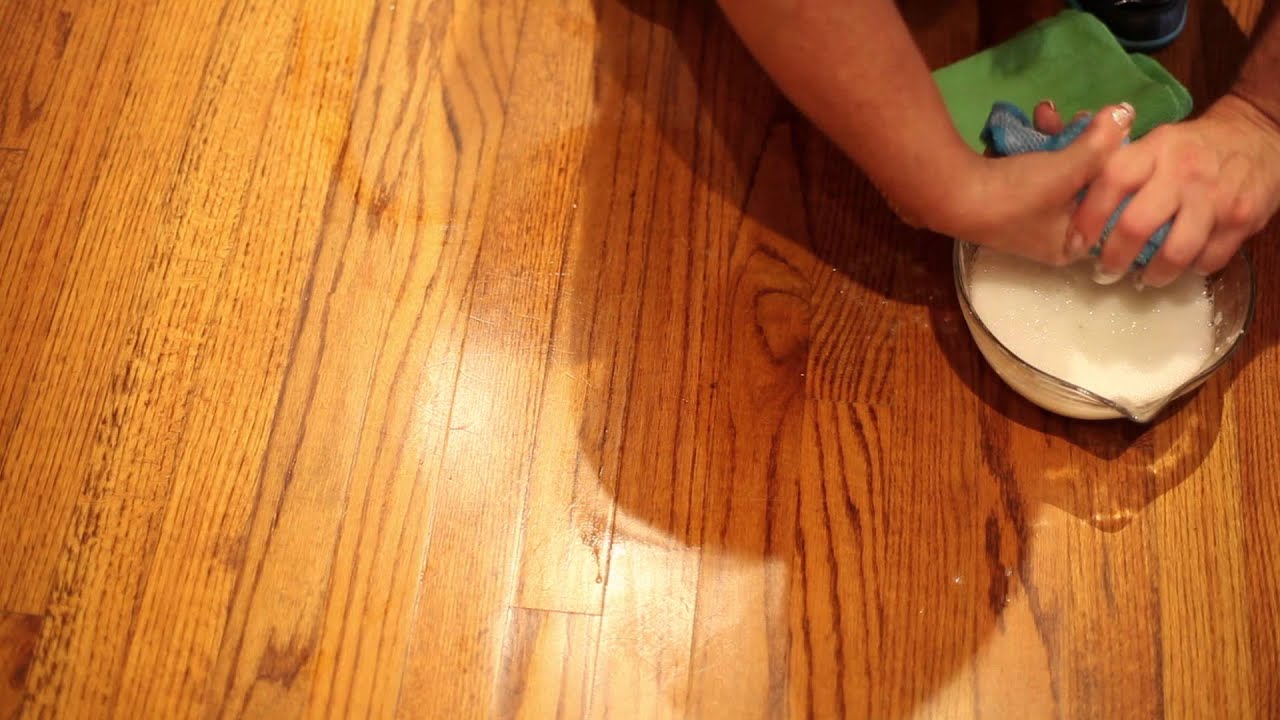
Step 5: Apply the Wax
Now that your floor is clean and prepared, it’s time to apply the wax. Here’s how to apply the wax effectively:
- Read the instructions: Before applying the wax, carefully read the instructions provided by the manufacturer. Different waxes may have specific application techniques or instructions for optimal results.
- Wear protective gloves: Put on a pair of protective gloves to shield your hands from the wax and any potential chemicals.
- Pour the wax: Pour a small amount of wax into a clean bucket or container. Avoid pouring too much at once to prevent wastage and spills.
- Dip the mop or applicator pad: Dip the terry cloth mop or wax applicator pad into the bucket containing the wax. Ensure that the mop or pad is evenly coated with wax, but not dripping excessively.
- Start from one corner: Begin applying the wax from one corner of the room. Work in small sections to ensure even coverage.
- Apply in a thin, even layer: Use smooth, overlapping strokes to apply the wax in a thin and even layer. Avoid applying too much wax in one area, as it can lead to drying inconsistencies and an uneven finish.
- Follow the grain: If you’re waxing a hardwood floor, follow the direction of the wood grain to achieve a more natural and seamless appearance.
- Continue across the floor: Move across the floor, section by section, until the entire floor is covered with the wax. Take breaks as needed to prevent fatigue and maintain a consistent application.
Applying the wax properly is key to achieving a smooth and glossy finish. Take your time and ensure thorough coverage for the best results.
Make sure to thoroughly clean the floor before waxing to remove any dirt or debris. This will ensure a smooth and even application of the wax, leading to a better finish.
Step 6: Spread the Wax
After applying the wax, it’s important to spread it evenly across the floor surface. This step ensures that the wax is distributed uniformly for a consistent finish. Follow these steps to spread the wax effectively:
- Use a clean mop or wax spreader: Switch to a clean mop or a wax spreader tool specifically designed for spreading wax. These tools help to evenly distribute the wax and ensure a smooth application.
- Work in small sections: Divide the floor into manageable sections and focus on one section at a time. This allows you to spread the wax evenly without it drying too quickly.
- Spread in a back and forth motion: Begin spreading the wax in a back and forth motion, moving with the grain of the floor if applicable. This helps to ensure that the wax is distributed evenly and reaches into all the crevices of the floor.
- Apply light pressure: Apply light pressure as you spread the wax to ensure it is spread thin and even. Avoid pressing too hard, as this can lead to excess wax buildup in certain areas.
- Overlap the sections: As you move from one section to the next, overlap the waxed areas slightly. This helps to blend the newly applied wax with the previous section, achieving a seamless finish.
- Check for missed spots: After spreading the wax, check the floor for any missed spots or areas that may require additional wax. Touch up these areas as needed to ensure complete coverage.
Spreading the wax evenly is crucial to achieving a consistent and professional-looking finish. Take your time and be thorough in this step for the best results.
Step 7: Allow the Wax to Dry
Once you have spread the wax across the floor, it’s important to allow it to dry properly. Allowing the wax to dry ensures that it sets and forms a protective layer on the surface. Follow these steps to ensure adequate drying time for the wax:
- Check the product instructions: Refer to the product instructions provided by the manufacturer for the recommended drying time. Different waxes may have varying drying periods, so it’s important to follow the instructions specific to the product you are using.
- Avoid walking on the floor: While the wax is drying, it’s important to avoid walking on the freshly waxed areas. This prevents any footprints or smudges from disrupting the drying process and potentially damaging the finish.
- Provide ample ventilation: Ensure that the room is well-ventilated during the drying process. Opening windows or using fans can help speed up the drying time by promoting air circulation, especially in humid environments.
- Observe the wax’s appearance: As the wax dries, it will transition from a glossy, wet look to a more matte or semi-gloss finish. This visual cue indicates that the wax is drying and setting properly.
- Avoid premature contact with furniture: If you have moved furniture out of the room, refrain from placing it back until the wax is completely dry. Premature contact with furniture can leave indents or marks on the newly waxed surface.
Allowing the wax to dry thoroughly is crucial to ensure maximum protection and longevity of the finish. Take the recommended drying time into account and exercise patience to achieve the best results for your floors.
Read more: How To Clean Wax Off Floor
Step 8: Buff the Floor
Buffing the floor is an important step to enhance the shine and smoothness of the waxed surface. Buffing helps to eliminate any imperfections or unevenness in the wax, resulting in a polished and flawless finish. Follow these steps to effectively buff your floor:
- Choose a buffer: Select a floor buffer or polisher machine that is appropriate for your floor type. If you don’t have access to a machine, a clean, soft cloth can be used for manual buffing.
- Attach a buffing pad: If you’re using a floor buffer, attach a clean, soft buffing pad to the machine according to the manufacturer’s instructions. Ensure that the pad is securely fastened to prevent accidents or damage.
- Start in a corner: Begin buffing in a corner of the room, working your way toward the exit. This ensures that you don’t inadvertently walk on the freshly buffed areas.
- Move in overlapping strokes: Slowly move the buffer across the floor surface in smooth, overlapping strokes. The motion should be gentle and consistent to achieve an even buffing effect.
- Focus on high-traffic areas: Pay extra attention to high-traffic areas such as hallways or entryways that may require additional buffing. These areas tend to accumulate more wear and may benefit from extra attention.
- Buff in small sections: Divide the floor into small sections and buff each section thoroughly before moving on to the next. This ensures that all areas receive equal buffing and achieve a consistent shine.
- Utilize different angles: Vary the direction and angles at which you buff the floor to ensure that you reach all areas and achieve an even finish. This prevents any streaks or unevenness in the final appearance.
- Inspect for missed spots: Once you have finished buffing the entire floor, inspect the surface for any missed spots or areas that require further buffing. Address these areas as needed to achieve a uniform shine.
Buffing the floor helps to bring out the full luster and smoothness of the waxed surface. Take your time and be thorough in this step to achieve a beautiful and glossy finish for your floors.
Step 9: Apply Additional Coats (Optional)
Applying additional coats of wax is an optional step that can further enhance the appearance and durability of your floors. Multiple coats create a thicker protective layer and can provide a higher level of shine. Although additional coats are not always necessary, they can be beneficial, especially for high-traffic areas. Follow these guidelines if you choose to apply additional coats:
- Allow the initial coat to dry: Before applying additional coats, ensure that the initial coat of wax has dried completely. Refer to the product instructions for the recommended drying time.
- Clean the floor between coats: Before applying another layer of wax, thoroughly clean the floor to remove any dust, debris, or imperfections that may have accumulated during the drying process. Use a soft cloth or mop and a mild cleaner if necessary.
- Apply the second coat: Once the floor is clean, repeat the waxing process described in the earlier steps. Apply the second coat of wax in the same manner as the first, ensuring even coverage and a thin layer.
- Follow recommended drying times: Allow each additional coat to dry completely before applying the next one. This ensures proper adhesion and prevents any issues with the finish.
- Assess the desired shine: After applying the additional coats, assess the level of shine and protection achieved. If you’re satisfied with the appearance, you can stop at this point. If not, you may choose to apply further coats, following the same process.
Applying additional coats of wax is optional and depends on your preference for the level of shine and protection you want to achieve. It can be particularly beneficial for high-traffic areas that require an extra layer of durability.
Step 10: Maintain the Wax Finish
Maintaining the wax finish is essential to prolong the lifespan and appearance of your floors. Regular upkeep will ensure that the wax remains intact and continues to provide the desired shine and protection. Follow these maintenance tips to keep your waxed floors looking their best:
- Regular sweeping or vacuuming: Make it a habit to sweep or vacuum your floors regularly to remove any loose dirt, dust, or debris. This prevents particles from scratching or dulling the wax finish.
- Avoid excessive water: While waxed floors are generally water-resistant, excessive moisture can still cause damage. Clean up spills immediately and avoid using excessive water when mopping. Use a damp mop rather than a wet mop to prevent over-saturation.
- Use gentle cleaning solutions: When cleaning your floors, opt for mild detergents or floor cleaners specifically formulated for waxed surfaces. Harsh chemicals can strip away the wax and damage the finish.
- Protect high-traffic areas: Consider using area rugs or mats in high-traffic areas to minimize wear and tear on the waxed surface. Place doormats near entrances to prevent dirt and debris from being tracked onto the floors.
- Avoid dragging heavy furniture: When moving furniture, lift it instead of dragging it across the floor. Dragging heavy furniture can cause scratches or gouges in the wax finish.
- Touch up as needed: Over time, the waxed surface may develop small scratches or scuffs. To maintain the appearance, periodically touch up these areas by applying a thin layer of wax and buffing it until it blends with the surrounding area.
- Reapply wax as necessary: Depending on the amount of foot traffic and wear, you may eventually need to reapply a new coat of wax. Follow the same steps outlined in this article to prepare the floor, remove the old wax, and apply a fresh layer.
By following these maintenance practices, you can extend the life of your waxed floors and keep them looking beautiful for years to come.
Conclusion
Waxing your floors not only adds a beautiful shine but also provides protection against scratches and wear. By following the step-by-step process outlined in this article, you can achieve professional-quality results and enjoy the benefits of a well-maintained wax finish.
From preparing the floor to choosing the right wax, applying it correctly, and maintaining the finish, each step plays a crucial role in achieving a flawless and long-lasting result. Taking the time to properly prepare the floor, remove any stains, and choose the appropriate materials will ensure a successful waxing process.
Remember to spread the wax evenly, allow it to dry thoroughly, and buff the floor for a smooth and glossy finish. Applying multiple coats and maintaining the waxed surface through regular cleaning and careful maintenance will help prolong the life of the wax and keep your floors looking their best.
By following these guidelines and incorporating your creativity into the process, you can transform your hard floors into stunning focal points in your home or business. So gather your materials, roll up your sleeves, and get ready to enjoy the beauty and protection that a freshly waxed floor can provide.
Now, go ahead and confidently tackle the task of waxing your floors, knowing that you have the knowledge and expertise to achieve amazing results!
Frequently Asked Questions about How To Wax A Floor
Was this page helpful?
At Storables.com, we guarantee accurate and reliable information. Our content, validated by Expert Board Contributors, is crafted following stringent Editorial Policies. We're committed to providing you with well-researched, expert-backed insights for all your informational needs.


0 thoughts on “How To Wax A Floor”