Articles
How To Make Wax For Candles At Home
Modified: October 20, 2024
Learn how to make wax for candles at home with our informative articles. Get step-by-step instructions and expert tips for a successful DIY candle making experience.
(Many of the links in this article redirect to a specific reviewed product. Your purchase of these products through affiliate links helps to generate commission for Storables.com, at no extra cost. Learn more)
Introduction
Welcome to the world of candle-making! Making your own candles at home can be a fun and rewarding hobby. Not only do you get the satisfaction of creating something with your own hands, but you also have the ability to customize the candles to your preferences. From choosing the wax and adding color and fragrance, to selecting the perfect molds and trimming the wicks, every step of the candle-making process allows for creativity and personalization.
Whether you are a beginner or have some experience in candle-making, this article will guide you through the process of making wax candles at home. We will cover the necessary safety precautions, the materials and supplies you will need, and provide step-by-step instructions for each stage of the candle-making process. By the end, you will have beautiful homemade candles ready to light up your space or gift to your loved ones.
Before we dive into the specifics, it’s important to note that working with hot wax and open flames carries some risks. Always prioritize safety and take the necessary precautions to protect yourself and your surroundings. Make sure to work in a well-ventilated area, away from flammable objects, and never leave hot wax or lit candles unattended.
Now that we’ve covered the essentials, let’s gather our materials and get started on our candle-making adventure!
Key Takeaways:
- Embrace the joy of candle-making by prioritizing safety, gathering materials, choosing the right wax, and adding color and fragrance to create personalized, enchanting homemade candles.
- Enjoy the therapeutic and rewarding process of crafting homemade candles, from preparing molds and pouring wax to trimming wicks, testing, and sharing the warm glow and captivating scents with loved ones.
Read more: How To Melt Wax To Make Candles
Safety Precautions
When it comes to any DIY project, safety should always be the top priority. Candle-making involves the use of hot wax and open flames, so it’s crucial to take the necessary precautions to prevent accidents and injuries. Here are some safety guidelines to keep in mind:
- Choose a well-ventilated area: Ensure that you have enough ventilation in the room where you’ll be working. This will help dissipate any fumes that may be released during the candle-making process.
- Protect your work surface: Place a heat-resistant surface, like a silicone mat or a metal tray, beneath your candle-making area. This will protect your countertop or table from any spills or drips of hot wax.
- Wear protective clothing and gear: Wear long sleeves and protective gloves to shield your skin from hot wax splatters and potential burns. Safety goggles are also recommended to protect your eyes from any flying wax or chemicals.
- Keep flammable objects away: Ensure that there are no flammable materials or objects near your candle-making workspace. This includes curtains, paper, and other combustible items.
- Use appropriate equipment: Make sure to use appropriate tools and equipment, such as a double boiler or a dedicated melting pot for wax. Never use containers that are meant for cooking food or other purposes.
- Handle hot wax with caution: Be careful while working with hot wax, as it can cause severe burns. Take your time and use protective equipment while pouring and handling the melted wax.
- Never leave candles unattended: Always supervise lit candles and never leave them burning unsupervised. This will help prevent accidental fires or other accidents.
- Keep an extinguisher nearby: Have a fire extinguisher or a bucket of sand close by in case of emergencies. This will help you extinguish any fires quickly and safely.
By following these safety precautions, you can ensure a secure and enjoyable candle-making experience. Now that we have addressed safety, let’s move on to gathering the materials and supplies necessary for making your own candles at home.
Gathering Materials and Supplies
Before you start making candles, it’s important to gather all the necessary materials and supplies. Having everything prepared ahead of time will ensure a smooth candle-making process. Here’s a list of what you’ll need:
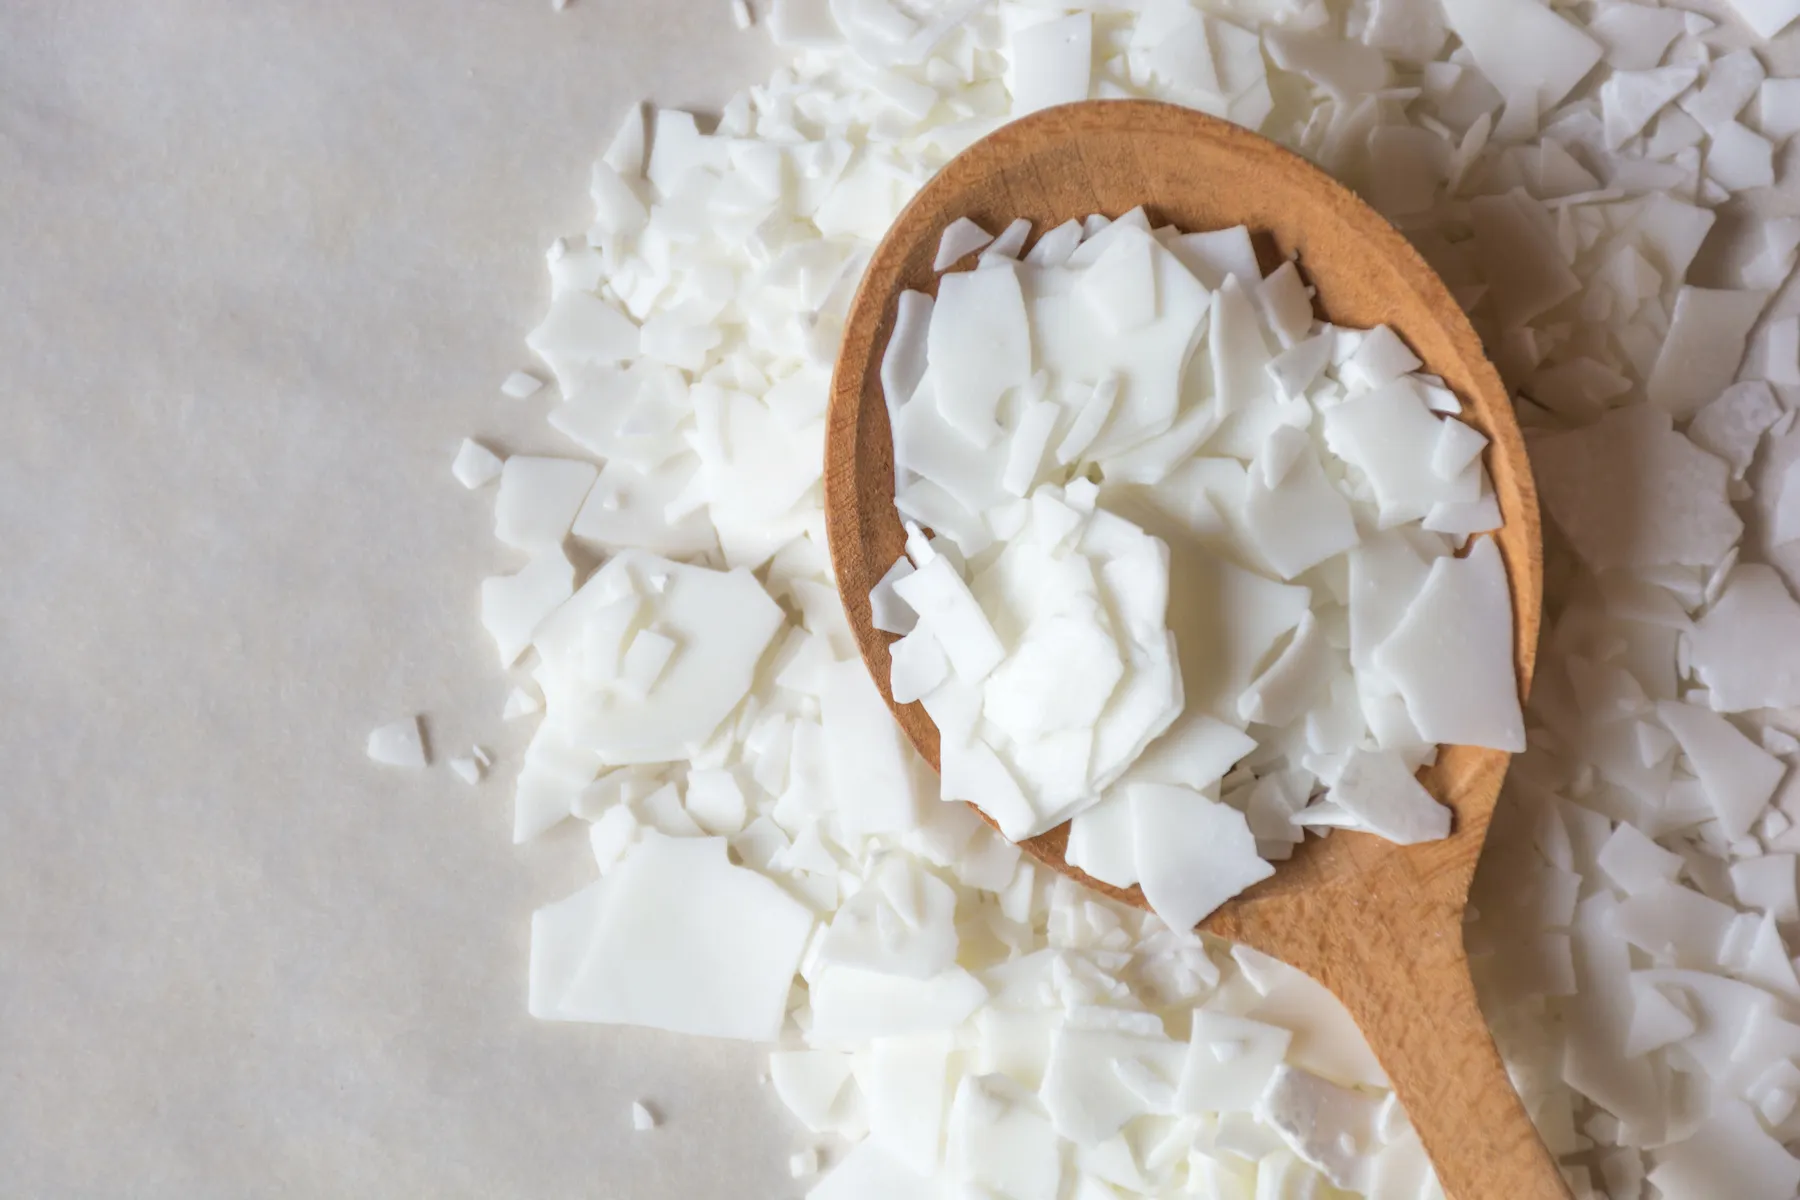
- Wax: The main component of candles, wax comes in different types, such as soy wax, beeswax, and paraffin wax. Choose the wax that suits your preferences and requirements. Ensure that the wax is specifically designed for candle-making.
- Wicks: Wicks are the strings that provide the fuel for the flame. Make sure to choose wicks that are appropriate for the size of the candle you intend to make. Pre-tabbed wicks are recommended, as they come with metal tabs that make the insertion process easier.
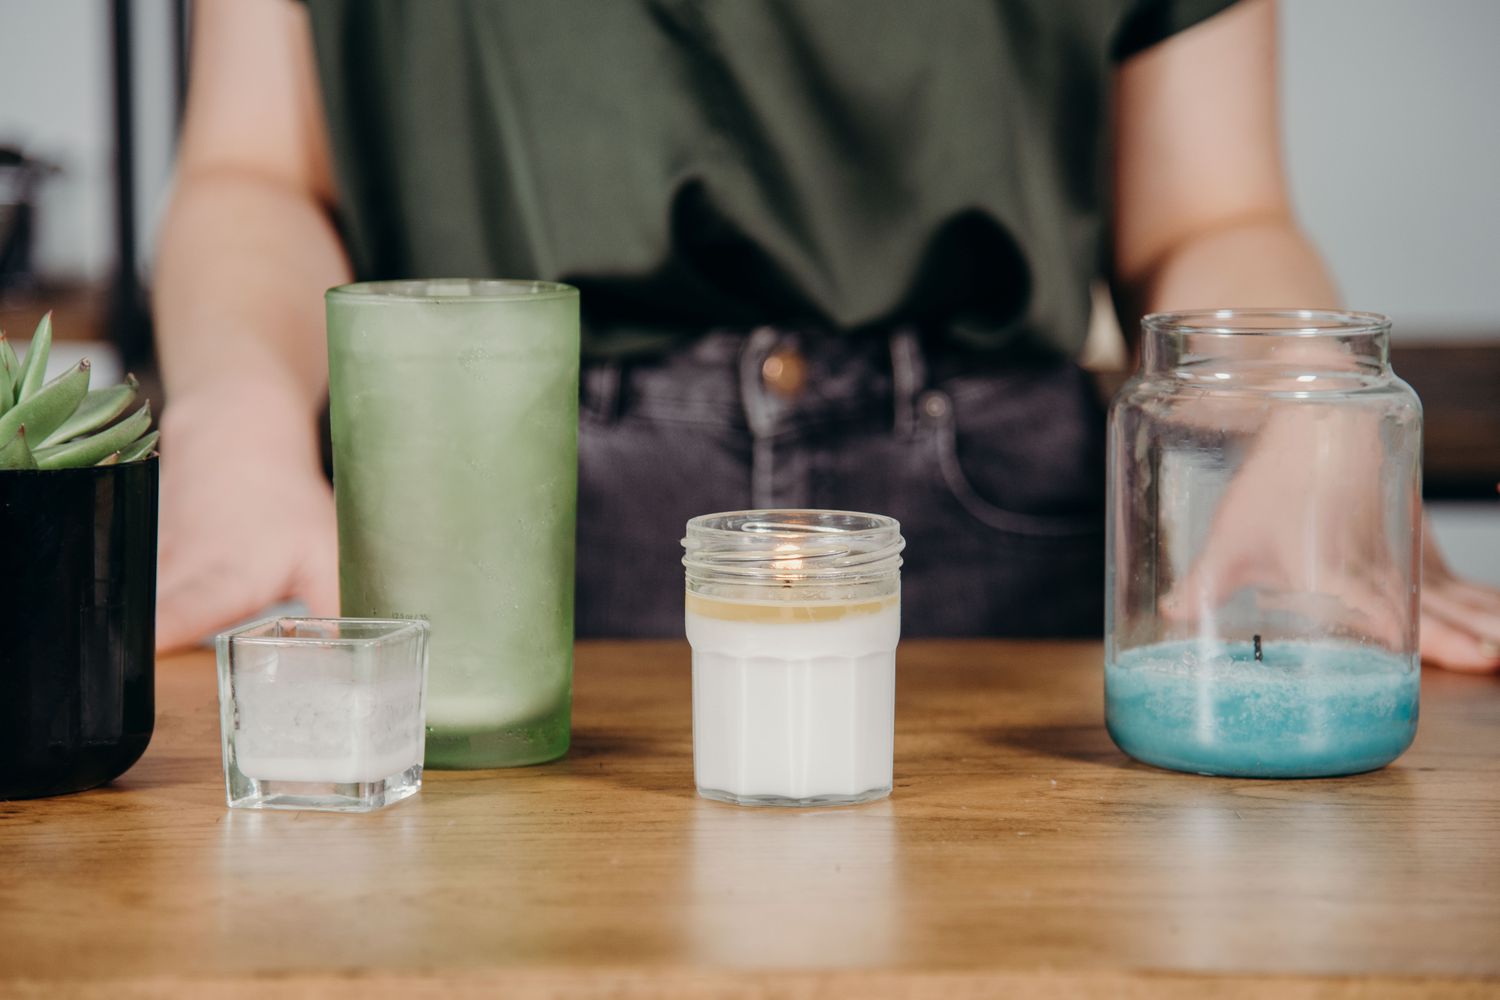
- Candle containers or molds: Decide whether you want to make container candles or molded candles. For container candles, you can use various heat-resistant containers like glass jars or metal tins. If you prefer molded candles, consider silicone or metal molds.
- Fragrance oils or essential oils (optional): If you want scented candles, choose fragrance oils or essential oils that are safe for candle-making. Ensure that the oils are specifically formulated for this purpose and are suitable for the type of wax you are using.
- Candle dyes (optional): If you want to add color to your candles, consider using candle dyes. These dyes are specifically formulated for candle-making and will blend well with the wax.
- Double boiler or dedicated melting pot: To melt the wax, you’ll need a heat-resistant container. A double boiler setup or a dedicated melting pot is ideal for this purpose. Avoid using pots or containers that are meant for food preparation.
- Thermometer: A candle-making thermometer will help you monitor the temperature of the melted wax. This is important for achieving the correct pouring temperature and ensuring optimal candle performance.
- Stirring utensil: Use a heat-resistant stirring utensil, such as a stainless steel spoon or a silicone spatula, to mix the wax and additives.
- Scale: Measuring the wax and other ingredients by weight is more accurate than using volume measurements. Invest in a kitchen scale or a digital scale to ensure precise measurements.
- Protective gear: To ensure your safety, don’t forget to gather protective gear such as gloves, safety goggles, and an apron. These will help protect you from hot wax splatters and potential injuries.
Take your time to gather all the materials and supplies before you begin your candle-making journey. Once you have everything ready, you’ll be prepared to move on to the next step: choosing the right wax.
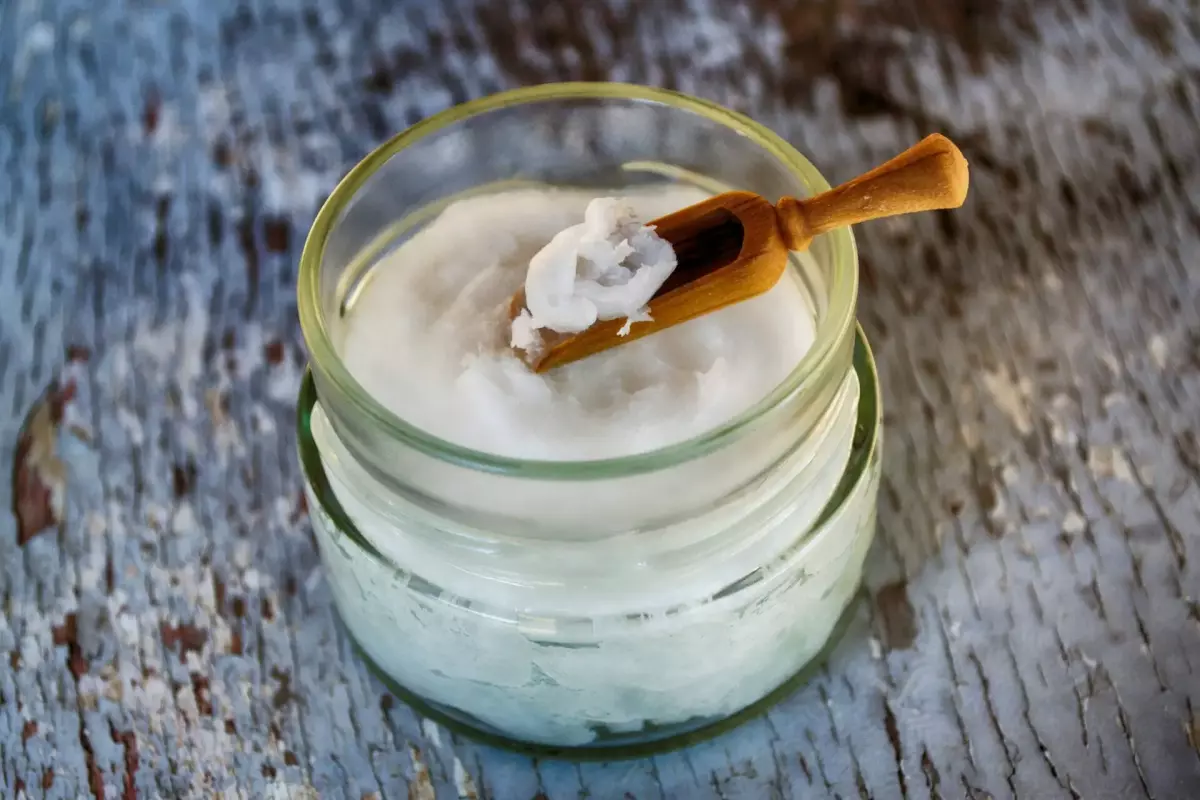
Choosing the Right Wax
Choosing the right wax is an essential step in candle-making. Different types of wax have distinct characteristics that will affect the final appearance and performance of your candles. Here are a few common types of wax to consider:
- Soy Wax: Soy wax is a popular choice among candle makers due to its natural and renewable origin. It burns cleanly and has a longer burn time compared to other waxes. Soy wax also has excellent fragrance retention, making it ideal for scented candles.
- Beeswax: Beeswax is a natural wax produced by bees. It has a warm and natural scent and burns slowly. Beeswax candles have a beautiful natural color and a subtle honey-like fragrance. They are often used for their air-purifying properties.
- Paraffin Wax: Paraffin wax is a petroleum-based wax commonly used in candle-making. It is widely available and affordable. Paraffin wax can produce vibrant colors and has excellent scent throw. However, it may release more soot compared to other waxes.
- Palm Wax: Palm wax is derived from palm oil and produces unique crystalline patterns when the candle cools. It has a long burn time and good scent throw. Ensure that the palm wax you choose is sustainably sourced to support environmentally-friendly practices.
Consider the following factors when choosing the right wax:
- Desired Candle Appearance: Some waxes, like soy wax and beeswax, have a natural and rustic appearance. If you prefer a more refined and smooth finish, paraffin or palm wax might be better options.
- Fragrance Retention: If you intend to make scented candles, choose a wax with good fragrance retention like soy wax. This will ensure that the scent is effectively released as the candle burns.
- Burn Time: Consider the burn time you desire for your candles. Soy wax and beeswax tend to have longer burn times compared to paraffin wax.
- Environmental Impact: If sustainability is important to you, opt for natural waxes like soy wax or beeswax, as they are renewable and biodegradable. Ensure that any palm wax you choose is sustainably sourced.
Keep in mind that there is no one-size-fits-all answer when it comes to choosing the right wax. It ultimately depends on your personal preferences, specific project requirements, and candle-making goals. Experimenting with different waxes can be a fun way to explore and find the perfect wax for your homemade candles.
With the wax selected, we’re ready to move on to the next step: melting the wax.
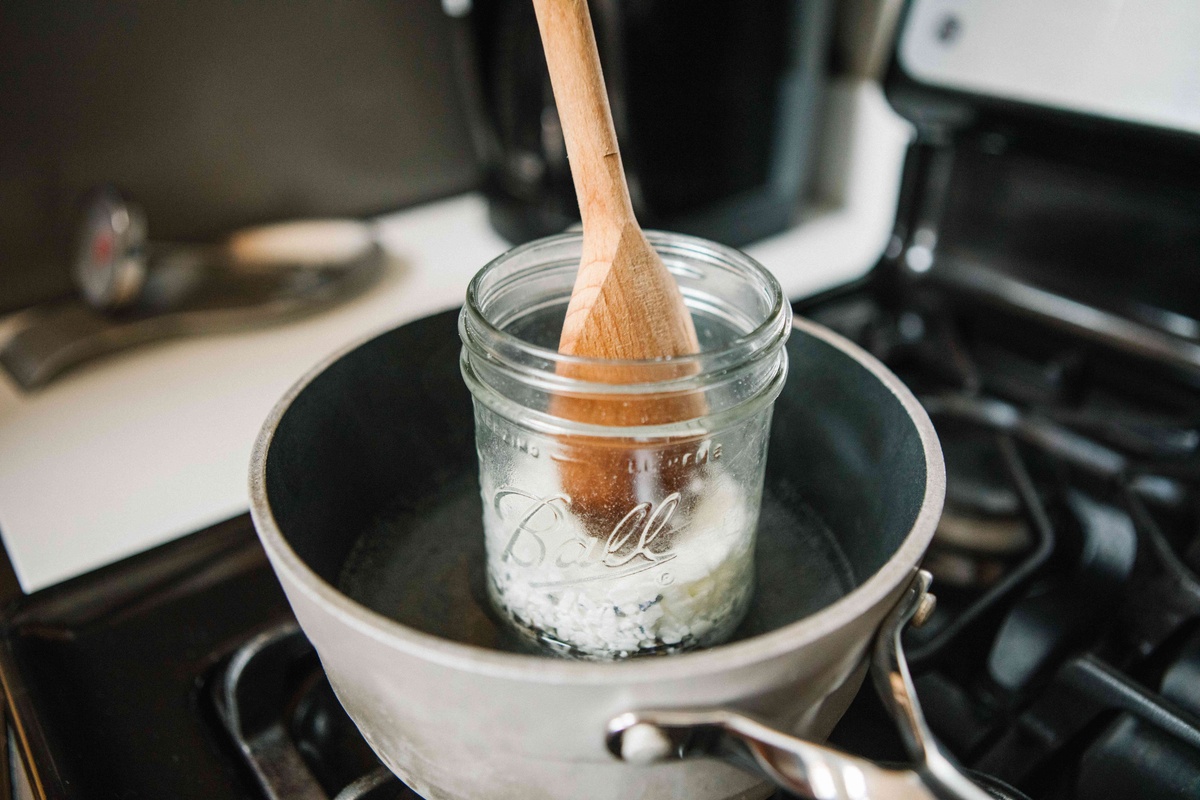
Melting the Wax
Now that you have chosen the right wax for your candles, it’s time to begin the process of melting it. Properly melting the wax is crucial for achieving a smooth and even consistency. Follow these steps to melt the wax safely and efficiently:
- Prepare your melting equipment: Set up a double boiler or use a dedicated melting pot specifically designed for candle-making. Fill the lower pot or container with water and place it on the stove. Place the wax in the top pot or container without allowing it to come into direct contact with the water.
- Measure the wax: Use a kitchen scale or a digital scale to measure the desired amount of wax. Remember to take into account the container size and the desired final volume of your candles.
- Heat the water: Turn on the stove and heat the water in the lower pot over medium heat. Gradually heat the water to simmering, but avoid bringing it to a rolling boil.
- Add the wax to the top pot: Once the water is simmering, place the top pot or container with the measured wax on top of the lower pot. The steam from the simmering water will gently melt the wax in the top pot.
- Monitor the temperature: Insert a thermometer into the wax to monitor the temperature during the melting process. Different waxes have different melting points, so refer to the manufacturer’s instructions for the optimal melting temperature.
- Stir the wax: As the wax melts, gently stir it using a heat-resistant stirring utensil. This will help distribute the heat evenly and ensure that the wax melts uniformly.
- Continue heating until fully melted: Keep the heat on and stir occasionally until all the wax has completely melted and reached the desired temperature. Be patient during this process, as melting the wax too quickly can result in uneven consistency or air bubbles.
It’s important to note that different waxes have different melting points, so be sure to follow the specific instructions provided by the wax manufacturer. Once the wax is fully melted, you’re ready to move on to the next step: adding color and fragrance to your homemade candles.
Read more: How To Make Homemade Candles Without Wax
Adding Color and Fragrance
Adding color and fragrance to your homemade candles is a fun and creative way to personalize your creations. Whether you want vibrant, eye-catching colors or enticing scents, you can easily achieve the desired effect. Here’s how to add color and fragrance to your candles:
- Choosing candle dyes: If you want to add color to your candles, it’s best to use candle dyes specifically designed for this purpose. Candle dyes come in various forms, including liquid, chips, or blocks. Follow the manufacturer’s instructions for the recommended amount of dye to use based on the amount of wax.
- Adding color to the wax: Once your wax is fully melted and at the desired temperature, carefully add your chosen candle dye. Stir gently but thoroughly to ensure that the color is evenly distributed throughout the wax. Add more dye if you want a deeper or more vibrant color, and continue stirring until you achieve your desired shade.
- Choosing fragrance oils or essential oils: To add a pleasant scent to your candles, select fragrance oils or essential oils specifically formulated for candle-making. These oils come in a wide range of enticing scents. Make sure to choose oils that are safe to use with the type of wax you are using.
- Adding fragrance to the wax: Once your desired color is achieved, remove the melted wax from the heat source. Allow it to cool slightly (but not solidify) before adding the fragrance oil or essential oil. Follow the manufacturer’s recommendations for the proper amount of fragrance oil to add based on the amount of wax.
- Stirring the fragrance oil: Using a heat-resistant stirring utensil, gently stir the fragrance oil into the wax. Be thorough but gentle, ensuring that the fragrance is evenly incorporated throughout the wax. Take your time to enjoy the beautiful aroma that fills the room.
Keep in mind that both color and fragrance can be adjusted to your personal preferences. Experiment with different combinations and intensities to create unique and captivating candles.
Once you have added color and fragrance to your wax, we’re ready to move on to the next step: preparing the candle molds.
Preparing the Candle Molds
Preparing the candle molds is an important step in the candle-making process. Properly preparing the molds will ensure that your candles come out smoothly and retain their desired shape. Here’s how to prepare your candle molds:
- Clean and dry the molds: Before you begin, make sure your molds are clean and dry. Any dirt, residue, or moisture can affect the overall appearance and quality of your candles.
- Apply mold release agent (optional): If you’re using rigid molds made of materials such as metal or plastic, applying a mold release agent can make it easier to remove the candles once they’ve hardened. Simply spray or brush a thin layer of mold release agent onto the inside of the mold and allow it to dry before proceeding.
- Secure the wicks: If you’re making container candles, place a wick at the center of each container, making sure it reaches the bottom. You can use a wick sticker or a small dab of hot glue to secure the wick to the bottom of the container. For molded candles, place the wick vertically in the center of the mold, ensuring it’s straight and centered.
- Anchor the wicks (optional): To keep the wicks centered and straight during the pouring process, you can use various methods to anchor them. One method is to tie the wicks around a pencil or a chopstick and rest it across the top of the mold. Another method is to use wick pins or wick bars, which can be attached to the top of the mold to hold the wick in place.
- Check the mold stability: Make sure that your molds are secure and stable to prevent any leaks or accidents during the pouring process. If necessary, use adhesive putty or tape to seal any potential gaps or openings.
By following these steps, you’ll ensure that your candle molds are properly prepared and ready to receive the melted wax. Now that the molds are ready, it’s time to move on to the next step: pouring the wax into the molds.
When making wax for candles at home, use a double boiler to melt the wax slowly and evenly. This will help prevent the wax from burning or becoming discolored.
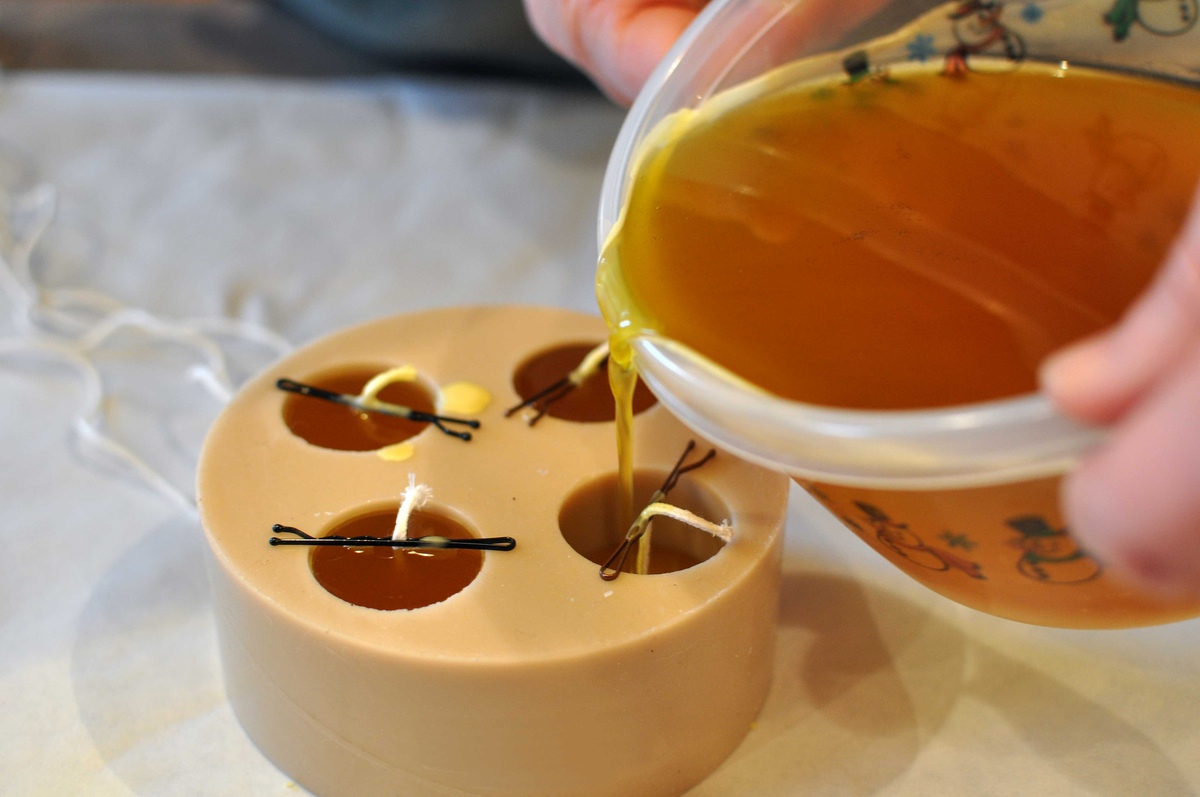
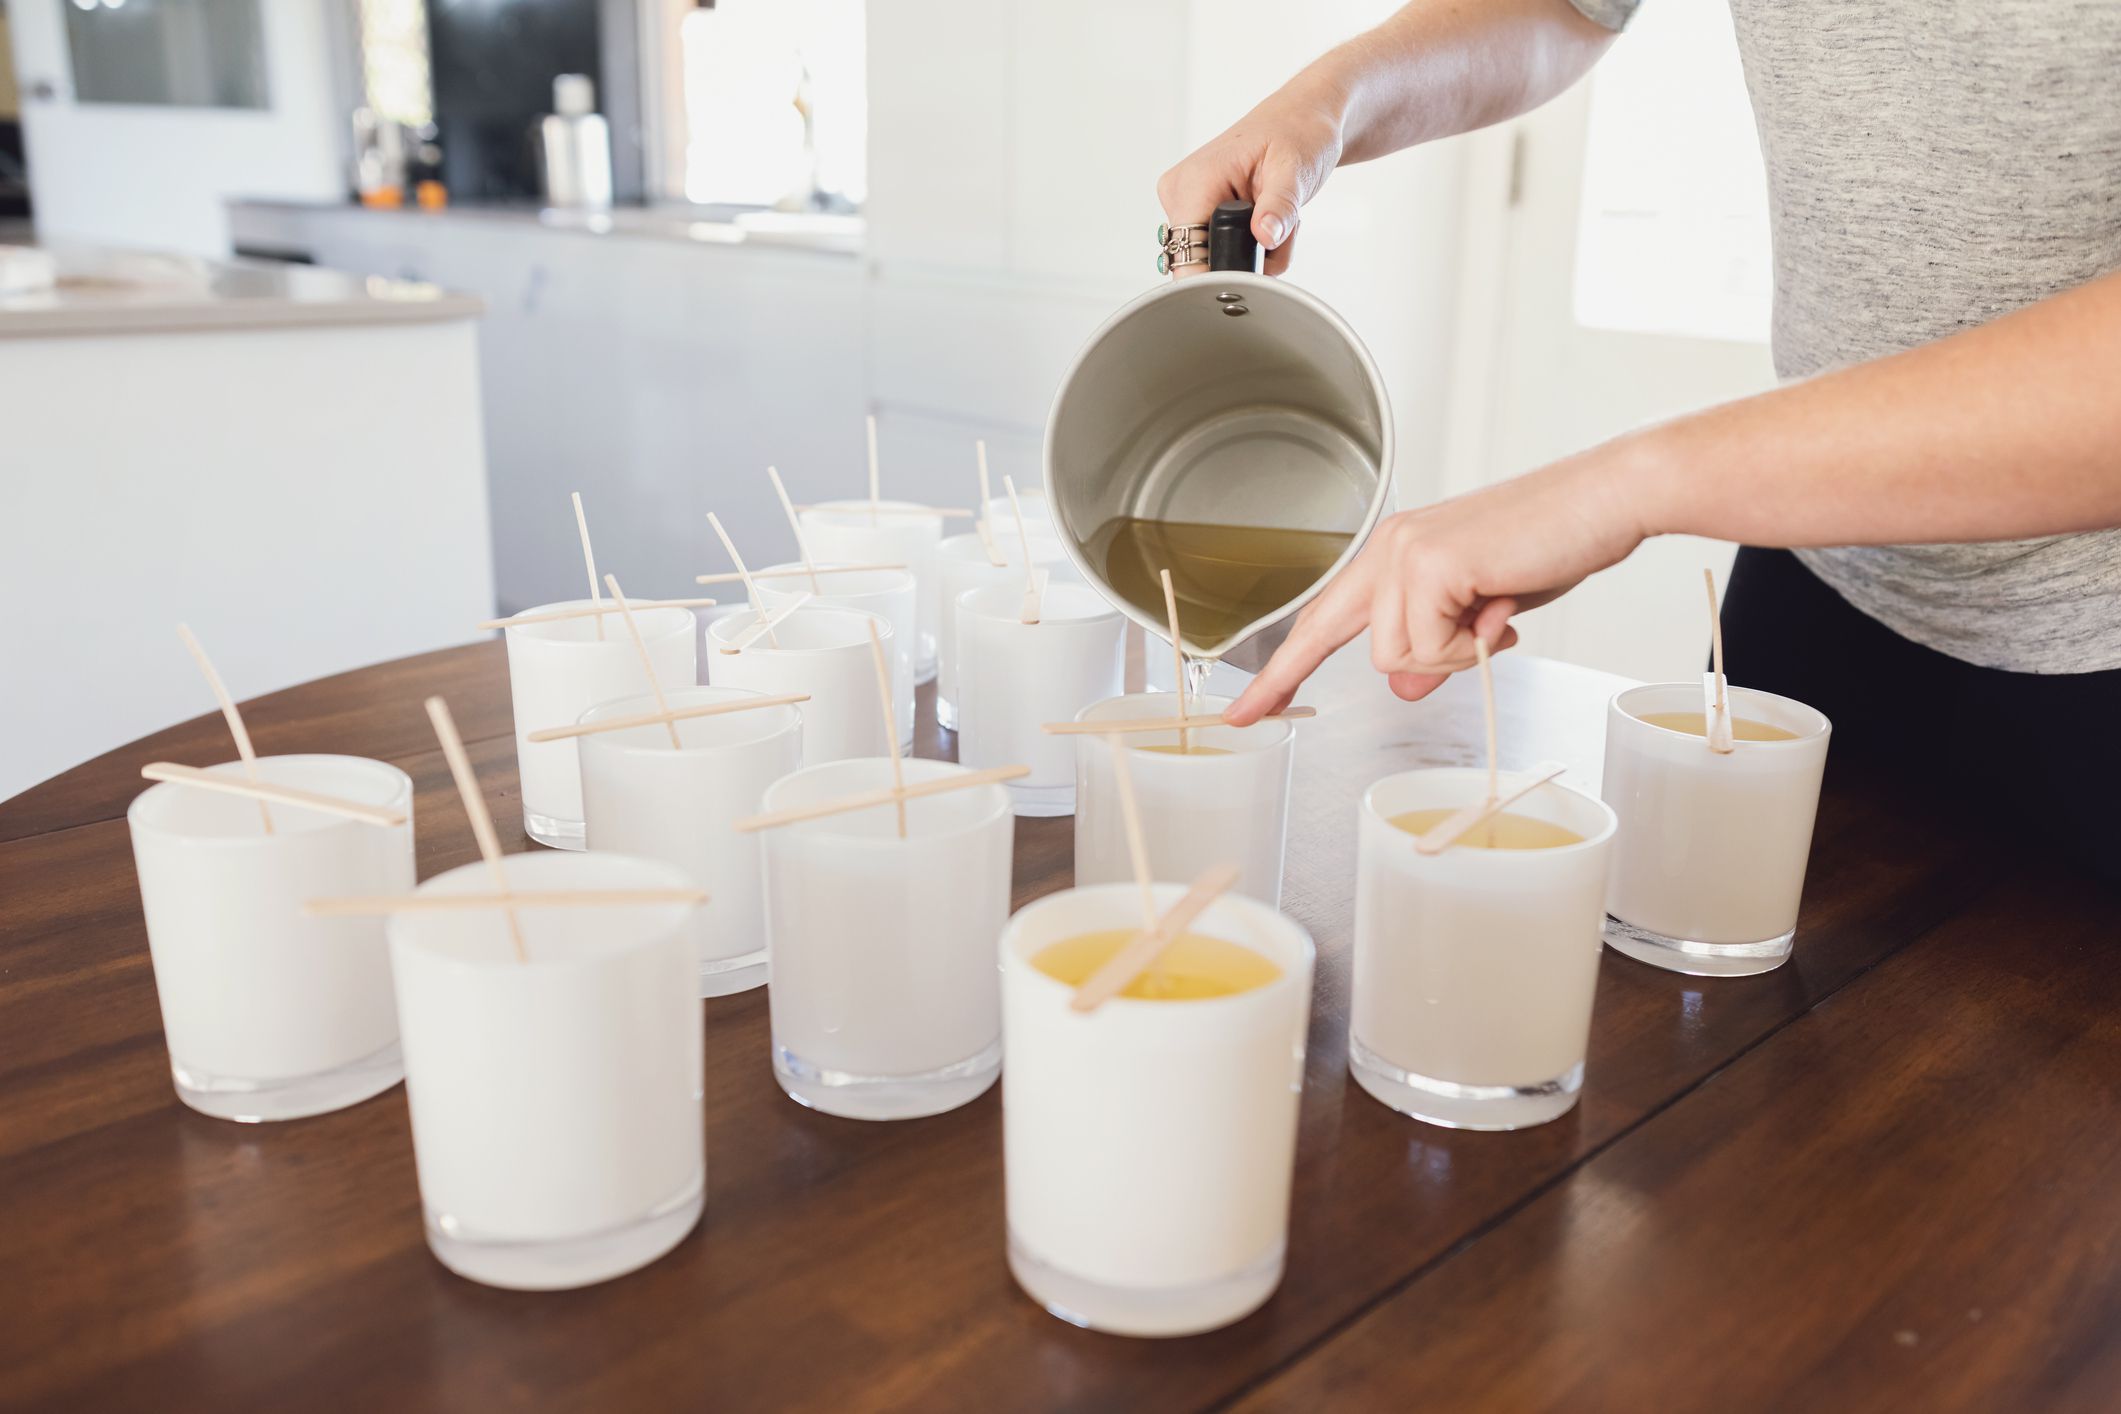
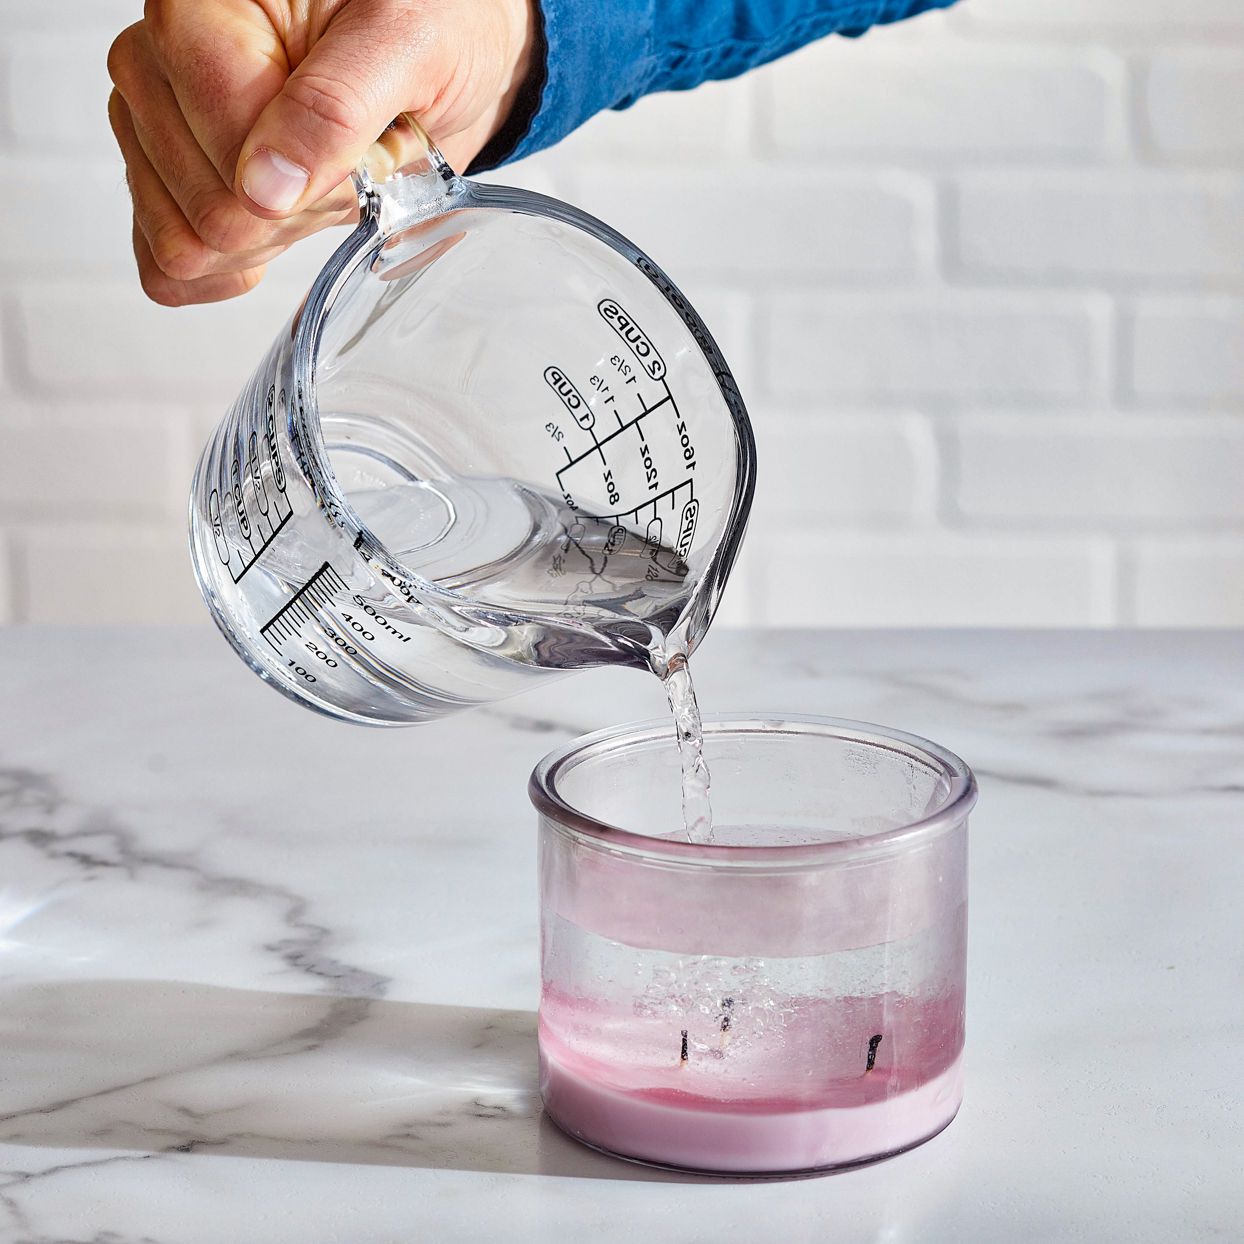
Pouring the Wax into Molds
With your molds prepared and everything in place, it’s time to pour the melted wax into the molds. This step requires precision and care to ensure that the wax fills the molds evenly and produces beautiful, professional-looking candles. Here’s how to pour the wax into the molds:
- Set up your workspace: Place a heat-resistant surface, such as a silicone mat or a metal tray, beneath your mold to catch any potential drips or spills. Make sure that your molds are arranged in a stable and easily accessible manner.
- Slowly pour the wax: Using steady and controlled movements, pour the melted wax into the molds. Start pouring from a low height to minimize the formation of air bubbles. Fill the molds up to the desired level, leaving a small amount of space at the top for later adjustments.
- Tap the molds: After pouring the wax, gently tap the molds on the table or countertop to release any trapped air bubbles. This will help ensure a smoother and more even finish for your candles.
- Adjust the wicks: As the wax begins to cool and solidify, take a moment to readjust the wicks if needed. If they have shifted or become off-centered, gently move them back to their proper position using a pair of tweezers or your fingers.
- Allow the wax to cool and harden: Let the wax cool and harden completely at room temperature. This process can take several hours, depending on the size and type of candle. Avoid moving or disturbing the molds during this time to ensure the formation of smooth, tangle-free candles.
It’s important to note that some shrinkage may occur as the wax cools and solidifies. To ensure a smooth and even surface on your finished candles, you may need to top them off with additional melted wax. Simply melt a small amount of wax and pour it into the indentations left by the cooling process.
Now that you have successfully poured the wax into the molds, it’s time to allow the candles to cool and harden completely. Once they are ready, we will move on to the next step: removing the candles from the molds.
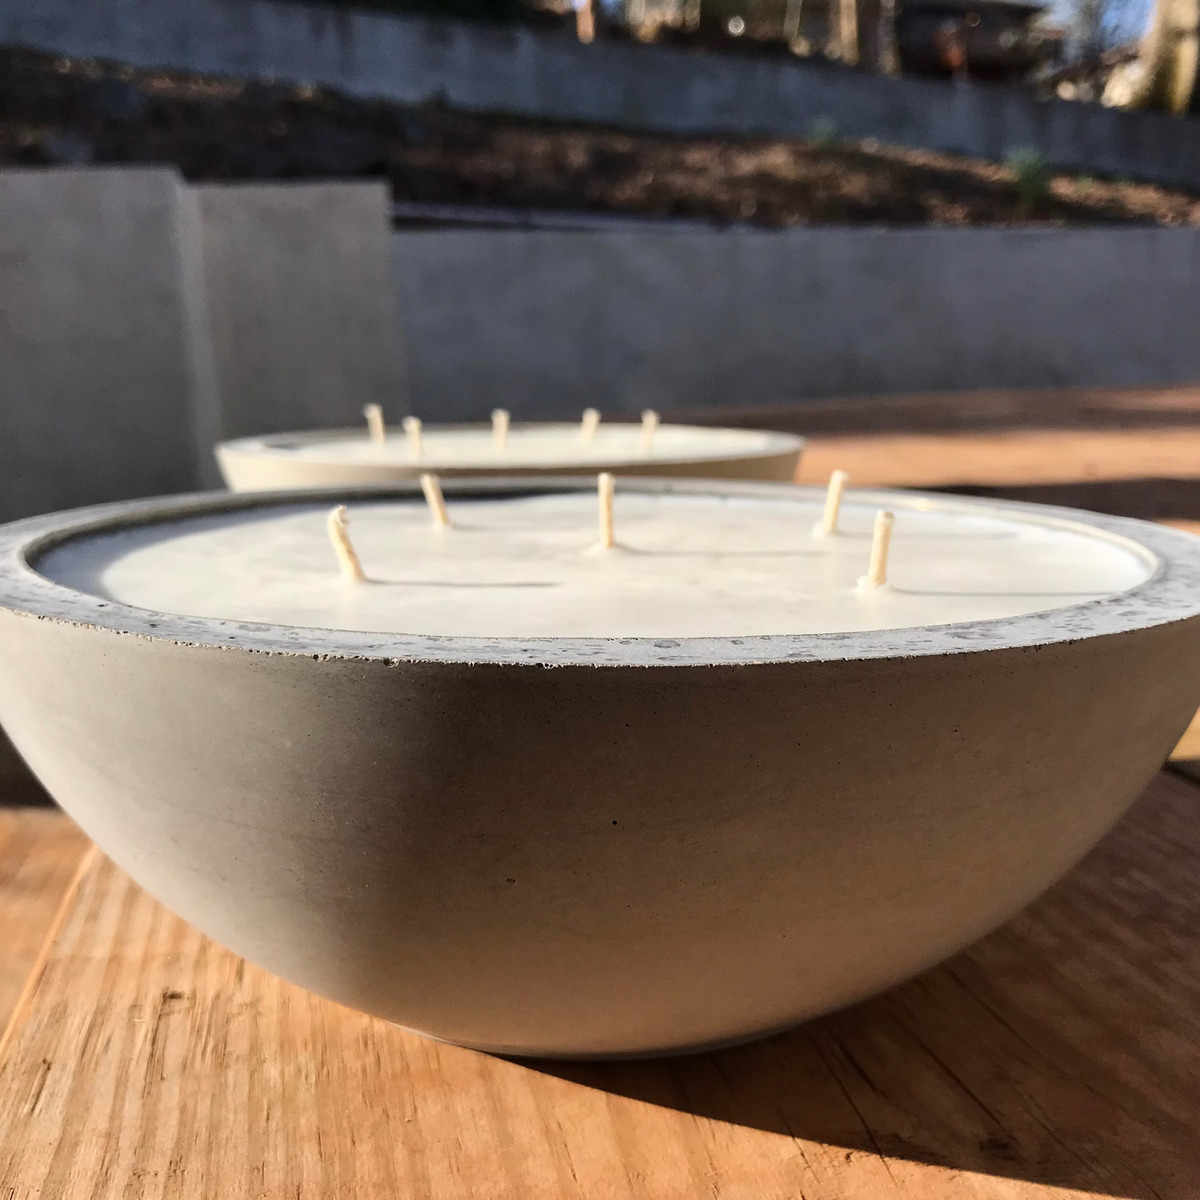
Allowing the Candles to Cool and Harden
After pouring the melted wax into the molds, it’s essential to allow the candles to cool and harden completely. This process is crucial for ensuring that the candles maintain their shape and integrity. Here’s what you need to do to allow the candles to cool and harden successfully:
- Find a designated cooling area: Choose a cool, dry place where you can leave the candles undisturbed as they cool and harden. Avoid areas with direct sunlight or drafts, as they can affect the cooling process and result in uneven surfaces.
- Be patient: The cooling and hardening time can vary depending on the size and type of candle. Typically, it takes several hours for the candles to cool completely. Avoid the temptation to touch or move the candles before they are fully hardened to prevent any mishaps or deformities.
- Check for completeness: To determine if the candles have thoroughly cooled and hardened, gently touch the surface of the wax. It should feel firm and solid without any signs of softness or pliability.
- Monitor the cooling process: Keep an eye on the candles as they cool, especially during the first hour or two. Occasionally check for any signs of sinkholes or uneven surfaces. If you notice any imperfections forming, you may need to top off the candles with additional melted wax to achieve a smooth and even appearance.
Remember, patience is key during this stage of candle-making. Rushing the cooling process can lead to cracked or misshapen candles. Allow the necessary time for the wax to cool and harden completely to achieve professional-looking and long-lasting candles.
Once the candles have cooled and hardened, we can move on to the next step: removing the candles from the molds.
Read more: How To Store Candle Wax
Removing the Candles from the Molds
Now that your candles have cooled and hardened, it’s time to remove them from the molds. Properly removing the candles ensures that they come out smoothly and retain their desired shape. Here’s how to remove the candles from the molds:
- Check for complete cooling and hardening: Before attempting to remove the candles, make sure they have cooled and hardened completely. Gently touch the surface to ensure they are firm and solid throughout.
- For container candles: If you made container candles, carefully loosen the sides of the candles by gently pressing around the edges with your fingers. This will help release the wax and make it easier to remove the candle from the container.
- For molded candles: If you made molded candles, gently press on the sides of the mold to release the vacuum seal. Then, carefully invert the mold and tap it on a soft surface to loosen the candle. The candle should slide out easily from the mold.
- Use caution: Be gentle and patient when removing the candles to avoid any breakage or damage. If a candle feels stuck, do not force it out. Instead, let it sit at room temperature for a little longer to ensure it has fully hardened before attempting to remove it again.
- Tidy up the candles: Once the candles are out of the molds, inspect them for any imperfections or rough edges. Use a small knife or a candle shaver to trim away any excess wax or uneven edges, if necessary.
After successfully removing the candles from the molds, you will have beautifully crafted candles ready to be enjoyed or gifted. Take a moment to admire your handiwork and appreciate the creative process you went through to bring these candles to life.
With the candles removed from the molds and any necessary tidying up done, we are now ready to move on to the next step: trimming the wicks.
Trimming the Wicks
Once you have removed the candles from their molds and tidied up any rough edges, it’s time to trim the wicks. Trimming the wicks not only enhances the aesthetic appearance of the candles but also promotes a safer and more efficient burn. Here’s how to trim the wicks:
- Ensure candles are completely cooled: Before trimming the wicks, make sure that the candles have cooled and hardened completely. This ensures that the wicks will be firm and less likely to bend or break during the trimming process.
- Inspect the wicks: Take a close look at each wick to identify any abnormalities or irregularities. Look out for wicks that are too long, bent, or have excess buildup around them.
- Measure and cut the wicks: Using a pair of sharp scissors, measure the desired length for the wicks. A good rule of thumb is to trim the wicks to approximately ¼ inch (6 mm) in length. Carefully cut each wick, ensuring a clean and straight cut.
- Remove trimmed wick remnants: After trimming, gently shake off or brush away any trimmed wick remnants or debris that may have settled on the candles.
- Dispose of trimmed wicks safely: Collect the trimmed wick remnants and dispose of them properly. Avoid leaving them on surfaces or near flammable materials.
Trimming the wicks not only improves the overall appearance of the candles but also helps promote a safer burning experience. Trimming the wick to the recommended length helps control the flame size, reduces soot and smoke, and prevents excessive mushrooming of the wick.
With the wicks neatly trimmed, your candles are now ready for the final step: testing and enjoying the fruits of your labor.
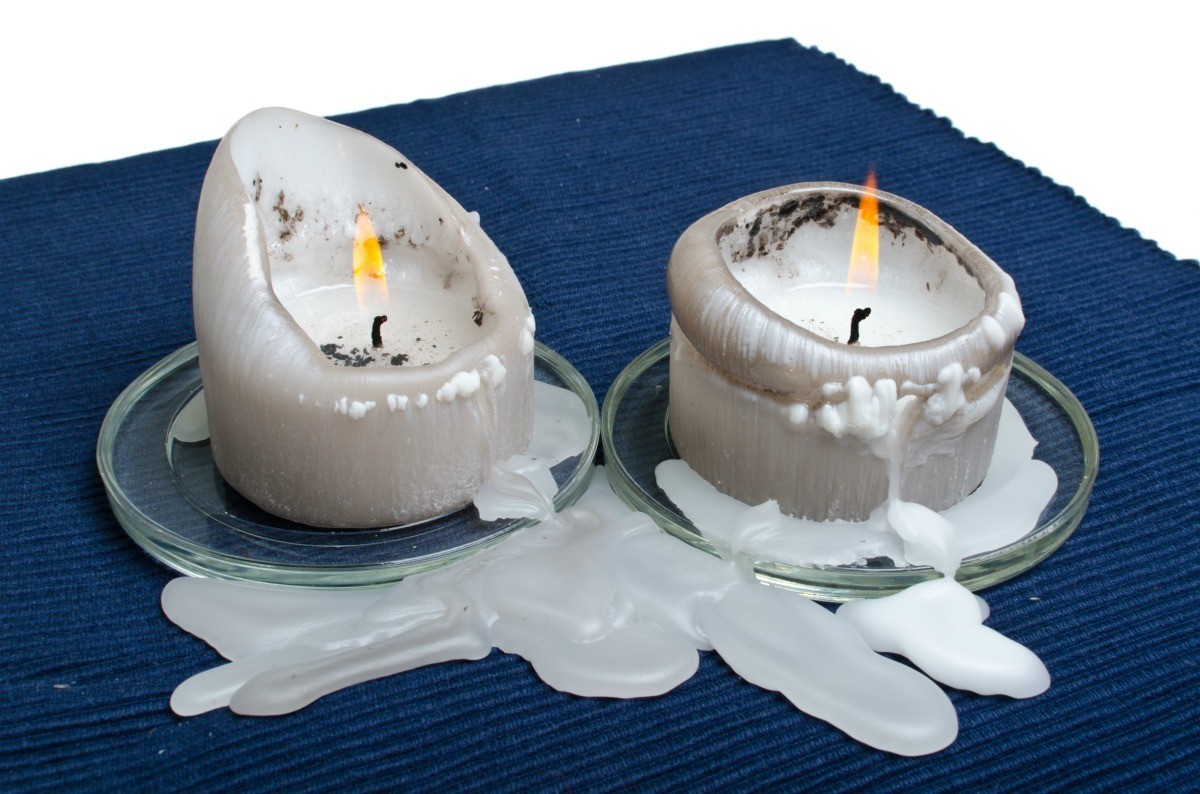
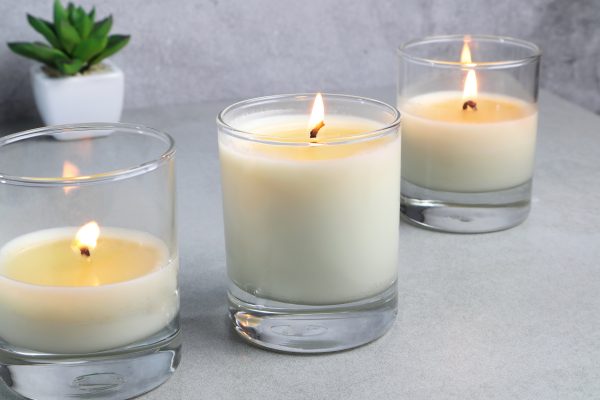
Testing and Enjoying the Homemade Candles
Now that you have successfully made and prepared your homemade candles, it’s time to test and enjoy the fruits of your labor. Here’s what you need to do to ensure your candles are safe, functional, and ready to be enjoyed:
- Perform a burn test: Before lighting your candle, it’s important to perform a burn test to ensure that everything is in order. Place the candle on a heat-resistant surface and light the wick. Observe the flame to ensure it burns steadily and without excessive flickering or excessive smoke.
- Monitor the first burn: During the first burn, it’s important to allow the wax to melt evenly across the entire surface of the candle. This will help prevent tunneling and promote an even burn in subsequent uses. Let the candle burn for at least one hour for each inch of its diameter.
- Keep an eye on the flame: While the candle is burning, make sure to keep an eye on the flame. Ensure that it remains at a moderate size and doesn’t come into contact with the container or any nearby objects. Never leave a burning candle unattended.
- Enjoy the fragrance: If you added fragrance oils or essential oils to your candles, delight in the beautiful scents that fill the air. Allow the aroma to create a relaxing and inviting atmosphere.
- Follow safety precautions: Always prioritize safety when using your homemade candles. Keep them away from flammable objects, children, and pets. Trim the wick before each use and never leave a burning candle unattended.
- Gift or display: Once you’ve tested and ensured that your homemade candles are safe and functional, you can choose to display them in your own space or gift them to friends and loved ones. Handcrafted candles make thoughtful and personal gifts for any occasion.
Congratulations on successfully making your own candles! The joy of creating something beautiful and functional with your own hands is truly rewarding. Now sit back, relax, and enjoy the warm and comforting glow of your homemade candles.
Before we conclude, remember to practice responsible candle usage and follow all safety guidelines. With this knowledge and experience, you can continue to explore the wonderful world of candle-making and create even more personalized and enchanting candles in the future.
Conclusion
Creating homemade candles can be a fulfilling and rewarding experience. From choosing the right wax and adding color and fragrance, to pouring the wax into molds and trimming the wicks, each step of the candle-making process allows for personalization and creativity. By following the necessary safety precautions and gathering the materials and supplies, you’re equipped to embark on your candle-making journey.
Through careful melting of the wax and adding color and fragrance, you bring your candles to life. Preparing and filling the molds with the melted wax, allowing them to cool and harden, and then removing the candles from the molds ensure that they maintain their desired shape and quality. Trimming the wicks is the final step, promoting safe and efficient burning.
Once your homemade candles are tested and enjoyed, you can proudly display them in your space or share them as thoughtful gifts with loved ones. The joy of crafting your own candles and witnessing the warm glow and mesmerizing scents they emit is truly magical.
As you continue your candle-making journey, don’t forget to explore different types of wax, experiment with colors and fragrances, and discover your own unique style. Let your creativity run wild and enjoy the therapeutic and artistic process of making homemade candles.
Remember, safety should always be a priority when working with hot wax and open flames. Take precautionary measures, follow instructions, and never leave a burning candle unattended.
So go ahead, let your imagination soar, and dive into the world of making beautiful and enchanting homemade candles. Enjoy the flickering ambiance and delightful aromas that will surely brighten any space and captivate the senses!
Frequently Asked Questions about How To Make Wax For Candles At Home
Was this page helpful?
At Storables.com, we guarantee accurate and reliable information. Our content, validated by Expert Board Contributors, is crafted following stringent Editorial Policies. We're committed to providing you with well-researched, expert-backed insights for all your informational needs.
0 thoughts on “How To Make Wax For Candles At Home”