Articles
How To Wire A Basement
Modified: January 6, 2024
Learn how to wire your basement with these informative articles. Get step-by-step instructions and expert tips for a successful wiring project.
(Many of the links in this article redirect to a specific reviewed product. Your purchase of these products through affiliate links helps to generate commission for Storables.com, at no extra cost. Learn more)
Introduction
Wiring a basement is a crucial step in creating a functional and well-lit space. Whether you’re planning to turn your basement into a home office, a gym, or a cozy living area, ensuring proper electrical wiring is essential for safety and convenience. An organized and carefully executed wiring project can provide you with a safe and efficient electrical system that will meet all your needs.
In this article, we will guide you through the process of wiring your basement. We’ll cover everything from planning and preparation to the final testing and inspection. You’ll learn about the materials and tools you’ll need, as well as the steps to install electrical boxes, outlets, light fixtures, switches, and GFCI outlets. Additionally, we’ll discuss how to connect your basement wiring to the main electrical panel, ensuring that it is properly integrated into your home’s electrical system.
Before we dive into the details, it’s important to emphasize the significance of safety when working with electrical systems. If you’re not experienced with electrical work, it’s highly recommended to hire a licensed electrician who can ensure that everything is done correctly and in compliance with local building codes. However, if you have the necessary knowledge and skills, this article will provide you with a comprehensive guide to wiring your basement with confidence.
Throughout the article, we’ll incorporate SEO best practices to optimize the content for search engines. However, our primary focus is to provide you with valuable information and guidance on how to wire your basement effectively. So, let’s get started!
Key Takeaways:
- Proper planning, preparation, and adherence to safety protocols are essential for successfully wiring a basement. From mapping out the wiring layout to connecting to the main electrical panel, attention to detail ensures a safe and efficient electrical system.
- Testing and inspection are crucial to verify the functionality and compliance of the basement electrical system. Prioritizing safety and seeking professional assistance when needed ensures a well-lit and functional space for various activities.
Read more: How Much Does It Cost To Wire A Basement
Step 1: Planning and Preparation
Before you begin any electrical wiring project, proper planning and preparation are key. This step will help you ensure that you have all the necessary materials and tools, as well as a clear understanding of how you want to layout your electrical system in your basement.
Here are some important considerations for planning and preparing your basement wiring project:
- Assess your electrical needs: Determine the number of outlets, light fixtures, and switches you’ll need in your basement. Take into account the specific activities or functions you’ll have in each area, such as a home office, entertainment space, or laundry room. This will help you determine the number of circuits and wiring configurations required.
- Create a wiring plan: Sketch out a diagram or floor plan of your basement. Indicate the locations where you want to install outlets, light fixtures, and switches. Plan the routes for the wiring, considering the most efficient and aesthetically pleasing pathways. This will help you understand the scope of your project and ensure that you have all the necessary materials.
- Check local building codes: Familiarize yourself with the electrical codes and regulations specific to your area. This will ensure that your wiring project complies with safety standards and that you obtain any necessary permits or inspections.
- Determine the wire gauge: The wire gauge depends on the amperage requirements of the circuits. Consider the electrical load of each circuit and choose the appropriate wire gauge. A higher amperage may require a thicker wire gauge to handle the load safely.
- Estimate wire lengths: Measure the distances between electrical boxes, outlets, light fixtures, and switches to estimate the length of the wiring you’ll need. This will help you determine the quantity of wire and cable required.
- Prepare your tools and materials: Gather all the necessary tools and materials for the project. This may include electrical cables and wires, electrical boxes, outlets, switches, light fixtures, wire strippers, wire nuts, and electrical tape. Having everything ready beforehand will save you time and make the wiring process smoother.
By taking the time to plan and prepare, you’ll have a clear roadmap for your basement wiring project. This will help you avoid unnecessary delays and ensure that you have everything you need to complete the job successfully.
Step 2: Gathering Materials and Tools
Once you have completed the planning and preparation stage for your basement wiring project, it’s time to gather all the necessary materials and tools. Having everything you need on-hand will streamline the installation process and prevent interruptions.
Here are the essential materials and tools you’ll need for your basement wiring project:
- Electrical cables and wires: Determine the appropriate type and gauge of electrical cables and wires based on your planned circuits and load requirements. Common types include non-metallic sheathed cable (NM), armored cable (AC), and underground feeder cable (UF).
- Electrical boxes: Choose the appropriate type and size of electrical boxes for your outlets, switches, and light fixtures. Consider whether you need standard junction boxes, old work boxes, or specialty boxes for specific installations.
- Outlets, switches, and light fixtures: Select the style and type of outlets, switches, and light fixtures that match the design and functionality of your basement. Choose between standard outlets, GFCI outlets, dimmer switches, and various light fixture options.
- Wire connectors and fasteners: Gather wire nuts, grounding screws, cable staples, and other connectors and fasteners needed to secure and connect electrical components.
- Wire strippers and cutters: Invest in a quality pair of wire strippers and wire cutters to safely and efficiently strip insulation and cut wires to the desired lengths.
- Fish tape and conduit: If you’re running wires through walls or ceilings, you may need fish tape and conduit to guide and protect the cables during installation.
- Electrical testers and meters: Ensure you have a voltage tester, continuity tester, and a multimeter to test and troubleshoot your wiring connections.
- Other tools: Stock up on essential tools such as a screwdriver set, pliers, wire fish rods or poles, measuring tape, levels, and a stud finder.
It’s important to invest in high-quality materials and tools to ensure the longevity and safety of your electrical system. Additionally, double-check that you have all the necessary permits and inspections in place before starting the installation process.
By gathering all the materials and tools beforehand, you’ll avoid interruptions and delays during the wiring project. You’ll have everything you need to complete each step efficiently and effectively, resulting in a well-executed basement wiring job.
Step 3: Mapping Out the Wiring Layout
Mapping out the wiring layout is a crucial step in ensuring that your electrical system in the basement is organized and efficient. This step involves planning the routes and connections of electrical cables, determining the placement of outlets, switches, and light fixtures, and considering any special requirements specific to your basement space.
Here are the key considerations for mapping out the wiring layout:
- Refer to your wiring plan: Use the floor plan or diagram you created during the planning stage as a reference. This will help you envision the most efficient routes to run the electrical cables and determine the optimal locations for outlets, switches, and light fixtures.
- Plan for dedicated circuits: Identify areas or appliances in your basement that require their own dedicated circuits, such as a home theater or a workshop with heavy power tools. This ensures that the electrical load is evenly distributed and prevents overloading.
- Consider accessibility: Think about the accessibility and convenience of outlets and switches in each area of your basement. Place outlets at convenient heights, and consider installing extra outlets to accommodate future needs.
- Plan for lighting: Determine the number and placement of light fixtures you’ll need to adequately illuminate your basement. Consider different types of lighting, such as recessed lights, pendant lights, or track lighting, to create the desired ambiance.
- Plan for data and communication: If you plan to have a home office or entertainment center in your basement, consider the need for data and communication wiring. Plan the placement of Ethernet cables, phone lines, and coaxial cables for internet and television connections.
- Account for special requirements: Take into consideration any special electrical requirements or restrictions in your local building codes. This may include maintaining certain distances between outlets and water sources or installing GFCI outlets in areas prone to moisture.
Once you have mapped out the wiring layout, use electrical tape or markers to indicate the paths of the electrical cables on the walls or ceilings. This will serve as a visual guide during the installation process, ensuring that you follow the planned routes accurately.
By carefully mapping out the wiring layout, you’ll create a well-organized electrical system that meets your specific needs in the basement. It will make the installation process smoother and help prevent any potential issues or complications down the road.
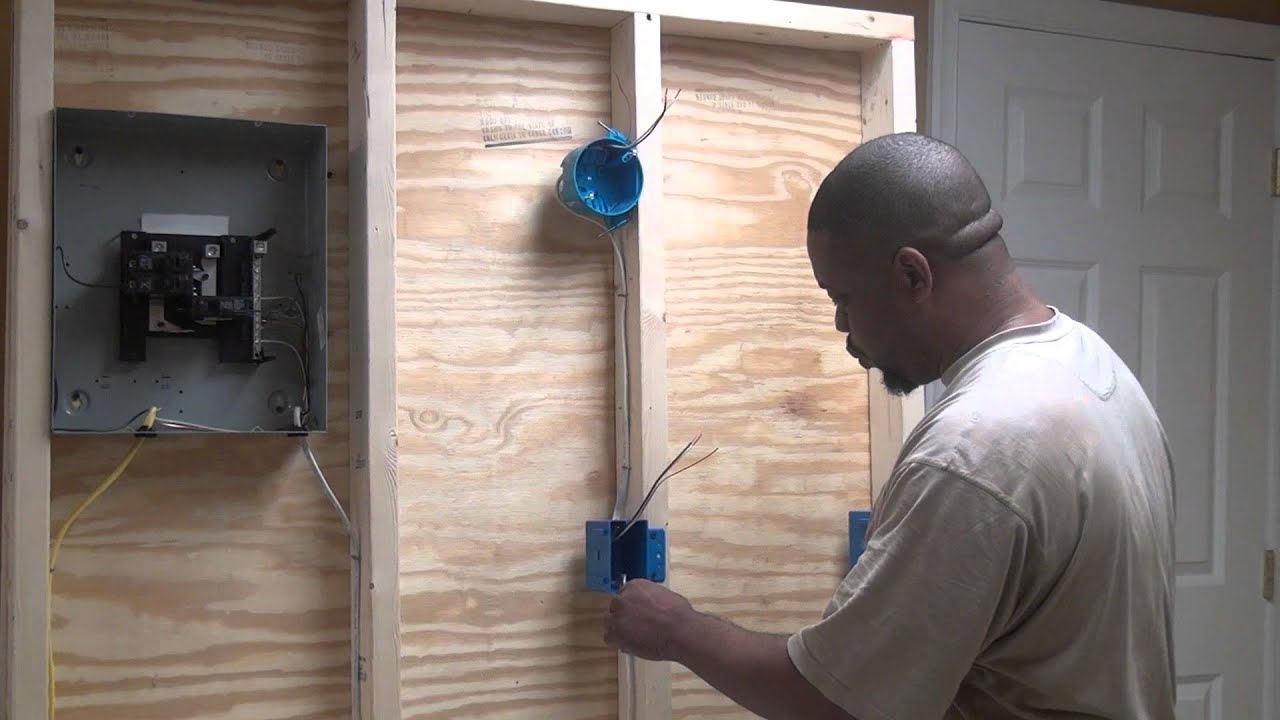
Step 4: Installing Electrical Boxes and Outlets
Installing electrical boxes and outlets is a fundamental step in wiring your basement. Electrical boxes provide a secure housing for switches, outlets, and other electrical devices, while outlets serve as the points of connection for your electrical devices and appliances. Proper installation of these components ensures a safe and functional electrical system in your basement.
Here’s a step-by-step guide to installing electrical boxes and outlets:
- Locate and mark the positions: Refer to your wiring plan and use a pencil or marker to mark the locations where you want to install the electrical boxes and outlets. Ensure the placement of the boxes follows the specific electrical code requirements of your area.
- Turn off the power: Before starting any electrical work, always turn off the power to the circuit you’ll be working on. Locate the circuit breaker in your main electrical panel and switch it off to cut off the power supply.
- Prepare the electrical boxes: Remove the cover plates from the electrical boxes and insert the appropriate knockout holes based on your wiring configuration. If necessary, secure the boxes to the wall using screws or other mounting hardware.
- Install the electrical boxes: Position the electrical boxes on the marked locations and use a level to ensure they are straight. Secure the boxes to the wall or ceiling by driving screws through the mounting holes.
- Run the cables: Carefully route the electrical cables from your main electrical panel to the installed electrical boxes. Make sure to leave enough slack for easy connections and future adjustments.
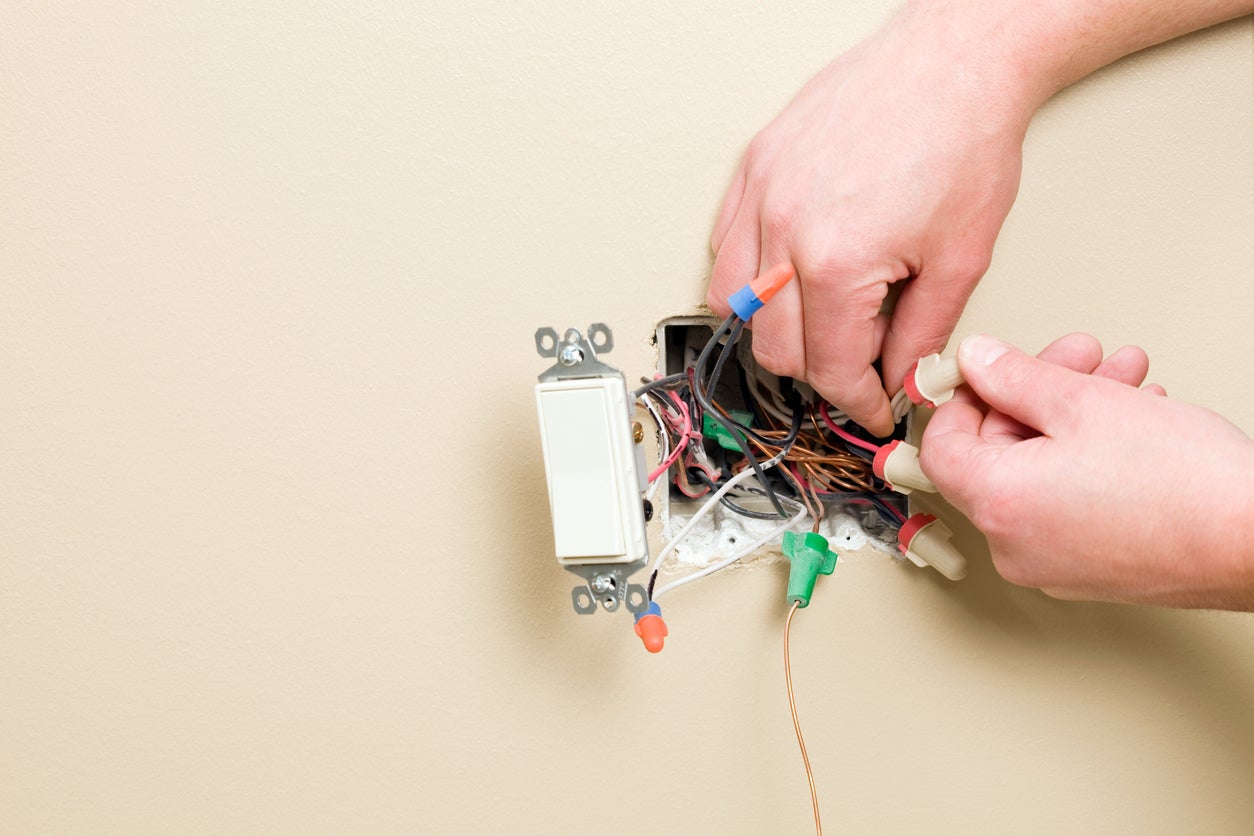
- Wire the outlets: Strip the outer insulation of the electrical cables inside the electrical boxes, exposing the individual wires. Follow the specific wiring diagram for the type of outlet you’re installing, connecting the black (hot) wire to the brass screw, the white (neutral) wire to the silver screw, and the bare copper or green (ground) wire to the green grounding screw.
- Secure the outlets: Gently fold the wired outlets into the electrical boxes, taking care not to pinch or damage the wires. Attach the outlets to the electrical boxes using screws or mounting clips.
- Test the outlets: After completing the installation, restore power to the circuit and use a voltage tester to ensure that the outlets are properly wired and functioning. Test each outlet by plugging in a lamp or a small device to verify power supply.
It’s important to follow the manufacturer’s instructions and local building codes when installing electrical boxes and outlets. If you’re unsure about any aspect of the installation, consult a licensed electrician for guidance and assistance.
By carefully installing electrical boxes and outlets, you’ll have a solid foundation for your basement wiring project. This step sets the stage for connecting the wiring, switches, and light fixtures, bringing your basement electrical system to life.
Step 5: Running Electrical Cables
Running electrical cables is a critical step in the basement wiring process that involves routing the electrical wires from the main electrical panel to the various outlets, switches, and light fixtures in your basement. Proper installation and organization of the cables ensure a safe and efficient electrical system in your basement.
Here’s a step-by-step guide to running electrical cables in your basement:
- Plan the cable routes: Refer to your wiring layout and determine the most efficient and aesthetically pleasing routes for running the electrical cables. Avoid running cables near water pipes or in areas that could be prone to damage.
- Select the appropriate cables: Choose the correct type and gauge of electrical cables based on the specific requirements of each circuit. Consider factors such as the anticipated electrical load and the distance the cables need to run.
- Turn off the power: Before running any electrical cables, turn off the power to the circuit you’ll be working on. Locate the circuit breaker in your main electrical panel and switch it off to cut off the power supply.
- Route the cables: Using appropriate cable staples or clips, secure the electrical cables along the planned routes. Ensure the cables are properly secured but not excessively tight, as this can damage the insulation.
- Use protective conduit: In areas where the cables may be exposed, such as unfinished walls or ceilings, consider using protective conduit to guard the cables against damage. This is particularly important if the cables will be running through areas with high foot traffic.
- Avoid sharp bends and kinks: When running the electrical cables, make sure to avoid sharp bends or kinks that could damage the wires or hinder the flow of electricity. Maintain minimum bend radius requirements for the specific types of cables being installed.
- Secure and protect the cables: At regular intervals, secure the cables to the framing members using cable staples or fasteners. Avoid driving staples too tightly, as this can damage the insulation. Additionally, protect the cables where they pass through holes or notches in framing members by using protective plates.
- Label the cables: As you run the cables, label them appropriately to indicate which circuit they belong to. This will make it easier for future reference or troubleshooting.
Throughout the process, be sure to comply with local building codes and safety regulations. If you’re unsure about any aspect of running electrical cables, consult a licensed electrician to ensure that everything is done correctly.
By properly running electrical cables in your basement, you’ll have a well-organized and functional electrical system. This step sets the foundation for the next steps of wiring light fixtures, switches, and outlets, bringing power to every corner of your basement.
When wiring a basement, always make sure to use the correct gauge of wire for the intended electrical load. Consult local building codes to ensure compliance with safety regulations.
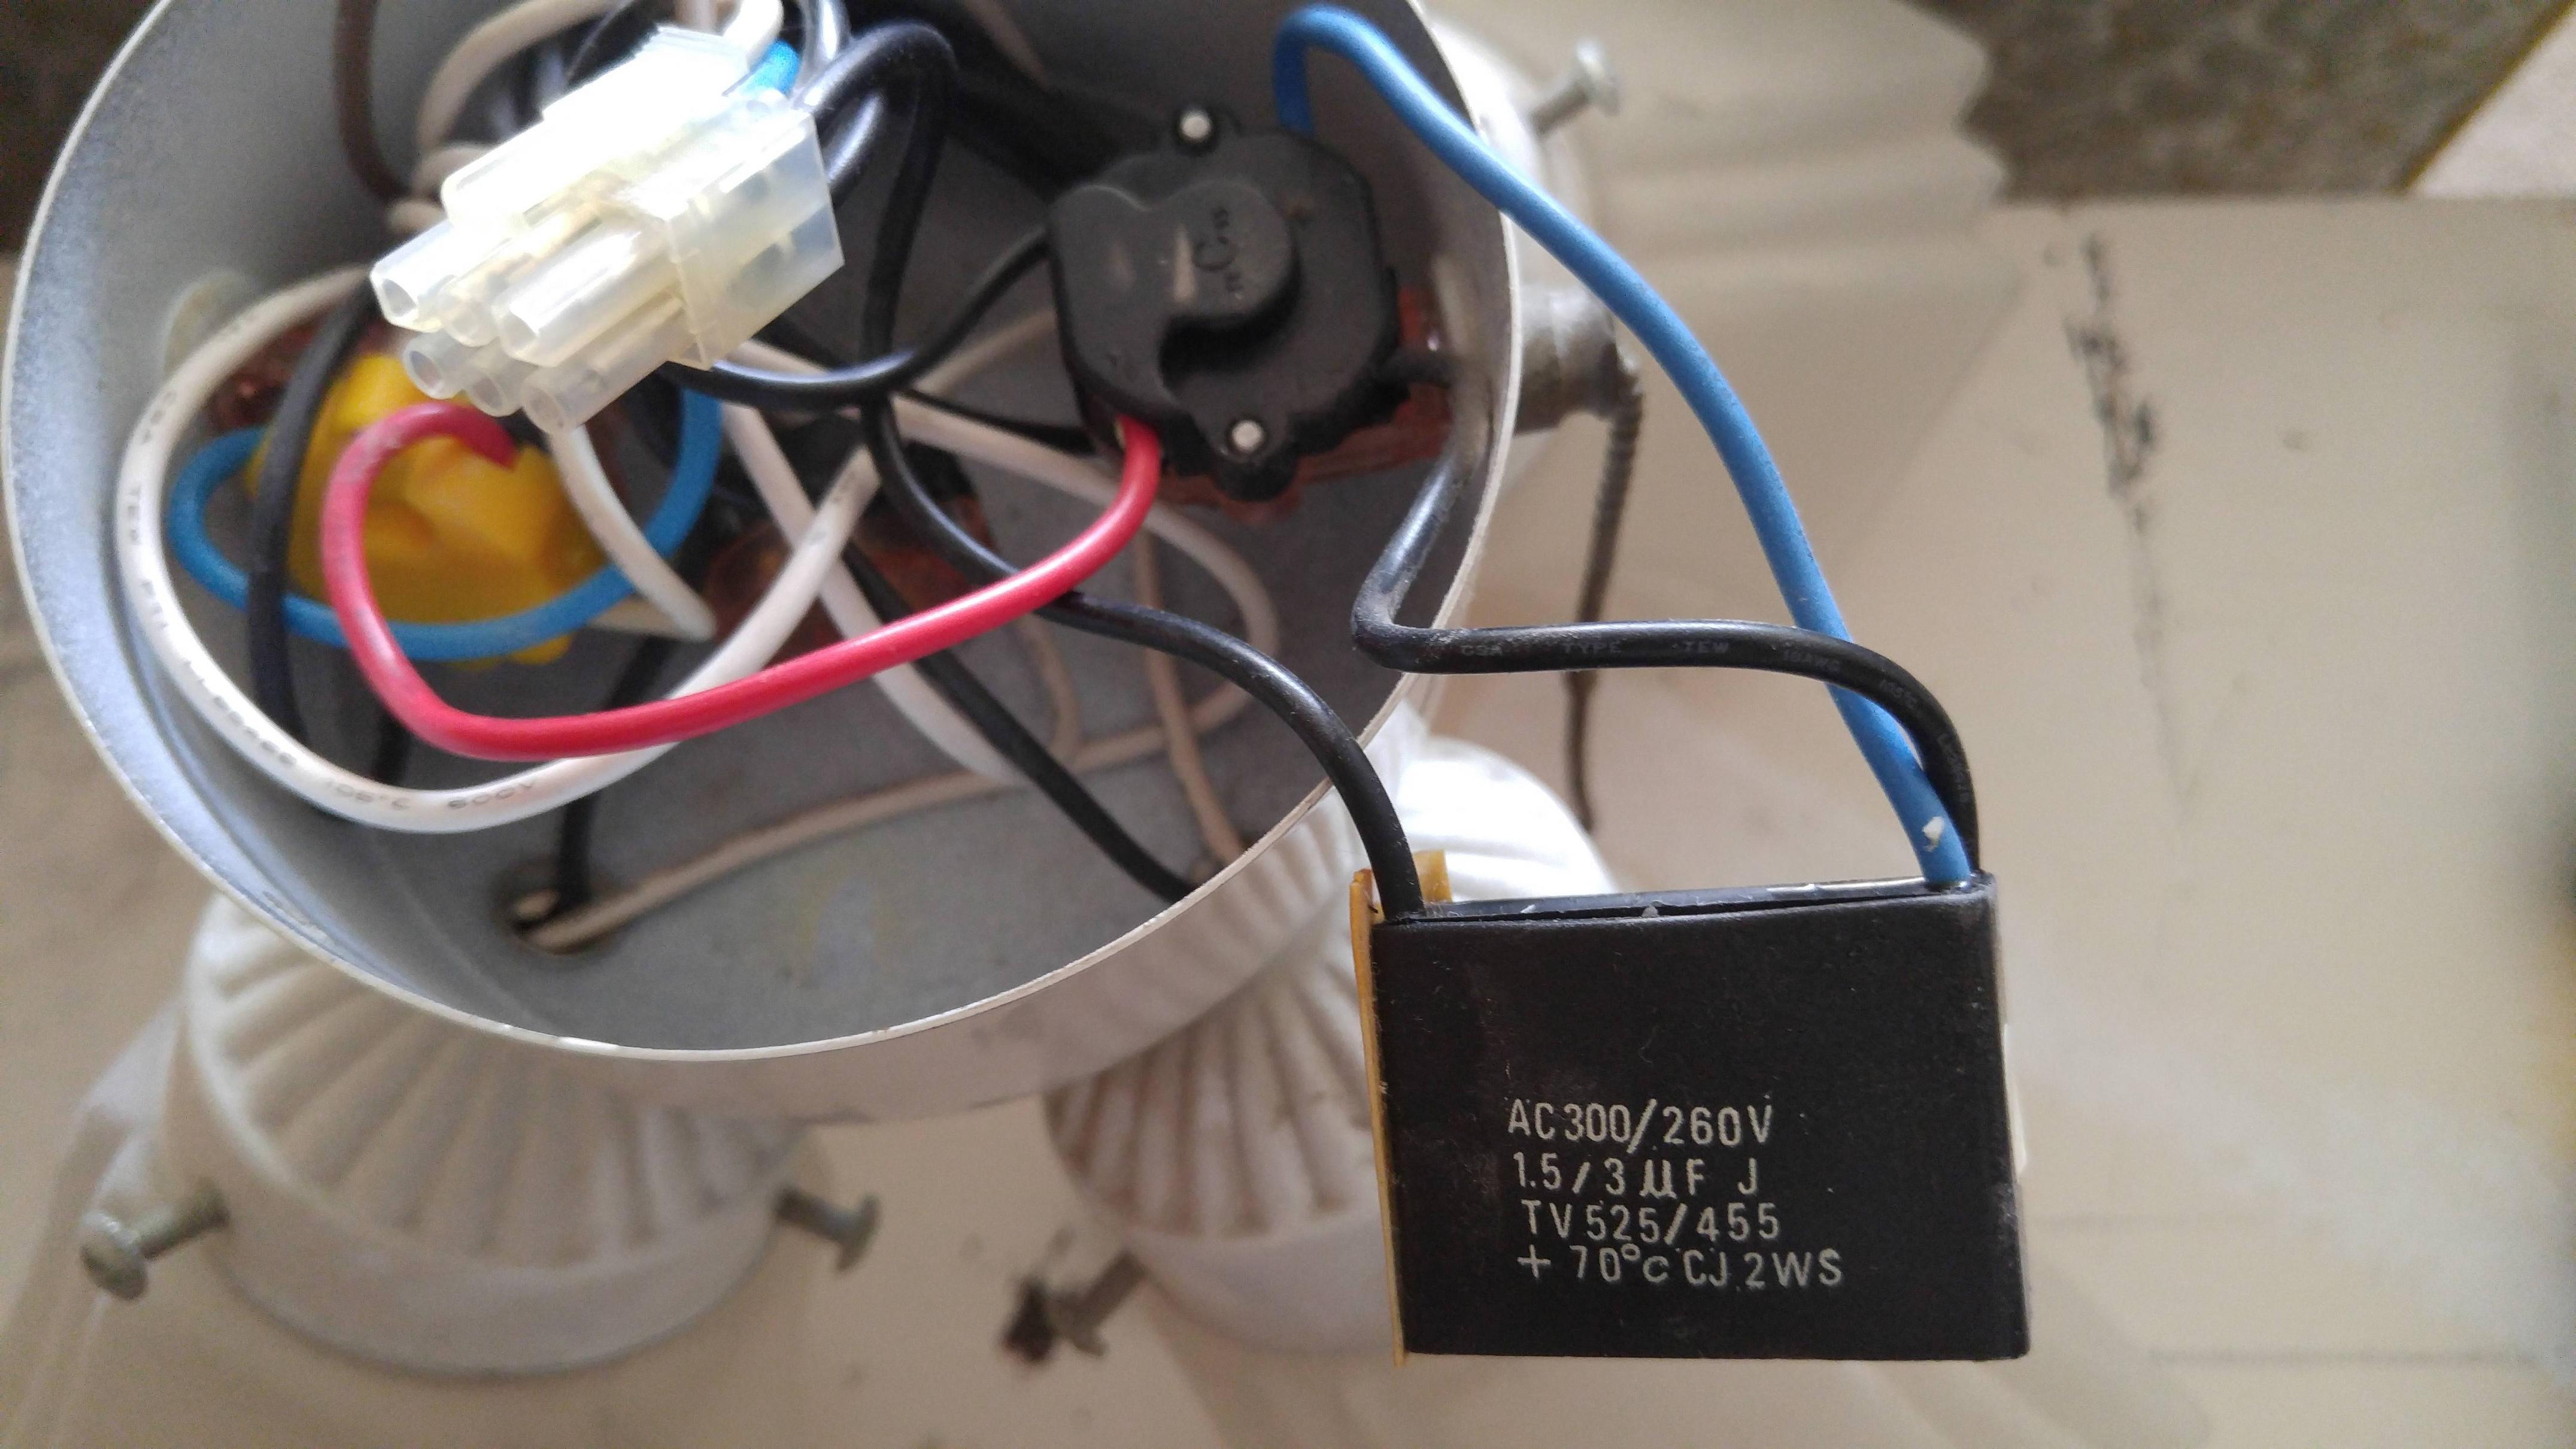
Step 6: Wiring Light Fixtures
Wiring light fixtures is an important step in illuminating your basement and creating a well-lit and inviting space. Properly wiring the light fixtures ensures that they receive the necessary power supply and operate safely and efficiently.
Here’s a step-by-step guide to wiring light fixtures in your basement:
- Choose the appropriate fixtures: Select the light fixtures that suit the design and lighting needs of your basement. Consider factors such as the size, style, and type of light fixtures that will best complement the space.
- Turn off the power: As always, before starting any electrical work, turn off the power to the circuit you’ll be working on. Locate the circuit breaker that controls the specific circuit and switch it off to cut off the power supply.
- Prepare the light fixtures: Carefully read the manufacturer’s instructions for your chosen light fixtures. Remove any packaging, including plastic covers or protective films, and ensure you have all the necessary parts and components.
- Mount the light fixtures: Follow the manufacturer’s instructions to mount the light fixtures to the designated locations on the ceiling or walls of your basement. Secure the fixtures using screws, brackets, or other provided mounting hardware.
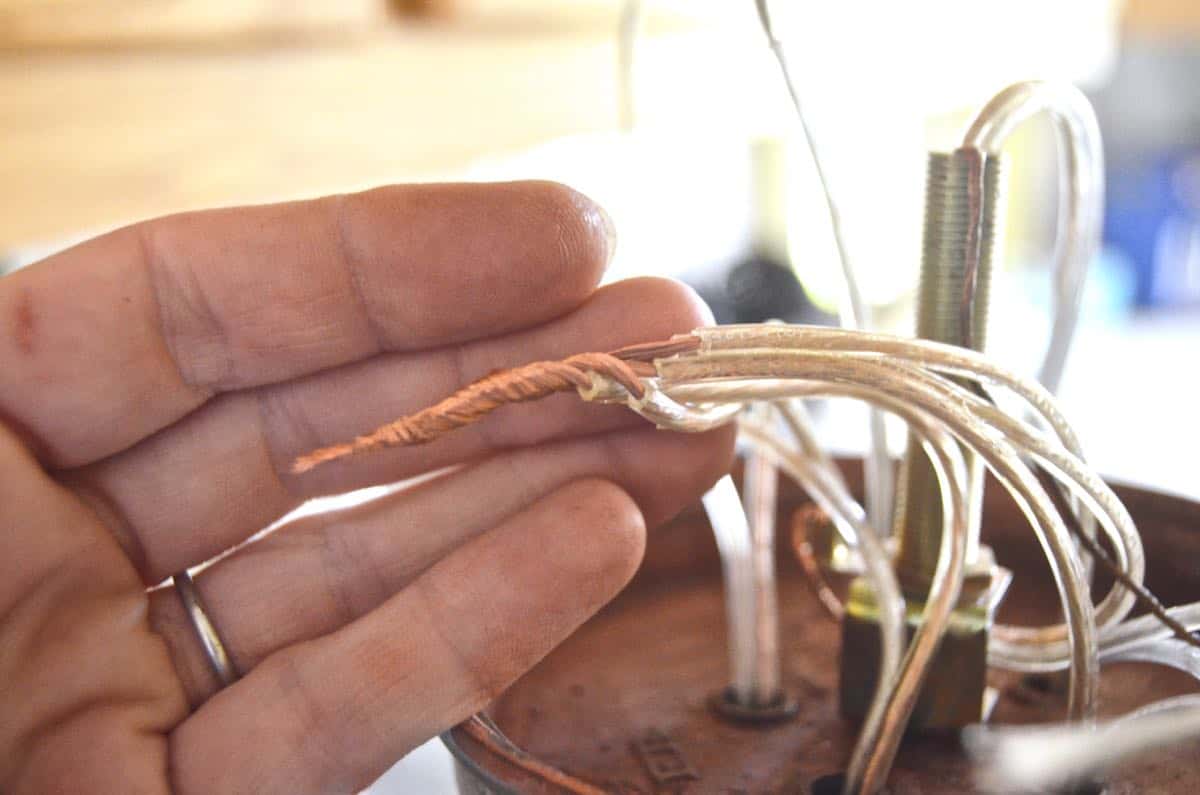
- Prepare the electrical cables: Strip the outer insulation of the electrical cables inside the electrical boxes where the light fixtures will be connected. Expose the individual wires, typically a black (hot) wire, a white (neutral) wire, and a bare copper or green (ground) wire.
- Wire the light fixtures: Connect the wires from the electrical cables to the corresponding wires on the light fixtures. Typically, this involves connecting the black (hot) wire to the black or gold wire on the light fixture, the white (neutral) wire to the white or silver wire, and the bare copper or green (ground) wire to the green grounding screw or wire.
- Secure the wire connections: After making the wire connections, secure them with wire nuts or other appropriate connectors. Twist the exposed wires together, matching the colors, and screw on the wire nuts until they are tight and secure.
- Attach the light fixture: Carefully tuck the connected wires into the electrical box behind the light fixture, making sure there is enough space for the fixture to sit flush against the ceiling or wall. Attach the fixture to the electrical box using screws or other provided mounting hardware.
- Restore power and test: Once the light fixtures are properly wired and securely installed, restore power to the circuit by switching on the corresponding circuit breaker in the main electrical panel. Test each light fixture by flipping the corresponding switch and ensuring that they illuminate.
It’s essential to follow the manufacturer’s instructions and any relevant electrical codes when wiring light fixtures. If you’re unsure about any aspect of the process, consult a licensed electrician for guidance and assistance.
By correctly wiring your light fixtures, you’ll add brightness and functionality to your basement, creating a comfortable and enjoyable space for various activities and occasions.
Step 7: Wiring Switches
Wiring switches is a crucial step in controlling the lighting and electrical devices in your basement. Properly wiring switches ensures that you have convenient access to turning lights on and off, providing functionality and convenience in your space.
Here’s a step-by-step guide to wiring switches in your basement:
- Select the appropriate switches: Choose the type and style of switches that match the design and functionality of your basement. Consider factors such as single-pole switches for controlling one light fixture or multiple switches for three-way or four-way lighting configurations.
- Turn off the power: As always, before working with electrical connections, turn off the power to the circuit you’ll be working on. Locate the circuit breaker that controls the specific circuit and switch it off to cut off the power supply.
- Prepare the switches: Remove any packaging from the switches and ensure you have all the necessary parts and components. Check the manufacturer’s instructions for specific wiring requirements or connections.
- Prepare the electrical cables: Strip the outer insulation of the electrical cables inside the electrical boxes where the switches will be installed. Expose the individual wires, typically a black (hot) wire, a white (neutral) wire, and a bare copper or green (ground) wire.
- Wire the switches: Connect the wires from the electrical cables to the corresponding terminals on the switches. Typically, this involves connecting the black (hot) wire to the common terminal on the switch and connecting the white (neutral) wire to the neutral terminal. If you are wiring a three-way or four-way switch setup, consult the manufacturer’s instructions for the specific wiring steps.
- Secure the wire connections: After making the wire connections, secure them with wire nuts or other appropriate connectors. Twist the exposed wires together, matching the colors, and screw on the wire nuts until they are tight and secure.
- Attach the switches: Carefully fold the connected wires into the electrical box behind the switches, making sure there is enough space for the switches to fit flush against the wall. Attach the switches to the electrical box using screws or other provided mounting hardware.
- Restore power and test: Once the switches are properly wired and securely installed, restore power to the circuit by switching on the corresponding circuit breaker in the main electrical panel. Test each switch by flipping it on and off to ensure that it controls the intended lighting or electrical devices.
It’s important to follow the manufacturer’s instructions and any relevant electrical codes when wiring switches. If you’re unsure about any aspect of the process, consult a licensed electrician for guidance and assistance.
By correctly wiring your switches, you’ll have convenient control over the lighting and electrical devices in your basement. This step adds functionality and ease of use to your space, allowing you to customize the lighting based on your needs and preferences.
Step 8: Wiring GFCI Outlets
Wiring GFCI (Ground Fault Circuit Interrupter) outlets is a crucial step in ensuring the safety of your electrical system in the basement. GFCI outlets are designed to protect against electrical shocks and are commonly installed in areas where water is present, such as bathrooms, kitchens, and laundry rooms.
Here’s a step-by-step guide to wiring GFCI outlets in your basement:
- Choose the appropriate GFCI outlets: Select GFCI outlets that meet the necessary specifications and comply with electrical codes. Ensure that they have built-in protection against ground faults.
- Turn off the power: As always, before installing or wiring any electrical components, turn off the power to the circuit you’ll be working on. Locate the circuit breaker that controls the specific circuit and switch it off to cut off the power supply.
- Prepare the outlets: Remove any packaging from the GFCI outlets and ensure you have all the necessary parts and components. Check the manufacturer’s instructions for specific wiring requirements or connections.
- Prepare the electrical cables: Strip the outer insulation of the electrical cables inside the electrical boxes where the GFCI outlets will be installed. Expose the individual wires, typically a black (hot) wire, a white (neutral) wire, and a bare copper or green (ground) wire.
- Wire the GFCI outlets: Follow the specific wiring diagram provided by the manufacturer for GFCI outlets. Typically, this involves connecting the black (hot) wire to the brass LINE terminal, the white (neutral) wire to the silver LINE terminal, and the bare copper or green (ground) wire to the green grounding screw or terminal.
- Secure the wire connections: After making the wire connections, secure them with wire nuts or other appropriate connectors. Twist the exposed wires together, matching the colors, and screw on the wire nuts until they are tight and secure.
- Attach the GFCI outlets: Carefully tuck the connected wires into the electrical box behind the GFCI outlets, making sure there is enough space for the outlets to fit flush against the wall. Attach the outlets to the electrical box using screws or other provided mounting hardware.
- Test the GFCI outlets: Once the GFCI outlets are properly wired and securely installed, restore power to the circuit by switching on the corresponding circuit breaker in the main electrical panel. Press the TEST button on each GFCI outlet to ensure that it trips and cuts off power. Then, press the RESET button to restore power and verify that the outlet is functioning correctly.
When wiring GFCI outlets, it’s critical to follow the manufacturer’s instructions and any relevant electrical codes. GFCI outlets play a vital role in preventing electrical shocks, so ensure that they are wired correctly to provide the necessary protection.
By safely wiring GFCI outlets in your basement, you’ll have added protection against electrical hazards, especially in areas where water may be present. This step ensures the safety and peace of mind of everyone using the electrical system in your basement.
Read more: How To Get Basement Smell Out Of Basement
Step 9: Connecting to the Main Electrical Panel
Connecting your basement wiring to the main electrical panel is the final step in completing your electrical system. This step involves safely and properly integrating your basement circuits into the main electrical panel, ensuring a reliable and efficient power supply for your basement.
Here’s a step-by-step guide to connecting your basement wiring to the main electrical panel:
- Turn off the power: Before working with the main electrical panel, turn off the main circuit breaker to cut off power to the entire panel. This step ensures your safety while working with electrical connections.
- Locate the appropriate breaker slots: Identify the breaker slots in the main electrical panel that correspond to the circuits you’ve installed in your basement. Each circuit should have its own dedicated breaker slot.
- Prepare the electrical cables: Strip the outer insulation of the electrical cables leading from your basement circuits. Expose the individual wires, typically a black (hot) wire, a white (neutral) wire, and a bare copper or green (ground) wire.
- Connect the wires to their respective breaker slots: Follow the specific instructions provided by the manufacturer and any local electrical codes. Typically, this involves connecting the black (hot) wire to the breaker’s terminal screw, the white (neutral) wire to the neutral bar, and the bare copper or green (ground) wire to the grounding bar or its designated location.
- Ensure proper connections: Double-check that all wire connections are secure and properly tightened. Use the appropriate screws for securing the wires, ensuring they are snug but not overly tightened.
- Turn on the power: Once all the connections are made and verified, turn on the main circuit breaker in the electrical panel to restore power. Make sure all the breakers are in the “off” position before switching them on one by one to test the individual circuits.
- Test and inspect: With the power restored, test the circuits in your basement by turning on the corresponding switches and outlets. Verify that each circuit is functioning properly and that there are no issues such as flickering lights, tripped breakers, or electrical malfunctions.
- Ensure compliance: If required by local regulations, schedule an inspection with the appropriate authority to ensure that your basement wiring meets the necessary codes and safety standards.
It’s crucial to exercise caution and follow all safety protocols when connecting your basement wiring to the main electrical panel. If you’re uncertain or uncomfortable with working on the main panel, it’s recommended to seek the assistance of a licensed electrician.
By successfully connecting your basement wiring to the main electrical panel, you’ll have a fully operational electrical system in your basement. Your circuits will be integrated into the main panel, providing a reliable and safe power supply for all your basement needs.
Step 10: Testing and Inspection
Testing and inspection are the final steps in ensuring the functionality, safety, and compliance of your basement electrical system. These steps involve thorough testing of all wiring connections, circuits, outlets, switches, and fixtures, as well as scheduling an inspection with the appropriate authority.
Here’s a guide to testing and inspecting your basement electrical system:
- Perform a visual inspection: Carefully inspect all the wiring, connections, outlets, switches, and fixtures in your basement. Look for any signs of physical damage, loose connections, or exposed wires. Ensure that all components are installed correctly and securely.
- Test the outlets and switches: Use a voltage tester to ensure that all outlets and switches are wired correctly and functioning properly. Test each outlet for power and check that switches turn on and off their respective fixtures or circuits.
- Check for proper grounding: Verify that all outlets and switches are properly grounded. Use a multimeter or continuity tester to confirm the presence of a good ground connection.
- Test GFCI outlets: Push the TEST button on each GFCI outlet to verify that it trips and cuts off power. Then, press the RESET button to restore power and ensure that the outlet is functioning correctly.
- Test light fixtures: Turn on each light fixture and check for proper illumination. Ensure that all light switches are working correctly and controlling the corresponding fixtures.
- Check for proper circuit operation: Test each circuit individually to verify that all devices and fixtures connected to the circuit are receiving power and operating as intended.
- Schedule an inspection: Contact the appropriate authority in your area to schedule an inspection of your basement electrical system. This step is essential to ensure compliance with local electrical codes and safety standards.
- Address any issues: If any issues or problems are identified during the testing or inspection process, make the necessary repairs or corrections. This may involve re-wiring, replacing components, or making adjustments to ensure proper functionality and compliance.
- Document and maintain records: Keep a record of the tests performed, inspection results, and any repairs or modifications made to your electrical system. These records can be invaluable for future reference, maintenance, or resale purposes.
Testing and inspection are crucial steps to ensure the safety and functionality of your basement electrical system. Following these steps diligently will help identify and address any issues, ensuring that your electrical system operates reliably and meets all necessary requirements.
If you’re unsure about any aspect of testing or inspection, it’s recommended to consult a licensed electrician to ensure that your basement electrical system is thoroughly assessed and compliant with local regulations.
Conclusion
Wiring a basement is a complex but rewarding project that can transform your space into a functional and well-lit area. By following the step-by-step guide outlined in this article, you can successfully wire your basement and create a safe and efficient electrical system.
Throughout the process, proper planning and preparation are crucial. Take the time to assess your electrical needs, create a wiring plan, and gather all the necessary materials and tools. Mapping out the wiring layout and installing electrical boxes and outlets set the foundation for running electrical cables and wiring light fixtures, switches, and GFCI outlets.
Connecting your basement wiring to the main electrical panel is the final step in the installation process. Ensure that all connections are secure and follow safety protocols. Afterward, perform testing and inspection to verify the proper functioning of your electrical system and schedule a professional inspection if required.
As you wire your basement, always prioritize safety. Comply with local building codes, turn off the power before working on electrical connections, and consult a licensed electrician if needed. Safety should always be the top priority to protect yourself and your household.
Once your basement wiring is complete, you can enjoy a well-lit and functional space that meets all your electrical needs. Whether you’re setting up a home office, a home theater, or a recreational area, a properly wired basement ensures convenience and safety for all your activities.
Remember, if you’re unsure about any aspect of the wiring process, it is always recommended to consult with a licensed electrician. They have the knowledge and expertise to ensure that your basement wiring is done correctly and meets all necessary electrical codes.
Now, armed with the knowledge and understanding gained from this comprehensive guide, you’re ready to tackle your basement wiring project with confidence. Enjoy the process and the transformed space that awaits you!
Frequently Asked Questions about How To Wire A Basement
Was this page helpful?
At Storables.com, we guarantee accurate and reliable information. Our content, validated by Expert Board Contributors, is crafted following stringent Editorial Policies. We're committed to providing you with well-researched, expert-backed insights for all your informational needs.

0 thoughts on “How To Wire A Basement”