Home>Articles>How To Run Electrical Wire In Unfinished Basement Ceiling

Articles
How To Run Electrical Wire In Unfinished Basement Ceiling
Modified: October 20, 2024
Discover articles on how to effectively run electrical wire in your unfinished basement ceiling and complete your DIY electrical projects with ease.
(Many of the links in this article redirect to a specific reviewed product. Your purchase of these products through affiliate links helps to generate commission for Storables.com, at no extra cost. Learn more)
Introduction
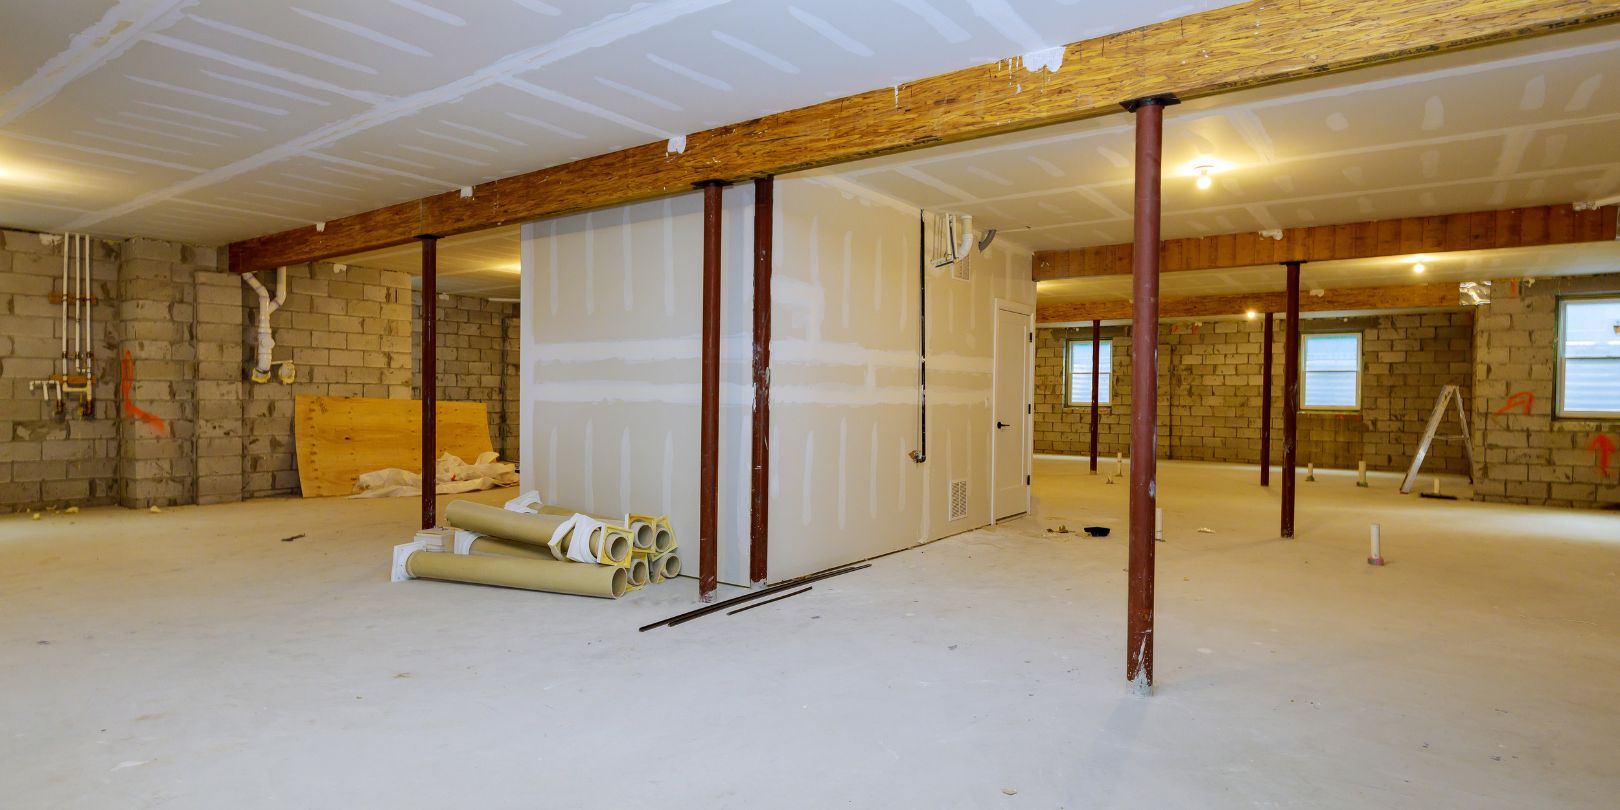
Running electrical wire in an unfinished basement ceiling is a crucial step in any home improvement project that involves adding electrical outlets, lighting fixtures, or switches to the space. While the task may seem daunting for those without any electrical experience, with the right planning and precautions, it can be completed safely and efficiently.
Before undertaking this project, it is essential to have a basic understanding of electrical systems and to follow all local building codes and regulations. Ensuring that the wiring is installed correctly is vital for the safety and functionality of your basement electrical system.
This article will guide you through each step of running electrical wire in an unfinished basement ceiling. From planning and safety precautions to connecting the wiring to the existing electrical system, you will learn the necessary skills and techniques to successfully complete this project.
Remember, if you feel unsure or uncomfortable at any point during the process, it is always wise to consult a licensed electrician. Safety should be your top priority when working with electricity.
So, are you ready to take on the challenge of running electrical wire in your unfinished basement ceiling? Let’s dive into the details and get started!
Key Takeaways:
- Prioritize safety and meticulous planning when running electrical wire in an unfinished basement ceiling. Follow local codes, gather materials, and create a detailed wiring plan to ensure a successful and compliant installation.
- Test and inspect the completed wiring to guarantee safety and functionality. Document your work, consider professional inspection, and prioritize proper grounding and compliance with local codes for peace of mind.
Read more: How To Heat An Unfinished Basement
Step 1: Planning and Safety Precautions
Before you begin running electrical wire in your unfinished basement ceiling, it is crucial to thoroughly plan the project and take necessary safety precautions. This will ensure that the process goes smoothly and minimize the risks associated with working with electricity.
Here are some key steps to follow during the planning and safety phase:
- Evaluate your electrical needs: Determine the specific electrical requirements for your basement. Consider factors such as the number of outlets, lighting fixtures, and switches you will need. This will help you estimate the amount of electrical wire you will require and plan accordingly.
- Check local building codes: Familiarize yourself with the electrical codes and regulations in your area. Different regions may have specific requirements for wire gauge, conduit placement, and circuit protection. Ensuring compliance with these codes is essential for the safety and legality of the project.
- Create a wiring diagram: Sketch out a wiring diagram that outlines the locations of outlets, switches, and fixtures. This diagram will act as your guide throughout the installation process and ensure that you don’t miss any essential components.
- Shut off the power: Before starting any electrical work, always turn off the power to the basement at the main electrical panel. This will prevent any accidental electrical shocks while you are working with the wiring.
- Use personal protective equipment (PPE): Wear appropriate safety gear, such as safety glasses, gloves, and non-conductive footwear, to protect yourself during the project. These precautions will minimize the risk of injuries in the event of an accident.
- Arrange adequate lighting: Ensure that your work area is well-lit. Proper lighting will help you see clearly and prevent any mistakes or accidents that may occur due to poor visibility.
- Keep your workspace organized: Clear any clutter or obstacles from the area where you will be working. Organize your tools and materials to have easy access and reduce the risk of accidents caused by tripping or falling objects.
- Have fire safety measures in place: Keep a fire extinguisher nearby as a precautionary measure. In the event of an electrical fire, having a fire extinguisher readily available can help minimize the damage and ensure your safety.
- Work with a partner: If possible, have a friend or family member assist you during the installation. Having an extra set of hands can help with holding and routing the wires, making the process easier and safer.
By taking these planning and safety precautions, you are setting yourself up for a successful and secure electrical wiring project in your unfinished basement ceiling. Remember, if you are unsure about any step or feel uncomfortable working with electrical systems, it is always best to consult a professional electrician to ensure your safety.
Step 2: Gathering Materials and Tools
Once you have completed the planning and safety preparations, it’s time to gather all the necessary materials and tools for running electrical wire in your unfinished basement ceiling. Having everything you need on hand will help streamline the installation process and ensure that you can work efficiently.
Here is a list of the essential materials and tools you will need:
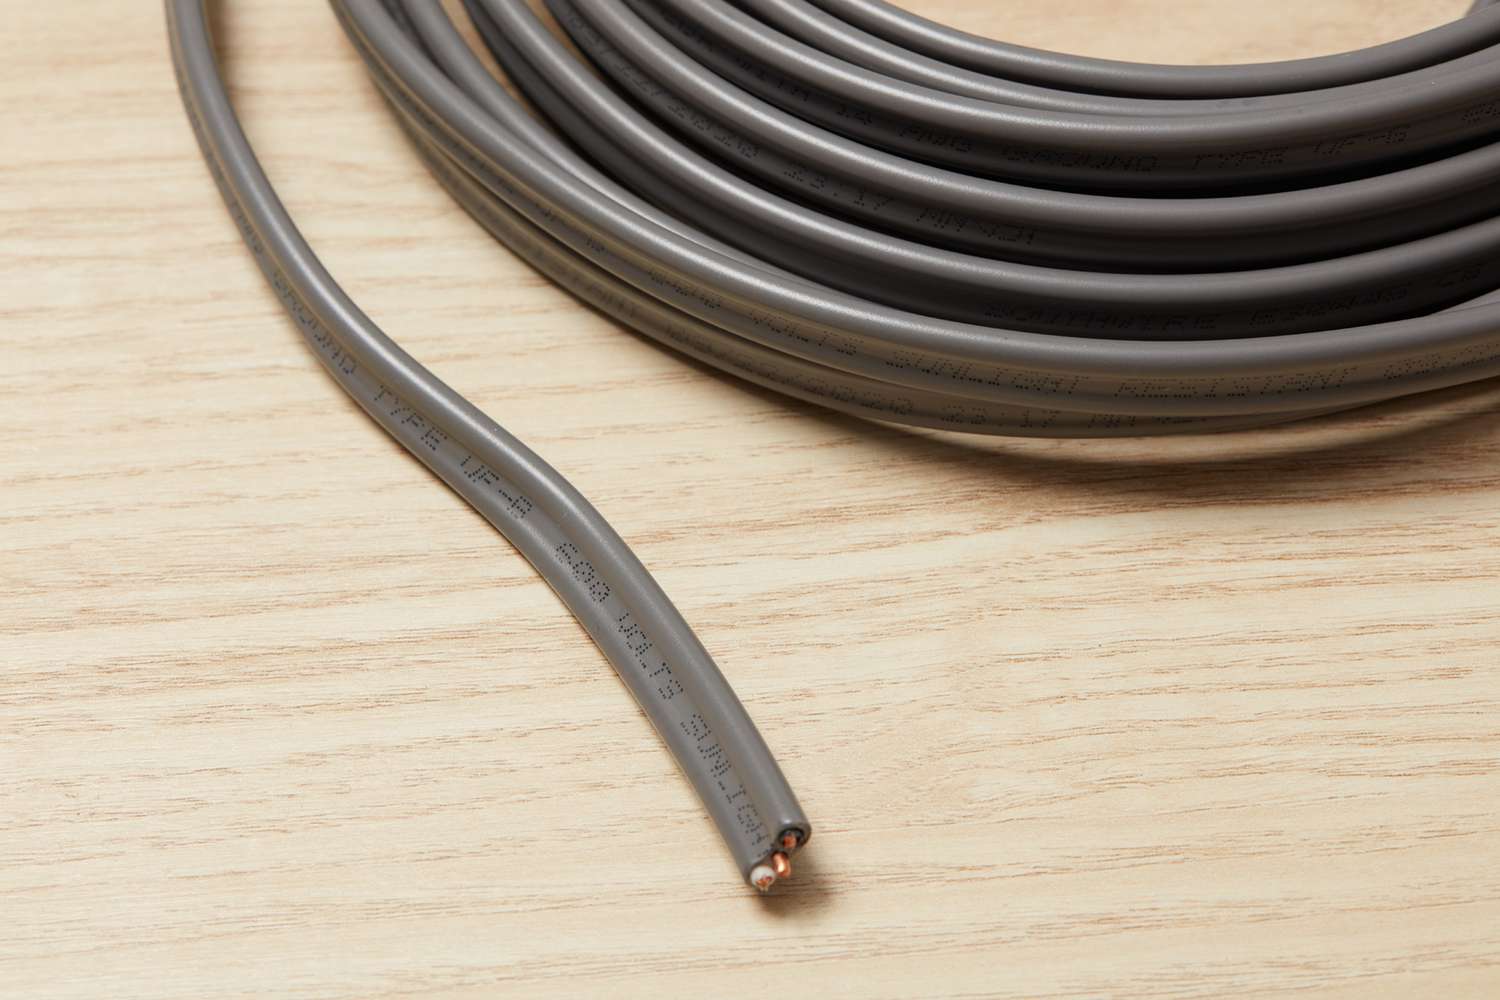
- Electrical wire: Purchase the appropriate type and gauge of electrical wire for your project. Consider factors such as the ampacity requirements and the distance the wire needs to cover. Common types of electrical wire for residential applications include NM (Non-Metallic) cable or Romex.
- Conduit (if required by local code): Check your local building codes to see if conduit is necessary for the wiring in your unfinished basement ceiling. If required, ensure that you have the appropriate size and type of conduit for your project.
- Outlet and switch boxes: Obtain the necessary outlet and switch boxes for installing outlets and switches. Select boxes that are compatible with the wiring method you are using.
- Wire connectors: Purchase wire connectors of the appropriate size and type for making secure connections between wires.
- Electrical staples or clamps: Depending on your local code requirements, you may need electrical staples or clamps to secure the electrical wire to the joists or other structural elements in the ceiling.
- Fishing tape or wire: If you need to route the wire through tight or hard-to-reach spaces, such as between joists, fishing tape or wire will be beneficial for pulling the wire through.
- Wire strippers: Wire strippers are essential for removing the insulation from the ends of the electrical wire.
- Wire cutters: Wire cutters are used for cutting the electrical wire to the desired length.
- Screwdrivers and drills: Depending on the type of boxes and mounting methods you are using, you may need screwdrivers or drills for attaching the outlet and switch boxes to the ceiling.
- Measuring tape and level: These tools are crucial for measuring and marking the locations for the outlet and switch boxes, as well as ensuring that they are installed level and aligned.
- Flashlight: A flashlight will come in handy to provide additional lighting in tight or dark areas of your basement.
- Personal protective equipment (PPE): As mentioned in the previous step, wear appropriate PPE, including safety glasses, gloves, and non-conductive footwear, to protect yourself during the installation process.
Before beginning the project, make sure that you have all the required materials and tools easily accessible and organized. This will save you time and prevent any delays or interruptions as you work on running electrical wire in your unfinished basement ceiling.
With the necessary materials and tools at your disposal, you are now ready to move on to the next step: creating a wiring plan for your basement ceiling.
Step 3: Creating a Wiring Plan
Before you start running electrical wire in your unfinished basement ceiling, it is essential to create a detailed wiring plan. This plan will act as your roadmap, guiding you through the installation process and ensuring that you have a clear understanding of where the wires will be routed and the locations of outlets and switches.
Here are the key steps to create an effective wiring plan:
- Measure the basement: Begin by measuring the dimensions of your basement. This will help you determine the lengths of wire needed and the locations for outlets and switches.
- Determine the locations of outlets and switches: Decide where you want your outlets and switches to be placed in your basement. Consider the layout and functionality of the space to determine the best positions for these electrical components.
- Mark the locations of outlet and switch boxes: Once you have decided on the positions for outlets and switches, use a measuring tape and a level to mark the locations of the boxes on the ceiling. Make sure to follow local electrical codes regarding spacing requirements.
- Plan the routing of the wires: From each outlet or switch box, plan the route that the wire will take to reach the main electrical panel. Consider the most direct and accessible paths to minimize wire lengths and potential obstructions.
- Account for special requirements: Take into account any special wiring requirements, such as dedicated circuits for high-demand appliances or specific wiring needs for lighting fixtures. Plan accordingly to ensure that all electrical needs are met.
- Create a detailed wiring diagram: Use graph paper or a digital design tool to create a wiring diagram that includes the locations of outlet and switch boxes and the routing of the wires. Label each component and wire to ensure clarity.
- Review and adjust the plan: Take a step back and carefully review your wiring plan. Make any necessary adjustments or modifications to ensure that it meets your electrical needs and complies with local building codes.
By creating a thorough wiring plan, you will have a clear understanding of the project scope and layout. This will save you time and effort during the installation process and reduce the chances of mistakes or errors.
Once you have finalized your wiring plan, you are ready to move on to the next step: measuring and marking the ceiling for running the electrical wire.
Step 4: Measuring and Marking the Ceiling
Now that you have created a wiring plan for your unfinished basement ceiling, it’s time to measure and mark the ceiling to ensure accurate installation of the electrical wire and outlet/switch boxes. This step is crucial to ensure that everything is properly aligned and the wiring runs smoothly without any obstructions.
Here’s how to measure and mark the ceiling for running the electrical wire:
- Gather your measuring tools: Get a measuring tape, a pencil, and a level. These tools will help you accurately measure and mark the positions of the outlet and switch boxes on the ceiling.
- Refer to your wiring plan: Take out your wiring plan and refer to it while measuring and marking the ceiling. This will ensure that you follow the layout and placement of the electrical components accurately.
- Start with the first outlet or switch box: Begin by measuring and marking the position of the first outlet or switch box according to your wiring plan. Measure from the nearest wall and mark the spot on the ceiling with a pencil.
- Measure and mark subsequent outlet/switch box positions: Refer to your wiring plan and measure the distances between each outlet or switch box. Mark these locations on the ceiling. Use a level to make sure that the marks are straight and aligned.
- Consider spacing requirements: Check your local electrical codes for requirements on outlet and switch box spacing. Make sure that your measurements and markings comply with these regulations.
- Double-check your markings: Before proceeding to the next step, double-check all your measurements and markings to ensure accuracy. Make any necessary adjustments at this stage to avoid problems during the installation process.
By taking the time to measure and mark the ceiling correctly, you will ensure that the electrical wire is installed in the desired locations and that the outlet and switch boxes are aligned properly. This step will greatly contribute to the overall functionality and aesthetics of your electrical system in the unfinished basement.
Once you have completed measuring and marking the ceiling, you can move on to the next step, which involves running the electrical wire along the joists.
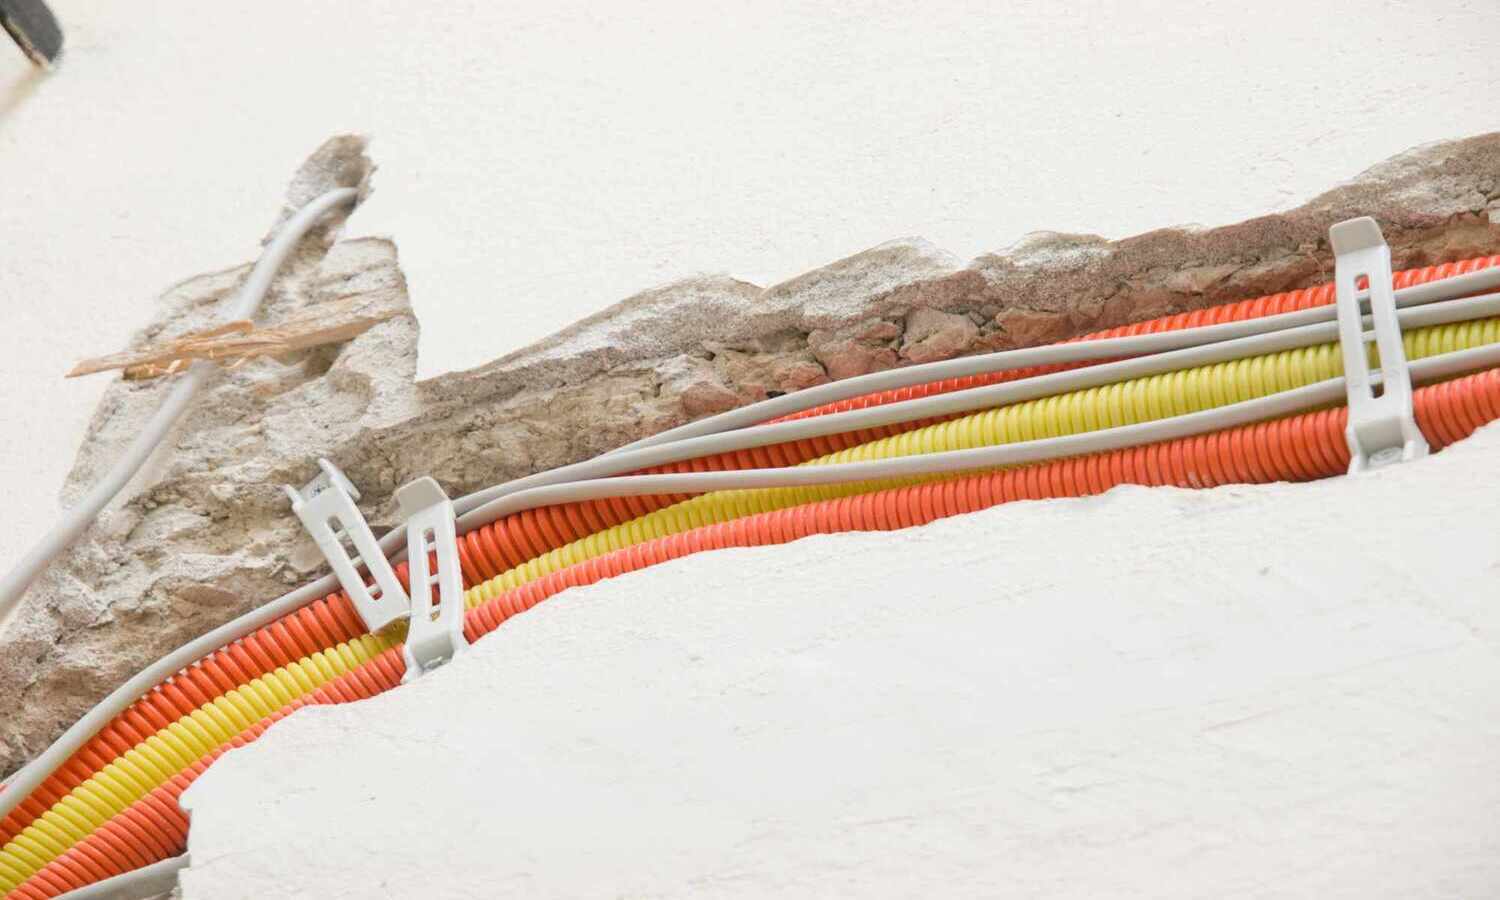
When running electrical wire in an unfinished basement ceiling, always use proper cable supports and secure the wire to the joists to prevent damage and ensure safety. Be sure to follow local building codes and regulations.
Read more: How To Run Electrical Wire In A House
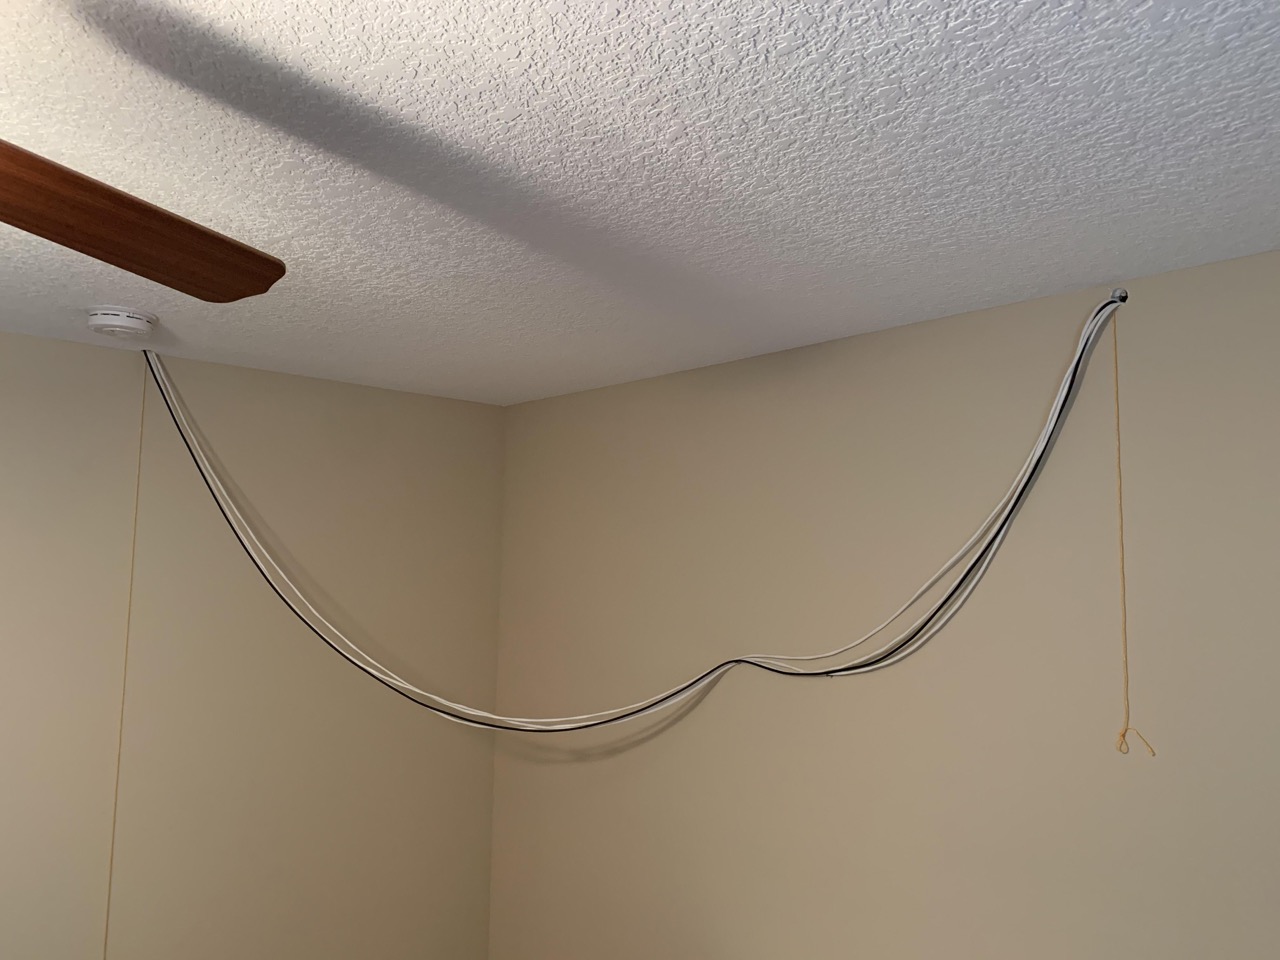
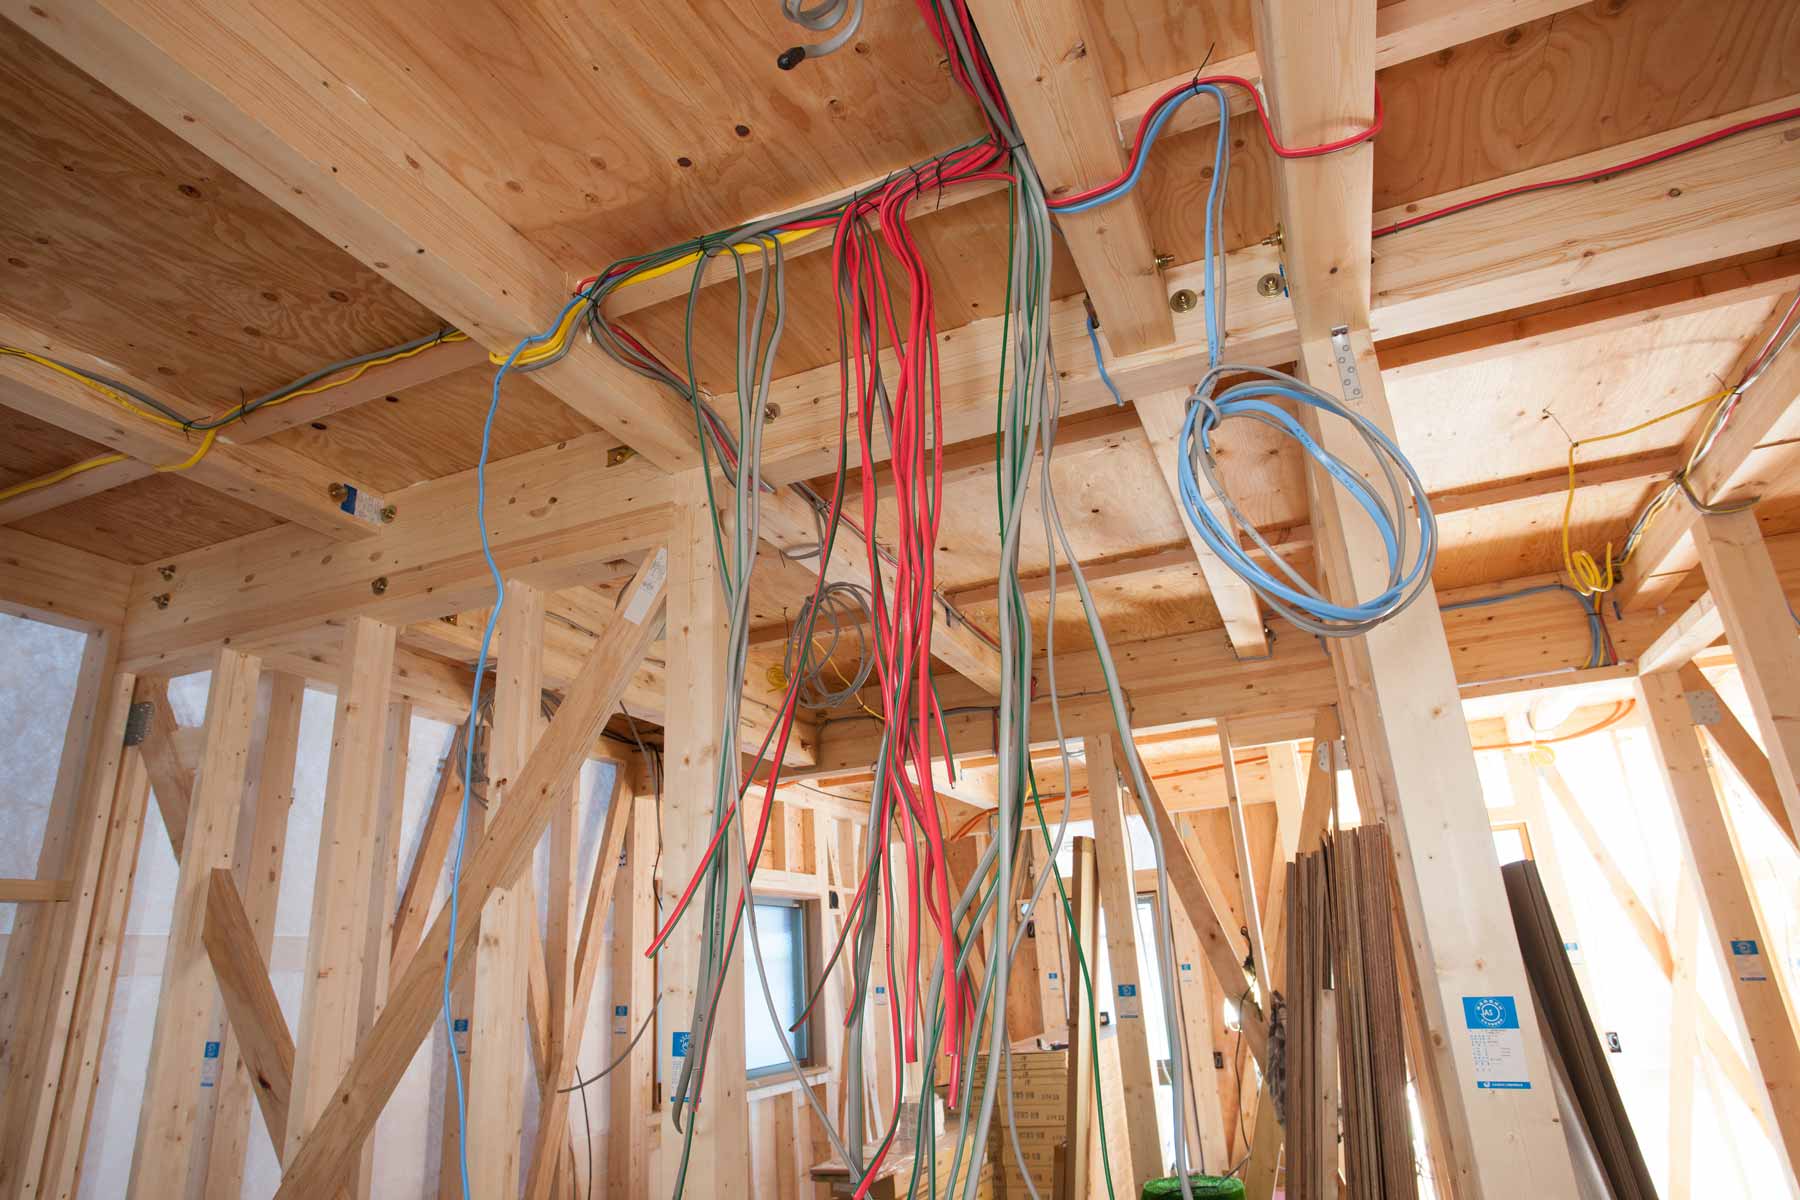
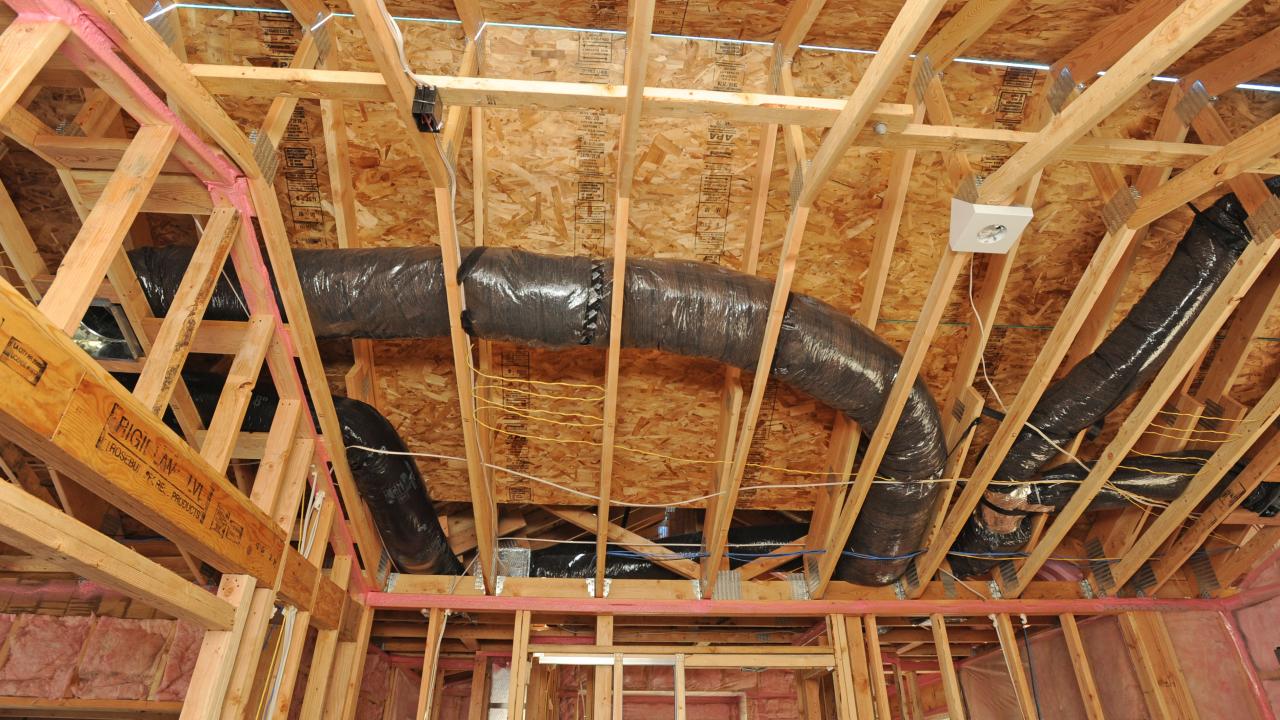
Step 5: Running Electrical Wire along Joists
With the ceiling properly measured and marked, it’s time to start running the electrical wire along the joists in your unfinished basement. This step requires precision and attention to detail to ensure that the wiring is neat, secure, and follows the planned route.
Here’s how you can run the electrical wire along the joists:
- Start at the electrical panel: Begin by identifying the location of the main electrical panel and determine the path that the wiring will take from there to the first outlet or switch box. Make sure to follow the route you planned in your wiring diagram.
- Secure the wire: Use electrical staples or clamps to secure the electrical wire to the sides or bottom of the joists. Ensure that the wire is held firmly in place but not overly tight, as this could damage the insulation.
- Avoid sharp bends: When running the electrical wire, avoid making sharp bends or kinks in the wire. These can damage the wire, affect its performance, and make future maintenance or troubleshooting difficult.
- Keep wires away from sharp objects: Be mindful of any sharp objects or edges in the basement and make sure to route the electrical wire away from them. This will prevent accidental damage to the wire.
- Maintain proper clearance: Keep the electrical wire at least 1.25 inches away from the edges of the joists to maintain the required clearance. This prevents the wire from being accidentally damaged by nails or screws during the construction or renovation process.
- Group wires correctly: If you are running multiple wires, such as for different outlets or switches, group them together using plastic cable ties or wire organizers. This will keep the wires organized and make future repairs or modifications easier.
- Leave slack at each outlet and switch box: When reaching an outlet or switch box, leave enough slack in the wire to comfortably reach the box. This extra length will make it easier to connect the wiring components during the installation process.
- Avoid damp areas and insulation: If your basement has areas with moisture or insulation, make sure to route the electrical wire away from these areas. Moisture can damage the wire, and insulation can affect its performance and create a fire hazard.
- Work methodically and double-check: As you run the electrical wire along the joists, work methodically and double-check your work at regular intervals. Verify that the wire is securely fastened, properly routed, and follows the planned pathway.
By following these steps, you will ensure that the electrical wire is installed correctly and securely along the joists of your unfinished basement. Taking the time to do this step accurately will contribute to the safety and functionality of your electrical system.
Once you have run the electrical wire along the joists, you can proceed to the next step, which involves installing outlet or switch boxes.
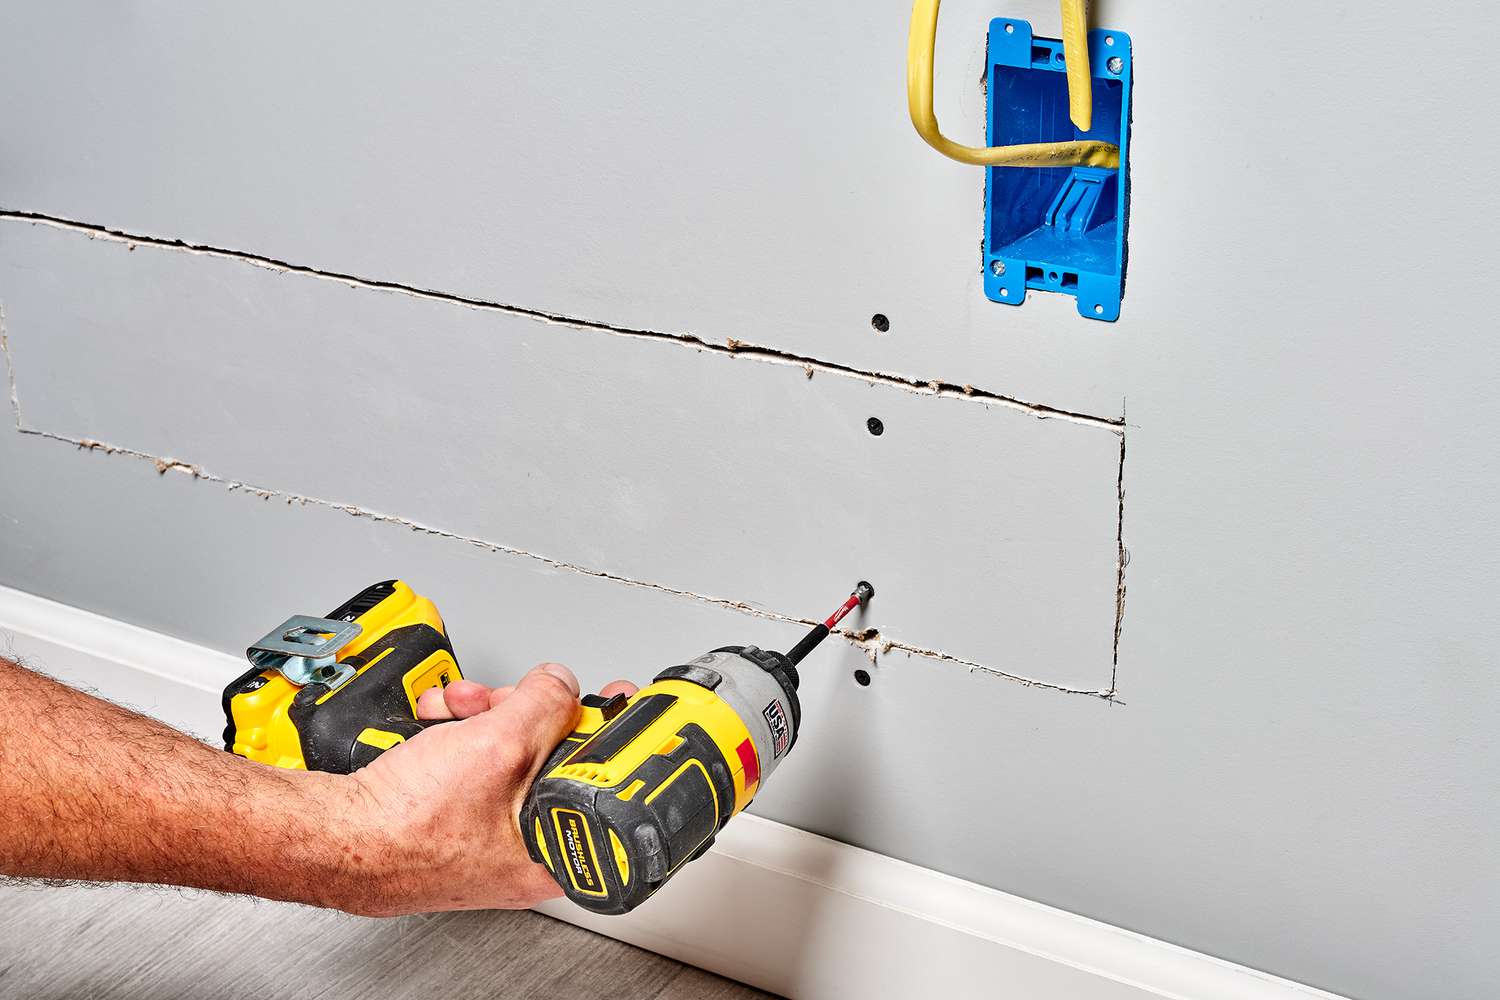
Step 6: Installing Outlet or Switch Boxes
With the electrical wire running along the joists in your unfinished basement, it’s time to install the outlet or switch boxes. These boxes provide a secure housing for the electrical connections and serve as the mounting point for switches, outlets, or other devices.
Here’s how you can install outlet or switch boxes:
- Position the boxes: Align the outlet or switch boxes with the markings you made on the ceiling. Ensure that they are level and securely positioned.
- Trace the box outlines: Using a pencil, trace the outlines of the boxes on the ceiling. This will serve as a guide for cutting the holes to accommodate the boxes.
- Cut the holes: Use a drywall saw or a jab saw to carefully cut along the traced outlines. Take your time and make precise cuts to avoid any damage to the surrounding areas.
- Secure the boxes: Insert the outlet or switch boxes into the holes and secure them in place. Use the provided screws or nails to attach the boxes to the ceiling, ensuring they are tightly fastened.
- Adjust the box height: If necessary, adjust the height of the boxes so that they are flush with the surface of the ceiling. This will allow the cover plates to sit neatly against the ceiling.
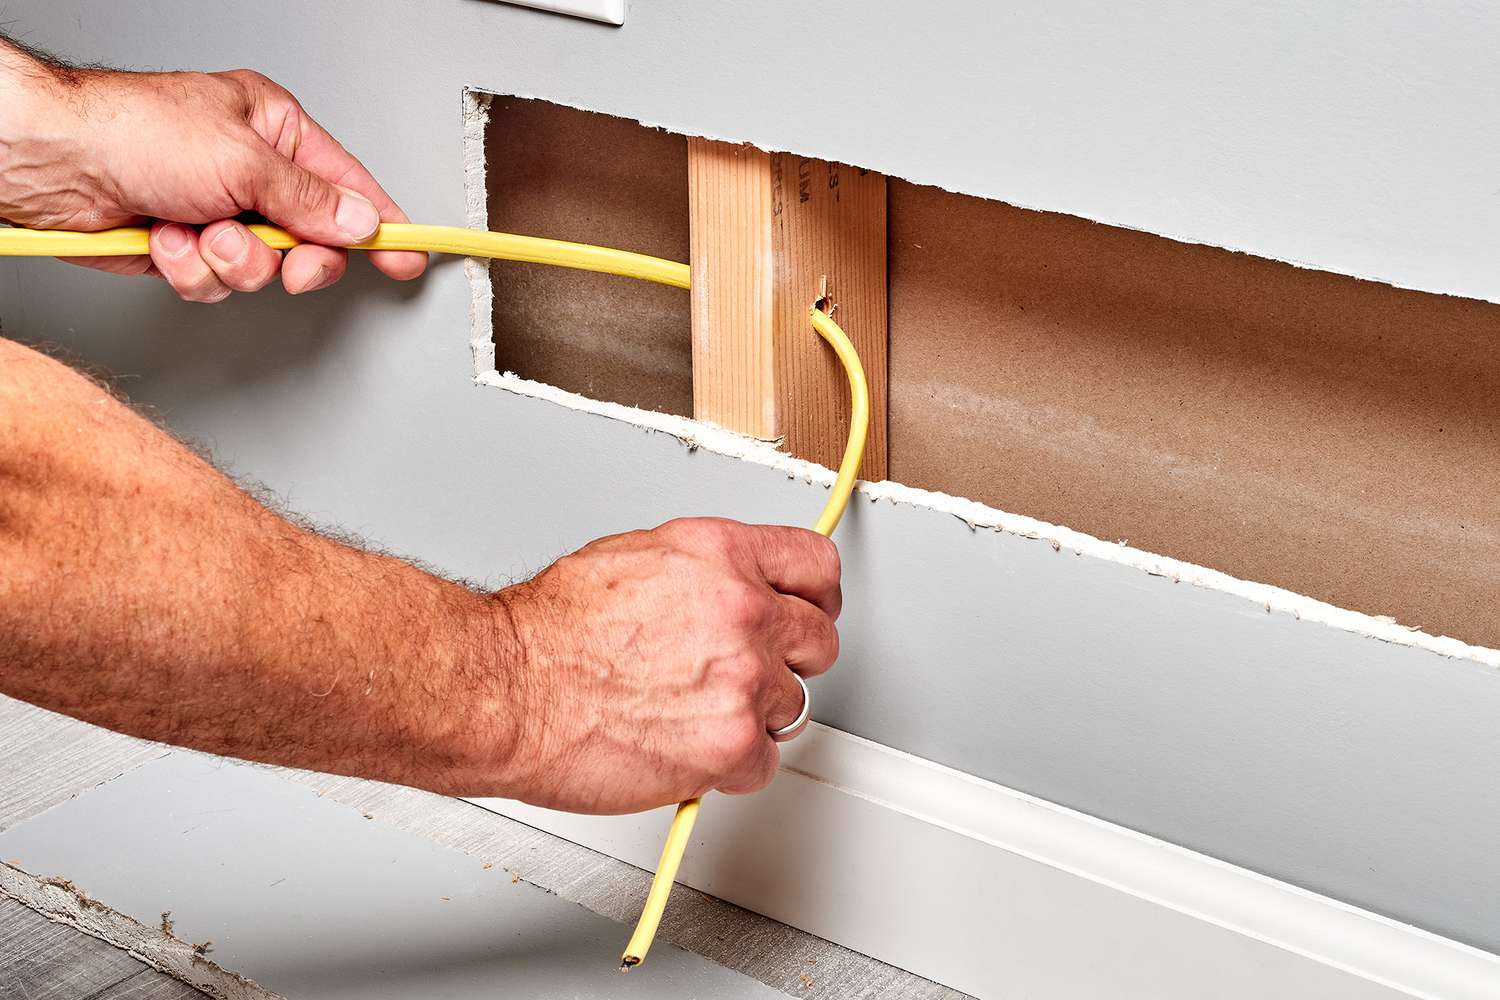
- Prepare the boxes for wiring: Within the boxes, remove the knockouts or insert cable connectors to create openings for the electrical wiring to enter.
- Route the wiring into the boxes: Carefully guide the electrical wiring into the boxes, ensuring they are positioned correctly and not subjected to excessive strain or bending.
- Secure the wiring: Use cable staples or clamps to secure the electrical wiring inside the boxes, keeping them organized and preventing any accidental damage.
- Install cover plates: Once the wiring is in place, attach the appropriate cover plates to the outlet or switch boxes. Ensure that they are securely fastened and properly aligned with the boxes.
- Double-check and test: Before proceeding to the next step, double-check all wiring connections and ensure that everything is properly installed. Once you are satisfied, turn on the power and test the outlets or switches to ensure they are functioning correctly.
By following these steps, you will successfully install the outlet or switch boxes in your unfinished basement ceiling. The boxes will provide a safe and organized housing for your electrical connections and devices.
With the outlet or switch boxes installed, you can now move on to the next step: connecting the wiring to the existing electrical system.
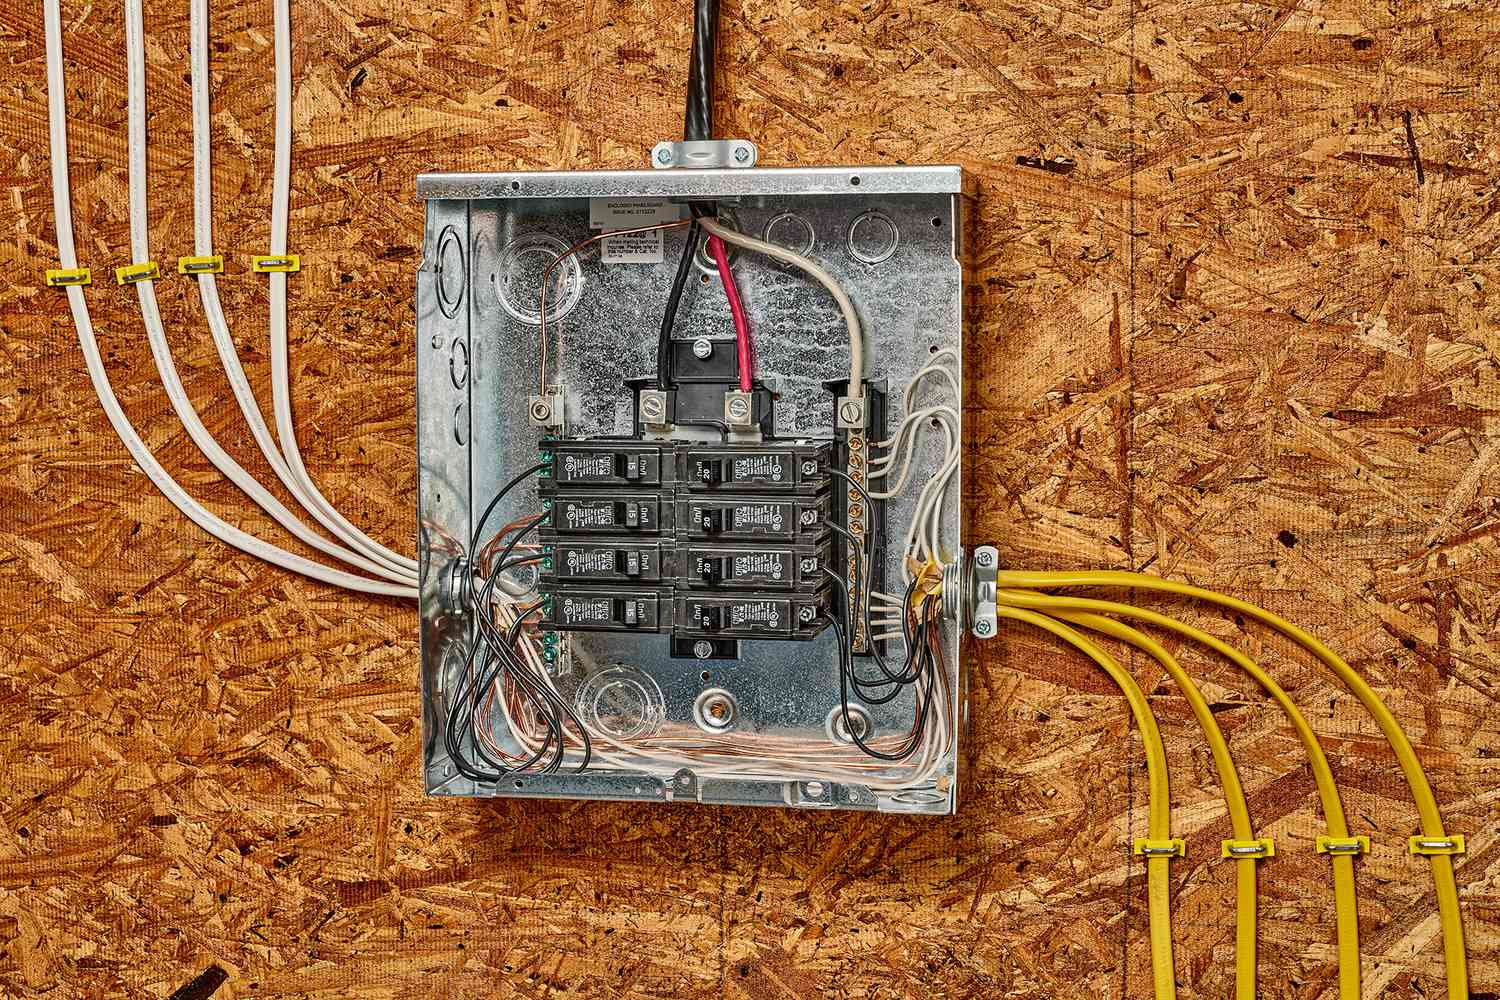
Step 7: Connecting the Wiring to Existing Electrical System
With the outlet or switch boxes properly installed in your unfinished basement ceiling, it’s time to connect the wiring to the existing electrical system. This step involves making the necessary connections to ensure that the new electrical components are properly powered and integrated into the overall electrical system of your home.
Here’s how you can connect the wiring to the existing electrical system:
- Turn off the power: Before working on any electrical connections, make sure to turn off the power to the circuit you are working on. Identify the correct circuit breaker in the main electrical panel and switch it off to ensure your safety.
- Identify the hot, neutral, and ground wires: Within the outlet or switch boxes, identify the hot wire (usually black or red), the neutral wire (usually white), and the ground wire (usually green or bare copper).
- Strip the wire ends: Use wire strippers to remove the proper amount of insulation from the ends of the wires. The length will vary depending on the type of connectors you are using.
- Make the connections: Connect the hot wire to the brass-colored screw terminal, the neutral wire to the silver-colored screw terminal, and the ground wire to the green screw terminal, as specified by the wiring diagram. Use wire nuts or terminal screws to secure the connections.
- Insert the wiring into the electrical box: Neatly fold the connected wires into the outlet or switch boxes, making sure they are not pinched or stretched. Arrange the wires to allow for easy installation of the switch or outlet.
- Secure the outlets or switches: Attach the switches or outlets to the outlet or switch boxes by securing them with the provided screws. Ensure they are securely fastened and aligned properly.
- Double-check the connections: Before restoring power, double-check all your wiring connections to ensure they are secure and properly installed. Verify that there are no loose or exposed wires.
- Restore power and test: Once you are confident in the connections, go to the main electrical panel and switch the circuit breaker back on. Test the newly installed outlets or switches to ensure they are functioning correctly.
- Label the new circuit: To ensure easy identification in the future, add a label to the circuit breaker that corresponds to the new wiring you have installed in the basement ceiling.
By following these steps, you will successfully connect the wiring to the existing electrical system in your home. This will allow the new outlets or switches in your unfinished basement ceiling to receive power and integrate seamlessly with the rest of your electrical system.
After completing the connections, be sure to test the outlets or switches to ensure that they are functioning properly before continuing with any additional steps in your basement renovation.
Now that the wiring connections have been made, you can move on to the final step: testing and inspecting the wiring in your unfinished basement ceiling.
Step 8: Testing and Inspecting the Wiring
After completing the installation of the wiring in your unfinished basement ceiling, it is crucial to thoroughly test and inspect the wiring to ensure that it is safe, functional, and meets all applicable electrical codes and regulations. This final step is essential for your peace of mind and the overall success of your project.
Here’s how you can test and inspect the wiring in your unfinished basement ceiling:
- Test the outlets and switches: Once the power is restored, check each outlet and switch in your basement to ensure that they are functioning correctly. Plug in various devices and test that the power is being supplied as expected.
- Check for any tripped circuit breakers: While testing the outlets and switches, if you encounter any circuit breakers that trip repeatedly, it may indicate an overloaded circuit. Evaluate the electrical load and consider redistributing or adding additional circuits if necessary.
- Inspect the wiring for any signs of damage: Visually inspect the wiring in your unfinished basement ceiling for any signs of damage, such as frayed or exposed wires. Pay close attention to where the wires are secured to the joists or running through conduit or boxes. If you notice any issues, consult a licensed electrician for repairs.
- Check for proper grounding: Verify that the ground wires are securely connected and properly grounded. Grounding is essential for safety, as it provides a path for electrical current in case of a fault or surge.
- Ensure proper wire labeling: Take the time to label each circuit appropriately in the electrical panel. Clear labeling makes future maintenance, troubleshooting, or modifications easier and safer for you or any future homeowners.
- Review compliance with local codes: Double-check that the wiring in your unfinished basement ceiling complies with all local electrical codes and regulations. This can include spacing requirements, wire gauges, and the use of appropriate conduit or cable types.
- Document your work: Keep a record of your electrical work, including the wiring plan, any modifications made during installation, and the final layout of the electrical system. This documentation will be valuable for future reference or if you decide to sell your home.
- Consider a professional inspection: If you are uncertain about any aspect of your electrical work or want an expert assessment, consider scheduling a professional inspection by a licensed electrician. They can ensure that everything is up to code and provide any necessary recommendations or corrections.
By diligently testing and inspecting the wiring in your unfinished basement ceiling, you can have confidence in the safety and functionality of your electrical system. Taking the time to complete this step will help avoid any future issues and ensure that your basement is equipped with a reliable and compliant electrical setup.
With the testing and inspection complete, you have successfully completed the process of running electrical wire in your unfinished basement ceiling. Congratulations!
Remember, if you ever encounter electrical issues or feel uncertain about any electrical work, always consult a licensed electrician to ensure your safety and the proper functioning of your electrical system.
Read more: How To Run Outdoor Electrical Wire
Conclusion
Running electrical wire in your unfinished basement ceiling may initially seem like a daunting task, but with proper planning, safety precautions, and attention to detail, it can be successfully accomplished. By following the step-by-step guide outlined in this article, you can confidently install the necessary electrical components to enhance the functionality and convenience of your basement space.
Throughout the process, it is crucial to prioritize safety. Familiarize yourself with local electrical codes and regulations, wear appropriate personal protective equipment (PPE), and make sure to turn off the power before working on any electrical connections. If you ever feel unsure or uncomfortable at any point, do not hesitate to consult a licensed electrician for assistance.
From planning and gathering materials to measuring and marking the ceiling, running the electrical wire along the joists, installing outlet or switch boxes, connecting the wiring to the existing electrical system, and testing and inspecting the completed work, each step plays a vital role in ensuring a safe and functional electrical system.
By creating a detailed wiring plan, gathering the necessary materials and tools, and meticulously following the steps outlined in this article, you can successfully run electrical wire in your unfinished basement ceiling while adhering to electrical codes and regulations.
Remember, always test and inspect the completed wiring to ensure that it meets safety standards and functions as intended. Document your work and consider a professional inspection to verify compliance and to provide valuable peace of mind.
With the proper installation of the electrical system in your unfinished basement ceiling, you now have the ability to add outlets, lighting fixtures, or switches to create a more functional and inviting space. Whether you plan to use the basement as a workshop, an entertainment area, or an additional living space, having a reliable and efficient electrical system in place is essential.
Now, armed with the knowledge and guidance provided in this article, you can confidently tackle the task of running electrical wire in your unfinished basement ceiling. Enjoy the process, prioritize safety, and transform your space into a haven that meets your electrical needs.
Frequently Asked Questions about How To Run Electrical Wire In Unfinished Basement Ceiling
Was this page helpful?
At Storables.com, we guarantee accurate and reliable information. Our content, validated by Expert Board Contributors, is crafted following stringent Editorial Policies. We're committed to providing you with well-researched, expert-backed insights for all your informational needs.


0 thoughts on “How To Run Electrical Wire In Unfinished Basement Ceiling”