Articles
How To Build A Basement
Modified: October 20, 2024
Discover expert articles on how to build a basement and enhance your home. Gain valuable insights and tips from our comprehensive collection of guides.
(Many of the links in this article redirect to a specific reviewed product. Your purchase of these products through affiliate links helps to generate commission for Storables.com, at no extra cost. Learn more)
How To Build a Basement
Building a basement can greatly increase the living space and functionality of your home. Whether you’re looking to create a recreational area, a guest suite, or simply additional storage space, a well-built basement can be a valuable addition. In this article, we will guide you through the process of building a basement, from planning and permits to the final touches of furnishing and decorating.
Key Takeaways:
- Building a basement requires careful planning, skilled labor, and adherence to safety regulations. From excavation to furnishing, prioritize safety, functionality, and compliance with building codes for a successful project.
- Enhance your basement with appropriate furniture, lighting, and safety measures. Create a functional and inviting space that reflects your lifestyle and adds value to your home.
Read more: How To Build A Basement Door
Planning and Permits
The first step in building a basement is assessing the feasibility of adding one to your home. Take into consideration factors such as the soil conditions, water table level, and any existing plumbing or utility lines that may affect the excavation process. Before starting any construction, it’s crucial to obtain the necessary permits and approvals from your local building authority.
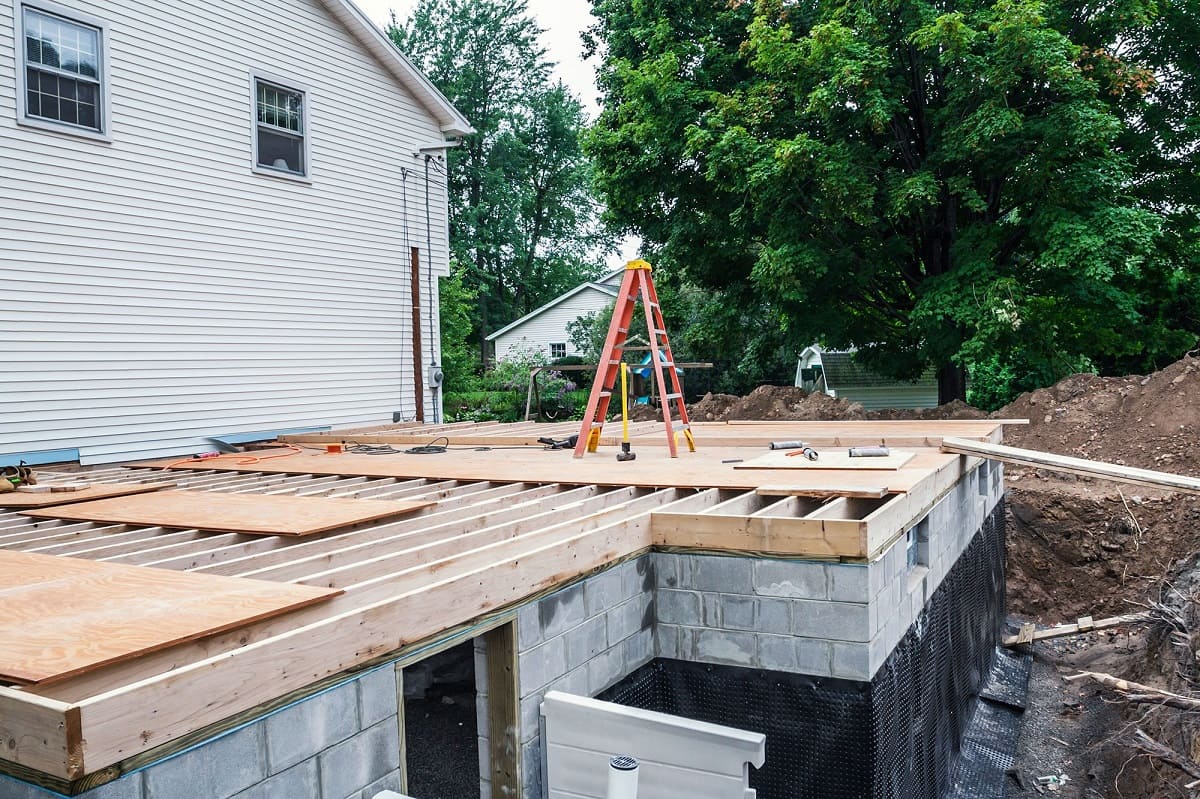
Excavation and Foundation
Once the planning and permits are in place, the excavation process can begin. Clear the area surrounding your home to make space for the basement. Hire professionals or rent excavation equipment to dig the foundation to the desired depth, ensuring it is level and properly aligned with the existing structure. Next, pour the concrete foundation, reinforcing it with steel bars to provide strength and stability.
Waterproofing and Insulation
To protect your basement from water damage, it’s essential to install proper waterproofing measures. This includes installing drainage systems to redirect water away from the foundation, applying waterproof coatings to the exterior walls, and sealing any cracks or gaps. Additionally, insulating the basement walls and floors will help maintain a comfortable temperature and prevent moisture buildup.
Framing and Structural Elements
Framing the basement walls is a crucial step in creating separate rooms and defining the layout of the space. Use treated lumber or metal studs to construct sturdy and durable walls. Install beams and columns for additional support and stability. Consider the placement of staircases and access points to ensure easy movement between the basement and the upper floors.
Read more: How To Build Basement Shelves
Electrical and Plumbing
Once the structure is in place, it’s time to wire the basement for electrical outlets, lighting fixtures, and any other electrical components you may need. Consult a licensed electrician to ensure your wiring meets safety standards and code requirements. Similarly, plumbing connections for sinks, toilets, and additional bathrooms should be installed by a professional plumber.
Flooring and Wall Finishes
Choose the right flooring materials based on your needs and preferences. Options include carpet, tile, laminate, or vinyl flooring. Install subflooring to provide a smooth and level surface before laying the finished flooring. For the walls, consider adding a fresh coat of paint or hanging wallpaper to enhance the aesthetic appeal of the basement.
Lighting and Ventilation
Proper lighting and ventilation are essential to create a comfortable and usable space. Install lighting fixtures strategically to illuminate different areas of the basement effectively. Maximize natural light by incorporating windows or skylights, if possible. Adequate ventilation is crucial to prevent moisture buildup and ensure good air circulation. Consider installing exhaust fans or creating vents to maintain a healthy environment.
Furnishing and Decorating
Choosing the right furniture and arranging the layout of your basement will depend on its intended use. Consider the activities you plan to accommodate, whether it’s a home theater, a gym, or a play area. Make sure to select furniture that fits the dimensions of the space and complements the overall design. Enhance the aesthetics with appropriate decorations and accessories that reflect your personal style.
Read more: How To Build A Bar In Basement
Safety Considerations
Prioritize safety in your basement by installing smoke detectors and fire extinguishers in key areas. Implement security measures such as locks on windows and doors to protect your valuables. Additionally, ensure there are clear emergency exits that comply with local building codes in the event of an emergency. Building a basement requires careful planning, attention to detail, and adherence to building codes and safety regulations. By following these steps and hiring professionals as needed, you can successfully build a functional and inviting basement that adds value to your home. So, roll up your sleeves and get ready to transform your space with a new basement!
This article is provided for informational purposes only. It is not intended to be a substitute for professional advice or guidance. Always consult a qualified contractor or architect for accurate information and guidance related to your specific project.
Introduction
Basements are often an underutilized and overlooked space in many homes. However, when built correctly, they can provide numerous benefits and significantly enhance the functionality and value of a property. In this section, we will explore the importance of basements and provide an overview of the building process.
Importance of Basements
Basements offer a wide range of advantages that make them a valuable addition to any home. Here are some key reasons why basements are important: 1. Additional Living Space: One of the primary benefits of a basement is the extra living area it provides. Whether you need a recreation room, an office, a guest suite, or simply extra storage space, a well-designed basement can fulfill all these needs, helping you maximize your home’s usable square footage. 2. Flexible Use: Basements offer versatility in terms of their potential uses. The space can be transformed into a wide range of rooms based on your lifestyle and preferences. From a home theater to a workout area, a playroom for kids, or even a wine cellar, the possibilities are endless. 3. Privacy: If you have a growing family or frequently entertain guests, a basement can provide an extra level of privacy. It allows for separate zones within the house, allowing family members or guests to relax or engage in activities without disturbing others in the main living areas. 4. Weather Protection: Basements can serve as a safe retreat during severe weather events. Having a well-built basement provides a secure space where you and your family can shelter during storms, hurricanes, or other emergencies, providing peace of mind and added protection.
Overview of the Building Process
Building a basement is a complex and multi-step process that requires careful planning, skilled labor, and adherence to safety regulations. Here is a general overview of the building process: 1. Planning and Permits: Assess the feasibility of adding a basement to your property and obtain the necessary permits and approvals from the local building authority before commencing any construction. 2. Excavation and Foundation: Clear the area surrounding your home and excavate the designated space for the basement. Pour a concrete foundation with proper reinforcement to provide strength and stability. 3. Waterproofing and Insulation: Install drainage systems to redirect water away from the foundation and apply waterproof coatings to prevent water intrusion. Insulate the basement walls and floors to maintain a comfortable temperature and prevent moisture buildup. 4. Framing and Structural Elements: Frame the basement walls using treated lumber or metal studs. Install supporting beams and columns to ensure structural integrity. Incorporate staircases and access points for easy movement. 5. Electrical and Plumbing: Wire the basement for electricity, including outlets, lighting fixtures, and other electrical components. Install plumbing connections for sinks, toilets, and any additional bathrooms. 6. Flooring and Wall Finishes: Choose and install suitable flooring materials based on your preferences. Apply finishes such as paint or wallpaper to enhance the aesthetics of the basement walls. 7. Lighting and Ventilation: Install lighting fixtures strategically to provide adequate illumination. Incorporate natural light sources and ensure proper ventilation for a healthy and comfortable environment. 8. Furnishing and Decorating: Select appropriate furniture and arrange the layout according to the intended use of the basement. Add decorative elements and personal touches to create a welcoming and enjoyable space. 9. Safety Considerations: Install smoke detectors, fire extinguishers, and security measures to ensure the safety of occupants. Create clear emergency exits that comply with building codes. By following these steps, you can successfully build a functional and inviting basement that adds value to your home. It is essential to consult professionals, such as contractors or architects, to ensure accurate information and guidance throughout the construction process.
This article is provided for informational purposes only. It is not intended to be a substitute for professional advice or guidance. Always consult a qualified contractor or architect for accurate information and guidance related to your specific project.
Key Takeaways:
- Building a basement requires careful planning, skilled labor, and adherence to safety regulations. From excavation to furnishing, prioritize safety, functionality, and compliance with building codes for a successful project.
- Enhance your basement with appropriate furniture, lighting, and safety measures. Create a functional and inviting space that reflects your lifestyle and adds value to your home.
Read more: How To Build A Basement Door
Planning and Permits
Successfully building a basement requires careful planning and obtaining the necessary permits and approvals. This section will guide you through the process of assessing the feasibility of a basement and obtaining the required permissions.
Assessing the Feasibility of a Basement
Before proceeding with the construction of a basement, it’s crucial to assess the feasibility of adding one to your property. Here are some factors to consider: 1. Soil Conditions: The type and condition of the soil on your property will impact the excavation process. Different soil types, such as clay or sand, may require different approaches to ensure stability. Consulting with a soil engineer can help determine the suitability of your soil for a basement. 2. Water Table Level: The water table level refers to the depth at which water is found underground. If the water table is too high, it could pose challenges during excavation and increase the risk of water seepage into the basement. A professional assessment can determine the water table level and provide guidance on how to address it. 3. Existing Plumbing and Utilities: Consider the location of existing plumbing and utility lines within your property. These may need to be rerouted or modified to accommodate the new basement. Consulting with a licensed plumber and utility companies can help identify any potential conflicts or necessary adjustments. 4. Structural Integrity: Assess the structural integrity of your existing foundation. Ensure it can support the additional load of a basement and any alterations required for the construction. Structural engineering consultation may be necessary to determine the viability and structural reinforcement required. 5. Space and Layout: Evaluate the available space and layout options for your basement. Consider the desired use of the space and ensure it will fulfill your needs. Pay attention to ceiling height, natural light sources, and any potential obstacles that may affect the functionality and aesthetics.
Obtaining Necessary Permits and Approvals
Before beginning any construction, it’s essential to obtain the necessary permits and approvals from your local building authority. Here’s an overview of the permit process: 1. Research Local Regulations: Familiarize yourself with the building codes and regulations specific to your area. These may include requirements for setbacks, maximum lot coverage, building heights, and safety standards. Contact your local building department or visit their website for detailed information. 2. Prepare Documentation: Prepare all required documentation, including architectural plans, engineering calculations, and site surveys. Ensure that your plans meet the local building code’s requirements and submit them with your permit application. 3. Submit Permit Application: Visit your local building department and submit the completed permit application form along with the required documentation. Pay any application fees as determined by the municipality. 4. Plan Review Process: Your permit application will go through a review process. The building department will verify that your plans and proposed construction comply with all relevant codes and regulations. This process may take several weeks, depending on the complexity of your project and the workload of the department. 5. Permit Approval and Issuance: Once your plans are approved, you will receive your building permit. This permit authorizes you to begin construction and confirms that your project meets all necessary requirements. Display the permit prominently on the construction site as required by your local building department. 6. Inspections: Throughout the construction process, you will need to schedule and pass inspections as specified by the building department. Inspections typically occur at several stages, such as foundation, framing, electrical, plumbing, and final inspections. Ensure that you make necessary corrections or modifications based on the inspector’s comments. By assessing the feasibility of a basement and obtaining the proper permits and approvals, you can ensure a smooth and compliant construction process. Remember to consult with professionals, such as architects or contractors, for guidance and expertise in navigating the planning and permit process.
This article is provided for informational purposes only. It is not intended to be a substitute for professional advice or guidance. Always consult a qualified contractor or architect for accurate information and guidance related to your specific project.
Excavation and Foundation
The excavation and foundation phase is a critical step in building a basement. This section will provide an overview of the necessary steps, including clearing the area for excavation, digging the basement foundation, and pouring the concrete foundation.
Read more: How To Build A Basement Foundation
Clearing the Area for Excavation
Before excavation can begin, it’s essential to clear the area surrounding your home. Remove any obstructions, such as trees, shrubs, rocks, or existing structures that may hinder the basement construction. Ensure that the site is cleared completely to provide enough space for the excavation process.
Digging the Basement Foundation
Once the area is cleared, the next step is to dig the basement foundation. This process involves the removal of soil to create a space for the basement. Here are the key steps involved in digging the basement foundation: 1. Marking the Foundation: Use stakes and string to mark the outline of the basement foundation based on the architectural plans. This will serve as a guide for the excavation process. 2. Excavation Equipment: Depending on the size and complexity of the project, you can hire professionals or rent excavation equipment, such as a backhoe or excavator, to perform the digging. Ensure that the equipment operator is experienced in basement excavation. 3. Excavation Depth: Dig the foundation to the desired depth based on local building codes and the project requirements. Typically, basements are excavated to a depth that allows for comfortable headroom and the incorporation of necessary utilities. 4. Sloping and Leveling: During the excavation, pay attention to proper sloping and leveling to ensure proper drainage away from the foundation. This will help prevent water infiltration and moisture issues in the basement. 5. Compaction: After the excavation is complete, it’s important to compact the soil to provide a stable base for the foundation. Use a compactor or heavy machinery to achieve proper soil compaction.
Pouring the Concrete Foundation
Once the basement foundation has been excavated and prepared, it’s time to pour the concrete foundation. Here are the key steps involved in this process: 1. Formwork Installation: Install formwork along the perimeter of the basement foundation. Formwork acts as a mold to hold the concrete in place until it sets. Ensure that the formwork is properly aligned and level. 2. Reinforcement: Place steel reinforcement bars (rebar) within the formwork to provide strength and structural integrity to the foundation. Follow the architectural plans and building codes for the proper placement and spacing of the rebar. 3. Concrete Pouring: Mix and pour the concrete into the foundation formwork. Ensure that the concrete is consistent and free of air pockets. Use a concrete vibrator to remove any trapped air, ensuring proper compaction. 4. Finishing: After pouring the concrete, finish the surface using tools such as trowels or floats to create a smooth, level, and even finish. Allow the concrete to cure and harden according to the manufacturer’s recommendations. 5. Removal of Formwork: Once the concrete has cured sufficiently, carefully remove the formwork to reveal the newly poured foundation. Take caution to avoid damaging the concrete during this process. Proper excavation and the construction of a solid foundation are vital for a successful basement project. It is recommended to hire experienced professionals or consult with a contractor during these stages to ensure accuracy, safety, and compliance with building codes.
This article is provided for informational purposes only. It is not intended to be a substitute for professional advice or guidance. Always consult a qualified contractor or architect for accurate information and guidance related to your specific project.
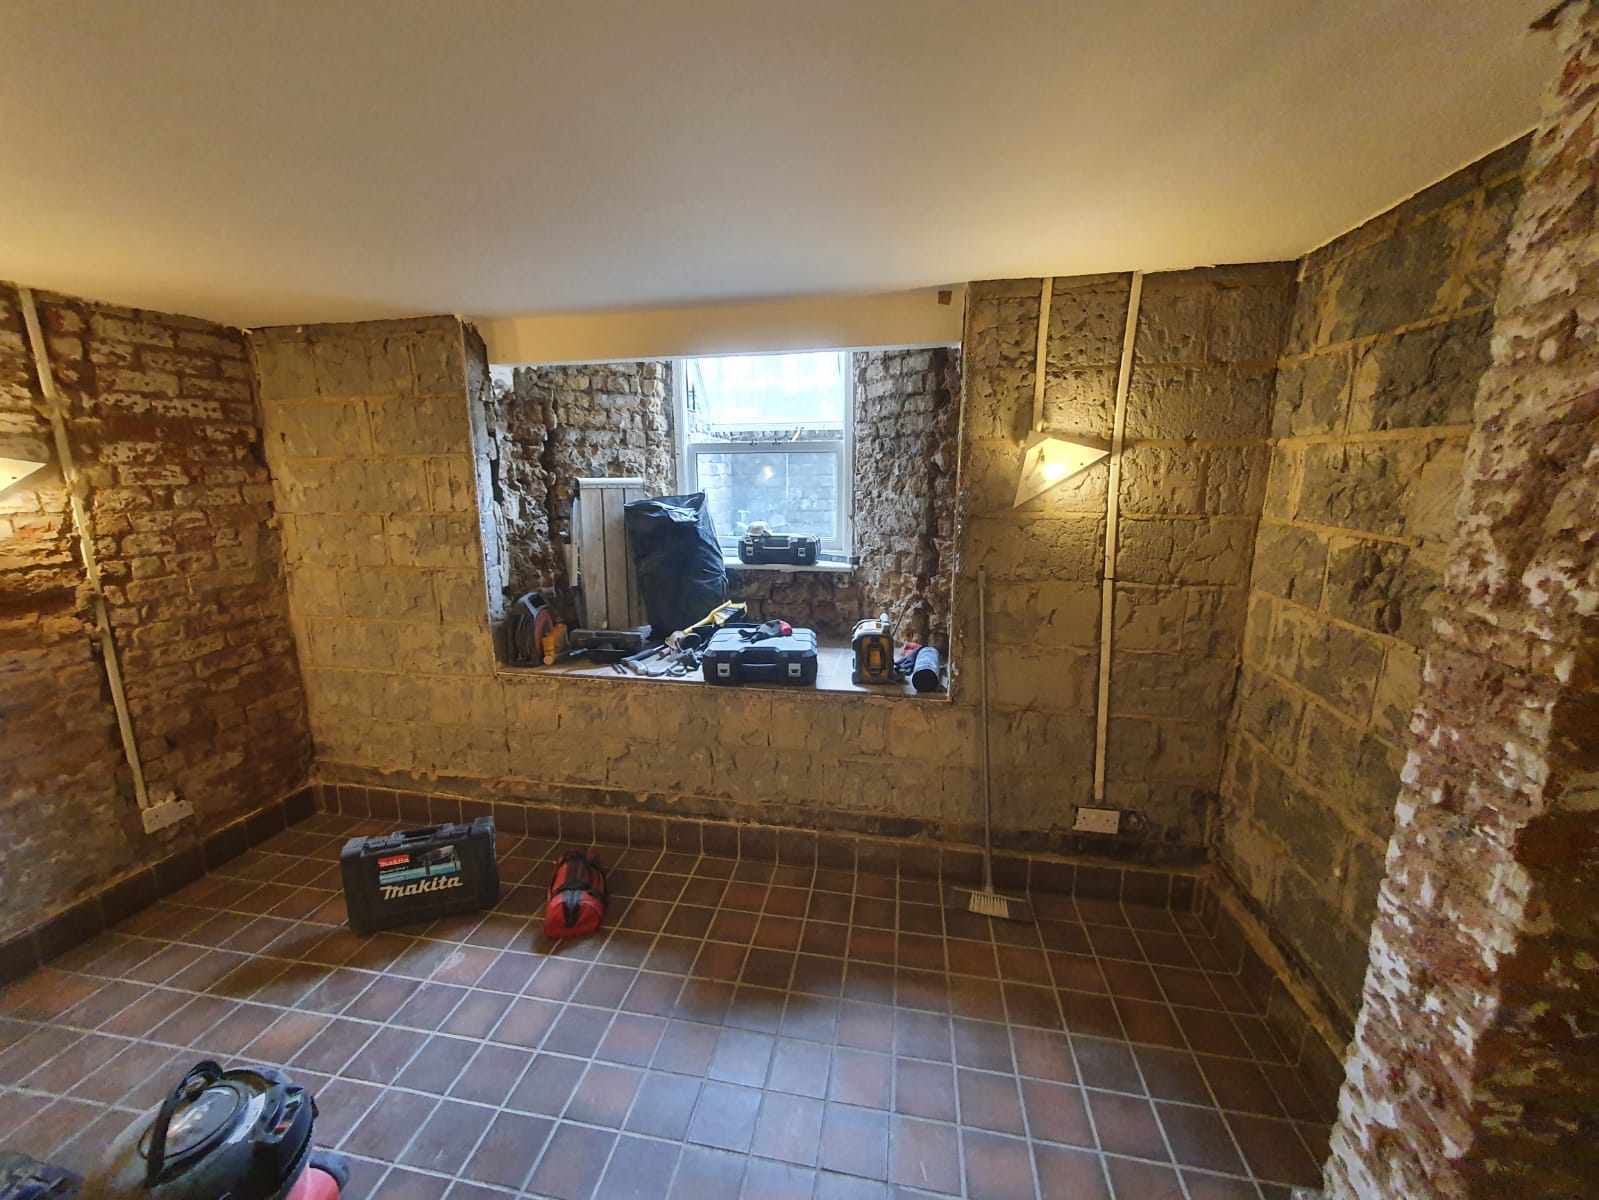
Waterproofing and Insulation
Waterproofing and insulation are crucial steps in building a basement. These measures help protect the space from water intrusion and create a comfortable environment. This section will outline the steps involved in installing drainage systems, applying waterproof coatings, and insulating the basement walls and floors.
Read more: How To Build A Sauna In Basement
Installing Drainage Systems
Effective drainage is essential for preventing water buildup and ensuring a dry basement. Here are the key steps involved in installing drainage systems: 1. Exterior Drainage: Excavate around the perimeter of the basement foundation and install a French drain or exterior drainage system. This system collects water and directs it away from the foundation, preventing water from seeping into the basement. 2. Interior Drainage: Install an interior drainage system, such as a sump pump and drainage pipes, to manage water that may enter the basement. This system collects water and pumps it out of the basement, reducing the risk of flooding. 3. Proper Sloping: Ensure that the soil around the foundation slopes away from the basement walls. This helps direct water away from the foundation, reducing the likelihood of water seepage.
Applying Waterproof Coatings
Applying waterproof coatings is a crucial step in protecting the basement walls from moisture infiltration. Here’s how to apply waterproof coatings effectively: 1. Prepare the Surface: Clean the basement walls thoroughly, removing any dirt, dust, or loose particles. Repair any cracks or imperfections in the walls before applying the waterproof coating. 2. Select the Coating: Choose a high-quality waterproof coating or sealer suitable for your basement walls. Ensure that the product is designed for below-grade applications and offers long-lasting protection against water intrusion. 3. Apply the Coating: Follow the manufacturer’s instructions to apply the waterproof coating evenly on the basement walls. Use a brush, roller, or sprayer depending on the type of coating. Apply multiple coats if needed, allowing sufficient drying time between each coat. 4. Pay Attention to Vulnerable Areas: Pay special attention to vulnerable areas such as corners, joints, and areas prone to water seepage. Apply additional layers or use specialized waterproofing products for added protection in these areas.
Insulating the Basement Walls and Floors
Insulation helps regulate the temperature, minimize moisture, and improve energy efficiency in the basement. Consider the following steps for insulating the basement walls and floors: 1. Moisture Barrier: Before insulating, install a moisture barrier, such as a plastic vapor barrier or a waterproof insulation board, on the interior surface of the basement walls. This helps prevent moisture from penetrating the insulation. 2. Insulation Material: Choose an insulation material suitable for basement applications, such as rigid foam boards or spray foam insulation. Consider the R-value (thermal resistance) of the insulation to ensure efficient temperature control. 3. Insulation Installation: Install the insulation according to the manufacturer’s instructions, ensuring a tight fit without any gaps or compression. Secure the insulation on the walls using adhesive, mechanical fasteners, or insulation hangers. 4. Floor Insulation: Insulate the basement floors using rigid foam insulation or insulation boards. Install a layer of plywood or subfloor on top of the insulation to create a smooth and level surface for flooring materials. By properly installing drainage systems, applying waterproof coatings, and insulating the basement walls and floors, you can create a dry and comfortable environment while preventing moisture-related issues. Consider consulting with professionals or experts in basement waterproofing and insulation to ensure proper installation and adherence to building codes.
This article is provided for informational purposes only. It is not intended to be a substitute for professional advice or guidance. Always consult a qualified contractor or architect for accurate information and guidance related to your specific project.
Framing and Structural Elements
Framing the basement walls and installing necessary structural elements are critical steps in building a functional and sturdy basement. This section will guide you through the process of framing the basement walls, installing beams and columns for support, and adding staircases and access points.
When building a basement, ensure proper waterproofing to prevent moisture issues. Use quality materials and consider hiring a professional for complex tasks.
Read more: How To Build A Basement Ventilation System
Framing the Basement Walls
Framing the basement walls involves constructing the framework that will define the layout and separate different areas within the basement. Here are the key steps involved in framing the basement walls: 1. Measure and Mark: Measure and mark the desired location of the walls, following the layout plans. Use a chalk line or laser level to ensure accurate placement. 2. Select and Cut Lumber: Choose treated lumber or metal studs for the wall framing. Cut the lumber to the appropriate lengths, accounting for wall height and any openings for doors or windows. 3. Install Bottom Plate: Secure a pressure-treated or moisture-resistant bottom plate along the perimeter of the basement floor. Ensure it is level and securely anchored to the concrete floor using concrete anchors or nails. 4. Install Wall Studs: Space the wall studs according to the building code requirements, typically 16 inches on center. Secure the studs vertically to the bottom plate and use a level to ensure they are plumb. Secure the top of the studs to the floor joists or ceiling joists above. 5. Install Top Plate: Install a top plate horizontally to cap the wall studs and provide additional stability. Secure it to the wall studs using nails or screws. 6. Frame Openings: Frame any necessary openings for doors, windows, or other access points. Install headers above the openings and provide proper supports as needed.
Installing Beams and Columns for Support
Beams and columns provide structural support to the basement and help distribute the weight of the upper floors. Here’s how to install beams and columns: 1. Determine Beam Placement: Consult with a structural engineer to determine the need for beams and their placement. Consider factors such as load-bearing walls, span distances, and support requirements. 2. Select and Cut Beams: Choose appropriately sized and rated beams based on the structural requirements. Cut the beams to the required lengths and ensure they are properly treated and supported for longevity. 3. Install Beams: Temporarily support the existing upper-level structure during the installation of beams. Use proper construction techniques to anchor the beams in place, ensuring they are level and aligned according to the engineer’s specifications. 4. Install Columns: Install columns beneath the beams to provide additional support. Choose columns that can handle the load and height requirements. Secure the columns to the basement floor and beams to create a stable structure.
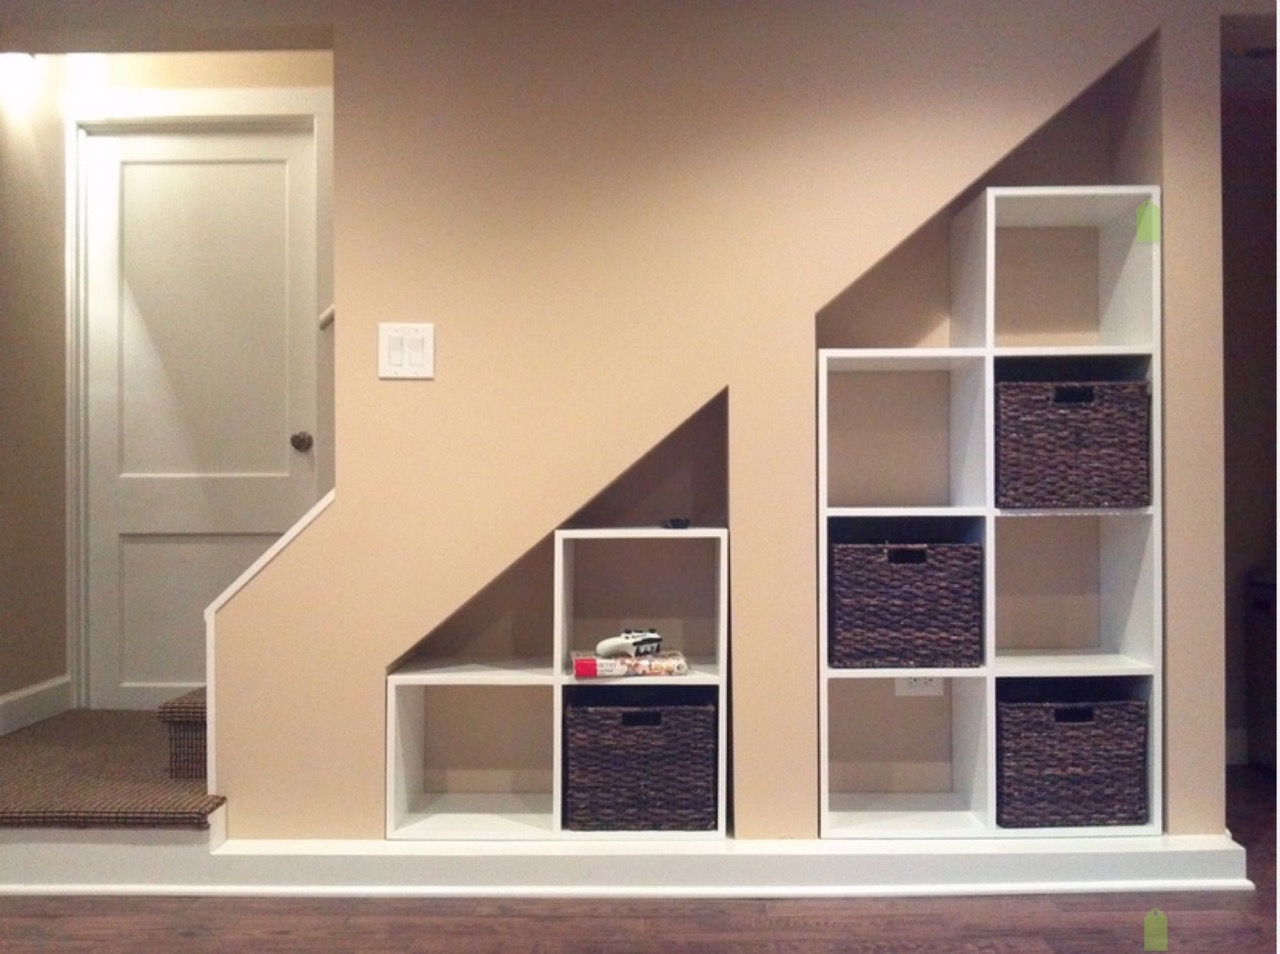
Adding Staircases and Access Points
Properly designed staircases and access points are essential for the functionality and usability of the basement. Here’s how to add staircases and access points: 1. Determine Staircase Placement: Determine the ideal location for the staircase based on the basement layout and architectural plans. Consider factors such as headroom, clearances, and existing structure. 2. Design and Construct the Staircase: Design the staircase based on the width and height requirements. Follow the local building codes for the minimum tread depth, riser height, and handrail specifications. Construct the staircase using appropriate materials and techniques. 3. Install Access Points: Install access points such as doors, windows, or exterior entrances according to the architectural plans and local building codes. Ensure proper framing, flashing, and weatherproofing techniques are used. 4. Ensure Safety and Accessibility: Pay attention to safety features such as handrails, guardrails, and proper lighting for staircases and access points. Ensure that the design meets code requirements for accessibility, particularly if the basement will be used by individuals with mobility challenges. By following these steps, you can successfully frame the basement walls, install beams and columns for support, and create functional staircases and access points. It’s important to consult with professionals, such as architects or contractors, to ensure accurate construction, adherence to building codes, and structural integrity.
This article is provided for informational purposes only. It is not intended to be a substitute for professional advice or guidance. Always consult a qualified contractor or architect for accurate information and guidance related to your specific project.
Read more: How To Build Basement Shelves
Electrical and Plumbing
Proper electrical and plumbing installations are essential for a functional and safe basement. This section will guide you through the process of wiring the basement for electricity, installing electrical outlets and fixtures, and setting up plumbing connections for sinks and bathrooms.
Read more: How To Build A Wine Cellar In Basement
Wiring the Basement for Electricity
Wiring the basement for electricity involves installing the necessary electrical wiring and components to power lights, outlets, and other electrical devices. Here are the steps involved: 1. Plan the Electrical Layout: Determine the location and number of electrical outlets, light fixtures, and switches based on your basement’s layout and electrical needs. Consult the local building codes to ensure compliance. 2. Consult with an Electrician: It is recommended to consult with a licensed electrician for the proper design and wiring of your basement. They will ensure compliance with electrical codes and safety standards. 3. Install Wiring: Run electrical wiring through the walls and ceilings according to the electrical plan. Use approved electrical cable, such as Romex, and follow proper wiring techniques, including securing and protecting the wires. 4. Connect to the Electrical Panel: Connect the wiring to a circuit breaker in your main electrical panel. Assign separate circuits for different areas and use appropriate circuit breakers based on the load requirements.
Installing Electrical Outlets and Fixtures
Installing electrical outlets and fixtures is necessary to provide power throughout the basement. Follow these steps for proper installation: 1. Determine Outlet and Fixture Locations: Determine the location of electrical outlets, light switches, and fixtures according to the electrical plan. Consider convenience, function, and safety when placing them. 2. Install Outlet Boxes: Install electrical outlet boxes at the predetermined locations. Ensure they are securely fastened to the wall and aligned with the finished surface. 3. Install Electrical Outlets, Switches, and Fixtures: Connect the electrical wiring to electrical outlets, switches, and light fixtures. Follow the manufacturer’s instructions for proper wiring and installation. 4. Test the Electrical Connections: Once the outlets, switches, and fixtures are installed, test the electrical connections with a multimeter or voltage tester to ensure they are functioning properly.
Setting Up Plumbing Connections for Sinks and Bathrooms
Setting up plumbing connections involves installing the necessary pipes, fixtures, and drains for sinks and bathrooms in the basement. Here are the steps involved: 1. Plan the Plumbing Layout: Determine the layout and location of plumbing fixtures based on the basement’s design and functionality. This includes sinks, toilets, showers, and any other desired plumbing connections. 2. Consult with a Plumber: Consult with a licensed plumber to ensure proper planning and installation of the plumbing system. They will help determine the best route for pipes and ensure compliance with plumbing codes. 3. Install Drainage and Vent Pipes: Install the necessary drainage and vent pipes to connect to the main sewer or septic system. Place them strategically to accommodate the fixtures and ensure proper flow. 4. Install Water Supply Lines: Run water supply lines from the main supply to the basement, connecting them to appropriate fixtures and appliances. Use approved piping materials such as copper, PEX, or CPVC. 5. Install Fixtures: Install sinks, toilets, showers, and other fixtures according to the plumbing plan. Follow the manufacturer’s instructions and ensure proper sealing and connections. 6. Test for leaks: After installation, thoroughly test the plumbing connections for any leaks. Address any issues promptly to ensure a reliable and leak-free system. It’s essential to hire experienced and licensed professionals, such as electricians and plumbers, for proper installation of electrical and plumbing systems in your basement. They will ensure compliance with safety codes and standards, providing a reliable and functional setup.
This article is provided for informational purposes only. It is not intended to be a substitute for professional advice or guidance. Always consult a qualified contractor or architect for accurate information and guidance related to your specific project.
Flooring and Wall Finishes
Choosing the right flooring materials and wall finishes can greatly enhance the aesthetics and functionality of your basement. This section will guide you through the process of selecting the right flooring, installing subflooring and finished flooring, and applying paint or wallpaper on the basement walls.
Choosing the Right Flooring Materials
When selecting flooring materials for your basement, it’s important to consider factors such as moisture resistance, durability, and personal preferences. Here are some popular options: 1. Carpet: Carpet provides warmth and comfort underfoot. Choose a carpet with moisture-resistant backing for basements prone to moisture. Consider low-pile carpets that are easy to maintain. 2. Vinyl or Laminate: Vinyl and laminate flooring are moisture-resistant and durable options that mimic the look of hardwood or tile. They are easy to clean and come in a variety of styles and designs. 3. Ceramic or Porcelain Tile: Tile is a durable and moisture-resistant choice for basements. It is available in various sizes, shapes, and finishes, allowing for versatile design options. 4. Engineered Hardwood: Engineered hardwood is a suitable option for basements since it is more resistant to moisture compared to solid hardwood. It provides the warmth and beauty of natural wood. 5. Concrete Stain or Acid Stain: If you prefer an industrial or modern look, you can opt to leave the concrete floors exposed and apply a stain or acid stain for a decorative finish.
Installing Subflooring and Finished Flooring
Installing subflooring and finished flooring is crucial for creating a level and comfortable surface in your basement. Follow these steps for proper installation: 1. Prepare the Subfloor: Ensure the subfloor is clean, dry, and free of any debris or moisture. Repair any uneven or damaged spots. 2. Install Vapor Barrier: Lay a vapor barrier over the subfloor to prevent moisture from seeping into the flooring material. Use a moisture-resistant barrier appropriate for your chosen flooring type. 3. Install Subfloor: Install a subfloor to provide a level and stable base for your finished flooring. Options include plywood, oriented strand board (OSB), or specialized subfloor panels designed for basements. 4. Acclimate the Flooring: Allow the flooring material to acclimate to the basement environment before installation, following the manufacturer’s recommendations. 5. Install Finished Flooring: Lay the chosen flooring material according to the manufacturer’s instructions. Use appropriate adhesives, nails, or click-and-lock systems depending on the type of flooring. Follow the proper installation techniques to ensure a secure and professional finish.
Applying Paint or Wallpaper on the Basement Walls
Applying paint or wallpaper can transform the look of your basement walls and add personality to the space. Here’s how to apply paint or wallpaper effectively: 1. Prepare the Walls: Clean the walls thoroughly, removing any dirt, dust, or stains. Repair any imperfections such as cracks or holes and ensure the walls are dry. 2. Prime the Walls: Apply a primer to create a smooth and even surface for paint or wallpaper. This will also ensure better adhesion and durability. 3. Applying Paint: Choose high-quality paint suitable for basement applications. Apply the paint using a roller or brush in even strokes, following the manufacturer’s instructions for drying time and additional coats if needed. 4. Applying Wallpaper: Measure and cut the wallpaper to the desired length, leaving a little extra for adjustments. Apply wallpaper adhesive according to the manufacturer’s instructions. Smooth the wallpaper onto the wall, removing any air bubbles or wrinkles. 5. Finishing Touches: Once the paint or wallpaper is dry, touch up any areas as needed. Trim any excess wallpaper and apply a protective clear coat over the paint or wallpaper if desired. When choosing flooring materials and wall finishes, make sure they align with your design preferences, budget, and functionality requirements. Consider consulting with professionals or designers for expert opinions and guidance.
This article is provided for informational purposes only. It is not intended to be a substitute for professional advice or guidance. Always consult a qualified contractor or architect for accurate information and guidance related to your specific project.
Lighting and Ventilation
Proper lighting and ventilation are crucial considerations when building a basement. Well-planned lighting can create a welcoming and functional space, while proper ventilation ensures a comfortable and healthy environment. This section will guide you through the process of installing lighting fixtures and switches, incorporating natural light sources, and ensuring proper ventilation and air circulation.
Installing Lighting Fixtures and Switches
Proper lighting is essential for creating a well-lit and inviting basement. Follow these steps for installing lighting fixtures and switches: 1. Plan the Lighting Layout: Determine the locations and types of lighting fixtures you’ll need based on the basement layout and intended use of different areas. Consider the desired ambiance, task lighting requirements, and safety considerations. 2. Consult with a Lighting Designer or Electrician: For a well-designed lighting scheme, consult with a professional lighting designer or licensed electrician. They can help you create the ideal lighting plan, incorporating both functionality and aesthetics. 3. Install Wiring and Electrical Boxes: Install the necessary electrical wiring and junction boxes in the desired locations for lighting fixtures and switches. Connect the wiring to the electrical panel following safety precautions and local electrical codes. 4. Install Lighting Fixtures: Install the chosen lighting fixtures, such as recessed lights, pendant lights, or track lights, according to the manufacturer’s instructions. Take care to align the fixtures properly and ensure secure installations. 5. Install Switches and Dimmers: Install switches and dimmers in accessible and convenient locations. Choose switches and dimmers that match your design preferences and the types of lighting fixtures you have installed.
Incorporating Natural Light Sources
Incorporating natural light sources can make a basement feel brighter and more welcoming. Consider these options: 1. Egress Windows: Install egress windows where feasible to provide natural light and emergency exit routes. Egress windows should comply with local building codes and safety requirements. 2. Window Wells: Enhance the functionality and aesthetics of egress windows by installing window wells. These help bring in more natural light and prevent water infiltration. 3. Light Wells or Light Tubes: If direct windows are not possible, consider using light wells or light tubes to channel natural light into the basement. These are designed to capture and reflect sunlight into the space.
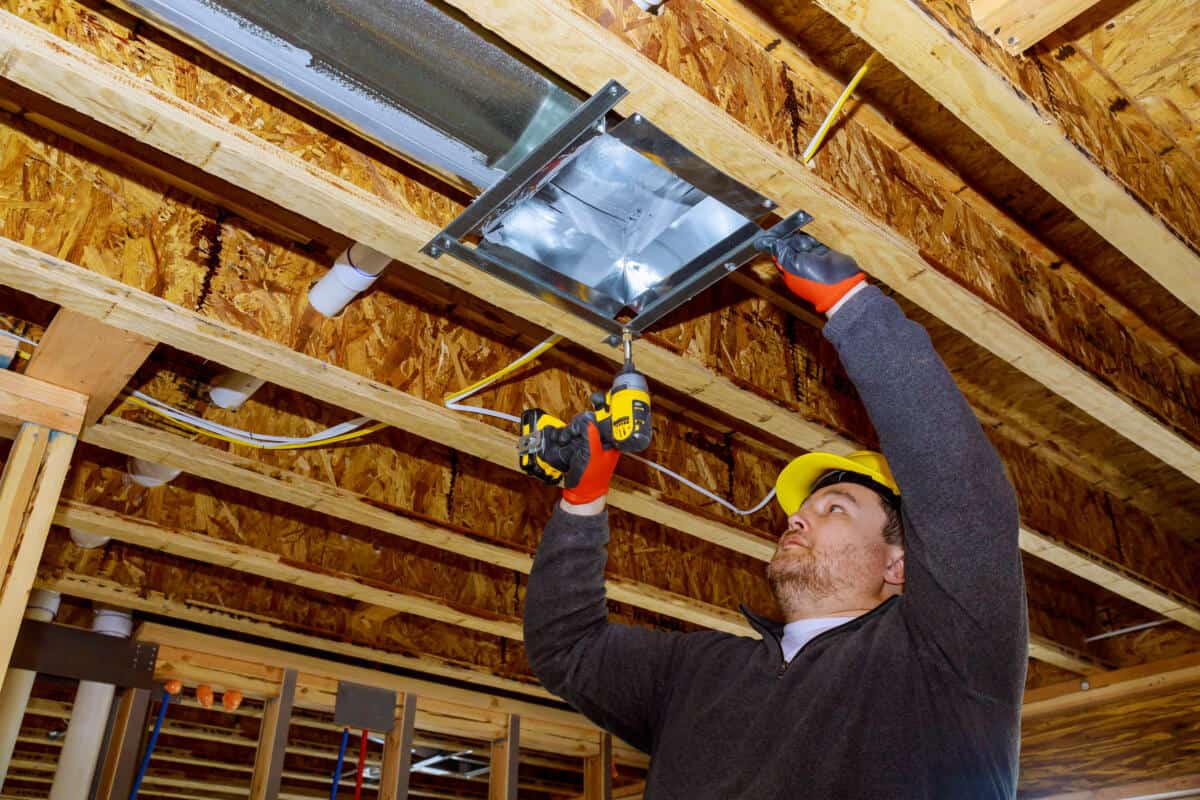
Ensuring Proper Ventilation and Air Circulation
Proper ventilation and air circulation are crucial for maintaining a healthy indoor environment and preventing moisture-related issues. Here’s how to ensure proper ventilation in your basement: 1. Natural Ventilation: Make use of windows and vents to allow natural airflow into the basement. Open windows or install operable vents to facilitate the exchange of fresh air. 2. Mechanical Ventilation: Install exhaust fans or ventilation systems in areas with limited natural ventilation. These can help remove stale air, odors, and excess moisture from the basement. 3. Dehumidifiers: Consider using a dehumidifier to control humidity levels in the basement. This helps prevent mold growth and maintain a comfortable environment. 4. Ductwork and Air Registers: Connect the basement to the main HVAC system to ensure proper heating and cooling. Install air registers and return air vents strategically to facilitate air circulation. 5. Air Sealing: Seal any gaps, cracks, or openings in the basement walls, floors, and ceilings to prevent outside air infiltration and improve energy efficiency. By installing adequate lighting fixtures, incorporating natural light sources, and ensuring proper ventilation and air circulation, you can create a comfortable and well-lit basement environment.
This article is provided for informational purposes only. It is not intended to be a substitute for professional advice or guidance. Always consult a qualified contractor or electrician for accurate information and guidance related to your specific project.
Furnishing and Decorating
Furnishing and decorating your basement is an exciting step that allows you to personalize the space and make it functional and visually appealing. This section will guide you through the process of choosing appropriate basement furniture, arranging the layout for various purposes, and enhancing the aesthetics with decorations and accessories.
Read more: How Much Does It Cost To Build A Basement
Choosing Appropriate Basement Furniture
When selecting furniture for your basement, it’s important to consider the space’s purpose, dimensions, and your personal preferences. Here are some tips to help you choose the right furniture: 1. Assess the Space: Determine how your basement will be utilized, whether it’s a home theater, a playroom, a gym, a home office, or a multi-purpose space. Consider the size and layout of the basement to ensure furniture fits comfortably. 2. Functionality and Comfort: Choose furniture that suits the activities you’ll be doing in the basement. Opt for comfortable seating, ergonomic desks, and storage solutions that maximize functionality. 3. Size and Scale: Take measurements of the available space and consider the scale of the furniture before making a purchase. Avoid overcrowding the room and ensure there is enough room for movement. 4. Versatility: Consider furniture that is versatile and can adapt to different functions. Modular furniture, foldable tables, and sleeper sofas are great options for a multi-purpose basement.
Arranging the Layout for Various Purposes
Arranging the layout of your basement will depend on the activities you plan to accommodate. Here are some general tips to help you arrange the furniture effectively: 1. Define Zones: Create separate areas within the basement for different activities. Use furniture placement, rugs, or room dividers to define zones for lounging, working, or entertaining. 2. Consider Traffic Flow: Arrange furniture in a way that allows for smooth traffic flow and easy access to different areas of the basement. Avoid blocking doorways or creating obstacles. 3. Multifunctional Spaces: Maximize the functionality of your basement by incorporating multifunctional furniture and flexible layouts. For example, consider a desk that can double as a dining table or a sofa bed for hosting guests.
Enhancing the Aesthetics with Decorations and Accessories
Decorations and accessories can significantly enhance the aesthetics of your basement while reflecting your personal style. Here are some ideas to enhance the overall look: 1. Paint and Wallpaper: Apply a fresh coat of paint or hang wallpaper that complements the overall design theme of your basement. Choose colors and patterns that create the desired atmosphere. 2. Lighting Fixtures: Install appropriate lighting fixtures to create a welcoming ambiance in your basement. Use a combination of overhead lighting, task lighting, and accent lighting to achieve the desired effect. 3. Wall Art and Decorations: Hang artwork, posters, or photographs on the walls to add personality and visual interest. Consider other decorations such as mirrors, shelves, or wall-mounted plants to create a visually appealing space. 4. Soft Furnishings: Add comfort and style to your basement with soft furnishings such as cushions, throws, and rugs. Choose textures and patterns that complement the overall design and add visual warmth. 5. Storage Solutions: Incorporate stylish storage solutions such as shelves, cabinets, or ottomans with hidden compartments. These not only add functionality but also help keep the space organized and clutter-free. By selecting appropriate basement furniture, arranging the layout for different purposes, and enhancing the aesthetics with decorations and accessories, you can create a basement that is functional, welcoming, and visually appealing.
This article is provided for informational purposes only. It is not intended to be a substitute for professional advice or guidance. Always consult a qualified interior designer or decorator for accurate information and guidance related to your specific project.
Read more: How To Build A Bar In Basement
Safety Considerations
Ensuring the safety of your basement is of paramount importance. Implementing safety measures can help protect against potential dangers and emergencies. This section will guide you through the process of installing smoke detectors and fire extinguishers, implementing security measures, and creating emergency exits in the basement.
Read more: How To Build A Safe Room In Your Basement
Installing Smoke Detectors and Fire Extinguishers
Smoke detectors and fire extinguishers are essential safety measures that can save lives and minimize property damage. Follow these steps to install them effectively: 1. Determine Placement: Install smoke detectors in key locations throughout the basement. Place them near bedrooms, in hallways, or near areas with potential fire hazards such as kitchens or utility rooms. 2. Follow Manufacturer Instructions: Read and follow the manufacturer’s instructions for smoke detector installation. They typically provide specific guidelines on placement, recommended height, and maintenance. 3. Test and Maintain Regularly: Test smoke detectors regularly to ensure they are functioning properly. Replace batteries as needed and clean detectors periodically to prevent obstruction. 4. Install Fire Extinguishers: Install fire extinguishers in easily accessible areas of the basement. Choose an extinguisher suitable for the types of fires you may encounter, such as a multi-purpose ABC extinguisher. 5. Train Household Members: Educate household members on how to use the fire extinguisher properly. Review safety protocols, evacuation plans, and emergency contact information.
Implementing Security Measures
Implementing security measures in your basement helps protect against unauthorized access and provide peace of mind. Consider the following steps: 1. Secure Doors and Windows: Install sturdy doors and windows in the basement and ensure they have robust locks. Consider reinforcing doors with deadbolts or security bars for added protection. 2. Install Security Cameras: Install security cameras in strategic locations to monitor the basement and deter potential intruders. Choose a reliable system that can be accessed remotely if desired. 3. Use Motion Sensor Lighting: Install motion sensor lighting around the exterior of the basement to deter trespassers and improve visibility in the darker areas. 4. Alarm System Integration: Integrate your basement with an existing home alarm system or install a separate security system for additional protection. Consult with a security professional to determine the best options for your needs.
Creating Emergency Exits in the Basement
Creating emergency exits in the basement ensures a safe means of escape in the event of an emergency. Here are some steps to follow: 1. Determine Exit Locations: Identify suitable locations for emergency exits based on the basement layout and accessibility. Ideally, there should be at least two separate exits. 2. Install Egress Windows: Install egress windows in designated exit locations. Egress windows provide both natural light and an emergency exit route. Ensure compliance with local building codes and safety standards. 3. Install Ladders or Steps: Install ladders or steps beneath egress windows to provide a safe and accessible means of egress. These should be sturdy and capable of supporting the weight of occupants. 4. Clear Exit Paths: Ensure that exit paths from the basement are clear of obstructions. Regularly inspect and maintain exits, removing any debris or potential hazards. By installing smoke detectors and fire extinguishers, implementing security measures, and creating emergency exits, you can significantly enhance the safety of your basement. Remember to regularly test safety equipment, review evacuation plans, and stay updated on safety guidelines to maintain a secure environment.
This article is provided for informational purposes only. It is not intended to be a substitute for professional advice or guidance. Always consult a qualified contractor, security specialist, or fire safety professional for accurate information and guidance related to your specific project.
Conclusion
Building your own basement can be a rewarding and fulfilling project that enhances the functionality, value, and enjoyment of your home. Throughout the process, you have learned the importance of careful planning, obtaining necessary permits, and following proper building techniques. From excavation and foundation to electrical and plumbing installations, waterproofing and insulation, and all the way to furnishing and decorating, you have gained valuable knowledge and skills that will help you create a basement that meets your needs and preferences. By incorporating safety measures such as smoke detectors, fire extinguishers, security systems, and emergency exits, you have prioritized the well-being of your family and the protection of your property. These measures provide peace of mind and can make a significant difference in the event of an emergency. Building your own basement requires dedication, attention to detail, and sometimes the advice or expertise of professionals. Remember to consult with architects, contractors, electricians, plumbers, or other specialists when needed. They can provide valuable insights, ensure compliance with regulations, and help you navigate any challenges that may arise. As you move forward with the completion of your basement, remember to stay focused and maintain a positive mindset. Building a basement is a time-consuming process, but the end result will be well worth the effort. Be patient, flexible, and open to adjustments along the way. Embrace the excitement of seeing your vision come to life and the satisfaction of a job well done. From creating a functional layout and selecting the right materials to adding personal touches with decorations and accessories, your basement will become a reflection of your lifestyle and a space that brings joy and relaxation to you and your family. Take pride in your accomplishments and celebrate each milestone achieved. Whether it’s the pouring of the foundation, the installation of electrical outlets, or the final touch of hanging artwork on the walls, acknowledge and appreciate the progress you have made. In conclusion, building your own basement is an adventure that can significantly enhance your home and your quality of life. Embrace the process, remain focused on the goal, and surround yourself with the support and expertise needed for successful completion. Enjoy the journey, and soon, you will have a beautiful and functional basement that you can be proud of.
This article is provided for informational purposes only. It is not intended to be a substitute for professional advice or guidance. Always consult a qualified contractor or architect for accurate information and guidance related to your specific project.
Frequently Asked Questions about How To Build A Basement
Was this page helpful?
At Storables.com, we guarantee accurate and reliable information. Our content, validated by Expert Board Contributors, is crafted following stringent Editorial Policies. We're committed to providing you with well-researched, expert-backed insights for all your informational needs.

0 thoughts on “How To Build A Basement”