Articles
How To Remove Agitator From Kenmore Washer
Modified: October 18, 2024
Learn how to easily remove the agitator from your Kenmore washer with our step-by-step articles. Get expert tips and save time and money!
(Many of the links in this article redirect to a specific reviewed product. Your purchase of these products through affiliate links helps to generate commission for Storables.com, at no extra cost. Learn more)
Introduction
Are you experiencing issues with your Kenmore washer’s agitator? Does it need to be replaced or cleaned? Removing the agitator from your Kenmore washer may seem like a daunting task, but with the right tools and instructions, you can easily accomplish it yourself. This article will guide you through the step-by-step process of removing the agitator from your Kenmore washer, allowing you to address any problems or perform maintenance on this vital component.
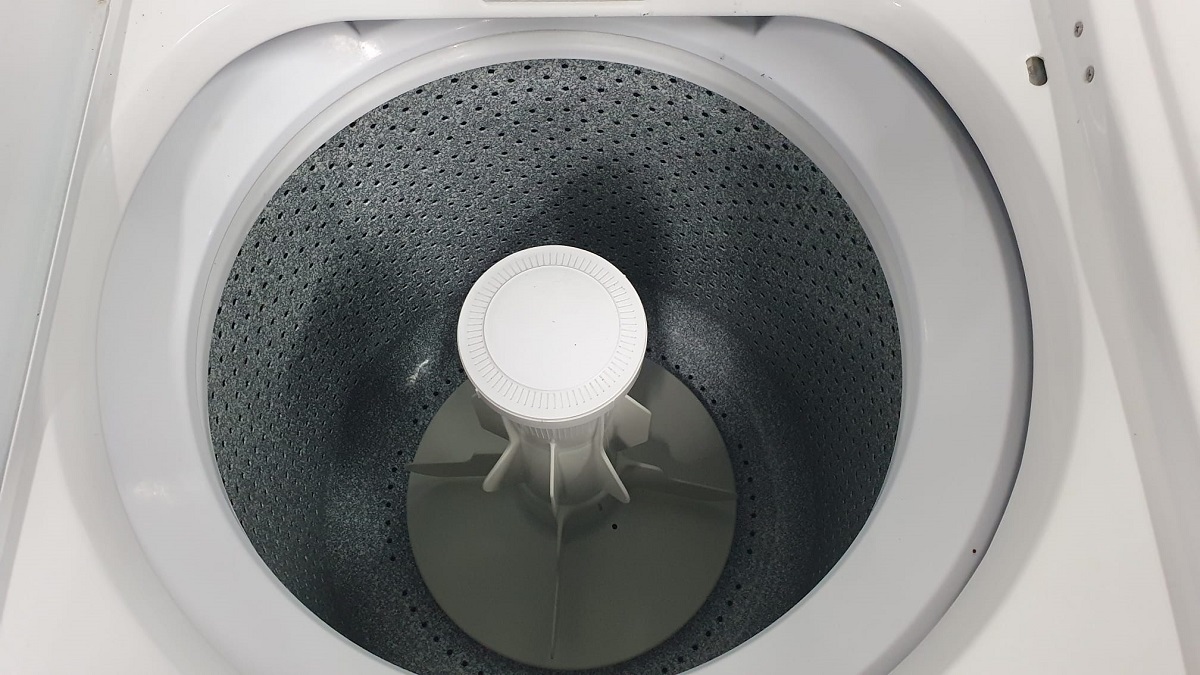
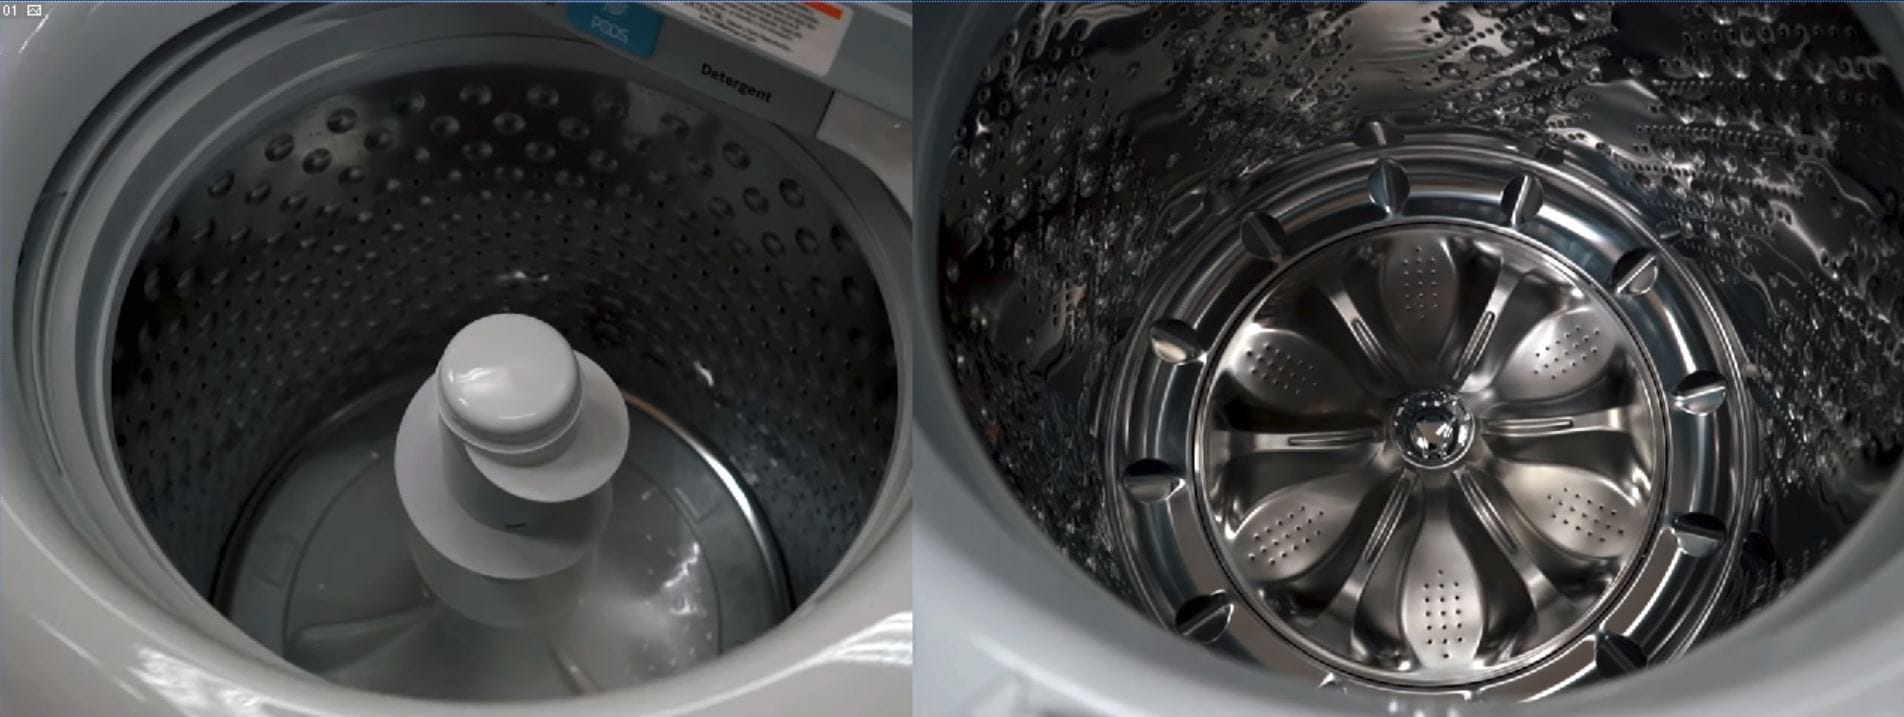
Before we dive into the process, it’s important to understand what the agitator is and its role in your washing machine. The agitator is the central spindle-like structure in the middle of the washer drum that helps to move and circulate the clothes during the wash cycle. Over time, dirt, debris, and even fabric softener can build up on the agitator, affecting its performance and overall cleanliness. By removing the agitator, you can thoroughly clean it or replace it if necessary.
To successfully remove the agitator from your Kenmore washer, you’ll need a few essential tools and materials. These include:
Key Takeaways:
- Regularly removing and cleaning the agitator in your Kenmore washer is a manageable DIY task that can improve the machine’s performance and prolong its lifespan. Prioritize safety and follow the step-by-step process for optimal results.
- By disconnecting power and water supply, carefully removing the agitator, cleaning and inspecting it, and then reinstalling it, you can ensure the smooth operation of your Kenmore washer. Don’t hesitate to seek professional help if needed.
Read more: How To Remove Agitator From Ge Washer
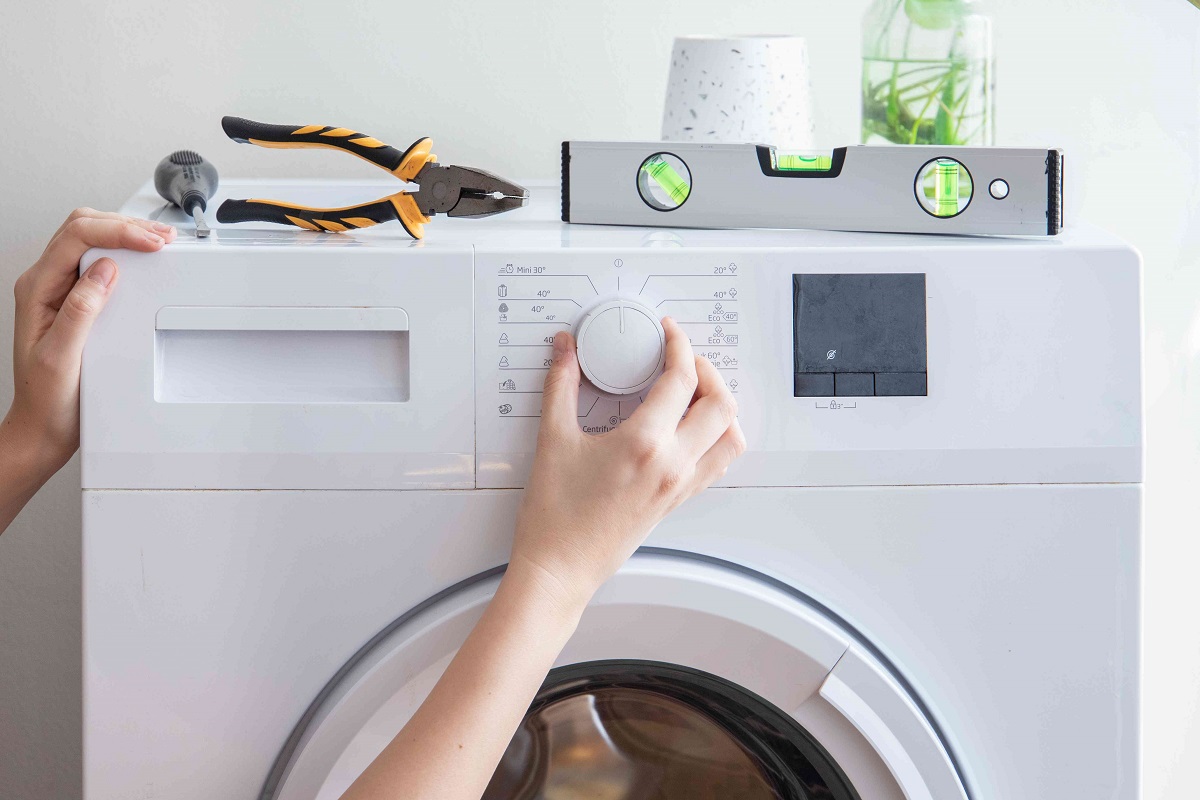
Tools and Materials Needed
- Adjustable wrench
- Pliers
- Putty knife or flat-head screwdriver
- Bucket or container
- Cleaning solution (optional)
With these tools and materials ready, let’s proceed to the step-by-step instructions for removing the agitator from your Kenmore washer.
Key Takeaways:
- Regularly removing and cleaning the agitator in your Kenmore washer is a manageable DIY task that can improve the machine’s performance and prolong its lifespan. Prioritize safety and follow the step-by-step process for optimal results.
- By disconnecting power and water supply, carefully removing the agitator, cleaning and inspecting it, and then reinstalling it, you can ensure the smooth operation of your Kenmore washer. Don’t hesitate to seek professional help if needed.
Read more: How To Remove Agitator From Ge Washer
Tools and Materials Needed
Before you begin removing the agitator from your Kenmore washer, make sure you have the following tools and materials ready:
1. Adjustable wrench: You’ll need an adjustable wrench to loosen and remove any bolts or fasteners holding the agitator in place.
2. Pliers: Pliers will come in handy for gripping and pulling out any stubborn components, such as the agitator cap.
3. Putty knife or flat-head screwdriver: A putty knife or flat-head screwdriver is useful for prying open the agitator cap, which can be tightly sealed.
4. Bucket or container: Place a bucket or container nearby to catch any water that may spill out during the removal process.
5. Cleaning solution (optional): If you plan on cleaning the agitator, have a suitable cleaning solution ready to remove dirt, grime, and residue.
Having these tools and materials prepared beforehand will streamline the removal process and prevent any interruptions. Once you gather everything you need, you can move on to the next step: preparing your washing machine for agitator removal.
Step 1: Preparation
Before you start removing the agitator from your Kenmore washer, it’s essential to take the necessary preparations to ensure a smooth process. Follow these steps to prepare your washing machine:
1. Turn off the power: Start by turning off the power to your Kenmore washer. Unplug it from the electrical outlet or switch off the circuit breaker connected to the washer. This step is crucial for your safety throughout the removal process.
2. Disconnect the water supply: Locate the water supply valves connected to your washing machine. Turn them off by twisting them clockwise until they are fully closed. This will prevent any water flow or leaks during the agitator removal process.
3. Empty the washing machine: Make sure your washing machine is empty of any clothes or other items. Remove any existing laundry to avoid obstructions or potential damage to the agitator or other components.
Once you’ve completed these preparations, you’re ready to proceed with removing the agitator from your Kenmore washer. Remember, taking these preliminary steps will ensure your safety and prevent any potential damage to your washing machine or its components.
Step 2: Disconnect Power and Water Supply
Now that you have completed the necessary preparations, it’s time to disconnect the power and water supply to your Kenmore washer. Follow these steps:
1. Turn off the power: Ensure that your Kenmore washer is disconnected from the power source. Unplug the power cord from the electrical outlet or switch off the circuit breaker dedicated to the washer. This step is crucial to avoid any electrical accidents while working on the agitator.
2. Close the water supply valves: Locate the water supply valves behind the washer. Rotate them clockwise until fully closed to cut off the water flow to the washing machine. This will prevent any leaks or water damage during the agitator removal process.
3. Verify the disconnection: To ensure that the power and water supply are properly disconnected, briefly turn on the washer to check if it doesn’t start. Also, try running a short cycle to confirm that no water enters the machine. If everything is in order, proceed to the next step.
By disconnecting the power and water supply, you minimize the risk of accidents and protect your washing machine from potential damages. Now that you have completed this step, you can move on to removing the agitator cap in the next step.
Read more: Maytag Washer How To Remove Agitator
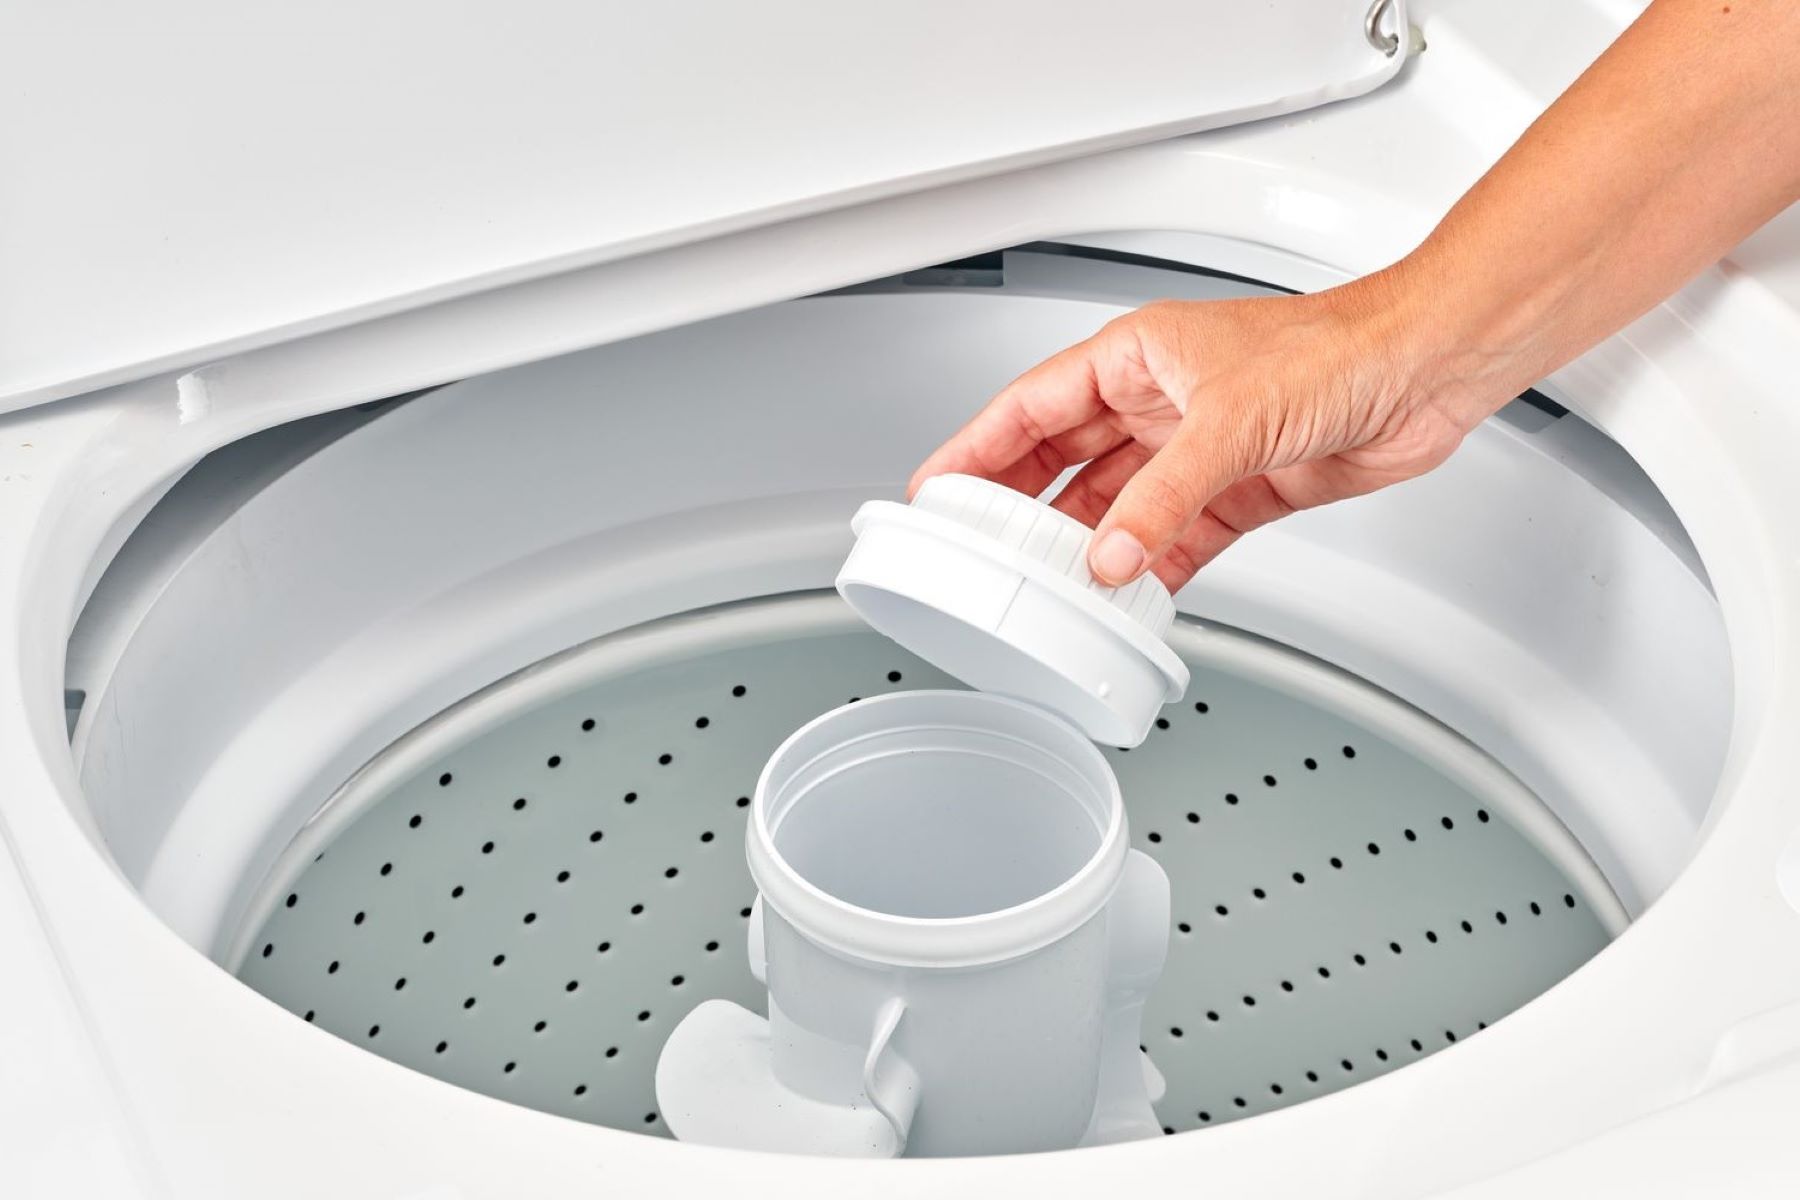
Step 3: Remove the Agitator Cap
With the power and water supply disconnected, it’s time to remove the agitator cap. Follow these steps:
1. Locate the agitator cap: Look for a cap on top of the agitator. It is typically located in the center of the washer’s drum. The cap covers the central bolt that secures the agitator in place.
2. Use a putty knife or flat-head screwdriver: To remove the agitator cap, carefully insert a putty knife or a flat-head screwdriver into the gap between the cap and the agitator. Gently pry the cap upwards to release it from its position. Be cautious to avoid any damage to the cap or the surrounding area.
3. Set aside the agitator cap: Once the agitator cap is free, set it aside in a safe place. You’ll need it later when reinstalling the agitator.
Removing the agitator cap allows you to access the bolt securing the agitator. Be patient and gentle while removing the cap to avoid any unnecessary damage. With the cap out of the way, you can proceed to the next step of removing the agitator bolt.
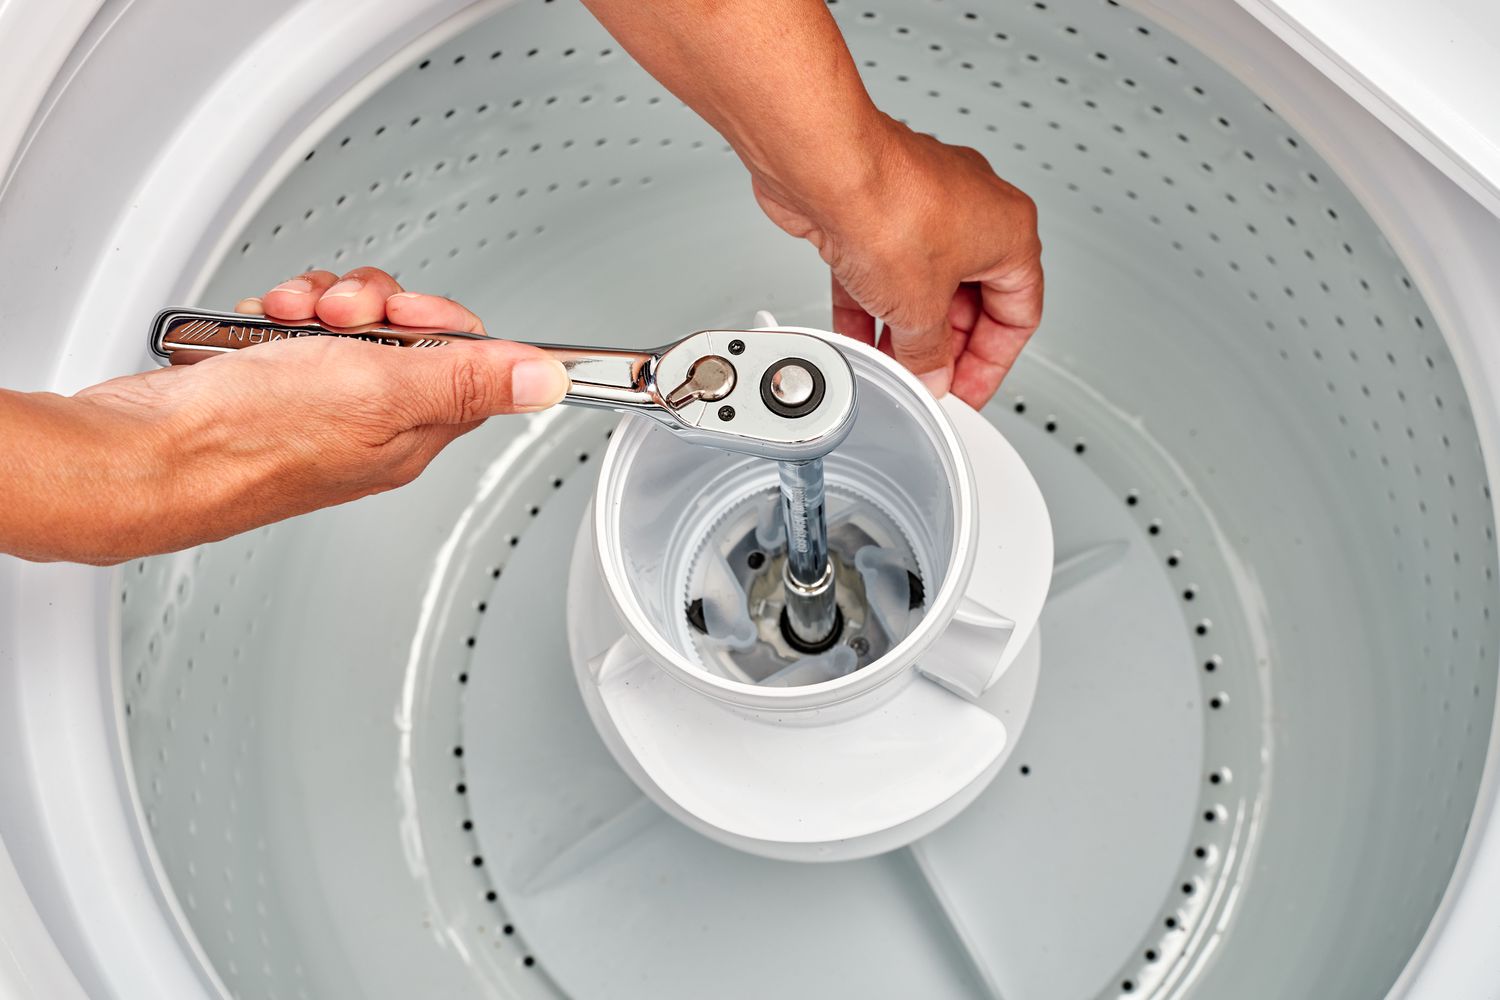
To remove the agitator from a Kenmore washer, first, remove the fabric softener dispenser. Then, locate the bolt or nut at the top of the agitator and use a socket wrench to loosen and remove it. Finally, lift the agitator out of the washer.
Step 4: Remove the Agitator Bolt
With the agitator cap removed, it’s time to detach the agitator bolt that secures the agitator in place. Follow these steps:
1. Locate the agitator bolt: Look for a bolt in the center of the agitator shaft. This bolt holds the agitator securely to the drive spindle of the washing machine.
2. Use an adjustable wrench: Take your adjustable wrench and position it onto the agitator bolt. Ensure that the wrench is set to the appropriate size to fit the bolt snugly.
3. Turn the wrench counterclockwise: Apply force to the wrench, turning it counterclockwise, to loosen and remove the agitator bolt. It may take some effort, as the bolt can be tightly secured.
4. Set aside the agitator bolt: Once the bolt is fully loosened, remove it and set it aside in a safe place. You’ll need it later when reinstalling the agitator.
Removing the agitator bolt is a crucial step in detaching the agitator from your Kenmore washer. Take your time and make sure to apply adequate force to loosen the bolt. With the bolt removed, you can proceed to the next step of removing the agitator itself.
Step 5: Remove the Agitator
Now that the agitator bolt is removed, you can proceed to remove the agitator itself from your Kenmore washer. Follow these steps:
1. Grip the agitator: With the agitator bolt removed, firmly grip the bottom edge of the agitator. Use both hands to ensure a secure hold.
2. Apply even pressure: While gripping the agitator, gently rock it back and forth to loosen it from the drive spindle. Apply even pressure and continue rocking until you can feel the agitator starting to lift off.
3. Gradually lift the agitator: Once you feel the agitator loosen, gradually lift it straight up. Take caution not to tilt or twist the agitator excessively, as it may cause damage.
4. Set aside the removed agitator: Once the agitator is fully removed, set it aside in a safe place. You may want to place it on a clean surface or in a container to prevent any dirt or debris from getting on it.
With the agitator successfully removed, you now have access to clean or inspect it as needed. Take your time to inspect the agitator for any signs of damage or excessive wear. If necessary, clean the agitator thoroughly before reinstallation. Now that the agitator is removed, you can proceed to the next step of cleaning and inspecting it in detail.
Step 6: Clean and Inspect the Agitator
With the agitator removed from your Kenmore washer, it’s important to take the time to clean and inspect it. Follow these steps to clean and inspect the agitator:
1. Prepare a cleaning solution (optional): If your agitator is dirty or has residue buildup, prepare a cleaning solution. Fill a bucket or container with warm water and add a mild detergent or a specialized washing machine cleaner. Mix the solution well.
2. Soak the agitator: Place the agitator in the cleaning solution and allow it to soak for a few minutes. This will help to loosen any dirt or debris that may be stuck on the agitator.
3. Scrub the agitator: After soaking, use a soft brush or sponge to scrub the agitator gently. Pay attention to any stubborn areas or stains, and continue scrubbing until the agitator is clean.
4. Rinse the agitator: Rinse the agitator thoroughly with clean water to remove any cleaning solution or residue. Make sure no soap or cleaning agents are left behind.
5. Inspect the agitator: Once clean, carefully inspect the agitator for any signs of damage, such as cracks, chips, or worn-out parts. Pay attention to the agitator fins or paddles to ensure they are intact and in good condition. If you notice any significant damage, it may be necessary to replace the agitator.
6. Dry the agitator: Use a clean cloth or towel to dry the agitator completely before reinstalling it. Make sure there is no moisture left on the surface, as this can lead to mold or mildew growth.
Cleaning and inspecting the agitator is crucial for maintaining its performance and prolonging its lifespan. Taking the time to remove any dirt or debris and checking for any damage will ensure that your Kenmore washer operates smoothly. Once the agitator is clean and inspected, you can move on to the next step of reinstalling it in your washing machine.
Step 7: Reinstall the Agitator
Now that you’ve cleaned and inspected the agitator, it’s time to reinstall it in your Kenmore washer. Follow these steps to properly reinstall the agitator:
1. Position the agitator: Align the bottom of the agitator with the drive spindle in the center of the washer drum. Make sure it fits snugly and sits securely in place.
2. Lower the agitator: Gently lower the agitator onto the drive spindle, taking care to align it properly. Make sure it sits flush and does not tilt or wobble.
3. Push down on the agitator: Apply downward pressure on the agitator to ensure it is fully seated on the drive spindle. It should fit tightly and not move or rotate freely.
4. Insert the agitator bolt: Take the agitator bolt that you set aside earlier and insert it back into the center of the agitator. Use your adjustable wrench to tighten the bolt securely. Ensure it is snug but not overly tightened.
5. Replace the agitator cap: Retrieve the agitator cap and position it back on top of the agitator. Press down firmly to secure it in place. It should fit snugly and cover the bolt completely.
Once the agitator is securely reinstalled, give it a gentle pull and twist to ensure it is held in place. If it feels firm and doesn’t move, you have successfully reinstalled the agitator in your Kenmore washer. Now, you can move on to the final step of reconnecting the power and water supply.
Step 8: Reconnect Power and Water Supply
With the agitator successfully reinstalled, it’s time to reconnect the power and water supply to your Kenmore washer. Follow these steps:
1. Turn on the water supply valves: Locate the water supply valves behind the washer and rotate them counterclockwise to open them. This will allow water to flow back into the machine.
2. Plug in the power cord or turn on the circuit breaker: If you unplugged the power cord earlier, plug it back into the electrical outlet. Alternatively, if you switched off the circuit breaker, turn it back on to restore power to the washer.
3. Test the washer: Once the power and water supply are reconnected, turn on your Kenmore washer and start a short cycle. Monitor the washer to ensure that it is functioning properly and that there are no leaks or issues.
4. Check for any abnormalities: While the cycle is running, carefully observe the washer’s operation. Make sure the agitator is working smoothly and the machine is functioning as expected. If you notice any abnormalities, such as strange noises or leaks, immediately turn off the washer and investigate the issue.
By reconnecting the power and water supply, you ensure that your Kenmore washer is ready for use again. Take a moment to celebrate your successful agitator removal and reinstallation process. If everything is functioning correctly, you have completed the final step. Congratulations!
Conclusion
Removing and reinstalling the agitator in your Kenmore washer may seem like a daunting task, but with the right tools and instructions, it can be a manageable DIY project. By following the step-by-step process outlined in this article, you can easily address any issues with your agitator or perform routine maintenance to ensure optimal performance of your washing machine.
Remember to always prioritize your safety by disconnecting the power and water supply before starting any work on your washer. Take your time during each step, being careful not to damage any components or exert excessive force. By cleaning and inspecting the agitator, you can prolong its lifespan and maintain its efficiency, ultimately improving the performance of your Kenmore washer.
If you encounter any difficulties during the agitator removal or reinstallation process, it is always advisable to consult the manufacturer’s manual or seek professional assistance. Safety should always be your top priority, and if you are unsure about any aspect of the process, it is best to seek expert help.
By successfully removing and reinstalling the agitator, you have taken an important step in maintaining your Kenmore washer. Regularly inspecting and cleaning your washer’s components will help prevent future issues and ensure that your machine continues to function effectively for years to come. Now that you have the knowledge and guidance, go ahead and give your Kenmore washer the care it deserves!
Frequently Asked Questions about How To Remove Agitator From Kenmore Washer
Was this page helpful?
At Storables.com, we guarantee accurate and reliable information. Our content, validated by Expert Board Contributors, is crafted following stringent Editorial Policies. We're committed to providing you with well-researched, expert-backed insights for all your informational needs.

0 thoughts on “How To Remove Agitator From Kenmore Washer”