Articles
What Does A Woodworking Router Do
Modified: August 28, 2024
Discover the role of a router in woodworking with our informative articles. Enhance your woodworking skills and learn the various uses and techniques of using a router.
(Many of the links in this article redirect to a specific reviewed product. Your purchase of these products through affiliate links helps to generate commission for Storables.com, at no extra cost. Learn more)
Introduction
In the world of woodworking, a router is an invaluable tool that allows craftsmen to create intricate designs, smooth edges, and precise joinery. Whether you’re a professional woodworker or a passionate hobbyist, understanding the capabilities and functions of a router is essential for elevating your woodworking projects to the next level.
A router is a power tool that spins a cutting bit at high speeds, allowing you to shape, trim, and hollow out various materials, including wood. With the right router and bit combination, you can add decorative details, create precise joinery, and shape wood with ease.
There are different types of routers available in the market, each with its own set of features and capabilities. From handheld routers to table-mounted routers, each type serves a specific purpose and offers unique advantages. Understanding the different types will help you choose the right router for your woodworking needs.
When it comes to woodworking, a router has a multitude of functions, ranging from shaping and trimming wood to creating intricate joinery. Let’s explore some of the key functions of a router in woodworking:
Key Takeaways:
- A router is a versatile woodworking tool that can shape and trim wood, create intricate joinery, route decorative edges, and replicate designs with precision. Understanding router types and safety measures is crucial for successful woodworking projects.
- Pattern routing with a router allows woodworkers to replicate shapes and designs accurately across multiple workpieces, enhancing the consistency and quality of decorative moldings and intricate inlays. Prioritizing safety and mastering router techniques are essential for a safe and creative woodworking experience.
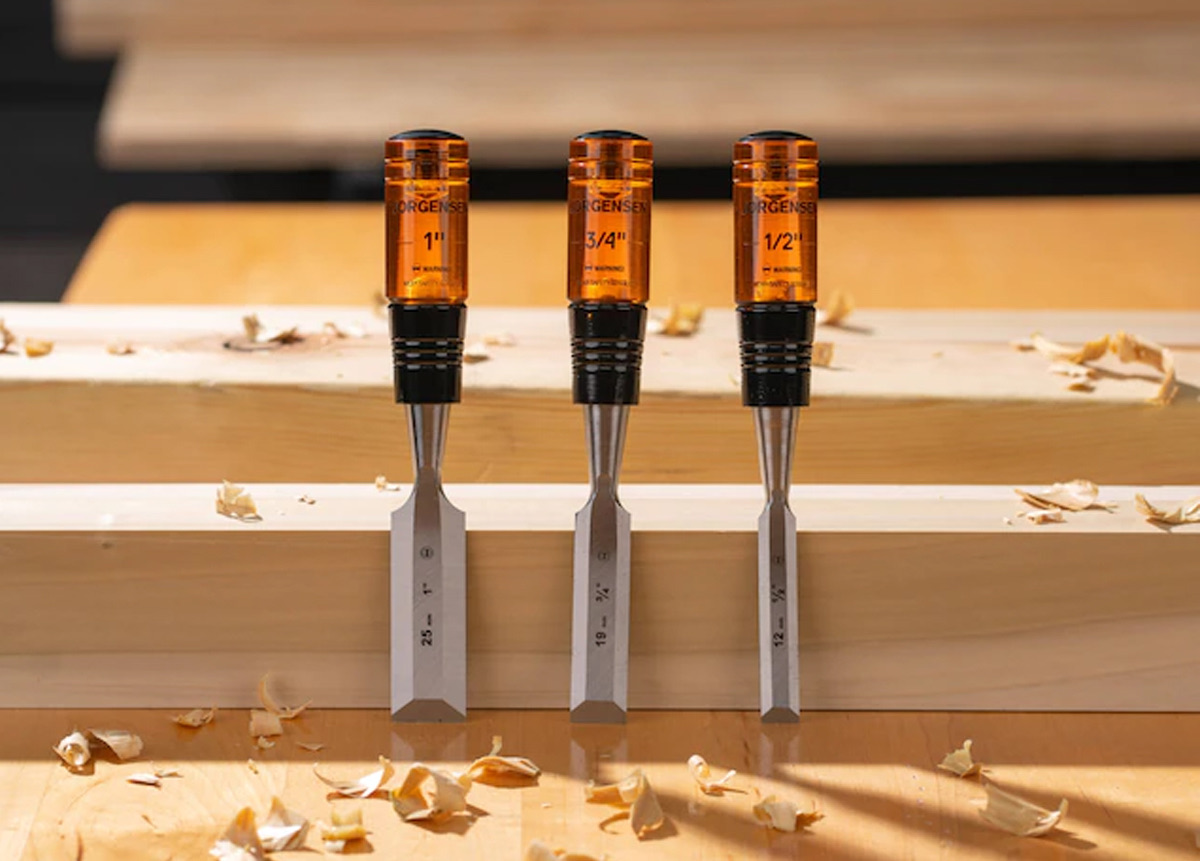
Read more: What Does A Jointer Do In Woodworking
Understanding the Router
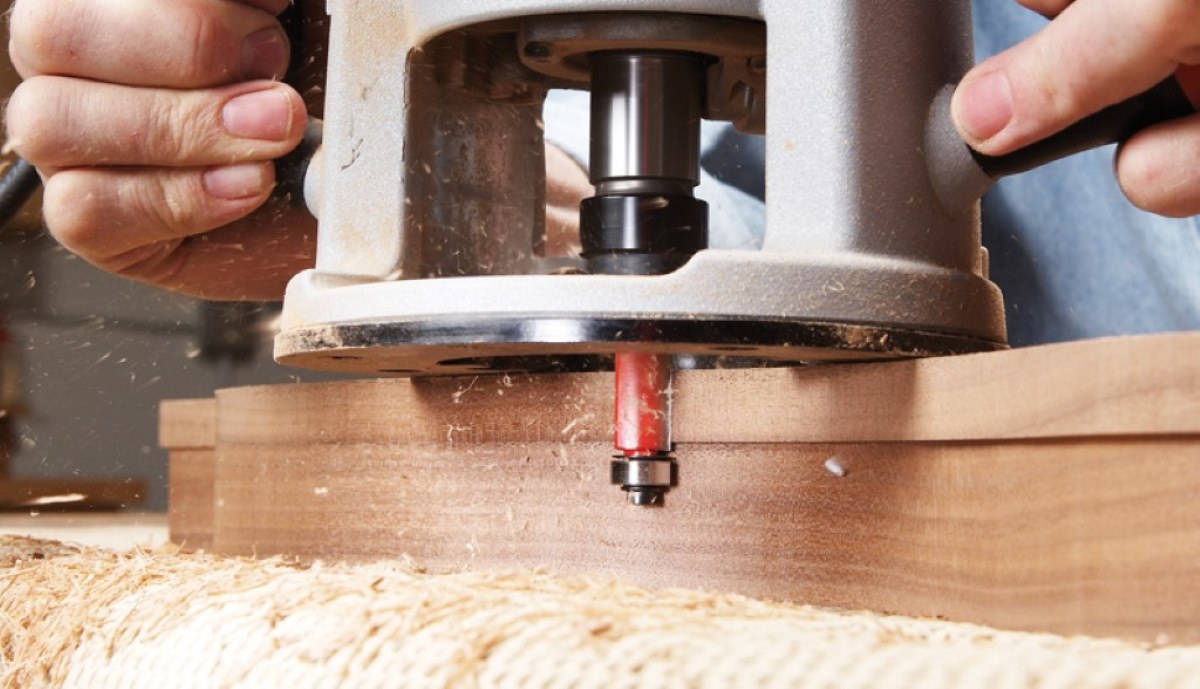
Before delving into the various functions of a router in woodworking, it’s important to have a basic understanding of how a router works. A router consists of a motor, a base, and a cutting tool known as a bit. The motor rotates the bit at high speeds, allowing it to remove material from the workpiece.
The base of the router is designed to provide stability and control. It allows you to guide the router along the workpiece to achieve precise cuts and shapes. The depth of the cut is determined by adjusting the position of the router bit in relation to the base.
Routers come in two main designs: handheld routers and table-mounted routers. Handheld routers are portable and offer greater versatility, allowing you to maneuver the tool around the workpiece. Table-mounted routers, on the other hand, are fixed to a table, providing stability and precision for more intricate tasks.
Understanding the different components and designs of a router will help you make informed decisions about which type of router is best suited for your woodworking projects.
Types of Routers
When it comes to choosing a router for your woodworking projects, it’s important to consider the different types available, as each type offers unique features and advantages. Let’s explore some of the most common types of routers:
- Handheld Router: This type of router is the most versatile and commonly used in woodworking. It is compact, lightweight, and easy to maneuver, making it ideal for a wide range of tasks. Handheld routers are suitable for tasks such as edge routing, trimming, and shaping.
- Plunge Router: A plunge router is designed to allow the bit to be lowered into the material while the router is running. This makes it easier to create plunge cuts, grooves, and mortises. Plunge routers are versatile and suitable for both handheld and table-mounted use.
- Fixed Base Router: As the name suggests, a fixed base router has a stationary base that is locked into position. These routers are typically used when a high level of precision is required, such as when creating joints or routing inlays. Fixed base routers are commonly used in table-mounted setups.
- Combination Router: Combination routers offer the flexibility of both a fixed base and a plunge base. This allows you to switch between the two bases depending on the task at hand, giving you the best of both worlds when it comes to versatility and precision.
- CNC Router: CNC (Computer Numerical Control) routers are a more advanced type of router that are controlled by a computer program. They are typically used for large-scale woodworking projects and allow for automated and precise cuts.
When choosing a router, consider the specific tasks you’ll be undertaking and your level of woodworking experience. Each type of router has its own strengths and applications, so it’s important to choose one that aligns with your needs and skill level.
Router Functions in Woodworking
A router is a versatile tool that can perform a wide range of functions in woodworking. Let’s explore some of the main functions and applications of a router:
Shaping and Trimming Wood: One of the primary functions of a router is to shape and trim wood. By using different router bits, you can create decorative edges, curves, and profiles on the surface of the wood. Whether you’re adding a decorative edge to a tabletop or shaping the edges of a cabinet door, a router is an essential tool for achieving precise and clean cuts.
Creating Joinery: Routers are highly effective in creating various types of joinery. Whether you’re making dovetail joints, box joints, or mortise and tenon joints, a router can help you achieve precise and consistent results. Using a router with a specialized bit, you can create clean and accurate cuts that allow for strong and durable joinery.
Routing Decorative Edges and Profiles: A router can be used to add decorative details to your woodworking projects. With a wide variety of router bits available, you can create intricate profiles, bevels, and decorative patterns on the edges of your furniture, cabinetry, and other woodworking pieces. This allows you to add a personal touch and enhance the aesthetic appeal of your creations.
Routing Dados, Rabbets, and Grooves: Routers excel in creating dados, rabbets, and grooves in wood. Whether you need to create a recess for a shelf or a groove for a panel, a router can accurately and efficiently remove material to the desired depth and width. This functionality is particularly useful when building cabinets, bookcases, and other furniture pieces that require precise fittings.
Using a Router for Pattern Routing: Pattern routing is a technique that involves using a template or pattern to guide the router along the workpiece. By attaching the template to the workpiece and using a flush-trim or pattern bit, you can replicate the shape or design onto multiple pieces with precision. Pattern routing is commonly used for creating identical pieces for furniture components, curved moldings, and decorative inlays.
With its versatility and range of functions, a router is an essential tool in any woodworking workshop. By mastering the various techniques and applications of a router, you can elevate your woodworking projects and achieve professional-level results.
Shaping and Trimming Wood with a Router
One of the primary functions of a router in woodworking is shaping and trimming wood. With the right router bit and technique, you can achieve smooth and precise cuts, creating decorative edges and profiles on your workpieces.
When it comes to shaping wood, a router offers unparalleled versatility. By using a variety of router bits, you can create different shapes and contours on the edges of your projects. For example, a round-over bit can be used to create a smooth, rounded edge, while a chamfer bit can be used to create a beveled edge.
The process of shaping wood with a router involves guiding the tool along the edge of the workpiece, controlling the depth and movement to achieve the desired shape. It is important to practice proper technique and take necessary safety precautions when working with a router.
In addition to shaping wood, a router can also be used for trimming excess material. For instance, when building a cabinet or a tabletop, a flush-trim bit can be used to trim the edge of one piece to match the contour of another, ensuring a seamless and professional-looking joint.
When using a router for shaping and trimming wood, it’s important to consider the following tips:
- Choose the right router bit: Different router bits are designed for specific tasks. Make sure to select the appropriate bit for the shape or profile you want to achieve.
- Secure the workpiece: Use clamps or other secure methods to hold the workpiece in place while working with the router. This ensures stability and prevents any movement that can result in uneven cuts.
- Take multiple passes: When shaping or trimming wood, it’s often better to take multiple shallow passes rather than one deep cut. This allows for greater control and reduces the risk of tear-out or splintering.
- Practice on scrap wood: Before working on your actual project, it’s always a good idea to practice on scrap wood to familiarize yourself with the router and get comfortable with the technique you’ll be using.
- Take safety precautions: Wear safety goggles, ear protection, and a dust mask to protect yourself while using a router. Always keep your hands away from the cutting area and ensure the router is turned off and unplugged when changing bits or adjusting settings.
Shaping and trimming wood with a router is a rewarding aspect of woodworking. With practice and attention to detail, you can achieve clean, precise cuts and create beautifully shaped edges and profiles on your woodworking projects.
Read more: What Does Wps Button Do On Wi-Fi Router
Creating Joinery with a Router
In woodworking, creating strong and precise joinery is essential for constructing durable and well-crafted furniture pieces. A router is a valuable tool that can be used to create a variety of joints, allowing woodworkers to connect pieces of wood together securely and seamlessly.
One of the most popular joints created with a router is the dovetail joint. Dovetail joints are known for their strength and aesthetic appeal, making them a common choice for drawers, cabinets, and other furniture pieces. With a dovetail bit and a router, you can easily cut the interlocking pins and tails that create a tight and durable joint.
Another type of joint that can be created with a router is the box joint, also known as a finger joint. This joint consists of interlocking fingers or pins that provide strength and stability. By using a box joint bit, you can cut precise fingers on the ends of your workpieces, allowing them to fit together snugly.
Routers are also commonly used to create mortise and tenon joints. A mortise is a cavity or slot cut into a piece of wood, while a tenon is a protruding piece that fits into the mortise. This type of joint is widely used in furniture making and offers excellent strength and stability. With a router and the appropriate mortising bit, you can accurately cut the mortises, while a straight or spiral router bit can be used to shape the tenons.
Another type of joinery that can be achieved with a router is the rabbet joint. A rabbet joint is formed by cutting a groove along the edge of a piece of wood, allowing another piece to fit into the groove. This joint is commonly used in cabinetmaking and bookcase construction. Using a rabbeting bit, you can easily cut the groove to the desired depth and width.
When creating joinery with a router, there are a few key tips to keep in mind:
- Choose the right router bit: Ensure you have the appropriate router bit for the type of joint you are creating. Different bits are designed for specific joint configurations.
- Measure and mark accurately: Accurate measurements and markings are crucial for achieving well-fitting joints. Take your time to measure and mark the precise locations for your cuts.
- Make multiple passes: Depending on the depth and width of the joint, it may be necessary to make multiple passes with the router to achieve the desired cuts. Take your time and make shallow passes to prevent tear-out and ensure clean cuts.
- Test fit your joints: Before applying any adhesives or fastening methods, always test fit your joints to ensure they fit snugly and accurately. This allows you to make any necessary adjustments before final assembly.
- Practice on scrap wood: If you’re new to creating joinery with a router, it’s always a good idea to practice on scrap wood before working on your actual project. This will allow you to refine your technique and familiarize yourself with the router and bit.
With a router, woodworkers can create strong, precise, and professional-looking joints. Whether you’re a novice or an experienced woodworker, mastering the art of joinery with a router will greatly enhance the quality and longevity of your woodworking projects.
When using a router in woodworking, always ensure that the router bit is sharp and properly secured. This will help to achieve clean and precise cuts in your wood projects.
Routing Decorative Edges and Profiles
One of the unique capabilities of a router in woodworking is its ability to add decorative edges and profiles to your projects. By using a variety of router bits, you can transform plain and ordinary edges into beautifully detailed and visually appealing designs.
When it comes to decorative edges, there are numerous router bits available, each creating a different profile. For instance, a round-over bit can be used to create a smooth, rounded edge, while an ogee bit can produce an S-shaped profile. By experimenting with different router bits, you can customize the look and feel of your woodworking projects.
A popular edge profile used in furniture making is the beading profile. This profile creates a small rounded bead along the edge of the wood, adding depth and visual interest. Beading bits are available in various sizes, allowing you to create different levels of detail in your design.
In addition to decorative edges, a router can also be used to create decorative profiles on the surface of your workpiece. This is commonly done using router bits with bearing guides that follow a template or pattern. By attaching a template to your workpiece, you can use a flush-trim or pattern bit to duplicate the shape onto multiple pieces with precise accuracy.
Decorative profiles can range from simple shapes like a bullnose or a cove to more intricate designs such as a Roman ogee or a raised panel. These profiles can enhance the visual appeal of furniture, cabinetry, and other woodworking projects, giving them a refined and polished look.
When routing decorative edges and profiles, consider the following tips for achieving the best results:
- Select the right router bit: Different router bits create different profiles. Choose the appropriate bit that matches the design you want to achieve.
- Use the appropriate speed and feed rate: Refer to the manufacturer’s guidelines to determine the correct speed and feed rate for your router bit. Using the wrong speed can lead to burning or chattering.
- Secure your workpiece: Ensure your workpiece is securely clamped or held in place while routing the edges or profiles. This keeps it stable and allows for more accurate cuts.
- Make multiple passes: Depending on the depth of cut and the hardness of the wood, it may be necessary to make multiple passes to achieve the desired profile. Take your time and make shallow passes to prevent tear-out and ensure cleaner cuts.
- Practice on scrap wood: If you’re new to routing decorative edges and profiles, it’s always a good idea to practice on scrap wood first. This allows you to test different router bits, fine-tune your technique, and refine the desired design.
With a router, you have the power to transform plain edges into stunning decorative features. By incorporating decorative edges and profiles into your woodworking projects, you can add a touch of elegance and personalization to your creations.
Routing Dados, Rabbets, and Grooves
When it comes to woodworking, the ability to create precise and accurate dados, rabbets, and grooves is paramount. These types of cuts are essential for fitting pieces together, creating recesses for shelves, and constructing strong and sturdy joints. A router is a versatile tool that excels in routing these features, allowing you to achieve clean and professional results.
Dados: A dado is a flat-bottomed groove that runs across the grain of the wood. It is commonly used for creating strong and secure joints, such as attaching shelves to a cabinet or dividers to a drawer. With a router and a straight bit, you can easily cut dados of varying widths and depths to match the thickness of the material you’re working with. It’s important to align your cuts accurately and make multiple passes to achieve the desired depth.
Rabbets: A rabbet is a recess or groove cut along the edge or end of a piece of wood. It is often used to create a joint or to join two pieces together at a right angle. Rabbets can also be used to house panels or glass in doors and frames. To create rabbets, you can use a router with a rabbeting bit or a straight bit, adjusting the depth to match the thickness of the material. It’s important to make multiple passes and ensure precise measurements to achieve a clean and snug fit.
Grooves: A groove is a channel cut into the wood, typically along the length of the grain. Grooves are commonly used for inserting panels, such as in cabinet doors or drawer bottoms. They provide a secure and seamless fit for the inserted material. With a router and a straight bit or a groove-cutting bit, you can easily create grooves of various widths and depths. It’s crucial to measure and mark the groove placement accurately and make multiple passes if necessary to achieve the desired width and depth.
When routing dados, rabbets, and grooves, here are some essential tips to help you achieve optimal results:
- Carefully measure and mark: Precise measurements are crucial for achieving accurate and well-fitting cuts. Double-check your measurements before routing to ensure a proper fit.
- Secure your workpiece: Use clamps or other secure methods to hold your workpiece firmly in place. This prevents any movement that may result in uneven or incorrect cuts.
- Make multiple passes: Depending on the depth and width of the cut, it’s often better to make multiple shallow passes rather than a single deep cut. This ensures cleaner cuts and reduces the risk of tear-out.
- Test fit and adjust: After routing the dado, rabbet, or groove, it’s important to test the fit with the corresponding piece. Make any necessary adjustments to ensure a snug fit before assembly.
- Practice on scrap wood: If you’re new to routing dados, rabbets, and grooves, it’s advisable to practice on scrap wood first to familiarize yourself with the technique and adjust your settings accordingly.
With the precision and versatility of a router, you can confidently create dados, rabbets, and grooves that will enhance the strength, functionality, and aesthetic appeal of your woodworking projects.
Using a Router for Pattern Routing
Pattern routing is a technique that allows you to replicate a specific shape or design onto multiple pieces with complete accuracy. It involves using a template or pattern to guide the router, creating identical cuts on each workpiece. This technique is especially useful when you need to create multiple pieces with consistent shapes, such as curved moldings or intricate inlays.
To perform pattern routing effectively, you’ll need a router equipped with a pattern-routing bit and a template or pattern made from a sturdy material like MDF or plywood. The template should be carefully crafted to match the desired shape or design you want to replicate.
Here’s a step-by-step guide on how to perform pattern routing:
- Create or obtain a template: Start by either creating your own template or obtaining one that matches your desired shape. The template should be carefully crafted to ensure accuracy and durability.
- Safety first: Wear safety goggles, ear protection, and a dust mask before you begin routing. Ensure that your work area is clean and free of any obstacles.
- Attach the template: Securely attach the template to your workpiece using clamps or double-sided tape. Ensure that it is firmly in place to prevent any movement during routing.
- Install the pattern-routing bit: Choose a pattern-routing bit that matches the desired shape you want to achieve. Install it securely in your router, following the manufacturer’s instructions.
- Set the depth and guide system: Adjust the cutting depth of the bit based on the thickness of your workpiece, taking into account any additional margin for compatibility with the template. If your router has a guide system, set it up to follow the template accurately.
- Begin routing: Turn on the router and position it against the template. Slowly and steadily move the router along the template, allowing the bearing or guide system to follow the contours. Make sure to maintain a consistent speed and apply gentle pressure to avoid any mishaps.
- Repeat the process: Once you have completed routing one piece, remove the template and attach it to the next workpiece. Repeat the routing process for each piece, ensuring that the template is securely fastened each time.
- Clean up and final touches: After pattern routing all the workpieces, double-check the shapes and make any necessary adjustments. Remove any excess material and smooth out any rough edges using sandpaper or a router’s trim bit.
- Test fit and assemble: Test fit the workpieces to ensure that they fit together seamlessly. Make any necessary adjustments before proceeding with final assembly.
Pattern routing allows you to quickly and accurately replicate shapes and designs across multiple workpieces. It’s a valuable technique for creating decorative moldings, precise inlays, and other intricate details in your woodworking projects.
Remember to practice on scrap wood or less important pieces before attempting pattern routing on your final workpieces. With some patience, skill, and attention to detail, pattern routing can produce stunning and consistent results in your woodworking projects.
Read more: What Tools Do I Need For Woodworking
Router Safety Tips
While routers are incredibly versatile and powerful tools, it’s important to prioritize safety when using them. By following these router safety tips, you can protect yourself and others from potential hazards and ensure a safe woodworking experience:
- Wear appropriate safety gear: Always wear safety goggles or glasses to protect your eyes from flying debris. Additionally, wear ear protection to shield your ears from the loud noise generated by the router. A dust mask can also help protect against inhaling harmful dust particles.
- Read and understand the router manual: Familiarize yourself with the router’s manual and specifications before use. Understand the specific safety guidelines and procedures recommended by the manufacturer.
- Inspect the router and bits: Before each use, inspect the router and router bits for any signs of damage or wear. Check that the bits are properly secured in the collet and that the router is in good working condition.
- Use the appropriate router and bit: Ensure that you are using the right router and bit for the specific woodworking task. Different routers and bits are designed for specific applications, so using the correct tool will help prevent accidents and ensure optimal performance.
- Secure your workpiece: Always secure your workpiece firmly using clamps or other appropriate methods. This will prevent the wood from moving or slipping during the routing process, reducing the risk of accidents.
- Choose the right router speed: Adjust the router speed according to the type of wood and the specific routing task. High speeds may cause the router to become difficult to control, while low speeds can result in poor cutting performance. Refer to the manufacturer’s guidelines for recommended speed settings.
- Take shallow cuts: To achieve clean and precise cuts, make multiple shallow passes rather than trying to remove too much material in a single pass. This will help maintain better control over the router and reduce the risk of kickback or tear-out.
- Keep your hands away from the cutting area: Always keep your hands at a safe distance from the cutting area. Use push sticks, featherboards, or other appropriate tools to guide the workpiece and maintain a safe distance from the router bit.
- Avoid routing against the grain: Routing against the grain can increase the chances of tear-out and result in a rough finish. Whenever possible, plan your routing direction to go with the grain of the wood.
- Turn off the router when not in use: Remember to turn off the router and unplug it from the power source when making adjustments, changing router bits, or taking breaks. This helps prevent accidental start-ups and keeps the workspace safe.
By following these router safety guidelines, you can minimize the risk of accidents and ensure a safe woodworking environment. Always exercise caution, prioritize safety, and stay focused while operating a router to create your woodworking projects with peace of mind.
Conclusion
A router is a powerful tool that opens up a world of possibilities in woodworking. Its versatility, precision, and ability to create intricate designs make it an essential tool for both professional woodworkers and passionate hobbyists. Throughout this article, we have explored the various functions and applications of a router in woodworking.
We discussed how a router works and the different types available, including handheld routers, plunge routers, fixed base routers, combination routers, and CNC routers. Each type offers its own advantages and is suited for different tasks and skill levels.
We explored how routers can be used for shaping and trimming wood, creating joinery, routing decorative edges and profiles, and routing dados, rabbets, and grooves. Each of these functions allows woodworkers to add unique touches, enhance structural integrity, and bring their woodworking projects to life.
We also discussed the technique of pattern routing, which enables woodworkers to replicate shapes and designs with precision across multiple workpieces. This technique is invaluable for creating consistency and uniformity in decorative moldings, intricate inlays, and other detailed patterns.
Furthermore, we highlighted the importance of safety when using a router and provided essential safety tips to follow. By wearing appropriate safety gear, inspecting the router and bits, securing the workpiece, and using the correct router speed, woodworkers can minimize the risk of accidents and create a safe woodworking environment.
In conclusion, a router is a versatile and indispensable tool in the world of woodworking. Its functions and capabilities allow woodworkers to unleash their creativity, achieve precise cuts, and elevate the quality of their projects. By mastering the art of router usage and adhering to safety guidelines, woodworkers can unlock endless possibilities and create timeless pieces that showcase their craftsmanship.
Now that you've mastered the basics of using a woodworking router, why not delve deeper into the precision and capabilities of CNC woodworking? Our next article sheds light on how computer numerical control technology elevates traditional woodworking methods, allowing for intricate designs and efficient production processes. Whether you're a hobbyist eager to refine your craft or a professional aiming to streamline operations, understanding CNC woodworking could be a game-changer for your projects.
Frequently Asked Questions about What Does A Woodworking Router Do
Was this page helpful?
At Storables.com, we guarantee accurate and reliable information. Our content, validated by Expert Board Contributors, is crafted following stringent Editorial Policies. We're committed to providing you with well-researched, expert-backed insights for all your informational needs.


0 thoughts on “What Does A Woodworking Router Do”