Articles
What Is An I Spy Quilt
Modified: August 22, 2024
Learn all about I Spy quilts in this informative article. Discover how to make your own and get inspired by creative designs and patterns.
(Many of the links in this article redirect to a specific reviewed product. Your purchase of these products through affiliate links helps to generate commission for Storables.com, at no extra cost. Learn more)
Introduction
Welcome to the world of I Spy Quilts! These captivating quilts are not only beautiful works of art, but they also hold a special interactive element that keeps both children and adults entertained for hours. If you’re unfamiliar with I Spy Quilts, prepare to be amazed by their whimsy and charm.
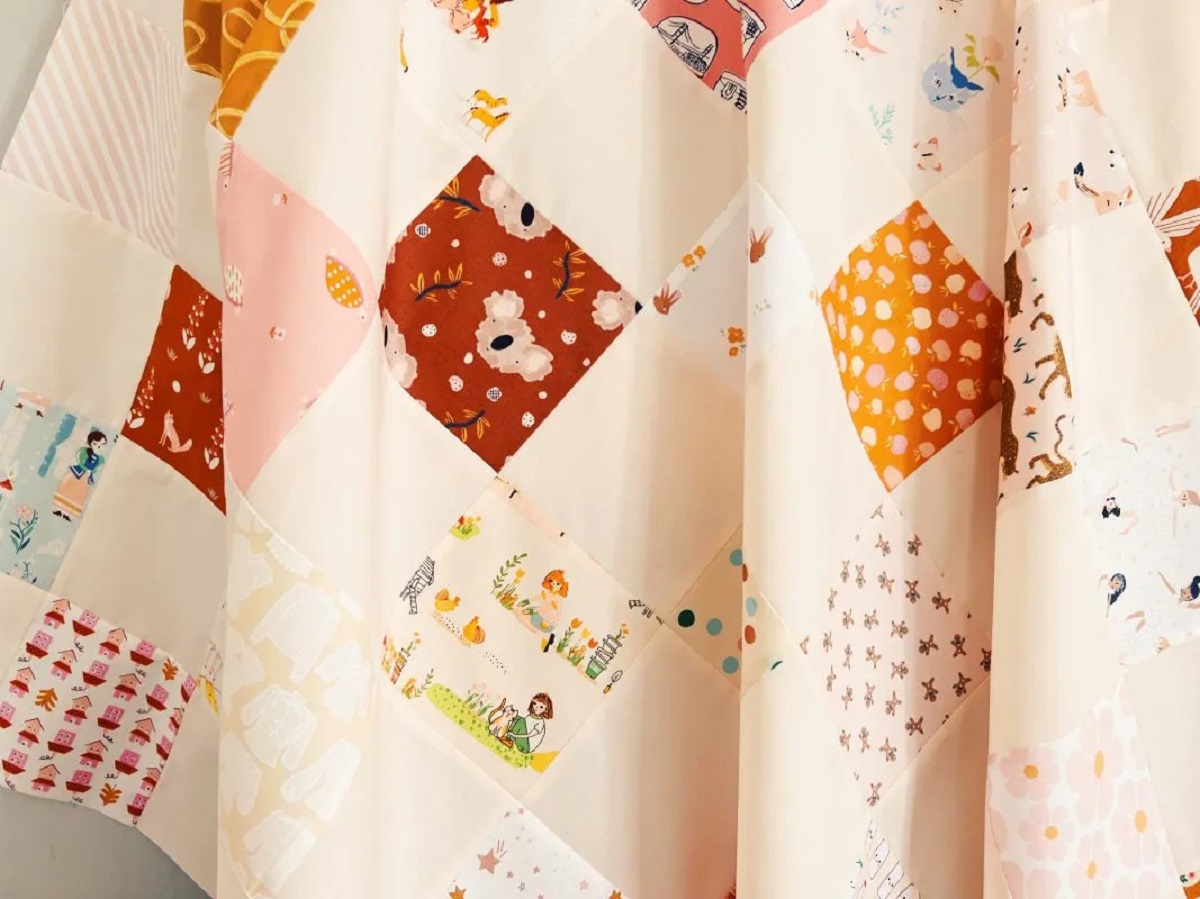
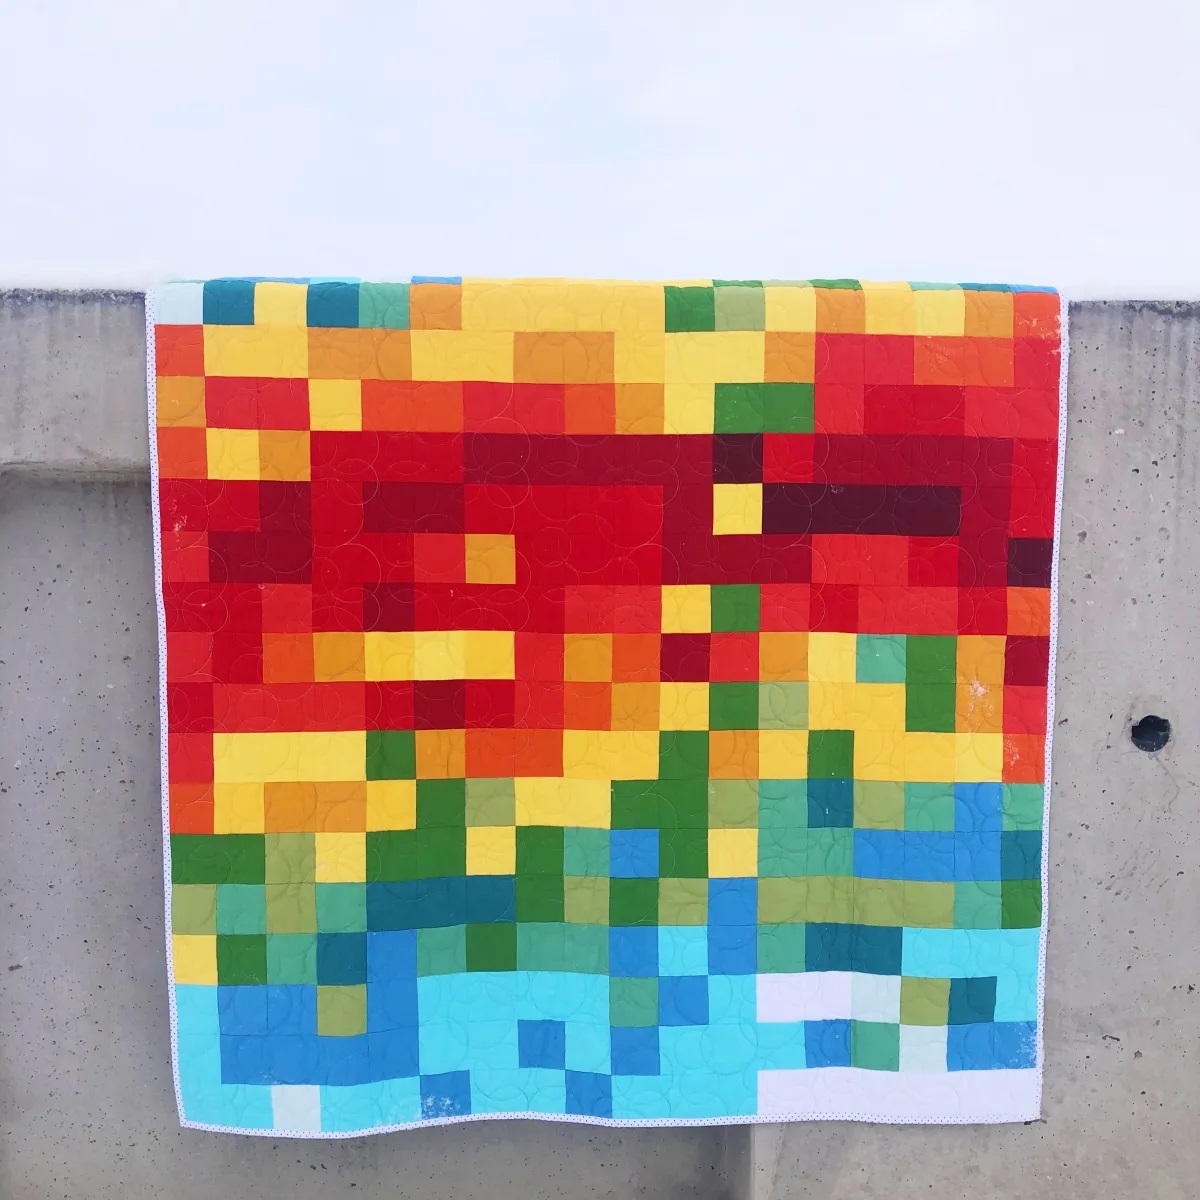
An I Spy Quilt is a type of quilt that incorporates a variety of fabric squares featuring different objects, animals, or patterns. The goal is to spot and identify the various elements within the quilt, creating a fun and engaging experience for the viewer. Think of it as a “Where’s Waldo?” in quilt form.
These quilts can be made in various sizes, from small lap quilts to large bed-sized quilts, and can be enjoyed by people of all ages. Children, especially, are captivated by the challenge of finding all the hidden treasures within the quilt while also enjoying the comforting warmth it provides.
Whether you’re a seasoned quilter looking for a new project or a novice just starting out, creating an I Spy Quilt is a fantastic way to showcase your creativity and storytelling abilities. So, let’s delve into the captivating world of I Spy Quilts and unlock the secrets behind making these delightful masterpieces!
Key Takeaways:
- I Spy Quilts are not only visually stunning but also serve as educational tools for children, promoting object recognition, color identification, and cognitive development through interactive engagement.
- Creating an I Spy Quilt is a labor of love that requires patience, creativity, and attention to detail. It’s a delightful journey that combines artistry with the joy of discovery.
Read more: How To Make A Spy Glass
Overview of I Spy Quilts
I Spy Quilts have gained popularity over the years for their unique and interactive nature. These quilts not only provide warmth and comfort but also serve as a source of entertainment and education. The idea behind an I Spy Quilt is to create a visually stimulating quilt, filled with an assortment of fabric squares, each featuring different objects or patterns. These objects can range from everyday items like animals, fruits, and vehicles, to more specific themes like letters, numbers, or colors.
What sets I Spy Quilts apart is the challenge they present to those who view them. Viewers are encouraged to “spy” and identify the various elements within the quilt. This interactive element engages the viewer’s attention and creates a sense of excitement as they search for the hidden treasures within the quilt.
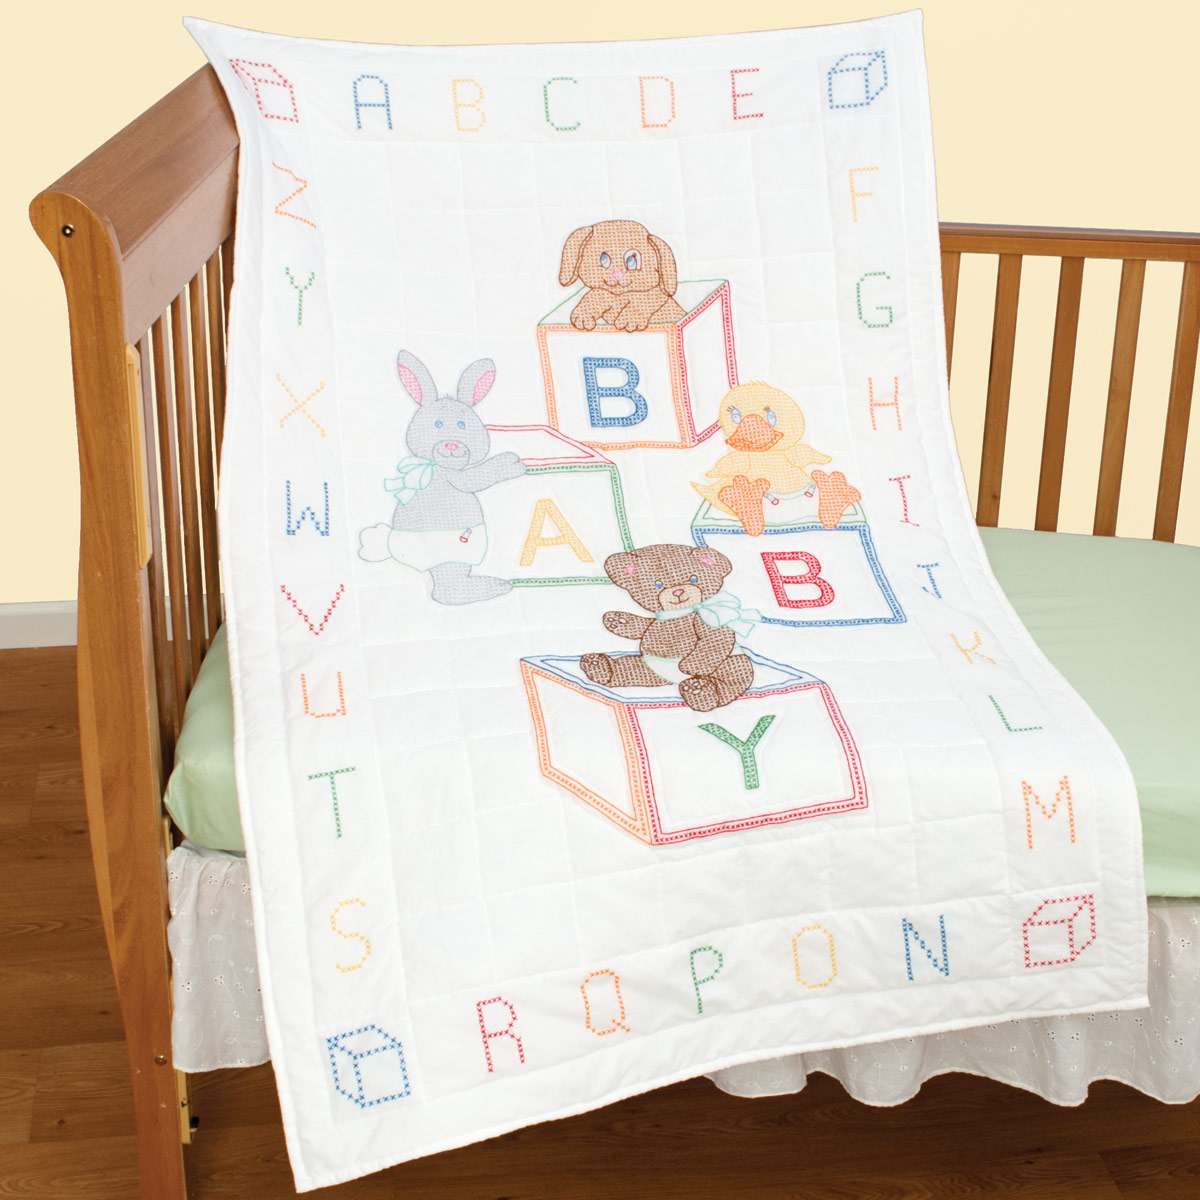
I Spy Quilts are not only visually appealing but also offer a great opportunity for learning. They can be used to teach children about object recognition, color identification, and even counting. Through the process of searching and identifying the objects, children can develop their observational skills and cognitive abilities.
In addition to being educational and entertaining, I Spy Quilts are a wonderful way to express creativity. Quilters have the freedom to choose a wide variety of fabrics and colors to create their quilt. They can incorporate different patterns, textures, and designs to make each fabric square unique. This allows quilters to showcase their artistic skills and create a quilt that truly represents their individual style.
An I Spy Quilt can be designed to suit any theme or occasion, making it a versatile and customizable project. Quilters can create quilts for children based on their interests or hobbies, or even make one as a personalized gift for a loved one. The possibilities are endless!
Now that we have a general understanding of what I Spy Quilts are, let’s explore their fascinating history and how they have evolved over time.
History of I Spy Quilts
The origins of I Spy Quilts can be traced back to the rich quilting traditions of the past. Quilting has been practiced for centuries as a practical and creative way to repurpose fabric scraps and create warm coverings for beds. However, the concept of incorporating hidden objects into quilts emerged much later.
The inspiration for I Spy Quilts can be attributed to the popular children’s book “I Spy” series, written by Jean Marzollo and illustrated by Walter Wick. The books, which were first published in the 1990s, feature vibrant and detailed photographs, challenging readers to find specific objects within the images. The success and popularity of these books sparked the idea of recreating the “I Spy” concept in a tactile and interactive form – the I Spy Quilt.
Quilters started to experiment with adding small fabric squares, known as “I Spy” squares, into their quilts. These squares featured different objects or patterns, allowing viewers to search for and identify the hidden elements within the quilt. The concept quickly gained momentum, and I Spy Quilts became a sought-after project for quilters looking to create something unique and engaging.
As the popularity of I Spy Quilts grew, quilters began to explore and expand on the concept. They began incorporating more elaborate designs and themes into their quilts, using a wide range of fabrics to create visually stunning pieces of art. With the advent of digital print fabrics, quilters could easily source fabric squares featuring a variety of objects, animals, and patterns, giving them even more creative freedom.
The internet played a significant role in the spread and evolution of I Spy Quilts. Quilters began sharing their creations online, inspiring others to embark on their own I Spy Quilt journey. Online communities, forums, and social media platforms provided a platform for quilters to exchange ideas, share patterns, and showcase their work.
Today, I Spy Quilts have become a beloved project for quilters around the world. They have found their place not only in children’s bedrooms but also in schools, libraries, and children’s hospitals, where they serve as interactive learning tools and sources of comfort.
The history of I Spy Quilts showcases the ingenuity and creativity of quilters, as they took a simple concept from children’s books and transformed it into a tangible, interactive art form. Let’s now explore the materials and tools you’ll need to create your own I Spy Quilt.
Materials and Tools Needed
Creating an I Spy Quilt requires a few essential materials and tools. Here’s a list of what you’ll need to get started:
1. Fabric: Choose a variety of fabrics in different colors, patterns, and textures. Look for fabrics that feature objects or patterns suitable for an I Spy theme. You can use both printed fabric and solids to create a visually interesting quilt.
2. Fabric Squares: Cut your fabric into squares of equal size. The size of the squares will depend on your preference and the desired finished size of your quilt. Common square sizes for I Spy Quilts are 5 inches or 6 inches.
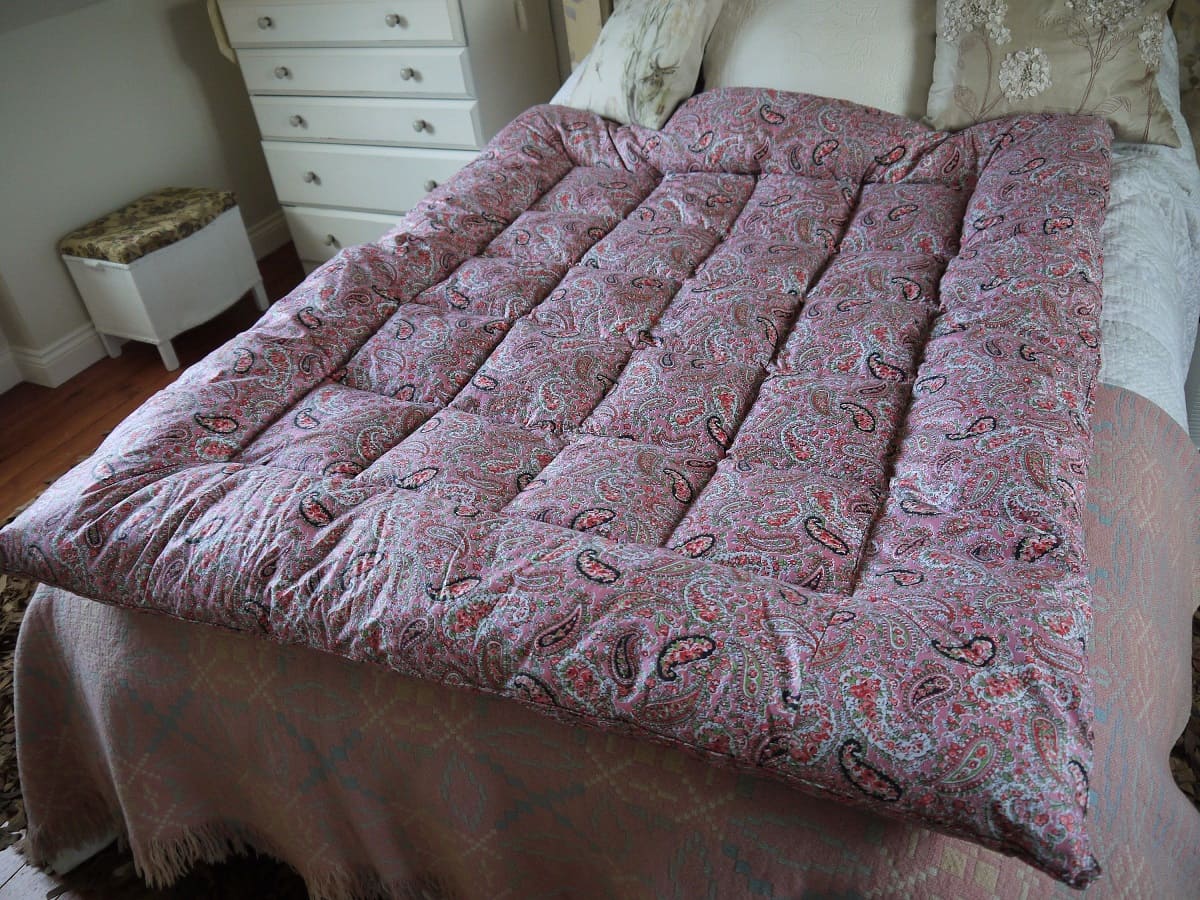
3. Batting: Batting is the layer of material placed between the quilt top and backing to provide warmth and thickness. Select a batting that suits your desired level of warmth and loftiness.
4. Backing Fabric: Choose a fabric for the backing that complements the colors and theme of your quilt top. Ensure that the size of the backing fabric is larger than your quilt top to allow for seam allowances.
5. Thread: Use a high-quality thread that matches or complements the colors of your fabric. Cotton thread is commonly used for quilting.
6. Sewing Machine: A sewing machine will make the process of piecing your quilt top together much quicker and more efficient. Ensure that your sewing machine is in good working condition and that you have the appropriate needles and accessories for quilting.
7. Rotary Cutter and Mat: A rotary cutter and self-healing cutting mat will make cutting your fabric squares precise and efficient. Be sure to use a sharp blade for clean cuts.
8. Ruler: A clear quilting ruler with measurements will help you accurately cut and measure your fabric squares.
9. Iron and Ironing Board: Ironing your fabric before and during the quilt-making process is essential for achieving crisp, neat seams.
10. Pins or Clips: Pins or fabric clips will help hold your fabric squares together as you piece your quilt top.
11. Quilting Supplies: Depending on your preferred quilting method, you may also need supplies such as a quilting hoop or frame, walking foot, free-motion quilting foot, or quilting gloves.
These are the basic materials and tools you’ll need to create an I Spy Quilt. As you progress with your quilting journey, you may discover additional tools and techniques that suit your preferences. Now that you have the necessary supplies, let’s move on to designing your I Spy Quilt.
Designing an I Spy Quilt
Designing an I Spy Quilt is an exciting and creative process. Here are some steps to help you design a unique and visually appealing quilt:
1. Choose a Theme: Think about the theme you want for your I Spy Quilt. It can be animals, transportation, nature, letters, numbers, or any other theme that interests you. Consider who the quilt is for and their preferences.
2. Gather Inspiration: Look for inspiration online, in books, or in your surroundings. Take note of the colors, patterns, and objects that catch your eye. This will help you create a cohesive and visually captivating design.
3. Select Fabrics: Choose a variety of fabrics that align with your chosen theme. Look for prints that feature objects, animals, or patterns related to your theme. Consider using different textures and colors to add visual interest to your quilt top.
4. Decide on the Quilt Size: Determine the size of your quilt based on its intended use. Whether you want to make a small lap quilt or a larger bed-sized quilt, knowing the dimensions will help you plan your design and calculate the number of fabric squares you’ll need.
5. Sketch your Layout: Use graph paper or quilting software to sketch your quilt layout. This will help you visualize how the fabric squares will be arranged and ensure a balanced distribution of colors and objects. Consider creating a focal point or a central design element.
6. Organize Fabric Squares: Sort your fabric squares based on their color, pattern, or theme. This will make it easier to see how the different fabrics work together and allow you to arrange them in a visually pleasing manner.
7. Adjust and Refine: Play around with the arrangement and placement of fabric squares. Experiment with different combinations to find the perfect balance between colors, patterns, and objects. Step back occasionally to evaluate the overall design and make any necessary adjustments.
8. Add Borders or Sashing: Consider adding borders or sashing strips to frame your quilt top. This can provide a finished and cohesive look to your design. Choose fabrics or colors that complement the rest of the quilt.
Remember, designing an I Spy Quilt is a personal and creative endeavor. There are no strict rules, and the possibilities are endless. Trust your instincts and have fun with the process. Once you’re satisfied with your design, it’s time to start piecing together your quilt top.
Read more: How Do I Quilt
Piecing the Quilt Top
Piecing the quilt top is the process of sewing together the fabric squares to create the main design of your I Spy Quilt. Follow these steps to piece your quilt top:
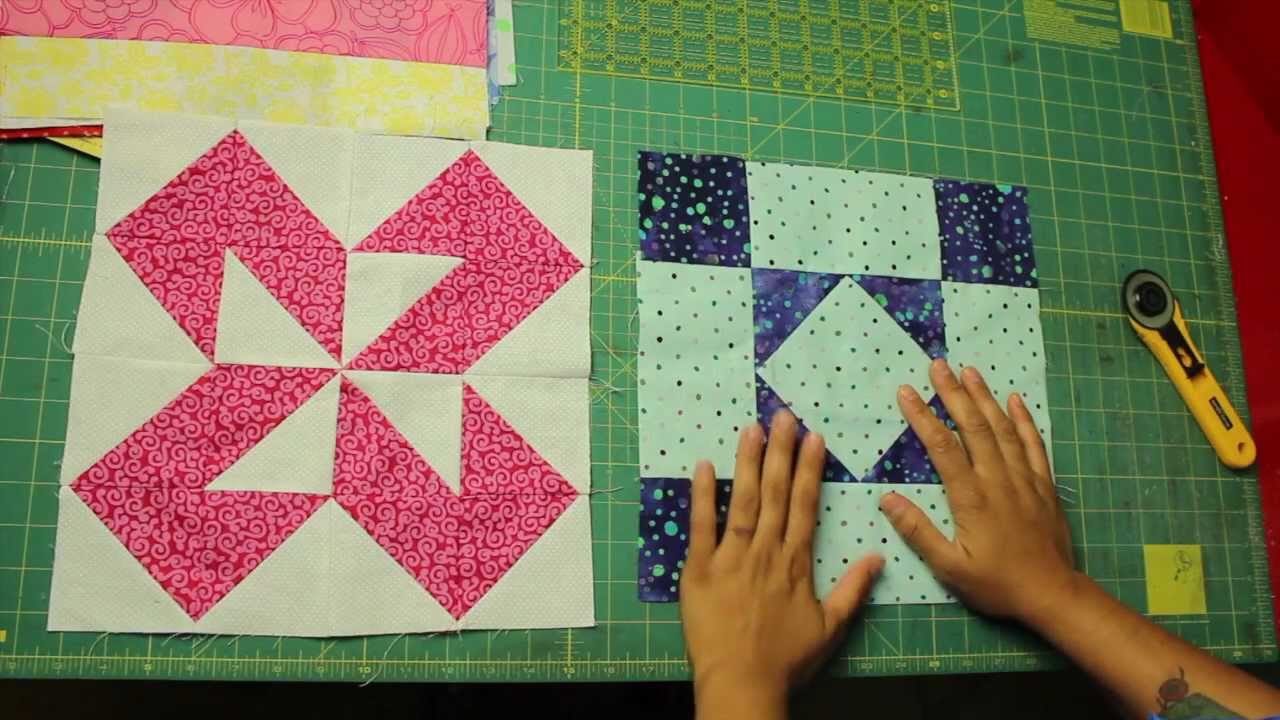
1. Arrange the Fabric Squares: Begin by arranging your fabric squares according to your chosen design. Lay them out on a flat surface, following the sketch or design you created earlier. Take your time to ensure you’re happy with the placement of each square.
2. Join the Squares: Once you have finalized the layout, it’s time to start sewing the squares together. Take the first two squares that need to be joined and place them right sides together. Align the edges carefully and pin them together if desired.
3. Sew the Seam: Using a 1/4-inch seam allowance, sew along the pinned edge, joining the two squares together. Backstitch at the beginning and end of the seam to secure it. Repeat this step for each set of fabric squares until all the squares are sewn together into rows.
4. Press the Seams: After sewing each seam, press the seam allowances to one side using an iron. This will help create neat and flat seams and ensure the fabric lies smoothly.
5. Join the Rows: Once you have sewn all the fabric squares into rows, it’s time to join the rows together. Place two rows right sides together, aligning the edges and matching the seams. Pin them together if desired.
6. Sew the Rows: Using a 1/4-inch seam allowance, sew along the pinned edge, joining the rows together. Repeat this step to sew all the rows together until your entire quilt top is pieced.
7. Press Open the Seams: After sewing the rows together, press the seam allowances open or to one side. This will help reduce bulk and create a flatter surface for quilting later on.
8. Square Up the Quilt Top: Trim any excess fabric or uneven edges to ensure that your quilt top is square and even. Use a ruler and rotary cutter to achieve clean and straight edges.
Once you have pieced your quilt top, give it a final press to remove any wrinkles or creases. Now you’re ready to move on to the next step – creating the I Spy elements that make these quilts so engaging and unique.
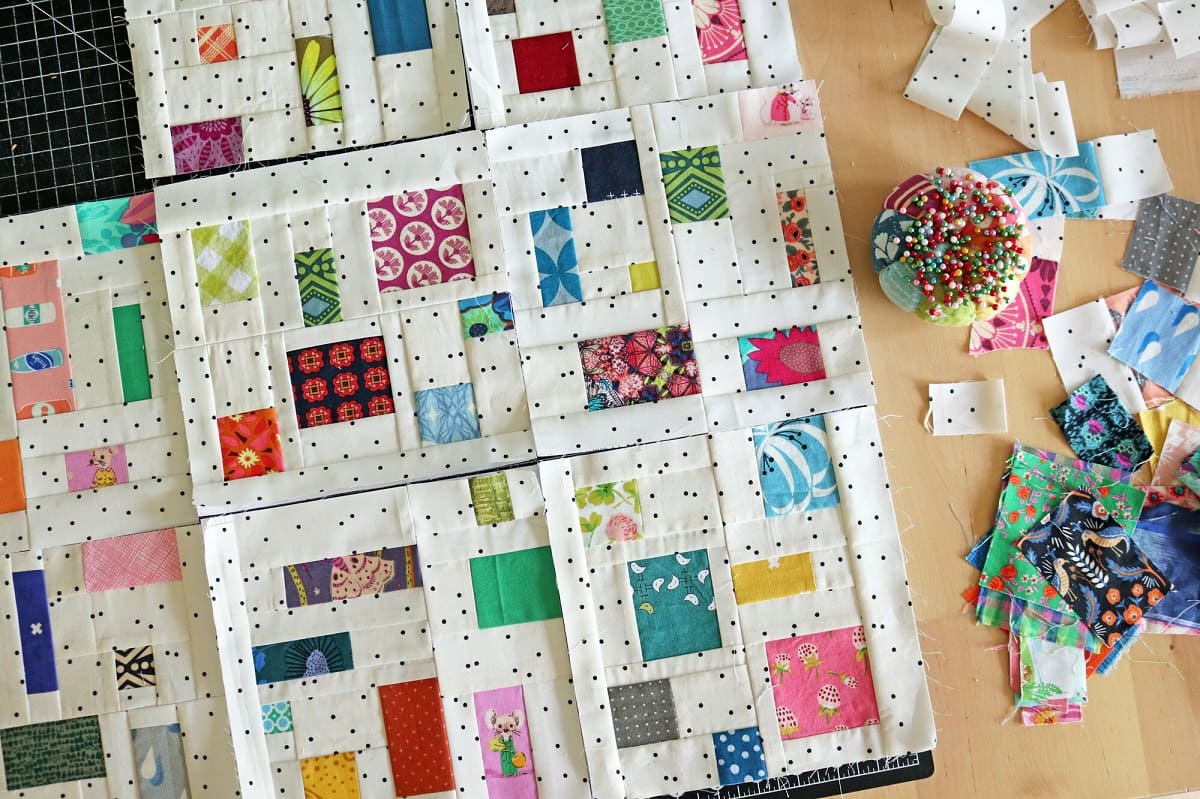
When creating an I Spy quilt, be sure to use a variety of colorful and interesting fabrics with different patterns and textures to make the hidden objects stand out.
Creating the I Spy Elements
The I Spy elements are the hidden objects or patterns within your quilt that make it interactive and engaging. Here are some techniques you can use to create these elements:
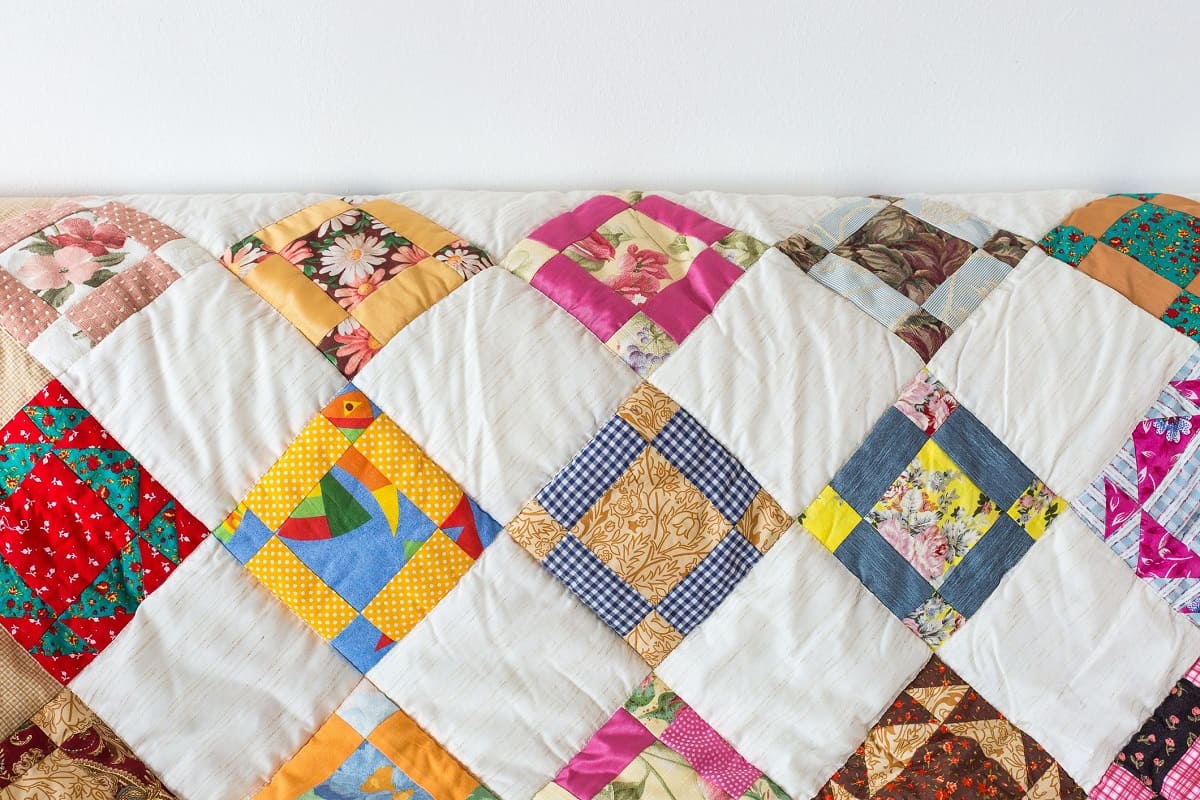
1. fussy cutting: Fussy cutting is the process of selectively cutting out specific elements from fabric to showcase them in your quilt. Look for fabrics that feature objects or patterns relevant to your theme and cut them out carefully to highlight those elements.
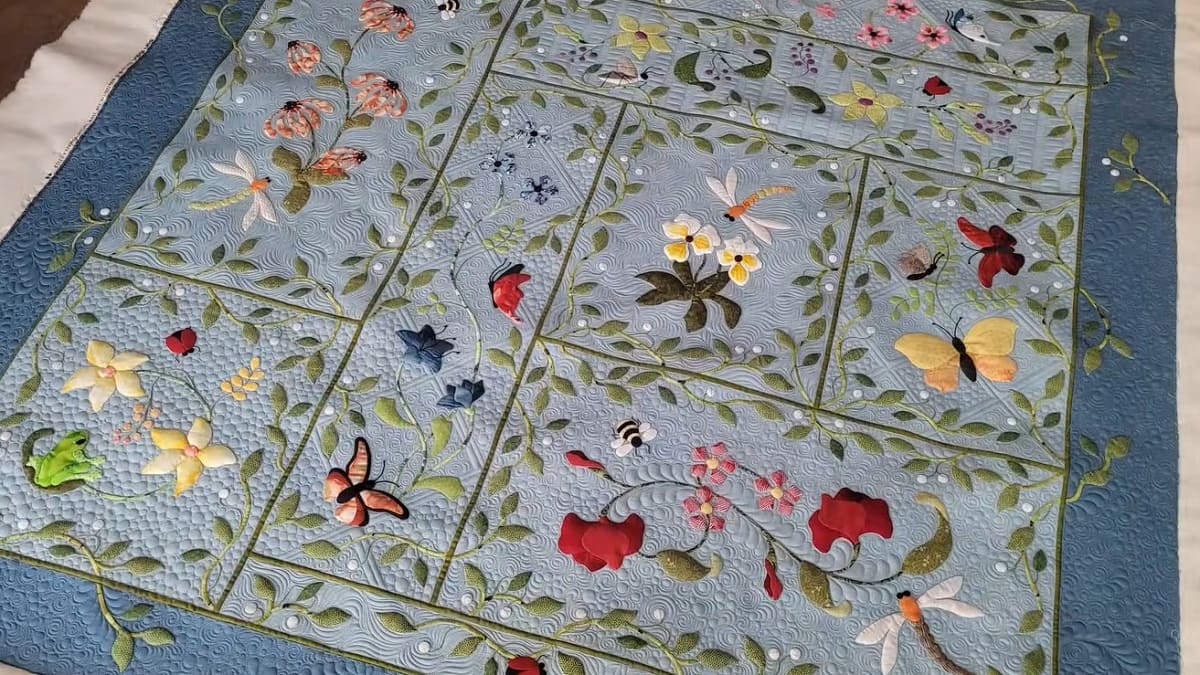
2. Appliqué: Appliqué is the process of attaching fabric shapes onto your quilt top. You can create appliqué shapes of various objects that your viewers can “spy” within the quilt. Use fusible web or hand-sewing techniques to secure the appliqué pieces onto the fabric squares.
3. Embroidery or Hand-Quilting: Another way to add I Spy elements is through embroidery or hand-quilting. You can use embroidery floss or thread to stitch small motifs or objects onto the fabric or quilt top. This technique adds texture and visual interest to your quilt.
4. Fabric Markers or Paint: Fabric markers or fabric paint can be used to directly add objects, symbols, or words onto the fabric squares. This method allows for precision and control in creating your I Spy elements.
5. Pieced Blocks: In addition to adding individual elements, you can design and create pieced blocks that showcase larger objects or scenes. By incorporating these blocks into your quilt top, you can provide a “wow” factor and a focal point for your viewers to discover.
The key to creating effective I Spy elements is to ensure that they are easily recognizable and distinguishable within the quilt. Bold colors, contrasting fabrics, and clear stitching or markings can help enhance the visibility of these objects.
Remember to distribute the I Spy elements evenly throughout your quilt top. You want to provide a balance between the main design and the hidden objects to maintain the overall aesthetic appeal.
Once you have incorporated the I Spy elements into your quilt top, it’s time to move on to the next step – assembling the quilt.
Assembling the Quilt
Assembling the quilt involves layering the quilt top, batting, and backing fabric, and securing them together. Follow these steps to assemble your I Spy Quilt:
1. Prepare the Quilt Backing: Ensure that your backing fabric is clean, pressed, and larger than your quilt top. Trim off any excess fabric that extends beyond the quilt top edges.
2. Layer the Quilt Sandwich: Lay your backing fabric on a flat surface, wrong side up. Smooth it out to remove any wrinkles or creases. Place the batting on top of the backing fabric, and then place your quilt top, right side up, on the batting. Smooth out each layer to ensure they are flat and aligned.
3. Baste the Layers: To hold the layers together, you can either hand-baste the quilt sandwich with large, loose stitches or use safety pins to secure the layers in place. Start from the center and work your way outward to prevent puckering or distortion.
4. Quilting: Quilting is the process of stitching the layers together. You can choose from various quilting techniques such as hand quilting, machine quilting, or long-arm quilting. Quilt along the seams, around the I Spy elements, or create your own quilting design to enhance the overall look of the quilt.
5. Trim the Excess: Once the quilting is complete, carefully trim the excess batting and backing fabric, making sure to leave a border of a few inches around the quilt top edges. This will allow room for binding and finishing.
6. Create Binding: Cut strips of fabric, usually 2.5 inches wide, to create the binding. Join the strips together, end to end, at 45-degree angles to create a continuous strip. Fold the strip in half lengthwise and press it to create the binding tape.
7. Attach the Binding: Starting in the middle of one side of the quilt, with the raw edges aligned, sew the binding to the quilt, leaving a few inches unstitched at the beginning. Sew with a 1/4-inch seam allowance, mitering the corners as you go. When you reach the starting point, overlap the binding ends and finish sewing.
8. Finish the Binding: Fold the binding over the raw edges of the quilt and hand stitch it down on the backside for an invisible finish. Alternatively, you can use a decorative machine stitch to secure the binding.
9. Finishing Touches: Give your quilt a final press to remove any wrinkles or creases. Trim any loose threads and inspect the quilt for any necessary touch-ups or repairs.
With the quilt fully assembled and finished, you can now marvel at your beautiful I Spy Quilt. The next step is to add the final quilting touches and prepare it for use or gifting.
Quilting and Finishing Techniques
Quilting and finishing techniques add the final touches to your I Spy Quilt, enhancing its durability and appearance. Let’s explore some key quilting and finishing techniques:
1. Quilting Designs: Consider the quilting design that will complement your I Spy Quilt. You can choose from various options such as stippling, straight-line quilting, free-motion quilting, or echo quilting. Select a design that accentuates your quilt’s design and adds texture.
2. Quilting Thread: Use a high-quality quilting thread that matches or contrasts with your fabric and design. Ensure that the thread is strong enough to endure regular use and washing.
3. Quilting Stitches: Whether you are hand-quilting or machine quilting, maintain consistent and even stitches. Take your time and practice your chosen quilting technique to achieve the desired result.
4. Binding Techniques: There are various binding techniques you can use to finish the edges of your quilt. Double-fold binding is a common and durable option. You can also experiment with bias tape or decorative trims to add a unique touch to your quilt’s edges.
5. Labeling: Consider adding a label to your I Spy Quilt. A label can include your name, the year, and any other meaningful information. It serves as a personal touch and provides future generations with details about the quilt’s origin.
6. Hanging Sleeve: If you plan to display your quilt on a wall, consider adding a hanging sleeve. The sleeve allows you to insert a rod or dowel, making it easy to hang your quilt as a piece of wall art.
7. Embellishments: Depending on your preferences, you can add embellishments to your I Spy Quilt. This can include embroidery, buttons, ribbons, or beads. Just ensure that the adornments are securely attached and won’t come loose with use or washing.
8. Washing and Care Instructions: Before gifting or using your I Spy Quilt, include washing and care instructions. Provide guidance on how to clean and care for the quilt to preserve its beauty and longevity.
Remember, quilting and finishing techniques are opportunities to showcase your creativity and make your I Spy Quilt truly unique. Take your time, experiment with different techniques, and enjoy the process of bringing your quilt to its final form.
Now that your I Spy Quilt is complete, let’s explore some helpful tips and tricks to ensure a successful quilting journey.
Read more: What Is A Quilt
Tips and Tricks for Making an I Spy Quilt
Creating an I Spy Quilt can be a rewarding and enjoyable experience. Here are some tips and tricks to help you along the way:
1. Plan Your Layout: Before sewing, lay out your fabric squares to ensure a balanced distribution of colors, patterns, and objects. This will help create a visually appealing and cohesive design.
2. Use High Contrast: When selecting fabric squares, aim for high contrast between the objects and the background. This will make it easier for viewers to spot and identify the hidden elements within the quilt.
3. Consider Scale: Vary the scale of the objects in your fabric squares. Mix larger motifs with smaller ones to create visual interest and prevent the quilt from appearing too busy.
4. Create a Color Palette: Establish a color palette for your quilt to maintain a sense of unity. Select a mix of neutral colors and vibrant hues that harmonize with your chosen theme.
5. Secure Appliqué Pieces: When adding appliqué elements, secure them well by using fusible web or stitching around the edges. This will ensure that the pieces stay in place even after washing and use.
6. Choose Durable Fabrics: Opt for high-quality, durable fabrics that can withstand regular handling and washing. Consider using fabrics with a higher thread count to ensure longevity.
7. Test Embroidery: If adding embroidery to your quilt, practice the stitching on a sample fabric first. This will help you refine your technique and ensure a consistent and neat appearance on the quilt top.
8. Take Breaks: Quilting can be a time-consuming process. Remember to take breaks to rest your eyes and avoid fatigue. It’s also a good idea to step back periodically to evaluate your quilt’s progress from a fresh perspective.
9. Label Your Quilt: Add a label to the back of your quilt with your name, the quilt’s title, and the year it was made. This provides a personal touch and acts as a record for future generations.
10. Enjoy the Process: Above all, enjoy the journey of creating an I Spy Quilt! Embrace the creativity, let your imagination run wild, and have fun discovering hidden treasures within your quilt.
Remember that these tips and tricks are meant to guide and inspire you. Feel free to adapt and personalize them to suit your own quilting style and preferences.
Now that you’re equipped with these helpful tips, it’s time to venture into the world of I Spy Quilts and create your own captivating masterpiece!
Conclusion
Congratulations! You’ve reached the end of our journey through the enchanting world of I Spy Quilts. We’ve explored the history, materials, and techniques involved in creating these captivating and interactive quilts.
I Spy Quilts combine the artistry of quilting with the excitement of searching for hidden objects or patterns within the quilt. They provide not only warmth and comfort but also entertainment and education for people of all ages.
As you embark on your own I Spy Quilt project, remember to unleash your creativity and infuse the quilt with your personal touch. Choose fabrics and designs that resonate with your desired theme, and carefully arrange the fabric squares to create a visually pleasing layout. Experiment with different techniques to add the I Spy elements, whether through fussy cutting, appliqué, or embroidery.
Throughout the process, take the time to appreciate the details and enjoy the journey. Quilting is a labor of love that requires patience and skill, but the end result is a remarkable work of art that can be cherished for generations to come.
Now armed with tips and tricks for making an I Spy Quilt, you have the tools to bring your vision to life. Remember to take breaks, step back to evaluate your progress, and enjoy the creative process.
Whether you’re creating an I Spy Quilt as a gift for a loved one, an educational tool, or a cherished piece for your own home, it is sure to bring joy and fascination to all who encounter it.
So, let your creativity soar, your quilting skills shine, and your I Spy Quilt become a cherished masterpiece, filled with hidden treasures and endless wonder. Happy quilting!
Frequently Asked Questions about What Is An I Spy Quilt
Was this page helpful?
At Storables.com, we guarantee accurate and reliable information. Our content, validated by Expert Board Contributors, is crafted following stringent Editorial Policies. We're committed to providing you with well-researched, expert-backed insights for all your informational needs.

0 thoughts on “What Is An I Spy Quilt”