Articles
How Do I Applique On A Quilt
Modified: February 24, 2024
Learn how to applique on a quilt with our informative articles. Discover techniques, tips, and step-by-step instructions to enhance your quilting skills.
(Many of the links in this article redirect to a specific reviewed product. Your purchase of these products through affiliate links helps to generate commission for Storables.com, at no extra cost. Learn more)
Introduction
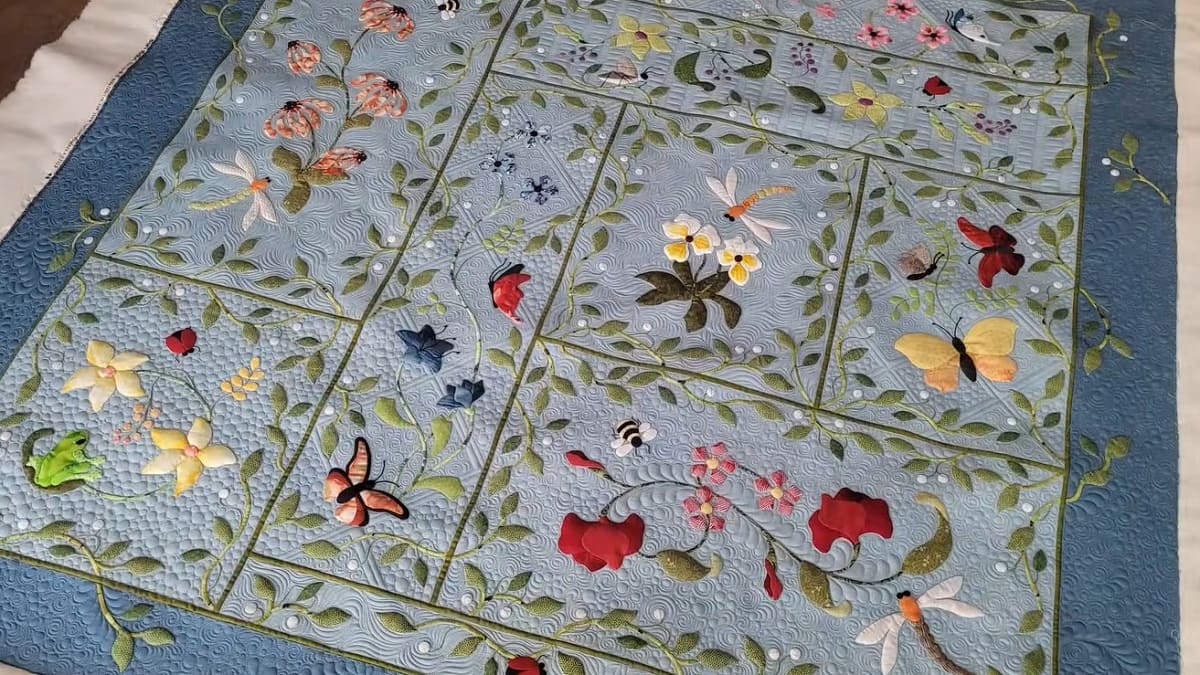
Applique is a popular quilting technique that adds decorative elements to a quilt top. Whether you are a beginner or an experienced quilter, learning how to applique on a quilt can elevate your projects and add a personal touch. This technique involves sewing fabric shapes onto the quilt top, creating eye-catching designs and adding texture to the finished quilt.
In this article, we will explore the step-by-step process of appliqueing on a quilt, from choosing the right design to sewing the applique pieces onto the fabric. Additionally, we will discuss the different applique techniques and the options for machine applique versus hand applique. By the end, you will be equipped with the knowledge and skills to confidently incorporate applique into your quilting projects.
Before we dive into the techniques, gather the materials you will need for this project. You will need:
- Fabric for the applique pieces
- Background fabric for the quilt
- Non-woven fusible web or applique adhesive
- An applique pattern or design template
- Scissors or rotary cutter and mat
- An iron and ironing board
- A quilting ruler
- Cutting mat
- Sewing machine
- Thread
- Pins or clips
- Optional: Hand-sewing needles and embroidery floss for hand applique
Now that you have gathered your materials, let’s begin by preparing the quilt for applique.
Key Takeaways:
- Elevate your quilting projects by learning how to applique on a quilt, from choosing designs to sewing techniques. Embrace creativity and personalize your quilts with stunning applique designs.
- Whether you’re a beginner or experienced quilter, applique adds a personal touch to your quilting projects. Explore different techniques, from machine to hand applique, and create unique, eye-catching designs.
Read more: How To Quilt Applique Patterns?
Materials Needed
Before you start appliqueing on a quilt, it’s essential to gather all the necessary materials. Here’s a list of items you’ll need:
- Fabric for the appliqué pieces: Choose fabrics that complement your quilt design. Consider using fabrics with contrasting colors, patterns, or textures to make the appliqué pieces stand out.
- Background fabric for the quilt: Select a fabric that provides a nice backdrop for your appliqué design. Make sure it matches the overall theme and color scheme of your quilt.
- Non-woven fusible web or appliqué adhesive: This is used to adhere your appliqué pieces to the background fabric. Fusible web is an iron-on adhesive that fuses the appliqué fabric to the background. Appliqué adhesive is a glue-like substance that can be used for temporary or permanent appliqué.
- An appliqué pattern or design template: You can purchase pre-made appliqué patterns or create your own design template. If you’re a beginner, it’s helpful to start with simple shapes like hearts, flowers, or animals.
- Scissors or rotary cutter and mat: These tools are essential for cutting out your appliqué pieces. A rotary cutter and mat provide precise and clean cuts, while scissors work well for smaller, intricate shapes.
- An iron and ironing board: You’ll need an iron to activate the fusible web or to press your fabric while preparing and arranging the appliqué pieces.
- A quilting ruler: A quilting ruler helps you measure and cut your fabric accurately. It ensures that your appliqué pieces are the correct size and shape.
- Cutting mat: Use a cutting mat to protect your work surface when using a rotary cutter or knife to cut out the appliqué shapes. It also provides a stable surface for precise cutting.
- Sewing machine: While you can hand-stitch appliqué, a sewing machine makes the process faster and more efficient. Make sure your sewing machine is in good working condition with the necessary thread and needles.
- Thread: Choose a thread color that matches your appliqué fabric or blends well with the background fabric. A high-quality cotton thread is commonly used for quilting.
- Pins or clips: Pins or clips are used to temporarily hold the appliqué pieces in place while you sew them onto the quilt. They help ensure that the shapes stay in position as you work.
- Optional: Hand-sewing needles and embroidery floss for hand appliqué: If you prefer hand appliqué, you’ll need hand-sewing needles and embroidery floss in coordinating colors.
Having all these materials ready before starting your appliqué project will make the process smoother and more enjoyable. Now that you have everything you need, let’s move on to preparing the quilt for appliqué.
Preparing the Quilt
Before you begin appliquéing on a quilt, it’s important to prepare the quilt top properly. Follow these steps to ensure a smooth and successful appliqué process:
- Clean and iron your fabric: Start by washing and ironing the fabric for your quilt top and background fabric. This will remove any dirt, wrinkles, or sizing chemicals that may affect the appliqué process.
- Trim and square up the quilt top: If you’re working with a pre-made quilt top, make sure to trim any uneven edges and square it up to the desired size. This will provide a clean canvas for your appliqué design.
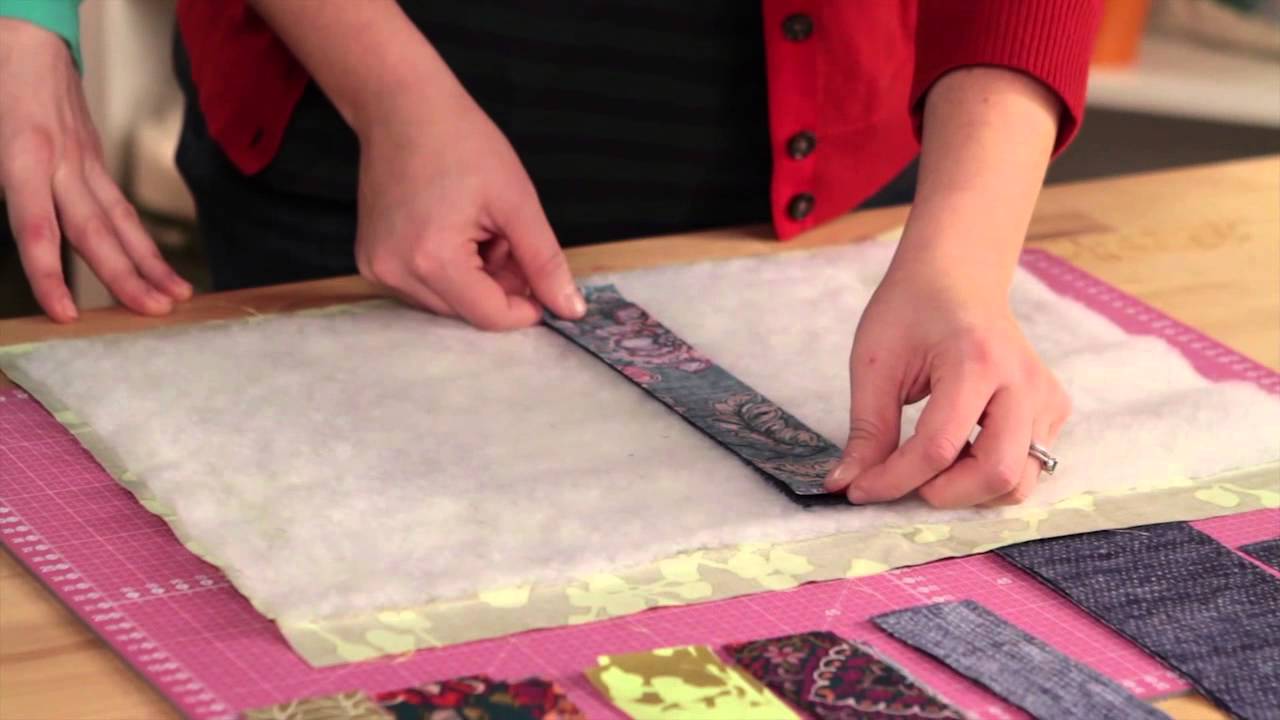
- Layer the quilt sandwich: To prepare the quilt for appliqué, layer the quilt top, batting, and backing fabric, and baste them together. Make sure the layers are smooth and secure, either with pins or basting stitches, to prevent shifting while you’re appliquéing.
- Mark your appliqué placement: Use a washable fabric marker or tailor’s chalk to mark the desired placement of your appliqué pieces on the quilt. This will serve as a guide as you arrange and sew the appliqué shapes onto the fabric.
Once your quilt is properly prepared, you’re ready to move on to the next step: choosing an appliqué design.
Take your time during the preparation process to ensure that your quilt top is free from any imperfections and ready to showcase your appliqué masterpiece. By following these steps, you’ll set a solid foundation for the rest of your appliqué project.
Choosing an Appliqué Design
Choosing the right appliqué design is an exciting part of the quilt-making process. It allows you to showcase your creativity and personal style. Here are some tips to help you choose an appliqué design that suits your preferences:
- Consider the theme and purpose of your quilt: Think about the overall theme or purpose of your quilt. Are you making a baby quilt, a holiday-themed quilt, or a quilt for a special occasion? Let the theme guide your appliqué design choice.
- Research different appliqué styles: Explore various appliqué styles, such as traditional, modern, or whimsical. Look through quilting magazines, books, or online resources to gather inspiration and ideas.
- Start with simple shapes: If you’re new to appliqué, it’s best to start with simple shapes like hearts, stars, flowers, or basic geometric shapes. As you gain confidence and experience, you can progress to more intricate designs.
- Personalize your design: Add a personal touch to your quilt by incorporating meaningful elements. It could be initials, names, or symbols that hold significance to you or the recipient of the quilt.
- Consider the size and scale: Take into account the size and scale of your quilt when choosing an appliqué design. A large quilt allows for more detailed and elaborate designs, while a small quilt may require simpler shapes to maintain clarity.
- Mix and match: Don’t be afraid to combine different appliqué shapes and elements to create a unique design. Experiment with colors, textures, and patterns to add visual interest and depth.
- Sketch and plan: Before cutting out your appliqué pieces, sketch your design on paper and plan the placement of each shape on the quilt. This will give you a visual idea of how the design will look and help you make any necessary adjustments.
Remember, the appliqué design you choose should reflect your personal style and preferences. Don’t be afraid to take risks and think outside the box. This is your opportunity to create a one-of-a-kind quilt that will be cherished for years to come.
Once you have selected an appliqué design, it’s time to trace and cut out the appliqué pieces. We will explore this step in detail in the next section.
Tracing and Cutting the Appliqué Pieces
Tracing and cutting out the appliqué pieces is a crucial step in the appliqué process. It requires precision and attention to detail to ensure that the shapes are accurately cut and ready to be sewn onto the quilt. Follow these steps to trace and cut your appliqué pieces:
- Prepare the fabric: Place the fabric you have chosen for your appliqué pieces on a cutting mat, ensuring it is smooth and wrinkle-free.
- Trace the design: Use a washable fabric marker or pencil to trace the appliqué shape onto the wrong side of the fabric. If you are using a pre-made pattern, you can trace the shape directly onto the fabric. Alternatively, if you are using a design template, place the template on top of the fabric and trace around it.
- Cut out the shapes: Carefully cut along the traced lines to create your appliqué pieces. Use scissors for smaller, intricate shapes or a rotary cutter for larger, simpler shapes. Take your time and make precise cuts to ensure clean and accurate shapes.
- Label the pieces: To keep track of the appliqué pieces and their placement on the quilt, consider labeling each piece with a number or letter. This will help you organize and remember the arrangement of the shapes as you sew them onto the quilt.
When cutting out your appliqué pieces, be mindful of the seam allowance. Leave a small seam allowance around each shape to allow for folding under the edges during the appliqué stitching process. The width of the seam allowance will vary depending on your personal preference and the design of your quilt. Generally, a 1/4 to 1/2 inch seam allowance is common for appliqué.
Once you have traced and cut out all your appliqué pieces, you’re ready to move on to the next step: arranging the appliqué pieces on the quilt. This step allows you to experiment with different layouts and determine the placement of each shape for optimal visual impact.
Read more: How Do I Quilt
Arranging the Appliqué Pieces on the Quilt
Arranging the appliqué pieces on the quilt is an exciting and creative step in the appliqué process. This is where you get to experiment with different layouts and find the perfect placement for each shape. Consider the following steps when arranging your appliqué pieces:
- Lay out the background fabric: Begin by laying out the background fabric flat on a clean surface. Ensure that it’s free from any wrinkles or creases.
- Refer to your design: Use your design template or visual reference to determine the placement and orientation of each appliqué piece. This will help you visualize how the finished design will look.
- Start with a focal point: Choose one appliqué piece to be the focal point of your design. This can be the largest or most visually striking shape. Place it on the background fabric in a position that will draw attention and set the tone for the rest of the design.
- Balance the design: As you add more appliqué pieces, strive for balance and harmony in the overall design. Distribute the shapes evenly across the quilt, considering their sizes, colors, and shapes.
- Overlap and layer: Don’t be afraid to overlap appliqué pieces or layer them on top of one another. This can add depth and dimension to your design.
- Take a step back: Periodically step back and view your design from a distance. This will give you a better perspective on how the appliqué pieces interact with each other and the overall composition.
- Tweak and adjust: Make adjustments as needed by rearranging or repositioning the appliqué pieces. Take your time to ensure that you are satisfied with the placement before moving on to the next step.
Remember, arranging the appliqué pieces is a creative process, and there are no set rules. Trust your instincts and go with what feels visually appealing to you. Don’t be afraid to experiment and make changes until you achieve the desired look.
Once you are satisfied with the arrangement of your appliqué pieces, you’re ready to move on to the next step: learning about different appliqué techniques.
Appliqué Techniques
There are several appliqué techniques to choose from, each offering a unique look and method of attaching the appliqué pieces to the quilt. The technique you choose will depend on your personal preference, the complexity of your design, and the desired outcome. Here are some popular appliqué techniques to consider:
- Raw-edge appliqué: Raw-edge appliqué involves attaching the appliqué pieces to the quilt using a straight or zigzag stitch along the raw edges of the fabric. This technique allows for a more relaxed and rustic look, and it works well for designs with intricate or detailed shapes.
- Turned-edge appliqué: Turned-edge appliqué involves folding the seam allowance under the appliqué shape and hand or machine stitching it in place. This technique creates a neat and clean look, with no raw edges visible. It is suitable for designs with curved or organic shapes.
- Needle-turn appliqué: Needle-turn appliqué is a hand-sewing technique where the seam allowance is turned under the edges of the appliqué shape using a needle. It requires skill and practice but produces a beautiful, soft, and seamless look.
- Reverse appliqué: Reverse appliqué involves layering fabric pieces to create a design and then cutting away the top layer to reveal the contrasting fabric underneath. It can be done by hand or by machine and allows for intricate and dimensional designs.
- Fusible web appliqué: Fusible web appliqué involves using a fusible web or adhesive to attach the appliqué pieces to the quilt top. The appliqué shape is traced onto the fusible web, fused to the fabric, and then stitched in place with a straight or decorative stitch.
When choosing an appliqué technique, consider your personal skill level, the intricacy of your design, and the time and effort you’re willing to invest. It’s also worth experimenting with different techniques to find the one that best suits your style and preference.
Now that you’re familiar with the different appliqué techniques, let’s explore the options of machine appliqué versus hand appliqué in the next section.
When appliqueing on a quilt, use a lightweight fusible web to adhere the applique shape to the quilt top before stitching. This will help keep the shape in place and make the stitching process easier.
Machine Applique vs. Hand Applique
When it comes to appliquéing on a quilt, you have the option to choose between machine appliqué and hand appliqué. Each method offers its own advantages and creates a different look. Consider the following factors when deciding which technique to use for your quilt:
Machine Appliqué:
Speed and Efficiency: Machine appliqué is generally faster than hand appliqué. If you have a large quilt or want to complete your project quickly, machine appliqué may be the best choice for you.
Durability: Machine-stitched appliqué tends to be more durable and withstands regular use and washing well. This makes it a good option for quilts that will be frequently used or washed.
Stitch Options: With machine appliqué, you have a wide range of decorative stitch options to choose from, including satin stitch, zigzag stitch, blanket stitch, and more. These decorative stitches can add visual interest and texture to your appliqué design.
Consistency: Machine appliqué allows for more consistent and precise stitching. If you prefer a polished and uniform look, machine appliqué can provide that level of precision.
Uses: Machine appliqué is well-suited for quilts with larger and simpler shapes. It is also a great option if you are working with a lot of appliqué pieces or if your design requires multiple layers of fabric.
Read more: How Do I Square Up A Quilt Block
Hand Appliqué:
Handcraftsmanship: Hand appliqué is known for its handcrafted and intricate look. If you enjoy the process of hand-sewing and value the delicate details, hand appliqué can offer a charming and traditional aesthetic.
Control and Precision: Hand appliqué allows for more control and precision over the placement and stitching of appliqué pieces. It allows you to manipulate the fabric and shape the edges as you stitch, resulting in a seamless and soft appearance.
Creativity and Flexibility: Hand appliqué offers more flexibility in design choices and allows for more creativity in stitch styles and thread choices. It also allows for finer detail work and works well for quilts with intricate or organic shapes.
Portability: Hand appliqué is a portable technique that can be done anywhere, making it a great choice for on-the-go or traveling quilters.
Ultimately, the decision between machine appliqué and hand appliqué depends on your personal preferences, skills, and the desired outcome of your quilt. You may also choose to incorporate a combination of both techniques, using machine appliqué for larger shapes and hand appliqué for smaller, detailed elements.
Now that you have an understanding of the different appliqué techniques, you’re ready to learn how to sew the appliqué pieces onto the quilt in the next section.
Sewing the Appliqué Pieces on the Quilt
Now that you have prepared your quilt, chosen an appliqué design, and arranged the appliqué pieces, it’s time to sew the pieces onto the quilt. This step brings your design to life and adds a beautiful decorative element to your quilt. Here’s how to sew the appliqué pieces onto the quilt:
- Choose your stitching method: Depending on the appliqué technique you’ve chosen (machine or hand), prepare your sewing machine or needle and thread. Make sure you have the appropriate thread color and needle size for your project.
- Secure the appliqué pieces: Start by securing the appliqué pieces onto the quilt using pins or clips. This will prevent them from shifting as you sew.
- Machine appliqué: If you’re using a sewing machine, select the appropriate stitch for your design. The most common stitch used for machine appliqué is the satin stitch, which is a dense zigzag stitch that covers the raw edges of the appliqué pieces. Slowly stitch around the edges of each shape, following the traced lines or using your design as a guide. Pivot at corners or curves, and backstitch at the beginning and end of each shape to secure the stitches.
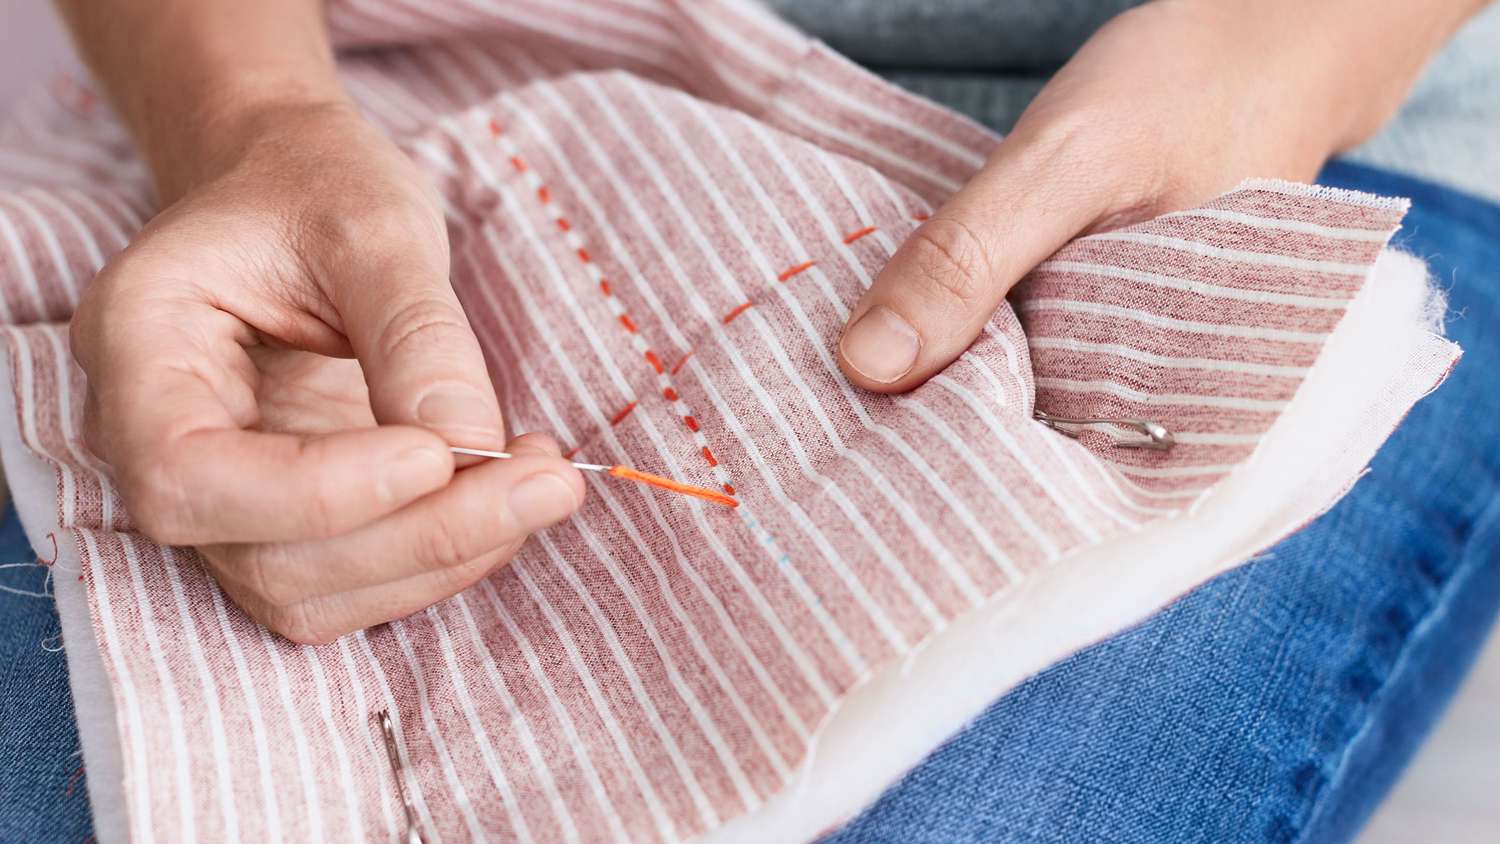
- Hand appliqué: If you prefer hand sewing, use a hand-sewing needle and coordinating thread. Start by securing the appliqué shape to the quilt with small, discreet stitches along the folded edge. Use a technique such as the blind stitch or a small whip stitch. Take care to stitch through all layers of the quilt top, including the appliqué piece, and make small, even stitches for a neat and secure finish.
- Trim excess threads and yarns: After sewing all the appliqué pieces onto the quilt, trim any excess threads or yarns to give your quilt a clean and polished appearance.
While sewing the appliqué pieces, take your time and pay attention to detail. Ensure that the stitches are even and secure, and that the fabric lies flat without puckering or gathering. If you make a mistake or aren’t happy with the stitching, don’t hesitate to remove it and try again.
Once you have sewn all the appliqué pieces onto the quilt, you’re almost done! It’s time to add the finishing touches to your appliqué quilt.
Finishing Touches
As you near the completion of your appliqué quilt, it’s important to add the finishing touches that will elevate the overall look and durability of your project. Here are some important finishing steps to consider:
- Press the quilt top: Before moving forward, give your quilt top a final press to ensure it lies flat and smooth. Use a hot iron and press along the seams and appliqué pieces, taking care not to stretch or distort the fabric.
- Add borders and sashing: If desired, you can add borders or sashing to your quilt to frame and enhance the appliqué design. Choose coordinating fabrics that complement the colors and style of your appliqué pieces.
- Layer the quilt sandwich: After adding any additional elements, layer your quilt top, batting, and backing fabric to create the quilt sandwich. Smooth out any wrinkles or bubbles, and pin or baste the layers together to hold them in place.
- Quilt the layers together: Decide on a quilting design that complements your appliqué and stitch the layers together. This can be done with a long-arm quilting machine, a domestic sewing machine, or by hand quilting. Choose a quilting pattern that enhances the overall design and ensures the layers are securely joined.
- Bind the quilt: Finish off your quilt by binding the edges. Cut binding strips from coordinating fabric, sew them together, and attach them to the raw edges of the quilt. Fold the binding over to the backside and hand-stitch or machine-stitch it in place for a polished finish.
- Label and sign your quilt: To add a personal touch and ensure your quilt’s legacy, consider adding a label with your name, the date, and any other information you’d like to include. A personalized label adds a special touch and will be cherished for years to come.
- Make final inspections: Before considering your quilt complete, take the time to inspect it closely. Check for loose threads, uneven stitches, or any areas that may require reinforcement or additional quilting. Make any necessary adjustments to ensure your quilt is finished to your satisfaction.
Once you’ve completed these finishing touches, step back and admire your beautiful appliqué quilt. It’s now ready to be enjoyed or given as a thoughtful gift.
Remember, the process of creating an appliqué quilt is an opportunity to showcase your creativity and create a unique piece of art. Have fun with the process, take your time, and enjoy the satisfaction of bringing your design to life through appliqué.
Congratulations on completing your appliqué quilt! It’s time to celebrate your accomplishment and showcase your beautiful work.
Conclusion
Congratulations! You have reached the end of this comprehensive guide on appliquéing on a quilt. You have learned the essential steps and techniques needed to add beautiful and personalized appliqué designs to your quilting projects. By following these instructions, gathering the necessary materials, and embracing your creativity, you can create stunning quilts that showcase your craftsmanship and artistic vision.
We started with the introduction, where we discussed the concept of appliqué and its ability to enhance quilt tops with decorative elements. We explored the materials needed, including fabrics, fusible web or adhesive, appliqué patterns, and sewing supplies. We then moved on to preparing the quilt, ensuring it was clean, squared up, and ready for appliqué.
Next, we delved into the exciting process of selecting an appliqué design. We discussed considering themes, researching styles, and personalizing the design to make it unique. We then learned how to trace and cut out the appliqué pieces accurately, paying attention to seam allowances and labeling for organization.
Arranging the appliqué pieces on the quilt allowed us to explore different layouts and achieve balance and visual appeal. We also explored various appliqué techniques, including raw-edge, turned-edge, needle-turn, reverse, and fusible web appliqué, each offering its unique advantages and look.
We also examined the comparison between machine appliqué and hand appliqué, discussing the factors to consider when choosing between the two methods. The decision ultimately depends on personal preference, skill level, and the desired outcome of the quilt.
The final sections focused on sewing the appliqué pieces onto the quilt, adding beautiful stitches using a sewing machine or hand-sewing methods. We also covered the importance of finishing touches, including pressing the quilt, adding borders, layering, quilting, and binding the edges for a polished and professional finish.
Throughout this guide, we emphasized the importance of creativity, attention to detail, and taking the time to enjoy the process. Whether you’re a beginner or an experienced quilter, adding appliqué to your quilting repertoire can elevate your projects and allow you to showcase your own unique style and personality.
Now that you have acquired the knowledge and skills to successfully appliqué on a quilt, it’s time to put them into practice. So gather your materials, choose a design, and embark on your next appliqué adventure. Let your creativity thrive, and may your future quilts be filled with stunning appliqué designs that inspire joy and make treasured keepsakes for yourself or your loved ones.
Frequently Asked Questions about How Do I Applique On A Quilt
Was this page helpful?
At Storables.com, we guarantee accurate and reliable information. Our content, validated by Expert Board Contributors, is crafted following stringent Editorial Policies. We're committed to providing you with well-researched, expert-backed insights for all your informational needs.
0 thoughts on “How Do I Applique On A Quilt”