Articles
What Supplies Do You Need To Make Candles
Modified: February 27, 2024
Discover the essential supplies needed to create beautiful candles with our informative articles. Whether you're a beginner or experienced, find everything you need for your candle-making journey.
(Many of the links in this article redirect to a specific reviewed product. Your purchase of these products through affiliate links helps to generate commission for Storables.com, at no extra cost. Learn more)
Introduction
Welcome to the wonderful world of candle making! Making your own candles can be a fulfilling and enjoyable hobby. Whether you’re a newbie or an experienced candle maker, having the right supplies is essential for creating beautiful, fragrant candles. In this article, we will explore the various supplies you need to make candles and how each one plays a crucial role in the candle making process.
Creating candles is a creative and artistic process that allows you to express your personal style. From choosing the perfect wax to selecting the right fragrance, every step in the candle making journey requires attention to detail. By having the necessary supplies at your disposal, you can ensure that your candle making experience is seamless and successful.
Before diving into the world of candle making, it’s important to understand the different types of candles you can create. Whether you prefer container candles, pillar candles, or taper candles, each type requires specific supplies to achieve the desired results. In this article, we will primarily focus on the supplies needed for making container candles, which are great for beginners and offer endless possibilities for customization.
When it comes to candle making, the quality of the supplies you use can greatly impact the final product. It’s crucial to invest in high-quality materials that are specifically designed for candle making. This ensures that your candles burn evenly, have good scent throw, and are safe to use. Now, let’s explore the key supplies you will need to make your own candles.
Key Takeaways:
- The right supplies, from wax and wicks to safety equipment, are essential for successful and safe candle making. Each supply plays a crucial role in creating high-quality, visually appealing, and fragrant candles.
- Attention to detail, creativity, and experimentation are key to elevating your candle making skills. Prioritize safety, follow manufacturer instructions, and enjoy the journey of creating mesmerizing, handcrafted candles.
Read more: What Tools Do You Need To Start Woodworking
Wax
Wax is the primary ingredient in candle making, and choosing the right wax is essential for creating high-quality candles. There are several types of wax available, each with its own characteristics and benefits. The most common types of wax used in candle making are:
- Paraffin Wax: Paraffin wax is a popular choice for beginners due to its affordability and ease of use. It has a low melting point, which makes it easy to work with and allows for a smooth and even burn.
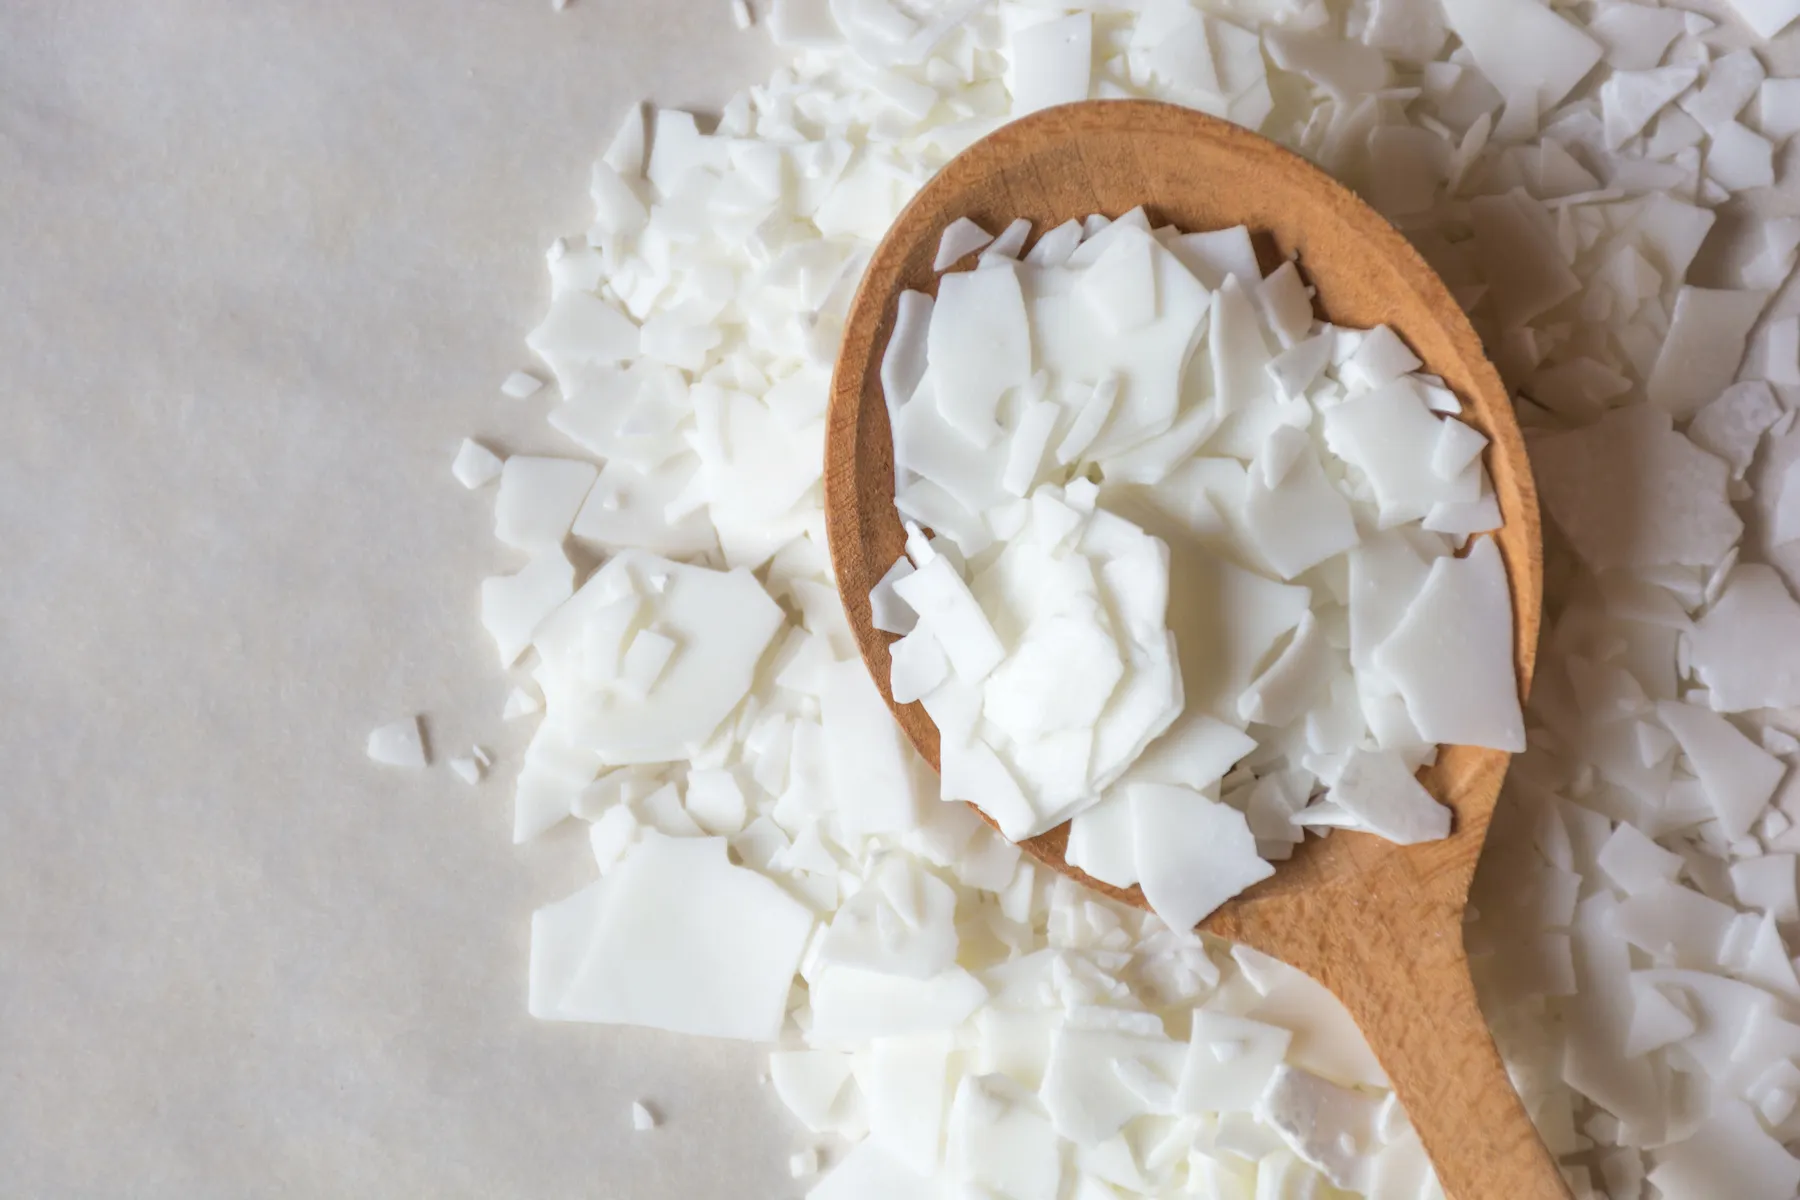
- Soy Wax: Soy wax is made from soybean oil and is a natural and eco-friendly option. It burns cleaner and produces less soot compared to paraffin wax. Soy wax also has a lower melting point, which means it takes longer to melt and requires more patience during the candle making process.
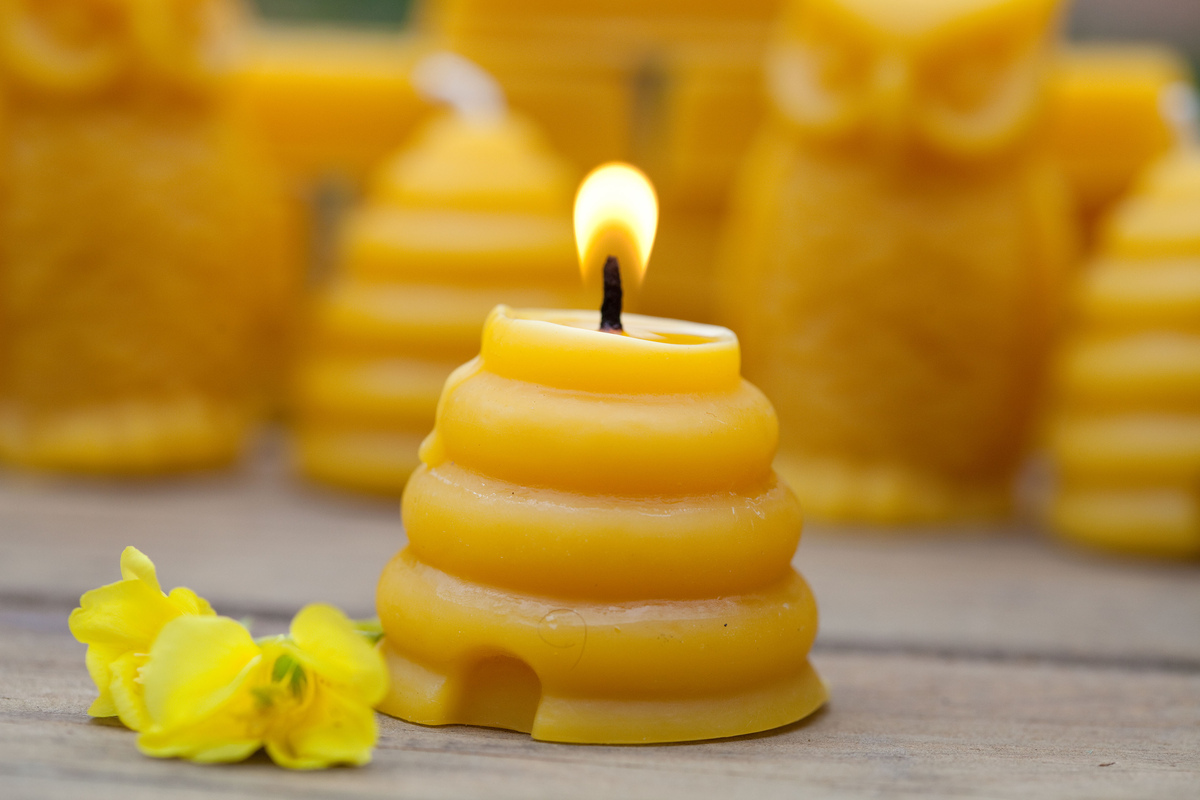
- Beeswax: Beeswax is a natural wax produced by honeybees and is valued for its pleasant scent and beautiful golden hue. It has a high melting point, which contributes to a longer burn time. Beeswax candles are known for their warm and natural glow.
- Palm Wax: Palm wax is derived from the oil of palm trees and is known for its unique crystalline finish. It has a high melting point, which means it requires careful handling during the melting process. Palm wax is often used for creating decorative and specialty candles.
When choosing a wax, consider factors such as burn time, scent throw, and the type of candle you’re creating. Each wax has its own set of advantages and disadvantages, so it’s important to do your research and experiment to find the wax that best suits your needs.
In addition to the type of wax, you’ll also need to consider the form in which the wax is available. It can be purchased in blocks, flakes, or pellets. Pellets and flakes are generally easier to measure and melt compared to blocks, especially for beginners. Consider your comfort level and the scale of your candle making projects when deciding on the form of wax to use.
Remember to handle the wax with care and follow the manufacturer’s instructions for melting and pouring. Different waxes have different melting points, so it’s crucial to use a thermometer to monitor the temperature and ensure it doesn’t exceed the recommended range. This will help you achieve optimal results and prevent any mishaps during the candle making process.
Now that you understand the importance of choosing the right wax, let’s move on to the next essential supply – wicks.
Wicks
Wicks are the heart and soul of a candle, responsible for the flame and the steady burn. Choosing the right wick is crucial for achieving a well-performing and long-lasting candle. The type of wick you use depends on factors such as the diameter of your container, the type of wax used, and the desired burn time.
Wicks come in various materials, such as cotton, hemp, and paper. Cotton wicks are the most commonly used and are suitable for a wide range of candle types. They are known for their stability, clean burn, and minimal soot production.
The size of the wick is determined by the diameter of the container or mold you’re using. It’s important to select a wick that is appropriate for the size of your candle to ensure proper burning. If the wick is too small, the candle may not burn evenly, causing tunneling or a weak flame. Conversely, if the wick is too large, the candle may produce excessive soot and a large, flickering flame.
When choosing a wick size, it’s helpful to refer to wick size charts or consult with experienced candle makers. Additionally, you can perform test burns to determine the optimal wick size for your specific candle and container combination. This involves burning a small sample candle to observe the burn characteristics and make adjustments if necessary.
In addition to the size, wicks can also be pre-tabbed or not. Pre-tabbed wicks come with a metal tab at the bottom, making them easy to center and secure in the container. This eliminates the need for additional adhesive or tools. If you prefer to use non-tabbed wicks, you will need to use wick stickers or another adhesive to affix the wick to the container.
Using a proper wick holder during the pouring process can also help keep the wick centered and straight. This ensures an even burn and eliminates any potential safety hazards.
Remember, the wick you choose will greatly impact the performance of your candle. It’s important to conduct thorough research, test different wick sizes, and consider the recommendations provided by the wick manufacturer. By selecting the right wick, you can ensure that your candles burn beautifully and provide a delightful sensory experience.
Now that you have a good understanding of wicks, let’s move on to the next essential supply – containers.
Containers
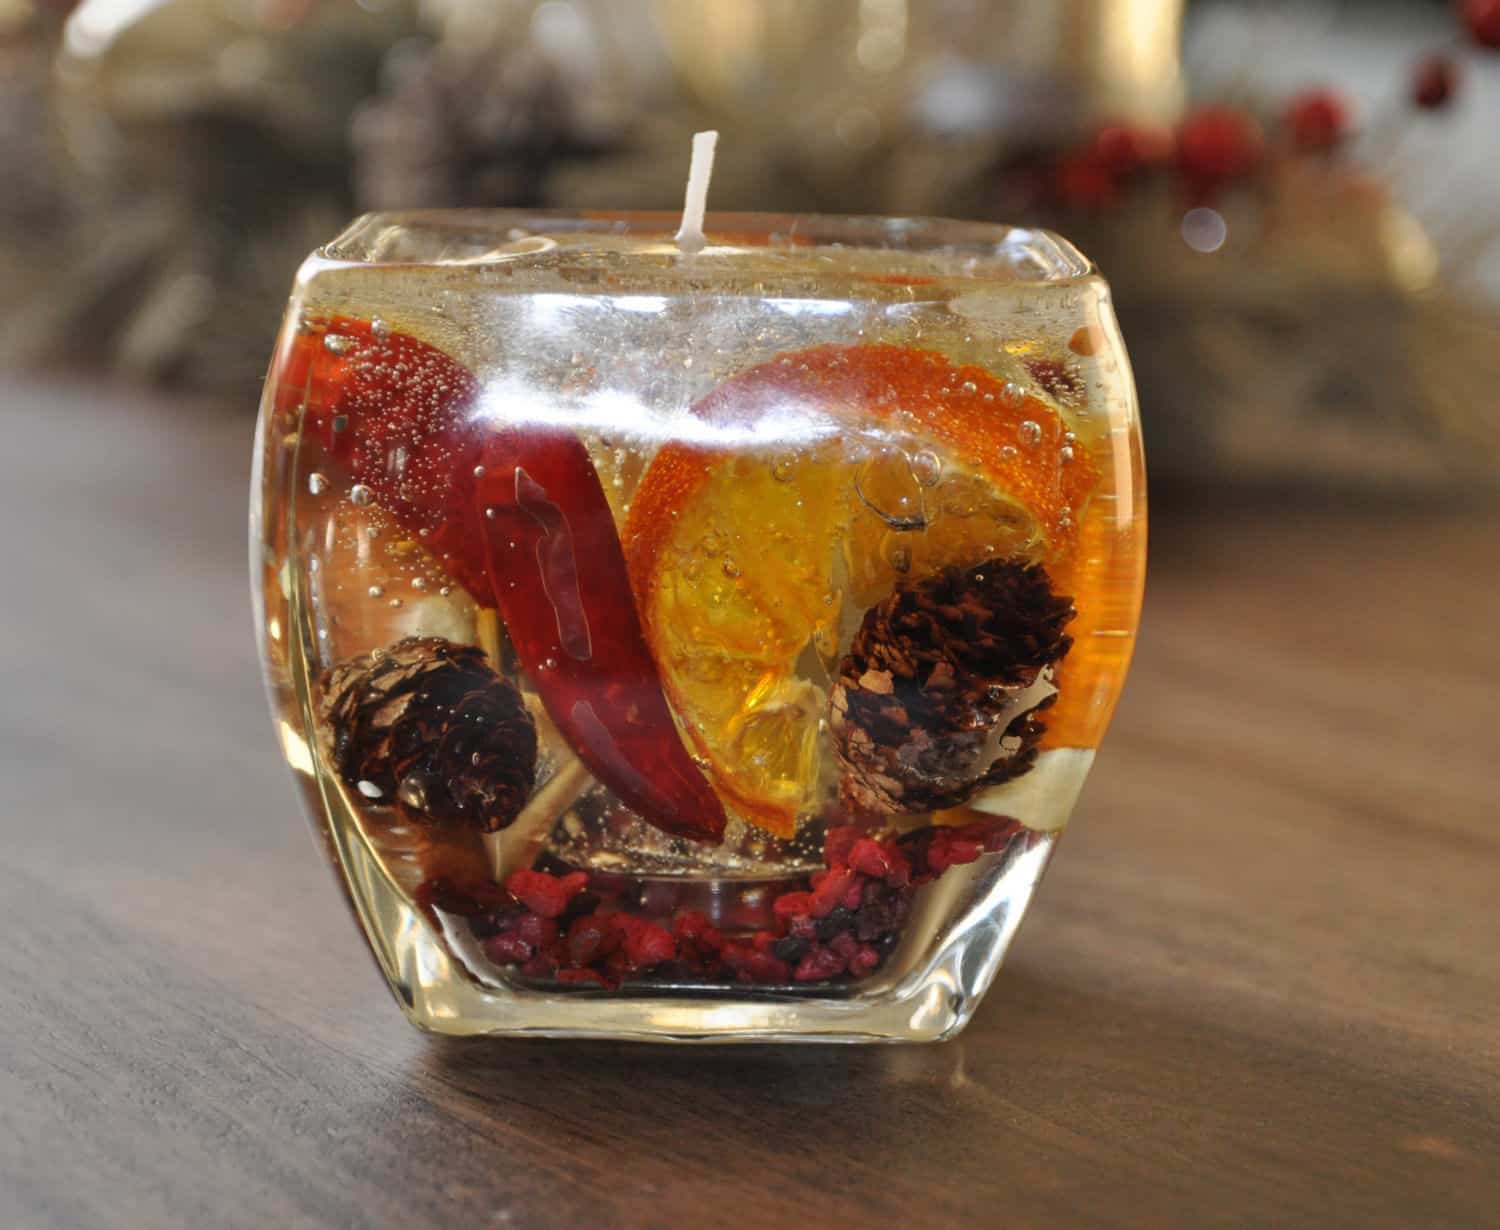
Containers are an important part of candle making, as they not only hold the wax but also serve as a decorative element. Choosing the right container is essential for creating visually appealing and functional candles. There are various types of containers available, each with its own unique characteristics.
Glass jars are a popular choice for container candles. They come in a variety of shapes, sizes, and styles, allowing you to create candles that match your personal aesthetic. Glass jars are heat-resistant and provide a clear view of the burning candle, creating a mesmerizing visual experience. They are also reusable, which adds to their appeal.
Tin containers are another option for container candles. They are lightweight, durable, and come in various sizes and finishes. Tin containers are often chosen for their portability and rustic charm. They are especially popular for travel candles or outdoor use.
Other container options include ceramic, concrete, and wooden vessels. These containers add a unique and natural touch to the candles, making them stand out. It’s important to ensure that these containers are appropriate for use with candles and can handle the heat generated during burning.
When selecting a container, consider the size of the container in relation to the amount of wax you plan to use. You want to ensure that the container is neither too small nor too large for the chosen wick size. The container should also be able to withstand the heat of the lit candle without cracking or shattering. Additionally, consider the design and aesthetics of the container, as it contributes to the overall look and feel of the finished candle.
Keep in mind that not all containers are suitable for candle making. Avoid using plastic containers, as they can melt or deform when exposed to high temperatures. It’s also important to clean and prepare the containers before pouring the wax. Ensure they are free from dust, debris, or any substances that may interfere with the adhesion of the wax.
Ultimately, the choice of container depends on your personal preferences and the style of candles you want to create. Experiment with different containers to discover the ones that best match your vision and enhance the overall aesthetic appeal of your candles.
Now that you have selected your container, we can move on to the next essential supply – fragrance oils.
Fragrance Oils
Fragrance oils are an integral part of candle making, adding delightful scents to enhance the ambiance and create a sensory experience. Whether you prefer a calming lavender scent, a refreshing citrus aroma, or a cozy vanilla fragrance, there is a wide range of fragrance oils available to suit every preference.
When selecting fragrance oils for your candles, it’s important to choose high-quality oils specifically designed for candle making. These oils are formulated to withstand the heat of burning and provide a strong and lasting scent throw. Avoid using essential oils on their own, as they tend to dissipate quickly when exposed to heat. If you prefer natural scents, look for fragrance oils that are phthalate-free and made with natural or essential oil blends.
Fragrance oils come in a vast array of scents, and it can be overwhelming to choose from the options available. Consider the theme or mood you want to create with your candle, as well as your target audience’s preferences. For example, floral scents like rose or jasmine are popular choices for relaxation and self-care candles, while fruity scents like apple or berry are invigorating and refreshing.
When using fragrance oils, it’s essential to follow the manufacturer’s recommended usage rates. These rates vary depending on the specific oil and can range from 5% to 10% of the total wax weight. Adding too much fragrance oil can negatively impact the burn quality and potentially cause the candle to emit excessive soot. On the other hand, using too little fragrance oil may result in a subtle or barely noticeable scent.
Before adding the fragrance oil to your melted wax, it’s recommended to perform a small test batch to determine the desired scent strength. This involves pouring a small amount of wax with the desired amount of fragrance oil into a container and allowing it to cure. Once cured, you can assess the scent strength and make adjustments if needed.
Remember to stir the fragrance oil into the wax thoroughly to ensure even distribution. Use a heat-safe utensil for stirring and be cautious of any splattering or spills. It’s also a good idea to keep a record of the fragrance oils you’ve used and their proportions for future reference.
Adding fragrance oils to your candles will not only enhance the olfactory experience but also allow you to create unique and personalized scents. Experiment with different combinations and ratios to find the perfect fragrance blend that resonates with your audience.
Now that you’ve added fragrance to your candle, let’s move on to the next essential supply – dyes.
Read more: What Do I Need To Start Making Candles
Dyes
Dyes are a fantastic way to add a splash of color and visual appeal to your candles. They allow you to customize your creations and match them to any decor or theme. Whether you prefer vibrant and bold hues or subtle and pastel shades, dyes provide endless possibilities for creative expression.
There are different types of dyes available for candle making, each with its own characteristics and methods of application. The most commonly used dyes for candles are liquid dyes, powdered dyes, and dye chips.
Liquid dyes are convenient to use as they can be directly added to the melted wax. They come in a variety of colors and are highly concentrated, requiring only a few drops to achieve the desired shade. Liquid dyes are great for achieving consistent and even color distribution.
Powdered dyes are another popular option, especially for those who prefer to mix their own colors. These dyes come in powder form and need to be mixed with a small amount of melted wax or a suitable liquid dispersant before adding them to the main batch. Powdered dyes offer versatility and allow for a customized color palette.
Dye chips are small, solid blocks of color that can be added directly to the melted wax. They are available in a wide array of colors and offer excellent color saturation. Dye chips are convenient to use and provide consistent results.
When using dyes, it’s important to start with smaller amounts and gradually add more until the desired color is achieved. Remember to keep a record of the amount used for future reference. Keep in mind that the color of the liquid wax may appear slightly different from the final color of the cooled, solid candle. It’s always a good idea to conduct test batches to ensure you achieve the desired color outcome.
While dyes can transform the appearance of your candles, it’s important to strike a balance between color intensity and burn quality. Adding too much dye can impact the burn quality and potentially result in waxy or smoky residue. It’s recommended to follow the manufacturer’s guidelines for recommended usage rates to ensure optimal results.
Experiment with different color combinations and try mixing dyes to create unique shades. You can also consider layering different colored waxes to achieve a beautiful gradient effect. The possibilities are endless, so don’t be afraid to get creative and have fun with colors!
Now that your candles are beautifully colored, let’s move on to the next essential supply – a thermometer.
Thermometer
A thermometer is an indispensable tool in candle making that allows you to monitor and control the temperature of your wax. Maintaining the proper temperature is crucial for achieving optimal results and ensuring the safety and quality of your candles.
There are various types of thermometers available for candle making, and it’s important to choose one that is specifically designed for measuring wax temperatures. The two most commonly used thermometers are digital and analog thermometers.
Digital thermometers provide accurate and instant readings. They are easy to read and often come with a probe that can be inserted into the melted wax to measure its temperature accurately. Digital thermometers are convenient to use, especially for beginners, as they eliminate the need for guesswork.
Analog thermometers, on the other hand, have a traditional dial-style display. They require a bit more patience and attention, as they take time to show the temperature accurately. Analog thermometers often have a clip or strap to attach to the container, allowing you to keep a constant eye on the temperature as the wax melts.
Regardless of the type of thermometer you choose, it’s crucial to ensure that it has a temperature range suitable for candle making. Different waxes have different melting points, so it’s important to select a thermometer that can measure within the desired range.
Using a thermometer allows you to melt your wax at the correct temperature and monitor it during the cooling process. Most waxes have a recommended pouring temperature, which ensures that the fragrance oils and dyes are added at the optimal stage for binding with the wax. Pouring the wax too hot or too cold can result in uneven burning or poor scent throw.
Additionally, a thermometer helps you prevent the wax from overheating, which can lead to discoloration or degradation of the fragrance. It also enables you to add fragrance oils and dyes at the correct temperature, ensuring they blend well and distribute evenly throughout the wax.
Keep in mind that different waxes have different temperature requirements, so it’s important to consult the specific guidelines provided by the wax manufacturer. By using a thermometer and following the recommended temperature ranges, you can achieve consistent and professional results with your candles.
Now that you have your temperature under control, let’s move on to the next essential supply – a double boiler or melting pot.
Double Boiler or Melting Pot
A double boiler or melting pot is an essential tool in candle making that helps you melt the wax safely and efficiently. It provides a controlled and indirect heat source to prevent the wax from overheating or scorching while melting.
A double boiler consists of two pots, one larger pot filled with water and a smaller pot that sits inside it. The water in the larger pot heats up, gently transferring heat to the smaller pot containing the wax. This indirect heating method ensures that the wax melts slowly and evenly without direct contact with the heat source.
If you don’t have a double boiler, you can also use a dedicated melting pot specifically designed for candle making. These melting pots often feature a built-in thermometer and a pour spout, making them convenient and user-friendly. They come in various sizes, allowing you to melt larger quantities of wax at once.
Using a double boiler or melting pot helps prevent the wax from becoming too hot and potentially catching fire. It also minimizes the risk of scorching, which can result in discoloration and a burnt smell. This controlled melting process ensures that the wax retains its desired properties, such as fragrance retention and smooth pourability.
When using a double boiler or melting pot, it’s important to follow a few safety guidelines. Always place the pots on a sturdy and heat-resistant surface, away from any flammable objects. Avoid leaving the melting wax unattended and keep a fire extinguisher nearby, just in case. Never pour water into a hot wax pot, as this can cause dangerous splattering.
Depending on the amount of wax you’re melting, it’s crucial to monitor the temperature using a thermometer. This will help you maintain the recommended melting temperature and prevent the wax from overheating or scorching. Stir the wax occasionally to ensure even melting and to help distribute any dye or fragrance added to the wax.
Remember to clean the double boiler or melting pot thoroughly after each use to remove any residual wax. This will help prevent any color or scent contamination in subsequent batches.
Having a double boiler or melting pot in your candle making arsenal ensures that you can melt your wax safely and efficiently. It provides a controlled environment for melting, allowing you to focus on creating beautiful and fragrant candles.
Now that you have your wax melting equipment in place, let’s move on to the next essential supply – stirring utensils.
When making candles, be sure to have the following supplies on hand: wax, wicks, fragrance oils, a double boiler, a thermometer, and a pouring pot. These are essential for a successful candle-making process.
Stirring Utensils
Stirring utensils are essential tools in candle making that enable you to mix and blend the various components of your candles. They help ensure that the fragrance oils, dyes, and additives are thoroughly incorporated into the melted wax, resulting in consistent and well-blended candles.
When it comes to stirring utensils, there are various options available depending on personal preference and the type of wax you’re working with. Here are a few commonly used stirring utensils:
- Wooden Stirring Sticks: Wooden sticks or dowels are commonly used in candle making due to their easy availability and affordability. They are great for stirring small batches of wax or for mixing additives. Wooden stirring sticks are disposable, making cleanup a breeze.
- Metal Stirring Spoons: Metal spoons, such as stainless steel or aluminum, are another popular choice. They are durable, heat-resistant, and easy to clean. Metal stirring spoons can be reused for multiple batches, making them a sustainable option.
- Heat-Resistant Silicone Spatulas: Silicone spatulas are highly recommended for candle making, especially for larger batches. They are heat-resistant and flexible, allowing you to reach every corner of the container or melting pot. Silicone spatulas are easy to clean and can be used for both stirring and scraping the sides of the vessel.
Regardless of the stirring utensil you choose, it’s important to dedicate separate utensils for each type of wax or fragrance to prevent cross-contamination of scents. This ensures that your candles maintain their intended fragrance profiles.
When stirring the wax, start slowly and gently to avoid excessive splashing or spills. Mix in a circular motion to ensure even distribution of fragrance oils and dyes throughout the wax. Be cautious not to introduce air bubbles while stirring, as they can affect the appearance and burning of the finished candle.
After each use, clean your stirring utensils thoroughly to remove any trace of wax or additives. Hot, soapy water is usually sufficient for cleaning, but for stubborn residue, you can use a solvent specifically designed for cleaning candle making equipment.
Using proper stirring utensils ensures that your wax is well-blended, resulting in beautiful and consistent candles. It also allows you to have more control over the candle making process and achieve the desired color and scent distribution.
Now that you have your stirring utensils ready, let’s move on to the next essential supply – measuring tools.
Read more: What Do I Need To Make Candles At Home
Measuring Tools
Accurate measurements are crucial in candle making to ensure consistency and precise results. Using the right measuring tools helps you to add the correct proportions of wax, fragrance oils, and other additives, resulting in beautifully crafted candles. Here are some essential measuring tools for candle making:
- Measuring Cup or Scale: A measuring cup or kitchen scale is needed to measure the amount of wax you’re using. For liquid measurements, use a heat-resistant measuring cup with clear markings to ensure accurate pouring. Alternatively, a kitchen scale can be used to measure wax by weight, which is particularly useful when working with larger quantities or for more precise measurements.
- Graduated Cylinder: A graduated cylinder is highly recommended for measuring fragrance oils. It allows for precise measuring, especially when working with smaller amounts of oils. The clear markings on the cylinder make it easier to measure the exact volume required for your candle recipe.
- Thermometer: Although we’ve discussed thermometers earlier, they also serve as a valuable measuring tool. They help measure the temperature of the wax, ensuring that it’s at the right temperature for adding fragrance oils, dyes, or other additives.
- Spoons or Pipettes: Small spoons or pipettes are useful for measuring and adding small amounts of fragrance oils or liquid additives when working on intricate or small-scale projects. They allow for more precise measurement and controlled pouring.
- Molds or Containers: While not traditional measuring tools, molds or containers serve as important measuring devices when pouring wax. They allow you to estimate the amount of wax needed for each candle, ensuring consistent sizing throughout your batch.
When measuring ingredients, it’s essential to use level measurements for accuracy. Follow the recipe or guidelines provided by the wax or fragrance oil manufacturer to ensure proper ratios. Consistent measurements not only contribute to the quality of the candles but also play a key role in replicating your recipes in the future.
After using your measuring tools, remember to clean and dry them thoroughly before their next use. This prevents any cross-contamination of scents or colors and maintains the accuracy of your measurements.
Having the right measuring tools on hand ensures that your candle making process is precise and efficient. By accurately measuring your ingredients, you can create consistent and high-quality candles that meet your desired specifications.
Now that you have your measurements down pat, let’s move on to the next essential supply – mold release spray.
Mold Release Spray
Mold release spray is a valuable tool in candle making, especially when working with intricate or unique molds. It ensures that your candles release easily and cleanly from the molds, preserving their shape and preventing any damage during the demolding process.
When using molds for candle making, it’s common for the wax to adhere to the mold’s surface. This makes it challenging to remove the candle without causing any deformities or breakages. Mold release spray forms a thin, non-stick barrier between the candle and the mold, making the demolding process much smoother.
Mold release sprays are typically silicone-based and come in aerosol form. They are designed to provide an easy and even application, ensuring that every nook and cranny of the mold is coated with the release agent. The silicone-based formula creates a slippery surface that allows the candle to slide out effortlessly.
Using mold release spray is simple. Before pouring the wax into the mold, hold the mold at an angle and spray a thin layer of release agent onto the interior surface. Make sure to cover all areas, including any intricate details or corners. Allow the spray to dry or set for a few minutes before pouring the wax.
When it’s time to remove the candle from the mold, gently flex or tap the mold to release any trapped air pockets. Then, slowly and carefully invert the mold and gently press on the base or sides to help loosen the candle. With the help of the mold release spray, the candle should slide out smoothly without any resistance.
Using mold release spray not only makes the demolding process easier, but it also helps maintain the integrity and detail of your candles. It reduces the risk of breakage or distortion and ensures that your candles have a professional finish.
Remember to follow the manufacturer’s instructions when using mold release spray and to choose a spray that is suitable for the type of mold and wax you’re working with. Some molds may require multiple coats for better release, while others may only need a single application.
Now that you know about the benefits of mold release spray, let’s move on to the next essential supply – adhesive tabs.
Adhesive Tabs
Adhesive tabs, also known as wick stickers or wick adhesive, are a must-have supply in candle making. They provide a secure and reliable method to keep the wick centered and anchored in the container, ensuring a straight and even burn.
When making container candles, it’s important to ensure that the wick remains in the center throughout the burning process. If the wick drifts to the side, it can cause uneven burning, tunneling, or even extinguishing of the flame. Adhesive tabs solve this problem by firmly securing the wick in place, preventing any movement during burning.
Adhesive tabs are typically small, circular stickers with a sticky surface on one side. They are specifically designed to be heat-resistant and unaffected by the melted wax or flame. The adhesive tabs adhere to the bottom of the wick’s metal tab and are then pressed onto the base of the container.
Using adhesive tabs is straightforward. After placing the wick in the center of the container, peel off the backing from the adhesive tab and attach it to the metal tab of the wick. Press firmly to ensure a secure bond. Then, press the adhesive tab with the wick onto the base of the container, making sure it is centered and straight.
For larger containers or multiple wicks, it is recommended to use multiple adhesive tabs or double up on the tabs for added security. This helps ensure that the wicks remain secure and centered, regardless of the size or diameter of the container.
Adhesive tabs offer several advantages in candle making. They save time and effort compared to using other methods of wick centering, such as hot glue or wick pins. They also provide a cleaner and more professional appearance by keeping the bottom of the wick concealed and hidden within the container.
When purchasing adhesive tabs, ensure that they are specifically designed for candle making and are suitable for the type of container and wick size you’re using. Some adhesive tabs are designed for specific wick sizes, so it’s important to choose the appropriate size for your project.
As with any adhesive product, it’s essential to follow the manufacturer’s instructions and test the adhesive tabs in your specific containers and wax formulations. This ensures that the tabs adhere properly and hold up against the heat generated during burning.
Now that your wicks are securely in place with adhesive tabs, let’s move on to the next essential supply – labels.
Labels
Labels are an essential component of candle making that adds a professional touch to your finished products. They provide important information, such as the fragrance, candle type, safety warnings, and your brand’s logo or name. Labels not only give your candles a polished and cohesive look but also serve as a way to promote your brand and provide important details to customers.
When designing and selecting labels for your candles, there are a few key factors to consider:
- Material: Choose labels made from durable and waterproof materials to withstand the conditions that candles may be exposed to. Common choices include vinyl, polyester, or coated paper labels that are resistant to moisture and oils.
- Size: Consider the size of your containers and the amount of information you want to include on the labels. The label should be large enough to be easily read but not so large that it overwhelms the container. You may also consider different label sizes for various candle sizes or types.
- Design and Branding: Create labels that reflect your brand identity and the aesthetic of your candles. Incorporate your logo, fonts, and colors to establish a cohesive and recognizable branding strategy. The design should be eye-catching, unique, and align with the overall image you want to convey to your customers. If your candles are intended as gifts or for special occasions, consider creating custom labels for those purposes.
- Information: Ensure that your labels include all relevant information required by regulations, such as the candle type, size, and volume. Additionally, include safety warnings, such as “Keep out of reach of children” and “Do not leave candles unattended.” Providing clear instructions for burning and maintenance is also helpful for customers.
- Adhesive: Choose labels with strong and permanent adhesive to ensure they stay securely attached to your candles. You wouldn’t want your labels to peel off or become dislodged during handling or shipping.
Printing your labels can be done professionally or by using a high-quality printer at home. Be sure to select a printing option that produces crisp and durable labels with vibrant colors.
Applying labels to your candles is a relatively simple process. Make sure the surface of the container is clean and dry before adhering the label. Begin by carefully aligning the label to one side of the container and gradually smooth it out, ensuring there are no wrinkles or air bubbles. Smoothly press the label onto the container, ensuring proper adhesion on all sides.
Candles with clear containers provide an opportunity to create unique labels, such as transparent or textured labels that add an extra layer of visual interest. However, keep in mind that the label should still be easy to read and provide the necessary information.
Labels not only enhance the appearance of your candles but also serve as a marketing tool. They can feature your website or social media links, helping customers connect with your brand online. Additionally, labels can provide space for personalization, such as writing custom messages or dedications for special occasions.
Now that your candles are labeled and ready to go, let’s move on to the next essential supply – packaging materials.
Read more: What Do You Need To Make Custom Rugs
Packaging Materials
Packaging materials play a significant role in the presentation, protection, and transportation of your candles. They not only ensure that your candles arrive in excellent condition but also enhance the overall customer experience. Here are some essential packaging materials to consider for your candle products:
- Candle Boxes: Properly designed and sturdy candle boxes offer protection and a professional presentation. These boxes come in various sizes to accommodate different candle shapes and sizes. They are typically made from durable cardboard or rigid materials, ensuring that your candles remain secure and undamaged during transit.
- Cellophane or Shrink Wrap: Cellophane or shrink wrap can be used to seal and protect individual candles or sets. They provide a transparent layer that not only safeguards your candles from dust, moisture, and tampering but also allows customers to see the product before purchasing. Heat-shrink wrap requires heat application to create a tight seal around the candle.
- Filling Materials: Filling materials, such as shredded paper, tissue paper, or bubble wrap, can be used to cushion and protect your candles within their packaging. These materials help prevent movement and minimize the risk of damage during shipping. Consider using eco-friendly or recyclable options for an environmentally conscious approach.
- Ribbon or twine: Adding a decorative touch, ribbon or twine can be used to secure packaging boxes or wrap around individual candles. They add an elegant and personal finishing touch, enhancing the overall visual appeal of your candles.
- Labels or Stickers: In addition to the labels on the candles themselves, you can also include additional labels or stickers on the packaging. These can display your logo, branding, or key information, serving as an extra marketing opportunity and creating a cohesive and professional presentation.
- Custom Inserts or Packaging Inserts: If you offer gift sets or multiple candles in one package, consider using custom inserts or dividers to securely hold each candle in place. These inserts not only prevent damage but also add a touch of elegance and organization to your packaged candles.
When selecting packaging materials, ensure that they are appropriate for the size and shape of your candles. The materials should provide sufficient protection and support to keep the candles secure and prevent any movement during shipping. Consider ordering samples or testing different materials to ensure they meet your requirements and align with your brand image.
Branded packaging materials play a crucial role in creating a positive unboxing experience for consumers. They can leave a lasting impression and make your candles stand out in a competitive market. Investing in high-quality packaging materials not only protects your products but also showcases the value and care you put into each candle.
Now that your candles are securely packaged, let’s move on to the next essential supply – safety equipment.
Safety Equipment
Safety should always be a top priority when it comes to candle making. Having the right safety equipment on hand ensures that you can create candles safely and minimize potential risks. Here are some essential safety equipment items to have in your candle making workspace:
- Gloves: Disposable or heat-resistant gloves are important for protecting your hands during the candle making process. They provide a barrier between your skin and hot wax, helping prevent burns or skin irritation. Choose gloves that are comfortable, properly fitting, and heat-resistant to handle hot wax safely.
- Protective Eyewear: When working with melting wax or handling chemicals, it’s crucial to protect your eyes from potential splashes or spills. Safety glasses or goggles will shield your eyes from any hazardous materials and prevent eye injuries. Ensure that your eyewear provides proper coverage and is certified for impact resistance.
- Apron or Protective Clothing: Wearing an apron or protective clothing can help protect your skin and clothing from hot wax, spills, or splatters. Choose a heat-resistant or wax-repellent material to minimize the risk of burns. It’s also a good idea to keep a fire-resistant apron nearby if you’re working with open flames or hot surfaces.
- Fire Extinguisher: Accidents can happen, and being prepared is essential. Keep a fire extinguisher nearby in case of any potential fire hazards. Ensure that it is suitable for extinguishing various types of fires, including those involving wax or electrical equipment. Familiarize yourself with the instructions and operation of the fire extinguisher.
- Ventilation: Adequate ventilation is crucial to ensure a safe working environment. Use a well-ventilated area, or consider using a fume hood or an exhaust fan to remove any fumes or potentially harmful vapors. Proper ventilation helps maintain good air quality and reduces the risk of inhalation hazards.
- First Aid Kit: Accidents can occur despite taking precautions, so having a well-stocked first aid kit readily available is essential. The kit should include items such as adhesive bandages, burn ointment, sterile dressings, and other basic first aid supplies. Familiarize yourself with basic first aid procedures as well.
In addition to having the right safety equipment, it’s important to educate yourself on proper candle making techniques, safe handling of materials, and potential hazards associated with the process. Being aware of safety guidelines and following best practices will help mitigate any risks and ensure a safe working environment.
Remember to read and follow the safety instructions provided by manufacturers for all the materials and equipment you use in candle making. These instructions will provide specific guidelines on proper usage, handling, and storage of the products.
By prioritizing safety and having the necessary safety equipment, you can create candles without compromising your well-being. Safety should always be at the forefront of every candle making endeavor.
Now that you have the right safety measures in place, you’re ready to embark on your candle making journey with confidence. Happy crafting!
Conclusion
Candle making is a creative and rewarding hobby that allows you to express your personal style and create beautiful, fragrant candles. By having the right supplies at your disposal, you can ensure a seamless and successful candle making experience.
Throughout this article, we have explored the essential supplies needed for candle making. From wax and wicks to containers, fragrance oils, dyes, thermometers, stirring utensils, measuring tools, mold release spray, adhesive tabs, labels, packaging materials, and safety equipment, each supply plays a crucial role in the candle making process.
Choosing the right wax, wicks, and containers is essential to produce high-quality candles that burn evenly and have a pleasing aesthetic. Fragrance oils and dyes allow you to add delightful scents and vibrant colors to your candles, while thermometers ensure accurate temperature control throughout the melting and pouring process.
Stirring utensils and measuring tools ensure precise and consistent measurements, resulting in well-blended and perfectly proportioned candles. Mold release spray and adhesive tabs help facilitate easy demolding and secure wick placement, while labels and packaging materials provide a professional and visually appealing presentation for your candles.
Of utmost importance, safety equipment ensures a secure working environment, protecting you from potential hazards. Gloves, protective eyewear, aprons, fire extinguishers, ventilation, and first aid kits are vital tools for ensuring your safety and well-being during the candle making process.
As you embark on your candle making journey, keep in mind that while having the right supplies is crucial, attention to detail, creativity, and experimentation will truly elevate your candle making skills. Whether you’re making candles for personal enjoyment, gifting, or starting a candle business, these supplies will contribute to the overall quality, safety, and beauty of your creations.
Remember to follow manufacturer instructions, educate yourself on proper techniques and safety guidelines, and always prioritize safety throughout the candle making process. Enjoy the journey, embrace your creativity, and delight in the mesmerizing glow and captivating scents of your handcrafted candles.
Now go forth and let your imagination light up the world with your stunning candle creations!
Frequently Asked Questions about What Supplies Do You Need To Make Candles
Was this page helpful?
At Storables.com, we guarantee accurate and reliable information. Our content, validated by Expert Board Contributors, is crafted following stringent Editorial Policies. We're committed to providing you with well-researched, expert-backed insights for all your informational needs.