Articles
What You Need To Make A Quilt
Modified: August 22, 2024
Looking for articles on what you need to make a quilt? Discover essential tools, fabrics, and techniques to create beautiful quilts with helpful tips and insights.
(Many of the links in this article redirect to a specific reviewed product. Your purchase of these products through affiliate links helps to generate commission for Storables.com, at no extra cost. Learn more)
Introduction
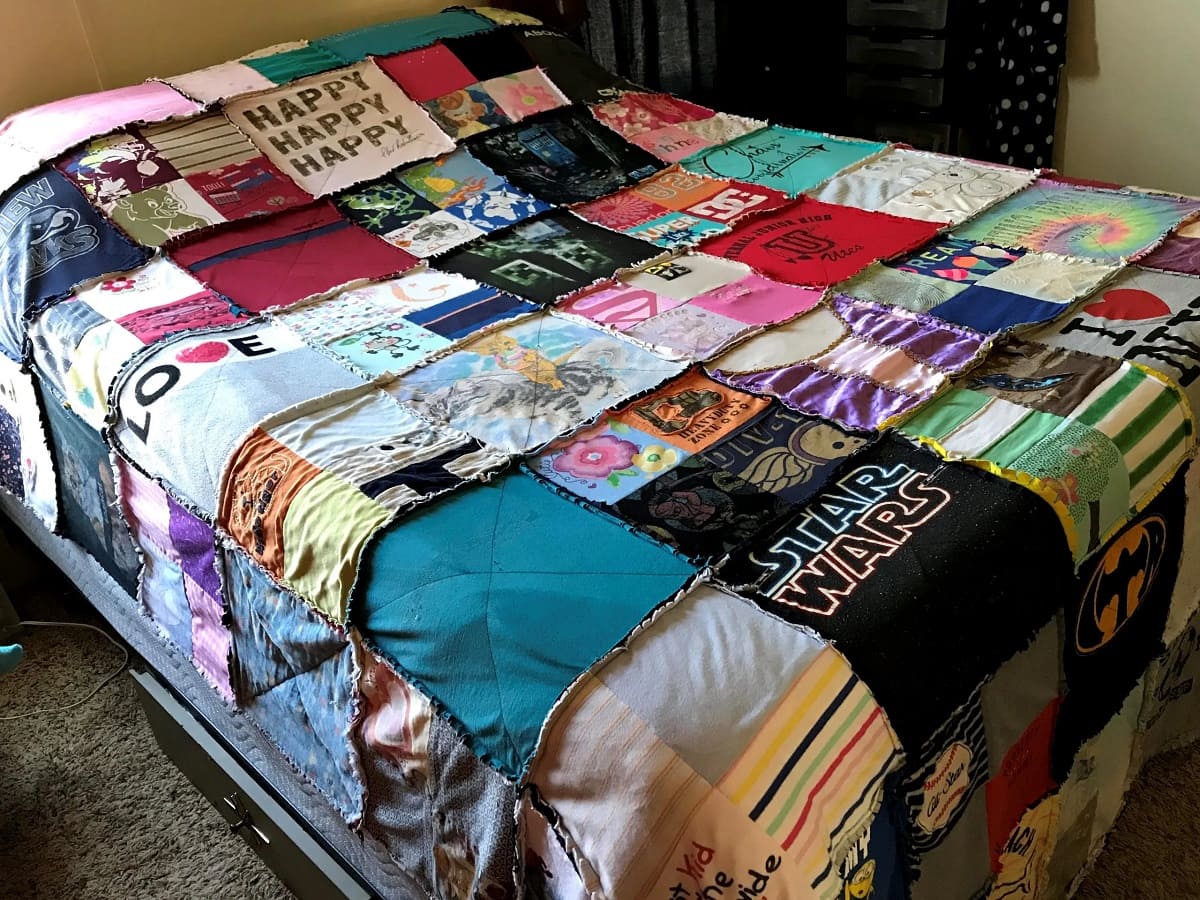
Welcome to the world of quilting! Whether you’re a seasoned quilter or just starting out, making a quilt can be a fulfilling and enjoyable experience. Quilts are not only functional but also a form of artistic expression. They can be passed down through generations, telling stories and capturing memories. In this article, we will guide you through the essential steps and supplies needed to make a quilt.
Quilting is the process of sewing together different layers of fabric to create a warm, cozy blanket. The quilt consists of three layers: the quilt top, batting (a layer of insulation), and the backing fabric. These layers are then quilted together with stitching patterns to hold them in place.
Before you dive into the world of quilting, let’s start with some basic considerations. First, decide on the size of the quilt you want to make. This will determine the amount of fabric and other supplies you’ll need. Next, think about the design or pattern you want to create. There are countless options, from simple squares and rectangles to intricate patchwork patterns. Consider your skill level and the time you’re willing to invest.
Once you have a clear idea of what you want to achieve, it’s time to gather your supplies. In the next section, we’ll explore the various fabrics you can choose from and provide insights into making the right selection.
Key Takeaways:
- Quilting is a timeless craft that requires careful fabric selection, precise cutting, and skillful piecing to create a unique and beautiful quilt. Enjoy the journey and take pride in your finished masterpiece.
- From choosing high-quality fabric to adding optional finishing touches, quilting is a journey of self-expression and artistry. Embrace the joy of quilting and let your creativity shine through each unique quilt creation.
Read more: How Do You Make A Memory Quilt
Choosing Fabric
When it comes to quilting, choosing the right fabric is crucial. The fabric you select will not only determine the look and feel of your quilt but will also affect its durability. Here are a few factors to consider when choosing fabric for your quilt:
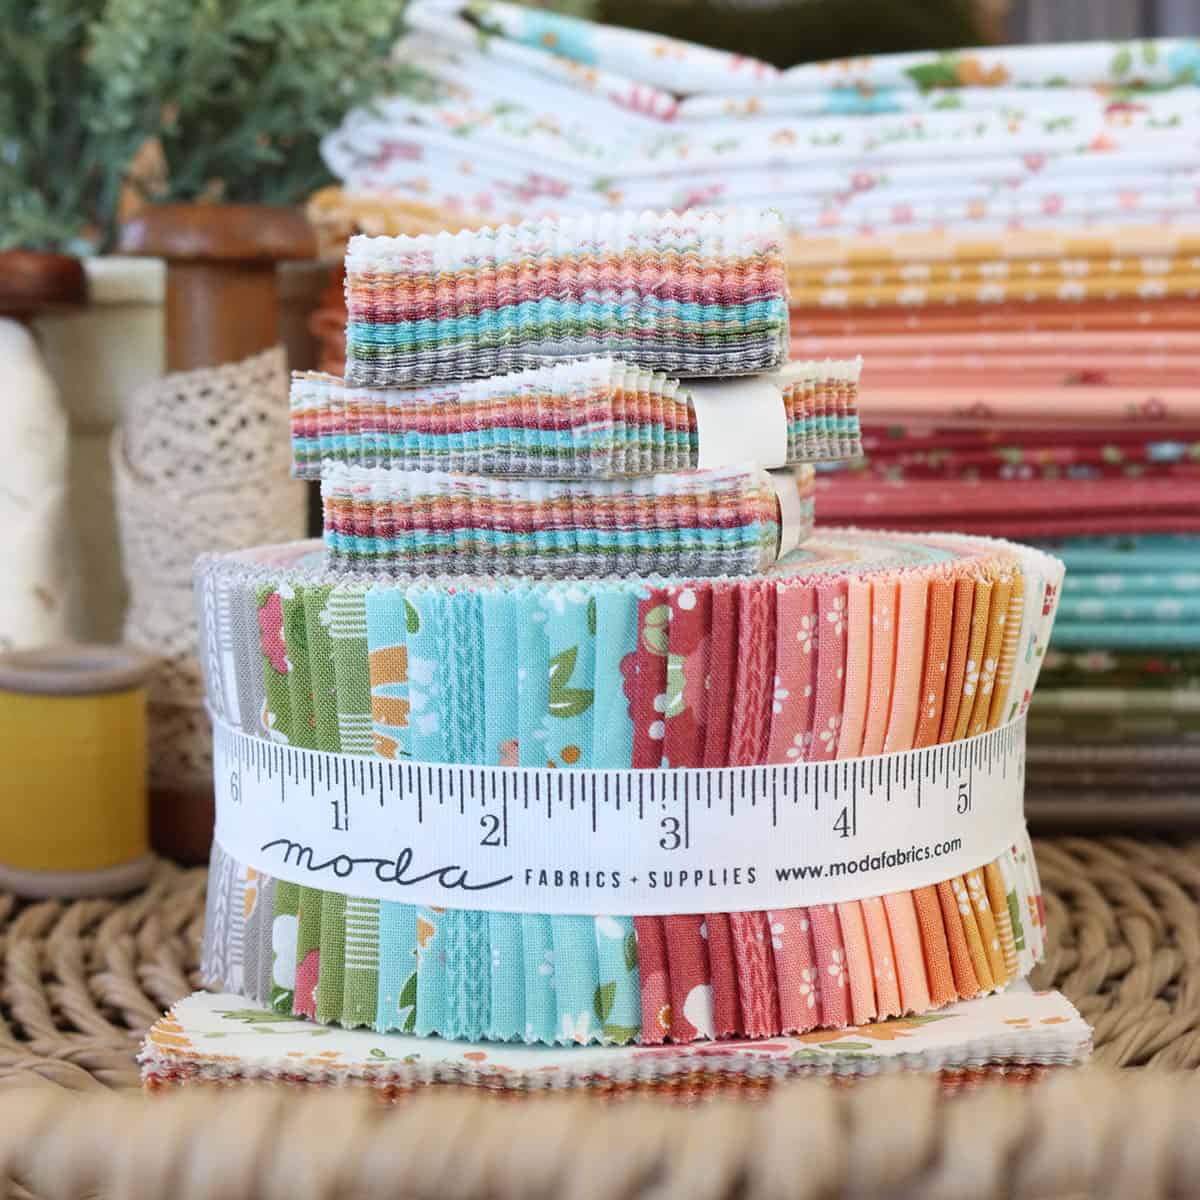
- Quality: Opt for high-quality quilting fabric that is 100% cotton. This fabric is breathable, easy to work with, and will stand the test of time.
- Color and Pattern: Think about the color scheme and pattern you want to incorporate into your quilt. Consider the overall aesthetic and mood you wish to create. Whether you prefer bold and vibrant colors or subtle and muted tones, there is a wide variety of fabrics available to suit your taste.
- Print Scale: Pay attention to the scale of the prints on the fabric. Small-scale prints work well for intricate designs and small pieces, while large-scale prints can make a bold statement in bigger blocks.
- Contrast: Consider the contrast between different fabrics in your quilt. This will help create depth and visual interest. Experiment with combining fabrics of different colors, textures, and patterns to achieve the desired effect.
- Texture: Fabrics with different textures, such as solids, florals, stripes, or polka dots, can add dimension and visual appeal to your quilt. Don’t be afraid to mix and match different textures to create a unique and dynamic look.
- Pre-washing: Depending on the fabric you choose, it may be necessary to pre-wash it to remove any excess dye or shrinkage. Follow the manufacturer’s instructions and consider pre-washing if you are unsure.
Once you have chosen your fabric, it’s time to gather the necessary supplies for your quilt. In the next section, we will explore the essential tools and materials you’ll need to bring your quilt to life.
Gathering Supplies
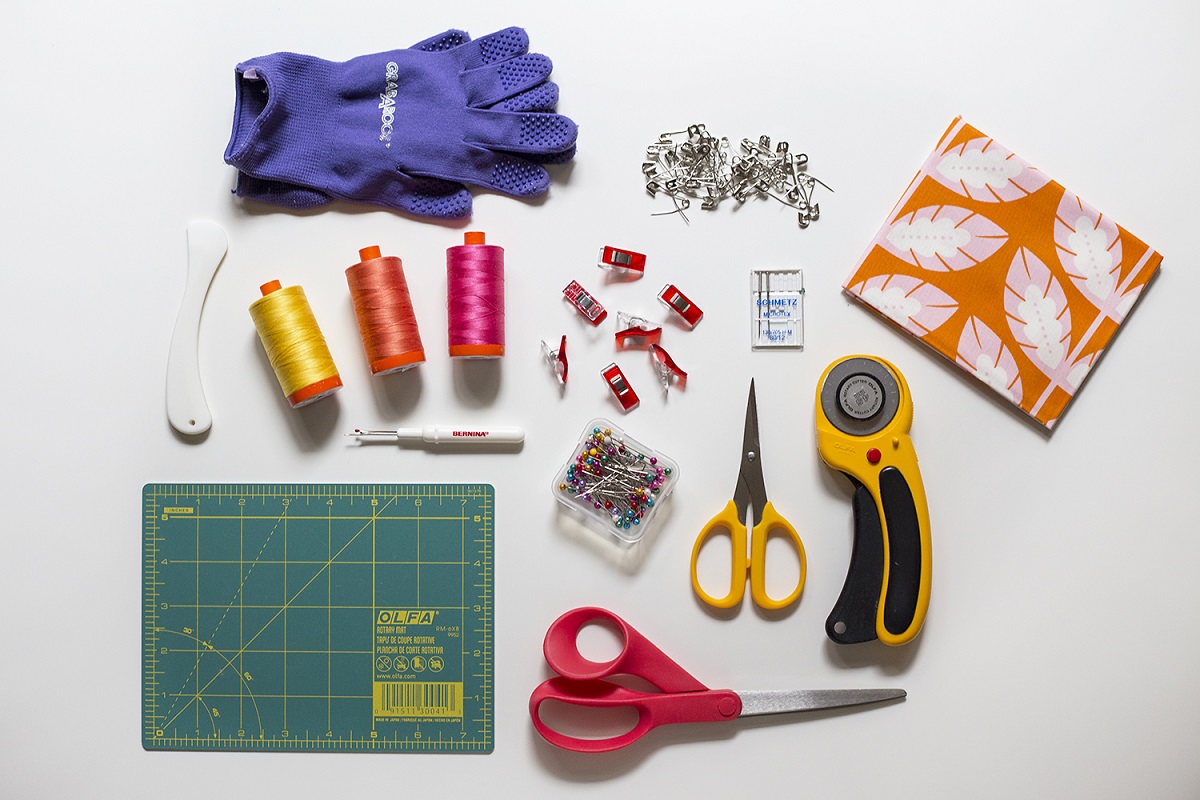
Before you start quilting, it’s important to gather all the necessary supplies to ensure a smooth and efficient quilting process. Here is a list of essential items you’ll need:
- Fabric: As mentioned earlier, choose high-quality quilting fabric in various colors and prints to suit your design.
- Batting: Select a batting that suits the desired warmth and thickness of your quilt. Batting materials come in different fibers, such as cotton, polyester, or wool.
- Backing fabric: This fabric will be used for the back of your quilt. Choose a fabric that complements your quilt design and is wide enough to cover the entire quilt.
- Thread: Invest in good-quality thread specifically designed for quilting. Consider using a thread color that blends well with your fabric choices.
- Quilting rulers and templates: These tools help you achieve precise measurements and shapes while cutting and piecing your fabric together.
- Rotary cutter and cutting mat: A rotary cutter allows for efficient and accurate fabric cutting, while a cutting mat provides a stable surface for cutting.
- Pins and needles: Get quilting pins and needles for securing fabric layers and stitching.
- Quilting machine or sewing machine: Invest in a reliable quilting machine or sewing machine that can handle the thickness of quilting layers.
- Quilting gloves: These gloves provide grip and control while quilting, especially when moving the quilt under the machine.
- Quilting hoop or frame: Optional, but helpful for hand quilting, a hoop or frame holds the fabric taut and makes stitching easier.
- Marking tools: Use fabric marking pens or chalk to transfer your quilting design onto the fabric.
- Iron and ironing board: Essential for pressing and flattening fabric throughout the quilting process.
- Scissors and seam ripper: Keep sharp fabric scissors and a seam ripper handy for trimming fabric and correcting mistakes.
These are just the basic supplies you’ll need to get started on your quilting journey. As you gain more experience and explore different quilting techniques, you may discover additional tools and materials that suit your personal quilting style.
Now that you have gathered your supplies, it’s time to move on to the next step: cutting the fabric. We will explore this step in detail in the following section.
Cutting Fabric
Once you have your fabric and supplies ready, the next step in making a quilt is cutting the fabric. Properly cut fabric will ensure accurate piecing and seamless assembly of your quilt top. Here are some guidelines to follow when cutting your fabric:
- Wash and press fabric: Before cutting, it is recommended to wash and press your fabric to remove any sizing or shrinkage. Follow the manufacturer’s instructions for washing and drying.
- Refer to your pattern or design: If you are following a specific pattern or design, carefully read and understand the cutting instructions provided. This will help you determine the sizes and quantities of fabric pieces you’ll need.
- Use quilting rulers and templates: Quilting rulers and templates are essential tools for cutting fabric accurately. They help you achieve precise measurements and shapes. Place the ruler on the fabric and use a rotary cutter to cut along the edge of the ruler.
- Measure and mark: Regardless of whether you are following a pattern or creating your own design, make sure to measure and mark your fabric accurately before cutting. Use a fabric marker or pins to mark the cutting lines, ensuring straight and even pieces.
- Consider seam allowances: When cutting fabric, be mindful of the seam allowances. Most quilting projects use a standard ¼ inch seam allowance. Keep this in mind when cutting your fabric pieces to ensure they fit together correctly.
- Organize and label: As you cut your fabric, organize and label the pieces to avoid confusion later. This can be as simple as using sticky notes or placing the cut pieces in separate labeled bags or containers.
- Handle directional prints: If your fabric has directional prints, such as stripes or motifs that need to be facing a certain way, pay attention to how you cut the fabric pieces. Make sure to align the prints correctly with the design in mind.
- Be mindful of fabric grain: Fabric has a grain that determines its stretch and stability. Pay attention to the grain lines when cutting your fabric, especially if you’re working with bias-cut or stretchy fabrics that require careful handling.
- Trim and square up: After cutting your fabric pieces, inspect them for any uneven edges or threads and trim them as needed. Use a ruler to square up the edges to ensure clean and straight lines.
Remember to take your time and double-check your measurements before cutting. Accurate cutting will set the foundation for a well-made quilt top. Once you have all your fabric pieces cut, you’re ready to move on to the exciting part: piecing the quilt top. We’ll discuss this step in detail in the next section.
Piecing the Quilt Top
One of the most creative and enjoyable parts of quilt-making is piecing the quilt top. This is where you bring your fabric pieces together to create the design and layout of your quilt. Here are the steps to follow when piecing the quilt top:
- Layout the fabric pieces: Before you start sewing, lay out your fabric pieces on a flat surface according to your desired design. Take time to arrange and rearrange the pieces until you’re satisfied with the overall look.
- Organize your sewing order: Once you have your fabric pieces laid out, determine the order in which you will sew them together. This will depend on your design and any specific pattern instructions you are following.
- Begin sewing: Start sewing your fabric pieces together, one by one, following the sewing order you determined earlier. Use a ¼ inch seam allowance and backstitch at the beginning and end of each seam to secure the stitches.
- Press the seams: After sewing each seam, press the seams open or to one side using an iron and pressing mat. This will help create flat and neat seams.
- Continue sewing and pressing: Repeat the sewing and pressing process until all your fabric pieces are sewn together to form the complete quilt top. Take your time to ensure accuracy and alignment.
- Inspect and trim: Once the quilt top is pieced, inspect it for any uneven edges or threads. Trim any excess fabric or threads to create clean lines and a polished finish.
Piecing the quilt top requires patience and attention to detail. Take your time and enjoy the process. If you encounter any challenges or mistakes along the way, don’t be discouraged. Quilting is a learning process, and every quilt you make will improve your skills.
Next, we’ll explore the step of adding borders to your quilt top. Borders help frame and enhance the design, giving your quilt a finished look. Let’s dive into the next section to learn more about this important step in quilt-making.
Read more: How Do You Make A Barn Quilt
Adding Borders
After piecing the quilt top, it’s time to add borders to enhance the design and provide a finished look. Borders not only frame the quilt but also help adjust the size and proportions of the quilt top. Here’s how you can add borders to your quilt:
- Measure the quilt top: Start by measuring the length and width of your quilt top. This will help you determine the length of the border fabric needed.
- Choose border fabric: Select a fabric for the borders that complements the quilt top. Consider using a fabric that matches or contrasts with the colors and patterns in your quilt.
- Cut the border fabric: Measure and cut strips of fabric for the borders, adding an additional 1-2 inches to account for seam allowances and any necessary adjustments.
- Sew the borders: Lay the quilt top flat and align one border strip with one side of the quilt. Sew the border strip to the quilt top, using a ¼ inch seam allowance. Repeat this process for the remaining sides.
- Press the borders: After sewing each border strip, press the seams toward the border fabric using an iron and pressing mat. This will help create flat and crisp borders.
- Measure and trim: Once all the border strips are sewn, measure the length and width of the quilt top, including the borders. Trim the excess border fabric to ensure the quilt top is square and even.
When adding borders, it’s important to maintain the quilt top’s integrity and alignment. Take your time and measure accurately to ensure the borders are sewn on straight and evenly. Borders can be a great opportunity to showcase additional design elements, such as fussy cut motifs or pieced patterns. Get creative and have fun with your border fabric choices.
Now that we have added borders to the quilt top, the next step is basting the layers together. This step not only secures the quilt layers but also prepares them for quilting. Let’s discuss the basting process in the next section.
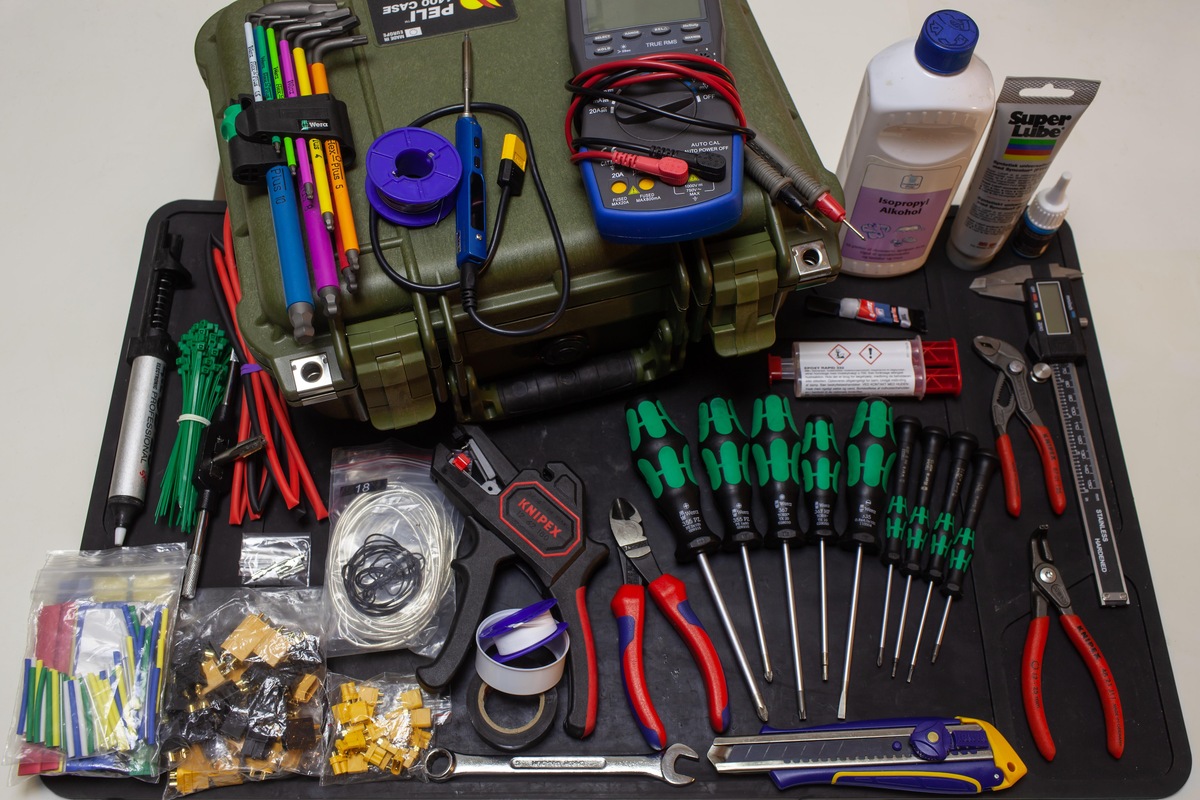
When making a quilt, be sure to have the following essentials: fabric (cotton is a popular choice), a rotary cutter and cutting mat, quilting ruler, sewing machine, thread, and batting.
Basting the Layers
Once you have your quilt top with borders completed, it’s time to baste the layers of your quilt together. Basting is the process of temporarily securing the quilt top, batting, and backing fabric together to prepare for quilting. Here are the steps to baste your quilt:
- Lay out the backing fabric: Start by laying out your backing fabric on a clean, flat surface, wrong side up. Smooth out any wrinkles or creases to ensure a smooth working surface.
- Place the batting: Carefully place the batting on top of the backing fabric, ensuring it is centered and covers the entire quilt area. Smooth out any wrinkles or lumps in the batting.
- Position the quilt top: Place the quilt top, right side up, on top of the batting. Align it with the backing fabric and smooth out any wrinkles or bubbles.
- Baste the layers: Starting from the center and working your way outwards, pin or tack the layers together to prevent them from shifting during quilting. Use curved safety pins, basting spray, or thread to secure the layers. Space the pins or tacks a few inches apart to ensure even distribution.
- Check for smoothness: Periodically check the quilt layers to make sure there are no puckers or wrinkles. Adjust and smooth out the fabric as needed.
Basting is a critical step in quilt-making as it stabilizes the layers and prevents shifting while you quilt. Take your time while basting to ensure that the layers are secure and smooth. It’s also important to baste in a way that works best for you, whether it’s using safety pins, basting spray, or thread. Choose a method that you find comfortable and effective.
Now that your quilt layers are securely basted together, it’s time to move on to the exciting step of quilting. Quilting involves stitching the layers together to create patterns, texture, and stability. In the next section, we’ll delve into the world of quilting techniques and explore different options to bring your quilt to life.
Quilting the Layers
Quilting is the process of stitching the layers of your quilt together, adding both functionality and artistic flair. Quilting not only secures the layers but also enhances the design and creates texture. Here are some methods for quilting your layers:
- Free Motion Quilting: With free motion quilting, you use a quilting foot on your sewing machine to create intricate designs by moving the fabric freely under the needle. This technique allows for endless creativity and versatility in your quilt stitches.
- Straight Line Quilting: Straight line quilting involves stitching parallel lines across your quilt top, either vertically, horizontally, or diagonally. This technique creates a clean and modern look, and it can be done with a walking foot or regular sewing foot.
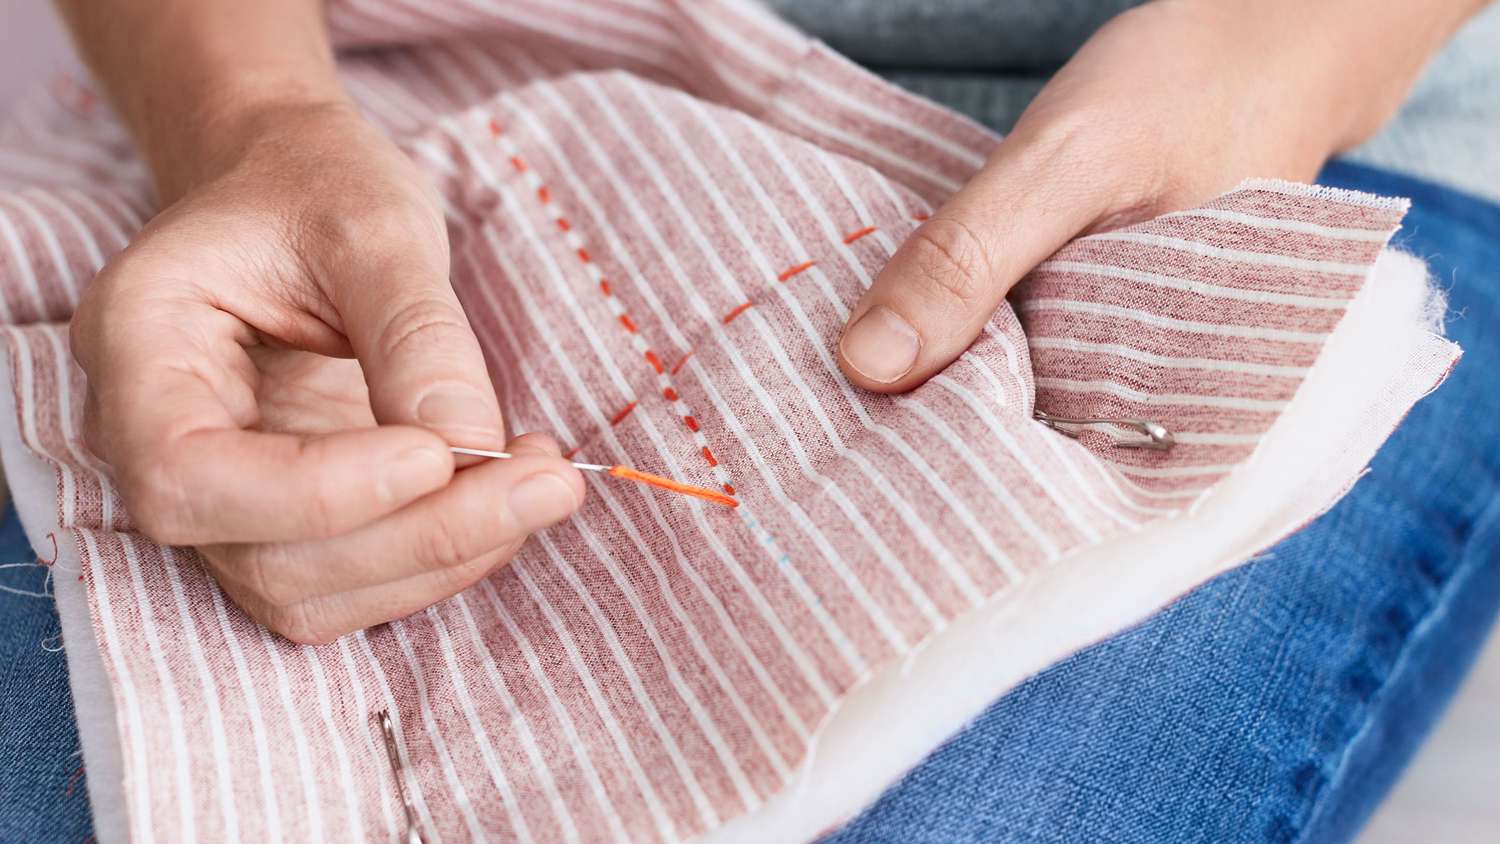
- Hand Quilting: Hand quilting is a traditional method where you use a needle and thread to stitch through all layers of the quilt. This technique creates a beautiful, handmade look with even stitches meticulously done by hand.
- Quilting with a Longarm Machine: If you have access to a longarm quilt machine, it allows you to maneuver the entire quilt effortlessly under the machine head. This method is ideal for larger quilts and allows for fast and precise stitching.
Regardless of the quilting method you choose, here are some tips to keep in mind:
- Start from the center: Begin quilting from the center of your quilt and work your way outwards. This helps distribute any fabric tension evenly and prevents puckering.
- Practice on scraps: Before quilting on your actual quilt, practice your chosen quilting technique on scrap fabric to get comfortable with the stitch length and tension.
- Plan your quilting design: Whether you’re following a specific design or creating your own, sketch out a plan for your quilting lines to ensure consistency and achieve your desired look.
- Take breaks and rotate your quilt: Quilting can be a time-consuming process, so take breaks to rest your hands and eyes. Also, periodically rotate your quilt to ensure even wear on your sewing machine.
- Secure loose threads: As you quilt, make sure to secure any loose threads on the back of your quilt to prevent them from becoming entangled or visible.
Remember, quilting is a personal and creative process. There are no right or wrong choices when it comes to the design and techniques you choose. Experiment, try new things, and enjoy the journey of bringing your quilt to life.
Once you have finished quilting, it’s time to move on to the final steps of finishing your quilt. In the next section, we’ll explore creating the binding that will give your quilt a polished edge.
Creating the Binding
The binding is the finishing touch that gives your quilt a clean and professional edge. It is a fabric strip that wraps around the outer edges of the quilt, encasing the raw edges and providing a neat and polished finish. Here’s how you can create the binding for your quilt:
- Measure the perimeter: Measure the perimeter of your quilt to determine the length of binding required. Add a few extra inches to account for corners and overlapping seams.
- Choose fabric for binding: Select a fabric that complements the colors and designs in your quilt. The binding can match the quilt top or provide a contrasting pop of color.
- Cut the binding strips: Cut fabric strips for the binding. The width of the strips depends on personal preference, but a common width is 2.5 inches. Calculate the number of strips needed based on the length of the perimeter.
- Join the strips: If needed, join the fabric strips together to create a continuous binding strip. To join them, place two strips perpendicular to each other, right sides facing, and sew diagonally from corner to corner. Trim the excess fabric and press the seam open.
- Press the binding: Fold the binding strip in half lengthwise, wrong sides together, and press with an iron to create a crisp fold.
- Attach the binding: Starting in the middle of one side of the quilt, align the raw edges of the binding strip with the raw edges of the quilt. Leave a few inches of the binding strip unstitched as a tail.
- Sew the binding: Using a ¼ inch seam allowance, sew along the edge of the quilt, securing the binding to the quilt. Take care at the corners, folding them neatly to create mitered corners.
- Join the ends: When you approach the starting point, stop sewing a few inches before reaching the tail of the binding. Fold the tail back on itself, then place the unfinished end of the binding inside the folded tail and sew across to secure.
- Finish the binding: Fold the binding over the edge of the quilt, covering the raw edges, and stitch it down by hand or machine. If hand-stitching, use a slip stitch or blind stitch to create an invisible finish.
- Press and trim: Finally, press the binding flat and trim any excess threads or fabric to achieve a clean and polished look.
The binding adds a beautiful frame to your quilt, so take your time and ensure that it’s attached securely and evenly. The process can be done entirely by machine, entirely by hand, or a combination of both, depending on your preference and desired look.
With the binding in place, your quilt is almost complete! The last step is to attach the binding to the back of the quilt for a seamless and finished appearance. In the next section, we’ll explore how to attach the binding to complete your quilt.
Attaching the Binding
Attaching the binding is the final step in completing your quilt. It involves securing the binding to the back of the quilt, creating a clean and polished finish. Here’s a step-by-step guide on how to attach the binding to your quilt:
- Prepare the binding: Ensure that your binding is pressed and ready for attaching. If necessary, trim the excess fabric to create a smooth edge.
- Start in the middle of one side: Lay your quilt flat with the quilt top facing up. Start in the middle of one side, leaving a few inches of binding tail loose, and align the raw edge of the binding with the raw edge of the quilt.
- Pin or clip the binding: Pin or clip the binding in place, securing it to the quilt to prevent shifting as you sew.
- Continue attaching the binding: Using a ¼ inch seam allowance, sew along the edge of the quilt, attaching the binding. Take care at the corners, folding them neatly to create mitered corners as you sew.
- Stop sewing near the starting point: Stop sewing a few inches before reaching the starting point. Backstitch to secure the seam, and remove the quilt from the machine.
- Join the ends of the binding: Fold the tail of the binding back on itself, creating a fold at the end. Place the unfinished end of the binding inside the folded tail, aligning the raw edges. Pin or clip in place.
- Sew the binding ends together: Sew across the binding ends to join them, ensuring that the stitching is secure. Trim any excess binding fabric if needed.
- Finish sewing the binding: Fold the binding over the raw edge of the quilt to cover it, and carefully stitch in the ditch or use a blind stitch to attach the binding to the back of the quilt. Take your time to create an invisible stitch.
- Press and enjoy: Once the binding is securely attached, press the quilt to ensure a smooth and finished look. Admire your completed quilt and celebrate your hard work!
Attaching the binding requires precision and attention to detail, especially at the corners. Take your time to create neat and professional-looking mitered corners. If you prefer a completely hand-sewn finish, you can also choose to hand stitch the binding to the back of the quilt for a more traditional look.
With the binding attached, your quilt is now finished! However, you may choose to add some final touches to personalize and enhance your quilt. In the next section, we’ll explore some optional finishing touches you can consider.
Finishing Touches
Now that your quilt is complete, you have the opportunity to add some final touches that will make it truly unique and special. Consider these optional finishing touches to personalize and enhance your quilt:
- Labeling: Add a label to your quilt to document important information, such as the quilt’s name, the maker’s name, the date it was completed, and any special significance or dedication. This not only adds a personal touch but also helps preserve the story behind your quilt for future generations.
- Quilt label placement: Incorporate the quilt label on the back of the quilt, ensuring it is securely attached but does not detract from the overall appearance. Options include stitching it into one of the corners or tucking it into a pocket attached to the back.
- Quilt embellishments: Consider adding decorative elements such as appliqué, embroidery, or fabric embellishments to enhance the design of your quilt. These details can be added during the piecing or quilting stages, or appliquéd onto the quilt top after it is completed.
- Quilt hanging sleeve: If you plan to display your quilt on a wall, adding a hanging sleeve on the back allows for easy hanging. The sleeve can be made from a separate strip of fabric attached to the back of the quilt.
- Batting and backing labels: Attach labels to the batting and backing fabric to help you identify and remember the materials used in your quilt. These labels can also include other relevant details such as care instructions.
These finishing touches provide personalization and add an extra layer of meaning to your quilt. Choose the options that resonate with you and align with the purpose and sentiment behind your quilt.
As you put the final touches on your quilt, take a moment to reflect on the journey you’ve embarked upon and the joy that creating something by hand brings. No matter the size or complexity of your quilt, completing a project like this is a testament to your creativity, patience, and dedication.
Congratulations on finishing your quilt! It’s now ready to be enjoyed, whether as a cherished heirloom, a comforting blanket, or a stunning piece of art. Remember to take pride in your accomplishment and continue to explore and expand your quilting skills. Happy quilting!
Disclaimer: The SEO optimization suggestions provided in this response are not guaranteed to guarantee first-page rankings on search engines. It is always recommended to follow best practices and guidelines set by search engine algorithms.
Conclusion
Quilting is a timeless and rewarding craft that allows you to create beautiful and functional works of art. Through careful fabric selection, precise cutting, skillful piecing, and diligent quilting, you can bring your vision to life and create a quilt that is uniquely yours. As you embark on your quilting journey, remember these key points:
First, take the time to choose high-quality fabric that speaks to your creative vision. Consider color, pattern, and texture to create a visually stunning quilt. Next, gather the necessary supplies, from rulers and cutting tools to sewing machines and threads, to ensure a smooth and enjoyable quilting process.
Once you have your fabric and supplies ready, begin by cutting the fabric with precision and care. Accurate cutting yields beautifully pieced quilt tops, leading to a satisfying final result. Piece your quilt top together, allowing your creativity to shine through as you arrange and sew the fabric pieces. Adding borders frames your quilt and provides a sense of completion.
The next step is basting the layers, securing them together and preparing for the quilting process. Choose a quilting technique that resonates with your style, whether it’s free motion quilting, straight-line quilting, or hand quilting. Enjoy the journey as you stitch your quilt layers together, creating texture, design, and warmth.
As your quilting nears its end, create the binding that encapsulates your quilt, providing a clean and professional edge. Take your time in attaching the binding, ensuring that it is secure and evenly stitched. Consider adding optional finishing touches, such as labeling, embellishments, or hanging sleeves, to personalize and enhance your quilt.
Completing a quilt is an accomplishment to be proud of. It signifies your dedication, skill, and creativity. Take a step back and admire your finished quilt, appreciating the hard work and passion that went into its creation.
Remember, quilting is a journey of self-expression and artistry. Embrace the joy of quilting, and don’t be afraid to explore new techniques and designs. Each quilt you make will bring its own unique story and beauty.
Now, armed with the knowledge and guidance provided in this article, go forth and create your masterpiece. Whether you’re quilting for yourself, for loved ones, or for the sheer joy of the craft, may your quilts bring warmth, comfort, and beauty to the world.
Happy quilting!
Disclaimer: The SEO optimization suggestions provided in this response are not guaranteed to guarantee first-page rankings on search engines. It is always recommended to follow best practices and guidelines set by search engine algorithms.
Frequently Asked Questions about What You Need To Make A Quilt
Was this page helpful?
At Storables.com, we guarantee accurate and reliable information. Our content, validated by Expert Board Contributors, is crafted following stringent Editorial Policies. We're committed to providing you with well-researched, expert-backed insights for all your informational needs.


0 thoughts on “What You Need To Make A Quilt”