Articles
How To Make Whipped Candles
Modified: January 5, 2024
Learn how to make beautiful whipped candles with our step-by-step articles. Discover the art of candle making and create unique, handmade candles that make perfect gifts.
(Many of the links in this article redirect to a specific reviewed product. Your purchase of these products through affiliate links helps to generate commission for Storables.com, at no extra cost. Learn more)
Introduction
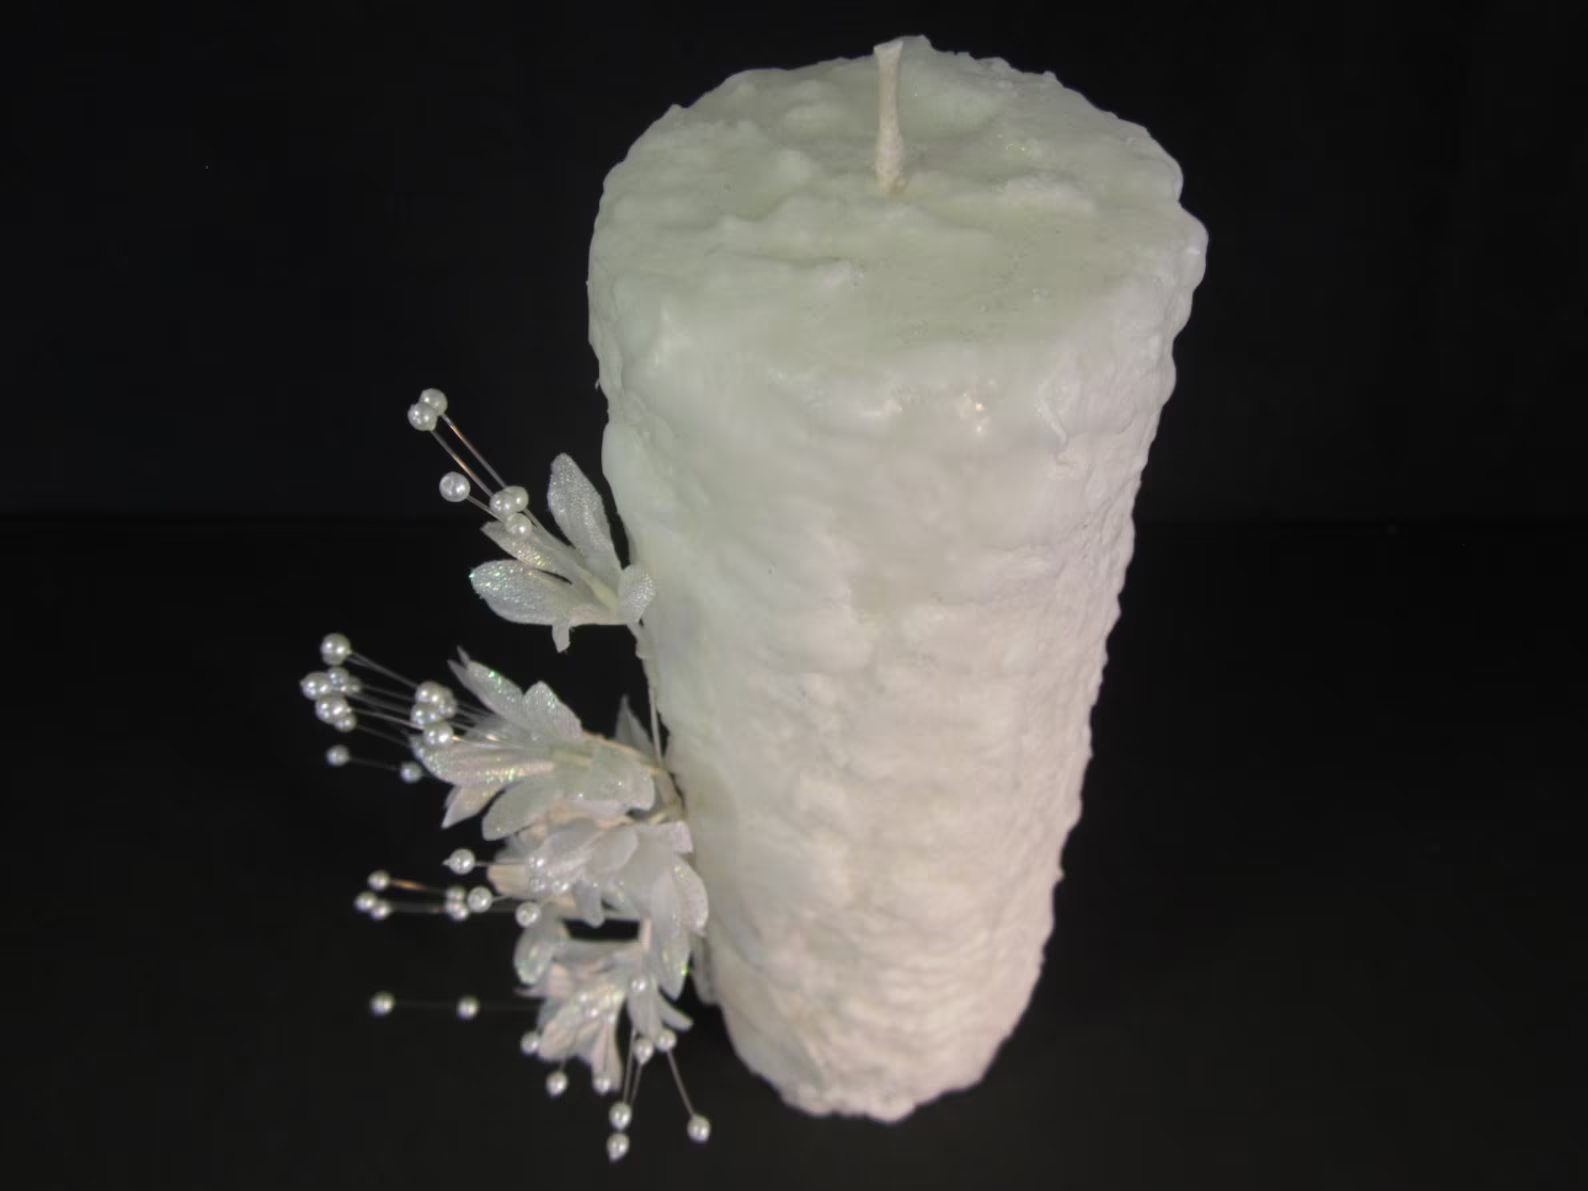
Whipped candles are a fun and creative way to add a touch of elegance and style to your home decor. They are a unique twist on traditional candles, with their soft and airy texture that resembles whipped cream. Not only do they look beautiful, but they also release a delightful fragrance when lit, creating a warm and inviting atmosphere.
If you are looking to try your hand at making whipped candles, you’re in luck! In this article, we will guide you through the step-by-step process of creating your very own whipped candles. We will cover everything from preparing the wax to adding fragrance and color, and finally, pouring the wax into molds to achieve the perfect whipped texture.
Before we dive into the details, let’s take a look at the materials you will need for this project:
- Wax: Choose a high-quality candle wax, such as soy wax or beeswax, for optimal results.
- Fragrance: Select a fragrance oil that suits your preference. Popular choices include lavender, vanilla, and citrus scents.
- Colorant: Use candle color chips or liquid dyes specifically designed for candles to add beautiful hues to your whipped candles.
- Wicks: Opt for pre-tabbed wicks that are suitable for the size of the candle mold you will be using.
- Heat-resistant container: A double boiler or a microwave-safe container will be needed to melt the wax.
- Molds: Silicone molds are ideal for making whipped candles as they allow for easy removal of the finished candles.
- Mixing tools: Have a whisk or an electric mixer on hand to whip the cooled wax.
- Optional decorations: Consider adding decorative elements like dried flowers, glitter, or ribbons to personalize your whipped candles.
Now that you have gathered all the necessary materials, let’s dive into the step-by-step process of making whipped candles. Follow our guide closely, and you’ll soon have a collection of stunning candles you can proudly display in your home or give as thoughtful gifts.
Key Takeaways:
- Create stunning whipped candles with unique textures and delightful fragrances using our comprehensive step-by-step guide. Personalize your candles with decorative elements for a touch of elegance and style.
- Embrace your creativity and explore the world of candle making with our detailed tutorial. From preparing the wax to adding finishing touches, craft beautiful whipped candles for yourself or as thoughtful gifts.
Read more: How To Make Whipped Cream With A Blender
Materials Needed
Before you embark on your whipped candle-making journey, it’s essential to gather all the necessary materials. Here is a list of items you will need:
1. Wax:
Choose a high-quality wax for your whipped candles. Soy wax and beeswax are popular options as they produce clean-burning candles. Make sure to use a wax suitable for container candles.
2. Fragrance:
Select a fragrance oil that suits your preference. There is a wide range of scents available, from floral and fruity to soothing and exotic. It’s best to use fragrance oils specifically designed for candle-making to ensure proper scent throw.
3. Colorant:
Add a pop of color to your whipped candles with candle color chips or liquid dyes. These colorants are specifically formulated for candles to maintain stability and prevent color bleeding.
Read more: How To Make Dole Whip In A Blender
4. Wicks:
Choose wicks that are suitable for the size of your candle molds. Pre-tabbed wicks are recommended as they come with metal tabs attached, making them easy to position and secure in the candles.
5. Heat-resistant container:
You will need a heat-resistant container to melt the wax. A double boiler or a microwave-safe container can be used for this purpose. Make sure the container is clean and free from any moisture or contaminants.
6. Candle molds:
Silicone molds work best for creating whipped candles. They are flexible, allowing for easy removal of the finished candles once they have set. Choose molds in various shapes and sizes to add visual interest to your candle collection.
7. Mixing tools:
A whisk or an electric mixer will be required to whip the cooled wax and create the desired whipped texture. Ensure that the mixing tools are clean and dry before use.
Read more: How To Make Whipped Cream In Stand Mixer
8. Optional decorations:
If you want to add a personal touch to your whipped candles, consider incorporating decorative elements. Dried flowers, glitter, ribbons, or small ornaments can enhance the visual appeal of the finished candles.
Now that you have gathered all the materials, you are ready to delve into the exciting process of making whipped candles. The next section will guide you through each step in detail, so you can create stunning and unique candles to enjoy or share with loved ones.
Step 1: Preparing the Wax
Preparing the wax is the first crucial step in making whipped candles. Follow these instructions to ensure that your wax is properly melted and ready to be whipped:
1. Measure the Wax:
Start by measuring the amount of wax you will need for your candles. The specific measurement will depend on the size and number of candles you plan to make. Using a kitchen scale, carefully measure the required weight of wax. It’s always a good idea to have a little extra wax on hand in case you need to make adjustments later on.
2. Prepare the Double Boiler or Microwave-Safe Container:
If you are using a double boiler, fill the bottom pot with water and place it on the stove over low heat. Place the wax in the top pot of the double boiler. If you are using a microwave-safe container, place the wax in the container and set it aside for now.
Read more: How To Make A Heater With Candles
3. Heat the Wax:
If using a double boiler, allow the water in the bottom pot to gently simmer. The steam from the simmering water will gradually melt the wax in the top pot. Stir the wax occasionally with a heat-resistant spatula or spoon to ensure even melting.
If using a microwave, place the container of wax in the microwave and heat it in short intervals, typically 30 seconds to 1 minute at a time. After each interval, take the container out and stir the wax. Continue heating and stirring until the wax is completely melted.
4. Remove from Heat and Let it Cool:
Once the wax is completely melted, remove it from the heat source and set it aside to cool. It’s important to let the wax cool to the desired temperature before moving on to the next step. This ensures that the fragrance oil and colorant will mix well into the wax without overheating.
That’s it for the first step! Now that you have successfully prepared the wax, you’re ready to move on to the next step: adding fragrance and color to your whipped candles.
Step 2: Adding Fragrance and Color
Adding fragrance and color to your whipped candles is where you can get creative and personalize the scent and appearance of your candles. Follow these steps to infuse your candles with delightful fragrances and vibrant hues:
1. Choose Your Fragrance:
Select a fragrance oil that appeals to your senses. There are numerous options available, ranging from floral and fruity scents to warm and comforting aromas. Consider personal preferences and the ambience you want to create in your space. Remember that a little goes a long way, so be cautious not to over-scent your candles.
Read more: How To Make Candles With Herbs
2. Measure the Fragrance Oil:
Using a dropper or a graduated pipette, carefully measure the amount of fragrance oil you need. The recommended ratio is typically 1 ounce (30 ml) of fragrance oil per pound (450 grams) of wax. Adjust the amount according to your desired strength of fragrance.
3. Add Fragrance to the Wax:
Add the measured fragrance oil to the melted wax and gently stir to incorporate. Take care not to vigorously stir, as this can introduce air bubbles into the mixture. Stirring gently ensures that the fragrance is evenly distributed throughout the wax.
4. Choose Your Candle Colorant:
Decide on the color scheme you want for your whipped candles. You can use candle color chips or liquid dyes specifically formulated for use in candles. These colorants come in a wide range of shades, allowing you to achieve the perfect color to complement your decor or personal taste.
5. Add Colorant to the Wax:
If using candle color chips, gently add a small piece to the melted wax and stir until it completely dissolves. Add more color chips as needed to achieve your desired color intensity.
If using liquid dyes, start by adding a small amount, usually a few drops, to the melted wax. Stir well and gradually add more drops until you reach the desired color.
Read more: How To Make Dipped Candles
6. Mix Thoroughly:
After adding the fragrance oil and colorant, mix the wax thoroughly but gently. You can use a heat-resistant spatula or spoon to ensure the fragrance and color are evenly distributed throughout the wax. Avoid excessive stirring, as this can introduce air bubbles.
Remember, the fragrance and color of your whipped candles will enhance the overall experience, so take your time in selecting scents and colors that suit your preferences. Once you have mixed the fragrance and color into the wax, you’re ready to move on to the next step: preparing the wick for your whipped candles.
Step 3: Preparing the Wick
Preparing the wick is an essential step in ensuring that your whipped candles burn properly and efficiently. Follow these steps to prepare the wick for your candles:
1. Select the Right Wick:
Choose a wick that is appropriate for the size of your whipped candles. Wicks come in different thicknesses, and selecting the right one will ensure a clean and even burn. Refer to the manufacturer’s guidelines or consult a wick size chart to determine the suitable wick for your candle size.
2. Cut the Wick:
Using scissors or a wick trimmer, cut the wick slightly longer than the height of your candle mold. This will give you enough length to secure the wick at the bottom of the mold and leave room for trimming later on.
Read more: How To Make Carved Candles
3. Attach the Wick to the Mold:
There are different ways to attach the wick to the bottom of the candle mold, depending on the type of mold you are using:
- If you are using a silicone mold, you can simply press the metal tab of the wick onto the bottom of the mold. Ensure that it is centered and securely attached.
- If you are using a different type of mold, you can use a hot glue gun or a small amount of melted wax to secure the metal tab to the bottom of the mold. Hold the wick in place until the adhesive sets and the wick is firmly attached.
4. Straighten the Wick:
Gently straighten the wick so it stands upright in the center of the mold. You can use a wick holder or a pencil to keep the wick straight and centered. This will ensure an even burn and prevent the wick from leaning or extinguishing prematurely.
5. Secure the Wick in Place:
If necessary, use a wick sticker or a small tab of melted wax to secure the top of the wick to the mold. This will prevent the wick from moving or tilting during the pouring process.
By properly preparing the wick, you are setting the foundation for a successful whipped candle. A securely attached and centered wick will ensure that your candles burn evenly and allow for easy trimming as needed. With the wick prepared, it’s time to move on to the next step: heating the wax.
Step 4: Heating the Wax
Heating the wax is a crucial step in the whipped candle-making process as it ensures that the wax is in its liquid state and ready to be whipped. Follow these steps to heat the wax properly:
Read more: How To Make Grungy Candles
1. Prepare a Double Boiler:
If you haven’t already set up a double boiler, now is the time to do so. Fill the bottom pot with water and place it on the stove over low heat. The water should gently simmer, creating steam that will gradually melt the wax in the top pot. Make sure the water level is enough to prevent the pot from boiling dry.
2. Place the Wax in the Double Boiler:
If you are using a double boiler, place the measured wax in the top pot. The steam from the simmering water will heat the pot and melt the wax safely and gradually. Stir the wax occasionally with a heat-resistant spatula or spoon to ensure even melting.
3. Melt the Wax:
Allow the wax to melt completely in the double boiler, stirring gently to facilitate the melting process. Be patient and avoid raising the heat too high, as this can cause the wax to become too hot and potentially affect the fragrance and color.
4. Use a Microwave-Safe Container:
If you prefer to use a microwave, transfer the measured wax into a microwave-safe container. Heat the wax in short intervals, typically 30 seconds to 1 minute at a time, depending on the quantity of wax. After each interval, remove the container and stir the wax to ensure even heating. Repeat the process until the wax is completely melted.
Note: Always follow the manufacturer’s instructions and guidelines when using a microwave to heat wax. Avoid overheating as it can be dangerous and could lead to wax fires.
Read more: How To Make Twist Candles
5. Check the Wax Temperature:
Once the wax is melted, check its temperature with a thermometer. The recommended temperature for whipped candles is typically between 160°F and 180°F (70°C and 82°C), but it’s best to refer to the specific instructions provided by the wax manufacturer.
Heating the wax to the correct temperature ensures optimal conditions for whipping and pouring. It also helps to blend the fragrance and color consistently into the wax. With the wax properly heated, it’s time to move on to the exciting step of whipping the wax into a delightful texture.
Step 5: Whipping the Wax
Whipping the wax is the step that gives whipped candles their unique and fluffy texture. Follow these steps to achieve the desired whipped effect:
1. Prepare Your Mixing Tools:
Ensure that your mixing tools, whether it’s a whisk or an electric mixer, are clean and dry before starting. This will prevent any contaminants from affecting the quality of the whipped wax. If you’re using an electric mixer, attach the appropriate whisk attachment for whipping.
2. Begin Whipping:
Start by gradually introducing air into the melted wax. If using a whisk, vigorously whisk the wax in a circular motion until it starts to thicken and become lighter in color. If using an electric mixer, set it to a medium speed and whisk the wax until it reaches a soft peak consistency.
Read more: How To Make Teacup Candles
3. Observe the Texture:
As you whisk the wax, keep a close eye on its texture. You want the wax to have a light and fluffy consistency, similar to whipped cream. Avoid over-whipping, as it can lead to a grainy texture or cause the wax to become too stiff.
4. Test for Peaks:
To check if the wax is properly whipped, lift the whisk or beaters out of the wax and observe if it forms soft peaks that hold their shape briefly. This indicates that the wax is whipped to the desired consistency.
5. Avoid Overheating:
Be cautious not to overheat the whipped wax as you continue to whisk. Overheating can cause the wax to become too liquidy, resulting in a loss of the desired whipped texture. If the wax starts to become too warm during the process, let it cool for a few moments before continuing.
Remember, the goal is to achieve a light and airy texture that resembles whipped cream. The more you whisk the wax, the fluffier it will become. Once the wax is whipped to perfection, it’s time to move on to the next step: pouring the wax into your chosen molds.
Step 6: Pouring the Wax
Now that your wax is whipped and has reached the desired fluffy texture, it’s time to pour it into your chosen molds. Follow these steps to ensure a smooth and successful pouring process:
Read more: How To Make Drip Candles
1. Prepare Your Molds:
Make sure your molds are clean and dry before pouring the wax. If you are using silicone molds, they usually do not require any additional preparation. However, if you are using other types of molds, you may need to apply a thin layer of mold release spray or rub a small amount of oil on the interior surface to facilitate easy removal of the finished candles.
2. Position the Molds:
Place your molds on a flat and stable surface where they can remain undisturbed until the wax sets. It is essential to choose a location that is away from drafts, direct sunlight, or any other factors that can affect the setting process.
3. Slowly Pour the Wax:
Gently pour the whipped wax into the molds, starting from the center and working your way outwards. Take care not to overfill the molds, leaving some space at the top to allow for any potential shrinkage during cooling.
4. Tap or Rotate the Molds:
To remove any air bubbles trapped within the wax, tap the molds gently on the countertop or rotate them in a circular motion. This will help ensure that the wax settles evenly in the molds and reduces the presence of air pockets.
Read more: How To Make Natural Candles
5. Let the Wax Set:
Allow the poured wax to cool and set undisturbed for several hours or as specified by the wax manufacturer. The setting time may vary depending on factors such as the type of wax and the size of the candles. Avoid touching or moving the molds during this time to prevent any disruption to the setting process.
6. Trim the Wicks:
Once the wax has completely set, trim the wicks to a suitable length, leaving about 1/4 inch (6 mm) above the surface of the candle. This will ensure an optimal burning experience when you light the whipped candles.
With the wax poured into the molds and set, your whipped candles are almost complete! In the final step, we’ll add some finishing touches to enhance the visual appeal of the candles.
Step 7: Finishing Touches
The finishing touches of your whipped candles are what make them truly special and unique. Follow these steps to add those final decorative elements and make your candles visually appealing:
1. Decorate with Dried Flowers or Herbs:
Add a touch of natural beauty to your whipped candles by embedding dried flowers or herbs on the surface. Press them gently into the cooled wax, arranging them in a pleasing pattern or design. Make sure to choose dried flowers or herbs that are safe to use in candles and won’t pose a fire hazard.
Read more: How To Make Molded Candles
2. Sprinkle Glitter or Shimmer:
Create a magical glow by sprinkling glitter or shimmer dust on top of the whipped candles. Lightly dust the surface with your desired sparkles, ensuring an even distribution. This adds a touch of sparkle and shine, perfect for special occasions or to simply elevate the aesthetic appeal of your candles.
3. Attach Ribbons or Embellishments:
Add elegance and charm by attaching ribbons or small embellishments to the base or sides of the candles. Use a hot glue gun or a small amount of melted wax to secure ribbons or decorative elements of your choice. This personalizes the candles and gives them a stylish and sophisticated look.
4. Add a Label or Tag:
For a professional touch, consider adding a label or tag to your whipped candles. Create custom labels with the fragrance name or your own branding. You can attach the label to the base of the candle or tie it around the jar with a decorative string. This adds a polished and personalized touch to your finished candles.
5. Package with Care:
If you’re planning to give your whipped candles as gifts or sell them, take the time to package them with care. Place each candle in a protective wrapping, such as a clear cellophane bag or a gift box. Add a bow or a personalized tag to complete the packaging, creating a delightful presentation for your recipients.
Remember, the finishing touches are an opportunity to let your creativity shine and add your personal touch to the whipped candles. Have fun experimenting with different decorations and materials to create candles that are truly one-of-a-kind.
Finally, step back and admire your beautiful whipped candles. You have successfully completed the process of making these unique and visually appealing candles. Enjoy the flickering glow and delightful fragrance as you light up your handmade creations or share them with others.
Congratulations on your whipped candle-making journey! We hope this guide has been helpful, and may you continue to explore and expand your creativity in the world of candle making.
Read more: How To Make Survival Candles
Conclusion
Congratulations! You have reached the end of our comprehensive guide on how to make whipped candles. We hope this step-by-step tutorial has provided you with the knowledge and inspiration to create stunning and unique candles with a fluffy and luxurious texture.
Throughout this article, we have covered everything from preparing the wax to adding fragrance and color, and finally pouring the whipped wax into molds. We also discussed the importance of preparing the wick, heating the wax, and achieving the desired whipped texture.
By following the instructions and tips provided, you can create whipped candles that not only add elegance to your home decor but also fill the space with delightful scents. The finishing touches, such as adding dried flowers or herbs, sprinkling glitter, attaching ribbons, or adding personalized labels, contribute to the overall aesthetic appeal of your candles.
This creative process allows you to fully customize your candles to your personal preferences and style. Whether you choose to make whipped candles as a hobby, for relaxation, or as thoughtful gifts for loved ones, the possibilities for creativity and expression are endless.
Remember, practice makes perfect. As you continue to experiment with different fragrances, colors, and decorative elements, you will develop your own unique style and techniques. Don’t be afraid to try new things and let your imagination run wild.
Lastly, always prioritize safety when working with hot wax and open flames. Keep a fire extinguisher or a bowl of water nearby, work in a well-ventilated area, and never leave burning candles unattended.
We hope you have enjoyed this guide and that it has ignited your passion for creating whipped candles. So go ahead, gather your materials, and start whipping up your own beautiful creations. Enjoy the process, embrace your creativity, and watch as your whipped candles bring warmth and ambiance to your surroundings.
Frequently Asked Questions about How To Make Whipped Candles
Was this page helpful?
At Storables.com, we guarantee accurate and reliable information. Our content, validated by Expert Board Contributors, is crafted following stringent Editorial Policies. We're committed to providing you with well-researched, expert-backed insights for all your informational needs.


0 thoughts on “How To Make Whipped Candles”