
Articles
How To Make A Quilt
Modified: August 28, 2024
Discover articles and tips on how to make a beautiful quilt. Get step-by-step instructions and inspiration for your next quilting project.
(Many of the links in this article redirect to a specific reviewed product. Your purchase of these products through affiliate links helps to generate commission for Storables.com, at no extra cost. Learn more)
Introduction
A quilt is a beautiful and practical piece of textile art that can be enjoyed for generations. Whether you are a seasoned quilter or a beginner looking to embark on a new crafting adventure, making a quilt can be a fulfilling and rewarding experience. The process of creating a quilt allows you to express your creativity, learn new skills, and produce a personalized masterpiece that reflects your unique style.
In this article, we will guide you through the step-by-step process of making a quilt, from gathering the materials to adding the finishing touches. Whether you want to create a simple patchwork quilt or tackle a more intricate design, we will cover the essential techniques and considerations to help you achieve a successful outcome.
So, grab your sewing machine, scissors, and colorful fabrics. It’s time to dive into the world of quilting and create a cherished keepsake that will bring warmth and beauty to your home or serve as a heartfelt gift for someone special.
Key Takeaways:
- Making a quilt is a fulfilling journey that allows you to express creativity, learn new skills, and create a cherished masterpiece reflecting your unique style and passion.
- From gathering materials to adding finishing touches, quilting offers a rewarding experience that brings warmth, comfort, and a piece of your heart into the homes of those who receive your beautiful creation.
Read more: How To Make A Quilt Larger
Step 1: Gathering Materials
Before you begin your quilting journey, it’s essential to gather all the necessary materials. Here’s a list of the basic items you’ll need to get started:
- Fabric: Choose a variety of fabrics in different colors and patterns. Consider the theme or color scheme you want for your quilt.
- Quilt Batting: This is the layer of material that goes in the middle of the quilt sandwich to provide insulation and dimension.
- Backing Fabric: Select a fabric for the back of your quilt that complements the colors and design of the quilt top.
- Thread: Use high-quality quilting thread that matches or complements your fabric choices.
- Cutting Tools: Invest in a rotary cutter, cutting mat, and acrylic ruler for precise fabric cutting.
- Pins or Safety Pins: These will be used for basting the layers together.
- Sewing Machine: A sewing machine with a quilting foot will make the piecing process easier and faster.
- Iron and Ironing Board: Pressing your fabric and seams is crucial for achieving neat and accurate quilt blocks.
- Quilting Needles: Choose needles specifically designed for quilting to ensure smooth stitching.
- Quilting Template or Stencils: These are optional but can be helpful for creating consistent quilt block patterns.
Once you have gathered all the materials, take some time to organize and prepare your work area. Clear a large table or floor space where you can spread out your fabric and work on your quilt comfortably.
Remember, the materials mentioned above are the basic necessities. Depending on the type of quilt and technique you choose, you may require additional tools or supplies such as applique templates, specialty rulers, or embellishments.
Now that you have everything you need, you’re ready to move on to the next step: choosing a quilt pattern!
Step 2: Choosing a Quilt Pattern
Choosing a quilt pattern is an exciting part of the quilting process. There are countless designs, styles, and techniques to choose from, so it’s important to find a pattern that matches your skill level, time commitment, and personal preferences.
If you’re a beginner, it’s recommended to start with a simple and straightforward pattern. Options like patchwork quilts, charm square quilts, or strip quilts are great choices that allow you to practice basic piecing techniques while still achieving a visually appealing result.
If you’re feeling more adventurous or have intermediate to advanced quilting skills, you can explore more intricate patterns such as applique quilts, paper piecing quilts, or even quilt-as-you-go projects. These patterns often require more precise cutting and sewing techniques but offer the opportunity to create stunning and detailed designs.
Consider the purpose and intended use of your quilt when choosing a pattern. If you’re making a quilt for a specific occasion or recipient, think about their preferences and the overall aesthetic you want to achieve. You can browse quilting books, magazines, or online platforms to get inspiration and discover a pattern that resonates with you.
Another factor to consider is the size of the quilt. Determine whether you want to create a small lap quilt, a twin-sized quilt, or even a bed-sized quilt. This will help you choose a pattern that suits the scale you’re aiming for.
Keep in mind that you can also modify and customize quilt patterns to add your own unique touch. Experiment with different color combinations, fabric choices, or block placements to create a one-of-a-kind quilt that reflects your personal style.
Once you’ve selected a quilt pattern, gather all the instructions and templates you need. Read through the pattern carefully to familiarize yourself with the steps involved and any special techniques or tools required.
With your pattern in hand, you’re now ready to move on to the next step: preparing the fabric!
Step 3: Preparing the Fabric
Preparing the fabric is a crucial step in the quilting process as it ensures that your quilt blocks and overall design come together seamlessly. Properly preparing the fabric involves several important tasks:
- Washing: Before you start cutting and piecing your fabric, it’s essential to wash and dry it. This helps remove any dirt, chemicals, or sizing from the fabric, as well as pre-shrink it. Be sure to follow the manufacturer’s instructions for washing and drying, as different fabrics may require specific care.
- Pressing: Once your fabric is clean and dry, iron it to remove any wrinkles or creases. This step is crucial for achieving accurate and precise cuts. Use a hot iron and press the fabric on a low heat setting, being careful not to stretch or distort the fabric as you iron.
- Squaring up: After pressing, square up the edges of your fabric pieces. This involves trimming any uneven or jagged edges to ensure that each piece is perfectly straight and aligned. Use your rotary cutter and acrylic ruler to achieve clean and uniform cuts.
- Fabric placement: If your pattern involves specific fabric placements or color combinations, take the time to arrange your fabric pieces according to the pattern instructions. This will help you visualize the final design and ensure that you have enough fabric for each block.
Additionally, you may want to consider using a fabric stabilizer or starch spray on your fabric before cutting. Stabilizing the fabric can prevent stretching and make it easier to work with, especially when dealing with bias edges or intricate piecing.
Remember, accuracy and attention to detail during fabric preparation will greatly contribute to the overall success of your quilt. Take your time to complete these steps before moving on to the next stage.
Now that your fabric is prepped and ready to go, it’s time to move on to Step 4: cutting the fabric pieces!
Step 4: Cutting the Fabric Pieces
Once you have appropriately prepared your fabric, it’s time to start cutting the pieces for your quilt. This step requires precision and accuracy to ensure that all the fabric components fit together seamlessly. Here’s how to cut the fabric pieces for your quilt:
- Refer to the pattern instructions: Carefully review the pattern instructions and measurements to determine the size and shape of each fabric piece you need to cut. The pattern will provide you with the necessary dimensions and cutting guidelines.
- Gather your cutting tools: Before you begin cutting, make sure you have all the necessary cutting tools handy. These typically include a rotary cutter, cutting mat, and acrylic ruler. These tools will help you achieve clean and straight cuts.
- Measure and mark: Use your ruler to measure the required dimensions of each fabric piece and mark the measurements directly on the fabric using a fabric pen or chalk. Take care to be precise and double-check your measurements before cutting.
- Cut with the rotary cutter: Place the fabric on the cutting mat and line up the ruler with the marked measurements. Hold the ruler firmly in place and use the rotary cutter to make a clean, straight cut along the edge of the ruler. Take your time and maintain a steady hand to prevent any jagged or uneven cuts.
- Organize and label: As you cut each fabric piece, it’s important to keep them organized and labeled. This will make it easier to identify and assemble the different sections of your quilt later on. Use sticky notes or fabric labels to mark the corresponding pattern piece number or placement.
Remember, accuracy in cutting is essential for achieving precise piecing and alignment of your quilt blocks. Take your time and double-check your measurements to ensure the best results.
Once you have cut all the required fabric pieces according to the pattern’s specifications, you’re now ready to move on to Step 5: creating the quilt top!
Read more: How Much Is It To Make A Quilt
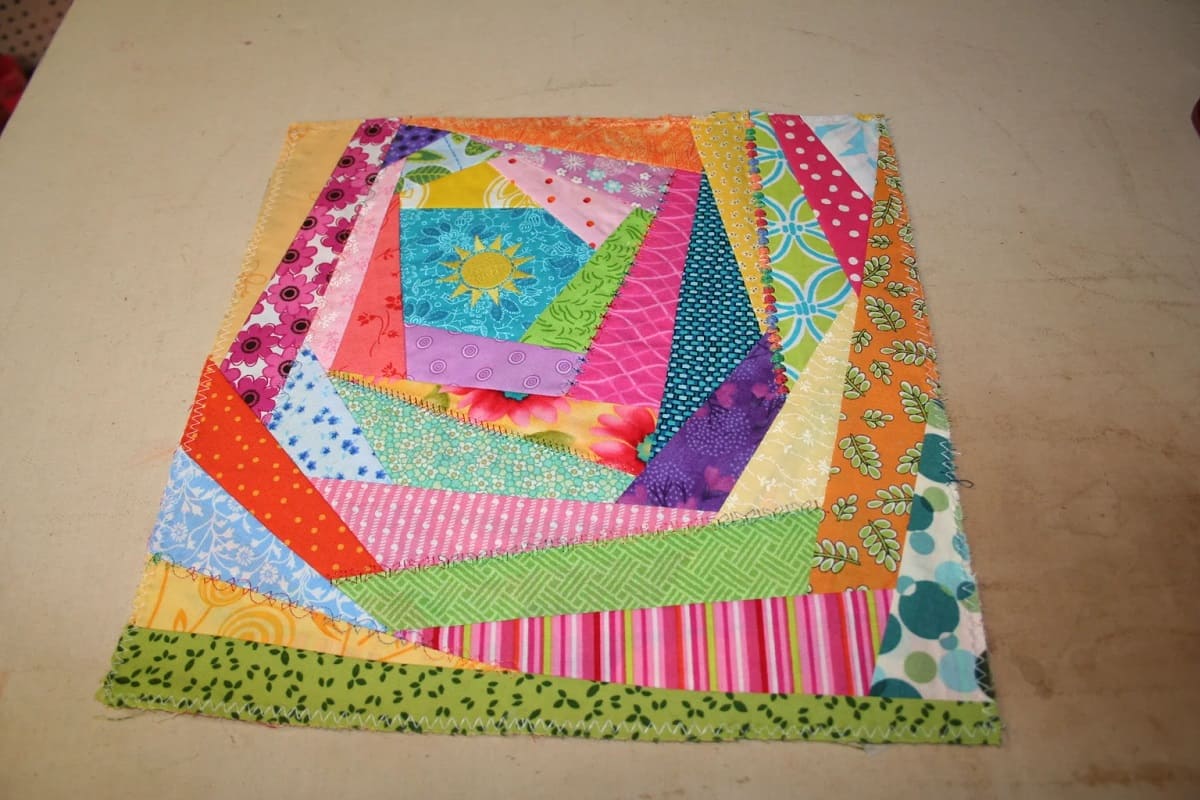
Step 5: Creating the Quilt Top
The quilt top is the centerpiece of your quilt and where your creative vision comes to life. It’s the stage where you’ll arrange and sew together the fabric pieces you’ve cut to create a cohesive and visually appealing design. Here’s how to create the quilt top:
- Refer to the pattern: Begin by referring to the pattern instructions for the layout and design of the quilt top. The pattern will provide you with a guide on how to arrange the fabric pieces and stitch them together.
- Design and layout: Lay out all your fabric pieces on a flat surface and experiment with different arrangements until you’re satisfied with the overall design. Consider color placement, block placement, and the visual flow of the quilt.
- Row by row assembly: Starting from the top row, take the fabric pieces and sew them together according to the pattern instructions. Use a 1/4-inch seam allowance unless otherwise specified. Take care to align the edges accurately and press the seams open or to the side as directed by the pattern.
- Continue piecing: Progress through each row of the quilt top, making sure to keep your fabric pieces in the correct order. Use pins or clips to hold the pieces together before sewing to ensure accurate alignment.
- Pressing and trimming: Once you’ve completed sewing all the rows of your quilt top, press the seams to set them and make the quilt top look neat and professional. Trim any excess threads or uneven edges.
Throughout the process, refer to the pattern instructions for any specific techniques or considerations unique to the quilt design. Take your time to ensure accurate piecing and alignment, as a well-constructed quilt top will result in a stunning finished product.
Now that you have completed the quilt top, it’s time to move on to the next step: assembling the quilt sandwich!
When making a quilt, be sure to prewash and iron your fabric to prevent shrinkage and ensure a smooth, even finish.
Step 6: Assembling the Quilt Sandwich
Assembling the quilt sandwich involves bringing together the quilt top, batting, and backing fabric to create the layers of your quilt. This step prepares the quilt for quilting and ensures stability and durability. Here’s how to assemble the quilt sandwich:
- Lay out the backing fabric: Start by laying the backing fabric on a clean, flat surface, wrong side up. Smooth out any wrinkles or creases. If necessary, you can tape or pin the fabric to the surface to keep it in place.
- Add the batting: Place the quilt batting on top of the backing fabric, ensuring it is centered and slightly larger than the quilt top. Smooth out any wrinkles or folds in the batting to ensure an even and flat surface.
- Place the quilt top: Carefully position the quilt top on the batting, right side up. Take your time to align the edges of the quilt top with the edges of the backing fabric, ensuring it is centered and evenly distributed.
- Baste the layers: To hold the layers together, you can use one of several basting methods. Traditional options include pin basting or thread basting. You can also consider using temporary spray adhesive or basting spray. Whichever method you choose, ensure that the layers are secure and won’t shift during the quilting process.
- Smooth and flatten: Once the layers are basted together, use your hands or a smoothing tool to gently flatten and smooth out any wrinkles or bulges. Take care not to stretch or distort the fabric while doing this.
During the quilt sandwich assembly, it’s important to maintain the tension and ensure that the layers are flat and even. This will prevent puckering or shifting during the quilting process.
Once the quilt sandwich is assembled, you’re now ready to move on to the next step: quilting the layers together!
Step 7: Quilting the Layers
Quilting is the process of stitching the layers of the quilt sandwich together. This step not only adds visual interest and texture to your quilt but also ensures the durability and stability of the finished piece. Here’s how to quilt the layers:
- Choose your quilting technique: There are various quilting techniques you can use, such as free-motion quilting, straight-line quilting, or using a quilting machine. Consider the design and complexity of your quilt top, as well as your personal preference and skill level when choosing a quilting technique.
- Prepare your machine: If you’re using a sewing machine, attach a quilting foot or walking foot for better control. Ensure that you have the appropriate thread and needle for quilting.
- Start quilting: Begin quilting in the center of your quilt and work your way outwards. This helps to distribute any potential fabric tension or puckering. Follow the design or pattern you’ve chosen, whether it’s stitching in the ditch, outlining shapes, or creating intricate quilting motifs.
- Take your time: Quilting is a meticulous process that requires patience and attention to detail. Take your time to ensure even and consistent stitches. Practice on scrap fabric or make a sample quilt sandwich to test your tension and stitch length before quilting on your actual project.
- Continue quilting: Move the quilt around as needed to access different areas or angles. As you progress, smooth out any wrinkles or bubbles that may form on the backing fabric. Take breaks if needed to avoid tension and fatigue.
- Secure and finish quilting: Once you’ve completed the quilting, secure your threads by backstitching or tying off the ends. Trim any excess thread or loose threads. Give your quilt a final press to remove any wrinkles or creases.
Remember, quilting is an opportunity to showcase your creativity and add your personal touch to the quilt. Let your imagination and skills guide you in creating a beautiful and unique finish to your quilt.
With the quilting complete, it’s time to move on to the next step: adding the quilt binding!
Step 8: Adding the Quilt Binding
Adding the quilt binding is the final step in completing your quilt. It not only provides a finished edge but also adds a decorative element to your quilt. Here’s how to add the quilt binding:
- Prepare your binding strips: Cut your fabric into strips for the binding. The width of the strips will depend on your preferred binding width and the thickness of your quilt. Typically, binding strips are cut 2.5 inches wide.
- Join the strips: If your quilt is larger than the length of a single strip, you’ll need to join multiple strips together to create one long strip. Use a diagonal seam to join the strips, stitching from one corner to the opposite corner. Trim the excess fabric and press the seam open or to the side.
- Press the binding strips: Fold the long strip in half lengthwise, wrong sides together, and press it with an iron to create a crease. This crease will be the edge of your binding.
- Attach the binding to the quilt: Starting in the middle of one side of the quilt, align the raw edge of the binding strip with the raw edges of the quilt. Leave a tail of a few inches before you start sewing. Use pins or clips to secure the binding in place.
- Sew the binding: Using a 1/4-inch seam allowance, sew along the edge of the binding, starting a few inches from the end. Continue sewing, mitering the corners as you reach them. When you approach the starting point, stop stitching a few inches away to create a gap.
- Join the ends: To join the binding ends, lay the starting tail over the ending tail, overlapping them. Mark where they overlap, then unfold both tails and trim them. Join the ends with a diagonal seam, press the seam open or to the side, and trim any excess fabric.
- Finish sewing the binding: Complete sewing the binding to the quilt, closing the gap left earlier. Fold the binding over the raw edge to the back of the quilt and secure it with pins or clips.
- Hand stitch or machine stitch the binding: Choose whether you want to hand stitch the binding to the back of the quilt using a blind or whip stitch, or machine stitch it from the front using a decorative or straight stitch. Be consistent in your stitching method throughout the quilt.
Once the binding is securely attached, give your quilt a final press to ensure it lays flat and the binding is neat and crisp. Admire your finished quilt, and congratulations on completing your quilting journey!
With the binding in place, your quilt is now complete and ready to be enjoyed. The last step is to add any finishing touches you desire.
Continue to Step 9: Finishing Touches!
Read more: How To Make A Quilt With Photos
Step 9: Finishing Touches
Now that your quilt is complete, it’s time for the final finishing touches. These small details can make a big difference in the overall appearance and durability of your quilt. Here are some finishing touches to consider:
- Trimming and squaring: Take a moment to carefully trim any excess batting or backing fabric, ensuring that all edges are straight and squared. This will give your quilt a polished look.
- Labeling: Consider adding a label to your quilt to document important details such as the maker’s name, date, and any special significance. This adds a personal touch and makes your quilt a treasured keepsake.
- Binding details: If you prefer, you can add decorative elements to your quilt binding, such as piping or ruffles. This adds visual interest and can enhance the overall design of your quilt.
- Embellishments: If desired, you can embellish your quilt with embroidery, applique, or other decorative elements. Keep in mind that embellishments should be securely attached and not interfere with the functionality of the quilt.
- Quilt care instructions: Include a card or note with care instructions for the quilt, especially if it is intended as a gift. This will help ensure that the quilt stays in good condition for years to come.
- Photograph and share: Capture the beauty of your finished quilt by taking photographs to showcase your hard work. Share your creation with friends, family, or fellow quilters to inspire and encourage others in their quilting journey.
- Admire and enjoy: Finally, take a moment to step back and admire your completed quilt. You have put in time, effort, and creativity to create a unique piece of art. Cherish your masterpiece and enjoy the warmth and comfort it brings.
Remember, these finishing touches add the final touches of personalization and care to your quilt. Let your creativity and preferences guide you in adding those special details that will make your quilt truly one-of-a-kind.
Congratulations on completing your quilt! We hope you’ve enjoyed this quilting journey and that your finished quilt brings joy and fond memories for many years to come.
Thank you for joining us on this quilting adventure!
Conclusion
Making a quilt is an art form that combines creativity, skill, and passion. From choosing the perfect fabrics to stitching intricate quilt blocks, each step in the process allows you to express your individuality and create a cherished masterpiece. Through this article, we have guided you through the step-by-step process of making a quilt, from gathering materials to adding the finishing touches.
Whether you are a beginner or an experienced quilter, quilting offers a fulfilling and rewarding experience. It allows you to unleash your imagination, learn new techniques, and create a tangible piece of art that can be passed down through generations. As you journeyed through each step, you learned the importance of gathering and preparing materials, choosing the right pattern, cutting fabric precisely, piecing the quilt top together, assembling the quilt sandwich, quilting the layers with care, adding the binding, and completing those final finishing touches.
Throughout the process, your creative vision took shape and transformed into a beautiful quilt that reflects your style and personality. Each stitch is a testament to your dedication and love for the craft. As the quilt comes to life, it becomes a tangible representation of your passion and an heirloom to be cherished.
Quilting is more than just a practical skill; it is a journey of self-expression and creativity. It brings a sense of relaxation, accomplishment, and joy as you witness your vision unfold. Whether you quilt for yourself, loved ones, or as a form of therapy, the process is as rewarding as the finished product.
As you complete your masterpiece, take the time to admire and appreciate the beauty you have created. Share it with others, knowing that your quilt brings warmth, comfort, and a piece of your heart into the homes of those who receive it. Celebrate your accomplishment and the skills you have honed.
Now, armed with knowledge and expertise, you are ready to embark on future quilting projects, explore new patterns, experiment with different designs, and continue to grow as a quilter. Embrace the possibilities that await and let your creativity soar.
Thank you for joining us on this quilting journey. May your future quilts be filled with inspiration, joy, and endless possibilities. Happy stitching!
Frequently Asked Questions about How To Make A Quilt
Was this page helpful?
At Storables.com, we guarantee accurate and reliable information. Our content, validated by Expert Board Contributors, is crafted following stringent Editorial Policies. We're committed to providing you with well-researched, expert-backed insights for all your informational needs.


0 thoughts on “How To Make A Quilt”