Articles
How Do You Make A Barn Quilt
Modified: January 9, 2024
Learn how to make a beautiful barn quilt with our step-by-step articles. Discover the techniques and materials needed to create a stunning barn quilt for your home or garden.
(Many of the links in this article redirect to a specific reviewed product. Your purchase of these products through affiliate links helps to generate commission for Storables.com, at no extra cost. Learn more)
Introduction
Have you ever driven by a picturesque barn adorned with a colorful and eye-catching quilt design? These beautiful creations, known as barn quilts, have become increasingly popular as a form of public art and a way to celebrate rural heritage. But what exactly is a barn quilt, and how are they made? In this article, we will delve into the fascinating world of barn quilts, exploring their history and providing a step-by-step guide on how to make your very own.
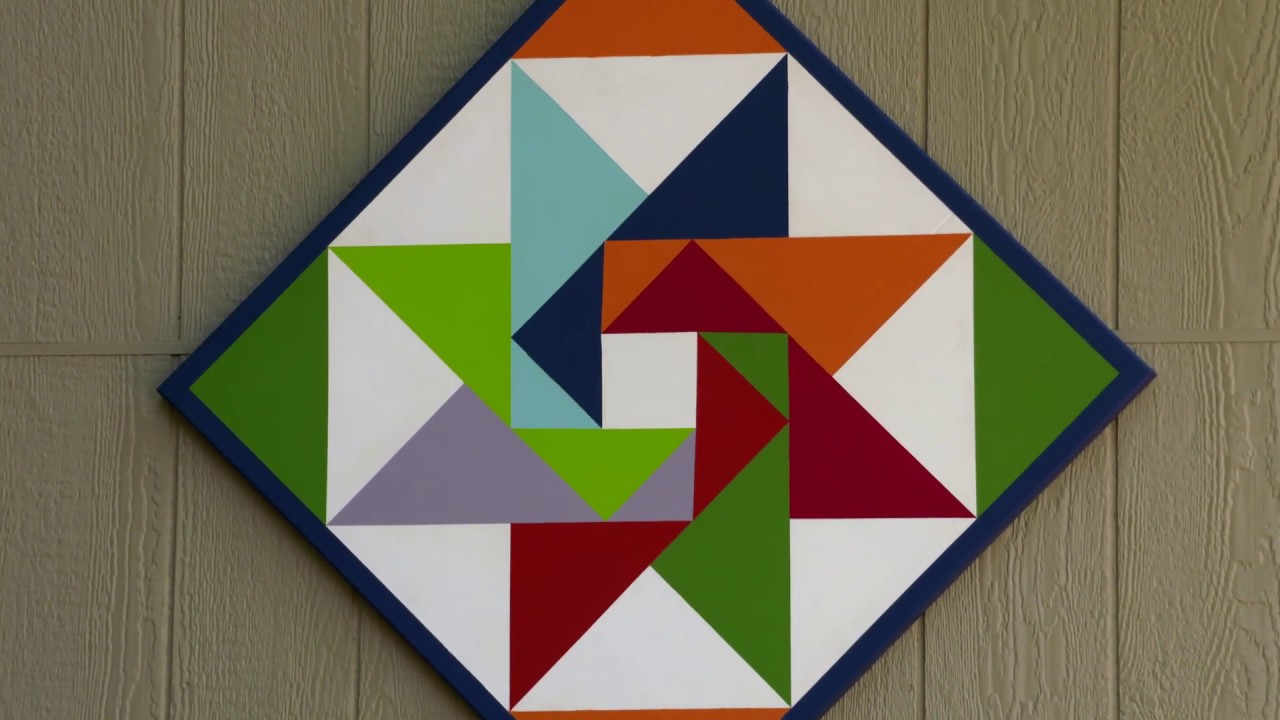
A barn quilt is essentially a large piece of painted wood that mimics the appearance of a traditional quilt block. It is then mounted on the exterior of a barn or other structures, creating a striking visual display. Just like traditional quilts, barn quilts can feature a wide variety of patterns and designs, ranging from simple geometric shapes to intricate and elaborate compositions.
These vibrant and intricate designs not only add an element of beauty to rural landscapes, but they also serve as a means of storytelling. Each barn quilt design holds meaning to the community or the individuals who create them, representing their unique heritage, culture, or personal stories.
The origins of barn quilts can be traced back to the Appalachian region of the United States in the early 2000s. Donna Sue Groves, a resident of Adams County, Ohio, is credited with starting the barn quilt movement when she wanted to honor her mother, a passionate quilter.
Today, barn quilts can be found in various parts of the country, and their popularity continues to grow. They serve as a visual celebration of rural life, bringing together the artistry of quilting and the rustic charm of barns.
Creating a barn quilt is a creative and rewarding process that can be enjoyed by individuals of all skill levels. Whether you are a seasoned quilter looking to expand your artistic horizons or a beginner seeking a new craft project, making a barn quilt offers an exciting opportunity to express your creativity and contribute to the rich tapestry of rural art. In the following sections, we will guide you through the step-by-step process of making your own barn quilt, from choosing a design to installing the finished piece on your barn.
So, roll up your sleeves, grab your paintbrushes, and let’s explore the world of barn quilts and the joy of creating these enchanting works of art.
Key Takeaways:
- Barn quilts are a vibrant celebration of rural heritage, serving as visual storytellers that connect communities through art, culture, and personal narratives. Creating a barn quilt is a creative and rewarding process that adds a unique touch to the rural landscape.
- Making a barn quilt involves a step-by-step process, from choosing a design to installing the finished piece. It’s an opportunity for individuals of all skill levels to express their creativity, learn new skills, and contribute to the rich tapestry of rural art.
Read more: How Do You Make A Memory Quilt
What is a Barn Quilt?
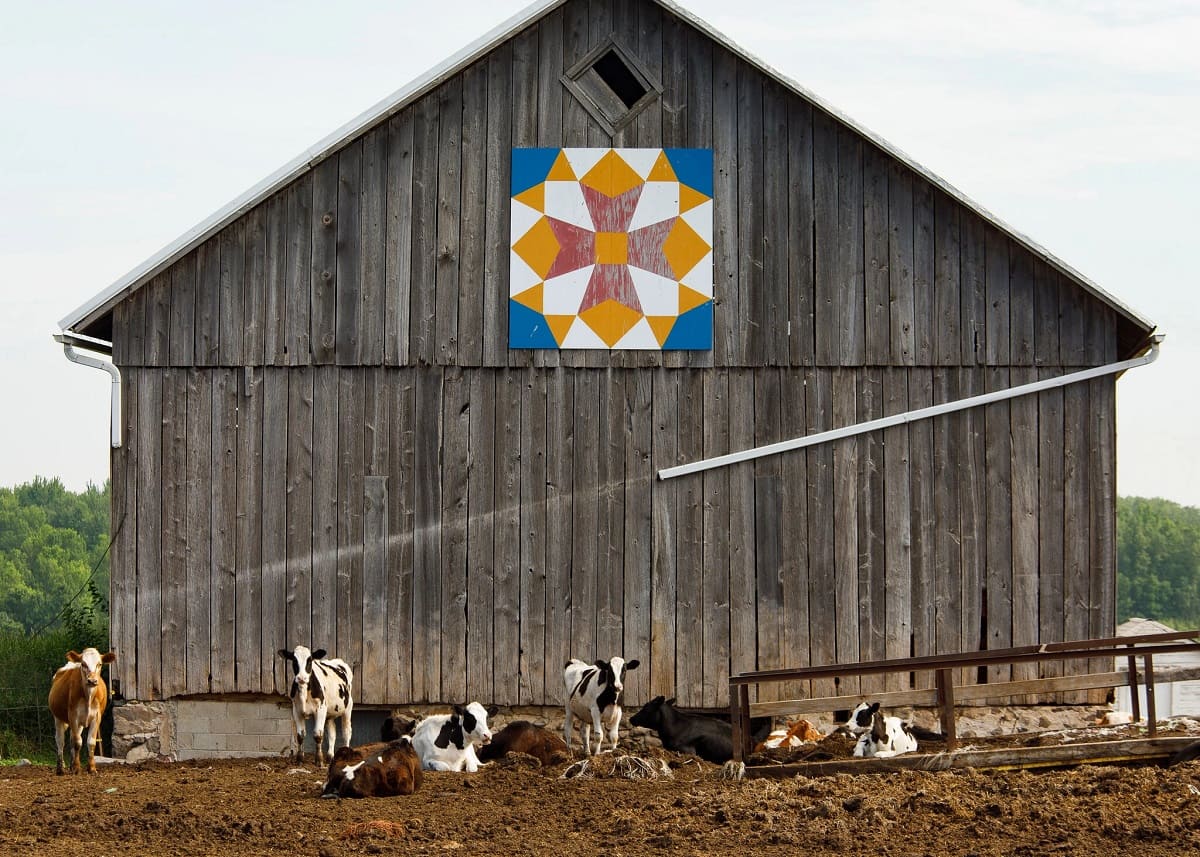
A barn quilt is a large, painted wooden panel that mimics the appearance of a traditional quilt block. These decorative pieces of art are typically mounted on the exterior of barns or other structures, adding a vibrant and visually appealing touch to the rural landscape. Just like the quilts they are inspired by, barn quilts feature intricate patterns and designs that can vary from simple geometric shapes to more complex and intricate compositions.
Barn quilts have evolved into a form of public art that celebrates rural heritage and community spirit. They serve as a visual representation of the rich quilting traditions that have been passed down through generations, while also showcasing the unique stories, history, and culture of the communities they are found in.
Unlike traditional quilts that are made of fabric, barn quilts are constructed using wood panels. The panels are typically made from weather-resistant materials, such as exterior-grade plywood or signboard, to withstand the elements. The size of a barn quilt can vary, but they are usually around four feet square, making them highly visible from a distance.
Each barn quilt design is carefully chosen to reflect the individuality and character of the barn owner or the community. Some designs are inspired by traditional quilt patterns that have been passed down through generations, while others are unique creations that incorporate local symbols, landmarks, or historical events. The colors used in barn quilt designs are often bright and contrasting, enhancing their visual impact and ensuring they stand out against the backdrop of the barn or structure they adorn.
One of the remarkable aspects of barn quilts is their ability to bring people together. Communities often organize barn quilt trails, where a collection of barn quilts can be discovered along a designated route. These trails attract tourists and locals alike, promoting tourism and fostering a sense of pride and connection within the community.
Barn quilts provide a unique way for individuals to express their creativity and contribute to the beauty of the rural landscape. Whether they are handmade by local artisans or created through community projects, barn quilts serve as a testament to the enduring artistry of quilting and the deep-rooted connections between art, culture, and the environment.
History of Barn Quilts
The history of barn quilts can be traced back to the early 2000s in the Appalachian region of the United States. The movement began with the vision of one woman, Donna Sue Groves, who wanted to honor her mother, an avid quilter, by painting a quilt block on their barn in Adams County, Ohio.
Donna Sue Groves, along with her friend, Kate Rettig, came up with the idea of creating barn quilts as a way to celebrate their love for quilting, their heritage, and their rural community. Groves wanted to combine her passion for quilting with her desire to bring attention to the beautiful wooden barns that dot the landscape of Ohio.
Their first barn quilt, called “The Wedding Ring,” was painted in 2001 as a tribute to Donna Sue Groves’ mother, who had recently passed away. The quilt design showcased intricate patterns and vibrant colors, reflecting the skill and artistry of traditional quilting.
The idea quickly caught on, and other individuals and communities started taking notice of the unique and captivating form of art. Soon, barn quilts began to appear on barns and structures across the country, spreading the joy of quilting and celebrating rural heritage.
The movement gained momentum when Donna Sue Groves and her friend Nancy Jane Pritchard teamed up with the Ohio Arts Council to establish the first official barn quilt trail in Adams County, Ohio, in 2003. The trail featured a series of barns adorned with barn quilts, creating a driving tour for locals and tourists to explore and appreciate the vibrant displays of art.
As word spread about the barn quilt movement, other states and communities started their own trails, creating a network of barn quilt enthusiasts across the country. Today, there are thousands of barn quilts, and barn quilt trails can be found in almost every state, from Kentucky to Iowa, and from Tennessee to Wisconsin.
The popularity of barn quilts can be attributed to their ability to bring people together and strengthen community bonds. Barn quilt projects often involve a collaborative effort, with volunteers painting and installing the quilts, and local businesses and organizations supporting the initiatives.
The barn quilt movement has also extended beyond the United States, with barn quilts appearing in countries such as Canada, Australia, and Germany. The beauty and symbolism of barn quilts have transcended borders, uniting people from different cultures and backgrounds through the art of quilting.
Today, barn quilts continue to capture the attention and admiration of both locals and art enthusiasts alike. They serve as a testament to the resilience of rural communities, preserving and celebrating their traditions, skills, and stories for generations to come.
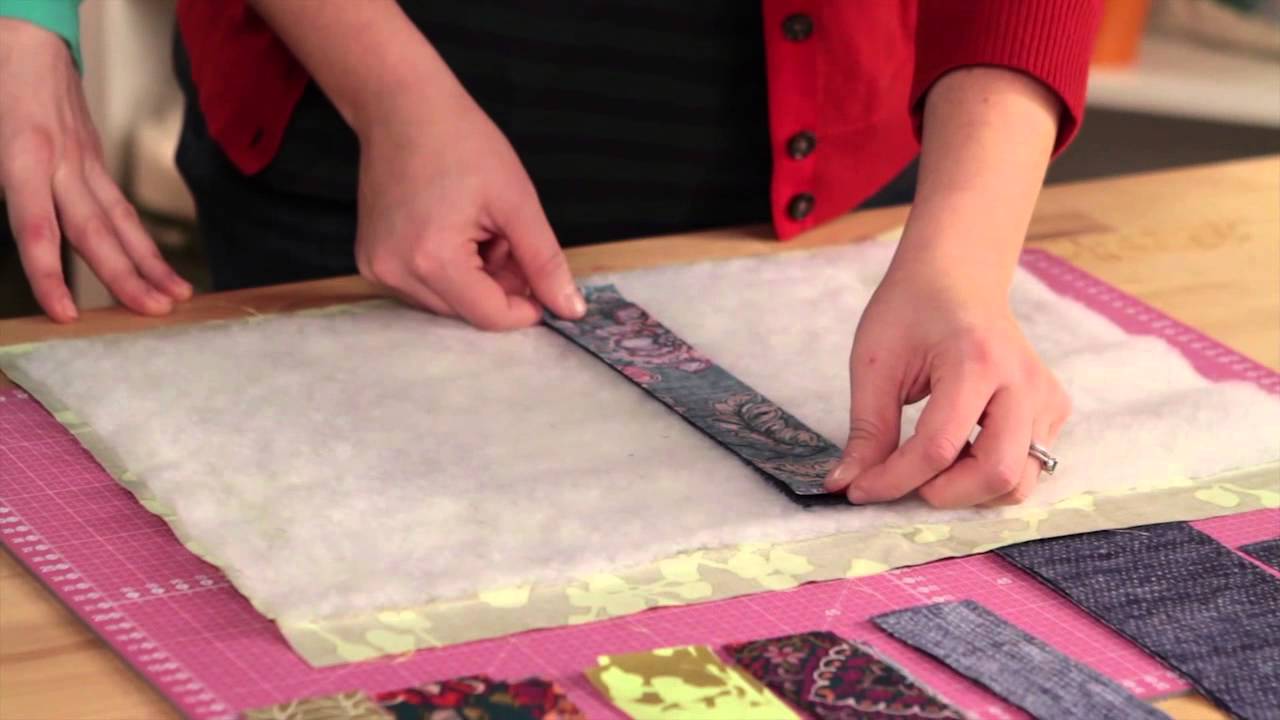
Materials and Supplies Needed
Making a barn quilt requires a few essential materials and supplies. Here’s a list of what you’ll need to get started:
- Wooden Panel: Choose a sturdy and weather-resistant wooden panel as the base for your barn quilt. Exterior-grade plywood or signboard are popular choices.
- Measuring Tools: A measuring tape and ruler will be handy for accurately marking out your quilt design on the wooden panel.
- Sandpaper: Prepare the wooden panel by sanding it to create a smooth surface for painting.
- Primer: Apply a coat of primer to the wooden panel to ensure that the paint adheres well and provides a durable finish.
- Acrylic Paint: Choose high-quality acrylic paint in a variety of colors to bring your quilt design to life. It’s best to select paint that is suitable for outdoor use and can withstand weather conditions.
- Paintbrushes and Foam Brushes: Have a selection of paintbrushes in different sizes to accommodate both detailed work and broader strokes. Foam brushes can also be useful for applying a smooth and even layer of paint.
- Palette and Paint Trays: Use a palette or paint trays to mix and blend your paint colors for the desired effect.
- Painter’s Tape: This will come in handy for creating clean and crisp lines between different areas of your quilt design.
- Clear Coat or Sealant: Apply a clear coat or sealant over the painted design to protect it from fading and harsh weather conditions.
- Hanging Hardware: If you plan to display your barn quilt on a wall or structure, you will need appropriate hanging hardware such as hooks or brackets.
- Safety Equipment: Remember to prioritize safety by using protective gear such as gloves and safety glasses while sanding and painting.
These materials and supplies will provide you with a solid foundation for creating your barn quilt. Depending on your design preferences, you may also need additional tools or embellishments, such as stencils, masking tape, or decorative elements that can add an extra flair to your quilt.
Before starting your project, make sure to gather all the necessary materials and create a comfortable and well-ventilated workspace. With your supplies in hand, you are now ready to embark on the creative journey of making your very own barn quilt.
Choosing a Barn Quilt Design
When it comes to choosing a barn quilt design, the possibilities are virtually limitless. You can opt for a traditional quilt pattern, create a unique design of your own, or draw inspiration from your local community and surroundings. Here are some tips to help you in the process:
Consider the Size: Think about the dimensions of your barn or the structure where you plan to display the quilt. A larger surface area may accommodate more intricate designs, while smaller areas may call for simpler patterns that can still make a bold statement.
Reflect Your Style and Personality: Your barn quilt is a reflection of your artistic vision and personal taste. Consider designs that resonate with you and align with the overall aesthetic you wish to achieve.
Draw from Tradition: Traditional quilt patterns have deep historical and cultural significance. Research traditional quilting designs and explore patterns that have been passed down through generations. Choose a design that pays homage to the rich heritage of quilting and adds a sense of tradition to your barn quilt.
Showcase Local Heritage: Incorporate elements that represent your local community, such as native flora, historical landmarks, or symbols that hold significance to the area. This not only adds a personal touch but also creates a meaningful connection between your barn quilt and its surroundings.
Experiment with Colors: The choice of colors can greatly impact the overall look and feel of your barn quilt. Consider using contrasting colors to make the design pop or opt for softer, more subtle shades for a more harmonious look. Play around with different color combinations to find the perfect palette for your design.
Seek Inspiration from Nature: Nature serves as an abundant source of inspiration for quilt designs. Draw inspiration from the beauty of flowers, birds, landscapes, or seasonal changes. These natural elements can add a touch of serenity and create a visually captivating design.
Get Creative: If you have a flair for creativity, don’t be afraid to think outside the box and create a unique design of your own. Combine different shapes, experiment with symmetry or asymmetry, and let your imagination run wild.
Remember, the beauty of barn quilts lies in their ability to tell a story, capture history, and reflect the individuality of the creator. Take your time in choosing a design that speaks to you and resonates with the message you want your barn quilt to convey.
Once you have settled on a design, gather the necessary materials, and prepare to bring your vision to life. In the next sections, we will guide you through the practical steps of preparing the barn quilt board, transferring the design, painting, and adding finishing touches to make your barn quilt a true masterpiece.
Read more: What Do Quilt Patterns On Barns Mean
Preparing the Barn Quilt Board
Before you can begin painting your barn quilt, it’s important to properly prepare the wooden panel, also known as the barn quilt board. Follow these steps to ensure a smooth and durable surface for your design:
1. Choose the Right Wooden Panel: Select a wooden panel that is sturdy and suitable for outdoor use. Exterior-grade plywood or signboard are common choices due to their durability and ability to withstand weather conditions.
2. Sand the Surface: Use sandpaper to smooth out any rough edges or imperfections on the wooden panel. Sanding will create a clean and smooth surface for painting and help the primer adhere properly.
3. Clean the Panel: Remove any dust or dirt from the wooden panel using a damp cloth or sponge. It’s important to start with a clean surface to ensure the paint adheres well and provides a long-lasting finish.
4. Apply Primer: Use a high-quality primer specifically designed for wood surfaces. Apply a thin and even coat of primer to the entire barn quilt board, front and back. The primer will help the paint adhere better and protect the wood from moisture and UV damage.
5. Let it Dry: Allow the primer to fully dry according to the manufacturer’s instructions. This may take a few hours or overnight, depending on the specific product used.
6. Lightly Sand the Primer: Once the primer is dry, lightly sand the surface with fine-grit sandpaper. This step will help smooth out any rough areas and create a better surface for painting.
7. Clean Again: After sanding, wipe away any dust or debris from the panel using a clean cloth or tack cloth. Ensuring a clean surface will help achieve a flawless paint finish.
By properly preparing the barn quilt board, you are setting the foundation for a beautiful and long-lasting barn quilt. Taking the time to sand, prime, and clean the wood will ensure that your design adheres well and withstands the test of time.
With the panel prepared, you are now ready to transfer your chosen design onto the board. In the next section, we will explore different methods for transferring the design, allowing you to bring your barn quilt to life.
When making a barn quilt, be sure to use exterior-grade materials and seal the finished piece with a weather-resistant sealant to protect it from the elements.
Transferring the Design onto the Board
Once you have prepared the barn quilt board, it’s time to transfer your chosen design onto the wooden panel. There are several methods you can use to accomplish this, depending on your preference and the complexity of your design. Here are a few popular techniques:
Pencil and Grid Method: Divide your design into a grid pattern. Create a corresponding grid on the barn quilt board, using a pencil and ruler. Transfer the design by sketching the individual elements from the grid onto the corresponding sections of the wooden panel.
Tracing and Carbon Paper: Place your design on top of the barn quilt board and secure it with tape. Slip a sheet of carbon paper underneath the design and trace over the lines with a pencil or pen. The pressure applied will transfer the design onto the wooden panel beneath.
Using Stencils or Templates: If your design consists of simple shapes or patterns, you can use pre-made stencils or templates. Place the stencil or template on the barn quilt board and trace the desired shape using a pencil or pen. Repeat the process for each element of your design.
Freehand Drawing: If you are comfortable with your drawing skills, you can skip the transfer process altogether and simply draw your design directly onto the barn quilt board. Use a pencil or pen to sketch your design with light and confident strokes.
When transferring the design, it’s important to ensure accuracy and attention to detail. Take your time to make precise and clean lines, as this will serve as your guide during the painting process. Once the design is transferred onto the board, double-check for any errors or areas that may need adjustments.
In addition, consider using painter’s tape along the edges of the design to create clean boundaries and prevent the paint from bleeding into adjacent sections. This will help ensure crisp and defined lines as you begin painting your barn quilt.
With the design successfully transferred, you are now ready to add color to your barn quilt. In the next section, we will explore the painting process and provide tips for achieving a professional and visually stunning finish.
Painting the Barn Quilt
Now that your barn quilt design is transferred onto the board, it’s time to bring it to life through the painting process. The way you approach the painting stage can greatly impact the final result. Here are some tips to ensure a successful and visually appealing barn quilt:
Prepare Your Paint: Set up your painting station with all the necessary colors and tools. Transfer each color of paint into separate paint trays or use a palette for easy access and mixing. Ensure you have a clean workspace and that your paintbrushes are in good condition.
Start with the Background: If your design has a specific background color, begin by painting that section first. Use broad strokes or a foam brush to cover the background evenly. Apply multiple coats if necessary, allowing each layer to dry before applying the next.
Work from the Background to the Foreground: When painting multiple elements within your design, it’s best to work from the background to the foreground. This technique helps create depth and ensures that overlapping elements are properly painted.
Use Thin Layers of Paint: Apply thin layers of paint, allowing each layer to dry before adding more. This technique helps prevent clumping and ensures a smooth and even finish. If needed, apply additional coats to achieve the desired color intensity.
Blend and Shade: If your design has shading or blending effects, use different shades of the same color or mix colors together to create those effects. Gradually blend the colors together using a soft brush or sponge to achieve a seamless transition.
Add Details and Patterns: Pay attention to the finer details and patterns within your design. Use smaller brushes or paint pens to add intricate lines, borders, or decorative elements. Take your time with these details to ensure precision.
Take Breaks and Step Back: Painting can be a time-consuming process, so make sure you take breaks to rest your hand and eyes. Additionally, step back from your work periodically to get a fresh perspective. This will help you identify any areas that may need adjustments or touch-ups.
Let it Dry and Cure: Once you have completed painting your barn quilt, allow it to fully dry according to the drying time recommended by the paint manufacturer. Afterward, consider allowing it to cure for a few days before applying any sealant or clear coat.
Remember that painting your barn quilt is a creative and individual process. Don’t be afraid to experiment, make adjustments, and let your artistic intuition guide you. The goal is to create a visually stunning and unique piece of art that reflects your design and personal style.
In the next section, we will discuss the final touches you can add to your barn quilt to truly make it a standout piece of art.
Adding Finishing Touches
After completing the painting process, you have the opportunity to add some finishing touches to your barn quilt. These final details can elevate your artwork and make it truly unique. Here are some ideas to consider:
Highlight with Outline or Borders: Consider outlining certain elements or adding borders to make them stand out. You can use a fine tip paintbrush or a paint pen to carefully trace the edges. This technique adds definition and gives your design a polished and finished look.
Embellish with Accents: Depending on your design and personal preferences, you may want to incorporate additional embellishments. This could include adding glitter, metallic paint accents, or small adhesive gems or sequins to specific areas of your barn quilt. These extra details can provide a touch of sparkle and visual interest.
Apply a Clear Coat or Sealant: To protect your barn quilt from the elements and ensure its longevity, consider applying a clear coat or sealant. This protective layer helps to safeguard the paint and prevent fading or damage. Choose a sealant that is suitable for outdoor use and follow the manufacturer’s instructions for application.
Sign or Label Your Barn Quilt: Adding a small sign or label to your barn quilt can be a thoughtful touch. Include your name or a short message to personalize your creation. This not only adds a sense of pride but also serves as a way to identify and commemorate your work of art.
Consider Backing or Framing: If you prefer to showcase your barn quilt indoors, you can add a backing to provide stability and protect the wood. Attach a piece of foam board or fabric to the back of the quilt using adhesive or staples. Alternatively, you can frame the barn quilt to give it a polished and finished appearance.
Document and Share: Photograph your completed barn quilt and share it with others. Capture its beauty and share the story behind its design on social media, in local publications, or through community art events. Documenting and sharing your creation helps foster a sense of connection and inspires others to appreciate the art form.
Remember, the finishing touches are an opportunity to truly make your barn quilt unique and reflective of your own artistic vision. Don’t hesitate to explore different ideas and techniques to add that extra touch of creativity and personalization.
With the final touches completed, you are now ready to install your barn quilt and proudly display it on your barn or chosen structure. In the next section, we will guide you through the process of installing your masterpiece.
Read more: How Do You Make A Quilt By Hand
Installing the Barn Quilt
With your barn quilt completed, it’s time to install it and showcase your hard work for all to admire. Here are some steps to guide you through the installation process:
1. Choose the Installation Location: Select the ideal spot on your barn or structure to display your barn quilt. Consider visibility, aesthetics, and structural integrity. Make sure the area is clean and free from any obstructions that may hinder the installation.
2. Prepare the Surface: Ensure that the surface where you will be installing the barn quilt is clean and smooth. Remove any dirt, debris, or peeling paint, as they can affect the adhesion of the barn quilt.
3. Gather Installation Materials: Depending on the type of barn quilt and the surface you are mounting it on, you may need different fasteners, such as screws, nails, or brackets. Make sure you have the appropriate tools and hardware for the installation.
4. Position the Barn Quilt: Hold the barn quilt against the chosen installation spot to determine the desired position. It may be helpful to have a second person assist you in this step to ensure that the barn quilt is level and aligned correctly.
5. Mark the Mounting Points: Once you determine the desired position, make pencil marks to indicate the mounting points on the barn quilt and the installation surface. Use a level to ensure that the barn quilt is straight and aligned properly.
6. Secure the Barn Quilt: Depending on the chosen installation method, carefully attach the barn quilt to the surface using the appropriate fasteners. This could involve drilling pilot holes and attaching screws, hammering nails, or using brackets for added support.
7. Double-check and Adjust: After securing the barn quilt, step back and examine it from different angles. Make any necessary adjustments to ensure that it is level and properly aligned. This step is essential to create a visually appealing and well-installed piece.
8. Maintain and Monitor: Regularly inspect your barn quilt to ensure that it remains secure and in good condition. Clean the surface as needed, and inspect for any signs of wear or damage. Promptly address any issues to maintain the longevity and appearance of your barn quilt.
Installing your barn quilt is the final step in the creation process. It allows you to proudly display your artwork and share it with your community and passersby. Remember, your barn quilt has the potential to inspire and spark conversations, so enjoy the process and the admiration it brings.
Congratulations on completing your barn quilt project! Your vibrant creation adds a unique touch to your barn or structure while celebrating the artistry and tradition of quilting. Step back and take pride in the captivating beauty you have brought to life through your creativity and dedication.
Conclusion
Creating a barn quilt is a journey that combines artistry, storytelling, and a celebration of rural heritage. From its humble beginnings in the early 2000s, the barn quilt movement has grown into a vibrant and widespread form of public art. These captivating displays of painted wooden quilt blocks not only add beauty to the rural landscape but also serve as a testament to the artistry of quilting and the connections between art, culture, and community.
Throughout this article, we have explored the fascinating world of barn quilts, from understanding what they are to learning about their history and the process of making one. We’ve discussed the materials and supplies needed, the importance of choosing the right design, and the step-by-step process of preparing the barn quilt board, transferring the design, painting, adding finishing touches, and finally installing the masterpiece on a barn or structure.
The beauty of barn quilts lies not only in their visual appeal but also in the stories they represent. Each barn quilt design carries meaning, whether it’s a traditional quilt pattern passed down through generations, a tribute to local heritage and landmarks, or a unique creation that expresses personal vision and style. Barn quilts truly serve as a means of storytelling, connecting individuals and communities through the art and narrative they share.
As you embark on your own barn quilt journey, remember to embrace your creativity, enjoy the process, and celebrate the beauty that emerges from your efforts. Whether you’re an experienced quilter or a beginner, making a barn quilt provides an opportunity to express your artistic vision, learn new skills, and contribute to the rich tapestry of rural art.
Once your barn quilt is complete and proudly displayed, it will become a focal point, captivating the attention of passersby, sparking conversations, and fostering a sense of community pride. Your barn quilt will serve as a symbol of creativity, heritage, and the enduring spirit of rural life.
So, gather your materials, let your imagination soar, and create a barn quilt that tells your story, honors your traditions, and adds a vibrant touch to the rural landscape. Happy quilting!
Frequently Asked Questions about How Do You Make A Barn Quilt
Was this page helpful?
At Storables.com, we guarantee accurate and reliable information. Our content, validated by Expert Board Contributors, is crafted following stringent Editorial Policies. We're committed to providing you with well-researched, expert-backed insights for all your informational needs.


0 thoughts on “How Do You Make A Barn Quilt”