Articles
How Do You Make A Lone Star Quilt
Modified: August 22, 2024
Learn how to make a stunning Lone Star quilt with our informative articles. Discover tips, tricks, and step-by-step instructions for creating your own masterpiece.
(Many of the links in this article redirect to a specific reviewed product. Your purchase of these products through affiliate links helps to generate commission for Storables.com, at no extra cost. Learn more)
Introduction
Quilting is more than just a craft. It’s an art form that allows you to create beautiful and unique pieces that can be cherished for generations. One popular quilt design that has stood the test of time is the Lone Star quilt.
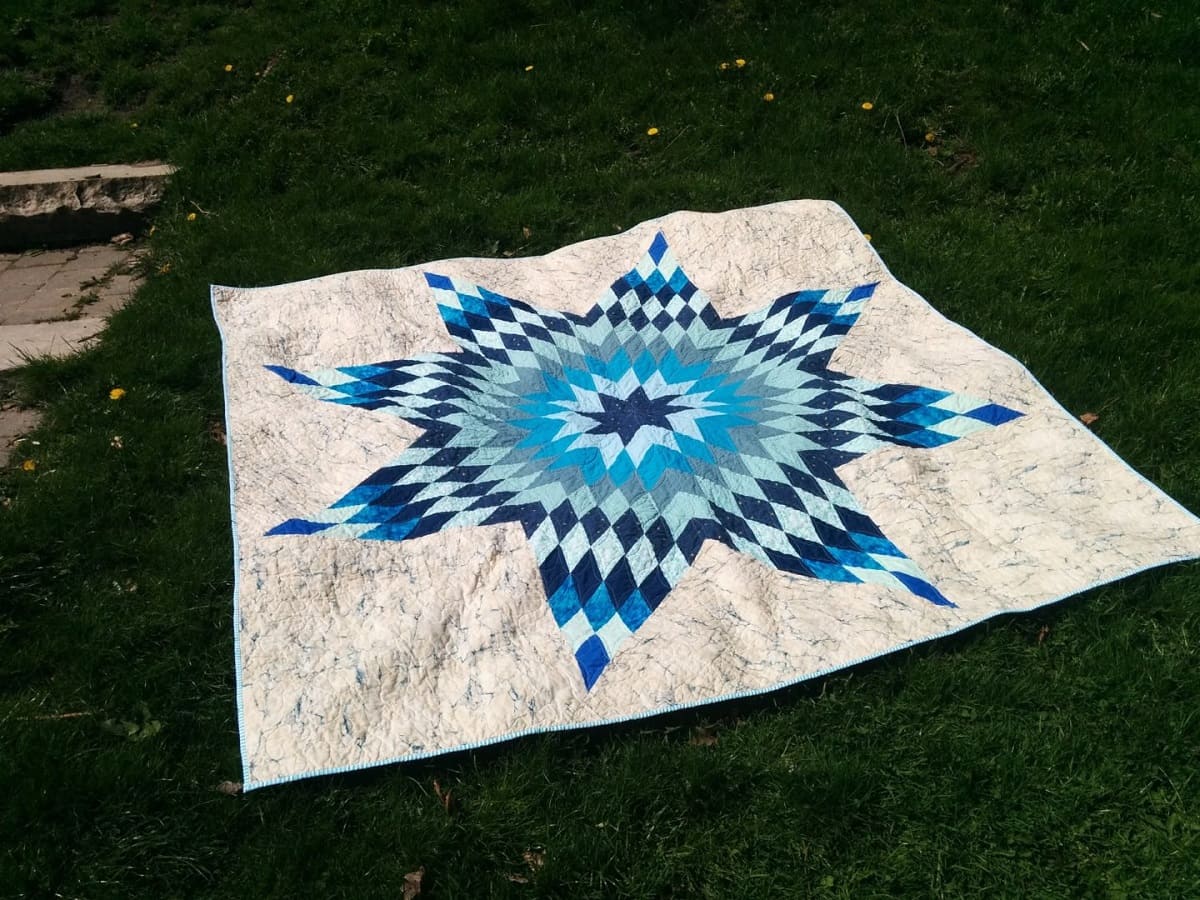
The Lone Star quilt, also known as the Texas Star quilt, is characterized by its striking star-shaped pattern. It’s a testament to the creativity and skill of the quilter and has become a beloved design among quilting enthusiasts.
If you’ve ever wanted to make a Lone Star quilt but weren’t sure where to start, you’re in the right place. In this article, we’ll guide you through the process of creating your own Lone Star quilt, step by step.
Before we dive into the details, let’s talk about the materials you’ll need to get started.
Key Takeaways:
- Crafting a Lone Star quilt is a labor of love that requires patience, precision, and creativity. From cutting the fabric to adding the finishing touches, each step contributes to a stunning and unique piece of art.
- The Lone Star quilt-making journey is a way to express creativity, connect with the quilting community, and leave a lasting mark. Embrace the process, experiment with colors and patterns, and enjoy the satisfaction of creating a one-of-a-kind masterpiece.
Read more: How To Make A Star Quilt
Materials Needed
To make a Lone Star quilt, you’ll need a few essential materials. Here’s a list of what you’ll need to gather before you get started:
- Fabric: Choose a variety of fabrics in different colors and patterns to create the star pattern and border. Consider using a mix of solid colors and prints to add visual interest to your quilt.
- Cutting tools: A rotary cutter, cutting mat, and acrylic ruler are essential for accurately cutting your fabric pieces.
- Sewing machine: A reliable sewing machine will make piecing the quilt top much easier.
- Thread: Choose a thread color that will blend well with your fabric choices.
- Pins: You’ll need pins to hold your fabric pieces in place while sewing.
- Quilt batting: This is the middle layer of your quilt that provides warmth and thickness. Choose a batting that suits your desired level of warmth and loft.
- Backing fabric: This is the fabric that will be on the backside of your quilt. Select a fabric that complements your quilt top.
- Quilt binding: Binding is used to finish the raw edges of your quilt. You can purchase pre-made binding or make your own from coordinating fabric.
- Quilting ruler: A quilting ruler with 45-degree marking lines will help you accurately piece the Lone Star pattern.
- Iron and ironing board: Pressing your fabric as you work is essential for achieving crisp and accurate seams.
- Quilting pins or safety pins: These will be used to hold the layers of your quilt together during the quilting process.
- Quilting needle and thimble: A sturdy quilting needle and thimble will make hand quilting or stitching the binding easier.
Once you have gathered all of these materials, you’ll be ready to embark on your Lone Star quilt-making journey. Let’s move on to the next step: cutting the fabric.
Step 1: Cutting the Fabric
Before you can start piecing your Lone Star quilt top, you’ll need to cut your fabric into the required shapes and sizes. Here’s a breakdown of the fabric pieces you’ll need to cut:
- Background fabric: This will be the fabric that surrounds the star pattern. Cut square blocks according to the desired size of your finished quilt top. The size of your blocks will depend on the overall dimensions you want for your quilt.
- Star fabric: Cut diamond-shaped pieces for the star points. The number of star points you’ll need will vary depending on the size of your Lone Star quilt. Follow a pattern or template to ensure accurate cutting.
- Border fabric: Cut long strips of fabric to form the borders of your quilt. The width and length of these strips will again depend on the size of your quilt and your personal preferences.
Using a rotary cutter, cutting mat, and acrylic ruler, carefully measure and cut your fabric pieces. Take your time to ensure accuracy, as precise cutting will impact the overall appearance of your quilt top.
Remember to label and organize your fabric pieces to avoid confusion later on. This will help you keep track of which pieces go where, especially as you move on to piecing the Lone Star pattern.
With your fabric pieces cut and ready, it’s time to move on to the next step: creating the Lone Star pattern.
Step 2: Creating the Lone Star Pattern
Now that you have your fabric pieces cut, it’s time to create the stunning Lone Star pattern that will be the centerpiece of your quilt top. Here’s how you can do it:
- Start by laying out your background fabric blocks in a square or rectangular shape, forming the base of your Lone Star.
- Take your star fabric diamonds and arrange them in a star shape on top of the background fabric. Use a quilting ruler with 45-degree marking lines to ensure precise alignment.
- Continue adding more rows of star fabric diamonds, alternating the color or pattern as desired. Gradually increase the size of the star shape by adding more rows of diamonds.
- As you add each row of star fabric diamonds, make sure to align the points of the diamonds with the intersections of the previous row. This will create the seamless appearance of a star.
- Once you are satisfied with the size and shape of your Lone Star pattern, carefully sew the fabric pieces together, using a quarter-inch seam allowance. Press the seams open to reduce bulk.
Creating the Lone Star pattern requires patience and precision, as it can be a bit challenging to align the fabric pieces accurately. Take your time and make any necessary adjustments along the way.
After piecing the Lone Star pattern, step back and admire your work. The star should be the focal point of your quilt top, showcasing your creativity and attention to detail.
Once you are happy with your Lone Star pattern, it’s time to move on to the next step: piecing the Lone Star quilt top.
Step 3: Piecing the Lone Star Quilt Top
With the Lone Star pattern created, it’s time to piece together the rest of the quilt top. Follow these steps to assemble your Lone Star quilt top:
- Take your background fabric blocks and arrange them around the Lone Star pattern. Sew the blocks together in rows to form the top portion of the quilt.
- Once the top portion is complete, sew the border fabric strips to the sides of the Lone Star quilt top. Adjust the length of the strips as needed to fit the dimensions of your quilt.
- Next, sew the border fabric strips to the top and bottom of the quilt top. This will give your Lone Star quilt a finished and cohesive look.
- Press the seams open or towards the border fabric to reduce bulk and create a smooth finish.
As you piece the Lone Star quilt top, double-check the alignment of the fabric pieces and ensure that your seams are straight and secure. This will help create a visually pleasing and well-constructed quilt top.
After piecing the Lone Star quilt top, step back and take a moment to appreciate your progress. The combination of the Lone Star pattern and the surrounding background and borders will truly showcase your quilting skills.
Now that your Lone Star quilt top is complete, it’s time to move on to the next step: adding borders.
When making a Lone Star quilt, be sure to accurately cut and piece your diamonds to ensure precise points and a smooth finished look. Take your time and press your seams carefully for best results.
Read more: How To Make A Lakota Star Quilt
Step 4: Adding Borders
Adding borders to your Lone Star quilt will not only enhance its visual appeal but also provide a finished look to your masterpiece. Follow these steps to add borders to your quilt:
- Measure the length of your Lone Star quilt top and cut two border fabric strips accordingly. These strips should match the desired width of your border.
- Sew the border fabric strips to the sides of the quilt top, right sides together, using a quarter-inch seam allowance. Press the seams towards the border fabric.
- Measure the width of your now-expanded quilt top, including the added side borders. Cut two more border fabric strips to match this width.
- Sew the border fabric strips to the top and bottom of the quilt top, right sides together, using a quarter-inch seam allowance. Press the seams towards the border fabric.
- Ensure that the corners of your quilt top and border strips are aligned properly. You can use pins or a quilting ruler to help you achieve a straight and even border.
- Press the entire quilt top, including the added borders, to give it a polished look.
Adding borders not only frames your Lone Star pattern but also allows you to incorporate additional fabric colors and patterns to complement your quilt top. Take your time to choose border fabric that blends well with the overall design of your quilt.
Once you’ve added the borders, stand back and admire your Lone Star quilt’s progress. It’s now time to move on to the next step: quilting the layers.
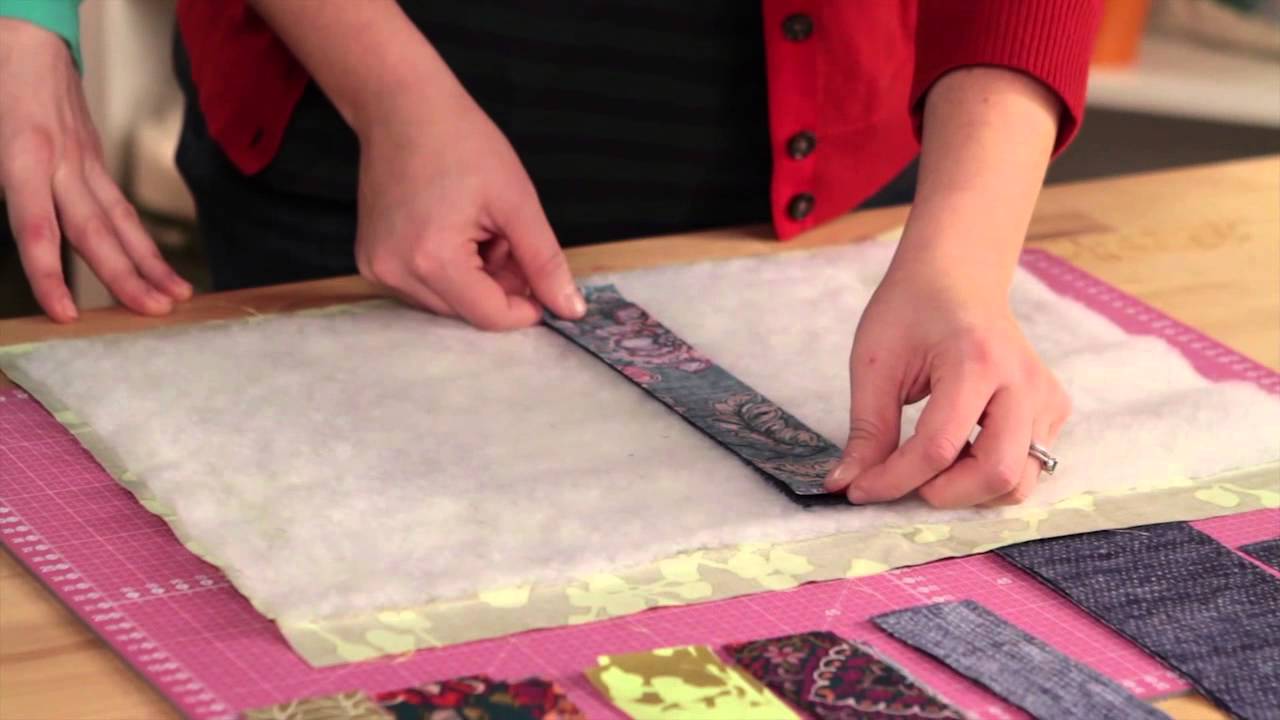
Step 5: Quilting the Layers
Quilting is the process of sewing together the three layers of a quilt – the quilt top, batting, and backing fabric. It not only adds structural integrity but also enhances the overall aesthetic of your Lone Star quilt. Follow these steps to quilt the layers:
- Place your Lone Star quilt top right side up on a flat surface. Smooth out any wrinkles or creases.
- Layer the quilt batting on top of the quilt top, ensuring it is centered and covers the entire quilt top.
- Place the backing fabric right side down on top of the batting, aligning the edges with those of the quilt top and batting.
- Use quilting pins or safety pins to secure the layers together, starting from the center and working your way outwards. Space the pins evenly to prevent shifting during quilting.
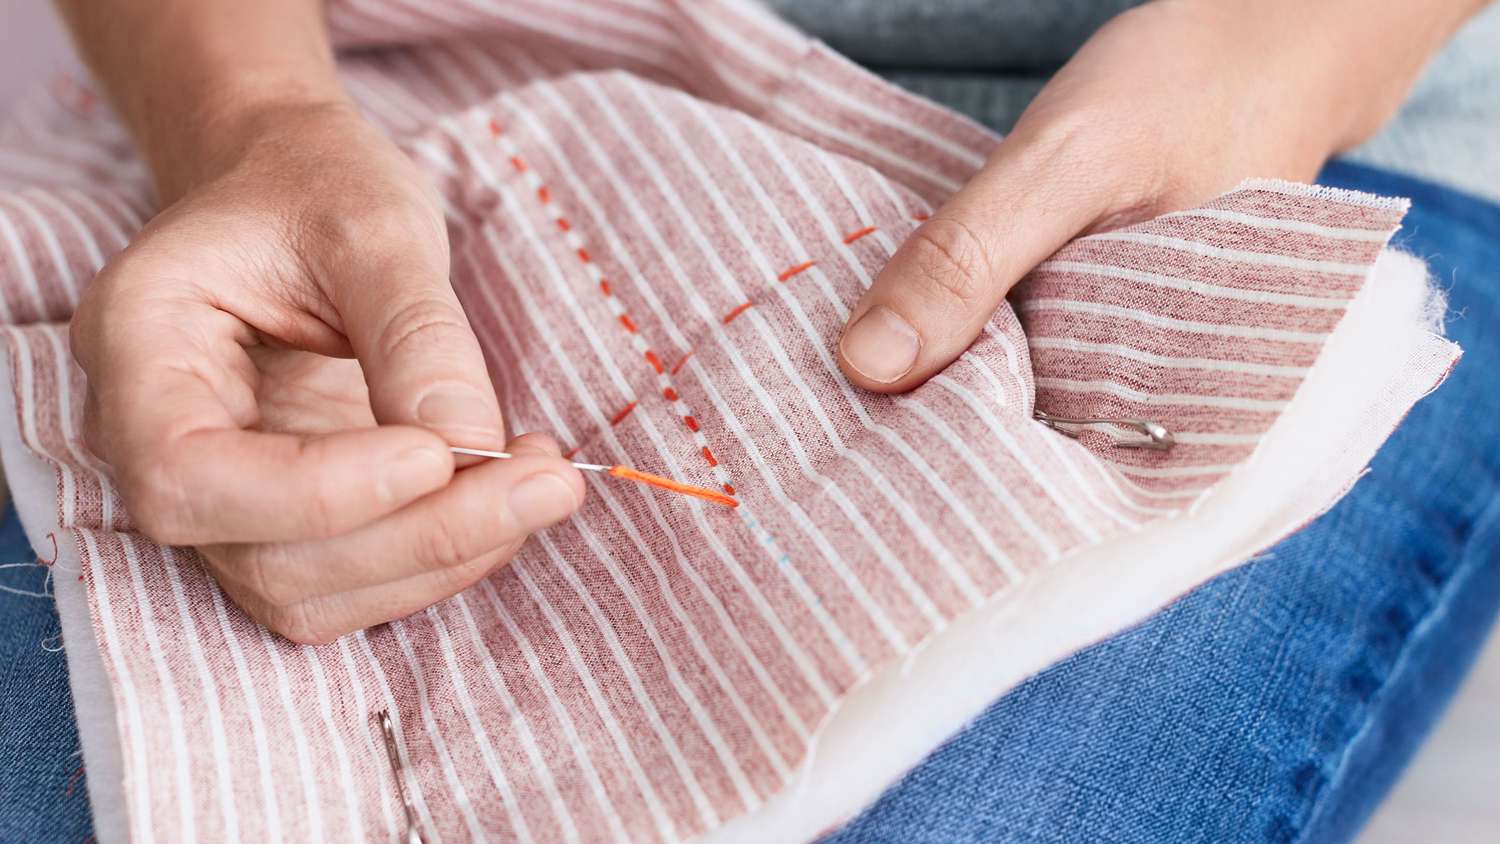
- Now, it’s time to quilt! You can choose from various quilting techniques, such as hand quilting or machine quilting. Select a quilting pattern that complements the design of your Lone Star quilt.
- If hand quilting, choose a quilting needle and thimble that are comfortable for you to use. Use a quilting thread that matches or complements the colors of your quilt.
- If machine quilting, attach the quilting foot to your sewing machine and select your desired stitch pattern. Practice on scrap fabric beforehand to ensure the tension and stitch length are appropriate.
- Start quilting in the center of your quilt and work your way towards the edges, following the quilting pattern you have chosen. Take your time and quilt slowly to ensure even stitching.
Quilting the layers of your Lone Star quilt requires patience and attention to detail. It’s a labor of love that adds beauty and stability to your quilt.
Once you have finished quilting, carefully remove the pins and give your quilt a final press. It’s now time to move on to the next step: binding the quilt.
Step 6: Binding the Quilt
Binding is the final step in completing your Lone Star quilt. It encloses the raw edges of the quilt and gives it a finished look. Follow these steps to bind your quilt:
- Cut fabric strips for binding, ensuring they are wide enough to cover the raw edges of your quilt. The length of the strips will depend on the perimeter of your quilt.
- Join the binding strips together by sewing them at a 45-degree angle to create a continuous binding strip. Press the seams open.
- Starting in the middle of one side of the quilt, align the raw edges of the binding strip with the raw edges of the quilt top. Leave a small tail of binding to overlap at the starting point.
- Using a quarter-inch seam allowance, sew the binding strip to the quilt top, stopping a quarter-inch away from the corner.
- Fold the binding strip up at a 45-degree angle, then fold it back down, aligning the fold with the next edge of the quilt. This creates a mitered corner.
- Continue sewing the binding strip to the quilt, repeating the mitered corner fold at each corner and overlapping the binding at the starting point. Stop sewing a few inches before reaching the starting point.
- Trim off any excess binding, leaving a small tail to tuck inside.
- Tuck the ending tail of the binding inside the starting point and fold the binding strip over. Use pins or clips to hold the folded edge in place.
- Hand sew the binding down using a blind stitch or use your sewing machine to topstitch along the edge of the binding, securing the folded edges.
Binding can be a time-consuming process, but it adds the final touch to your Lone Star quilt. Take your time and be meticulous in ensuring that the binding is neatly attached and secure.
Once you have finished binding your quilt, stand back and admire your completed masterpiece. The Lone Star pattern, the carefully pieced fabric, and the binding all come together to create a quilt that showcases your creativity and quilting skills.
Now that your Lone Star quilt is bound, it’s time for the final step: putting on the finishing touches.
Step 7: Finishing Touches
With your Lone Star quilt bound, you’re almost done! Now it’s time to add the finishing touches to complete your quilt. Here are some final steps to consider:
- Trim any excess batting or backing fabric that may extend beyond the quilt top and binding, ensuring that all layers are even.
- Inspect your quilt for loose threads or any areas that may need reinforcement. Use a needle and thread to secure any loose ends or make necessary repairs.
- Gently press your finished Lone Star quilt to give it a clean and crisp appearance. Be mindful of the heat settings for your fabric to avoid any damage.
- Consider adding a personalized label to your quilt. You can include your name, the completion date, and any other special details that you’d like to commemorate.
- Give your quilt a final once-over to ensure that it’s clean and free of any marks or debris. You want your quilt to look its best when it’s displayed or gifted.
Once you’ve completed these finishing touches, your Lone Star quilt is officially complete! Take a moment to appreciate the time, effort, and creativity that went into making this beautiful quilt.
Whether you plan to keep the quilt for yourself, gift it to a loved one, or even enter it into a quilt show, your Lone Star quilt will surely be cherished and admired for years to come.
Congratulations on completing your Lone Star quilt-making journey! Enjoy the satisfaction of creating a unique and stunning quilt that showcases your quilting skills and creativity.
And remember, this is just the beginning of your quilting adventures. There are endless possibilities and patterns to explore, so have fun and continue to let your creativity soar!
Happy quilting!
Read more: How To Make A Friendship Star Quilt Block
Conclusion
Creating a Lone Star quilt is a labor of love that results in a beautiful and striking piece of art. From cutting the fabric to piecing the Lone Star pattern, adding borders, quilting the layers, binding, and adding the finishing touches, each step of the process involves patience, precision, and creativity.
Throughout your Lone Star quilt-making journey, you’ve honed your skills and expressed your creative vision. The stunning star-shaped pattern, surrounded by carefully chosen fabrics and borders, has come together to form a quilt that is uniquely yours.
Quilting is more than just a craft – it’s a way to channel your creativity, relax, and connect with the quilting community. Whether you’re creating Lone Star quilts as a hobby, personal gift, or for sale, your quilting journey continues to evolve and grow with each project.
As you embark on future quilting endeavors, don’t be afraid to experiment with different colors, patterns, and quilting techniques. Each quilt you create tells a story and allows you to leave your mark on the world of quilting.
The Lone Star quilt will always hold a special place in the quilting world, captivating enthusiasts with its intricate design and timeless appeal. By following the steps outlined in this article and infusing your own creativity, you’ll be able to create a Lone Star quilt that is truly one-of-a-kind.
So, gather your materials, sharpen your sewing skills, and embark on the journey of creating your own stunning Lone Star quilt. Enjoy the process, relish in the satisfaction of completing each step, and bask in the joy of the finished quilt that reflects your dedication and talent.
Happy quilting!
Frequently Asked Questions about How Do You Make A Lone Star Quilt
Was this page helpful?
At Storables.com, we guarantee accurate and reliable information. Our content, validated by Expert Board Contributors, is crafted following stringent Editorial Policies. We're committed to providing you with well-researched, expert-backed insights for all your informational needs.


0 thoughts on “How Do You Make A Lone Star Quilt”