Articles
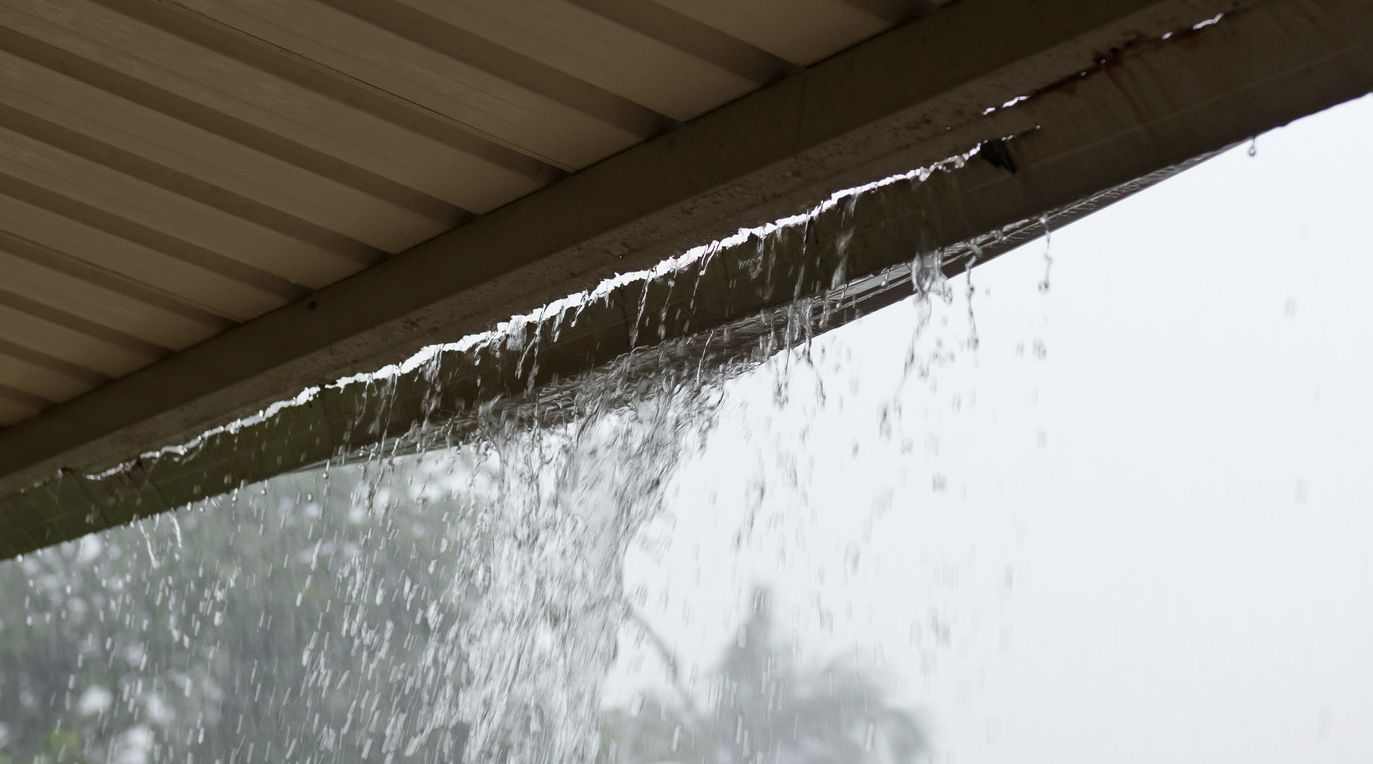
Why Are My Gutters Dripping
Modified: April 22, 2024
Discover the reasons behind your dripping gutters in this informative articles. Find expert tips and solutions to fix the issue and protect your home from water damage.
(Many of the links in this article redirect to a specific reviewed product. Your purchase of these products through affiliate links helps to generate commission for Storables.com, at no extra cost. Learn more)
Introduction
Gutters play a vital role in maintaining the integrity of your home. They collect and channel rainwater away from the roof, protecting the foundation and preventing water damage to the exterior of the house. However, if you notice that your gutters are consistently dripping, it could indicate a problem that needs to be addressed.
In this article, we will explore the common causes of dripping gutters and the potential effects of this issue. We will also provide practical tips on how to prevent and resolve dripping gutters, helping you maintain a functional and reliable gutter system for your home.
So, let’s dive into the world of gutters and discover why they may be dripping.
Key Takeaways:
- Regular gutter cleaning and maintenance are essential to prevent clogs, maintain proper water flow, and minimize the risk of water damage to your home.
- Proper downspout placement and regular gutter maintenance are equally important in ensuring effective water drainage and preventing water pooling near the foundation.
Read more: How To Stop Dripping Sound In Gutters
Understanding Gutters
Gutters are an essential component of the roofing system. They are typically made of metal, such as aluminum or steel, and are installed along the edge of the roofline. The primary function of gutters is to collect rainwater that flows off the roof and direct it away from the foundation of the house.
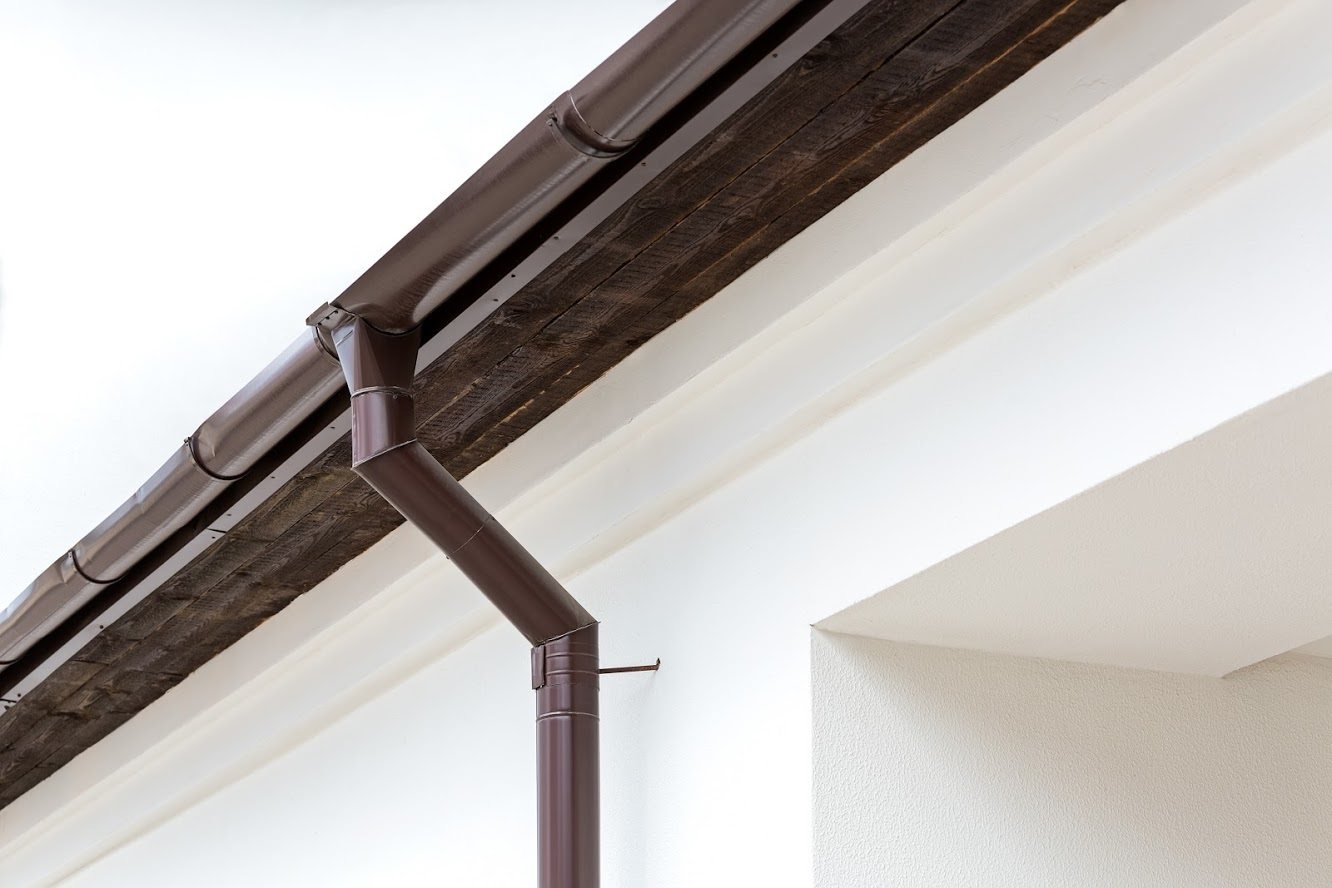
A gutter system typically consists of several components, including gutter channels, downspouts, and gutter guards. Gutter channels are the long, narrow troughs that run horizontally along the roofline. They collect rainwater and guide it towards the downspouts, which are vertical pipes that channel the water down to the ground level.
Gutter guards, also known as gutter screens or covers, are optional accessories that are designed to prevent debris such as leaves, twigs, and other debris from clogging the gutter channels. They help to maintain the flow of water and reduce the need for frequent gutter cleaning.
Properly functioning gutters are crucial for protecting your home from water damage. When rainwater is left to accumulate on the roof or pool around the foundation, it can lead to a range of problems, including roof leaks, foundation damage, mold growth, and pest infestations.
Now that we have a basic understanding of gutters, let’s explore some of the common causes of dripping gutters and how to address them.
Common Causes of Dripping Gutters
There can be several reasons why your gutters are dripping. It’s important to identify the cause in order to effectively address the issue. Here are some common causes of dripping gutters:
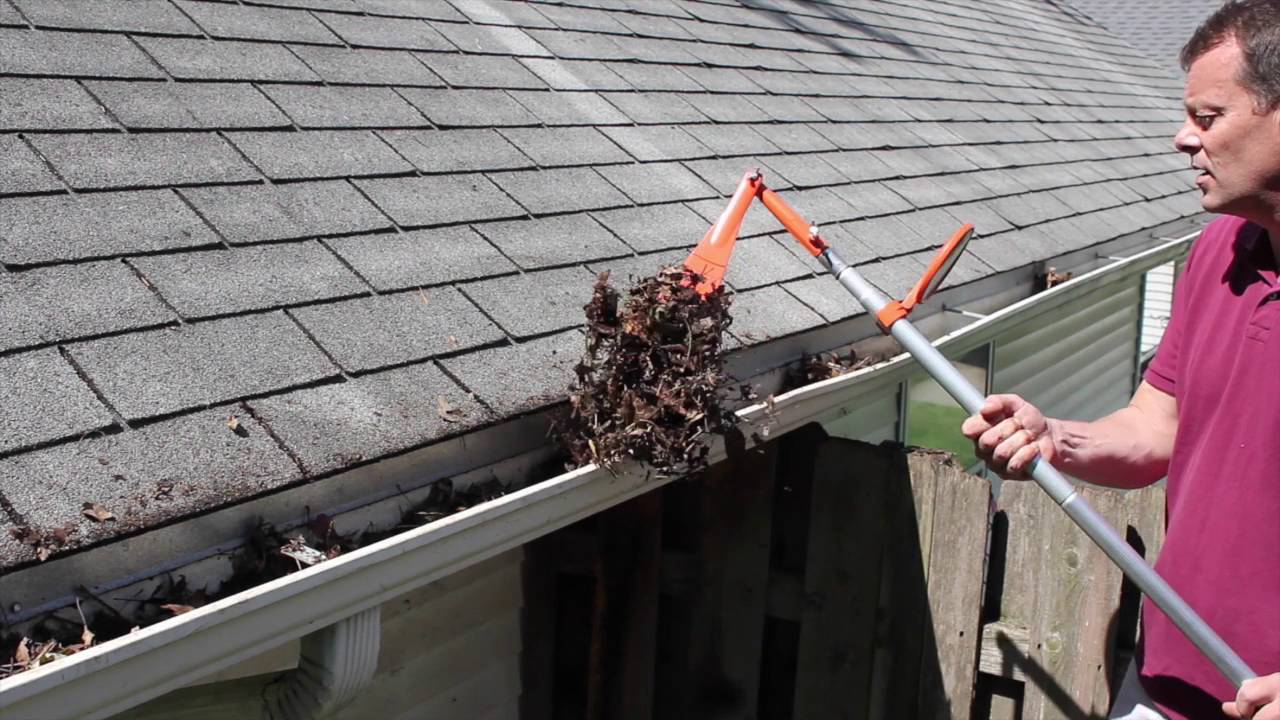
- Clogged Gutters: One of the most common reasons for dripping gutters is a build-up of debris, such as leaves, pine needles, and dirt, in the gutter channels. When the gutters are clogged, rainwater cannot flow freely, causing it to overflow and drip from the edges of the gutters. Regular gutter cleaning is essential to prevent clogs and maintain proper water flow.
- Improper Slope: Gutters should be installed with a slight slope to ensure that water flows towards the downspouts and drains away from the roof. If the gutters have an inadequate slope or if they are not properly positioned, water may accumulate and drip instead of being directed away from the house.
- Damaged or Misaligned Gutters: Over time, gutters can develop cracks, holes, or other types of damage. These issues can allow water to leak through the gutters instead of being directed down the downspouts. Additionally, gutters that are not properly aligned can result in water pooling, which can lead to dripping.
- Leaking Gutters: Metal gutters, especially older ones, can develop leaks at the seams or joints. These leaks can cause water to escape from the gutters and drip down the side of your house. Regular inspection and maintenance can help identify and address leaks promptly.
- Inadequate Downspouts: If your gutter system does not have enough downspouts or the downspouts are not positioned correctly, they may not be able to handle the volume of water flowing through the gutters. This can result in overflowing gutters and subsequent dripping.
- Overflowing Gutters: When gutters are overwhelmed by heavy rainfall or clogged with debris, they can become unable to handle the water flow effectively. As a result, water can overflow from the gutters and cause dripping.
Now that we have identified some common causes of dripping gutters, in the next sections, we will discuss the potential effects of this issue and provide practical solutions to prevent and resolve dripping gutters.
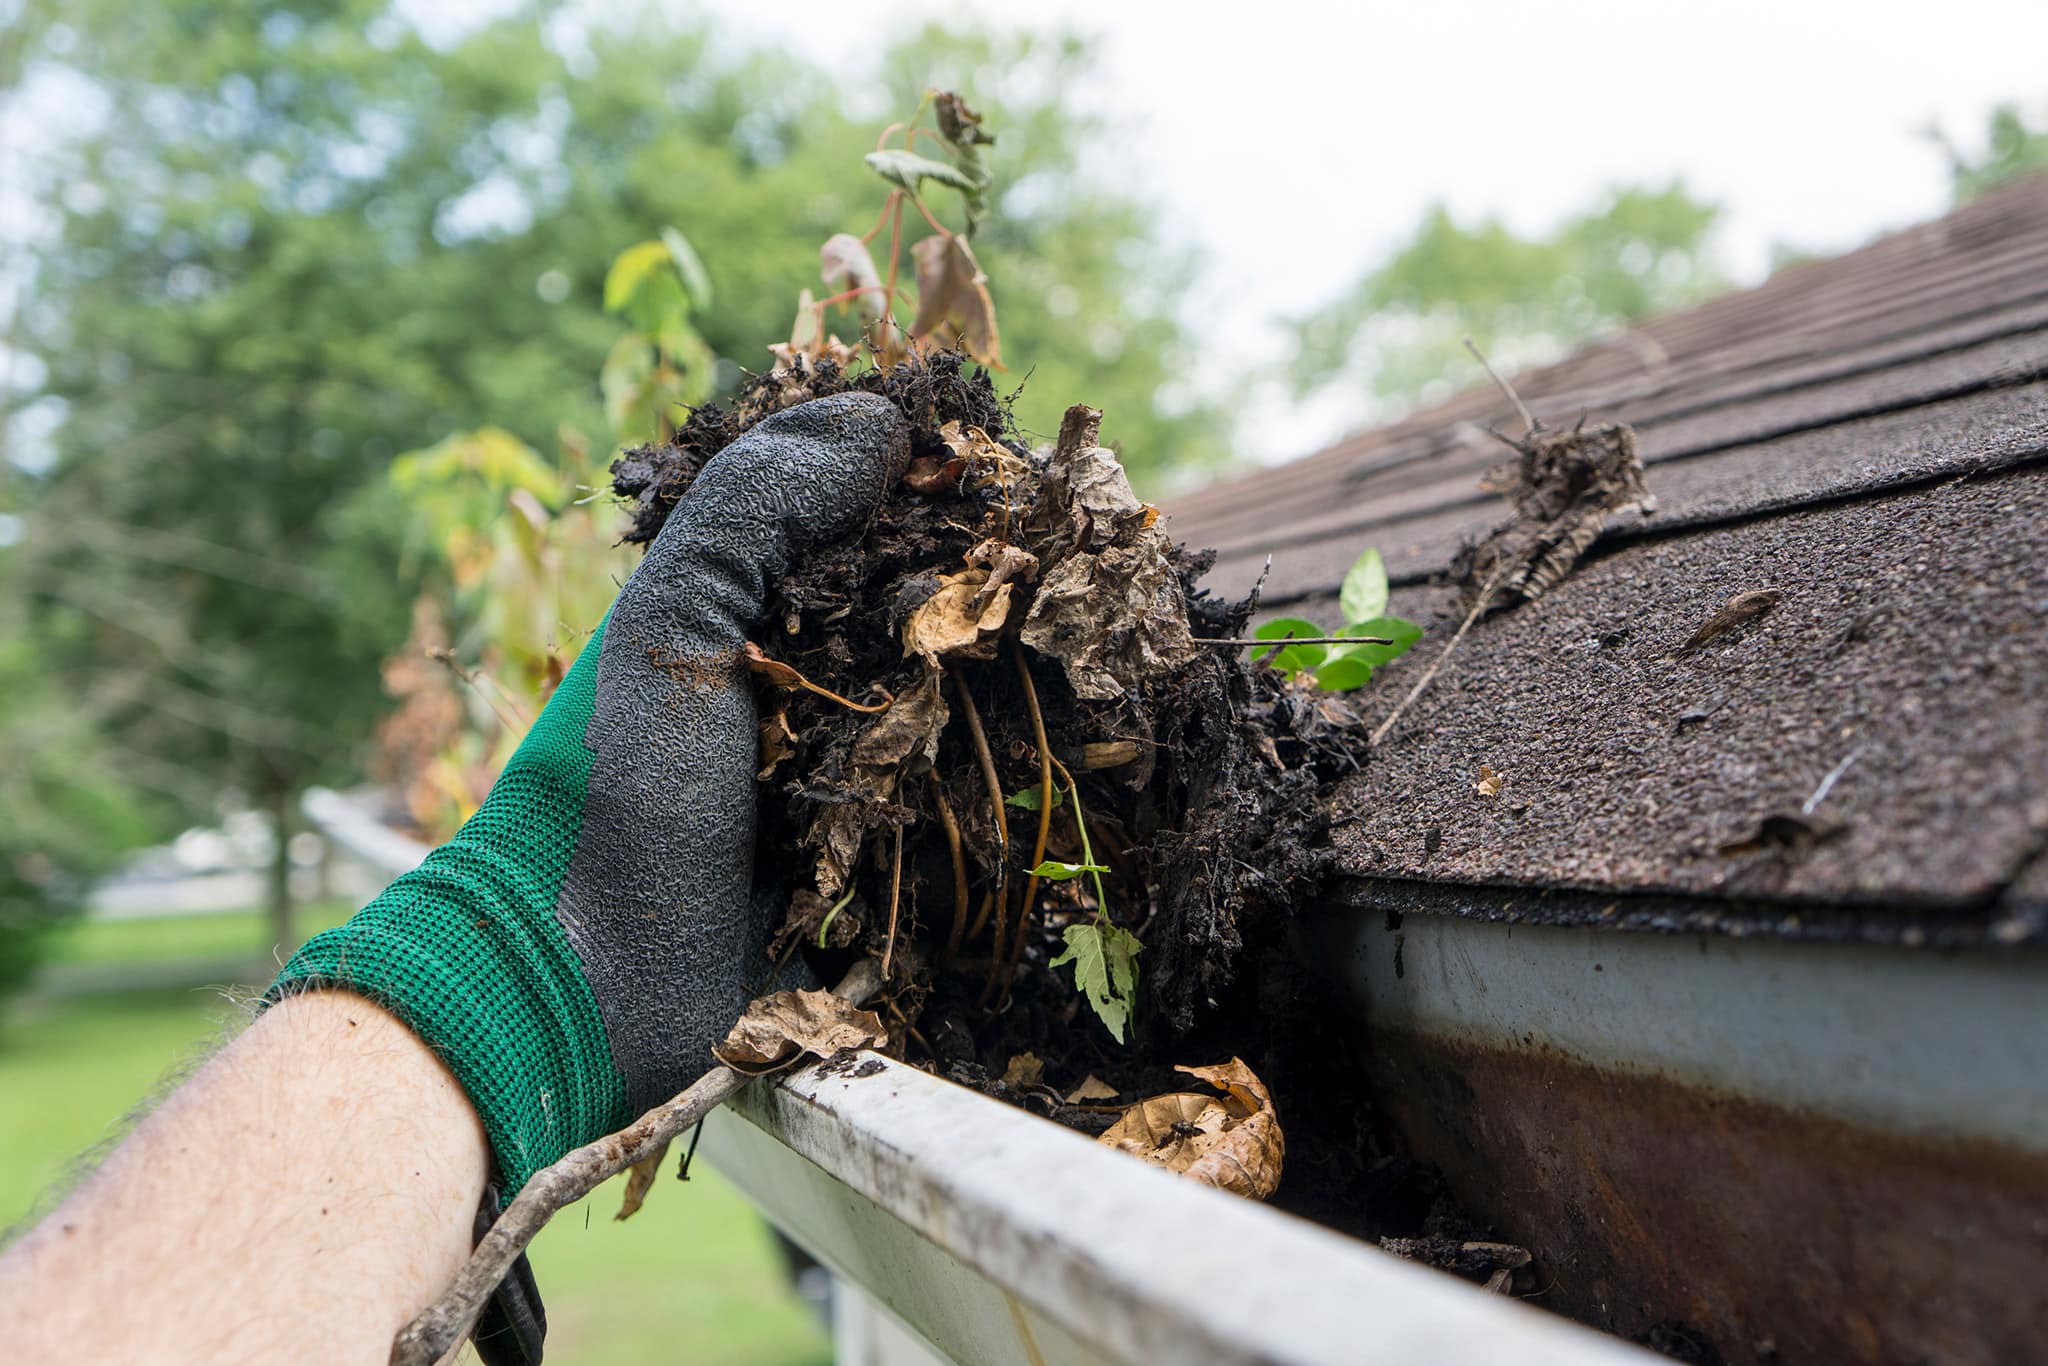
Clogged Gutters
Clogged gutters are a common culprit behind dripping gutters. When leaves, twigs, dirt, and other debris accumulate in the gutter channels, they can obstruct the flow of rainwater. This obstruction can lead to water overflowing from the gutters and dripping down the sides of your house.
Regular gutter cleaning is essential to prevent clogs and ensure proper water flow. Here are some steps to take to address clogged gutters:
- Schedule Regular Gutter Cleaning: It’s advisable to clean your gutters at least twice a year, ideally in the spring and fall. However, if your property is surrounded by trees, you may need to clean them more frequently to prevent excessive debris build-up.
- Use Protective Gear: When cleaning gutters, it’s important to wear gloves, safety goggles, and protective clothing. This will help protect you from potential hazards, such as sharp debris or pests that may be present in the gutters.
- Clear Debris: Start by removing any large debris, such as leaves and twigs, by hand or with a scoop. Place the debris in a bucket or tarp for easy disposal. Be thorough and ensure that you clear the entire gutter channel.
- Flush with Water: Once the larger debris is removed, use a garden hose to flush out any remaining dirt or smaller debris. Start from the end opposite the downspout and work your way towards it, ensuring that the water is flowing freely through the gutters.
- Inspect and Repair: While cleaning the gutters, take the opportunity to inspect them for any signs of damage, such as cracks, holes, or loose sections. Repair or replace any damaged parts accordingly to prevent future problems.
- Consider Gutter Guards: To reduce the frequency of gutter cleaning and prevent debris from entering the gutter channels, you may want to consider installing gutter guards or screens. These accessories act as a barrier, allowing water to flow through while keeping out leaves and other debris.
Regular gutter cleaning and maintenance are crucial for the proper functioning of your gutter system. By keeping your gutters clean and free from debris, you can help prevent dripping and potential water damage to your home.
Improper Slope
The slope or pitch of your gutters is an important factor in ensuring proper water flow towards the downspouts. If the gutters have an inadequate slope or if they are not properly positioned, water may accumulate and drip instead of being directed away from the house.
To address the issue of improper slope, consider the following solutions:
- Inspect the Existing Slope: Start by visually inspecting the slope of your gutters. Look for any sagging or areas where water is pooling. This can indicate that the gutters need adjustment to establish a proper slope.
- Adjust the Hangers: Gutter hangers or brackets are used to attach the gutters to the fascia board or the roofline. Check if the hangers are properly spaced and securely holding the gutters in place. If necessary, adjust the hangers to create a slight downward slope towards the downspouts.
- Install Gutter Shims: If certain sections of the gutters are not sloping correctly, you can use gutter shims to gradually increase the slope. These shims are wedges that can be placed behind the gutter, lifting it and creating a steeper angle for better water flow.
- Reposition the Gutters: In some cases, the gutters may need to be repositioned to achieve the correct slope. This may involve removing and reinstalling the gutters or adjusting the brackets to ensure they are properly aligned with the desired slope.
- Seek Professional Help: If you are unsure about adjusting the slope of your gutters or if the issue persists after attempting DIY solutions, it may be best to consult a professional gutter installer. They can assess the situation and make the necessary adjustments or repairs to ensure proper slope and water flow.
It’s important to address the issue of improper slope promptly to prevent water from pooling and dripping. Poor slope can lead to water damage to the roof, fascia, and siding of your home. By taking the necessary steps to establish a proper slope, you can ensure that rainwater is effectively channeled away from your house, reducing the likelihood of dripping gutters.
Read more: How To Install Gutters With Drip Edge
Damaged or Misaligned Gutters
Gutters that are damaged or misaligned can also be a common cause of dripping. Over time, gutters can develop cracks, holes, or other types of damage that allow water to leak through instead of being directed down the downspouts. Additionally, gutters that are not properly aligned can result in water pooling, which can lead to dripping.
To address the issue of damaged or misaligned gutters, consider the following solutions:
- Inspect for Damage: Begin by visually inspecting your gutters for signs of damage, such as cracks, holes, or rust. Take note of any sections that may be misaligned or loose.
- Repair Cracks and Holes: If you find any cracks or holes in your gutters, you can patch them up using a waterproof sealant designed for gutters. Clean the affected area thoroughly and apply the sealant according to the manufacturer’s instructions. Be sure to allow the sealant to fully cure before testing the gutter’s functionality.
- Replace Damaged Sections: In cases where the damage is extensive or cannot be repaired effectively, it may be necessary to replace the damaged sections of the gutters. Measure and purchase matching gutter materials, and carefully remove the damaged sections before installing the new ones. Ensure proper alignment and secure the gutters with hangers or brackets.
- Secure Misaligned Gutters: If the gutters are misaligned or pulling away from the fascia, use gutter hangers or brackets to secure them in their proper position. Make sure the gutters are properly aligned with the desired slope and securely attached to the fascia board.
- Consider Professional Help: If you are uncomfortable with DIY repairs or if the damage is extensive, it may be best to seek professional help. A skilled gutter installer can assess the condition of your gutters and provide comprehensive repairs or replacements as needed.
Addressing damaged or misaligned gutters is crucial in preventing further water damage to your home. By promptly repairing any cracks, holes, or misalignments, you can ensure that rainwater is directed away from your house, reducing the likelihood of dripping gutters and potential water damage to your home’s exterior and foundation.
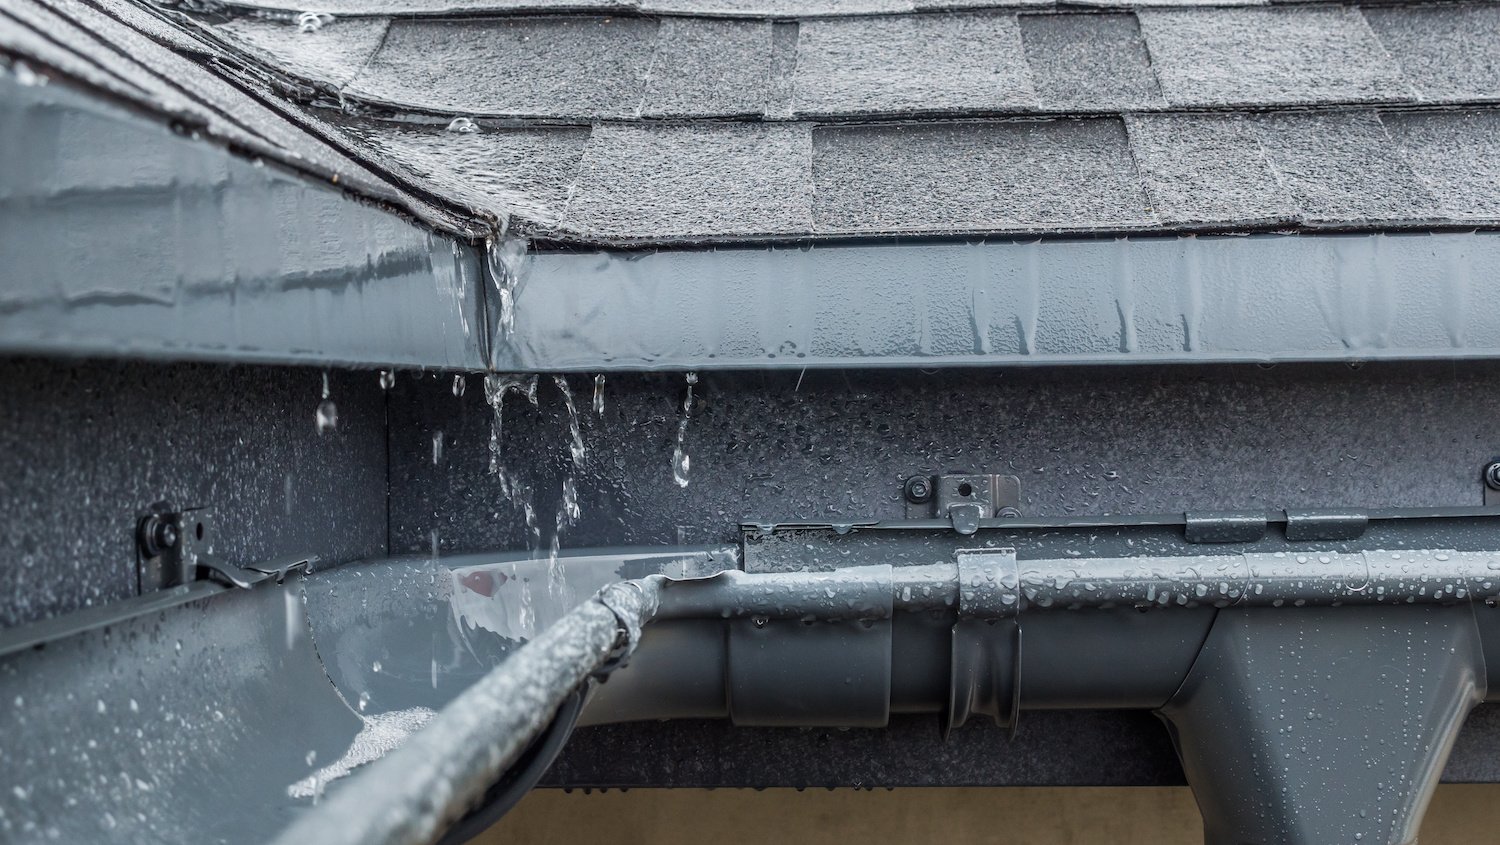
Leaking Gutters
Leaking gutters can be a frustrating problem that leads to dripping and potential water damage to your home. Metal gutters, especially older ones, can develop leaks at the seams, joints, or other weak points. These leaks allow water to escape from the gutters and drip down the side of your house.
To address the issue of leaking gutters, consider the following solutions:
- Inspect the Gutters: Start by inspecting your gutters carefully, paying close attention to the seams and joints. Look for any signs of leakage, such as water stains or dripping during rainstorms.
- Clean and Dry the Gutter: Before attempting any repairs, make sure the gutter is thoroughly cleaned and dry. Remove any debris or dirt that may be blocking the area around the leak.
- Apply Gutter Sealant: Use a gutter sealant or caulk to seal the leaks. Apply the sealant generously over the affected area, covering the seam or joint where the leak is occurring. Smooth the sealant with a putty knife or a gloved finger to ensure a watertight seal.
- Consider Patching Materials: In cases where the leak is more extensive or the sealant alone is not sufficient, you can use patching materials specifically designed for gutters. These materials, such as gutter patch kits or roofing cement, can provide a more durable and long-lasting solution. Follow the instructions provided with the patching materials for best results.
- Replace Damaged Sections: If the leaks persist or if the gutters are significantly damaged, it may be necessary to replace the affected sections. Measure the damaged area and purchase matching gutter materials. Remove the damaged section and install the new one, making sure to correctly align and secure it with the gutters’ hangers or brackets.
- Consult a Professional: If you are unsure about the best approach or if the leaks are severe, consulting a professional gutter specialist may be advisable. They have the expertise to evaluate the situation and recommend appropriate repairs or replacements.
By addressing leaking gutters promptly, you can prevent further water damage to your home. Sealant or patching repairs can help restore the integrity of the gutters, ensuring that rainwater is effectively channeled away from your house, reducing the likelihood of dripping gutters and potential water damage.
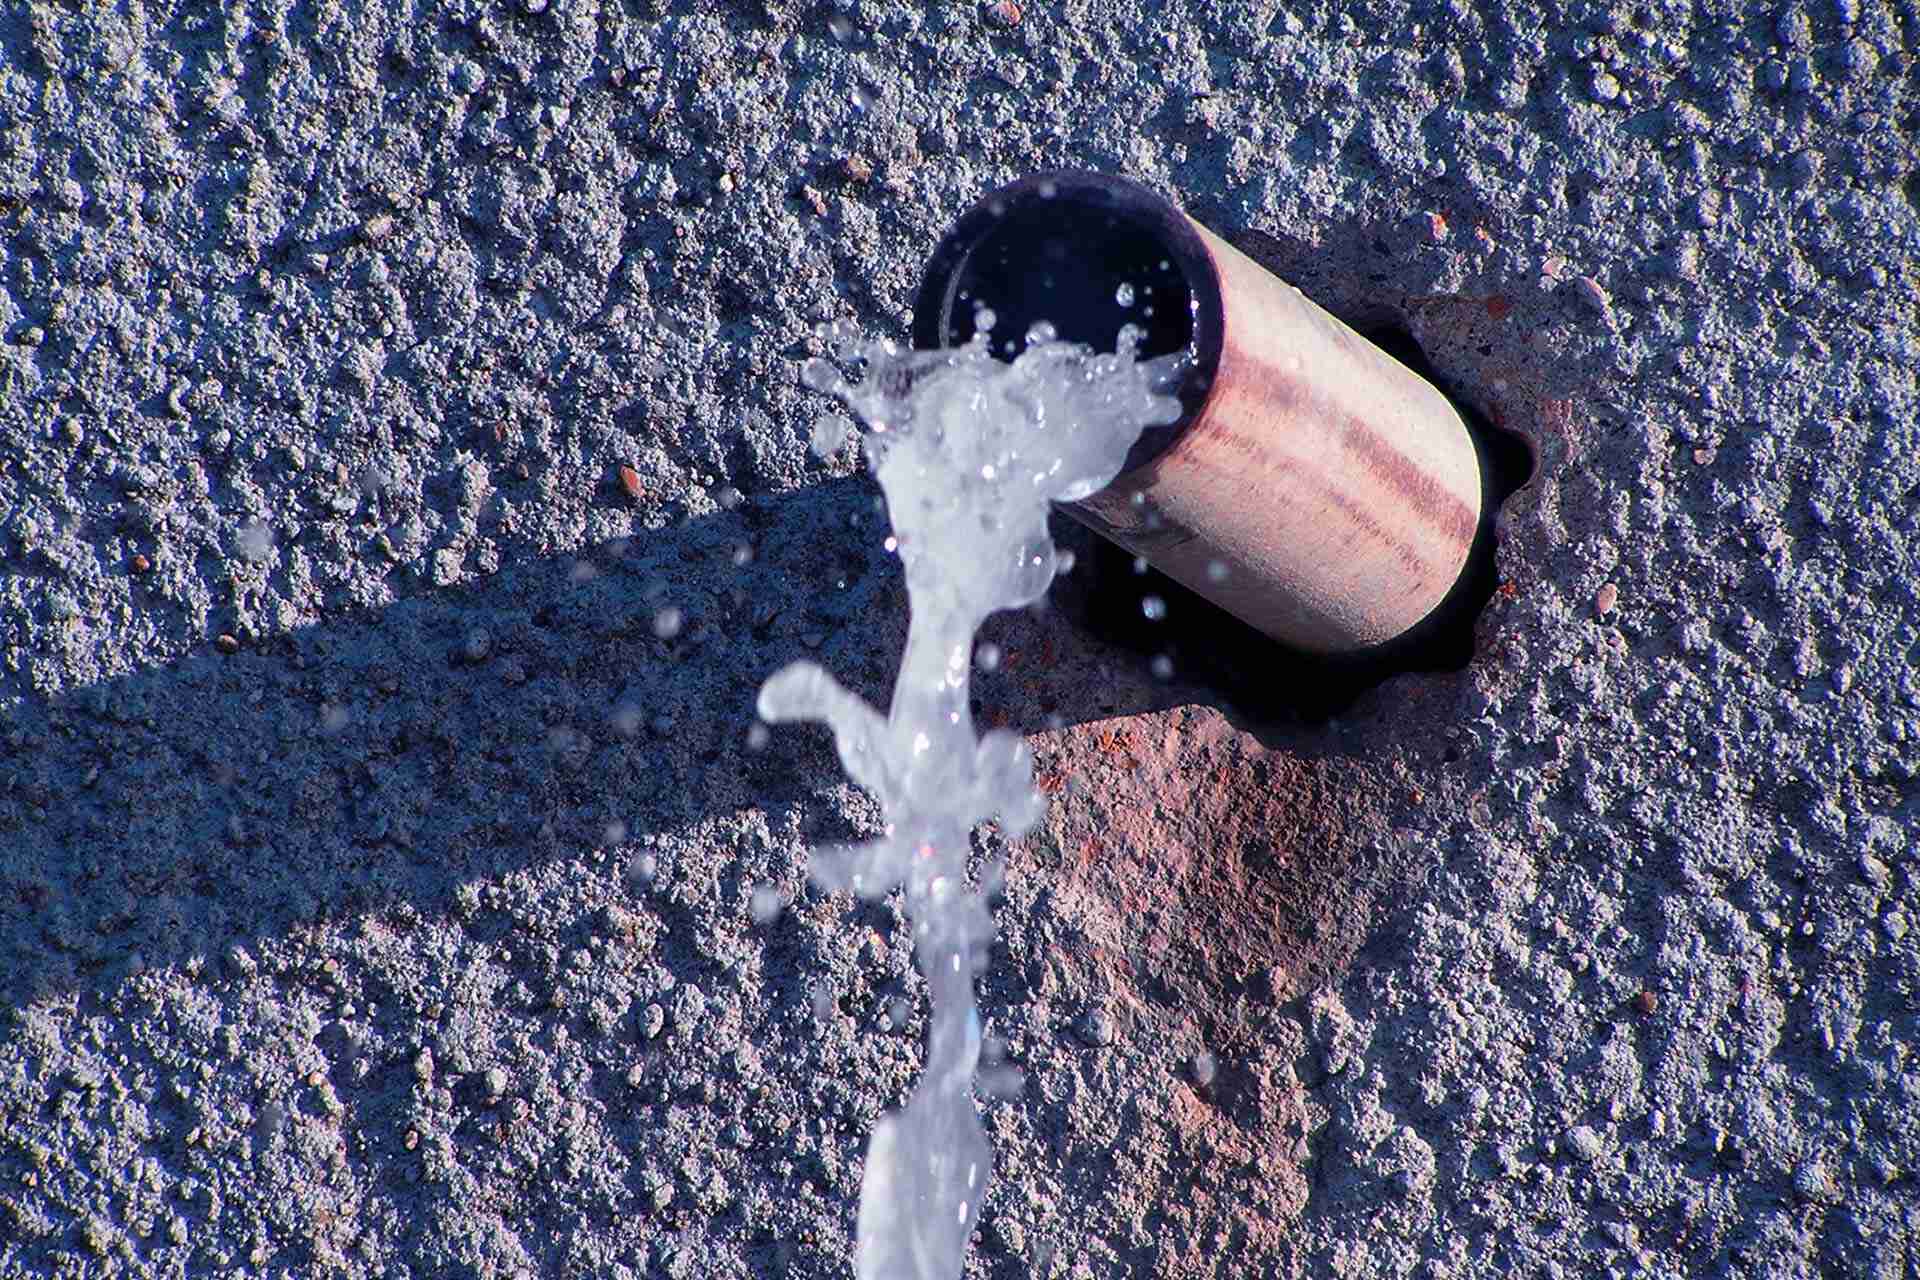
Inadequate Downspouts
Inadequate downspouts can contribute to dripping gutters. If your gutter system does not have enough downspouts, or if the existing downspouts are not positioned correctly, they may not be able to handle the volume of water flowing through the gutters. This can result in overflowing gutters and subsequent dripping.
To address the issue of inadequate downspouts, consider the following solutions:
- Evaluate the Downspout Placement: Assess the current placement of your downspouts. Check if they are evenly distributed along the gutter system or if there are areas that may be prone to overflow. Ideally, downspouts should be positioned at intervals that promote proper water flow.
- Add Additional Downspouts: If you notice areas of your gutters that regularly overflow, consider adding additional downspouts to relieve the excess water. This can help distribute the water more evenly across the gutter system and prevent overflowing and subsequent dripping.
- Direct Downspouts Away from the House: Ensure that the downspouts are extended away from your house’s foundation. Consider using downspout extensions or flexible tubing to redirect the water flow at least 3-4 feet away from the foundation. This helps prevent water from pooling near the foundation and potentially causing damage.
- Check for Clogs: Debris can accumulate in downspouts, causing them to become clogged and restricting water flow. Regularly inspect and clean the downspouts to remove any blockages. Use a plumbing snake or a hose to dislodge and flush out any debris that may be causing the clog.
- Consider Rain Chains or Collector Systems: Rain chains or collector systems can be an alternative to traditional downspouts. They can enhance the aesthetics of your home while effectively channeling water away from the gutters. Rain chains are decorative chains that replace downspouts, allowing water to flow along the chain and into a designated basin or garden area.
- Seek Professional Advice: If you are unsure about the best approach to address inadequate downspouts or if the issue persists despite your efforts, it may be beneficial to consult a professional gutter installer. They can assess the situation and recommend appropriate modifications or additions to ensure proper water flow.
By ensuring proper downspout placement and functionality, you can effectively distribute the water from your gutters and prevent dripping. Redirecting water away from the foundation helps protect your home from potential water damage and maintains the integrity of your gutter system.
Overflowing Gutters
Overflowing gutters can be a frustrating problem that leads to dripping and potential water damage to your home. When gutters are overwhelmed by heavy rainfall or clogged with debris, they can become unable to handle the water flow effectively. As a result, water can overflow from the gutters and cause dripping.
To address the issue of overflowing gutters, consider the following solutions:
- Regular Gutter Cleaning: One of the most important steps in preventing overflowing gutters is to regularly clean them. Clear out any leaves, twigs, dirt, or other debris that may have accumulated in the gutter channels. This will ensure maximum water flow and prevent clogging.
- Gutter Guards or Screens: Installing gutter guards or screens can help prevent leaves and debris from entering the gutter channels. These accessories act as a barrier while allowing water to flow freely. Gutter guards can significantly reduce the frequency of gutter cleaning and help prevent clogs that lead to overflow.
- Check for Proper Slope: Ensure that your gutters are properly sloped towards the downspouts. Verify that they have a slight angle to facilitate the smooth flow of water. Adjust or reposition the gutters if necessary to establish the correct slope.
- Inspect and Repair: Regularly inspect your gutters for any signs of damage or leaks that may be affecting their functionality. Repair or replace any damaged sections promptly to prevent water from escaping and overflowing the gutters.
- Optimize Downspouts: Ensure that your gutters have sufficient downspouts to handle the volume of water. Consider adding more downspouts if needed, especially in areas prone to overflowing. Direct the downspouts away from the house to channel water away from the foundation and prevent pooling.
- Redirect Water Flow: If overflowing persists, consider redirecting the water flow by using splash blocks or downspout extensions. These will help guide the water away from vulnerable areas and prevent it from pooling and overflowing the gutters.
- Consult a Professional: If you are unable to resolve the issue of overflowing gutters on your own or if the problem persists, it may be necessary to consult a professional gutter installer. They can evaluate your gutter system, identify the underlying cause of the overflow, and provide appropriate solutions.
By taking proactive measures to prevent overflowing gutters, you can maintain the integrity of your gutter system and protect your home from potential water damage. Regular cleaning, proper maintenance, and necessary repairs will help ensure that water flows smoothly through the gutters, reducing the likelihood of dripping and overflow.
Read more: Why Is My Range Hood Dripping Water
Effects of Dripping Gutters
Dripping gutters can have several detrimental effects on your home and property. It’s important to address this issue promptly to prevent further damage. Here are some potential effects of dripping gutters:
- Water Damage to Roof and Siding: Dripping gutters can lead to water pooling on the roof or running down the exterior walls of your house. Over time, this can cause water damage, including rotting of the roof decking, deterioration of shingles, and potential damage to the siding. It can also compromise the structural integrity of the roof and walls.
- Foundation Issues: When gutters are dripping and water is not effectively directed away from the house, it can accumulate around the foundation. This can lead to foundation damage, including cracks and shifting, as well as basement flooding. The excess moisture can weaken the foundation’s stability and compromise the structural integrity of your home.
- Mold and Mildew Growth: Excessive moisture caused by dripping gutters can create an environment conducive to mold and mildew growth. Mold and mildew thrive in damp conditions and can quickly spread throughout your home. These organisms not only cause health issues but also contribute to the degradation of building materials, leading to further damage.
- Pest Infestations: Standing water caused by dripping gutters attracts pests, such as mosquitoes, termites, and rodents. These pests can enter your home and cause damage to various areas, including the roof, attic, and walls. Additionally, moisture provides an inviting habitat for pests, exacerbating the problem.
Addressing and resolving dripping gutters is crucial to prevent these negative effects. Regular maintenance and necessary repairs will help maintain the integrity of your home and protect it from the damaging consequences of dripping gutters.
Water Damage to Roof and Siding
One of the primary effects of dripping gutters is water damage to the roof and siding of your home. When gutters are not functioning properly and water overflows or escapes from the gutters, it can lead to significant damage over time. Here are some ways in which dripping gutters can cause water damage to your roof and siding:
- Roof Decking Rot: Water pooling on the roof due to dripping gutters can penetrate the roof’s surface and seep into the underlying decking. Over time, this accumulated moisture can cause the decking to rot and weaken. If left untreated, it can compromise the structural integrity of the roof, leading to leaks and costly repairs.
- Deterioration of Shingles: Water dripping down the side of the house from clogged or damaged gutters can cause shingles to deteriorate. As the water flows over the shingles, it can loosen the protective granules and weaken their adhesive properties. This can result in damaged or missing shingles, leaving the roof vulnerable to leaks and further water damage.
- Siding Damage: Dripping gutters can also cause water to flow down the exterior walls of your home, leading to damage to the siding materials. Water can seep behind the siding and cause it to warp, rot, or become discolored. This not only affects the appearance of your home but can also compromise the structural integrity of the siding, requiring costly repairs or replacement.
- Paint and Stain Damage: If water continuously drips down the exterior walls, it can cause damage to paint or stains applied to the surfaces. The moisture can cause peeling, blistering, or discoloration, requiring repainting or refinishing to maintain the aesthetics of your home.
- Structural Damage: The continuous exposure to water from dripping gutters can weaken the structural components of your home. Moisture can seep into the framework, causing wood to swell, warp, or decay. This can compromise the overall stability and safety of your home’s structure.
Water damage to the roof and siding is a serious concern that should not be ignored. It is imperative to address any issues with your gutters promptly to prevent further damage. Regular gutter maintenance, cleaning, and necessary repairs are essential in maintaining the integrity of your home’s exterior and preventing costly repairs in the long run.
Make sure your gutters are clean and free of debris to allow proper water flow. Check for any leaks or holes and repair them promptly to prevent dripping. Regular maintenance can help prevent gutter issues.
Foundation Issues
Dripping gutters can have a significant impact on the foundation of your home. When gutters fail to effectively channel water away from the house, it can accumulate around the foundation and cause several potential problems. Here are some foundation issues that can result from dripping gutters:
- Excess Moisture: Dripping gutters can lead to the pooling of water around the foundation. Excess moisture can saturate the soil, causing it to expand. As the soil expands and contracts repeatedly, it puts pressure on the foundation walls, leading to cracks and shifting.
- Foundation Cracks: Over time, the constant exposure to water due to dripping gutters can weaken the foundation walls. This can result in the formation of cracks, which can allow water to further penetrate the foundation and potentially lead to basement flooding or structural instability.
- Uneven Foundation Settlement: The uneven distribution of water caused by overflowing gutters can result in uneven settlement of the foundation. This can lead to a sinking or shifting of the foundation, causing structural damage throughout the house. Signs of uneven settlement include uneven floors, cracks in walls or ceilings, and doors or windows that no longer close properly.
- Basement Flooding: When water is not effectively directed away from the house due to dripping gutters, it can seep into the basement or crawl space. This can lead to dampness, mold growth, and even full-fledged flooding, causing extensive damage to the foundation and valuables stored in the basement.
- Compromised Structural Integrity: The long-term impact of foundation issues caused by dripping gutters can compromise the structural integrity of your entire home. If left unresolved, it can lead to costly repairs and, in severe cases, can even result in the collapse of the foundation.
Protecting the foundation of your home is of utmost importance. To prevent foundation issues due to dripping gutters, regular gutter maintenance and repairs are essential. Ensure your gutters are properly sloped, clean, and functioning effectively. Redirect water away from the foundation using downspout extensions or splash blocks. By addressing dripping gutters promptly, you can safeguard your foundation and preserve the stability of your home.
Mold and Mildew Growth
Dripping gutters create a moist environment that promotes the growth of mold and mildew. When gutters are clogged, damaged, or overflowing, water can accumulate around the house, providing the perfect conditions for mold and mildew to thrive. Here are the potential consequences of mold and mildew growth due to dripping gutters:
- Health Concerns: Mold and mildew can negatively impact indoor air quality, leading to various health issues. Breathing in mold spores can trigger allergic reactions, respiratory problems, and irritate the throat, nose, and eyes. Individuals with pre-existing respiratory conditions or weakened immune systems are particularly susceptible to these health risks.
- Structural Damage: Mold and mildew can gradually deteriorate building materials such as wood, drywall, and insulation when left untreated. Over time, this can weaken the structural integrity of your home’s walls, floors, and ceilings. Structural repairs can be costly and time-consuming, making mold prevention essential.
- Unpleasant Odors: Mold and mildew growth often comes with a distinct musty odor that can permeate throughout your home. These unpleasant smells can be difficult to eliminate and may require professional remediation to fully eliminate the source.
- Visible Stains and Discoloration: Mold and mildew can cause unsightly stains and discoloration on walls, ceilings, and other surfaces. These stains can be difficult to remove and may require repainting or replacement of affected materials for a fresh and clean appearance.
- Spread of Spores: Mold spores can be carried through the air and spread to other areas of your home. This can lead to widespread mold growth if left unchecked. Containing the growth and addressing the moisture source in the form of dripping gutters is essential to prevent further contamination.
- Indoor Environmental Quality: Mold and mildew growth can significantly affect the overall indoor environment. The presence of mold can create a damp and unhealthy atmosphere, impacting the comfort and enjoyment of your living spaces. Removing the source of moisture, such as fixing dripping gutters, is essential for maintaining a healthy indoor environment.
To prevent mold and mildew growth due to dripping gutters, it is crucial to address any issues promptly. Regular maintenance, including cleaning out gutters, repairing leaks, and ensuring proper water flow, will help prevent water accumulation and the subsequent growth of mold and mildew. By taking these preventive measures, you can protect your home, preserve indoor air quality, and maintain a healthy living environment for you and your family.
Read more: Why Does My Rain Showerhead Drip
Pest Infestations
Dripping gutters can create an inviting environment for pests, leading to potential infestations in and around your home. When gutters are clogged or damaged, they can hold stagnant water, providing a breeding ground for mosquitoes and other insects. Additionally, the excess moisture can attract pests such as termites, ants, and rodents. Here are the potential consequences of pest infestations caused by dripping gutters:
- Mosquito Breeding: Stagnant water in clogged gutters can become a prime breeding ground for mosquitoes. Mosquitoes pose health risks as they can transmit diseases such as West Nile virus, Zika virus, and dengue fever. Preventing their breeding by eliminating standing water is crucial for the protection of your family’s health and well-being.
- Termite Infestations: Termites are attracted to moist environments. Dripping gutters can create moisture issues that can lure termites to your home’s foundation and wood structures. These wood-destroying insects can cause significant damage, compromising the structural integrity of your home and leading to costly repairs.
- Ants and Other Insects: Excess moisture around the foundation can attract various types of ants and other insects, seeking both moisture and food sources. Ant trails can be seen marching in and out of your home, while other insects may infiltrate your indoor living spaces. This can be an annoyance and may require professional pest control services to eliminate the infestation.
- Rodent Intrusions: Standing water near the foundation can entice rodents, such as rats or mice, to seek shelter and a water source in your home. Once inside, they can cause damage by gnawing on electrical wiring, furniture, and insulation, as well as spreading diseases through their droppings. The presence of rodents in your home poses health risks and requires immediate attention for proper removal and prevention.
- Structural Damage: Pests, such as termites and carpenter ants, can cause significant structural damage to your home if left unchecked. They can chew through wood, compromising the integrity of the structure. Additionally, rodents can cause damage by tunneling and nesting in your home’s insulation and walls. Timely pest control measures and fixing the dripping gutters are necessary to prevent further damage.
- Disruption of Outdoor Spaces: Pests attracted by dripping gutters can also disrupt your outdoor living spaces. Mosquitoes can make it difficult to enjoy your yard, and ants can take over patios and other outdoor areas. Taking preventative measures to eliminate the moisture source will help maintain a pest-free environment and allow you to make the most of your outdoor spaces.
To prevent pest infestations caused by dripping gutters, ensure that your gutters are clean, well-maintained, and free of standing water. Regular gutter cleaning, repairs, and the elimination of any stagnant water will help deter pests from invading your home. If infestations persist, it is advisable to consult with a professional pest control service to effectively address the issue.
Preventing Dripping Gutters
To maintain a functional and reliable gutter system, it is important to take preventative measures to prevent dripping gutters. By addressing potential issues and implementing regular maintenance practices, you can ensure the proper functioning of your gutters. Here are some tips to help prevent dripping gutters:
- Regular Gutter Cleaning and Maintenance: Perform regular gutter cleaning at least twice a year, or more frequently if needed, to remove leaves, twigs, and debris that can cause clogs. Additionally, inspect your gutters for damage and signs of wear, such as cracks or loose sections, and repair or replace any damaged components.
- Installing Gutter Guards or Screens: Consider installing gutter guards or screens to prevent debris from entering the gutter channels. These accessories act as a barrier, allowing water to flow through while keeping out leaves and other debris. Gutter guards can significantly reduce the need for frequent gutter cleaning and help maintain unobstructed water flow.
- Correcting Improper Slope: Ensure that your gutters have the correct slope to promote proper water flow. If needed, adjust the gutter hangers or install gutter shims to establish a slight downward slope towards the downspouts. This will prevent water from pooling and reduce the likelihood of dripping gutters.
- Repairing or Replacing Damaged Gutters: Regularly inspect your gutters for any signs of damage, such as cracks, holes, or loose sections. Promptly repair or replace damaged components to ensure the integrity of your gutter system. This will prevent water from escaping and causing dripping.
- Ensuring Proper Downspout Placement: Check the placement and number of downspouts in your gutter system. Ensure that they are positioned evenly and directed away from the foundation. Adequate downspouts will help handle the volume of water and minimize the risk of overflowing gutters and subsequent dripping.
By proactively maintaining and addressing issues with your gutters, you can prevent dripping gutters and the potential damage they can cause to your home. Regular gutter cleaning, installing gutter guards, correcting the slope, repairing or replacing damaged gutters, and ensuring proper downspout placement will help maintain a functional gutter system and protect your home from water damage.
Regular Gutter Cleaning and Maintenance
Regular gutter cleaning and maintenance are crucial for preventing dripping gutters and ensuring the proper functioning of your gutter system. By keeping your gutters clean and free from debris, you can maintain unobstructed water flow and minimize the risk of water damage to your home. Here are some essential steps to follow for regular gutter cleaning and maintenance:
- Schedule Regular Cleaning: Plan to clean your gutters at least twice a year, ideally in the spring and fall. However, if your property is surrounded by trees or experiences heavy rainfall, more frequent cleaning may be necessary to prevent excessive debris buildup.
- Gather the Necessary Tools: Before you begin, gather the tools you will need for gutter cleaning. This may include safety goggles, gloves, a sturdy ladder, a scoop or trowel, a bucket or tarp for collecting debris, and a garden hose for flushing out the gutters.
- Ensure Safety: Safety should be a top priority when cleaning gutters. Use a sturdy ladder on a level surface, ensuring it is secure before climbing. Wear appropriate safety gear such as gloves and safety goggles to protect your hands and eyes from debris.
- Remove Debris: Carefully remove any large debris, such as leaves, twigs, and dirt, from the gutters. Use a scoop or trowel to collect the debris and place it in a bucket or tarp for easy disposal.
- Flush with Water: Once the larger debris is cleared, use a garden hose to flush out the gutters. Start from the end opposite the downspout and work your way toward it, ensuring that the water is flowing freely through the gutters. This will help remove any remaining dirt or smaller debris.
- Inspect for Damage: While cleaning the gutters, take the opportunity to inspect them for any signs of damage, such as cracks, holes, or loose sections. Pay attention to the joints, seams, and connections. Repair or replace any damaged components as necessary to maintain the integrity of your gutter system.
- Clean Downspouts: Don’t forget to check and clean the downspouts to ensure proper water flow. Remove any debris or blockages that may hinder the flow of water. A plumbing snake or a hose can help dislodge and flush out any stubborn clogs.
- Consider Gutter Guards or Screens: To reduce the frequency of gutter cleaning and minimize debris buildup, you may want to install gutter guards or screens. These accessories act as a barrier, allowing water to flow while keeping out leaves and other debris. Regularly inspect and clean the gutter guards to ensure they are functioning effectively.
Regular gutter cleaning and maintenance are essential to prevent clogs, maintain proper water flow, and minimize the risk of dripping gutters. By staying on top of gutter maintenance, you can protect your home from water damage, extend the lifespan of your gutter system, and ensure the overall well-being of your property.
Installing Gutter Guards or Screens
Gutter guards or screens are effective tools for preventing debris buildup and reducing the frequency of gutter cleaning. These accessories act as a barrier, allowing water to flow through while keeping out leaves, twigs, and other debris. Installing gutter guards or screens can make maintaining your gutter system easier and help prevent dripping gutters. Here’s a step-by-step guide on how to install gutter guards or screens:
- Measure Your Gutters: Start by measuring the length of your gutters. This will help you determine the length and quantity of gutter guards or screens needed. It’s essential to choose the correct size that matches the dimensions of your gutters.
- Clean Your Gutters: Before installing gutter guards or screens, it’s important to clean your gutters thoroughly. Remove any leaves, twigs, and other debris from the gutter channels to ensure unobstructed water flow.
- Preparation: Ensure you have all the necessary tools and materials, including gutter guards or screens, screws or clips, a tape measure, and a drill. Follow the manufacturer’s instructions for the specific gutter guards or screens you’ve chosen.
- Positioning the Gutter Guards or Screens: Begin at one end of the gutter. Position the gutter guard or screen inside the gutter, ensuring that it rests securely against the back wall of the channel. Make sure it extends over the front lip of the gutter.
- Securing the Gutter Guards or Screens: Use screws or clips to secure the gutter guard or screen in place. Follow the recommended spacing provided by the manufacturer to ensure proper installation. Continue to attach the guards or screens along the length of the gutter, making sure they are aligned and tightly secured.
- Overlap and Connect: If your gutter length requires multiple sections of gutter guards or screens, overlap them slightly to prevent gaps where debris can enter. Use connectors provided by the manufacturer to join the sections securely.
- Test and Make Adjustments: Once the gutter guards or screens are installed, test their effectiveness by pouring water into the gutters. Ensure that the water flows freely through the guards or screens and into the downspouts. Make any necessary adjustments or tighten the screws/clips as needed.
- Regular Maintenance: Although gutter guards or screens can significantly reduce debris buildup, it’s important to perform routine maintenance. Inspect the guards/screens regularly to ensure proper functionality and remove any smaller debris that may have accumulated on the surface.
Installing gutter guards or screens can save you time and effort in gutter maintenance. They help prevent clogs, reduce the risk of dripping gutters, and extend the lifespan of your gutter system. However, it’s essential to choose high-quality gutter guards or screens and follow the manufacturer’s instructions for proper installation and maintenance.
Read more: Why Are Icicles Forming On My Gutters
Correcting Improper Slope
Proper slope is essential for ensuring that water flows smoothly through your gutters and away from your home. If your gutters have an improper slope, it can lead to water pooling, overflowing, and eventually dripping gutters. Correcting the slope of your gutters is important to prevent these issues. Here’s a step-by-step guide on how to correct an improper slope:
- Assess the Current Slope: Start by visually inspecting your gutters to determine if they have the correct slope. Look for areas where water may be pooling or where the gutters appear relatively flat. It’s important to identify the sections that need adjustment.
- Adjust the Hangers: The first step in correcting the slope is to adjust the gutter hangers or brackets. These are the components that hold the gutters in place. Using a screwdriver or wrench, loosen the hangers that need adjustment. Raise or lower the hangers as necessary to achieve the desired slope towards the downspouts.
- Check for Proper Alignment: Check the alignment of the gutters to ensure they are straight and aligned with each other. Use a level to verify that the gutters are not sagging or tilting in any areas. Adjust the hangers accordingly to ensure proper alignment and to maintain a consistent slope.
- Install Gutter Shims: If certain sections of the gutters are not sloping correctly, you can use gutter shims to gradually increase the slope. Gutter shims are small wedges that can be placed behind the gutters, lifting them and creating a steeper angle for better water flow. Use a shim between the hanger and the gutter to adjust the slope as needed.
- Reposition the Gutters: In some cases, repositioning the gutters may be necessary to correct the slope. This can involve removing and reinstalling the gutters or adjusting the brackets to ensure they are properly aligned with the desired slope. Carefully detach the gutters from the hangers or brackets and reposition them to establish the correct slope.
- Test the Water Flow: Once you have made the necessary adjustments, test the water flow through the gutters. Pour water into the gutters or use a hose to simulate rainfall. Observe how the water flows and ensure that it is properly directed towards the downspouts without any pooling or overflowing. Make further adjustments if needed.
Correcting the improper slope of your gutters is essential to maintain proper water flow and prevent dripping gutters. Adequate slope ensures that rainwater is effectively channeled away from your home, preventing water damage to your roof, siding, and foundation. Regularly inspect your gutters and make any necessary adjustments to ensure they are functioning optimally.
Repairing or Replacing Damaged Gutters
Over time, gutters can sustain damage from various factors such as harsh weather conditions, aging, or accidents. Damaged gutters can lead to dripping, water overflow, and potential water damage to your home. It’s important to promptly address any damage to your gutters to maintain their functionality. Here’s a step-by-step guide to repairing or replacing damaged gutters:
- Inspect the Damage: Start by thoroughly inspecting your gutters for any signs of damage, such as cracks, holes, loose sections, or rust. Pay attention to the joints, seams, and connections. Identifying the extent of the damage will help determine whether repair or replacement is necessary.
- Repair Small Cracks or Holes: For minor cracks or small holes in your gutters, you can use a waterproof sealant specifically designed for gutter repair. Clean the damaged area, removing any debris or dirt. Apply the sealant generously to cover the crack or hole, using a putty knife or gloved finger to spread it evenly. Allow the sealant to fully cure according to the manufacturer’s instructions before testing its effectiveness.
- Replace Damaged Sections: If the damage to your gutters is extensive or if repair is not a viable option, it may be necessary to replace the damaged sections. Measure the length of the damaged area and purchase matching gutter materials. Remove the damaged section carefully, ensuring not to cause further damage to the surrounding gutters. Install the new section, ensuring proper alignment and secure it with the proper hangers, screws, or clips.
- Secure Loose Sections or Connection: If your gutters have loose sections or connections, reattach them securely using the appropriate hangers or brackets. Tighten any screws or bolts that may have become loose due to wear and tear. Ensure that the gutters are correctly aligned, maintaining the proper slope for effective water flow.
- Paint or Refinish: After the repair or replacement, consider painting or refinishing the gutters to provide added protection against corrosion and improve their aesthetic appearance. Choose a high-quality paint or finishing product designed for outdoor use, and follow the manufacturer’s instructions for application.
- Regular Maintenance: Regularly inspect your gutters for any signs of damage or wear. Clean and clear them of debris to maintain their functionality and prevent future issues. Regular maintenance will help prolong the lifespan of your gutters and reduce the likelihood of further damage.
Repairing or replacing damaged gutters is vital in preventing dripping, water damage, and potential issues with your home’s foundation. Prompt attention to gutter maintenance and repairs will help protect your property from water damage and ensure the proper functioning of your gutter system.
Ensuring Proper Downspout Placement
Proper downspout placement is essential for effective water drainage and preventing dripping gutters. Downspouts play a crucial role in directing rainwater away from your home’s foundation. If the downspouts are not properly positioned, water can accumulate around the foundation, leading to potential water damage. Follow these steps to ensure the proper placement of downspouts:
- Evaluate Your Gutter System: Begin by evaluating your current gutter system and the number of downspouts it includes. Assess whether the existing downspouts adequately handle the volume of water flow, especially during heavy rainfall. Identify areas where additional downspouts may be necessary to improve water drainage.
- Determine Downspout Quantity: Consider the size of your home, the pitch of your roof, and the amount of rainfall your area typically receives. These factors will help determine the number of downspouts required. Keep in mind that as a general guideline, downspouts should be placed at intervals of 30-40 feet.
- Position Downspouts Away from the Foundation: Downspouts should direct water at least 3-4 feet away from your home’s foundation. Ensure that the downspouts extend beyond the immediate perimeter of your house to prevent water from pooling near the foundation. Use downspout extensions or flexible tubing to redirect the water flow if needed.
- Utilize Gravity and Natural Slope: Position the downspouts to take advantage of the natural slope of your landscape. Water should flow naturally away from the house without any obstructions. Align the downspouts with the slope, preferably with a gradual decline towards the desired drainage area.
- Secure Downspouts Properly: Ensure that the downspouts are securely attached to the gutters and properly fastened to the exterior wall of your home. Use appropriate brackets or straps to secure the downspouts, ensuring they remain stable during heavy rainfall and strong winds.
- Monitor Water Flow and Adjust as Needed: After implementing the proper downspout placement, monitor the water flow during rainfall. Observe how the water is being directed away from the foundation and adjust the downspouts if necessary. Fine-tuning may be required to achieve optimal water drainage.
Proper downspout placement is crucial for effective water management and preventing water damage to your home’s foundation. By ensuring that water is directed away from the foundation and into appropriate drainage areas, you can reduce the risk of dripping gutters and potential structural issues. Regularly inspect your downspouts and make necessary adjustments to ensure they remain in proper working order.
Conclusion
In conclusion, addressing dripping gutters is crucial for maintaining the integrity of your home and preventing potential water damage. Understanding the common causes of dripping gutters, such as clogs, improper slope, damages, and inadequate downspouts, allows you to take proactive steps to prevent these issues. Regular gutter cleaning and maintenance, including installing gutter guards or screens, correcting the slope, and repairing or replacing damaged gutters, are essential to ensure proper water flow and prevent water damage to your roof, siding, foundation, and overall structure.
Dripping gutters can have detrimental effects on your property, including water damage to the roof and siding, foundation issues, mold and mildew growth, and pest infestations. These problems not only compromise the structural integrity of your home but also pose health risks and lead to costly repairs.
By taking a proactive approach and implementing preventive measures, such as regular gutter cleaning, installing gutter guards or screens, correcting the slope, and addressing gutter damages promptly, you can prevent dripping gutters and maintain a functional and reliable gutter system. Regular maintenance and inspection will help you identify and address any issues before they escalate, protecting your home from potential water damage and prolonging the lifespan of your gutter system.
Remember, proper downspout placement and regular gutter maintenance are equally important in ensuring effective water drainage and preventing water pooling near the foundation. By redirecting water away from your home’s foundation, you can safeguard against structural issues and costly repairs in the long run.
Take the time to evaluate the condition of your gutters, perform necessary repairs or replacements, and establish a routine maintenance schedule. By doing so, you can enjoy the benefits of a functional gutter system that effectively protects your home from water damage and maintains its value and curb appeal in the long term.
Frequently Asked Questions about Why Are My Gutters Dripping
Was this page helpful?
At Storables.com, we guarantee accurate and reliable information. Our content, validated by Expert Board Contributors, is crafted following stringent Editorial Policies. We're committed to providing you with well-researched, expert-backed insights for all your informational needs.


0 thoughts on “Why Are My Gutters Dripping”