Articles
How To Install Gutters With Drip Edge
Modified: October 18, 2024
Learn how to install gutters with drip edge in this informative article. Discover helpful tips and step-by-step instructions to ensure a proper installation.
(Many of the links in this article redirect to a specific reviewed product. Your purchase of these products through affiliate links helps to generate commission for Storables.com, at no extra cost. Learn more)
Introduction
Welcome to the ultimate guide on how to install gutters with drip edge. If you’re a homeowner looking to protect your house from water damage and maintain the integrity of your foundation, installing gutters is an essential step. Gutters help to channel rainwater away from your roof and foundation, minimizing the chances of water infiltration and structural damage.
While installing gutters may seem like a daunting task, with proper guidance and the right tools, it can be a relatively straightforward DIY project. In this article, we will take you through the step-by-step process of installing gutters with drip edge, ensuring that you have a functional and efficient gutter system that will keep your home safe and dry.
Before we dive into the installation process, let’s start by gathering the necessary materials.
Key Takeaways:
- Protect your home from water damage and maintain its integrity by following the step-by-step guide to installing gutters with drip edge. Ensure proper measurement, secure attachment, and regular maintenance for an efficient gutter system.
- Enjoy the peace of mind that comes with a well-protected home. With properly installed gutters and drip edge, you can channel rainwater away from your roof and foundation, minimizing the risk of water infiltration and structural damage.
Read more: How To Install Roof Drip Edge
Materials Needed
Before you begin the installation process, make sure you have the following materials handy:
- Gutter sections
- Gutter brackets
- Gutter end caps
- Downspouts
- Downspout brackets
- Gutter screws
- Drip edge
- Sealant
- Measuring tape
- Hacksaw or tin snips
- Cordless drill
- Ladder or scaffolding
- Safety goggles
- Work gloves
- Pencil or marker
Having these materials ready will ensure that you have everything you need to complete the installation process smoothly. Now that we have all the necessary materials, let’s get started with the installation.
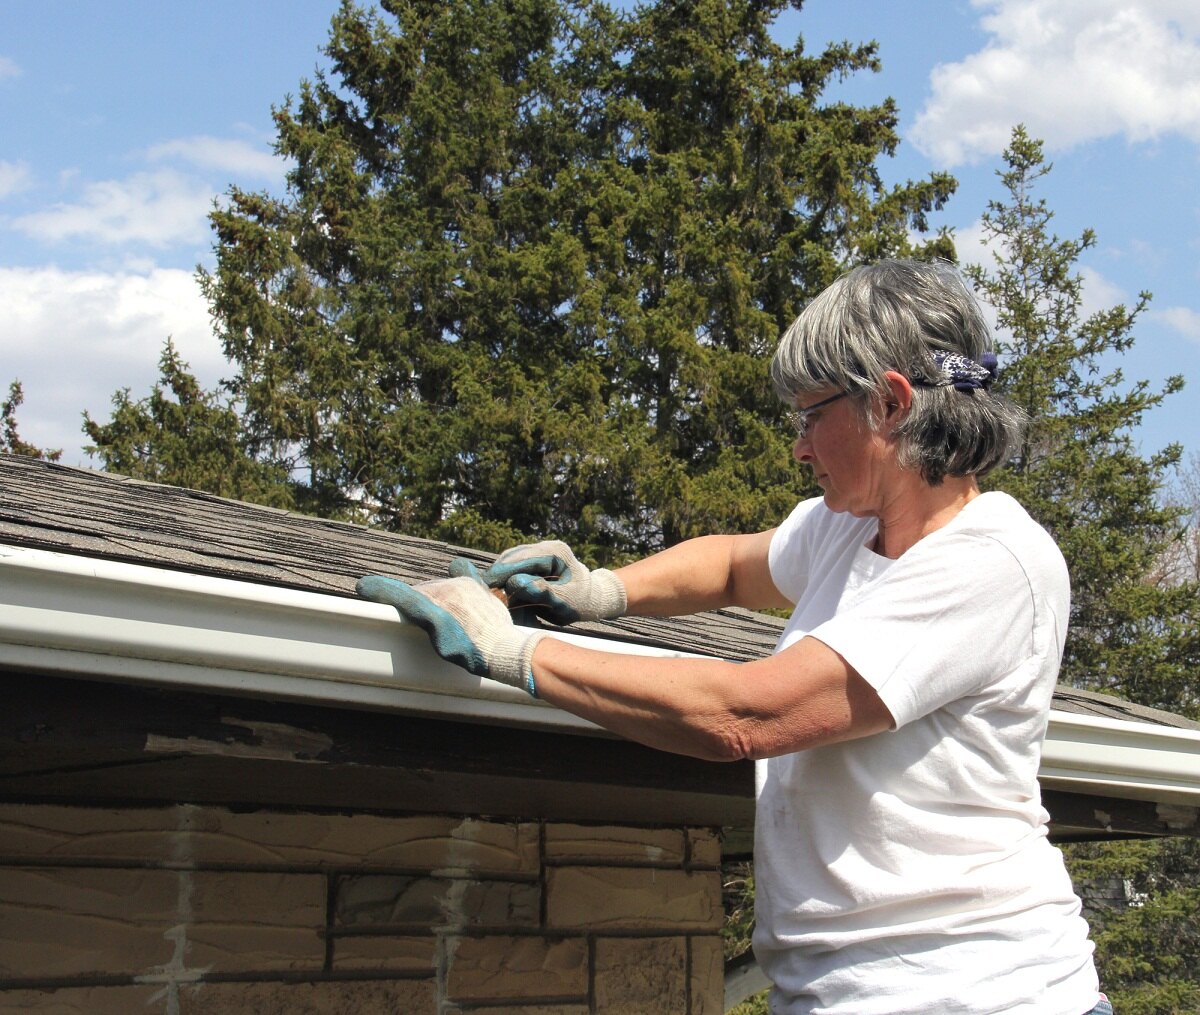
Step 1: Measure and Mark the Gutter Placement
The first step in installing gutters is to accurately measure and mark the placement of the gutter sections. Start by determining where you want the gutters to be positioned along the roofline. It’s crucial to ensure that the gutters slope slightly downward to allow water to flow towards the downspouts.
Using a measuring tape, measure the length of the roofline where the gutters will be installed. Make a note of this measurement and transfer it onto the gutter sections. Use a pencil or marker to mark the cutting points on the gutters.
Next, identify the placement of the downspouts. It’s recommended to have one downspout for every 30 to 40 feet of gutter length. Mark the locations for the downspouts on the gutter sections.
Once you have marked the gutter sections, carefully cut them to the desired length using a hacksaw or tin snips. Make sure to follow the markings accurately to ensure proper fit.
With the gutter sections cut to size, it’s time to move on to the next step: installing the drip edge.
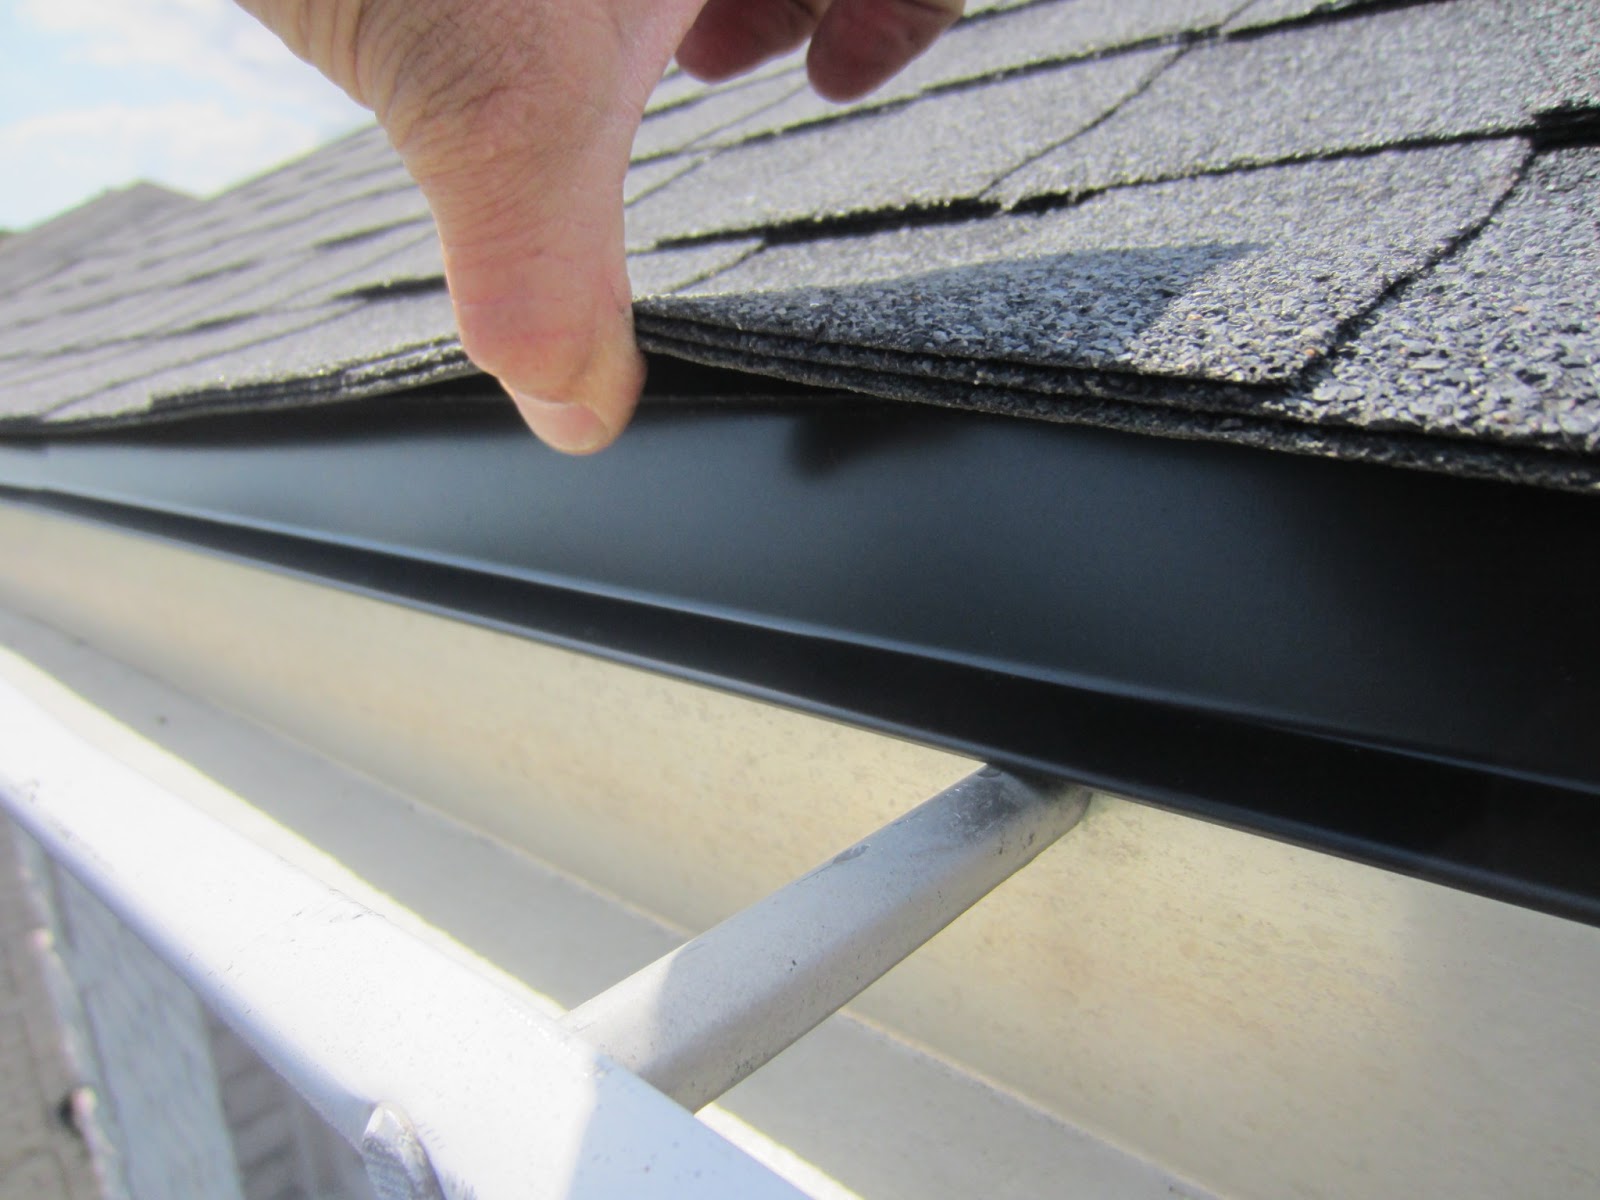
Step 2: Install the Drip Edge
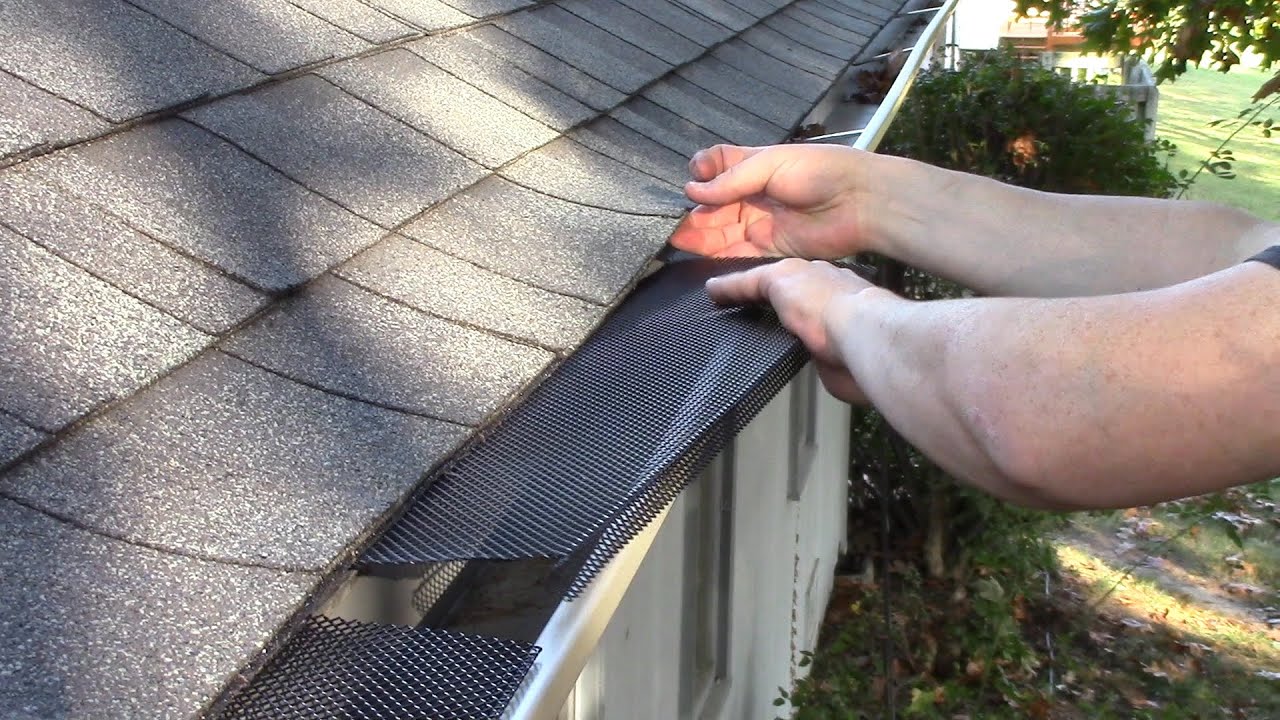
Installing a drip edge is an important part of gutter installation as it helps to prevent water from seeping behind the gutters and causing damage to the roof and fascia. Here’s how you can install the drip edge:
- Start by measuring the length of the roofline and cut the drip edge to match that length.
- Locate the edge of the roof and align the drip edge along the eave, ensuring that it overhangs the roofline slightly.
- Secure the drip edge in place using roofing nails or screws. Place them approximately 6-8 inches apart along the length of the drip edge, making sure it is securely fastened and flush with the roofline.
- Repeat this process on the other side of the roof, ensuring that the drip edge is positioned correctly and securely fastened.
Installing the drip edge is a crucial step in gutter installation as it helps to direct water into the gutters while protecting the underlying structure of the roof. With the drip edge securely in place, we can now move on to the next step of attaching the gutter brackets.
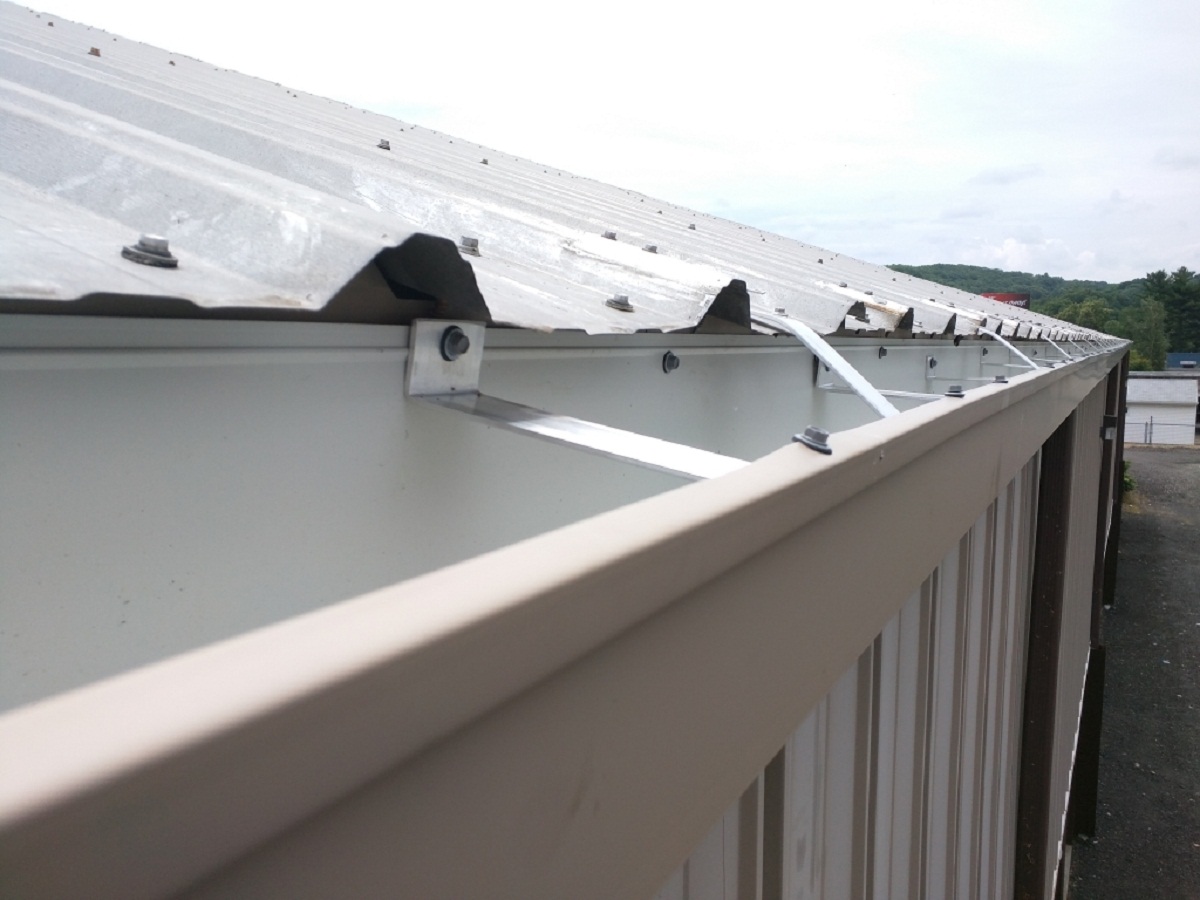
Step 3: Attach the Gutter Brackets
Once the drip edge is installed, it’s time to attach the gutter brackets. Gutter brackets play a crucial role in supporting the gutter sections and keeping them securely in place. Here’s how you can attach the gutter brackets:
- Start by marking the locations for the gutter brackets along the roofline. It’s recommended to install the brackets approximately 24-36 inches apart for optimal support.
- Using a cordless drill, attach the gutter brackets to the fascia board. Make sure to drill pilot holes first to prevent the wood from splitting.
- Once the brackets are securely attached, place the gutter sections onto the brackets. The gutter sections should slide into the brackets and sit securely.
- Ensure that the gutter sections align properly and are level. Adjust the brackets if necessary to achieve the desired alignment.
- Secure the gutter sections to the brackets using gutter screws. Place the screws through the pre-drilled holes in the brackets and into the gutter sections. Make sure to space the screws evenly along the length of the gutter.
Attaching the gutter brackets is an important step in ensuring the stability and longevity of your gutter system. With the brackets securely in place, we can proceed to the next step of cutting and securing the gutter sections.
When installing gutters with drip edge, make sure to properly align the drip edge with the edge of the roof before securing it in place. This will help prevent water from seeping behind the gutter and causing damage to the roof and fascia.
Read more: How To Install Drip Edge On A Shed
Step 4: Cut and Secure the Gutter Sections
Now that the gutter brackets are in place, it’s time to cut and secure the gutter sections. Each gutter section should fit precisely between the brackets, allowing for seamless flow of water. Here’s how you can cut and secure the gutter sections:
- Measure the distance between the brackets to determine the length of each gutter section. Use a pencil or marker to mark the measurements on the gutter sections.
- Using a hacksaw or tin snips, carefully cut the gutter sections along the marked lines. Take your time to ensure a clean and precise cut.
- Once the gutter sections are cut to size, slide them into the gutter brackets. Ensure that they fit securely and align properly with the rest of the gutter system.
- Secure the gutter sections to the brackets using gutter screws. Insert the screws through the pre-drilled holes in the brackets and into the gutter sections. Space the screws evenly along the length of the gutter.
- Continue this process for each gutter section, making sure they are securely attached to the brackets.
Properly cutting and securing the gutter sections is essential for a functional and efficient gutter system. This step ensures that the gutters fit seamlessly together and can effectively channel water towards the downspouts. With the gutter sections securely in place, we can move on to the next step of connecting the gutter sections.
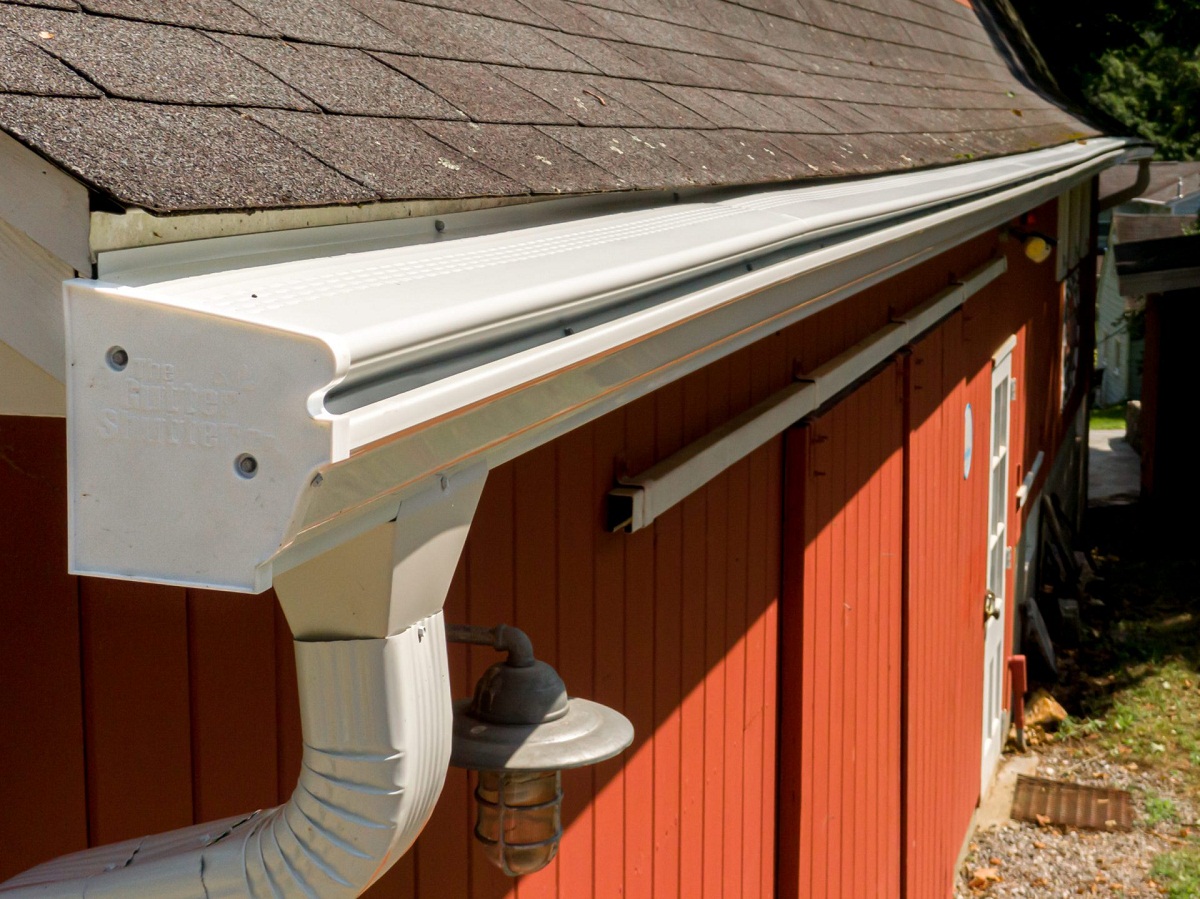
Step 5: Connect the Gutter Sections
Connecting the gutter sections is a crucial step in ensuring the continuity of the gutter system and maintaining proper water flow. Here’s how you can connect the gutter sections:
- Start by overlapping the end of one gutter section with the next section. Ensure that there is a sufficient overlap of at least 1-2 inches.
- Apply a generous amount of sealant to the inside of the gutter end cap.
- Place the end cap onto the overlapping section of the gutter, pressing it firmly to create a tight seal.
- Secure the end cap in place using gutter screws, making sure to attach it to the inside of the gutter section.
- Repeat this process for each connection between gutter sections, ensuring a secure and watertight seal.
Connecting the gutter sections properly is essential to prevent any leaks or gaps in the gutter system. A tight seal between the sections ensures that water is effectively channeled towards the downspouts without any leakage. With the gutter sections connected, we can move on to the next step of installing the downspouts.
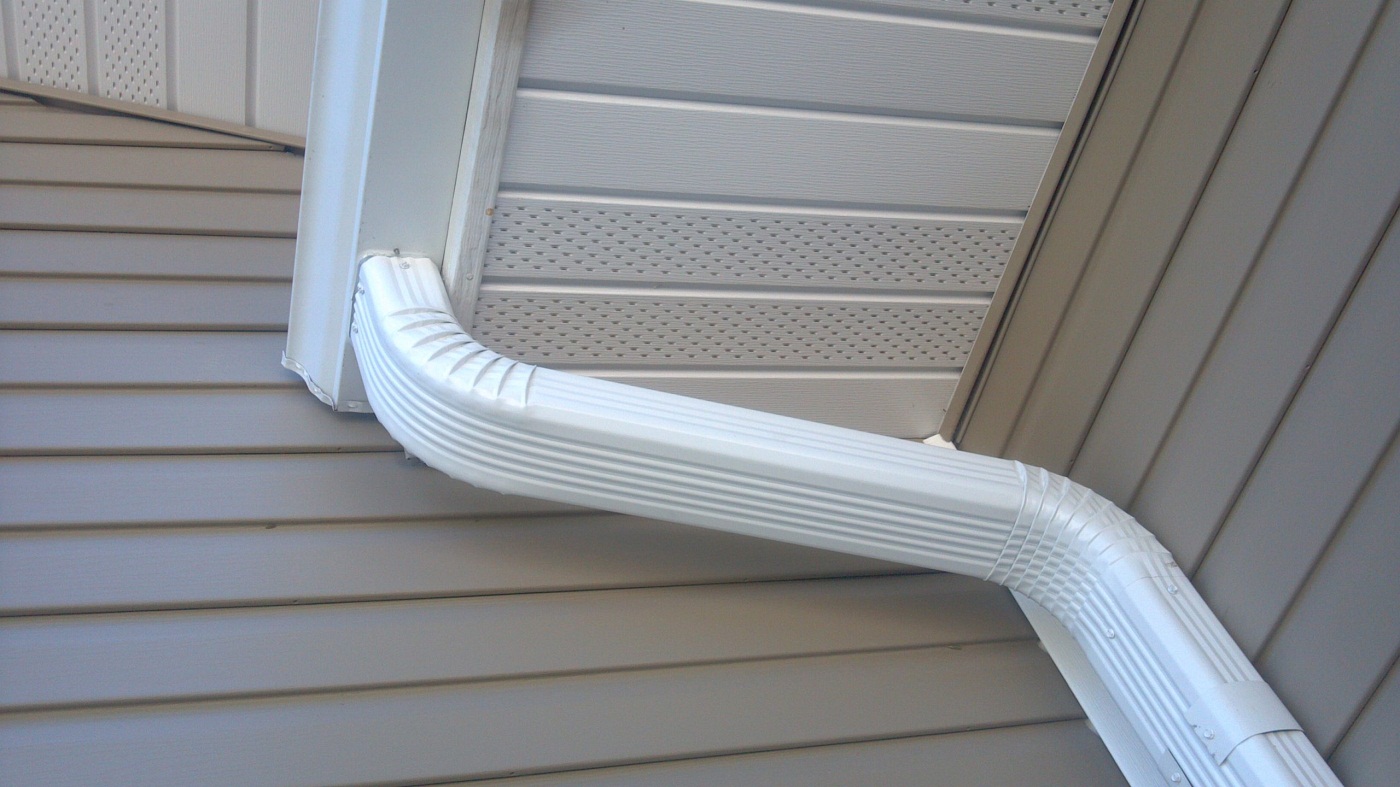
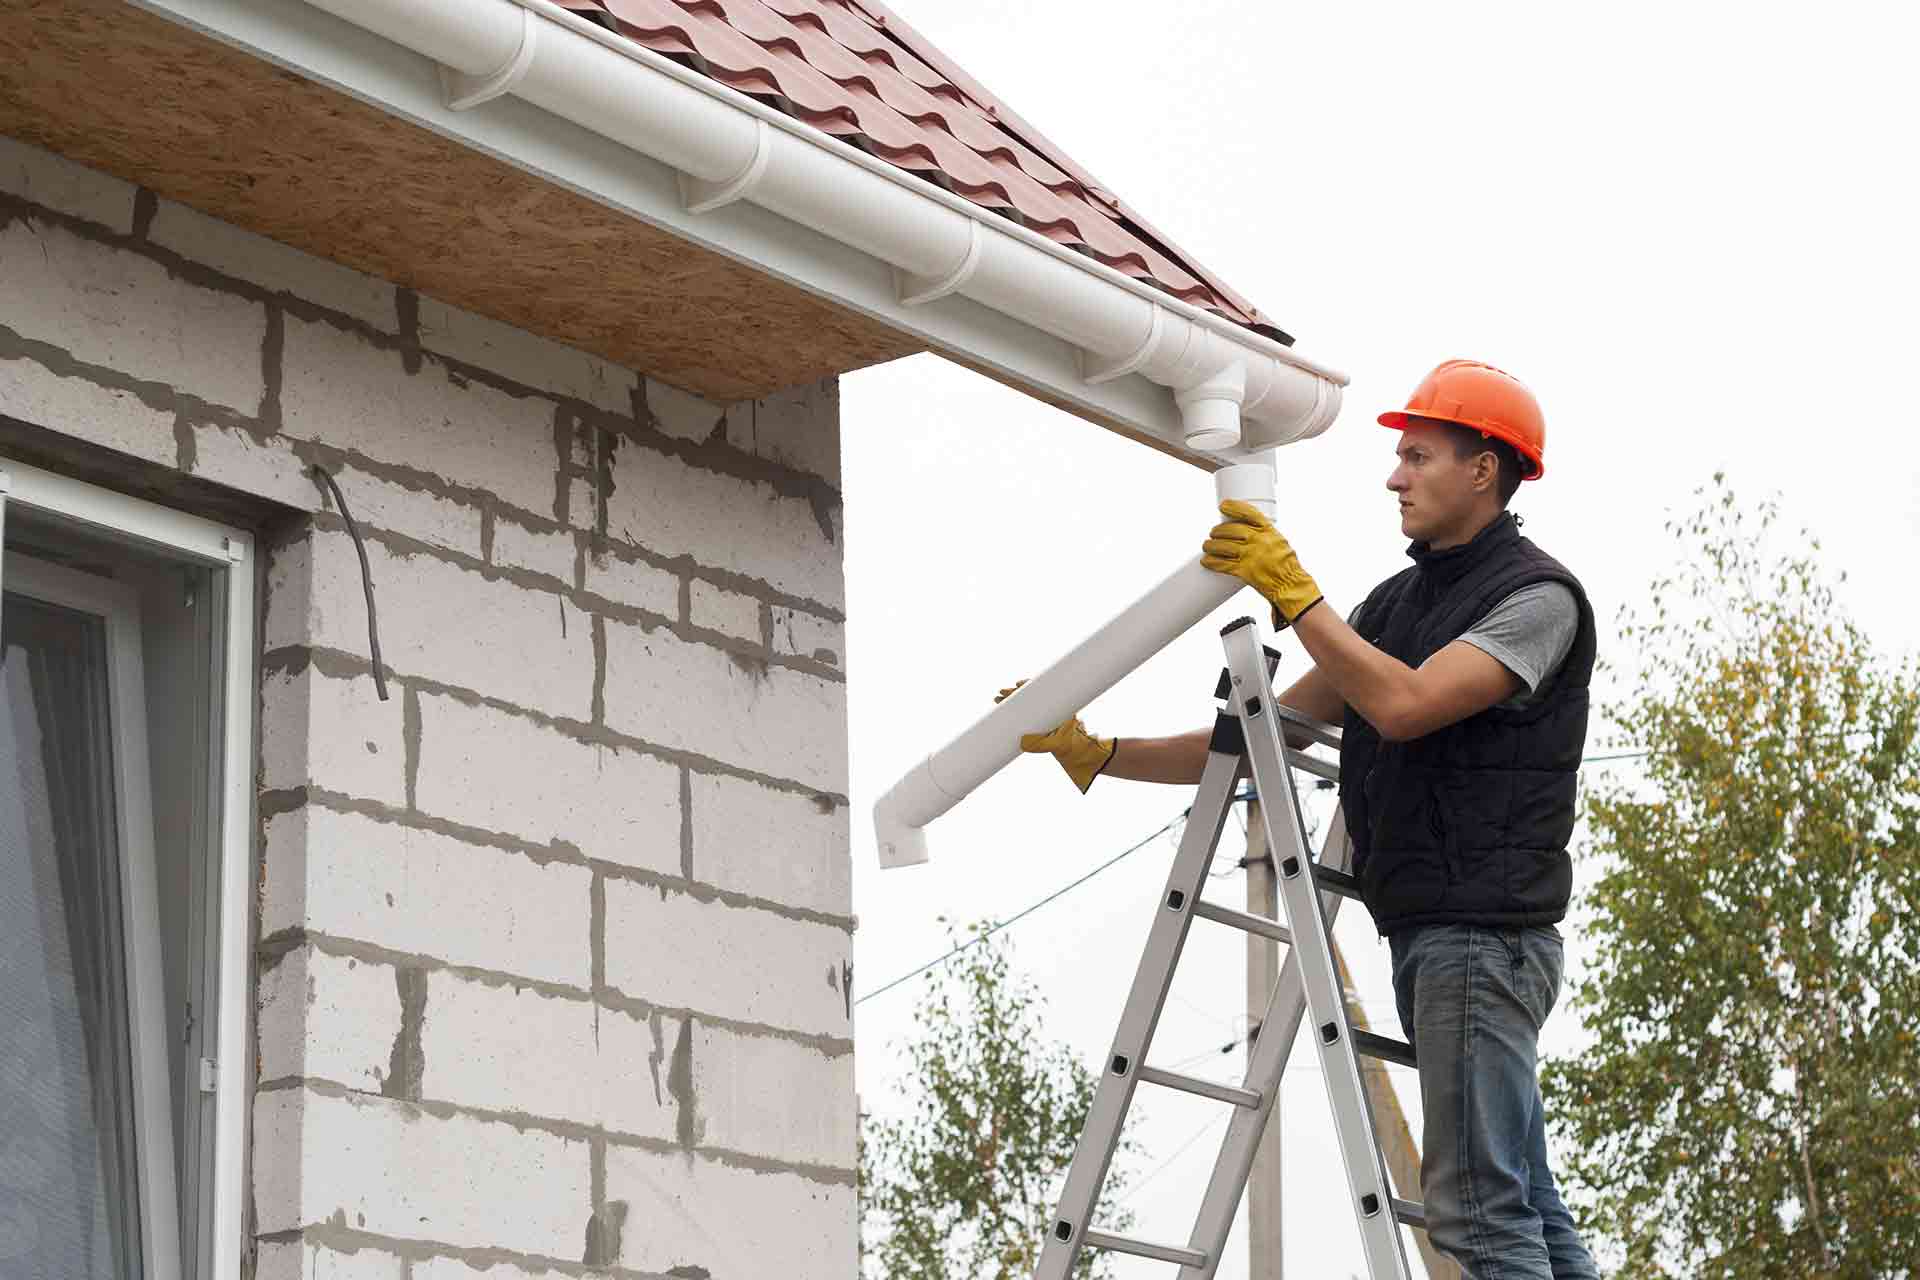
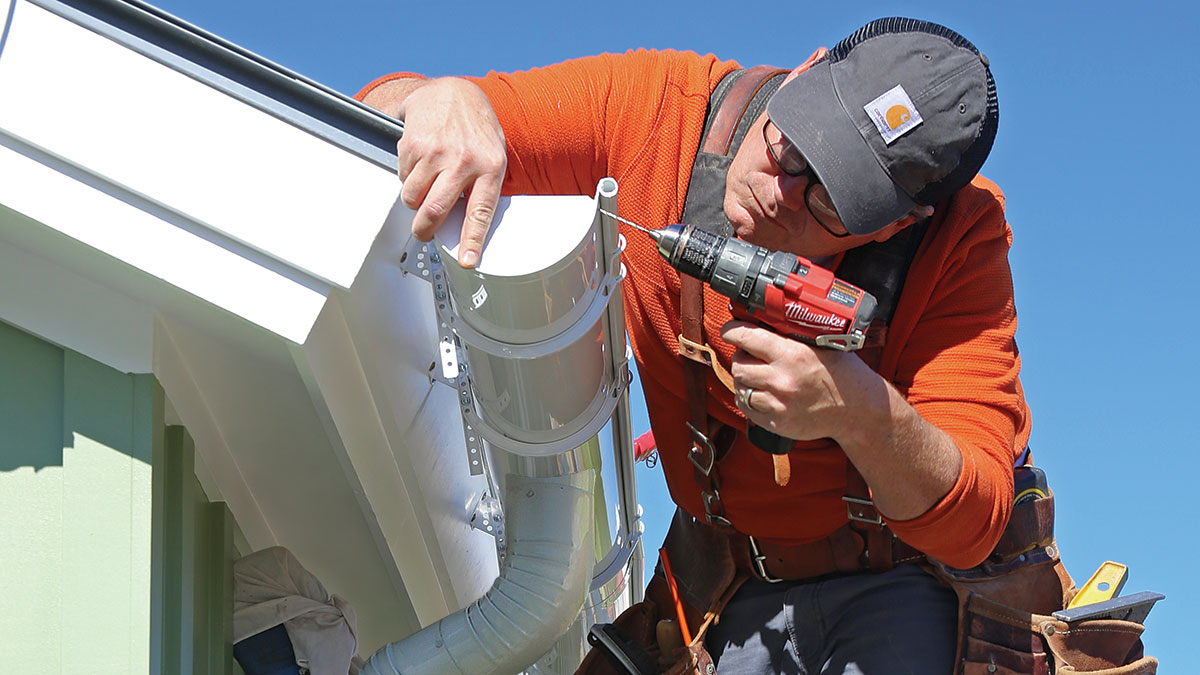
Step 6: Install the Downspouts
Installing the downspouts is the final step in completing your gutter system. The downspouts play a crucial role in directing water away from your home’s foundation. Here’s how you can install the downspouts:
- Start by determining the locations where the downspouts will be installed. Place them strategically around your home, ensuring that they are positioned to effectively drain the water away from the foundation.
- Measure and cut the downspouts to the desired length using a hacksaw or tin snips.
- Attach the downspout brackets to the wall using a cordless drill and screws. Make sure to position them at the appropriate height and ensure they are securely fastened.
- Slide the top end of the downspout into the bottom of the gutter and secure it using screws or nails.
- Connect the lower end of the downspout to an elbow or extension to direct the water away from your home. Secure the connection using screws or fasteners.
- Ensure that the downspout is tilted slightly away from the house to allow for proper drainage. Use a level to check the alignment.
Installing the downspouts completes the installation of your gutter system. The downspouts are essential in redirecting water away from your home’s foundation, preventing potential water damage and foundation issues. With the downspouts securely installed, we can now move on to the final step: testing and inspecting the gutter system.
Step 7: Test and Inspect the Gutter System
After completing the installation of your gutter system, it’s crucial to test and inspect it to ensure its functionality and effectiveness. Here’s how you can test and inspect your gutter system:
- Take a garden hose and run water through the gutters to simulate rainfall. Start at one end of the gutter system and gradually work your way towards the downspouts.
- Observe the flow of water through the gutters, looking for any leaks, blockages, or improper water flow.
- Check for proper drainage by examining the downspouts. Ensure that water is being directed away from your home’s foundation and that there are no obstructions hindering the flow.
- Inspect the gutter brackets, connections, and seals for any signs of damage or loosening. Tighten any loose screws or connections as necessary.
- Look for any sagging or misalignment in the gutter sections. This may indicate the need for readjustment or additional support.
- Remove any debris or leaves that may have accumulated in the gutters to prevent clogging and ensure proper water flow.
Testing and inspecting your gutter system allows you to identify any potential issues or areas that require maintenance. Regular maintenance and cleaning of your gutters will help them function efficiently and extend their lifespan.
By following these steps and properly maintaining your gutter system, you can ensure that your home is well-protected from water damage and maintain the integrity of your foundation. Enjoy the peace of mind that comes with having a properly installed gutter system!
Remember, if you’re unsure about any step or encounter any challenges during the installation process, it’s always best to consult a professional for assistance.
Now that you have successfully installed and tested your gutter system, you can sit back, relax, and enjoy the benefits of a well-protected home!
Read more: What Is A Drip Edge On A Roof
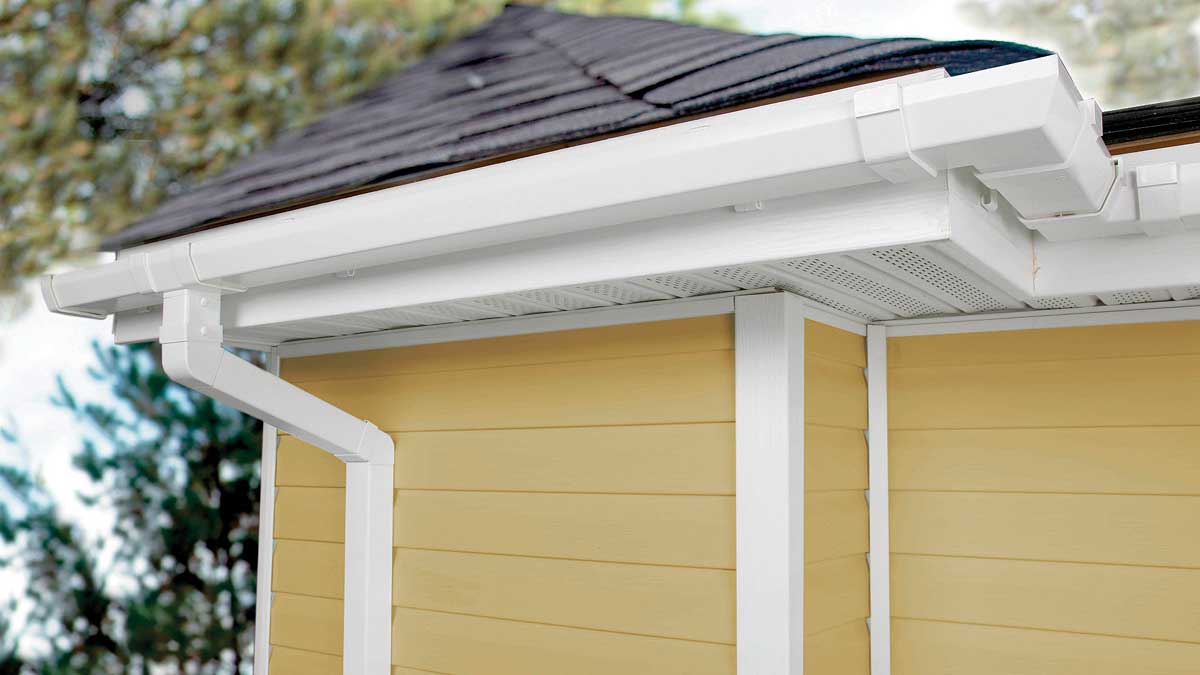
Conclusion
Congratulations! You have successfully completed the installation of gutters with drip edge. By following the step-by-step guide outlined in this article, you have taken an important step in protecting your home from water damage and maintaining the integrity of your foundation.
Gutters are an essential component of any home’s exterior, as they help to channel rainwater away from the roof and foundation. Properly installed gutters with drip edge ensure that water is directed away from your home, minimizing the risk of water infiltration and structural damage.
Throughout the installation process, you learned how to measure and mark the gutter placement, install the drip edge, attach the gutter brackets, cut and secure the gutter sections, connect the gutter sections, install the downspouts, and test and inspect the gutter system.
Regular maintenance and cleaning of your gutter system will be necessary to ensure its functionality and longevity. Removing debris, checking for leaks, and adjusting any misalignments will help keep your gutters in optimal condition.
If you are unsure about any step or encounter any difficulties during the installation process, it’s always beneficial to seek professional assistance. They have the expertise and tools to ensure a seamless and effective installation.
With your gutter system in place, you can enjoy the peace of mind that comes with knowing your home is well-protected from water damage. Rainwater will be safely channeled away from your roof and foundation, preserving your home’s structural integrity for years to come.
Thank you for following this comprehensive guide on how to install gutters with drip edge. Now go ahead and enjoy the benefits of a properly installed gutter system!
Now that you've got the hang of setting up gutters with a drip edge, you might be wondering who exactly should tackle this task. Whether you're considering hiring professionals or pondering the DIY route, our next guide on gutter installation offers insightful advice and key considerations that will help you make the best choice for your home. Don't miss out on expert tips that ensure your gutter system works flawlessly for years to come.
Frequently Asked Questions about How To Install Gutters With Drip Edge
Was this page helpful?
At Storables.com, we guarantee accurate and reliable information. Our content, validated by Expert Board Contributors, is crafted following stringent Editorial Policies. We're committed to providing you with well-researched, expert-backed insights for all your informational needs.


0 thoughts on “How To Install Gutters With Drip Edge”