Articles
Why Use Furring Strips On Ceiling
Modified: October 20, 2024
Discover the benefits of using furring strips on your ceiling with our informative articles. Increase stability, insulation, and create a chic aesthetic.
(Many of the links in this article redirect to a specific reviewed product. Your purchase of these products through affiliate links helps to generate commission for Storables.com, at no extra cost. Learn more)
Introduction
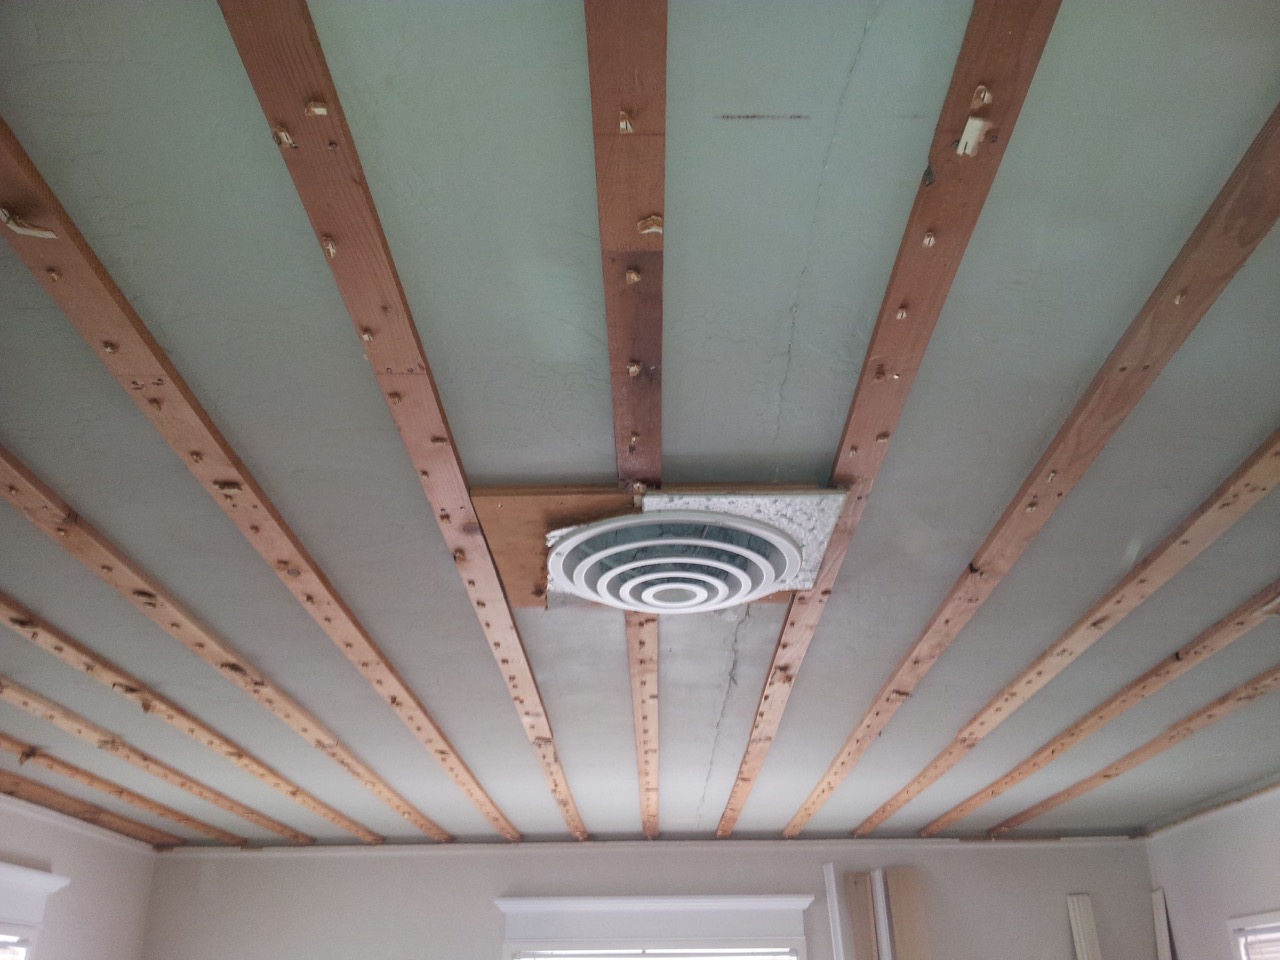
Furring strips, also known as battens or strapping, are thin strips of wood or metal that are commonly used in construction projects. While they can serve a variety of purposes, one of their significant applications is in the installation of ceilings.
In this article, we will explore why furring strips are used on ceilings and the benefits they provide. We will also delve into the installation process, the materials and tools required, as well as some tips and precautions to ensure a successful installation.
Whether you are a homeowner looking to renovate or a contractor seeking to understand the reasoning behind certain construction techniques, this article will provide you with valuable insights into the world of furring strips and their usage on ceilings.
Key Takeaways:
- Furring strips are essential for leveling, insulating, and enhancing the aesthetics of ceilings. They provide a stable base for finish materials and contribute to moisture control, making them a valuable addition to any construction or renovation project.
- Proper installation of furring strips requires careful planning, accurate measurements, and attention to detail. By avoiding common mistakes and following the installation process, you can achieve a visually appealing, well-insulated, and durable ceiling that adds value to any space.
Read more: Why Use A Laser Level For A Drop Ceiling
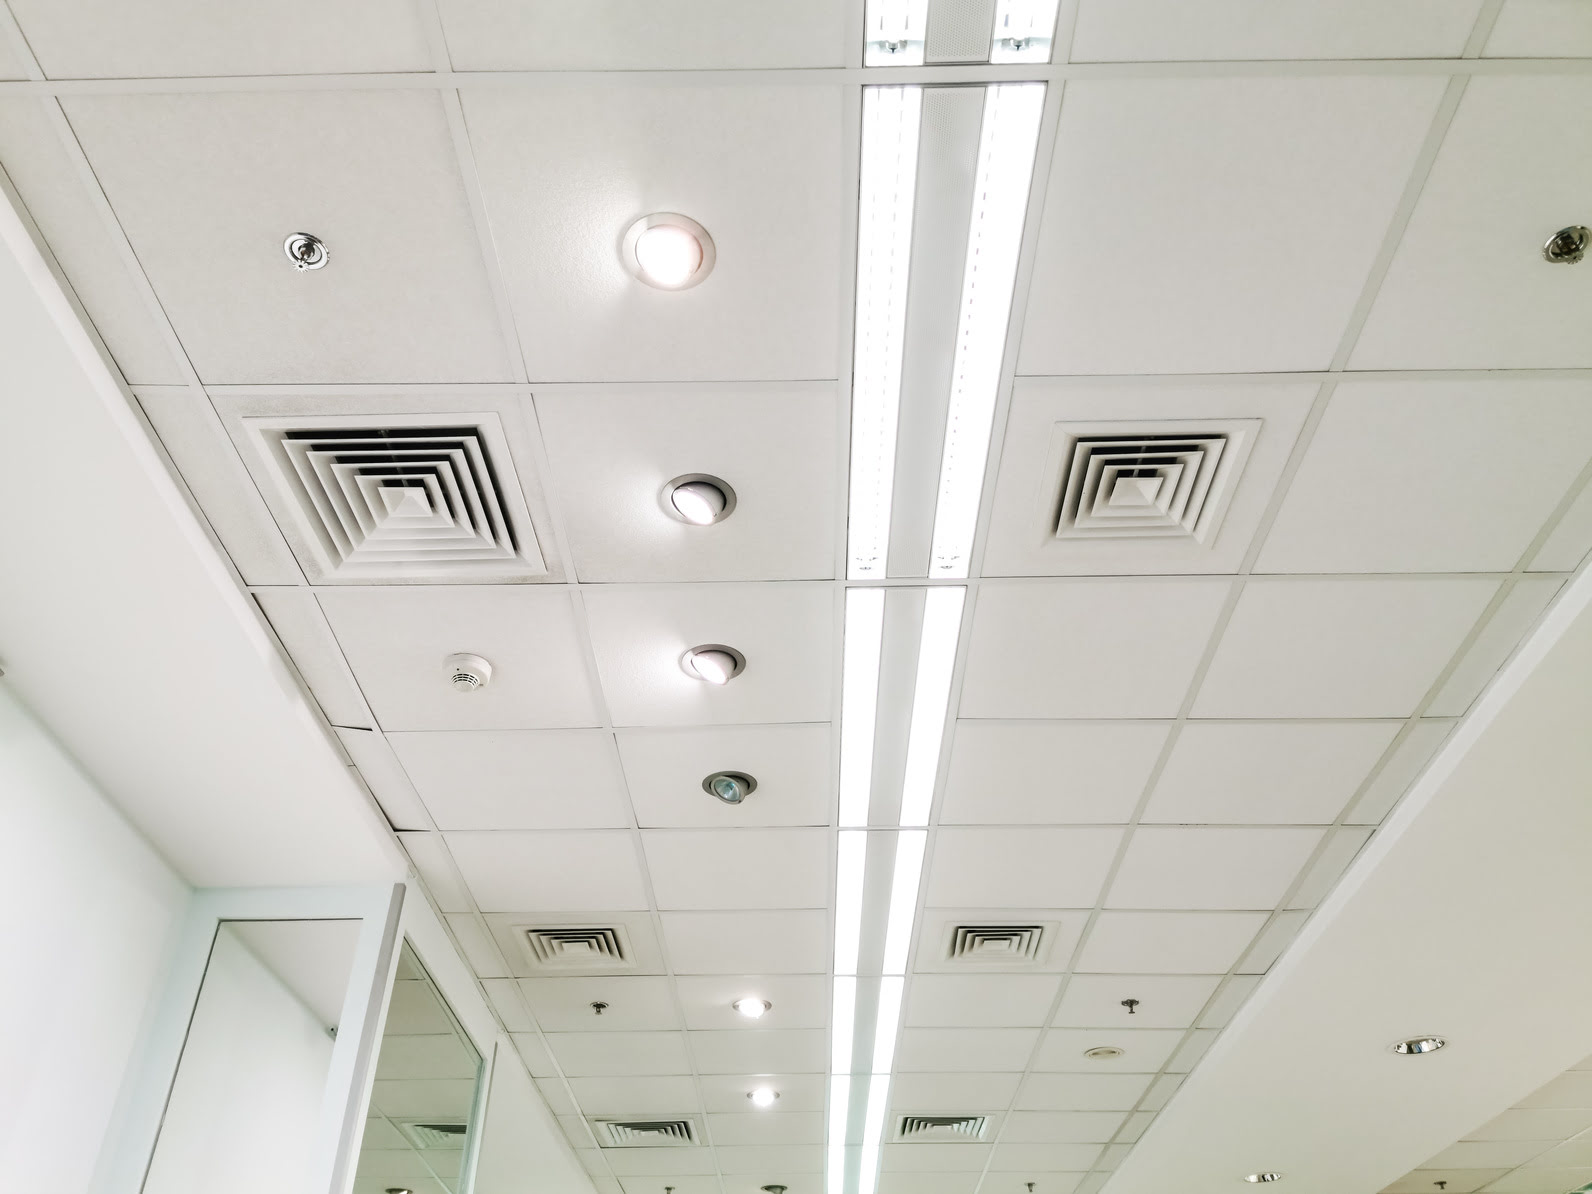
Definition of Furring Strips
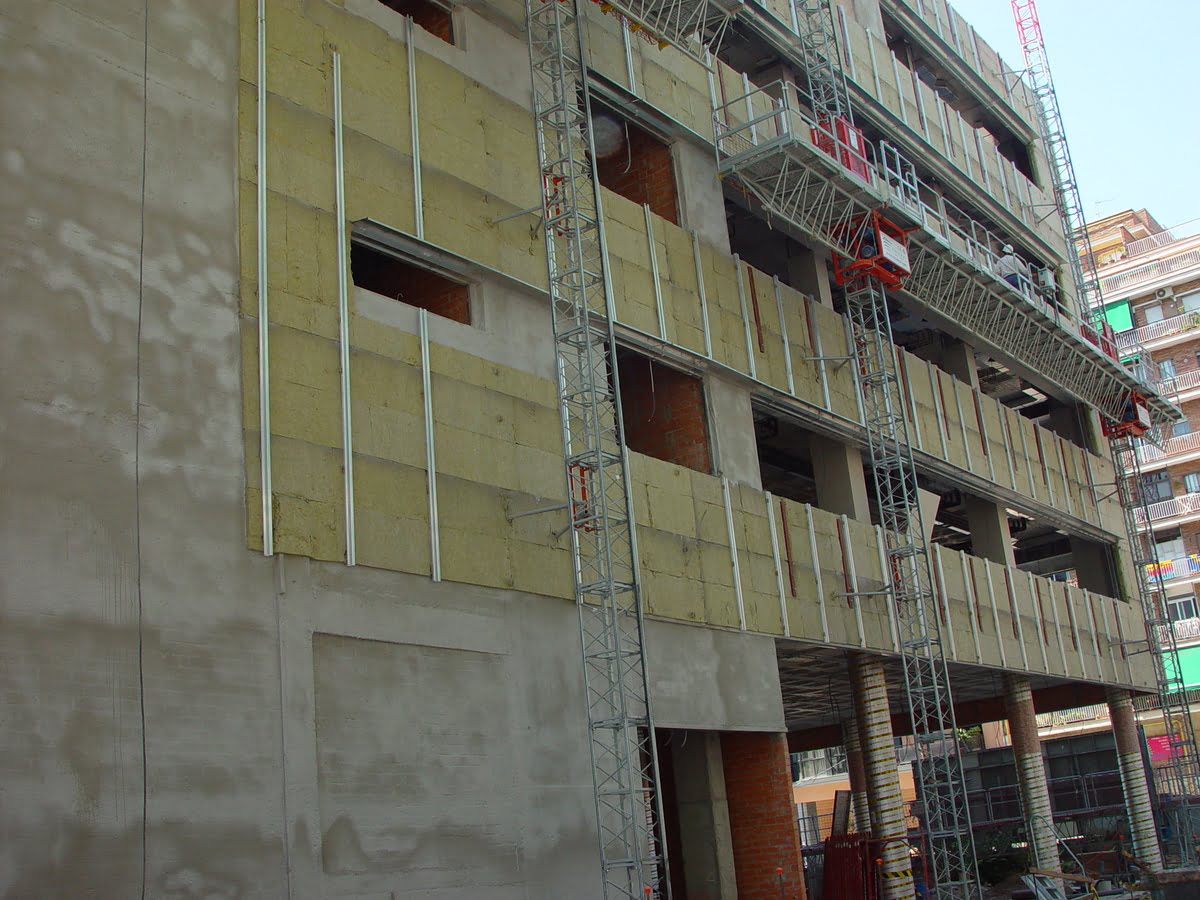
Furring strips are narrow strips of wood or metal that are typically used to create a level surface for the attachment of finishing materials, such as drywall or paneling. They are installed perpendicular to the main framing of a wall or ceiling, providing a framework to which the finishing materials can be securely fastened.
Furring strips are available in various dimensions and materials. Wood furring strips are commonly made from species such as pine or fir, while metal furring strips are typically made from galvanized steel or aluminum. The choice of material depends on factors such as the desired level of strength, moisture resistance, and fire rating.
Wooden furring strips are often preferred for their affordability, availability, and ease of installation. However, metal furring strips offer additional benefits such as enhanced fire resistance and dimensional stability.
The size of furring strips can vary depending on the specific application. Common sizes for wooden furring strips range from 1×2 inches to 1×4 inches, while metal furring strips are often available in standardized dimensions.
Before installing furring strips, it is essential to assess the condition of the existing surface. If the surface is uneven or damaged, it may need to be repaired or leveled before the furring strips are installed. Proper preparation ensures that the finished ceiling will be smooth and structurally sound.
Now that we have a clear understanding of what furring strips are, let’s explore their purpose when used on ceilings.
Purpose of Furring Strips on Ceiling
When it comes to ceilings, furring strips serve multiple purposes that contribute to the overall functionality and aesthetics of the space. Here are some key purposes of using furring strips on ceilings:
- Leveling the Surface: Furring strips provide a way to create a level surface on ceilings that may have minor imperfections or inconsistencies. By attaching the furring strips perpendicular to the existing ceiling framework, any irregularities can be compensated for, resulting in a smooth and even surface for finishing materials to be attached.
- Insulation and Soundproofing: Furring strips create a cavity between the existing ceiling and the new finish materials. This cavity can be used to install insulation materials, such as fiberglass or foam boards, which help improve the thermal insulation and soundproofing properties of the ceiling. The gap created by the furring strips also aids in reducing the transmission of sound between floors.
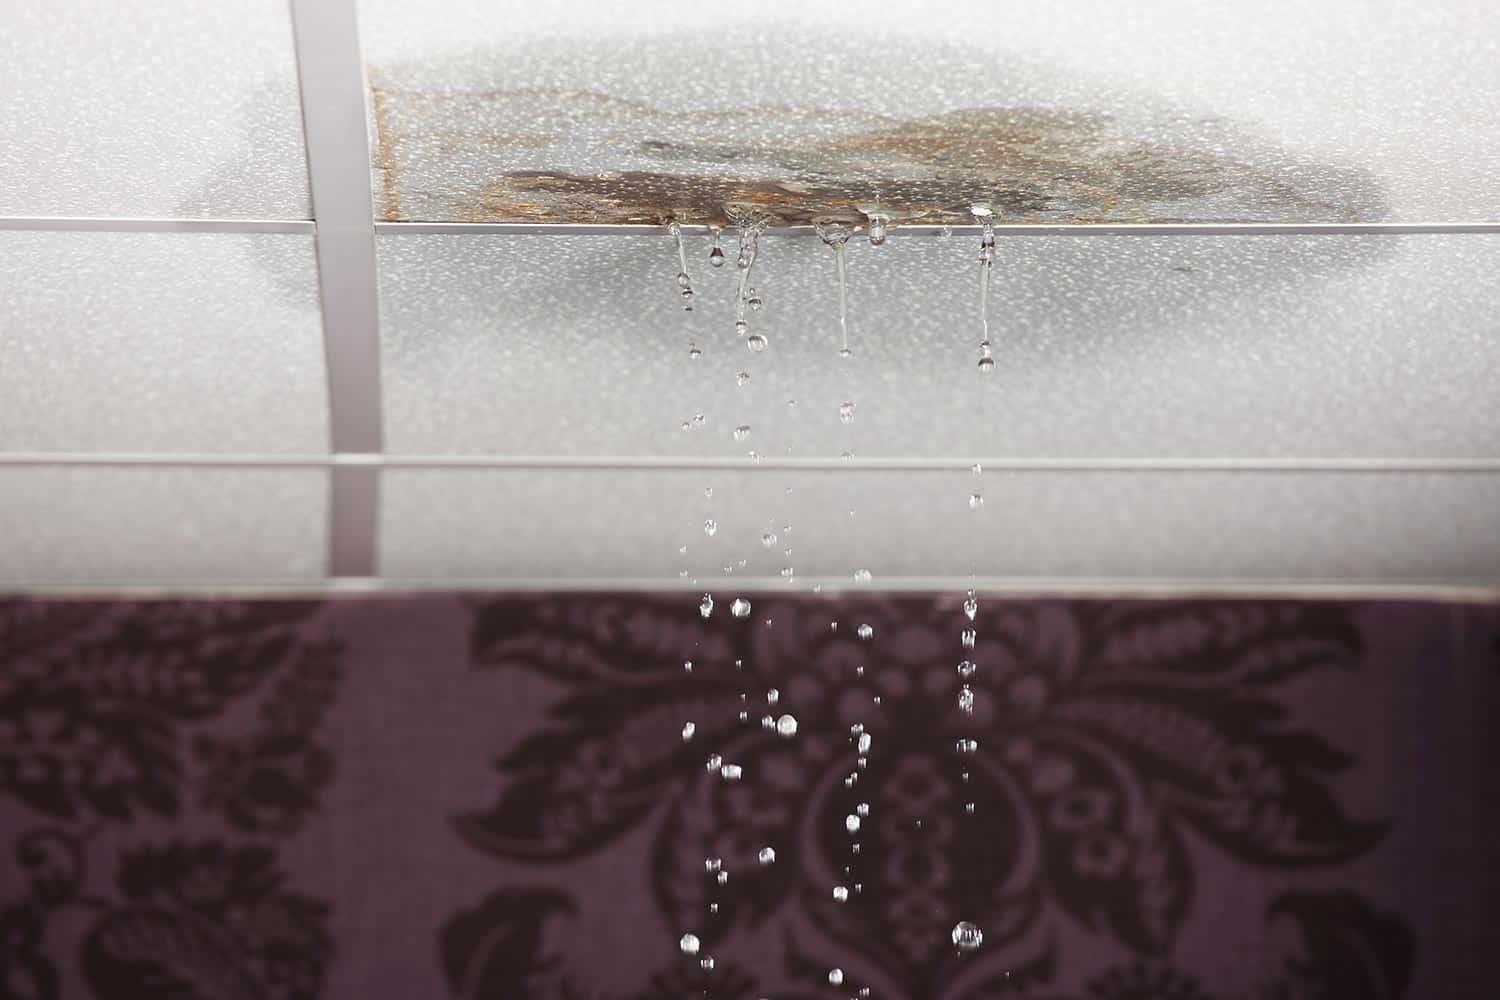
- Moisture Control: Another critical purpose of using furring strips on ceilings is to create an air gap between the existing ceiling and the new finish materials. This air gap allows for better air circulation and can help prevent moisture buildup, reducing the risk of mold and mildew growth. Furring strips made from moisture-resistant materials, such as pressure-treated wood or galvanized metal, offer additional protection against moisture-related issues.
- Aesthetics and Design: Furring strips can be strategically placed to create visual interest and design elements on the ceiling. They can be arranged in various patterns and orientations, adding texture and depth to the space. Furring strips can also serve as a means to hide wires, pipes, or other mechanical elements running across the ceiling, giving the room a cleaner and more polished appearance.
By understanding the purpose of furring strips on ceilings, you can better appreciate their role in improving the overall performance and appearance of a space. Now, let’s explore the advantages of using furring strips on ceilings.
Advantages of Using Furring Strips on Ceiling
Using furring strips on ceilings offers several advantages that make them a popular choice in construction and renovation projects. Here are some key advantages of using furring strips:
- Improved Surface Leveling: Furring strips provide a practical solution for addressing uneven or damaged ceilings. By attaching the furring strips perpendicular to the existing framework, any imperfections in the ceiling can be leveled out, ensuring a smooth and even surface for the installation of finish materials.
- Enhanced Insulation: The space created between the furring strips and the existing ceiling allows for the installation of insulation materials. This helps improve the thermal performance of the ceiling, reducing heat transfer through the ceiling structure and enhancing energy efficiency. Additionally, the insulation can also contribute to soundproofing, reducing noise transmission between rooms or floors.
- Better Moisture Control: The air gap created by the furring strips helps to enhance moisture control in the ceiling. Proper ventilation and airflow between the existing ceiling and finish materials can prevent the accumulation of moisture, minimizing the risk of mold and mildew growth. Using moisture-resistant furring strip materials further enhances this benefit.
- Flexibility in Design: Furring strips offer flexibility in ceiling design. They can be installed in various patterns and orientations, allowing for customized designs and architectural features. Furring strips can be used to create visual interest, accentuate specific areas, or even hide utility lines and mechanical elements.
- Easier Installation of Finish Materials: Furring strips provide a stable and secure surface for the installation of finish materials, such as drywall or paneling. By creating a framework for attachment, furring strips make the installation process easier and more efficient. They also help eliminate the need for complicated and time-consuming measures to directly attach finish materials to uneven ceilings.
By utilizing furring strips on ceilings, you can benefit from improved surface leveling, enhanced insulation, better moisture control, design flexibility, and simplified installation of finish materials. With an understanding of the advantages, let’s now explore the process of installing furring strips on ceilings.
Installation Process of Furring Strips on Ceiling
The installation of furring strips on a ceiling requires careful planning and attention to detail to ensure a successful outcome. Here is a step-by-step guide on how to install furring strips on a ceiling:
- Prepare the Ceiling: Start by removing any existing finish materials, such as drywall or paneling, from the ceiling. This will expose the underlying framework and allow for a clean installation of the furring strips.
- Measure and Mark: Measure the ceiling area to determine the spacing needed for the furring strips. The spacing between the furring strips will depend on the size of the finish materials you plan to install. Generally, a spacing of 16 to 24 inches apart is common.
- Locate Ceiling Joists: Use a stud finder to locate the ceiling joists. Furring strips should be attached directly to the joists to ensure stability and proper weight distribution. Mark the locations of the joists on the ceiling for reference.
- Cut Furring Strips: Cut the furring strips to the desired length, taking into account the dimensions of the ceiling and the spacing determined in the previous step. Use a saw appropriate for the type of material being used, such as a circular saw for wood or a metal-cutting saw for metal furring strips.
- Attach Furring Strips: Securely fasten the furring strips to the ceiling joists using appropriate fasteners, such as screws or nails. Make sure to align the furring strips perpendicular to the joists and in line with the marked spacing. Use a level to ensure the furring strips are straight and level as you attach them.
- Continue Installation: Repeat the process of measuring, cutting, and attaching furring strips until the entire ceiling area is covered. Leave slight gaps between each furring strip to allow for expansion and contraction of the materials due to temperature and humidity changes.
- Double-check Levelness: Once all furring strips are installed, use a level to double-check the levelness of the entire ceiling. Make any necessary adjustments by shimming or sanding down any high points.
- Proceed to Finish Materials: With the furring strips securely in place, you can proceed with the installation of your chosen finish materials, such as drywall, paneling, or ceiling tiles. Follow the manufacturer”s instructions for the specific installation process.
By following these steps, you can successfully install furring strips on a ceiling, providing a stable and level base for the installation of finish materials. However, it is important to use the appropriate materials and tools for the installation process, which we will explore in the next section.
When installing a ceiling, using furring strips can help create a level surface, provide a space for insulation, and allow for better air circulation. This can result in a more efficient and visually appealing ceiling installation.
Read more: What Insulation To Use In Basement Ceiling
Materials and Tools Required for Installing Furring Strips
Installing furring strips on a ceiling requires the use of specific materials and tools to ensure a proper and secure installation. Here is a list of the materials and tools you will need:
Materials:
- Furring Strips: Choose furring strips made from wood or metal, depending on your preference and project requirements.
- Fasteners: Select appropriate screws or nails that are suitable for the material of your furring strips and the ceiling framework. Wood furring strips typically require wood screws, while metal furring strips may require self-tapping screws or specialized fasteners.
- Leveling Shims: These small pieces of material, such as wood or plastic, are used to level out any uneven areas of the ceiling or furring strips.
Tools:
- Tape Measure: A precise measurement tool to determine spacing and dimensions for the furring strips.
- Stud Finder: This tool helps locate the ceiling joists, which are essential for properly attaching the furring strips.
- Saw: Use a saw appropriate for the material of your furring strips. A circular saw works well for cutting wooden furring strips, while a metal-cutting saw or shears are suitable for metal furring strips.
- Power Drill or Hammer: Depending on the fasteners you choose, you will need a power drill or hammer to secure the furring strips to the ceiling joists.
- Level: A level is crucial to ensure the furring strips are straight and level during installation.
- Safety Equipment: Always prioritize safety when working on any construction project. Wear safety glasses, gloves, and other appropriate safety gear as needed.
By having the necessary materials and tools ready for the installation process, you can carry out the installation smoothly and efficiently. In the next section, we will provide some tips to help you ensure a successful installation of furring strips on the ceiling.
Tips for a Successful Installation
Installing furring strips on a ceiling requires attention to detail and careful execution to ensure a successful outcome. Here are some tips to help you achieve a successful installation:
- Proper Measurement: Take accurate measurements of the ceiling area and determine the spacing needed for the furring strips. This will ensure that the strips are evenly spaced and aligned correctly.
- Secure Attachment: Use the appropriate fasteners, such as screws or nails, to securely attach the furring strips to the ceiling joists. Make sure the attachment points are strong and stable to support the weight of the finish materials.
- Levelness: Use a level to ensure that the furring strips are installed straight and level. This will help prevent any inconsistencies or unevenness in the finished ceiling.
- Attention to Gaps: Leave slight gaps between each furring strip to allow for expansion and contraction of the materials. This is particularly important for wood furring strips, as they will naturally expand and contract with changes in temperature and humidity.
- Secure Ends: Pay extra attention to the ends of the furring strips where they meet walls or other structural elements. Ensure that they are securely fastened and properly aligned to maintain the integrity of the installation.
- Consider Wiring and Plumbing: If there are electrical or plumbing lines running through the ceiling, plan the installation carefully to accommodate these elements. Use appropriate techniques to ensure the furring strips do not interfere with the installation or operation of these lines.
- Prevent Moisture Accumulation: Ensure that the installation allows for proper ventilation and airflow to prevent moisture buildup. This is particularly important in areas prone to high humidity or where moisture control is critical.
- Take Safety Precautions: Always prioritize safety during the installation process. Use appropriate safety gear, such as gloves and protective eyewear, and exercise caution when working with tools and materials.
By following these tips, you can ensure a successful installation of furring strips on your ceiling, resulting in a level, secure, and visually appealing finished product. However, it’s equally important to be aware of common installation mistakes that should be avoided, which we will discuss in the next section.
Common Mistakes to Avoid
When installing furring strips on a ceiling, it’s important to be aware of common mistakes that can compromise the overall quality and functionality of the installation. By avoiding these mistakes, you can ensure a successful and long-lasting result. Here are some common mistakes to avoid:
- Inaccurate Measurements: Failing to take precise measurements can lead to uneven spacing and misalignment of the furring strips. Always measure carefully and double-check your calculations before making any cuts or attaching the strips.
- Inadequate Attachment: Insufficiently securing the furring strips can result in a weak or unstable installation. Make sure to use the appropriate fasteners and attach the strips securely to the ceiling joists to ensure stability and durability.
- Ignoring Levelness: Neglecting to check the levelness of the furring strips can lead to a visibly uneven ceiling. Use a level to ensure straight and level installation and make any necessary adjustments before proceeding with finish materials.
- Overlooking Gaps: Failing to leave gaps between furring strips can prevent materials from expanding and contracting properly, leading to warping or buckling. Remember to leave slight gaps to allow for natural movement.
- Not Considering Wiring and Plumbing: Ignoring the presence of electrical or plumbing lines can result in damage or functionality issues. Take the time to plan the installation around these elements and ensure they are not obstructed or compromised.
- Poor Moisture Control: Overlooking proper ventilation and airflow can contribute to moisture buildup, leading to mold or mildew growth. Ensure proper ventilation and follow moisture control best practices, especially in areas prone to high humidity.
- Lack of Safety Precautions: Working without proper safety gear or failing to exercise caution when using tools can result in accidents or injuries. Always wear appropriate safety gear and follow safety guidelines throughout the installation process.
Avoiding these common mistakes will help you achieve a well-executed and professional installation of furring strips on your ceiling. By being aware of these potential pitfalls, you can ensure a successful and enjoyable construction or renovation project.
Now that we’ve covered the common mistakes to avoid, let’s summarize all the key points discussed in this article.
Conclusion
Furring strips play a crucial role in creating level and structurally sound ceilings. They provide a variety of benefits, including improved surface leveling, enhanced insulation, moisture control, and design flexibility. By using furring strips, you can achieve a visually appealing, well-insulated, and durable ceiling that adds value to any space.
When installing furring strips, it is important to follow a systematic process, taking accurate measurements and using the appropriate materials and tools. By properly planning and executing the installation, you can avoid common mistakes and ensure a successful outcome.
Remember to measure and mark the ceiling, locate the ceiling joists, securely attach the furring strips, and double-check the levelness. Leaving gaps for expansion, considering wiring and plumbing, ensuring proper moisture control, and prioritizing safety are also essential steps in the installation process.
Whether you are a homeowner or a contractor, understanding the purpose, advantages, and installation process of furring strips on ceilings empowers you to make informed decisions and achieve professional results. By following the guidelines outlined in this article, you can confidently tackle your next ceiling renovation or construction project.
So go ahead and unleash your creativity with furring strips, knowing that you are equipped with the knowledge and skills to create stunning and structurally sound ceilings.
Frequently Asked Questions about Why Use Furring Strips On Ceiling
Was this page helpful?
At Storables.com, we guarantee accurate and reliable information. Our content, validated by Expert Board Contributors, is crafted following stringent Editorial Policies. We're committed to providing you with well-researched, expert-backed insights for all your informational needs.


0 thoughts on “Why Use Furring Strips On Ceiling”