Articles
How To Install Access Panel In Ceiling
Modified: December 7, 2023
Learn how to install an access panel in your ceiling with our informative articles. Find step-by-step guides and expert tips to make the process easy and hassle-free.
(Many of the links in this article redirect to a specific reviewed product. Your purchase of these products through affiliate links helps to generate commission for Storables.com, at no extra cost. Learn more)
Introduction
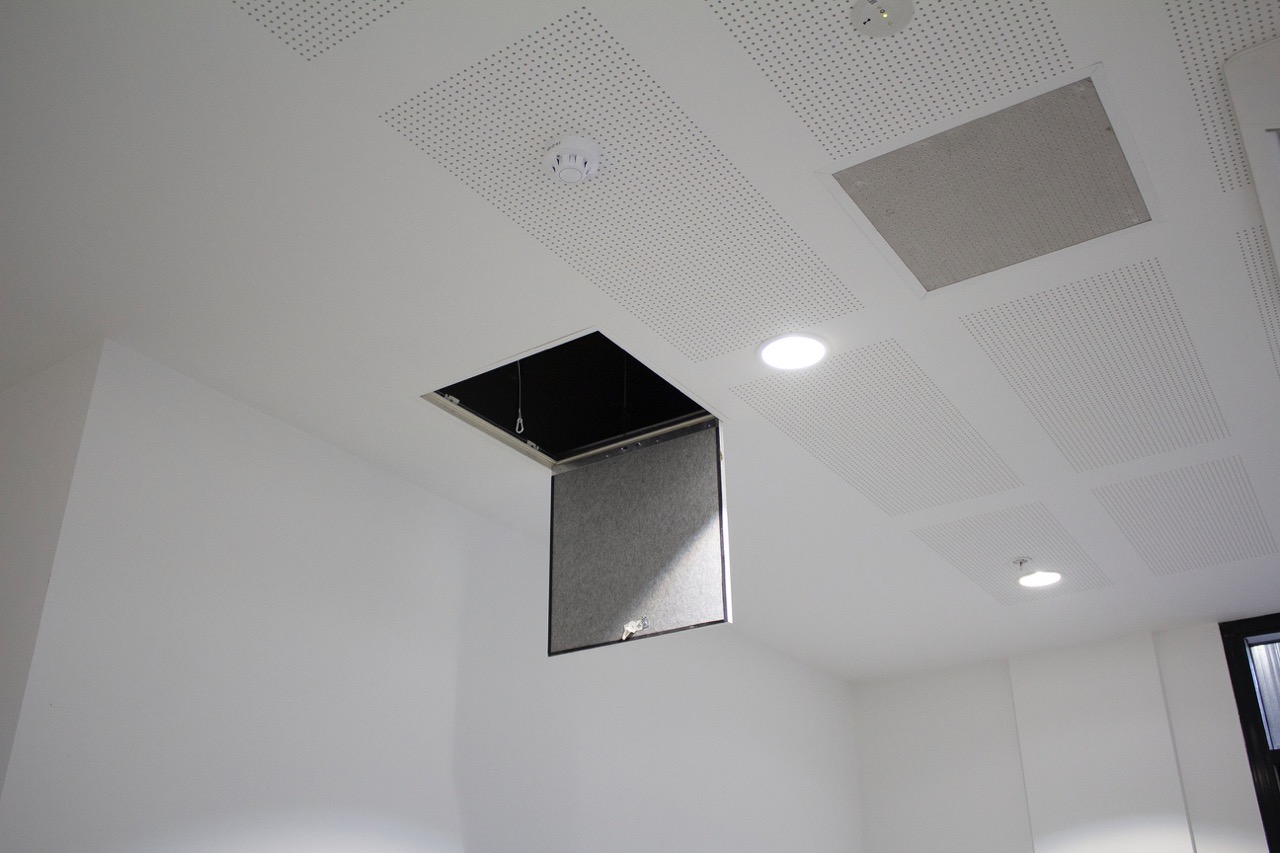
Welcome to this comprehensive guide on how to install an access panel in your ceiling. Access panels are a practical and convenient solution for providing easy access to electrical, plumbing, or HVAC systems hidden behind walls or ceilings.
Whether you’re a DIY enthusiast or a homeowner looking to improve accessibility in your home, this step-by-step tutorial will guide you through the installation process. By following these instructions, you’ll be able to create a hidden opening in your ceiling, allowing you to reach essential components for maintenance, repairs, or inspections.
Installing an access panel not only saves you time and effort but also ensures that future repairs or installations are hassle-free. So, let’s dive in and learn how to install an access panel in your ceiling!
Key Takeaways:
- Installing an access panel in your ceiling is a practical and efficient way to access essential systems without causing damage. Follow the step-by-step guide for a hassle-free installation process and improved accessibility.
- By carefully choosing the location, gathering the right materials, and following precise installation steps, you can create a discreet access point in your ceiling. Enjoy the convenience and peace of mind it brings!
Read more: How To Install An Access Panel In Drywall
Step 1: Gather Materials
Before you begin the installation process, it’s important to gather all the necessary materials. Having everything prepared in advance will make the installation smoother and more efficient. Here’s a list of the materials you’ll need:
- Access panel: Choose an access panel that suits your needs in terms of size, material, and style. You can find access panels made of plastic, metal, or drywall, depending on your preference.
- Tape measure: This will help you accurately measure the dimensions of the opening.
- Pencil: Use a pencil to mark the cutting lines on the ceiling.
- Drywall saw or utility knife: You’ll need a tool to cut through the ceiling material.
- Screwdriver: Depending on the type of access panel, you may need a screwdriver to secure it in place.
- Pan head screws or toggle bolts: These will be used to attach the access panel to the ceiling.
- Safety goggles and gloves: It’s always important to protect your eyes and hands when working with tools.
Once you have all the necessary materials, you’re ready to move on to the next step of the installation process. Make sure to double-check that you have everything you need before proceeding to avoid any delays or interruptions.
Step 2: Determine Access Panel Location
Choosing the right location for your access panel is crucial for convenience and functionality. You’ll want to select a spot that provides easy access to the systems you need to reach while also considering the aesthetics of the space. Here’s how you can determine the optimal location for your access panel:
- Identify the area: Take a moment to assess the area where you’ll be installing the access panel. Determine which systems (such as electrical wires, plumbing pipes, or HVAC ducts) you need to access and which section of the ceiling is closest to those components.
- Consider accessibility: Ensure that the chosen location is easily reachable and won’t require excessive bending, stretching, or contorting to reach the systems behind the ceiling. A central location is usually the most accessible.
- Check for obstructions: Look for any obstacles such as structural beams, pipes, or electrical wiring that might hinder the installation. You want to avoid cutting through or damaging any essential components.
- Evaluate aesthetics: Consider how the access panel will blend with the overall aesthetics of the room. Choose a location that won’t disrupt the visual appeal of the space and can be easily concealed if desired.
Once you’ve taken these factors into account, mark the chosen location with a pencil. This will serve as a guide when cutting the opening in the next step.
Remember, the location of the access panel is critical, so take your time to evaluate and choose the most suitable spot. This will ensure easy accessibility and maintain the visual appeal of the room.
Step 3: Mark and Cut the Opening
With the location for your access panel determined, it’s time to mark and cut the opening in the ceiling. Follow these steps to accurately mark and cut the opening:
- Gather your measuring tools: Use a tape measure to measure the dimensions of the access panel. Ensure that the panel will fit comfortably in the chosen location without being too tight or too loose.
- Mark the cutting lines: Using a pencil, carefully mark the outline of the access panel on the ceiling. Make sure the lines are straight and symmetrical.
- Double-check your measurements: Take a moment to review your measurements and marks to avoid any mistakes or inaccuracies.
- Prepare your cutting tool: Depending on the type of ceiling material, you can either use a drywall saw or a utility knife. Make sure your tool is sharp and in good condition.
- Start cutting: Begin cutting along the marked lines, following a slow and controlled motion. If you’re using a drywall saw, use a back-and-forth sawing action. If using a utility knife, score the lines with repeated passes until you can cut through the material.
- Remove the cut piece: Once you’ve completed the cut, gently push up on the ceiling material to remove the cut piece. Be careful not to damage any surrounding areas.
After cutting the opening, inspect it to ensure that it matches the dimensions of the access panel. If necessary, make any minor adjustments to achieve a proper fit. You’re now ready to move on to the next step of the installation process.
Remember, precision is key when marking and cutting the opening. Take your time and exercise caution to avoid any unnecessary damage to the ceiling or surrounding areas.
When installing an access panel in the ceiling, make sure to measure and mark the exact location carefully. Use a drywall saw to cut the opening, and secure the access panel in place with screws. Be sure to choose a panel that matches the surrounding ceiling for a seamless look.
Step 4: Install the Mounting Hardware
Now that the opening for the access panel is cut, it’s time to install the mounting hardware. The mounting hardware ensures that the access panel is securely attached to the ceiling. Here’s how you can install the mounting hardware:
- Refer to the instructions: Consult the manufacturer’s instructions that came with your access panel. These instructions will guide you on the specific type of mounting hardware required and the installation process.
- Locate the mounting points: Depending on the access panel design, there may be pre-drilled holes or slots for attaching the mounting hardware. Identify these points on the panel itself.
- Mark the corresponding spots: Using a pencil or marker, transfer the location of the mounting points onto the ceiling around the opening. Make sure the markings align with the holes or slots on the access panel.
- Prepare the screws or toggle bolts: Based on the manufacturer’s instructions, select the appropriate screws or toggle bolts to secure the access panel to the ceiling. Ensure they are the right length and type for your specific installation.
- Attach the mounting hardware: Align the screws or toggle bolts with the marked points on the ceiling and begin screwing them in. Follow the instructions to properly secure the mounting hardware.
- If you’re using screws, use a screwdriver to drive them into the ceiling until they are snug and secure.
- If you’re using toggle bolts, insert them into the holes and tighten them until they are securely anchored in the ceiling.
- Test the stability: Give the access panel a gentle tug to ensure that it is firmly attached to the ceiling. If there is any wobbling or instability, try tightening the screws or toggle bolts further.
Once the mounting hardware is properly installed, the access panel should be securely attached to the ceiling, ready for the final step of the installation process.
Remember, follow the manufacturer’s instructions for your specific access panel to ensure proper installation of the mounting hardware. Taking the time to install it correctly will ensure the durability and stability of the access panel.
Read more: How To Make Plumbing Access Panel
Step 5: Attach Access Panel
Now that the mounting hardware is in place, it’s time to attach the access panel to the ceiling. This step will secure the panel in position and complete the installation. Follow these steps to attach the access panel:
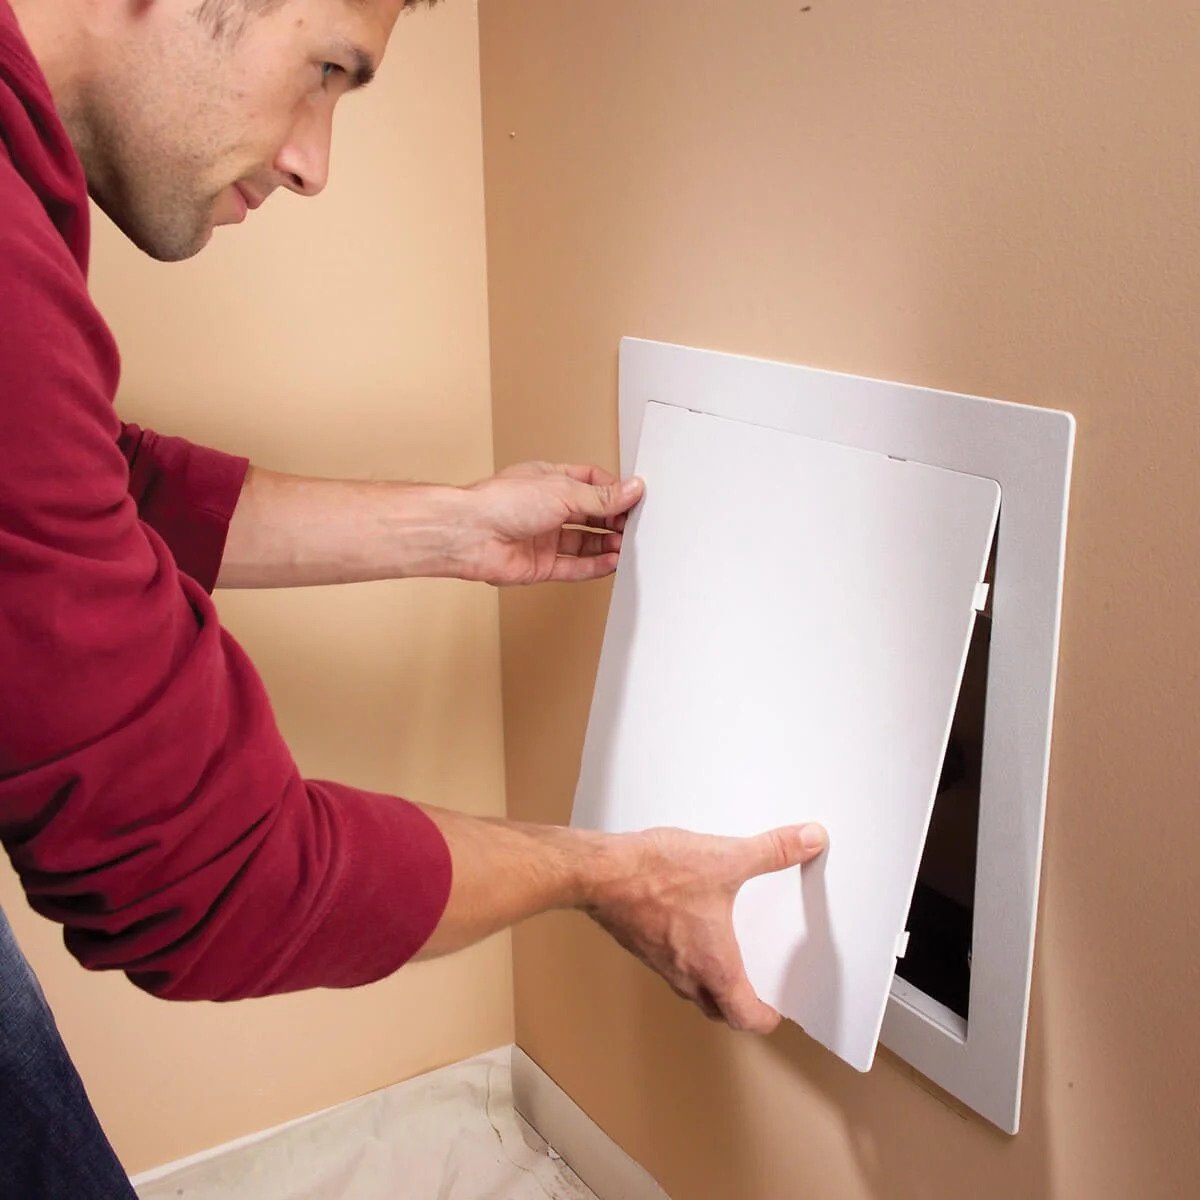
- Place the access panel: Position the access panel over the opening in the ceiling, aligning it with the mounting hardware.
- Slide or fasten the panel: Depending on the design of your access panel, there may be different methods for attaching it. Follow the manufacturer’s instructions to securely slide or fasten the panel to the mounting hardware.
- Secure the panel: Once the access panel is in place, use a screwdriver or the appropriate tool to tighten any screws, latches, or locks that secure the panel to the mounting hardware.
- Test the panel: Give the access panel a gentle push and ensure that it is securely closed and flush with the ceiling. It should remain in place without any movement or instability.
By properly attaching the access panel, you can ensure that it stays in place and provides easy access to the systems behind the ceiling whenever needed. The panel should fit snugly, blend with the surrounding ceiling, and maintain the aesthetics of the room.
Remember, it’s essential to follow the manufacturer’s instructions for your specific access panel model to ensure proper attachment. Taking the time to attach it correctly will ensure its functionality and longevity.
Step 6: Test and Finish
With the access panel securely attached, it’s time to test its functionality and add the finishing touches to complete the installation. Follow these final steps to ensure everything is in order:
- Open and close the access panel: Gently open and close the access panel to ensure smooth operation. It should open easily and close securely without any resistance.
- Inspect the seal: Check around the edges of the access panel to ensure there are no gaps or openings. If necessary, add caulk or weatherstripping to create a tight seal and prevent air leaks.
- Clean up: Remove any debris or dust from the installation process and clean the area around the access panel. This will leave the space looking tidy and well-maintained.
- Conceal or decorate (optional): Depending on your preference, you can choose to conceal the access panel further or incorporate it into the room’s design. Consider painting the access panel to match the surrounding ceiling or adding a decorative covering to mask its presence.
- Make note of the location: It’s a good idea to document the location of the access panel for future reference. This will come in handy when you need to access the systems behind the ceiling for maintenance or repairs.
- Celebrate your accomplishment: With the installation complete, take a moment to appreciate your hard work and the convenience the access panel provides.
Congratulations! You have successfully installed an access panel in your ceiling. You now have easy access to important systems without the need to damage or disturb the surrounding surfaces.
Remember, regular maintenance and inspections of the systems behind the access panel are crucial to ensure their proper function. Stay organized and make a note of any necessary maintenance tasks to keep everything running smoothly for years to come.
Conclusion
Installing an access panel in your ceiling is a practical and efficient solution for accessing electrical, plumbing, or HVAC systems hidden behind walls or ceilings. With the step-by-step instructions provided in this guide, you now have the knowledge and confidence to successfully complete the installation process.
By gathering the necessary materials, determining the access panel location, marking and cutting the opening, installing the mounting hardware, attaching the access panel, and performing the final tests and finishing touches, you can create a convenient and discreet access point in your ceiling.
Remember to always follow the manufacturer’s instructions for your specific access panel model, ensuring a secure and proper installation. Take your time during each step, paying attention to detail and precision, for the best results.
An access panel not only saves you time and effort when it comes to maintenance or repairs but also ensures that future inspections or installations are hassle-free. The easy accessibility granted by the access panel contributes to the overall functionality and longevity of your electrical, plumbing, or HVAC systems.
So, take the plunge and install an access panel in your ceiling. Enjoy the convenience, peace of mind, and improved accessibility it brings. You’ll be glad you did!
Frequently Asked Questions about How To Install Access Panel In Ceiling
Was this page helpful?
At Storables.com, we guarantee accurate and reliable information. Our content, validated by Expert Board Contributors, is crafted following stringent Editorial Policies. We're committed to providing you with well-researched, expert-backed insights for all your informational needs.

0 thoughts on “How To Install Access Panel In Ceiling”