Home>Construction & Tools>Building Materials>How To Anchor In Brick
Building Materials
How To Anchor In Brick
Modified: October 20, 2024
Learn how to anchor in brick using the right building materials. Get expert tips and techniques for secure and durable installations. Discover the best practices for anchoring in brick.
(Many of the links in this article redirect to a specific reviewed product. Your purchase of these products through affiliate links helps to generate commission for Storables.com, at no extra cost. Learn more)
Introduction
So, you've got a project that involves anchoring something to a brick wall. Whether it's a heavy picture frame, a bookshelf, a piece of art, or anything else, you'll need to ensure that it's securely attached. This is where brick anchors come into play.
Brick anchors are specially designed fasteners that provide a secure attachment point on a brick surface. They are essential for ensuring that your fixtures and fittings remain safely in place, even under significant weight or stress. However, using the right type of anchor and installing it properly are crucial for a successful outcome.
In this comprehensive guide, we'll delve into the world of brick anchors, exploring the different types available, the tools and materials you'll need, and the step-by-step process for selecting, preparing, and installing the right anchor for your specific project. By the end of this article, you'll be equipped with the knowledge and confidence to tackle your brick anchoring tasks like a pro.
So, let's roll up our sleeves and get ready to dive into the fascinating realm of brick anchors. Whether you're a seasoned DIY enthusiast or a newcomer to the world of home improvement, this guide will provide you with the essential insights and practical tips you need to anchor in brick with ease and precision.
Key Takeaways:
- Choose the right anchor based on weight, brick condition, and environment for a secure attachment that lasts. Proper preparation and testing ensure stability and longevity.
- Gather the right tools, clean and mark the brick surface, and install anchors with care for a reliable attachment. Test for stability and monitor long-term durability.
Read more: How To Remove Metal Wall Anchors From Brick
Understanding Brick Anchors
Before delving into the nitty-gritty of installing brick anchors, it’s essential to understand the different types of anchors available and their specific applications. Brick anchors come in various designs, each tailored to accommodate different weights and installation requirements.
One of the most common types of brick anchors is the expansion anchor, which consists of a sleeve and a cone-shaped nut. When the nut is tightened, the sleeve expands, creating a secure hold within the brick. This type of anchor is suitable for medium to heavy-duty applications and provides reliable support for shelving units, heavy mirrors, and other fixtures.
For lighter loads, plastic anchors are a popular choice. These anchors are inserted into pre-drilled holes in the brick and expand when the screws are driven in, creating a snug fit. Plastic anchors are ideal for hanging lightweight items such as framed photographs, small decorative shelves, and wall-mounted accessories.
In addition to expansion and plastic anchors, there are also sleeve anchors, wedge anchors, and adhesive anchors, each with its own unique features and installation methods. Understanding the specific characteristics of each type will enable you to select the most suitable anchor for your project.
When choosing a brick anchor, it’s crucial to consider the weight of the item you’ll be anchoring, as well as the condition of the brick surface. Additionally, factors such as environmental exposure, temperature variations, and the presence of moisture should be taken into account to ensure the longevity and reliability of the anchor.
By gaining a comprehensive understanding of the different types of brick anchors and their respective capabilities, you’ll be well-equipped to make informed decisions when selecting the most appropriate anchor for your specific application. In the following sections, we’ll explore the tools and materials needed for installing brick anchors and provide a step-by-step guide to help you achieve a secure and durable attachment on your brick wall.
Tools and Materials Needed
Before embarking on your brick anchoring project, it’s essential to gather the necessary tools and materials to ensure a smooth and efficient installation process. Here’s a comprehensive list of items you’ll need:
Tools:
- Power drill with masonry bits
- Screwdriver or impact driver
- Hammer
- Level
- Tape measure
- Pencil or marker
- Dust mask and safety goggles
Materials:
- Brick anchors (appropriate type and size for your specific application)
- Screws compatible with the selected anchors
- Clean cloth or brush for removing debris from the brick surface
- Masonry cleaner (if necessary)
- Optional: Anchor setting tools (for certain anchor types)
It’s important to ensure that you have the correct drill bits for masonry work, as standard drill bits may not be suitable for drilling into brick. Additionally, selecting the right anchor size and type based on the anticipated load and the condition of the brick surface is crucial for a successful installation.
When working with masonry materials, it’s essential to prioritize safety. Wearing a dust mask and safety goggles will protect you from inhaling airborne particles and prevent eye injuries during drilling and installation. Furthermore, having a level on hand will help ensure that your fixtures are installed straight and level, enhancing both the aesthetic appeal and functionality of the anchored items.
By gathering the necessary tools and materials and taking the appropriate safety precautions, you’ll be well-prepared to proceed with the next steps of selecting and preparing the brick surface for anchor installation. With the right equipment at your disposal, you can approach the project with confidence and precision, resulting in a secure and reliable attachment on your brick wall.
Read more: How To Anchor Into Stucco
Choosing the Right Anchor
When it comes to anchoring in brick, selecting the right anchor is a critical step that directly influences the stability and longevity of the installation. The key factors to consider when choosing an anchor include the weight of the item to be anchored, the condition of the brick surface, and the specific requirements of the application.
If you’re anchoring lightweight items such as framed artwork, decorative shelves, or wall-mounted accessories, plastic anchors may be the most suitable option. These anchors are designed to provide reliable support for lighter loads and are relatively easy to install, making them ideal for a wide range of decorative and functional applications.
For medium to heavy-duty installations, such as shelving units, heavy mirrors, or structural fixtures, expansion anchors are a popular choice. These anchors offer robust support and are capable of securely holding substantial weight when installed correctly. It’s essential to select the appropriate size and weight capacity of the expansion anchor based on the specific requirements of your project.
In addition to weight considerations, the condition of the brick surface plays a crucial role in anchor selection. If the brick is particularly dense or brittle, special anchors designed for challenging masonry conditions may be required to ensure a secure and lasting attachment. Understanding the composition and characteristics of the brick will guide you in choosing an anchor that is compatible with the surface material.
Environmental factors, such as exposure to moisture or temperature variations, should also be taken into account when selecting an anchor. For outdoor applications or areas prone to moisture, corrosion-resistant anchors are essential to prevent deterioration over time. Similarly, anchors designed to withstand temperature fluctuations are crucial for installations in environments with varying climate conditions.
By carefully assessing the weight of the load, the condition of the brick surface, and the environmental considerations, you can confidently choose the right anchor for your specific application. This thoughtful selection process ensures that your anchored items remain securely in place, providing both functionality and aesthetic appeal for years to come.
Preparing the Brick Surface
Before installing brick anchors, it’s essential to prepare the brick surface to ensure optimal adhesion and a secure attachment. Proper preparation not only enhances the effectiveness of the anchors but also contributes to the overall durability of the installation. Here’s a step-by-step guide to preparing the brick surface for anchor installation:
Step 1: Clean the Brick Surface
Begin by thoroughly cleaning the area of the brick wall where the anchors will be installed. Use a clean cloth or brush to remove any dirt, dust, or debris from the surface. If the brick is particularly dirty or stained, consider using a masonry cleaner to achieve a clean and smooth surface for anchor attachment.
Step 2: Mark the Anchor Locations
Using a pencil or marker, mark the precise locations where the anchors will be installed. Use a level to ensure that the markings are straight and aligned according to your installation requirements. Properly positioned markings are crucial for accurate drilling and anchor placement.
Read more: How To Anchor A Trampoline Down
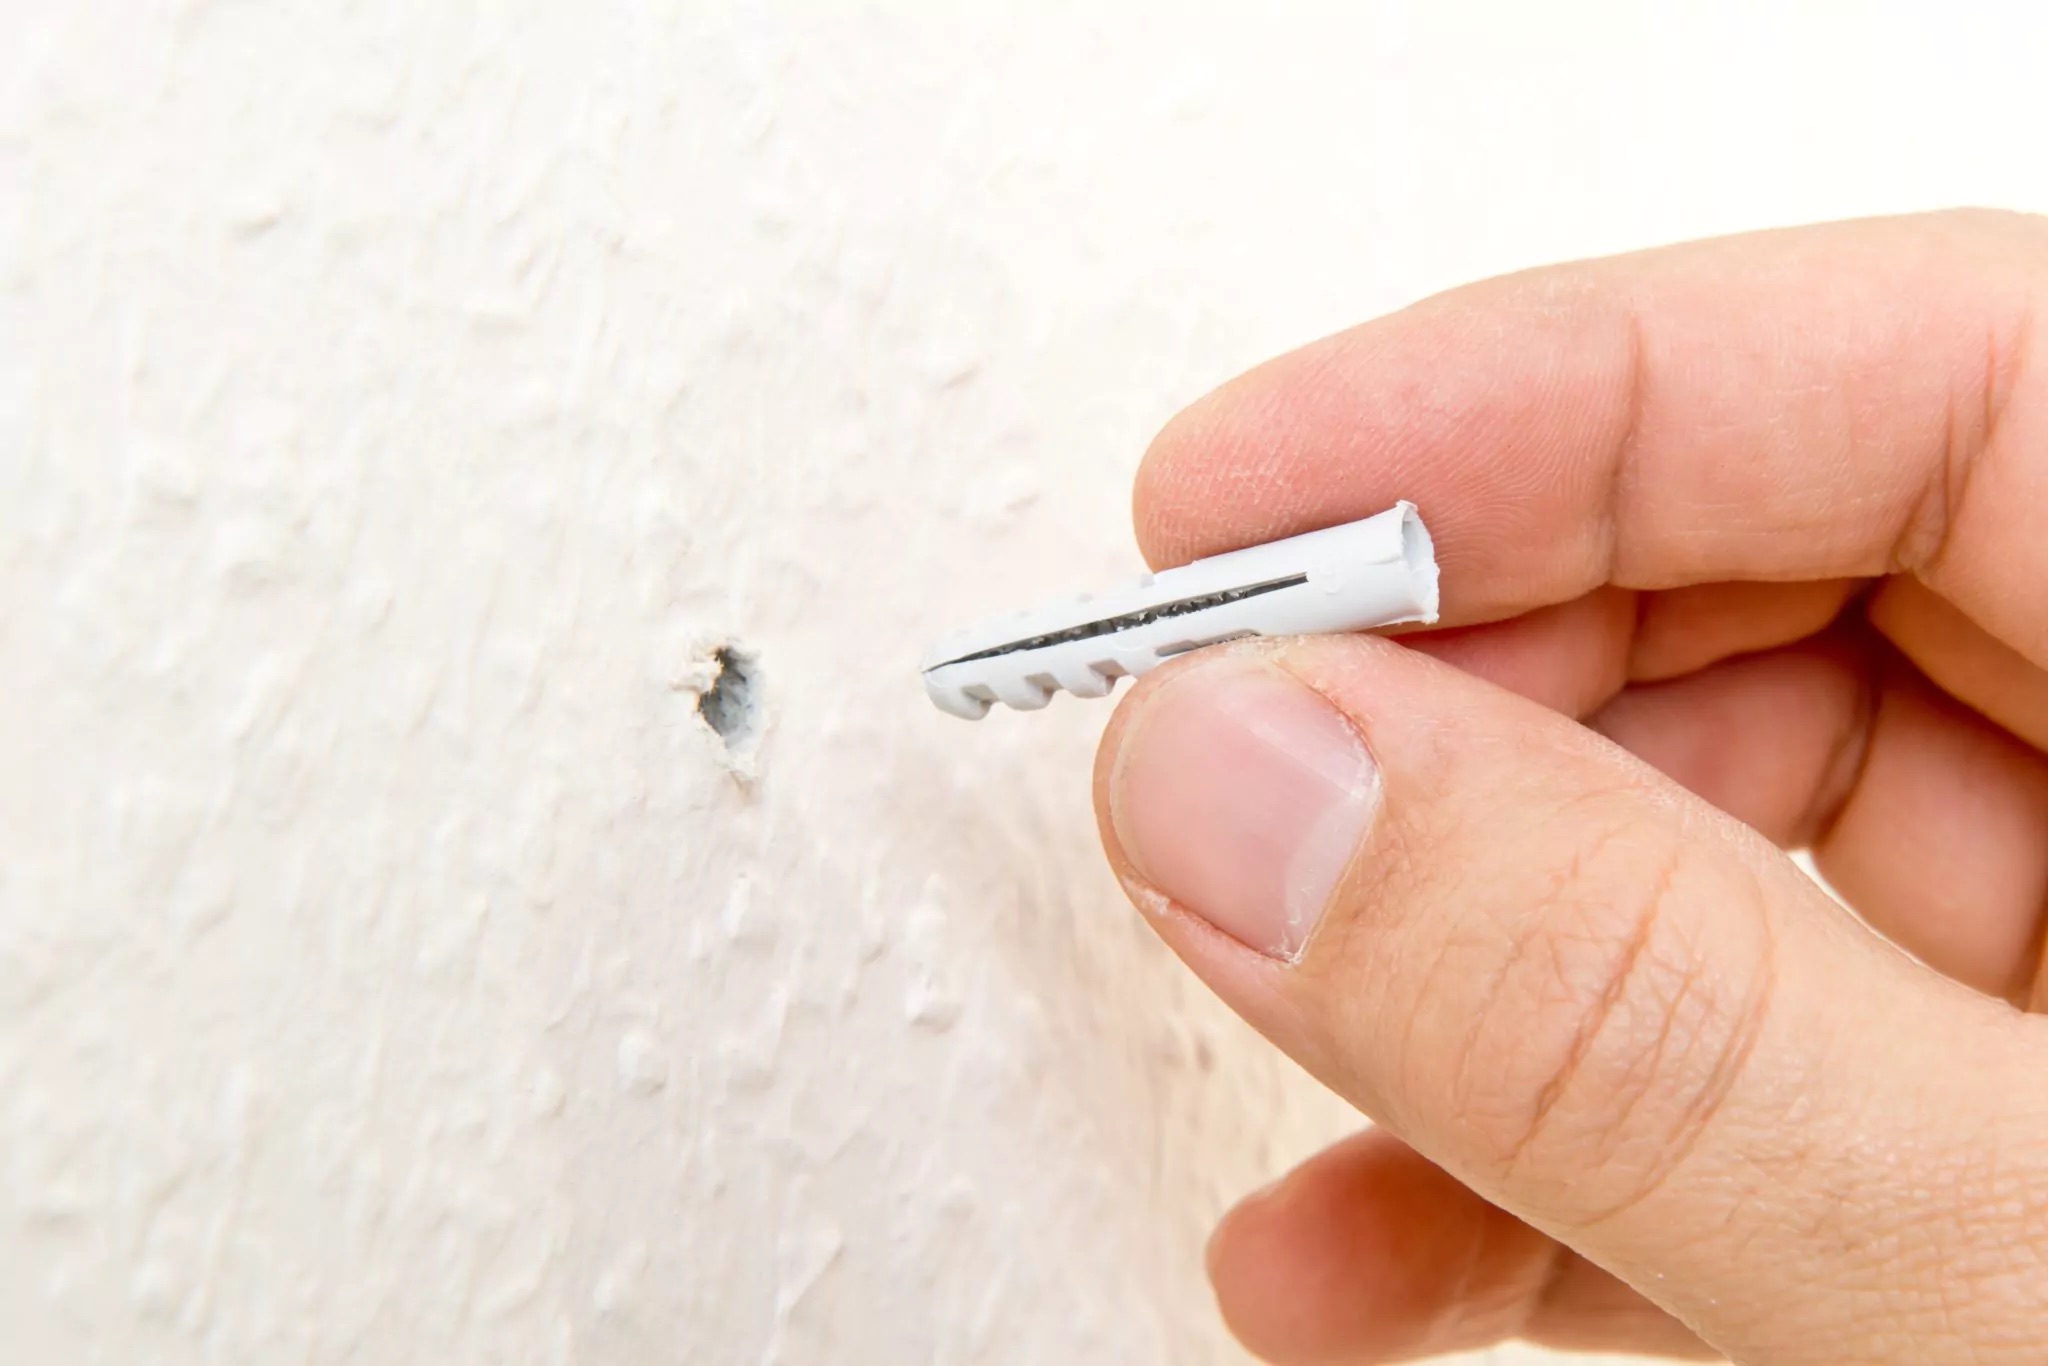
Step 3: Drill Pilot Holes
Select the appropriate masonry drill bit size based on the specifications of the chosen anchors. Carefully drill pilot holes at the marked locations, ensuring that the depth and diameter of the holes correspond to the requirements of the anchors. Use a power drill with a hammer function for efficient drilling into the brick surface.
Step 4: Clean the Drill Holes
After drilling the pilot holes, use a brush or compressed air to remove any residual dust or debris from the holes. Clean, debris-free pilot holes are essential for achieving a secure and flush fit for the anchors.
By following these preparatory steps, you’ll create an ideal foundation for the installation of brick anchors. The clean and accurately marked surface, combined with properly sized and cleaned pilot holes, sets the stage for a successful and reliable anchor attachment. With the brick surface prepared, you’re now ready to proceed with the installation of the selected anchors.
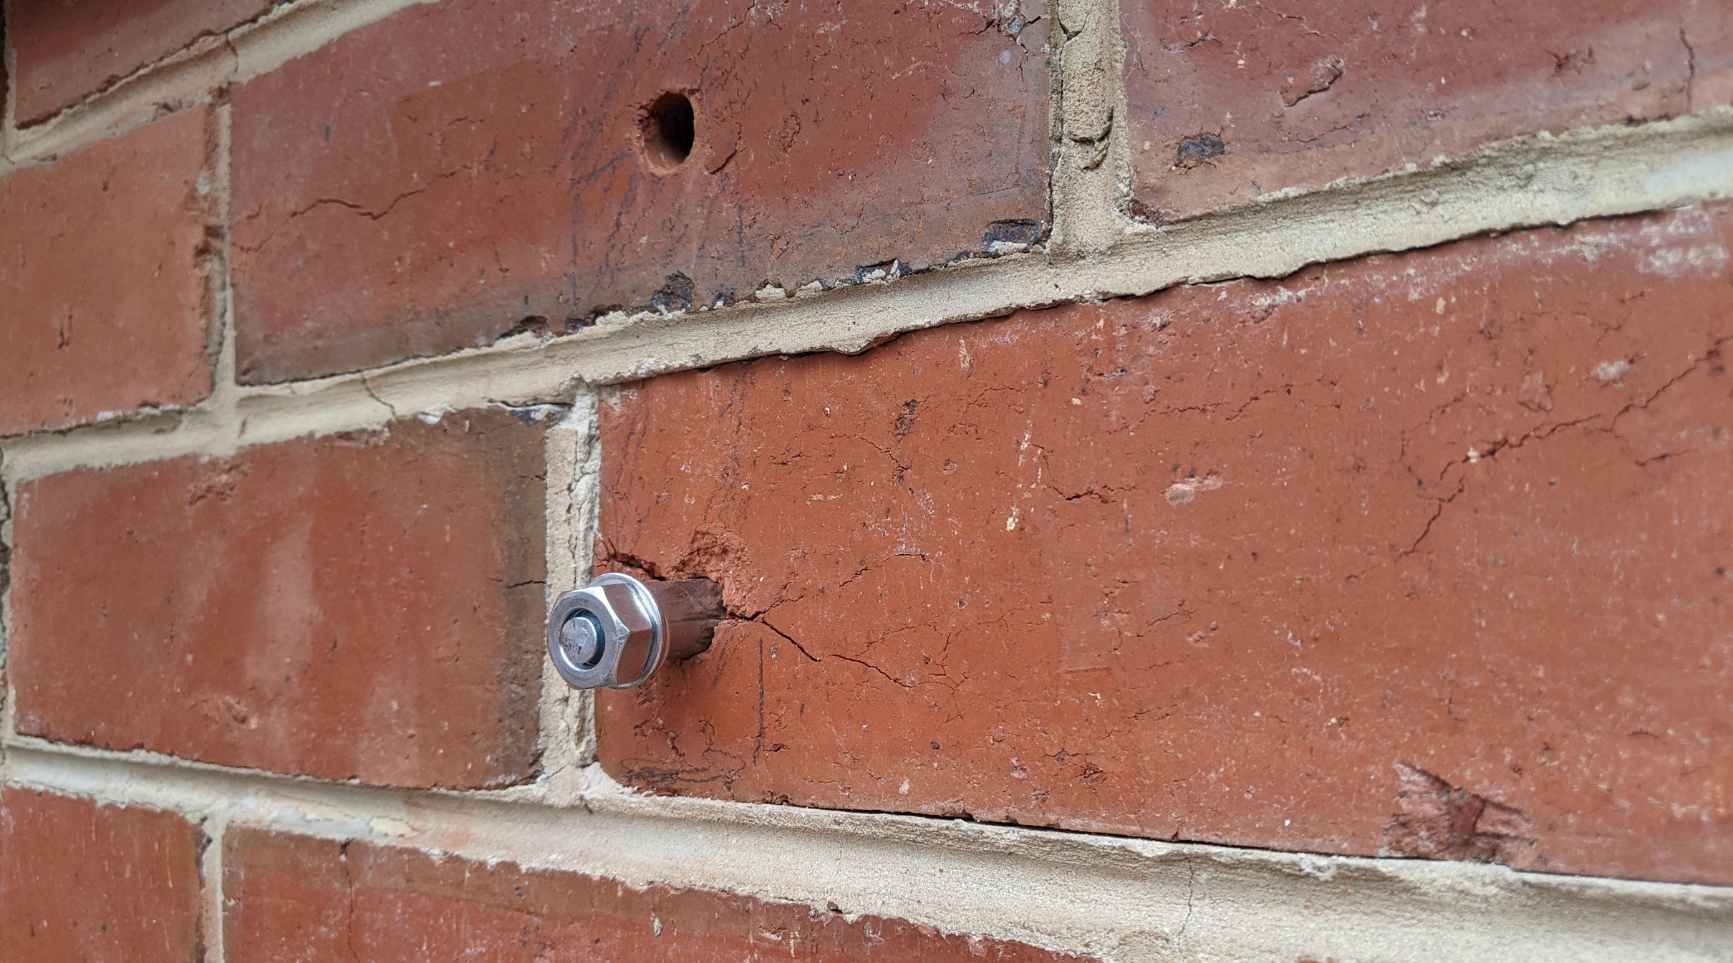
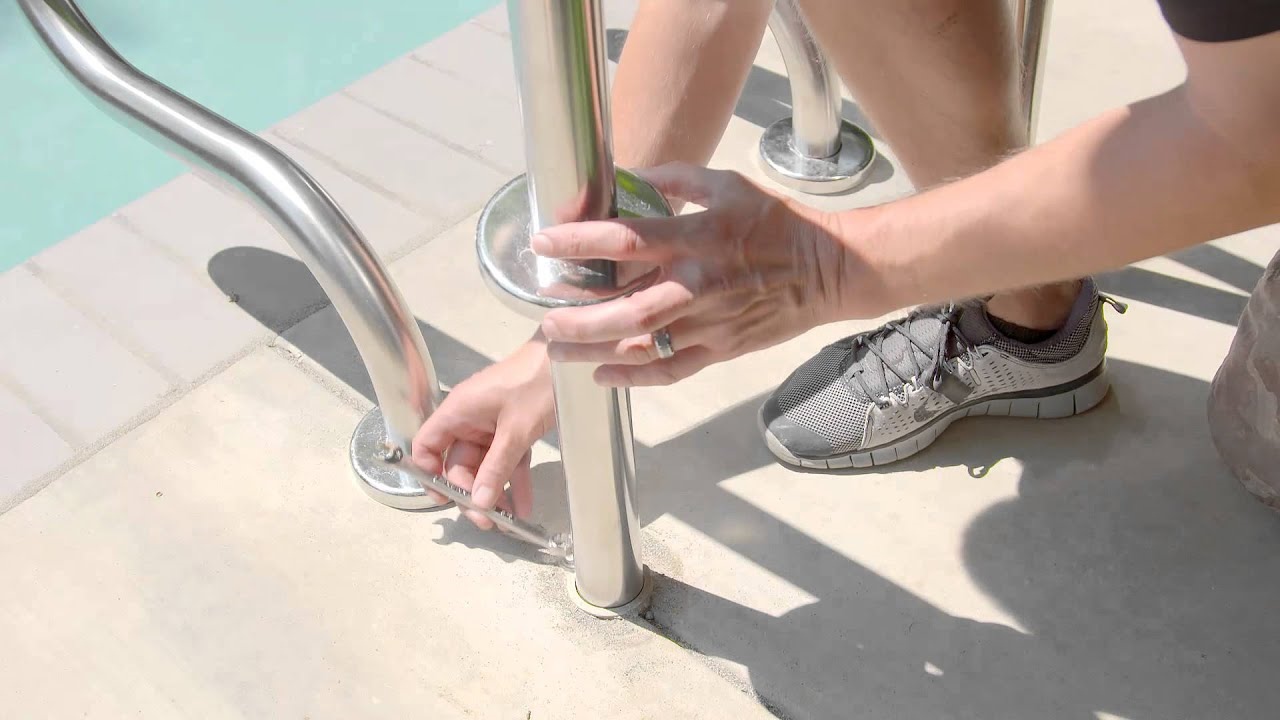
Installing the Anchor
With the brick surface prepared, it’s time to proceed with the installation of the selected anchors. The following step-by-step guide will walk you through the process of securely installing the anchors in the prepared brick surface:
Step 1: Insert the Anchor
Carefully insert the anchor into the pilot hole, ensuring that it sits flush against the surface of the brick. Depending on the type of anchor, you may need to use a hammer or a specific setting tool to secure the anchor in place. Follow the manufacturer’s guidelines for the precise installation method for the chosen anchor.
Read more: How To Anchor A Resin Shed
Step 2: Tighten the Anchor
Using a screwdriver or an impact driver, tighten the anchor by driving the screw into the anchor’s threaded portion. As the screw is driven in, the anchor will expand or engage with the brick, creating a secure attachment point. Exercise caution to avoid over-tightening, which could potentially damage the anchor or the surrounding brick surface.
Step 3: Verify the Secure Attachment
Once the anchor is installed and the screw is securely in place, gently test the stability of the attachment by applying light pressure or tugging on the anchor. A properly installed anchor should remain firmly in place without any visible movement or loosening. Verify that the anchor provides a stable and reliable attachment point for the intended load.
By following these installation steps with precision and care, you’ll achieve a robust and durable attachment for your fixtures and fittings on the brick wall. Properly installed anchors ensure that your items remain securely in place, providing peace of mind and functionality for your living or working space.
Testing the Anchor
After installing the anchor, it’s crucial to conduct a thorough assessment of the attachment to ensure its stability and reliability. The following steps will guide you through the process of testing the anchor to verify its secure installation:
Step 1: Apply Load to the Anchor
Once the anchor is installed and the fixture or fitting is ready to be mounted, carefully apply the intended load to the anchored item. This could involve hanging a shelf, mounting a mirror, or attaching any other fixture that the anchor is designed to support. Gradually apply the load to the anchor, paying close attention to any signs of movement or instability.
Read more: How To Anchor A Shed To The Ground
Step 2: Observe for Stability
Monitor the anchored item for any indications of instability or shifting. Check for any visible movement or loosening of the anchor from the brick surface. It’s essential to ensure that the anchor provides a stable and secure attachment point, capable of supporting the anticipated weight without compromise.
Step 3: Verify Long-Term Stability
After applying the load and observing the initial stability of the anchor, it’s beneficial to monitor the installation over time to verify its long-term stability. Regularly assess the anchored item for any changes in stability or signs of deterioration. This ongoing evaluation ensures that the anchor continues to provide reliable support for the attached fixture or fitting.
By rigorously testing the anchor and closely monitoring its stability over time, you can be confident in the durability and effectiveness of the installation. A securely anchored item contributes to a safe and functional living or working environment, providing peace of mind and longevity for your fixtures and fittings on the brick wall.
Conclusion
Congratulations! You’ve now gained valuable insights into the world of brick anchors and the essential steps for achieving secure and reliable attachments on brick surfaces. By understanding the different types of anchors, gathering the necessary tools and materials, and following a systematic approach to preparation and installation, you’re well-equipped to tackle your brick anchoring projects with confidence and precision.
Choosing the right anchor based on the weight of the load, the condition of the brick surface, and environmental considerations is a crucial decision that directly impacts the long-term stability and functionality of the installation. By carefully assessing these factors, you can ensure that your anchored items remain securely in place, providing both aesthetic appeal and practical utility.
Properly preparing the brick surface, drilling accurate pilot holes, and installing the anchors with care and precision are fundamental steps that contribute to the effectiveness and durability of the attachment. Thoroughly testing the anchor and monitoring its stability over time further reinforces the reliability of the installation, providing peace of mind and confidence in the anchored fixtures and fittings.
Whether you’re embarking on a DIY home improvement project or seeking professional guidance for commercial installations, the knowledge and expertise you’ve gained in this comprehensive guide will serve as a valuable resource. With the right approach and attention to detail, you can achieve secure and lasting attachments on brick walls, enhancing the functionality and visual appeal of your living or working space.
So, armed with this newfound knowledge, go forth and anchor in brick with the assurance that your fixtures and fittings will remain steadfast and secure, adding both practicality and charm to your surroundings.
Frequently Asked Questions about How To Anchor In Brick
Was this page helpful?
At Storables.com, we guarantee accurate and reliable information. Our content, validated by Expert Board Contributors, is crafted following stringent Editorial Policies. We're committed to providing you with well-researched, expert-backed insights for all your informational needs.


0 thoughts on “How To Anchor In Brick”