Home>Furniture>Outdoor Furniture>How To Anchor A Gazebo On The Patio

Outdoor Furniture
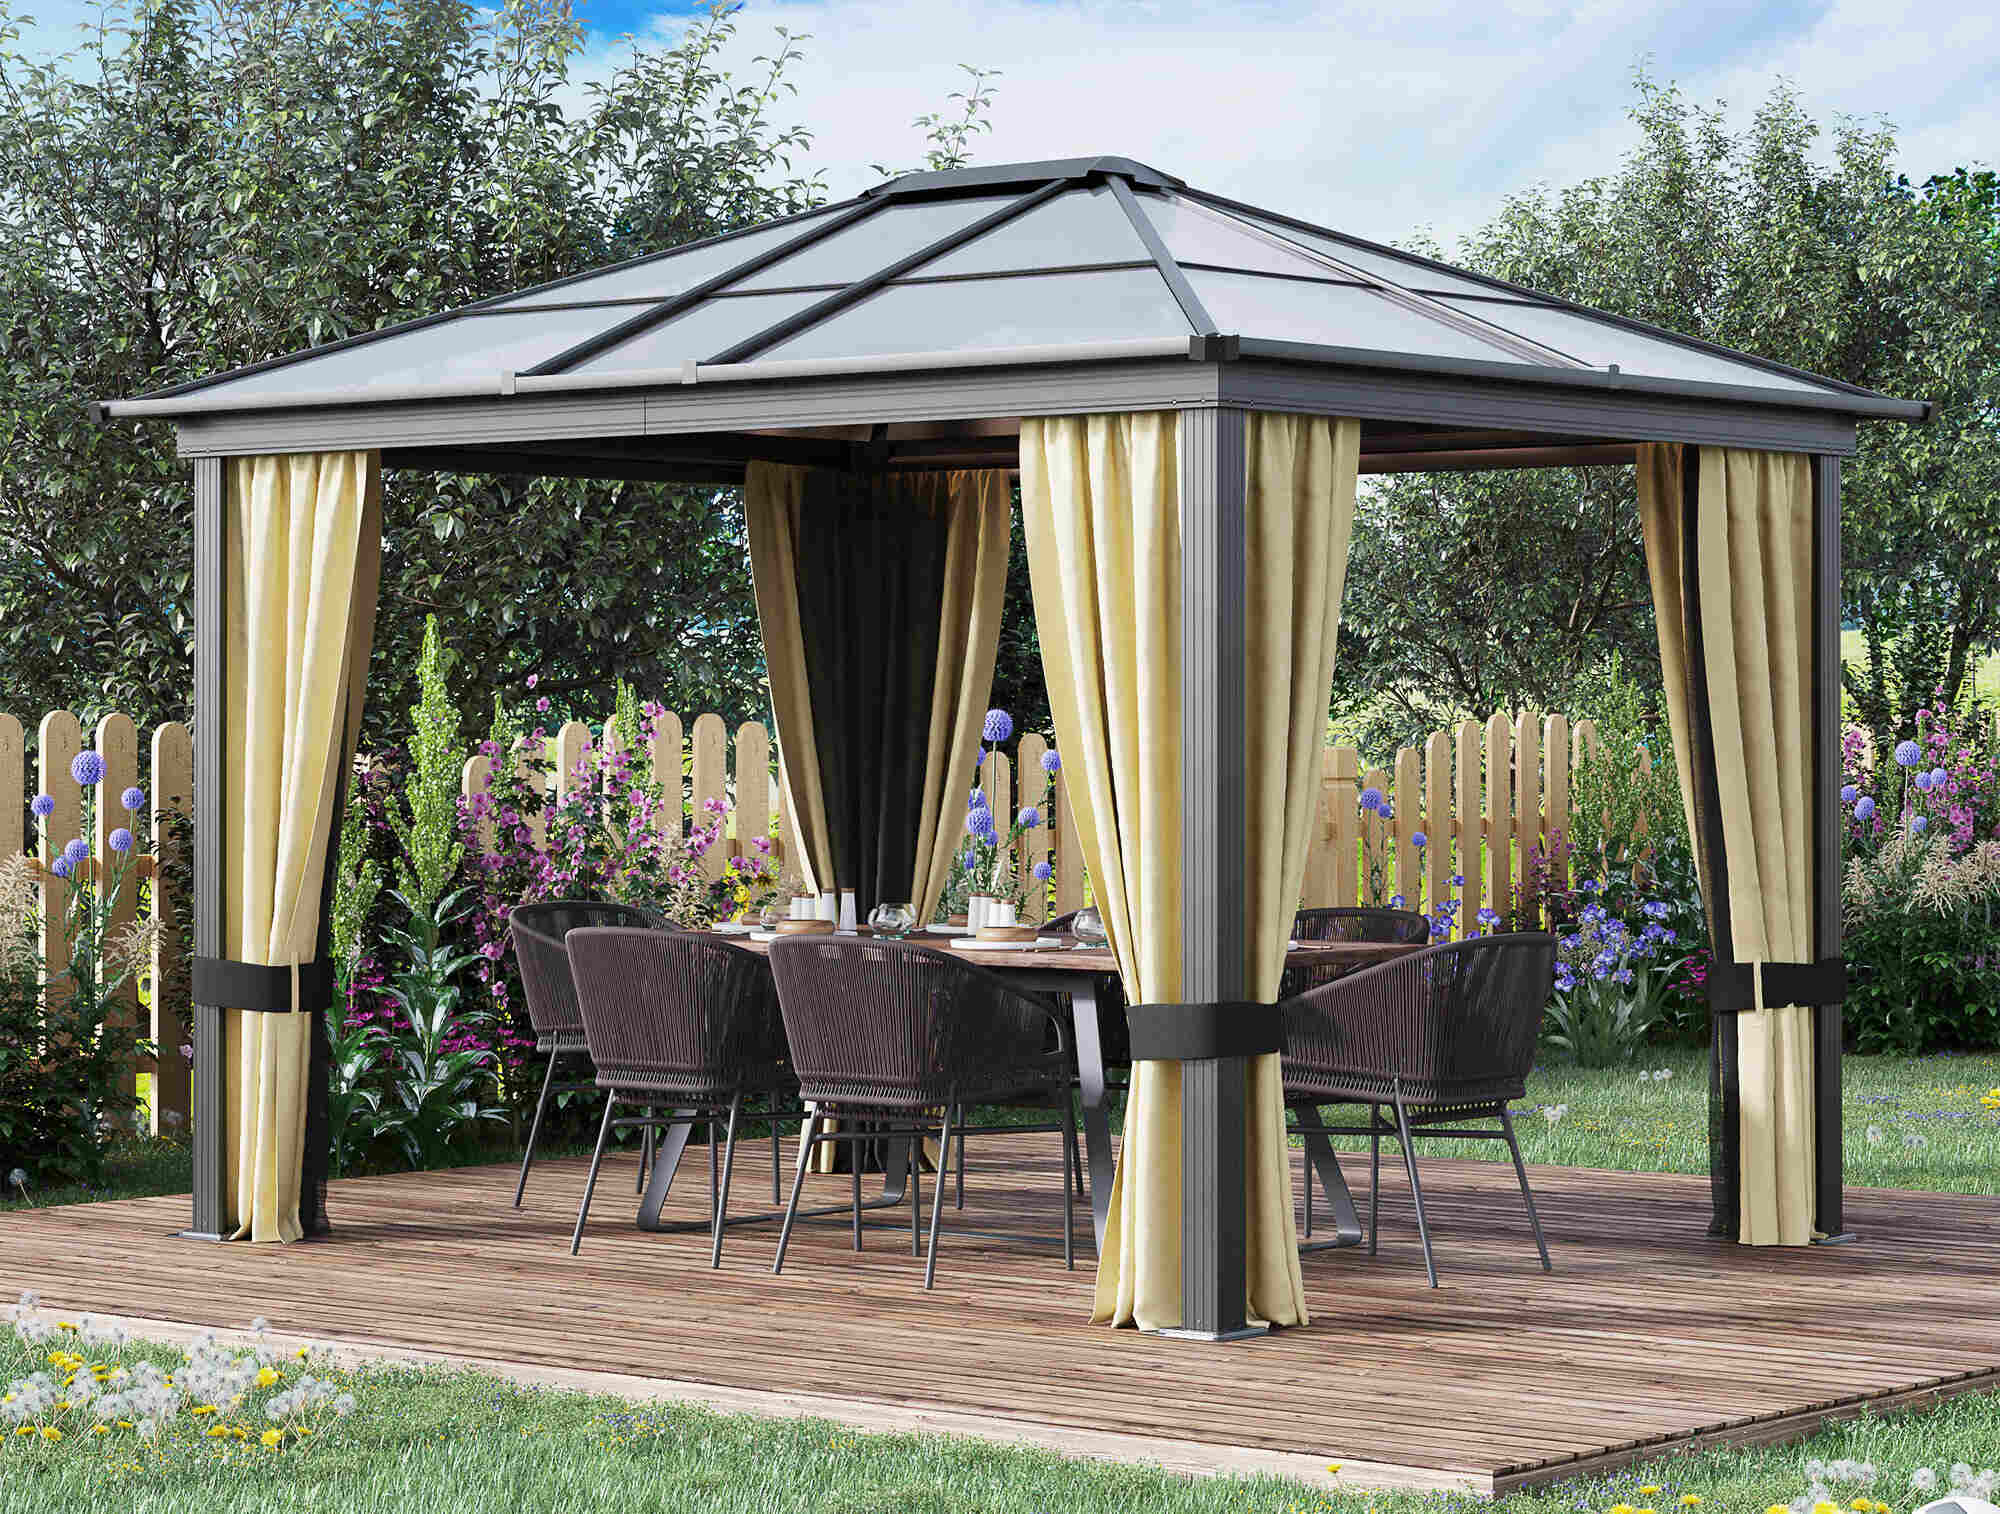
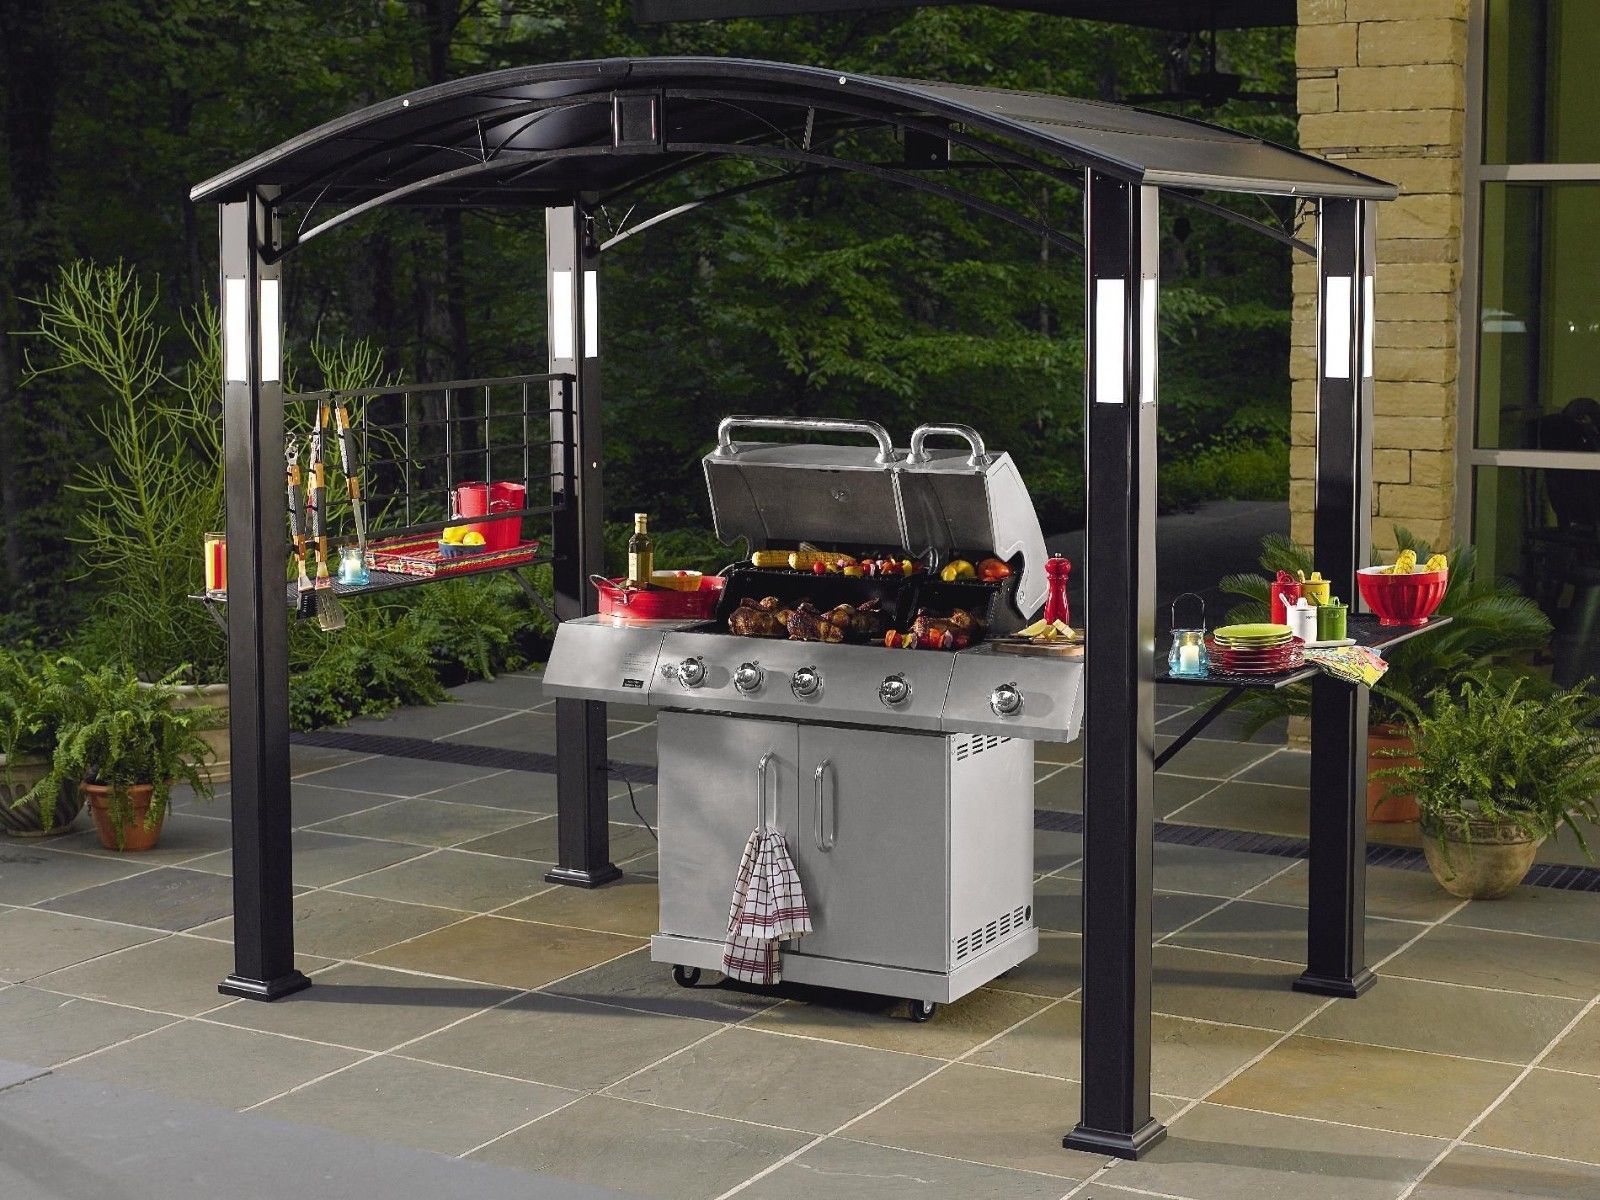
How To Anchor A Gazebo On The Patio
Modified: October 20, 2024
Learn the step-by-step process of anchoring a gazebo on your patio to ensure stability and security for your outdoor furniture. Expert tips and advice for a successful installation.
(Many of the links in this article redirect to a specific reviewed product. Your purchase of these products through affiliate links helps to generate commission for Storables.com, at no extra cost. Learn more)
Introduction
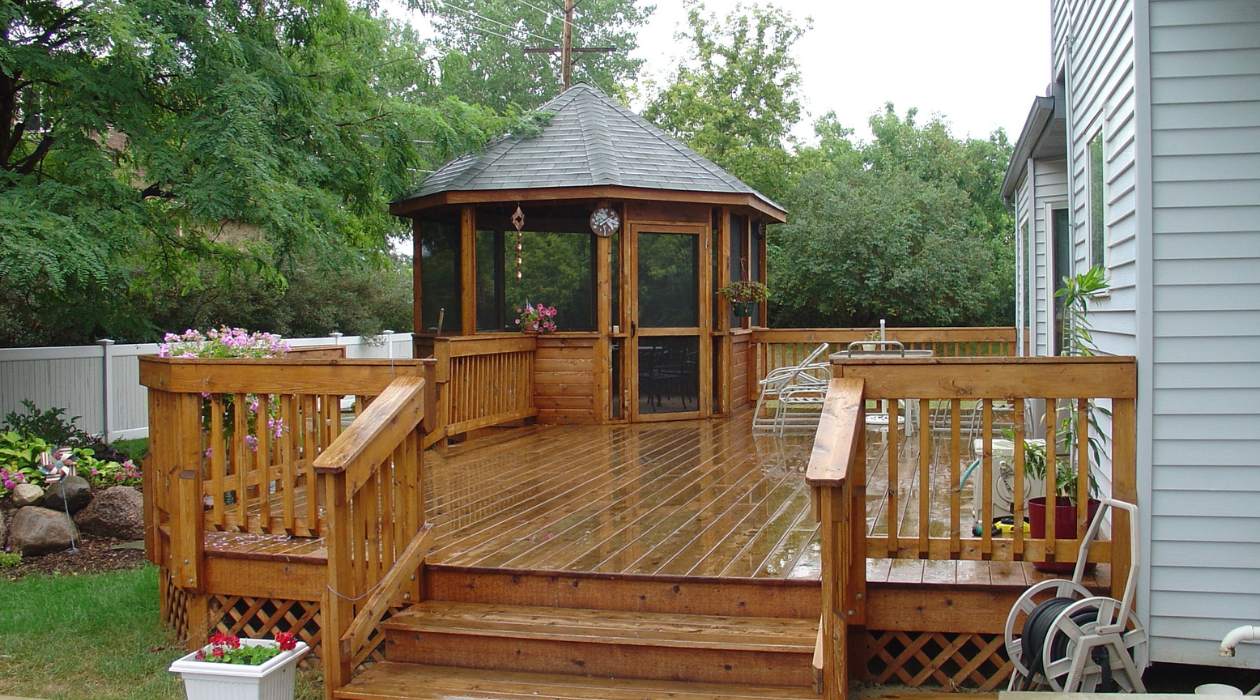
Welcome to our comprehensive guide on how to anchor a gazebo on the patio. Gazebos are a wonderful addition to any outdoor space, providing shade, a gathering area, and a touch of elegance. However, to ensure the safety and stability of your gazebo, it is crucial to properly anchor it onto the patio surface.
Whether you have a permanent patio or a temporary one made of interlocking pavers or concrete slabs, anchoring your gazebo will prevent it from being blown away by strong winds or becoming unstable during heavy rain or stormy weather. By taking the time to anchor your gazebo, you can enjoy peace of mind knowing that it will remain in place and provide a secure and comfortable space for relaxation, entertaining guests, or hosting outdoor events.
In this guide, we will walk you through the step-by-step process of anchoring a gazebo on the patio. We will discuss the benefits of anchoring, provide a list of tools and materials you will need, and explain each step in detail to ensure you have a solid understanding of the process. So, let’s get started!
Key Takeaways:
- Anchoring a gazebo on the patio provides stability, safety, and durability, protecting your investment and enhancing the aesthetic appeal of your outdoor space.
- Proper preparation, selection of anchors, and careful installation ensure a secure and stable gazebo, allowing you to enjoy outdoor relaxation and entertainment with confidence.
Read more: How To Build A Patio Gazebo
Benefits of Anchoring a Gazebo on the Patio
Anchoring a gazebo on the patio offers several significant benefits that contribute to the overall safety, stability, and longevity of your outdoor structure. Let’s take a closer look at these benefits:
- Enhanced Stability: One of the primary benefits of anchoring a gazebo is the increased stability it provides. By securely fixing the gazebo to the patio surface, you can minimize the risk of it being swept away by strong winds or wobbling during inclement weather. This is particularly important if you live in an area prone to high winds or storms.
- Improved Safety: A properly anchored gazebo is a safer gazebo. Without proper anchoring, a gazebo can become a hazard, especially during strong gusts of wind. Securing it to the patio ensures that it remains firmly in place, reducing the risk of the structure collapsing or causing damage to nearby property or individuals.
- Longevity and Durability: By anchoring your gazebo, you are significantly enhancing its lifespan. The forces exerted by wind and weather can take a toll on the structure, causing it to weaken over time. However, when anchored, the gazebo remains stable, reducing the strain on its frame and prolonging its overall durability.
- Protects Your Investment: Gazebos are often a significant investment, both in terms of money and time. Anchoring your gazebo protects this investment by ensuring its longevity and reducing the risk of damage. You won’t have to worry about constantly repairing or replacing your gazebo due to preventable issues caused by wind or unstable conditions.
- Additional Security: An anchored gazebo can provide an added sense of security. Whether you use your gazebo to store outdoor furniture, equipment, or other belongings, knowing that it is firmly anchored to the patio will give you peace of mind. This is particularly important if you leave your gazebo unattended for extended periods or during vacations.
- Preserves Aesthetics: Anchoring a gazebo on the patio helps maintain the overall aesthetic appeal of your outdoor space. Constantly needing to reposition or readjust a gazebo that is not anchored can disrupt the flow and design of your patio area. By securing it in place, you can ensure that your gazebo remains a beautiful focal point in your outdoor living space.
Considering these benefits, it’s clear that anchoring a gazebo on the patio is a wise investment of time and effort. Not only does it provide stability and safety, but it also enhances the longevity and durability of your gazebo, preserving your investment for years of enjoyment.
Tools and Materials Needed
Before you begin the process of anchoring your gazebo on the patio, it’s essential to gather the necessary tools and materials. Here is a list of what you will need:
Tools:
- Power Drill with Masonry Bit
- Hammer
- Tape Measure
- Pencil or Marker
- Screwdriver or Wrench (depending on anchor type)
- Level
Materials:
- Gazebo Anchors (such as auger-style anchors or concrete anchors)
- Concrete Screws (if using concrete anchors)
- Wood Screws (if using wooden anchors)
- Anchor Plates or Brackets (if required by the anchor type)
It’s important to note that the specific tools and materials needed may vary depending on the type of gazebo and the patio surface you are working with. Be sure to read and follow the manufacturer’s instructions for your gazebo and anchor system to ensure you have the correct tools and materials for your specific installation.
In addition to these tools and materials, it’s always a good idea to have gloves and safety goggles to protect yourself during the installation process. Safety should be a top priority when handling tools and working with anchors, especially if you are drilling into concrete or using heavy-duty equipment.
Once you have gathered all the necessary tools and materials, you’ll be ready to move on to the next steps of anchoring your gazebo on the patio. With everything at your disposal, you’ll be able to complete the process smoothly and efficiently, ensuring a secure and stable gazebo for years to come.
Read also: 8 Best Patio Gazebo For 2025
Step 1: Preparing the Patio Surface
Before you can begin anchoring your gazebo on the patio, it’s important to properly prepare the surface. This will ensure a solid foundation for the anchors and help prevent any issues or complications down the line. Here are the steps to follow when preparing the patio surface:
- Clean the Patio: Start by thoroughly cleaning the patio surface. Remove any debris, such as leaves, twigs, or dirt, using a broom or leaf blower. Sweep or hose down the area to ensure it is free of dust and grime. This will provide a clean and even surface for the next steps.
- Inspect for Damage: Take a close look at the patio surface for any cracks, unevenness, or damage. If you notice any significant cracks or structural issues, it’s important to address them before proceeding with the anchoring process. Consult with a professional if needed to ensure the patio is in a suitable condition for anchoring the gazebo.
- Level the Patio: Use a level to check the flatness and levelness of the patio surface. If you find any areas that are uneven or sloping, you may need to make adjustments before continuing. Depending on the severity of the unevenness, you might need to use leveling compounds or hire a professional to properly level the patio surface. It’s important to have a level and stable surface to ensure the stability of your gazebo.
- Mark the Gazebo Placement: Determine the exact location where you want to place your gazebo on the patio. Use a tape measure to mark the dimensions of the gazebo base on the patio surface. This will serve as a guide for positioning the anchors and ensure that the gazebo is centered and aligned correctly.
- Clear the Area: Remove any furniture, plants, or other obstacles from the marked area. Make sure there is enough space around the gazebo for easy access and movement. Clearing the area will make it easier to work on the patio surface and prevent any damage to nearby objects during the anchoring process.
By following these steps and properly preparing the patio surface, you will create a solid and stable foundation for anchoring your gazebo. This initial preparation is crucial for the overall success and longevity of your gazebo installation and will ensure that it remains secure and stable even in challenging weather conditions.
Step 2: Choosing the Right Anchors
Choosing the right anchors for your gazebo is crucial to ensure its stability and longevity. The type of anchors you need will depend on the patio surface and the size and weight of your gazebo. Here are some factors to consider when selecting the right anchors:
Patio Surface:
The type of patio surface you have will play a significant role in determining the appropriate anchors. Different surfaces require different anchor types for a secure installation. Here are some common patio surfaces and the corresponding anchor options:
- Concrete: If your patio is constructed of concrete, you can use concrete anchors or expansion anchors. These anchors are designed to be inserted directly into the concrete and provide a strong, stable connection.
- Interlocking Pavers: For interlocking pavers, you can use sandbag or weight-distribution anchors. These anchors sit on top of the pavers and distribute the weight of the gazebo evenly, preventing any single paver from shifting or sinking.
- Wooden Deck: If you have a wooden deck, you can use deck anchors or brackets. These anchors attach to the wooden surface of the deck and provide a secure connection for your gazebo.
Gazebo Size and Weight:
Consider the size and weight of your gazebo when choosing anchors. Larger and heavier gazebos will require stronger and more robust anchors to ensure stability. Check the manufacturer’s guidelines for your gazebo to determine the recommended anchor specifications.
Read more: How To Anchor In Brick
Weather Conditions:
Take into account the typical weather conditions in your area. If you live in a region prone to high winds or storms, you may need to choose anchors specifically designed for windy conditions, such as auger-style anchors. These anchors have helical threads that dig into the ground, providing added stability.
Manufacturer Recommendations:
Always refer to the manufacturer’s recommendations for anchor selection. They will provide guidance on the types and specifications of anchors that are compatible with your specific gazebo model.
By considering these factors and selecting the appropriate anchors, you can ensure that your gazebo is properly secured and able to withstand various weather conditions. Choosing the right anchors is a crucial step in the anchoring process and will directly impact the stability and safety of your gazebo.
Step 3: Positioning and Marking Anchor Locations
Once you have selected the appropriate anchors for your gazebo and patio surface, the next step is to position and mark the anchor locations. Proper placement of the anchors is essential to ensure the stability and balance of the gazebo. Here’s how to do it:
- Refer to Gazebo Instructions: Consult the manufacturer’s instructions for your gazebo to determine the recommended anchor placement. The instructions may provide specific guidelines on the distance between anchors and the optimal positioning for stability.
- Measure and Mark: Use a tape measure and a pencil or marker to measure and mark the anchor locations on the patio surface. Make sure to accurately mark the corners and any additional anchor points indicated in the instructions. For symmetrical gazebos, it’s important to ensure that the anchor locations are equidistant from each other for proper weight distribution.
- Double-Check Alignment: Before finalizing the anchor positions, use a level to double-check the alignment of the marks. This will ensure that the gazebo will be properly positioned and balanced once the anchors are installed.
- Account for Overhang: If your gazebo has an overhang, make sure to account for it when marking the anchor locations. The overhang should not extend beyond the perimeter of the patio to avoid any disruption or interference with surrounding structures or foliage.
- Consider Access Points: Take into consideration any access points you may need, such as doors or walkways, when marking the anchor locations. Ensure that the placement of the anchors allows for unobstructed entry and exit from the gazebo.
It’s important to be precise and accurate when positioning and marking the anchor locations. Proper placement will contribute to the stability and overall structural integrity of your gazebo. Take your time during this step to ensure that the marks are aligned correctly and match the recommended measurements provided by the manufacturer.
Once you have completed this step, you are ready to move on to the next phase of the anchoring process, which involves drilling holes for the anchors. By following the proper positioning and marking techniques, you are setting yourself up for a successful and secure gazebo installation.
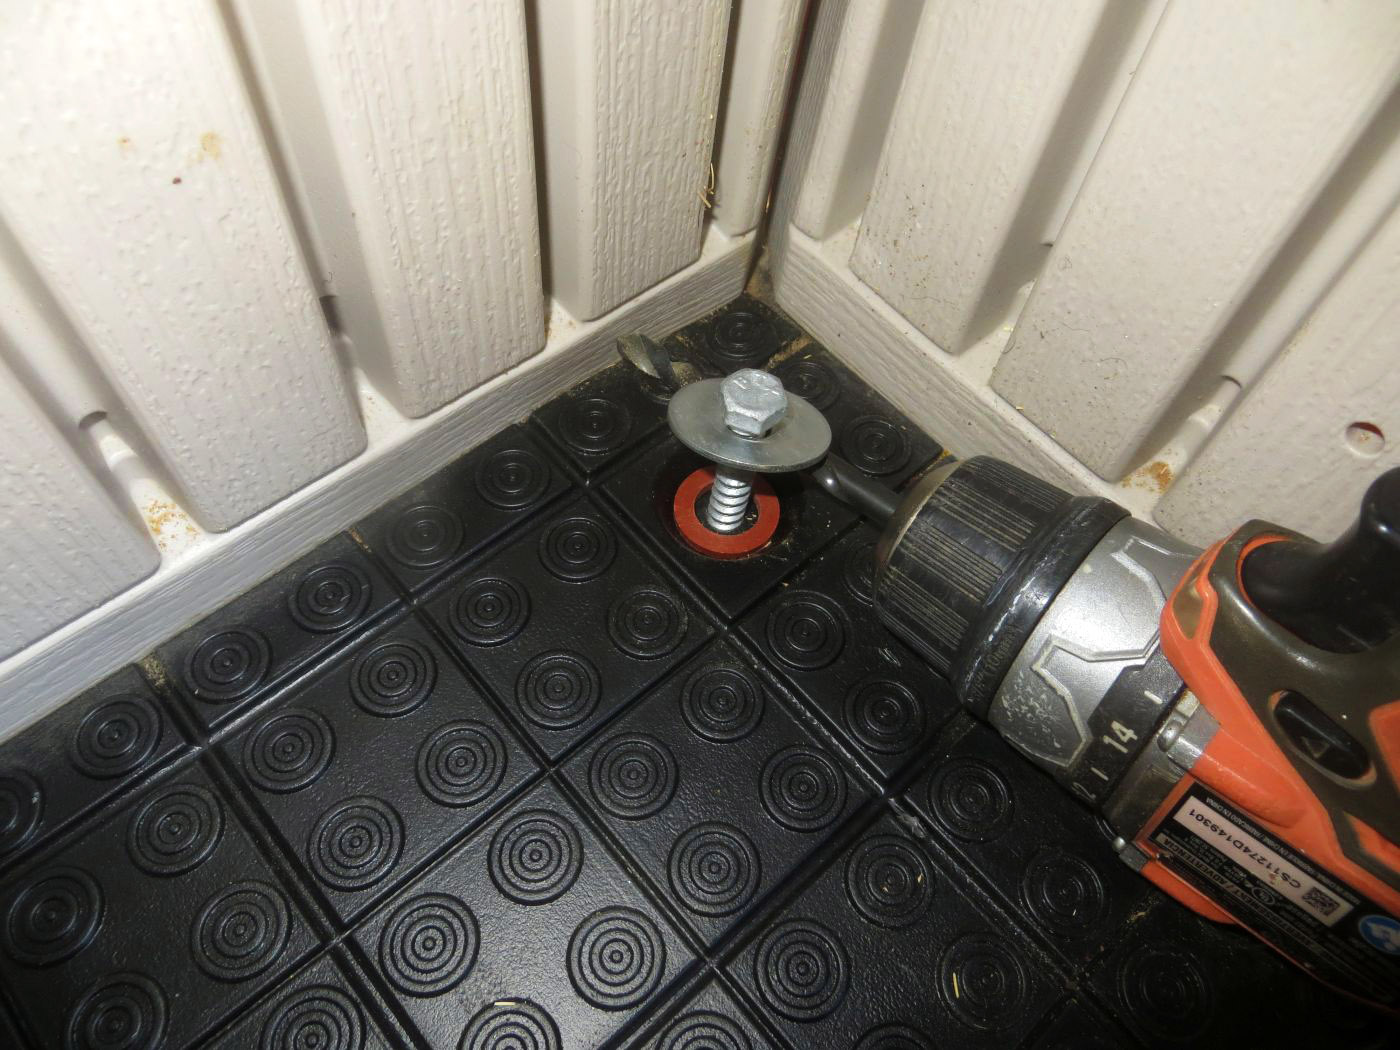
Step 4: Drilling Holes for Anchors
With the anchor locations marked on the patio surface, the next step is to drill holes for the anchors. This is a crucial step that will allow for secure and stable attachment of the gazebo to the patio. Here’s how to proceed:
- Prepare the Drill: Attach a masonry drill bit to your power drill. Choose a drill bit size that matches the diameter of the anchors you are using. It’s important to use a masonry bit specifically designed for drilling into the patio surface material, such as concrete or interlocking pavers.
- Wear Protective Gear: Before drilling, put on safety goggles to protect your eyes from any debris or dust that may be generated during the drilling process. It’s also recommended to wear ear protection if the noise level from the drill is loud.
- Drill the Holes: Position the drill bit on the first marked anchor location. Hold the drill perpendicular to the patio surface and apply steady pressure as you start drilling. Begin with a slow speed, gradually increasing the speed as the bit penetrates the surface. Drill to the recommended depth specified by the anchor manufacturer.
- Clear the Dust: As you drill, periodically remove the drill bit from the hole to clear away any dust or debris that may accumulate. This will ensure that the hole remains clean and clear for proper anchor insertion.
- Repeat for Each Anchor: Move on to the next marked anchor location and repeat the drilling process. Take your time with each hole, ensuring that you maintain the correct depth and position for each anchor. Double-check the alignment and depth of the holes as you progress.
- Clean Up: Once all the holes are drilled, use a brush or a blower to clean away any dust or debris from the holes and the surrounding area. This will ensure a clean and secure fit for the anchors.
Drilling the holes for the anchors may require some time and effort, especially if you’re working with a more solid patio surface, such as concrete. Take breaks as needed to prevent overheating of the drill or strain on your arm. It’s important to maintain patience and accuracy throughout this step to ensure the proper installation of the anchors.
With the holes drilled, you’re now ready to move on to the next step: inserting the anchors into the holes. The anchors will provide the necessary foundation to secure your gazebo to the patio surface.
Read more: How To Anchor Into Stucco
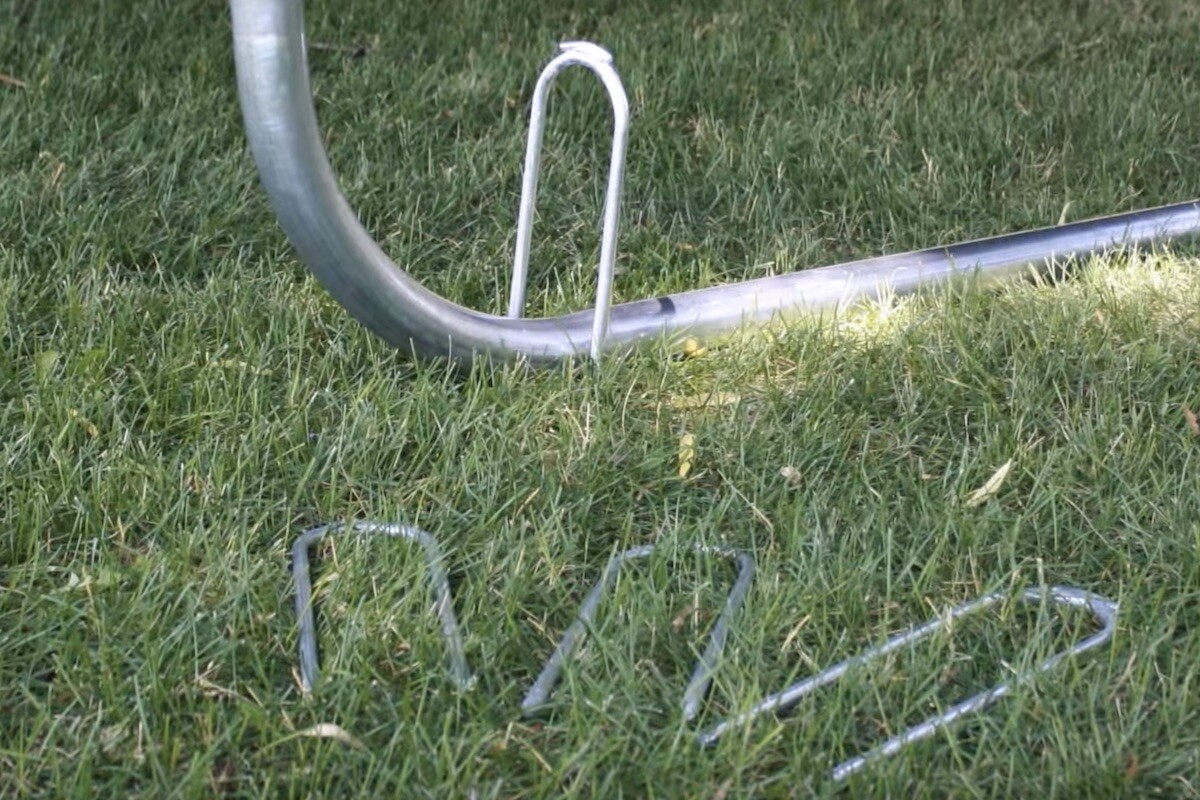
Step 5: Inserting the Anchors
Now that the holes are drilled, it’s time to insert the anchors into the patio surface. The anchors will provide the stability and secure connection needed to keep your gazebo in place. Here’s how to proceed:
- Prepare the Anchors: Depending on the anchor type, you may need to assemble or prepare them before inserting them into the holes. Follow the manufacturer’s instructions to ensure proper assembly and preparation.
- Apply a Lubricant (if necessary): Some anchors may require a lubricant, such as a construction adhesive or epoxy, to secure them in place. Follow the instructions provided with the anchors to determine if a lubricant is necessary and how to apply it.
- Insert the Anchors: Place an anchor into each drilled hole, making sure they are aligned properly with the marked anchor locations. Push the anchor into the hole until it is flush with the surface of the patio. If required, use a hammer to gently tap the anchor to ensure a secure fit. Repeat this process for each anchor hole.
- Check Alignment and Depth: Once all the anchors are inserted, double-check the alignment and depth of each anchor. They should be level with the patio surface and centered within the drilled holes. Make any necessary adjustments to ensure a uniform and secure fit.
- Secure the Anchors (if necessary): Depending on the anchor type, you may need to secure them further using screws or bolts. Follow the manufacturer’s instructions to properly secure the anchors to the patio surface. This will enhance the stability and ensure a strong connection between the gazebo and the anchors.
- Allow Time for Anchors to Set: If you have used a lubricant or adhesive, allow sufficient time for it to set according to the manufacturer’s instructions. This will ensure the anchors are fully secure and ready to support the weight of the gazebo.
By following these steps, you will successfully insert the anchors into the patio surface, providing a solid and stable foundation for your gazebo. It’s important to take your time during this step to ensure that each anchor is properly inserted and secured according to the manufacturer’s guidelines.
Now that the anchors are in place, the next step is to secure the gazebo to these anchors. This will ensure a strong and stable connection between the gazebo and the patio, allowing you to enjoy your outdoor space with peace of mind.
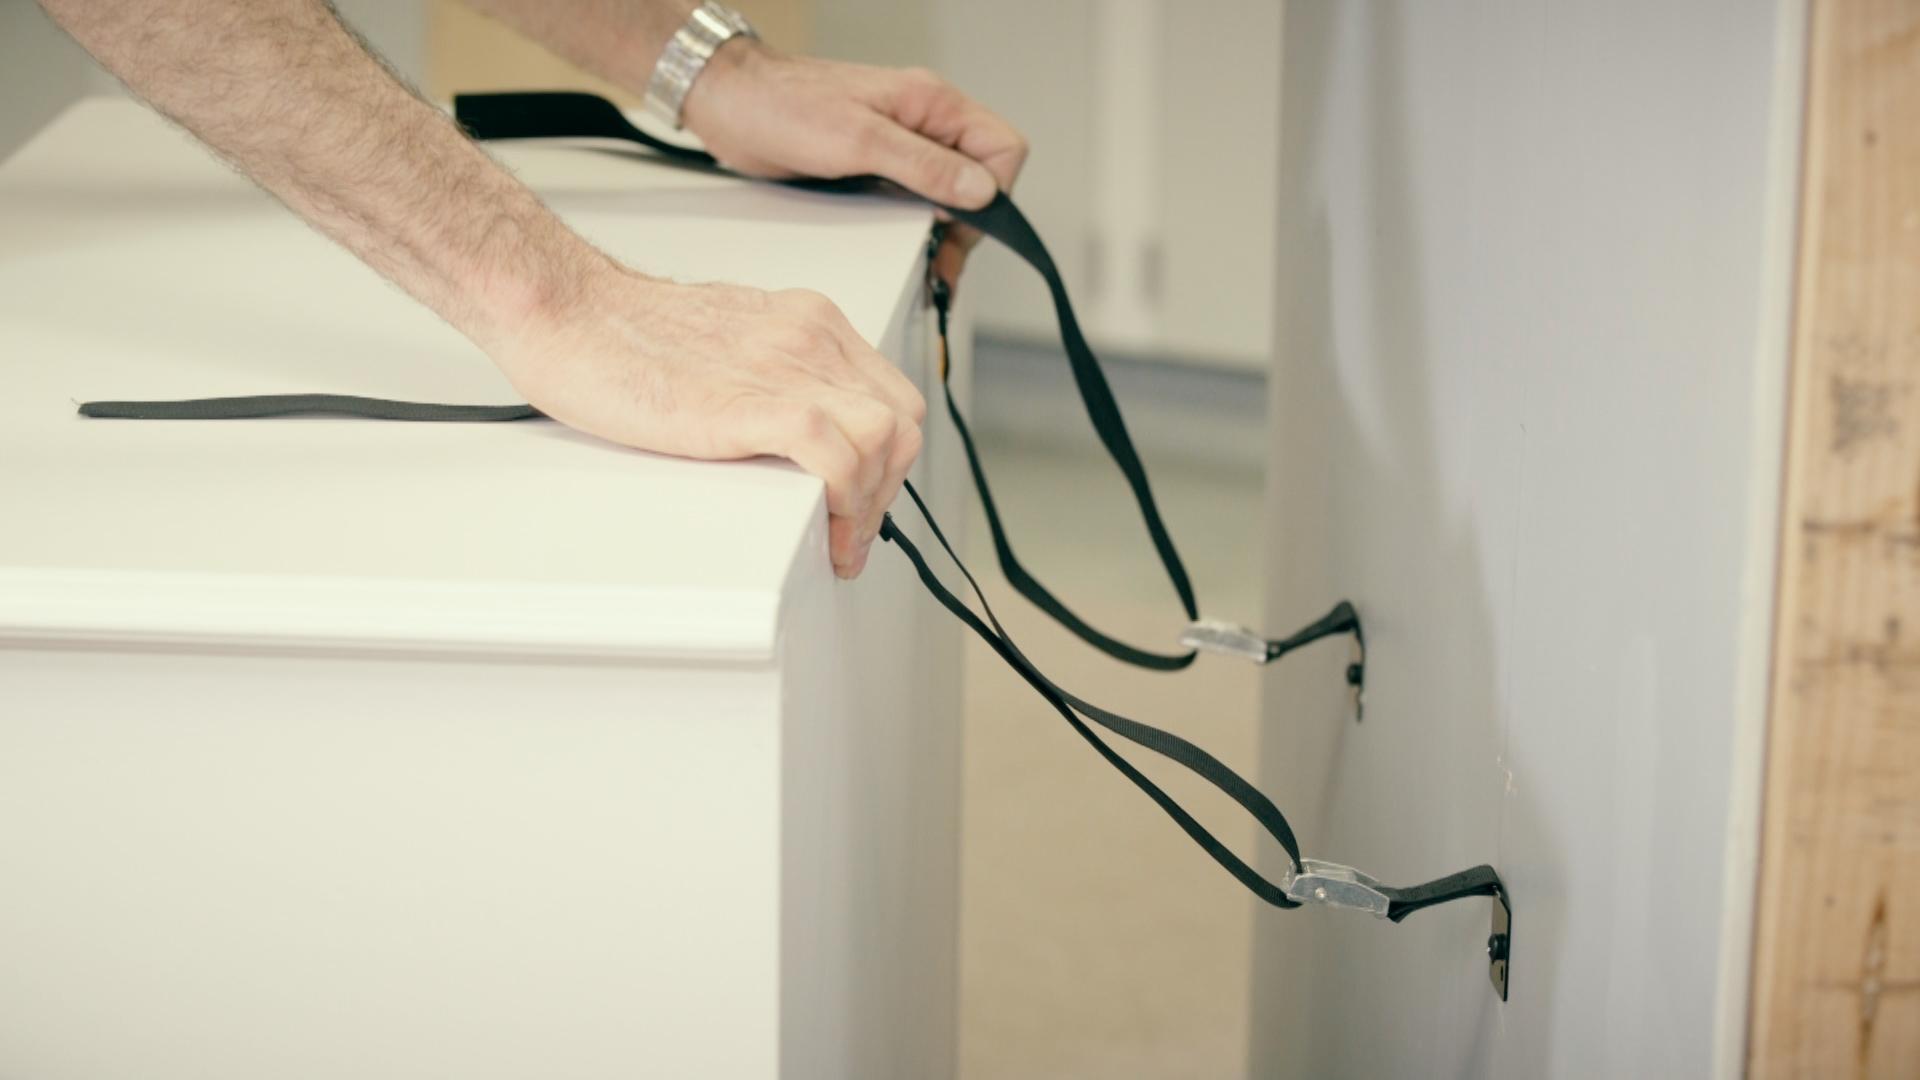
Step 6: Securing the Gazebo to the Anchors
With the anchors in place, it’s time to securely fasten the gazebo to these anchors. This step will ensure that your gazebo remains stable and resistant to strong winds or other external forces. Here’s how to proceed:
- Position the Gazebo: Carefully position the gazebo over the inserted anchors, making sure it aligns with the marked anchor locations on the patio. Take your time to ensure the gazebo is centered and properly positioned.
- Attach the Gazebo Base: Depending on your gazebo’s design and anchor system, you may need to attach the gazebo base to the anchors using screws, bolts, or other fasteners. Follow the manufacturer’s instructions to determine the appropriate attachment method and ensure a secure connection.
- Tighten the Hardware: If your gazebo uses brackets or plates for attaching the base to the anchors, use a screwdriver or wrench to tighten the hardware. Make sure the connection is secure but avoid overtightening, as this may cause damage to the gazebo or the anchors. Refer to the manufacturer’s guidelines for the recommended torque specifications.
- Repeat for Each Anchor: Move to each anchor location and repeat the process of attaching the gazebo base and tightening the hardware. Ensure that each connection is secure and aligned properly with the anchor and base.
- Check Stability: Once all the connections are secure, check the stability of the gazebo by gently pushing or shaking it. It should feel stable and not wobble or shift significantly. If you notice any instability, double-check the connections and tighten them as needed. Adjust the level of the gazebo if necessary using shims or adjustable feet.
- Inspect for any Remaining Loose Connections: After testing the stability, inspect all connections once more to ensure that no hardware has become loose during the installation process. Tighten any remaining loose connections to ensure the gazebo is securely anchored to the patio.
By following these steps, you will securely fasten your gazebo to the anchors, providing a stable and reliable outdoor space for relaxation and entertainment. It’s crucial to take the time to properly attach and tighten the gazebo base to ensure a secure and long-lasting connection.
Once the gazebo is securely attached to the anchors, the final step is to test the stability and make any necessary adjustments. This will help ensure that your gazebo remains stable and safe, even in challenging weather conditions.
Use heavy-duty metal stakes or concrete anchors to secure the gazebo legs to the patio. Make sure to drill pilot holes for the anchors and use a level to ensure the gazebo is properly aligned.
Step 7: Testing the Stability and Adjusting if Necessary
After securing the gazebo to the anchors, it’s essential to test its stability and make any necessary adjustments. This final step ensures that your gazebo is properly anchored and can withstand various weather conditions. Here’s how to proceed:
- Test for Stability: Gently push or shake the gazebo from different angles to check its stability. It should feel solid and not wobble or shift significantly. Pay attention to any areas that seem unstable or show signs of movement.
- Inspect Connections: Carefully inspect all the connections between the gazebo and the anchors. Check for any loose hardware, bolts, or screws and tighten them if necessary. Ensure that all connections are secure and aligned properly.
- Adjust Level if Needed: Use a level to check the levelness of the gazebo. If you notice any areas that are not level, you may need to make adjustments. You can use shims or adjustable feet to level the gazebo and ensure a stable and balanced structure.
- Consider Additional Supports: Depending on the size and weight of your gazebo, you may want to consider adding additional supports for extra stability. This could include bracing the gazebo legs with stakes or installing guy wires to anchor the gazebo to nearby structures or stakes in the ground.
- Monitor Over Time: Keep an eye on the gazebo’s stability over time, especially during periods of inclement weather. Regularly inspect the connections and anchors for any signs of loosening or damage. Make any necessary adjustments or repairs promptly to maintain the stability and safety of the gazebo.
Testing the stability of your gazebo and making proper adjustments is crucial to ensure the long-term safety and enjoyment of your outdoor space. By following these steps and regularly maintaining your gazebo, you can have peace of mind knowing that it will remain secure and stable.
Congratulations! You have successfully anchored your gazebo on the patio. You can now enjoy your outdoor oasis with confidence, knowing that your gazebo is securely fastened and ready to withstand the elements.
ConclusionAnchoring a gazebo on the patio is a crucial step in ensuring its stability, safety, and longevity. By following the step-by-step process outlined in this guide, you have learned how to prepare the patio surface, choose the right anchors, position and mark anchor locations, drill holes for anchors, insert the anchors, secure the gazebo to the anchors, and test the stability. Through careful planning and execution, your gazebo is now securely anchored, allowing you to enjoy your outdoor space with confidence.
By anchoring your gazebo, you have enhanced its stability, improving not only its resistance to strong winds and inclement weather but also its overall durability. This investment in the proper anchoring process protects your gazebo from potential damage and ensures that it remains a beautiful and functional addition to your outdoor living area for years to come.
Remember to regularly inspect the connections, tighten any loose hardware, and monitor the stability of your gazebo over time. Regular maintenance will help preserve the integrity of the anchoring system and allow you to address any potential issues before they become larger problems.
With a securely anchored gazebo, you can now entertain guests, host outdoor events, or simply relax in the shade with peace of mind. Enjoy the comfort, serenity, and beauty that your gazebo brings, knowing that it is firmly in place and ready to withstand the elements.
Thank you for following this comprehensive guide on how to anchor a gazebo on the patio. We hope this information has been helpful in ensuring a successful and secure installation. Cheers to many enjoyable moments spent under the shelter of your gazebo!
Frequently Asked Questions about How To Anchor A Gazebo On The Patio
Was this page helpful?
At Storables.com, we guarantee accurate and reliable information. Our content, validated by Expert Board Contributors, is crafted following stringent Editorial Policies. We're committed to providing you with well-researched, expert-backed insights for all your informational needs.

0 thoughts on “How To Anchor A Gazebo On The Patio”