Furniture
How To Anchor A Dresser To The Wall
Modified: January 6, 2024
Learn how to anchor your dresser securely to the wall with our step-by-step guide. Ensure the safety of your furniture and prevent accidents.
(Many of the links in this article redirect to a specific reviewed product. Your purchase of these products through affiliate links helps to generate commission for Storables.com, at no extra cost. Learn more)
Introduction
When it comes to furnishing your home, safety should always be a top priority. This is especially true when it comes to larger pieces of furniture, such as dressers. Anchoring your dresser to the wall is a crucial step in ensuring the safety of your family and preventing accidents from tipping or falling furniture.
In recent years, there has been an increased awareness about the dangers of unsecured furniture. According to the U.S. Consumer Product Safety Commission, there were an estimated 17,300 injuries caused by falling furniture in 2018 alone. The majority of these incidents involved young children who were climbing or playing near unsecured dressers.
By anchoring your dresser to the wall, you can greatly reduce the risk of furniture tip-overs and keep your loved ones safe. This simple and inexpensive DIY project can provide you with peace of mind and ensure the stability of your furniture.
In this article, we will guide you through the process of anchoring a dresser to the wall. From assessing the stability of the dresser to attaching anchor straps and securing them to wall studs, we will provide you with step-by-step instructions. But before we dive into the process, let’s take a look at the tools and materials you will need for this project.
Key Takeaways:
- Anchoring your dresser to the wall is a crucial safety measure that prevents tip-over accidents, promotes a secure living space, and complies with safety guidelines, ensuring the well-being of your loved ones.
- By following the step-by-step process of dresser anchoring, you not only secure your furniture but also set a positive example for others, contributing to a culture of responsible furniture safety in your home and community.
Read more: How To Anchor In Brick
Why should you anchor your dresser?
Anchoring your dresser to the wall is an essential safety measure that can prevent accidents and protect your loved ones. Here are a few reasons why you should consider anchoring your dresser:
- Prevent tip-overs: Dressers, especially taller ones, can become top-heavy and prone to tipping over if not properly secured. This is especially dangerous for households with young children, as climbing or pulling on the dresser can lead to serious injuries or even fatalities. Anchoring the dresser to the wall helps prevent tipping accidents and keeps your home safe.
- Ensure stability during emergencies: In the event of an earthquake or other natural disasters, furniture can shift and pose a significant risk if not anchored. By securing your dresser to the wall, you minimize the chances of it tipping or causing additional damage during such events. This not only protects your family but also helps in maintaining the structural integrity of your home.
- Promote a safe environment: Accidents can happen unexpectedly, especially in homes with curious pets or rambunctious children. By anchoring your dresser to the wall, you create a secure environment that minimizes the risk of accidents and gives you peace of mind as a responsible homeowner.
- Comply with safety guidelines: Consumer Product Safety Commission (CPSC) guidelines strongly recommend anchoring furniture, including dressers, to prevent tip-over accidents. Following these guidelines not only ensures the safety of your household but also demonstrates your commitment to creating a secure living space.
- Set an example for others: Anchoring your dresser sets a positive example for others, such as visiting friends or relatives who may have young children. By prioritizing safety in your own home, you encourage others to do the same and create a culture of responsible furniture anchoring.
Ultimately, anchoring your dresser to the wall is a simple and effective precautionary measure that can prevent accidents, protect your loved ones, and provide you with peace of mind. Now that you understand the importance of dresser anchoring, let’s move on to the tools and materials you will need for this project.
Tools and materials needed
Before embarking on the process of anchoring your dresser to the wall, it’s important to gather the necessary tools and materials. Here’s a list of what you’ll need:
- Tape measure: A tape measure will be essential for measuring distances and ensuring precise placement of the anchor straps.
- Pencil: A pencil will be used to mark the location of the anchor straps on both the dresser and the wall.
- Drill: You’ll need a drill to create pilot holes for the screws that will secure the anchor straps.
- Screwdriver: A screwdriver, either manual or electric, will be used to drive the screws into the dresser and wall.
- Wall anchors: Wall anchors provide additional stability and support. Choose wall anchors that are appropriate for your wall type and weight-bearing capacity.
- Screws: Be sure to have an ample supply of screws that are suitable for both the anchor straps and the wall anchors. The length of the screws should match the thickness of your dresser and the depth of the wall studs.
- Anchor straps: These specialized straps are designed to secure the dresser to the wall. Look for anchor straps made of sturdy, durable materials that can withstand the weight of the dresser.
- Stud finder: A stud finder is a useful tool for locating wall studs behind the drywall. This will ensure that the anchor straps are securely attached to the strongest part of the wall.
- Level: To ensure that your dresser is properly aligned, have a level on hand to check for any sloping or unevenness.
With these tools and materials at your disposal, you’ll have everything you need to successfully anchor your dresser to the wall. Now let’s move on to the step-by-step process of securing your dresser for maximum stability.
Step 1: Assess the dresser’s stability
Before you begin the process of anchoring your dresser to the wall, it’s important to assess its stability. This step will help you determine if there are any existing issues that need to be addressed or if the dresser is already secure enough to proceed with anchoring.
Here are a few things to consider when assessing the dresser’s stability:
- Inspect for wobbling: Gently push the dresser from different angles to see if it wobbles or feels unstable. Wobbling can indicate loose joints, uneven legs, or other structural issues that should be addressed before anchoring.
- Check for loose hardware: Examine the dresser for any loose screws, knobs, or handles. Tighten any loose hardware using a screwdriver or appropriate tool.
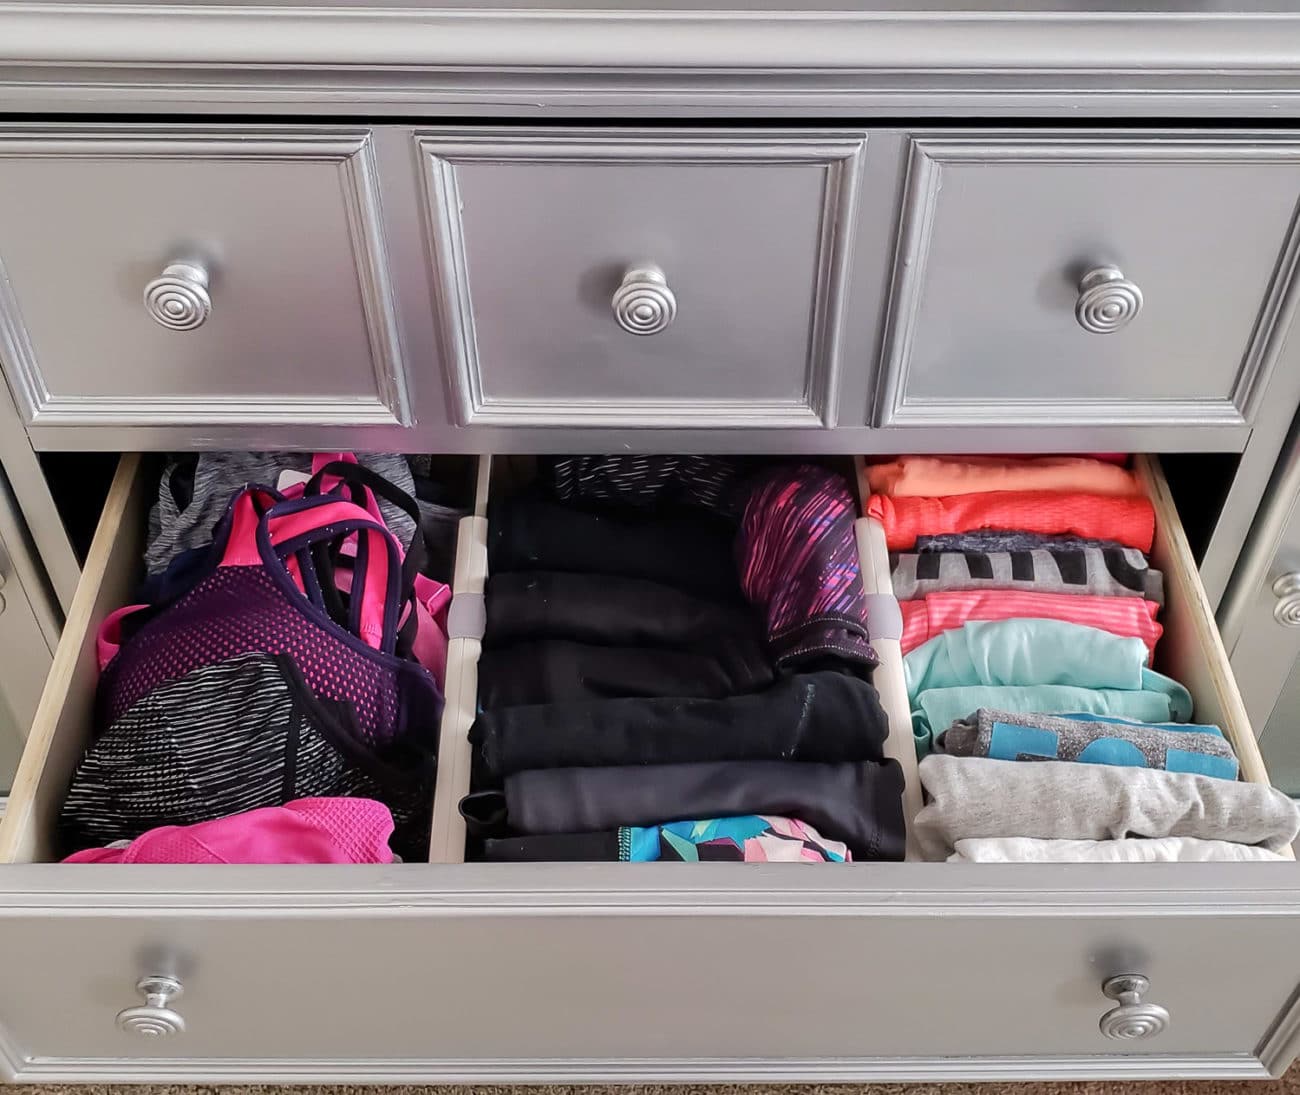
- Assess weight distribution: Take note of how the weight is distributed within the dresser. Heavy items should be placed in the lower drawers to provide stability and prevent the dresser from toppling over.
- Consider the condition of the dresser: If the dresser is in poor condition, with signs of significant damage or weakness, it may not be suitable for anchoring. In such cases, it is recommended to replace the dresser with a more stable option.
- Consider retrofitting options: If you find that the dresser is not stable enough for anchoring, you may want to explore retrofitting options. This could involve reinforcing weak areas, replacing damaged components, or consulting a professional for repairs.
By thoroughly assessing the stability of your dresser, you can ensure that it is in proper condition for anchoring. Addressing any existing issues beforehand will help prevent future problems and ensure the effectiveness of the anchoring process. Once you are confident in the stability of your dresser, you can proceed to the next step: locating wall studs.
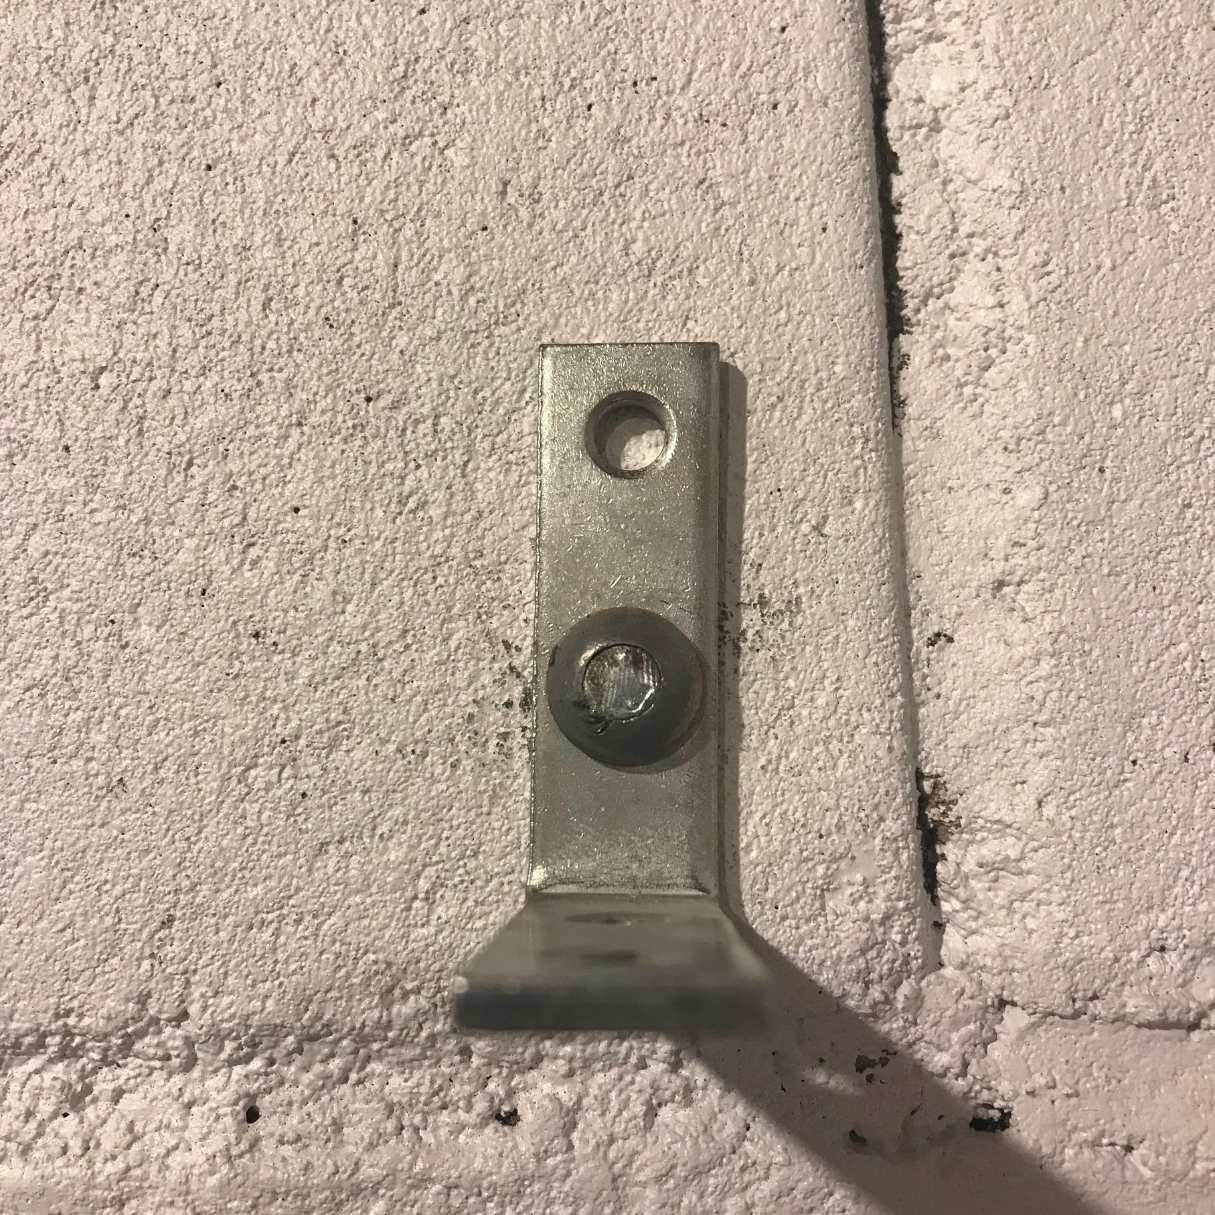
Step 2: Locate wall studs
Locating the wall studs is an important step in properly anchoring your dresser. Wall studs provide the necessary support and strength to secure the anchor straps and ensure the stability of the dresser. Here’s how to locate wall studs:
- Use a stud finder: Start by using a stud finder to locate the wall studs behind the drywall. A stud finder is a handheld device that uses electronic sensors to detect changes in density and locate the solid wood behind the wall.
- Follow the instructions: Different stud finders may have slight variations in operation, so it’s important to read and follow the instructions provided by the manufacturer for proper use.
- Scan the wall: Slowly move the stud finder horizontally across the wall in the area where you plan to anchor the dresser. The stud finder will indicate when it detects a change in density, signaling the presence of a stud.
- Mark the stud locations: Once you locate a stud, mark its edges with a pencil. Repeat the process to locate additional studs. Typically, studs are spaced 16 or 24 inches apart, so be sure to scan a wide enough area to find multiple studs as needed.
- Double-check with a tapping method: To confirm the presence of a stud, you can use a tapping method. Lightly tap the wall with your knuckles or a small hammer. A solid, resonating sound indicates a stud, while a hollow sound suggests there is no stud.
- Adjust the anchor strap placement: Depending on the location of the studs, you may need to adjust the placement of the anchor straps on the dresser to align with the stud locations. This will ensure maximum stability and strength when securing the dresser.
Locating wall studs is a crucial step in the dresser anchoring process. By finding the studs, you can ensure that the anchor straps are securely attached to the strongest part of the wall, providing optimal stability for your dresser. With the wall studs located and marked, you can now move on to the next step: attaching anchor straps to the dresser.
Use L-brackets to secure the back of the dresser to the wall studs. Make sure to use heavy-duty screws and a level to ensure the dresser is securely anchored.
Read more: How To Attach An IKEA Dresser To The Wall
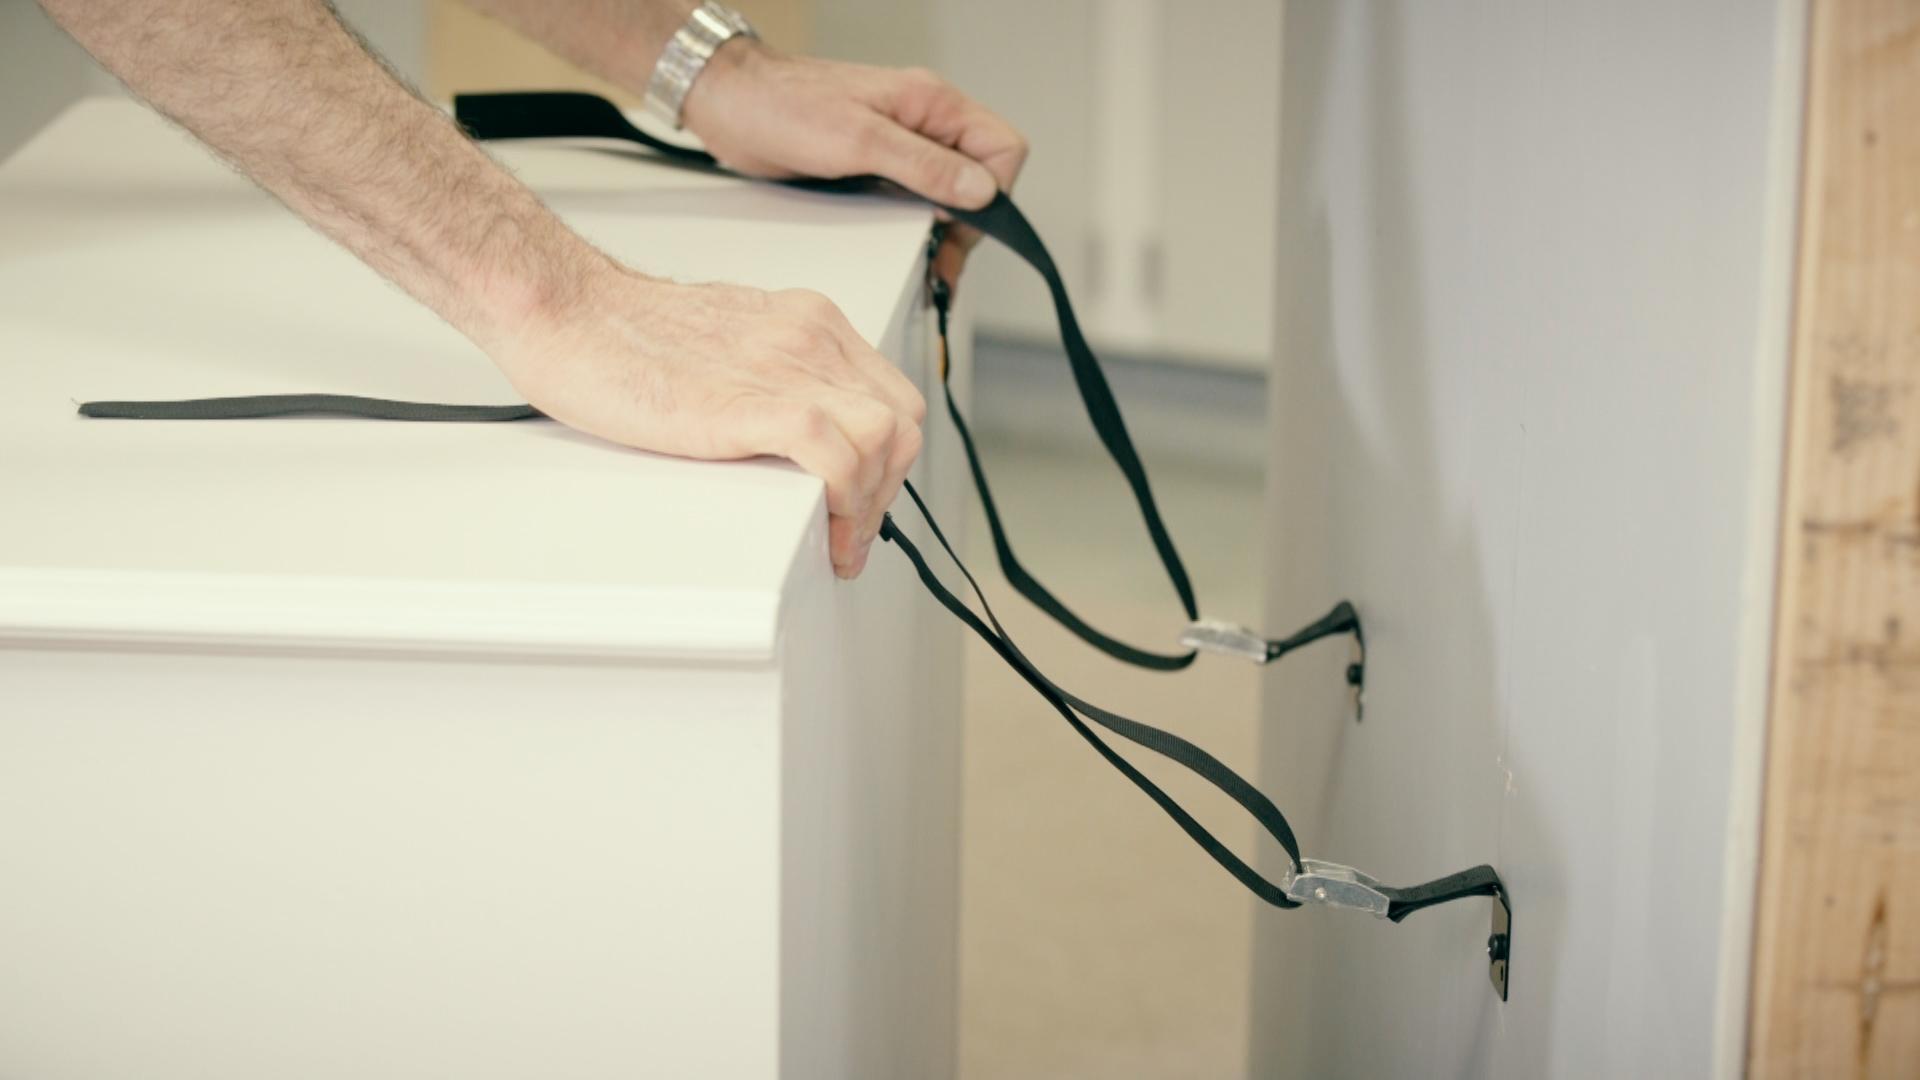
Step 3: Attach anchor straps to the dresser
Now that you have assessed the stability of your dresser and located the wall studs, it’s time to attach the anchor straps. Anchor straps are specialized devices designed to secure furniture to the wall and prevent tipping. Here’s how to attach anchor straps to the dresser:
- Position the dresser: Move the dresser away from the wall, leaving enough space to work comfortably and access the back of the furniture.
- Mark the strap locations: Place the anchor straps on the back of the dresser and use a pencil to mark the locations where the straps will be attached. It’s essential to position the straps in a way that allows them to be secured to the dresser’s solid, structural areas, such as the sides or the backboard.
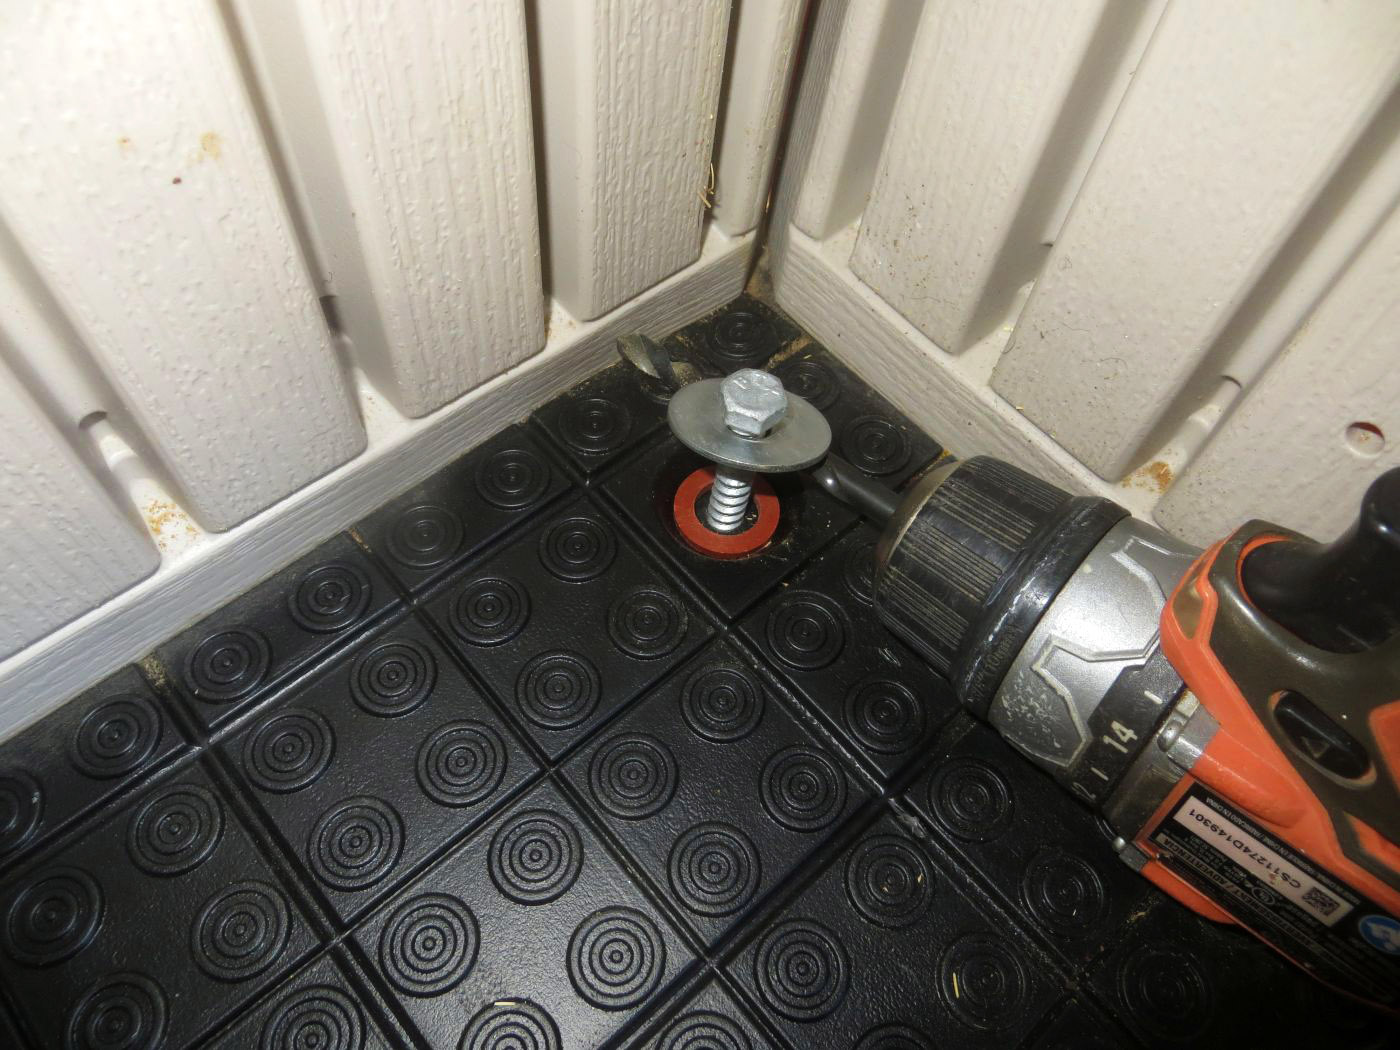
- Pre-drill the holes: Use a drill with a bit slightly smaller than the diameter of the screws that will be used to secure the anchor straps. Pre-drill holes at the marked locations on the dresser to prevent wood splitting when driving in the screws.
- Attach the anchor straps: With the pre-drilled holes in place, align the anchor straps with the holes and use a screwdriver or drill to secure them to the dresser. Make sure the anchor straps are tightly fastened to ensure a secure connection.
- Ensure proper tension: Check the tension of the anchor straps to ensure they are snug against the back of the dresser. Proper tension is vital to prevent any movement or shifting that could compromise the stability of the furniture.
- Repeat for additional anchor straps: Depending on the size and weight of your dresser, you may need to install multiple anchor straps. Repeat the previous steps to attach additional anchor straps, ensuring they are evenly spaced and properly secured to the dresser.
Attaching anchor straps to the dresser is a critical step in securing the furniture and preventing tip-overs. Take care to position the anchor straps in strong areas of the dresser, and ensure they are tightly fastened to provide maximum stability. With the anchor straps securely attached, you can now move on to the next step: positioning the dresser against the wall.
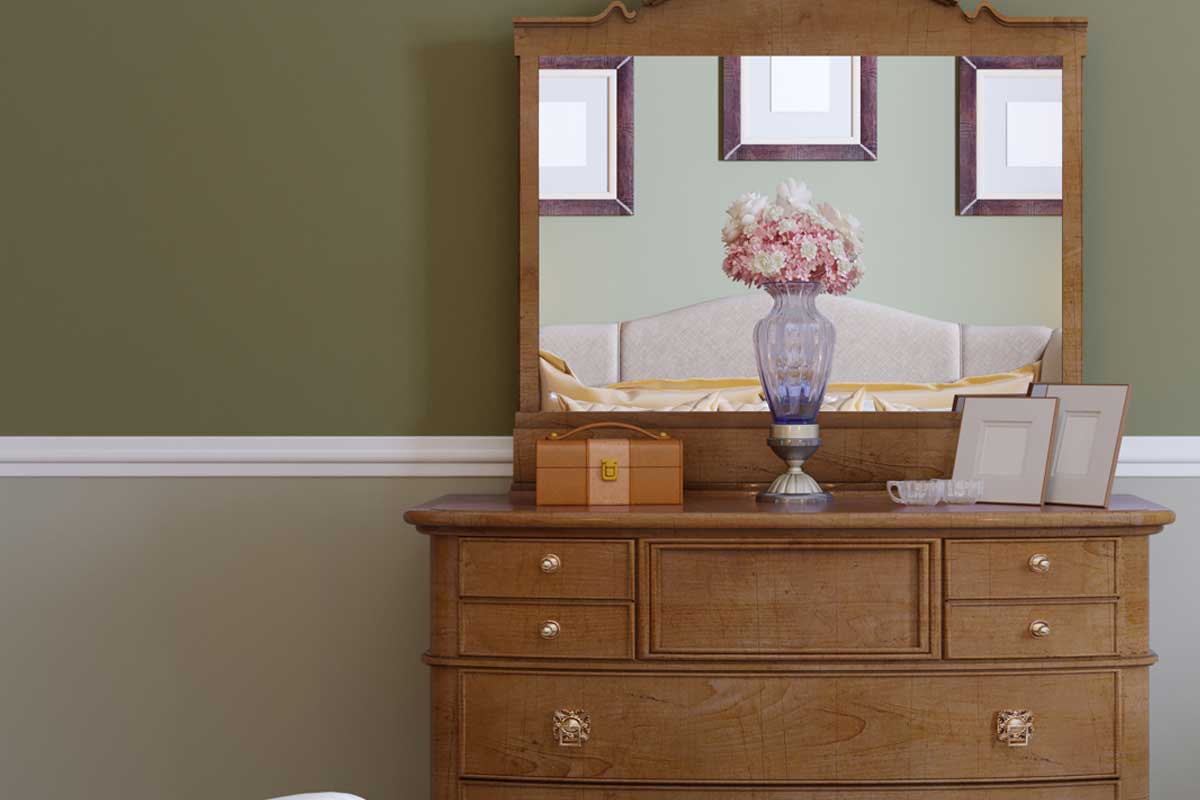
Step 4: Position the dresser against the wall
Now that you have attached the anchor straps to the dresser, it’s time to position the furniture against the wall. Proper positioning is crucial for maximizing stability and ensuring the effectiveness of the anchor straps. Follow these steps to correctly position the dresser:
- Clear the area: Remove any objects or obstacles from the wall and the floor where you plan to position the dresser. This will provide a clear and safe workspace.
- Enlist the help of another person: Dressers can be heavy and bulky, making it challenging to move them alone. Ask a family member, friend, or neighbor to assist you in positioning the dresser.
- Align with the wall studs: While pushing the dresser against the wall, make sure to align it with the previously marked locations of the wall studs. This will ensure that the anchor straps are properly secured to the strongest part of the wall.
- Ensure clearance: Leave a small gap between the back of the dresser and the wall to allow for the anchor straps to fit comfortably without any strain or tension.
- Center the dresser: Position the dresser so that it is centered on the wall or in the desired location of the room. This will not only enhance the aesthetics but also distribute the weight evenly.
- Use a level: To ensure that the dresser is level, use a carpenter’s level. Place the level on the top surface of the dresser and adjust the position if necessary, ensuring that it is perfectly horizontal.
- Double-check the stability: Once the dresser is in place, gently push it from different angles to ensure it is stable and does not wobble. If needed, make any necessary adjustments or tighten the anchor straps.
By properly positioning the dresser against the wall, you ensure that the anchor straps will function effectively, providing the necessary support and stability. Take your time during this step to ensure everything is aligned correctly and securely in place. With the dresser positioned, it’s time to move on to the next step: securing the anchor straps to the wall studs.
Step 5: Secure the anchor straps to the wall studs
Once the dresser is positioned against the wall, it’s time to secure the anchor straps to the wall studs. This step is crucial for ensuring the dresser’s stability and preventing tip-overs. Follow these steps to properly secure the anchor straps:
- Locate the marked stud positions: Identify the locations on the wall where the wall studs were previously marked. Double-check these markings to make sure they are aligned with the anchor straps on the dresser.
- Pre-drill the holes: Use a drill with a bit slightly smaller than the diameter of the screws that will be used to secure the anchor straps to the wall studs. Pre-drill holes at the marked stud locations on the wall to prevent any splitting or damage to the wall material.
- Attach the anchor straps to the wall: Line up the pre-drilled holes in the anchor straps with the corresponding holes in the wall. Insert screws through the anchor strap holes and into the pre-drilled holes in the wall. Ensure that the screws are securely fastened, but be careful not to overtighten and cause damage to the wall.
- Check for proper tension: Once the anchor straps are secured to the wall studs, check the tension of the straps. They should be taut, pulling the dresser slightly towards the wall. However, be cautious not to apply excessive tension, as this can put unnecessary strain on both the dresser and the wall.
- Verify stability: Give the dresser a gentle shake to test its stability. The dresser should remain secure and not tip or wobble. If any instability is detected, check the anchor straps, wall screws, and make any necessary adjustments.
Securing the anchor straps to the wall studs is a critical step in ensuring the stability and safety of the dresser. Take your time to align the anchor straps with the marked positions on the wall and securely attach them to the wall studs. With the anchor straps properly secured, the dresser will be effectively anchored to the wall. However, before considering the project complete, there is one more essential step: testing the stability of the dresser.
Step 6: Test the stability of the dresser
Once you have securely attached the anchor straps to both the dresser and the wall studs, it’s crucial to test the stability of the dresser. This final step will give you confidence in the effectiveness of the anchoring and ensure the safety of your furniture. Follow these steps to test the stability of the dresser:
- Stand at a safe distance: Step back and stand at a safe distance from the dresser, giving yourself enough space to observe any movement or wobbling during the stability test.
- Apply pressure: Place your hands on different parts of the dresser, such as the top surface and the sides, and gently apply pressure. Push and pull the dresser to simulate normal usage and ensure it remains stable without any significant movement or tipping.
- Check for wobbling: Pay close attention to any wobbling or tilting of the dresser. If you notice any instability, stop and reassess the anchor straps, wall screws, and the dresser itself. Tighten any loose components and make any necessary adjustments to ensure proper stability.
- Test from different angles: Test the stability of the dresser by pushing and pulling it from different angles. This will help identify any weak points or areas where additional reinforcement may be needed. The dresser should remain firmly in place without any significant movement or risk of tipping.
- Monitor over time: It’s important to regularly check the stability of the dresser, especially if there are any changes in the weight distribution or if any modifications have been made to the furniture. Periodically inspect the anchor straps and screws to ensure they remain secure and tighten them if necessary.
By thoroughly testing the stability of the dresser, you can ensure that the anchoring process has been successful and that your furniture is properly secured. If at any point you notice instability or have concerns about the dresser’s stability, consult a professional or consider alternative anchoring methods to enhance the security of the furniture.
With the stability of the dresser confirmed, you can now have peace of mind knowing that your furniture is safe and securely anchored to the wall. Enjoy your well-organized and secure living space!
Read more: How To Anchor Into Stucco
Conclusion
Anchoring your dresser to the wall is an essential step in creating a safe and secure home environment. By following the step-by-step process outlined in this article, you can ensure the stability of your dresser and prevent accidents caused by tipping or falling furniture.
By anchoring your dresser, you significantly reduce the risk of tip-over accidents, particularly in households with young children or pets. It promotes a safe living space and gives you peace of mind, knowing that your loved ones are protected from potential hazards.
Through the assessment of your dresser’s stability, locating wall studs, attaching anchor straps to the dresser, positioning the dresser against the wall, securing the anchor straps to the wall studs, and thoroughly testing the stability, you have taken the necessary precautions to secure your dresser effectively.
Remember to regularly inspect the dresser and anchor straps, ensuring they remain in good condition and securely fastened. If you make any modifications to the dresser or notice changes in the weight distribution, it’s important to reassess the stability and make any necessary adjustments or reinforcements.
By taking the time to anchor your dresser, you set an example for others and contribute to creating a culture of safety in your home and community. Additionally, you comply with safety guidelines set forth by organizations like the Consumer Product Safety Commission, demonstrating your commitment to responsible furniture anchoring.
Now that you have completed the process of anchoring your dresser to the wall, you can enjoy a secure and well-organized living space. Remember that safety should always be a priority, and regularly check the stability of your furniture to ensure continued protection.
Take pride in knowing that you have taken the necessary steps to prevent accidents and create a safe environment for yourself and your loved ones. Happy and secure living!
Frequently Asked Questions about How To Anchor A Dresser To The Wall
Was this page helpful?
At Storables.com, we guarantee accurate and reliable information. Our content, validated by Expert Board Contributors, is crafted following stringent Editorial Policies. We're committed to providing you with well-researched, expert-backed insights for all your informational needs.


0 thoughts on “How To Anchor A Dresser To The Wall”