Home>Construction & Tools>Building Materials>How To Cut Stucco

Building Materials
How To Cut Stucco
Modified: August 21, 2024
Learn the best techniques for cutting stucco, a popular building material, with our step-by-step guide. Find out the tools and safety measures needed.
(Many of the links in this article redirect to a specific reviewed product. Your purchase of these products through affiliate links helps to generate commission for Storables.com, at no extra cost. Learn more)
Introduction
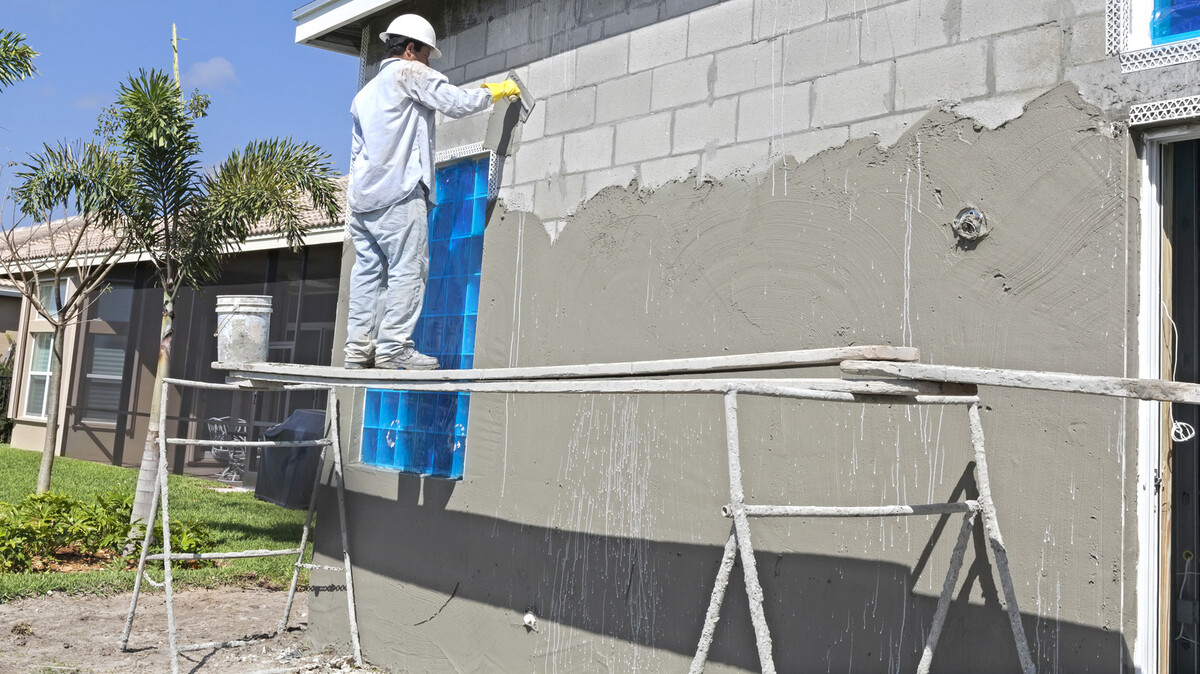
Cutting stucco is a crucial task in various construction and renovation projects. Whether you are installing a new window, creating an access panel, or making room for electrical fixtures, knowing how to cut stucco properly is essential. Stucco, a durable and weather-resistant material, requires specific techniques and tools for a clean and precise cut. In this article, we will explore the step-by-step process of cutting stucco, from safety precautions to finishing touches. By following these guidelines, you can ensure a successful stucco-cutting experience while maintaining the integrity of the surrounding structure. Let's delve into the intricacies of working with this versatile building material and master the art of cutting stucco safely and effectively.
Key Takeaways:
- Safety First!
Before cutting stucco, prioritize safety by wearing protective gear, preparing the work area, and using the right tools. This ensures a secure and efficient cutting process. - Precision is Key
Mark and measure the stucco accurately before cutting, and finish with deburring and cleaning. This attention to detail results in a professional and polished outcome.
Read more: How To Stucco A Foundation
Safety Precautions
Before embarking on any stucco-cutting project, prioritizing safety is paramount. Stucco cutting involves the use of power tools and exposure to potentially hazardous dust and debris. Here are essential safety precautions to adhere to:
- Protective Gear: Prior to commencing work, ensure that you are equipped with safety goggles, a dust mask, and work gloves. These items are vital for safeguarding your eyes, respiratory system, and hands from dust, debris, and potential splinters.
- Work Area Preparation: Clear the work area of any obstructions and ensure that it is well-ventilated. This reduces the risk of accidents and minimizes dust accumulation in the workspace.
- Power Tool Handling: Familiarize yourself with the proper handling and operation of power tools such as angle grinders or circular saws. Always adhere to the manufacturer’s guidelines and use the appropriate safety guards and accessories.
- Dust Management: Stucco cutting generates a considerable amount of dust. To mitigate this, consider using a vacuum attachment on the cutting tool or have a vacuum nearby to immediately capture airborne particles.
- Electrical Safety: If your project involves electrical components, such as wiring or outlets, ensure that the power source is turned off and take necessary precautions to avoid accidental contact with live wires.
- Sturdy Ladder Usage: When working at elevated heights, use a stable and secure ladder to prevent falls or injuries. Always maintain three points of contact when ascending or descending the ladder.
By prioritizing safety measures, you can mitigate potential risks and create a secure environment for stucco cutting. Remember, safety should always be the first consideration before embarking on any construction or renovation task.
Tools and Materials Needed
Equipping yourself with the appropriate tools and materials is essential for a successful stucco-cutting project. Here’s a comprehensive list of what you’ll need:
Tools:
- Angle Grinder: A powerful tool equipped with a diamond blade for precise and efficient cutting of stucco.
- Circular Saw: Ideal for making straight cuts in stucco, a circular saw with a masonry blade is a valuable tool for larger projects.
- Tape Measure: Essential for accurate measurements to ensure precise cuts.
- Chalk Line: Used for marking straight cutting lines on the stucco surface.
- Masonry Chisel: For scoring and breaking off sections of stucco, a sturdy masonry chisel is indispensable.
- Hammer: Used in conjunction with the masonry chisel for controlled chipping and breaking of stucco.
- Safety Gear: As mentioned in the safety precautions section, safety goggles, a dust mask, work gloves, and sturdy footwear are essential for personal protection.
- Vacuum with HEPA Filter: To minimize dust and debris, a vacuum with a high-efficiency particulate air (HEPA) filter is recommended for efficient cleanup.
Materials:
- Stucco Patching Compound: To repair any minor damage or imperfections that may occur during the cutting process.
- Painter's Tape: Used to protect surrounding surfaces from accidental damage during cutting.
- Drop Cloths: Cover the surrounding area to catch dust and debris, making cleanup more manageable.
- Marker or Pencil: For marking the cutting lines on the stucco surface.
- Extension Cord: If using power tools, ensure you have a suitable extension cord to reach the work area safely.
Having the right tools and materials at your disposal is the first step towards a successful stucco-cutting endeavor. With these items in hand, you can proceed with confidence, knowing that you are well-prepared for the task ahead.
Read more: How To Inspect Stucco
Preparing the Work Area
Prior to initiating the stucco-cutting process, it’s crucial to prepare the work area meticulously. This not only ensures a smoother workflow but also minimizes the potential for accidents and damage to surrounding surfaces. Here’s a step-by-step guide to preparing the work area for cutting stucco:
- Clear the Surrounding Space: Remove any furniture, decorations, or obstacles from the vicinity of the cutting area. This creates a clear and unobstructed workspace, reducing the risk of accidents and facilitating ease of movement.
- Protect Adjacent Surfaces: Cover nearby walls, windows, and other surfaces with drop cloths to prevent dust and debris from settling on them. Additionally, use painter’s tape to secure the drop cloths and create a barrier between the work area and adjacent surfaces.
- Secure Electrical Outlets: If the cutting process involves proximity to electrical outlets or fixtures, ensure that they are powered off and securely covered to prevent dust and debris from entering the sockets.
- Establish Ventilation: Open windows and doors to promote adequate airflow. If possible, set up fans to direct airborne dust particles away from the work area and towards an exit point, further enhancing ventilation.
- Position the Tools and Materials: Arrange your tools and materials within easy reach of the work area. This minimizes disruptions during the cutting process and allows for efficient access to necessary items.
- Secure the Workpiece: If you are cutting a specific section of stucco, ensure that it is adequately supported and stabilized. This may involve bracing or securing the surrounding structure to prevent movement during cutting.
By diligently preparing the work area, you set the stage for a safe, organized, and efficient stucco-cutting endeavor. Taking the time to complete these preparatory steps can significantly contribute to the overall success of the project and ensure a positive outcome.
Marking and Measuring
Precision is key when it comes to marking and measuring the stucco for cutting. Whether you are creating an opening for a window, door, or any other fixture, accurate measurements and markings are essential for a seamless cutting process. Here’s a detailed guide on marking and measuring stucco:
- Identify the Cutting Area: Determine the specific area of the stucco that needs to be cut. Use a level to ensure that the lines for cutting are straight and accurately positioned.
- Measure Twice, Cut Once: Adhering to this timeless adage, double-check all measurements before marking the stucco. This helps prevent errors and ensures that the cutting lines are precisely where they need to be.
- Use a Chalk Line: For straight cuts, use a chalk line to mark the cutting lines on the stucco surface. This provides a clear and visible guide for the cutting tool and helps maintain straight, consistent lines.
- Account for Clearances: If the cutout is for a specific fixture, such as a window or door, consider the necessary clearances for the frame and any additional space required for installation. Mark these clearances accordingly to ensure a proper fit.
- Marking Curved Cuts: If the cutout requires curved or irregular lines, consider using a flexible material, such as a piece of wire or flexible ruler, to outline the shape onto the stucco surface. This allows for precise and customized markings.
Accurate marking and measuring are fundamental to the success of the stucco-cutting process. By meticulously following these steps, you can ensure that the cutting lines are positioned correctly and that the resulting cutout aligns seamlessly with the intended fixture or access point.
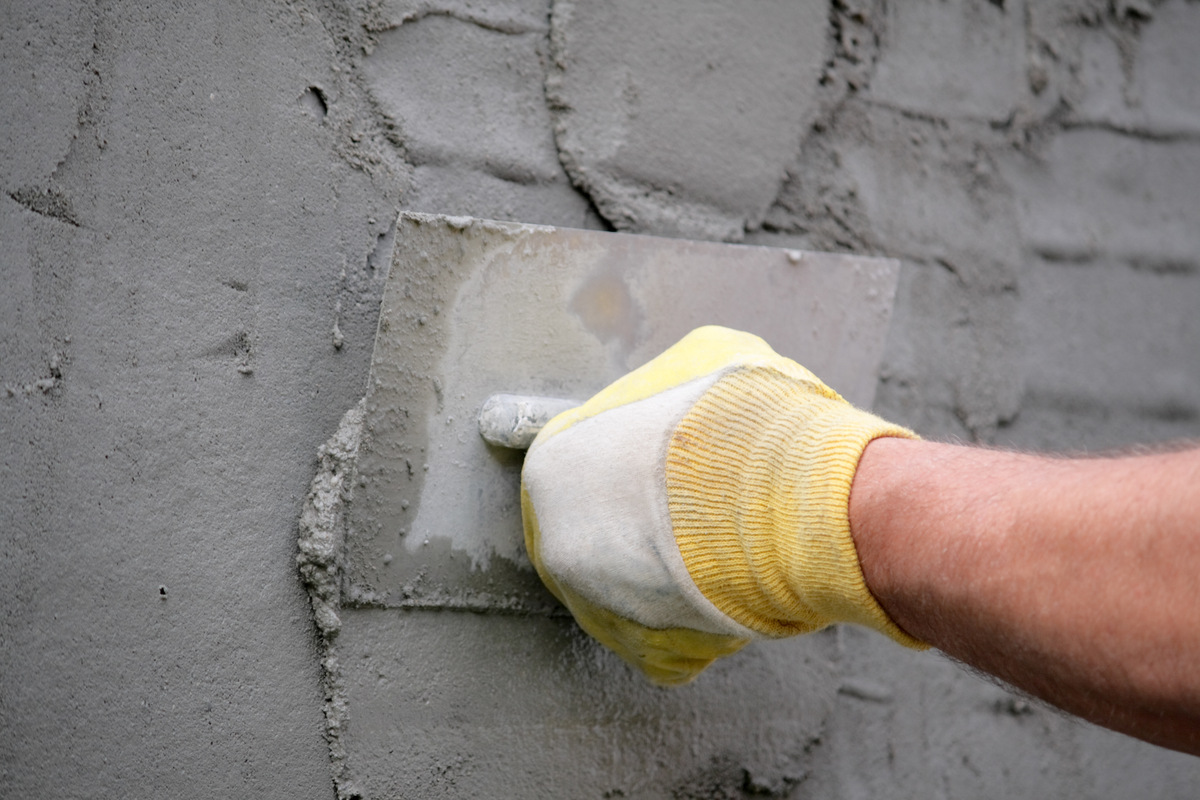
When cutting stucco, use a diamond blade on a circular saw for clean cuts. Score the stucco first to prevent chipping, and wear safety goggles and a dust mask.
Cutting the Stucco
Once the preparatory steps are complete and the stucco is marked and measured, it’s time to proceed with the cutting process. When cutting stucco, precision and control are essential to achieve clean and accurate results. Here’s a comprehensive guide to cutting stucco:
- Select the Appropriate Cutting Tool: Depending on the nature of the cut and the size of the project, choose the most suitable cutting tool. An angle grinder equipped with a diamond blade is ideal for precise cuts, while a circular saw with a masonry blade is effective for larger, straight cuts.
- Positioning and Safety: Before starting the cutting tool, ensure that you are in a stable and secure position. Hold the tool firmly with both hands and maintain a steady posture to ensure controlled and accurate cutting.
- Start the Cutting Process: With the cutting tool in position, carefully initiate the cutting process. Follow the marked lines on the stucco surface, maintaining a consistent speed and pressure to achieve a smooth and even cut.
- Control Dust and Debris: Throughout the cutting process, use a vacuum with a HEPA filter to immediately capture airborne dust and debris. This minimizes the spread of particles and contributes to a cleaner work environment.
- Chipping and Breaking: For sections that require chipping and breaking, such as creating access panels, use a masonry chisel and hammer to carefully score and break off the designated areas. Exercise caution and control to prevent unintended damage to the surrounding stucco.
- Inspect the Cut: Once the cutting is complete, inspect the cutout to ensure that it aligns with the intended measurements and specifications. Make any necessary adjustments or refinements to achieve the desired result.
By following these steps and exercising precision and care, you can achieve a clean and accurate cut in the stucco, meeting the requirements of your specific project. Remember to prioritize safety and maintain control throughout the cutting process for optimal results.
Finishing Touches
After the stucco has been cut, it’s essential to address any remaining tasks to ensure a polished and professional outcome. The finishing touches not only enhance the visual appeal but also contribute to the structural integrity of the stucco and surrounding areas. Here’s a detailed look at the essential finishing touches:
- Deburring and Smoothing: If the cut edges of the stucco exhibit roughness or burrs, use a masonry rasp or sanding block to smooth and deburr the edges. This creates a clean and professional finish while minimizing the risk of accidental cuts or abrasions.
- Clean the Work Area: Thoroughly clean the work area, removing any dust, debris, or leftover stucco particles. A vacuum with a HEPA filter is effective in capturing fine particles, ensuring a tidy and safe environment.
- Apply Stucco Patching Compound: If the cutting process resulted in minor damage to the stucco, apply a stucco patching compound to repair any imperfections. Smooth and blend the patched areas to seamlessly integrate them with the surrounding stucco surface.
- Inspect for Structural Integrity: After the cutting and finishing processes are complete, inspect the surrounding structure for any signs of damage or compromise. Ensure that the structural integrity of the stucco and adjacent surfaces remains intact.
- Seal and Protect: If the cutout is intended for the installation of a fixture or access panel, apply appropriate sealants or protective coatings to safeguard the exposed edges of the stucco from moisture and environmental elements.
- Final Cleanup and Inspection: Conduct a final cleanup of the work area, removing all protective coverings and ensuring that the surrounding space is restored to its original condition. Perform a comprehensive inspection to confirm that all finishing touches have been addressed satisfactorily.
By attending to these finishing touches with care and attention to detail, you can elevate the quality and longevity of the stucco-cutting project. These steps contribute to a professional and refined outcome, reflecting the precision and expertise applied throughout the cutting process.
Read more: How To Stucco A Chimney
Conclusion
Cutting stucco is a task that demands precision, careful planning, and adherence to safety measures. By following the step-by-step guidelines outlined in this article, you can confidently approach stucco-cutting projects with the knowledge and expertise required to achieve exceptional results. From safety precautions to finishing touches, each phase of the process plays a crucial role in ensuring a successful outcome.
Remember, prioritizing safety is non-negotiable when working with stucco. Equipping yourself with the necessary protective gear, preparing the work area meticulously, and exercising caution during the cutting process are fundamental to a secure and efficient workflow.
Furthermore, the selection of appropriate tools and materials, accurate marking and measuring, and the application of finishing touches contribute to the overall quality of the stucco-cutting endeavor. Each step is interconnected, ultimately culminating in a professional and visually appealing result that aligns with the project’s specifications.
As you embark on stucco-cutting projects, whether for home renovations, construction, or repairs, embrace the intricate process with confidence and a commitment to excellence. By mastering the art of cutting stucco safely and effectively, you can elevate the quality of your projects and achieve outcomes that endure the test of time.
With a thorough understanding of the stucco-cutting process and a dedication to precision, you are well-equipped to tackle stucco-cutting projects with confidence and expertise.
Frequently Asked Questions about How To Cut Stucco
Was this page helpful?
At Storables.com, we guarantee accurate and reliable information. Our content, validated by Expert Board Contributors, is crafted following stringent Editorial Policies. We're committed to providing you with well-researched, expert-backed insights for all your informational needs.


0 thoughts on “How To Cut Stucco”