Tableware
How To Set Plates On Dining Table
Modified: February 24, 2024
Learn the proper way to set plates on your dining table with our step-by-step guide. Discover the best tableware techniques for a stylish and organized table setting.
(Many of the links in this article redirect to a specific reviewed product. Your purchase of these products through affiliate links helps to generate commission for Storables.com, at no extra cost. Learn more)
Introduction
Welcome to our guide on how to set plates on a dining table! Properly setting a table not only enhances the aesthetic appeal of your dining area but also creates an organized and welcoming atmosphere for your guests. Whether you’re hosting a formal dinner party or having a casual family gathering, mastering the art of plate placement is essential.
In this article, we will walk you through the step-by-step process of setting plates on a dining table, providing you with valuable tips and tricks along the way. From choosing the right size plates to arranging the silverware and glassware, we’ve got you covered.
So, let’s dive in and learn how to set a picture-perfect table!
Key Takeaways:
- Master the art of table setting by choosing the right size plates, arranging silverware, and adding elegant glassware to create a visually appealing and welcoming dining atmosphere.
- Elevate your table setting with final touches like a centerpiece, place cards, and decorative elements, striking the perfect balance between functionality and aesthetics for a memorable dining experience.
Step 1: Choosing the right size plates
The first step in setting plates on a dining table is selecting the right size plates for your meal. The size of the plates you choose will depend on the type of meal you are serving and the style of your table setting.
For formal occasions, such as a dinner party or holiday gathering, consider using larger plates. These can be dinner plates with a diameter of around 10-12 inches. These plates provide ample space for a full-course meal and add an elegant touch to the table.
In settings that are more laid-back or for lighter meals, consider the strategic placement of dessert plates or salad plates. These plates usually measure about 7-8 inches across. The use of these smaller plates helps foster a cozy and casual ambiance, ideal for occasions like brunches or afternoon teas, where dessert plate placement plays a significant role.
It’s important to ensure that your plates are in proportion to your table and the other elements on it. If you have a small table, using oversized plates may overcrowd the space and make it difficult for your guests to eat comfortably. On the other hand, using small plates on a large table may give the impression of emptiness.
Consider the size of your table, the number of guests, and the amount of food you will be serving when choosing the size of your plates. Remember, it’s always better to have slightly larger plates than smaller ones to accommodate a variety of dishes and prevent overcrowding.
Once you have selected the right size plates, you are ready to move on to the next step of setting the dining table.
Step 2: Placing the dinner plate
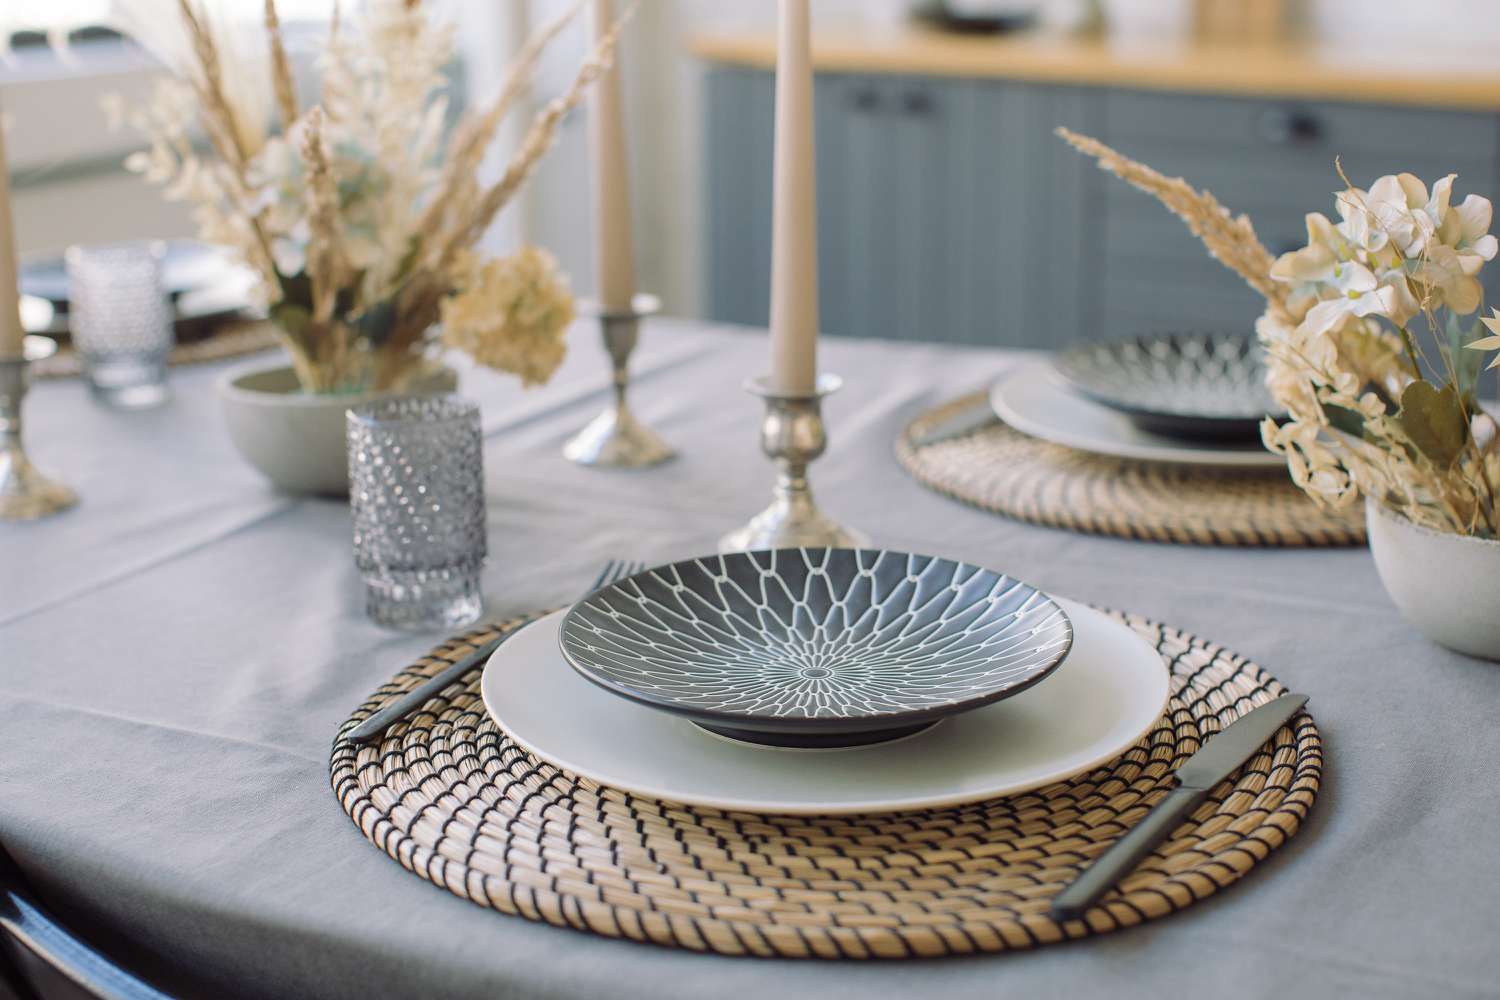
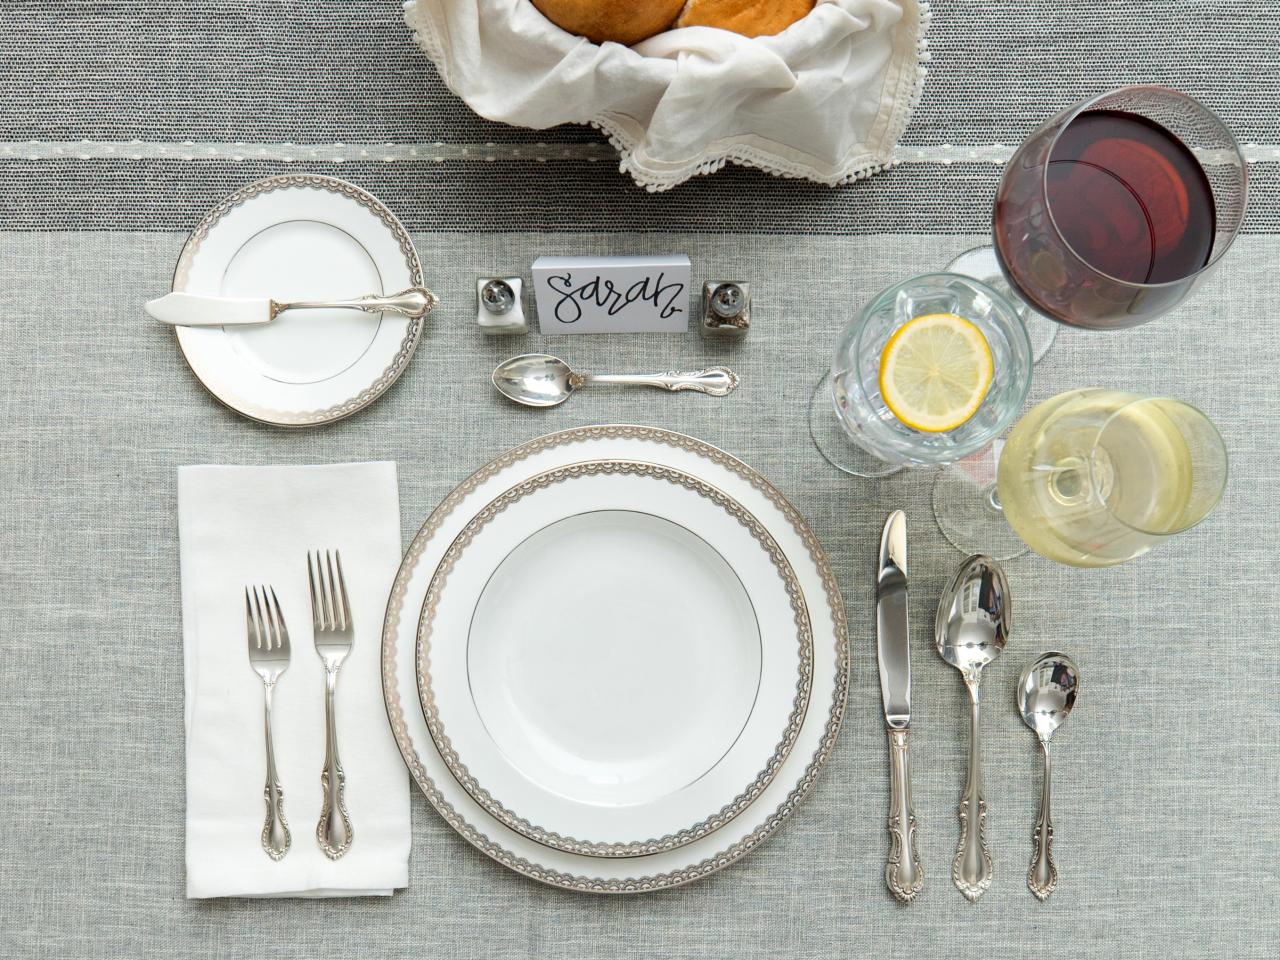
Now that you have chosen the right size plates, it’s time to set your table. The first plate to be placed on the table is the dinner plate, which serves as the foundation for the rest of the table setting.
Begin by positioning the dinner plate in the center of the place setting. The plate should be aligned with the edge of the table, approximately one inch from the table’s edge. This allows for a visually pleasing arrangement and leaves enough space for the guests to comfortably access their food.
Make sure the plate is well-centered on the table and parallel to the edges. Avoid angling or tilting the plate, as this may create an unbalanced and disordered appearance.
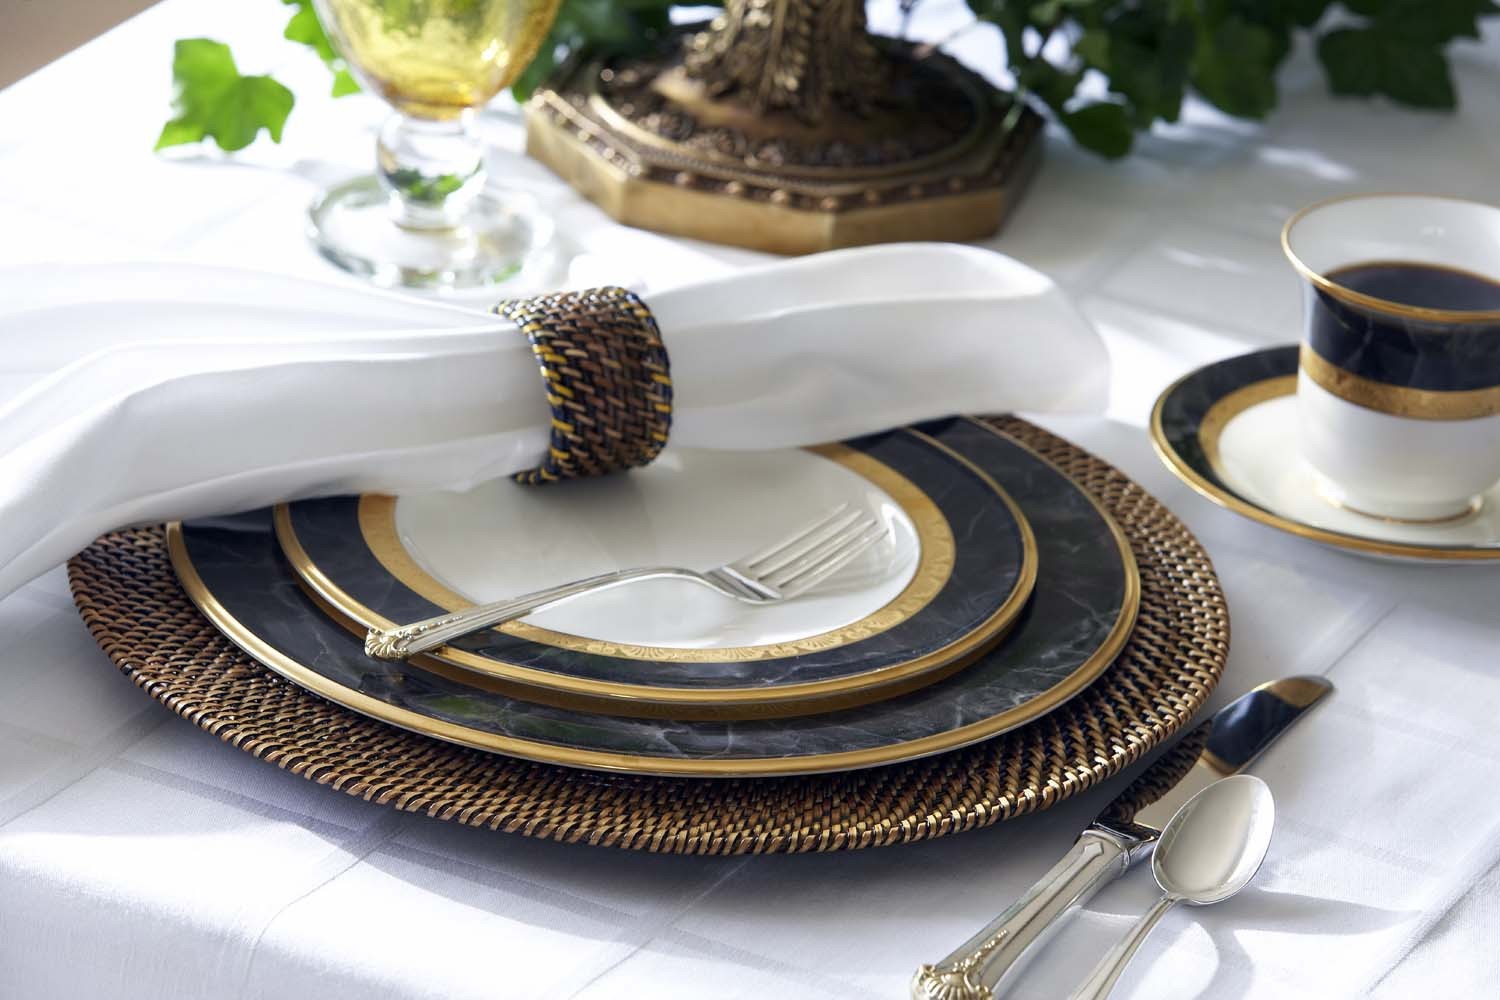
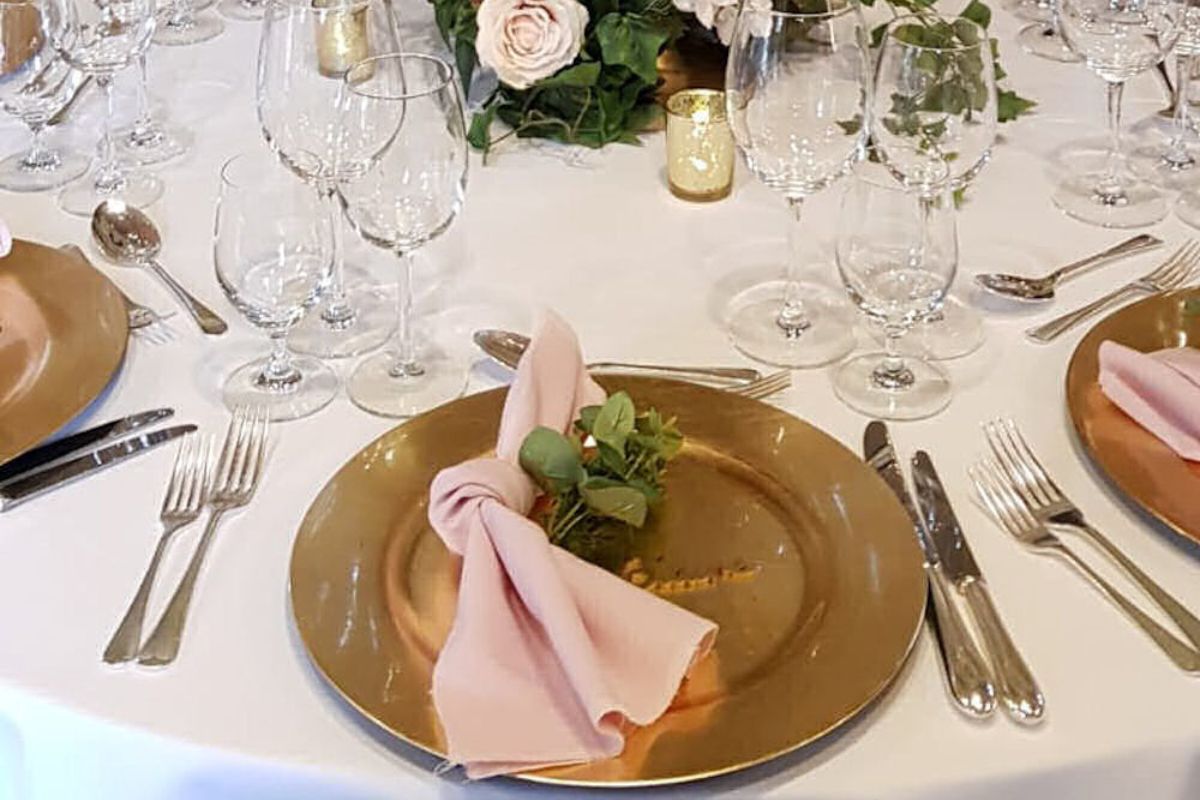
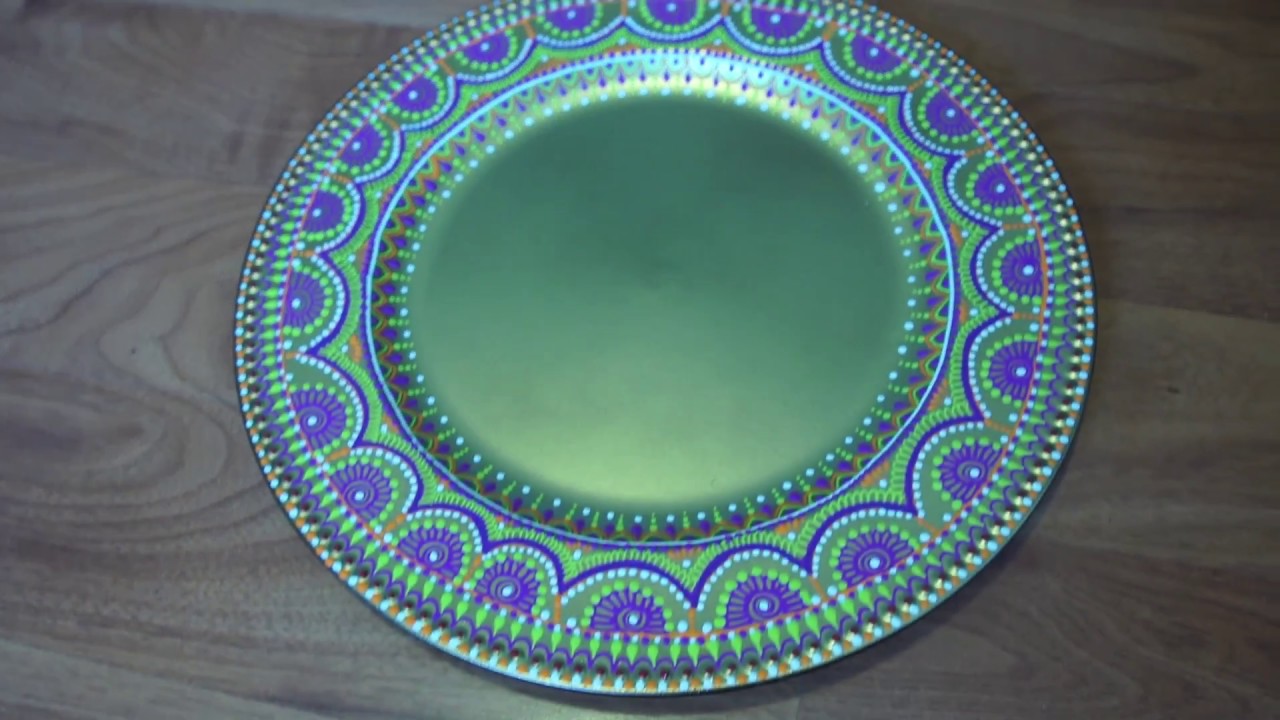
If you are using charger plates, which are decorative plates that go underneath the dinner plates, place them on the table first before adding the dinner plates. The charger plate acts as an elegant base and adds an extra layer of sophistication to your table setting.
When it comes to plate materials, there are various options to choose from depending on your preference and the occasion. Common choices include ceramic, porcelain, stoneware, and glass. Consider the overall theme and style of your dining table when selecting the material and design of the plates for a cohesive and harmonious look.
Now that you have successfully placed the dinner plate, we can move on to the next step of setting the table – adding the salad plate.
Step 3: Adding the salad plate
Next in line for setting the perfect table is the salad plate. The salad plate is typically placed on top of the dinner plate and is used for serving salads, appetizers, or small courses during the meal.
To add the salad plate, carefully center it on top of the dinner plate. The salad plate should be slightly smaller in size, with a diameter of around 7-8 inches. This creates a layered effect and adds visual interest to the table setting.
If you are serving a separate salad course, it is common practice to bring out the salad plates separately. In this case, you can keep the dinner plates in place and remove them once the salad plates are distributed.
When it comes to salad plate materials, options are similar to those of dinner plates. Consider using plates that complement the overall theme and style of your dining table. You may choose to match the material and design of the salad plates with the dinner plates for a cohesive look, or you can mix and match to create a more eclectic and personalized table setting arrangement.
Remember, the salad plate is placed on top of the dinner plate, so ensure that it is centered and aligned with the dinner plate. The two plates should create a neat and symmetrical arrangement.
With the salad plate in place, we move on to the next step of setting the table – positioning the bread plate.
Step 4: Positioning the bread plate
Now it’s time to add the bread plate to your table setting. The bread plate, also known as the side plate, is typically placed above the forks on the left side of each place setting. It is used for holding bread, rolls, or other small accompaniments during the meal.
To position the bread plate, start by locating the center of the place setting. Place the bread plate approximately one inch above the forks, diagonally on the left side of the dinner plate. Make sure it is aligned with the edge of the table and parallel to the other plates.
The bread plate is usually smaller in size, with a diameter of around 6-7 inches. It is important to ensure that it doesn’t overcrowd the place setting or interfere with the other elements on the table. Remember to leave enough space between the bread plate and the dinner plate, allowing your guests to comfortably access both plates.
When it comes to the material and design of the bread plate, you have the freedom to choose a coordinating or contrasting option. Some prefer to match the bread plate with the dinner and salad plates for a cohesive look, while others opt for a different pattern or color to add an element of surprise and visual interest.
Now that the bread plate is in place, it’s time to move on to the next step – arranging the silverware.
When setting plates on a dining table, start by placing the dinner plate in the center of each setting, about an inch from the edge of the table. Make sure the plates are evenly spaced and aligned with the chairs.
Read more: How To Make Charger Plates
Step 5: Arranging the silverware
Arranging the silverware is an essential part of setting a table. Proper placement of utensils not only enhances the visual appeal of the table setting but also provides a practical and efficient dining experience for your guests. Let’s dive into the details of how to arrange the silverware.
Start by placing the fork on the left side of the dinner plate. The dinner fork is usually the outermost utensil on the left side. To the left of the dinner fork, you can place the salad fork if it will be used for a separate salad course.
On the right side of the plate, place the knife closest to the plate, with the blade facing inwards. Remember to align the knife with the bottom edge of the dinner plate. Next to the knife, place the teaspoon or soup spoon, depending on the types of dishes you will be serving.
If you are serving seafood, you can place a seafood fork or a small fork to the right of the teaspoon or soup spoon. Special utensils like butter knives or dessert spoons can be added on a need basis and placed above the dinner plate or on the side.
When it comes to the placement of the napkin, you have a few options. You can either fold the napkin neatly and place it on the dinner plate, or you can use a napkin ring and position it to the left of the forks. The choice depends on the formality of the occasion and your personal preference.
Remember to leave enough space between each piece of silverware to prevent a cluttered look. Make sure all the utensils are aligned and parallel to each other for a polished and organized appearance.
With the silverware arranged, we can move on to the next step – placing the napkins.
Step 6: Placing the napkins
The placement of napkins is an important aspect of setting a table. Napkins not only serve a practical purpose but also add a decorative touch to the overall table setting. Let’s explore how to properly place the napkins.
There are several options for napkin placement, and the choice depends on the formality of the occasion and your personal preference. Here are a few common methods:
- On the dinner plate: This is a classic and elegant option. Fold the napkin neatly and place it directly on top of the dinner plate. Ensure that the napkin is neatly centered and aligned with the plate for a polished look.
- To the left of the forks: Another popular option is to place the folded napkin to the left of the forks. This can be done in a simple rectangle fold or a creative folded design. The napkin can be laid flat or inserted into a napkin ring for an added touch.
- In a napkin holder: If you have napkin holders or rings, you can place the folded napkins inside them on the dinner plate or to the left of the forks. This creates a more refined and organized appearance.
- On the bread plate: As an alternative, you can place the napkin on top of the bread plate or tuck it into the upper-left corner of the bread plate. This method works well if you want to keep the dinner plate clean until it is used.
Remember to use napkins that complement the color scheme and style of your table setting. They can be made of cloth or paper, depending on the formality of the occasion and personal preference.
With the napkins in place, we can move on to the next step – adding glassware.
Step 7: Adding glassware
Glassware plays a crucial role in completing the table setting. It not only provides the necessary vessels for serving beverages but also adds a touch of elegance and sophistication. Let’s discover how to properly add glassware to your table.
The number and types of glassware you will need depend on the beverages you plan to serve. Here are some common options:
- Water glass: Start by placing the water glass above the knives on the right side of the place setting. This glass is typically the largest and is used for serving water throughout the meal.
- Wine glasses: If you plan to serve wine, you can add wine glasses to the table setting. The wine glasses are placed to the right of the water glass, slightly above and to the right of the knives. Red wine glasses have a larger bowl, while white wine glasses have a slightly smaller bowl.
- Champagne flute: For special occasions or celebratory meals, you may choose to include a champagne flute. Place the flute to the right of the wine glasses, slightly above them.
When arranging the glassware, ensure that it is aligned and evenly spaced. The glasses should be in a straight line and parallel to each other for a clean and organized appearance. Leave enough space between each glass to prevent them from feeling overcrowded.
Remember to consider the height of the glassware in relation to the other items on the table, such as plates and centerpieces. This helps create a harmonious and balanced aesthetic.
With the glassware in place, we are now ready for the final step – adding those finishing touches to complete the table setting.
Step 8: Final touches
Now that you have set the plates, silverware, napkins, and glassware, it’s time to add the final touches to complete your table setting. These little details can elevate the overall look and make your guests feel welcomed and special. Let’s explore some final touches you can add:
- Centerpiece: Adding a centerpiece can be a focal point of your table setting. It can be a floral arrangement, a decorative bowl with fruits, or a collection of candles. Select a centerpiece that complements the theme and style of your table and ensure that it doesn’t obstruct the view or hinder conversation.
- Place cards: If you have specific seating arrangements, consider using place cards. Place cards can be handwritten or designed, and they help your guests find their designated seats. Place them above or beside the napkins or in the center of the plate.
- Tablecloth or placemats: Use a tablecloth or placemats to protect the surface of your table and add an extra layer of elegance. Choose colors or patterns that coordinate with the overall theme. Ensure that the tablecloth or placemats are properly ironed and fit the size of your table.
- Decorative elements: You can further enhance your table setting by incorporating decorative elements such as themed decor, seasonal accents, or personalized touches. These can include small figurines, decorative napkin rings, or custom-designed name tags. Get creative and add elements that reflect your personal style and the occasion.
Remember, the final touches should complement and enhance the overall table setting, rather than overpowering it. Maintain a balance between functionality and aesthetics, ensuring that your guests have enough space for their plates and utensils.
Once you have added these final touches, take a step back, and assess your table setting. Make any necessary adjustments to ensure everything looks visually harmonious and appealing.
With the final touches completed, your table is now beautifully set and ready to impress your guests. Enjoy your meal and the wonderful ambiance you have created!
Read more: How To Wash Charger Plates
Conclusion
Setting plates on a dining table may seem like a simple task, but it plays a significant role in creating a welcoming and visually appealing atmosphere for your guests. By following the steps outlined in this guide, you can master the art of table setting and create a table that exudes elegance and sophistication.
Starting with choosing the right size plates, you can ensure that each guest will have enough space for their meal. Placing the dinner plate as the foundation of the table setting sets the stage for the rest of the plates to come.
Adding the salad plate and bread plate in their designated positions creates a layered effect and adds an element of variety to the table. The silverware arrangement, along with the placement of napkins, adds a practical and polished touch to the table setting.
With the glassware added, you can provide your guests with the proper vessels for their beverages, adding an extra touch of sophistication to the table.
Lastly, the final touches, such as a centerpiece, place cards, or decorative elements, serve as the icing on the cake, completing the overall look and ambiance of the table.
Remember, the key to a well-set table is finding the balance between functionality and aesthetics. Consider the formality of the occasion, the size of your table, and your personal style when making decisions about plate sizes, silverware, and other elements.
Now that you have learned the art of setting plates on a dining table, it’s time to put your knowledge into practice and impress your guests with a beautifully arranged table. Enjoy the pleasure of a well-prepared meal in a captivating and inviting setting!
Frequently Asked Questions about How To Set Plates On Dining Table
Was this page helpful?
At Storables.com, we guarantee accurate and reliable information. Our content, validated by Expert Board Contributors, is crafted following stringent Editorial Policies. We're committed to providing you with well-researched, expert-backed insights for all your informational needs.


0 thoughts on “How To Set Plates On Dining Table”