Home>Furniture & Design>Bathroom Accessories>How To Connect A Bidet Toilet Seat
Bathroom Accessories
How To Connect A Bidet Toilet Seat
Modified: March 25, 2024
Learn how to easily install and connect a bidet toilet seat to your bathroom with our step-by-step guide. Upgrade your bathroom accessories today!
(Many of the links in this article redirect to a specific reviewed product. Your purchase of these products through affiliate links helps to generate commission for Storables.com, at no extra cost. Learn more)
Introduction
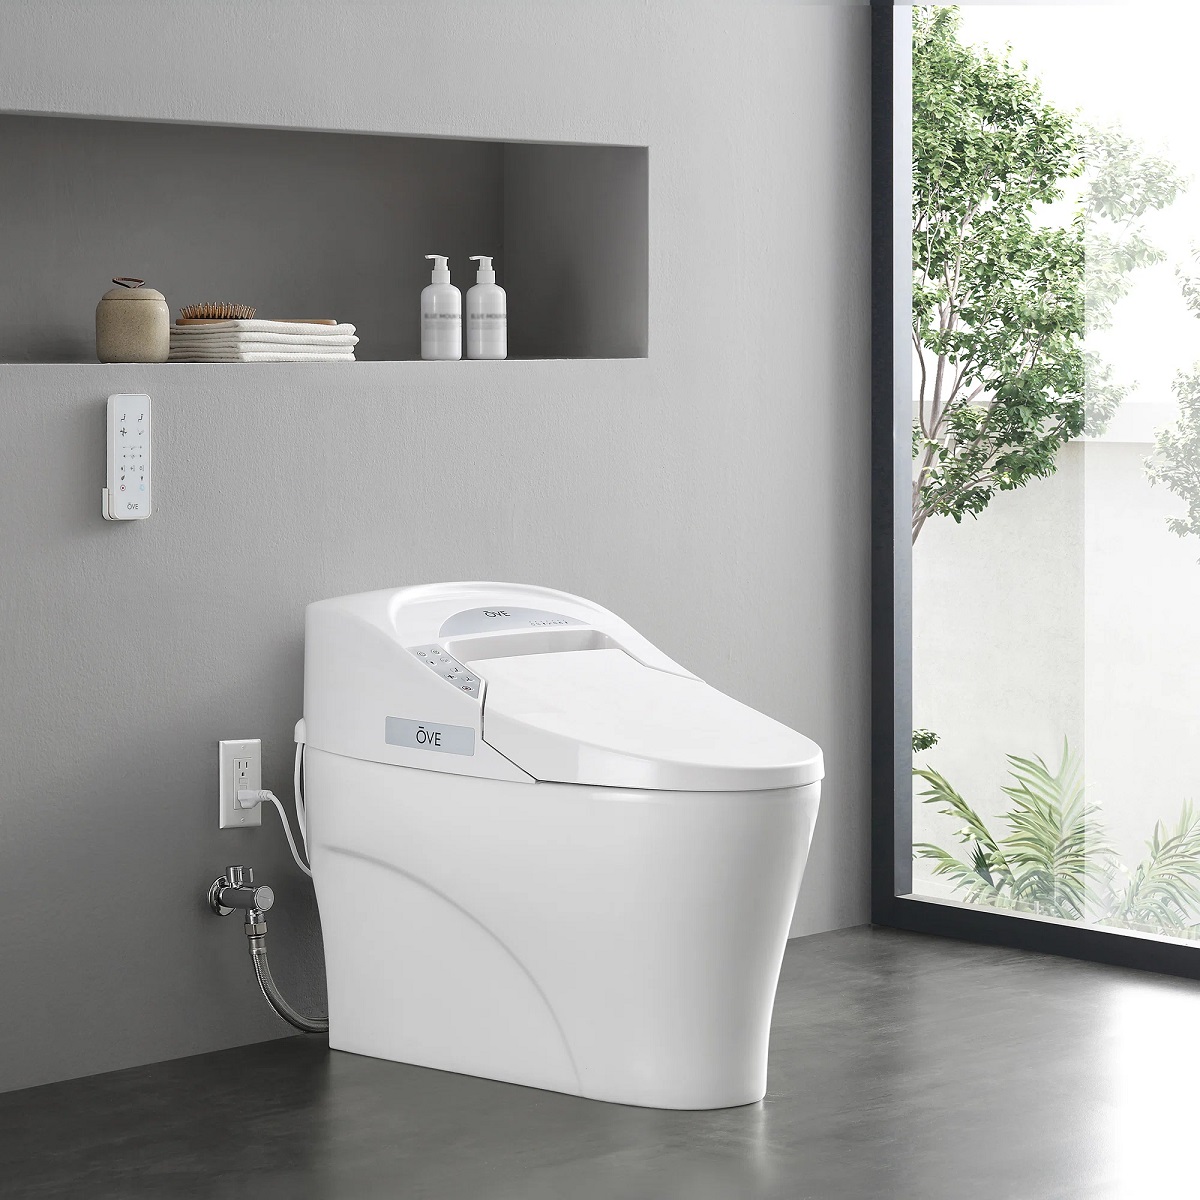
Installing a bidet toilet seat is a simple and effective way to upgrade your bathroom experience. Bidet toilet seats offer a range of benefits, including improved hygiene, comfort, and environmental sustainability. By following a few straightforward steps, you can easily connect a bidet toilet seat to your existing toilet, transforming it into a luxurious and modern fixture.
In this comprehensive guide, we will walk you through the process of connecting a bidet toilet seat, providing clear instructions and valuable insights to ensure a successful installation. Whether you are a seasoned DIY enthusiast or a novice homeowner looking to enhance your bathroom, this step-by-step tutorial will equip you with the knowledge and confidence to complete the task with ease.
As we delve into the installation process, you will discover the essential tools and materials required, learn how to safely turn off the water supply, and understand the precise steps for removing the existing toilet seat. We will then guide you through the installation of the bidet toilet seat and the crucial process of connecting the water supply. Finally, we will emphasize the importance of testing the bidet toilet seat to guarantee its optimal functionality.
By the end of this guide, you will have gained a comprehensive understanding of how to connect a bidet toilet seat, empowering you to elevate your bathroom environment and embrace the numerous advantages that come with this innovative upgrade. Let's embark on this journey together and unlock the transformative potential of a bidet toilet seat installation.
Key Takeaways:
- Upgrade your bathroom with a bidet toilet seat for improved hygiene, comfort, and sustainability. Follow simple steps to connect and test the seat, transforming your bathroom experience with modern luxury.
- Gather tools and materials, turn off water supply, remove old seat, install bidet seat, connect water supply, and test for optimal functionality. Elevate your bathroom experience with a seamless bidet toilet seat installation.
Read more: What Is A Bidet Toilet Seat
Step 1: Gather Necessary Tools and Materials
Before embarking on the installation of a bidet toilet seat, it is essential to gather the necessary tools and materials to ensure a smooth and efficient process. By having the following items at your disposal, you will be well-prepared to complete the installation with confidence and precision.
Tools:
- Adjustable Wrench: This versatile tool will be used to loosen and tighten nuts and bolts during the installation process.
- Screwdriver Set: Ensure you have both flat-head and Phillips-head screwdrivers to accommodate various types of screws.
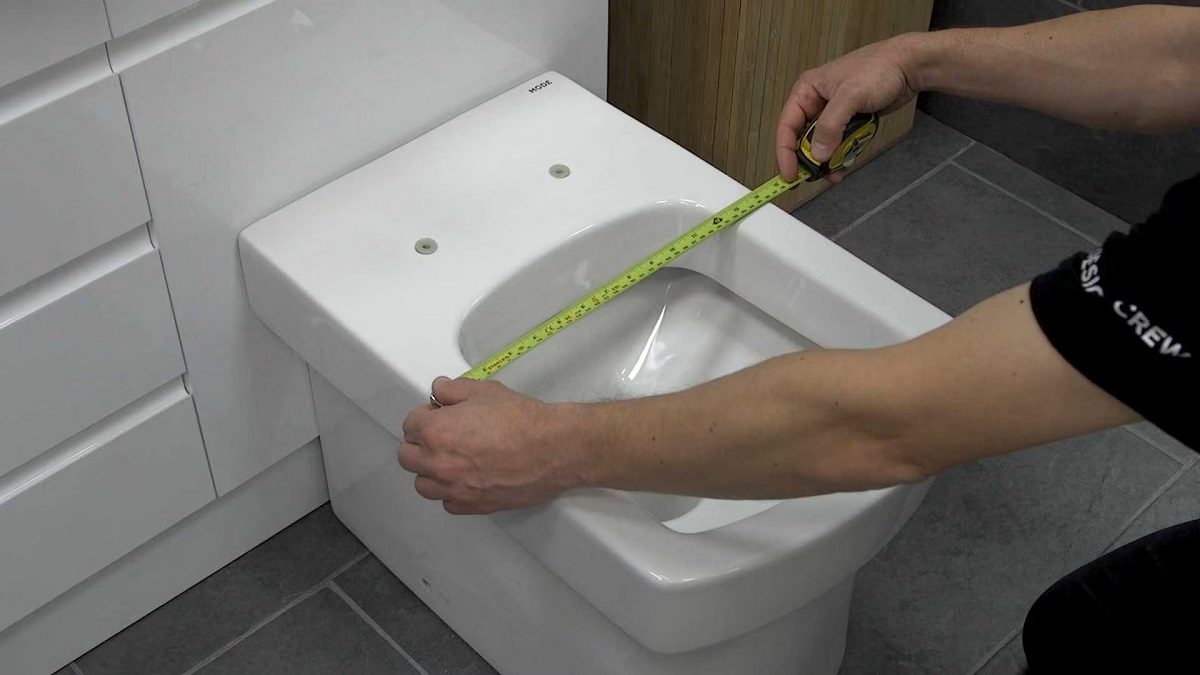
- Measuring Tape: Accurate measurements are crucial for aligning the bidet toilet seat properly, making a measuring tape indispensable.
- Utility Knife: A utility knife will come in handy for removing any old caulk or sealant around the existing toilet seat.
- Level: To ensure the bidet toilet seat is installed evenly and securely, a level will help you achieve the perfect alignment.
Materials:
- Bidet Toilet Seat: Select a high-quality bidet toilet seat that aligns with your preferences and bathroom decor. Ensure it comes with all the necessary components for installation.
- Water Supply Hose: Depending on the model of the bidet toilet seat, you may need a flexible water supply hose to connect the seat to the water source.
- Teflon Tape: This tape is essential for creating a secure and watertight seal when connecting the water supply hose to the toilet's water inlet.
- Rubber Washers: These washers will be used to prevent leaks and provide a tight seal when connecting the water supply hose.
- Caulk or Sealant: If recommended by the bidet toilet seat manufacturer, have caulk or sealant on hand to secure the seat in place and prevent shifting.
By ensuring that you have these tools and materials readily available, you will set the stage for a successful bidet toilet seat installation. With everything in place, you can proceed to the next steps with confidence, knowing that you are fully equipped to complete the project effectively and efficiently.
Step 2: Turn Off Water Supply
Before commencing the installation of a bidet toilet seat, it is crucial to prioritize safety and prepare the work area by turning off the water supply to the toilet. This step is essential to prevent any potential water leaks or accidents during the installation process. By following these simple yet critical guidelines, you can effectively and safely turn off the water supply in preparation for the bidet toilet seat installation.
-
Locate the Shut-Off Valve: Begin by identifying the shut-off valve located behind the toilet. This valve is typically situated on the wall or floor, directly behind the toilet tank. It is essential to familiarize yourself with the valve's location before proceeding further.
-
Turn Off the Water: Once you have located the shut-off valve, turn the valve handle clockwise to shut off the water supply to the toilet. This action will stop the flow of water to the toilet tank and ensure that no water is present in the supply line during the installation process.
-
Flush the Toilet: After turning off the water supply, flush the toilet to remove any remaining water from the tank and bowl. This step will minimize the water present in the toilet, making it easier and cleaner to proceed with the installation.
-
Verify Water Shut-Off: To confirm that the water supply has been successfully turned off, attempt to flush the toilet again. If the tank does not refill with water, the shut-off valve has effectively stopped the water supply.
By diligently following these steps to turn off the water supply, you will create a safe and controlled environment for installing the bidet toilet seat. This proactive measure ensures that the installation process can proceed smoothly and without the risk of water-related mishaps. With the water supply securely turned off, you are now prepared to advance to the subsequent steps of the bidet toilet seat installation, equipped with the confidence that you have taken the necessary precautions to facilitate a successful and trouble-free installation process.
Read more: How To Use A Bidet Toilet Seat
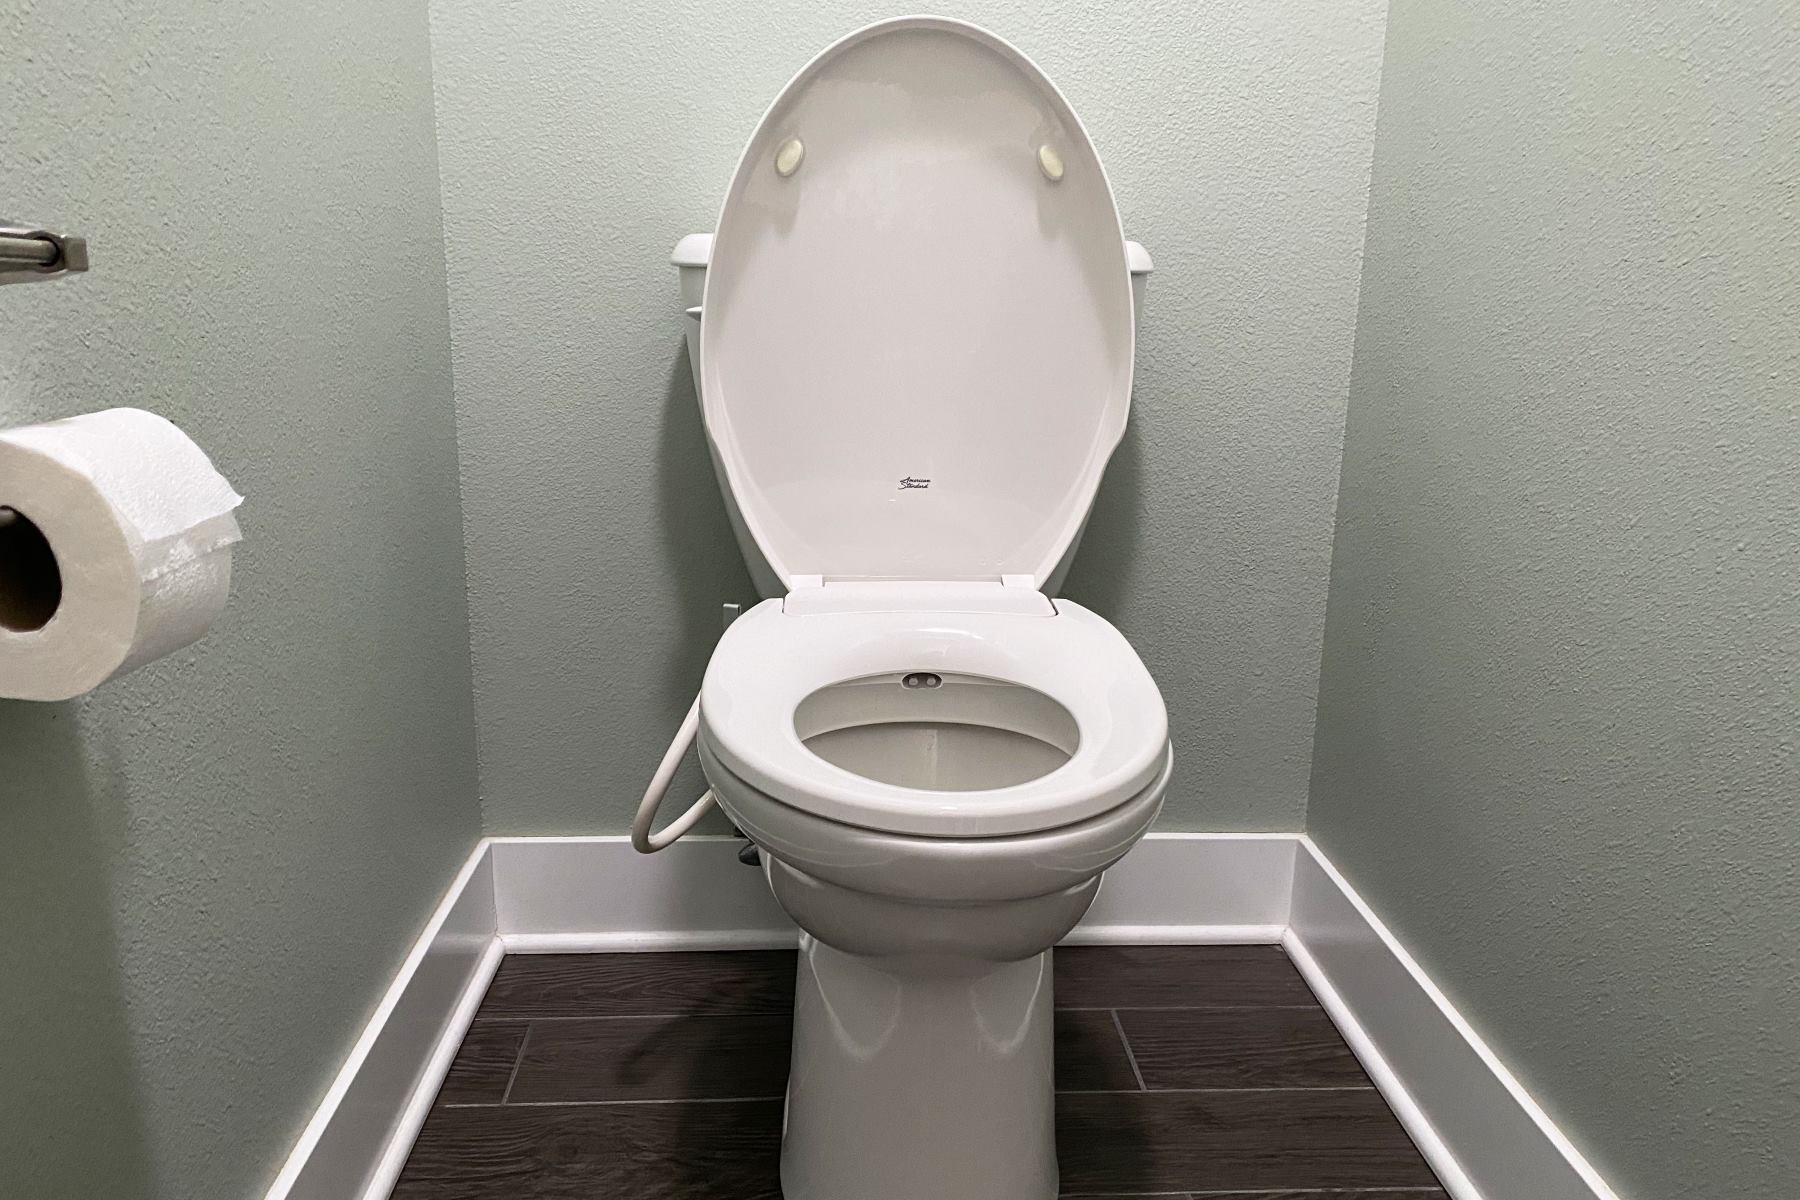
Step 3: Remove Existing Toilet Seat
Removing the existing toilet seat is a fundamental step in preparing the toilet for the installation of a bidet toilet seat. This process requires careful attention to detail and the use of basic tools to ensure a smooth transition to the new fixture. By following these detailed instructions, you can effectively remove the old toilet seat and pave the way for the installation of the bidet toilet seat.
-
Gather Necessary Tools: Before initiating the removal process, gather the essential tools required for this task. A screwdriver, preferably a wrench or pliers, will be needed to loosen and remove the bolts securing the existing toilet seat.
-
Locate the Bolts: Inspect the underside of the toilet bowl to locate the bolts securing the existing toilet seat. These bolts are typically situated at the rear of the bowl and are often covered by plastic caps. Use a flat-head screwdriver to carefully pry off the caps, revealing the bolt heads.
-
Loosen and Remove Bolts: Using the appropriate tool, whether a screwdriver, wrench, or pliers, begin loosening the bolts by turning them counterclockwise. It is common for the bolts to be secured tightly, so applying steady pressure may be necessary to loosen them. Once the bolts are sufficiently loosened, lift them out of the hinge holes to release the old toilet seat.
-
Discard the Old Seat: With the bolts removed, carefully lift the old toilet seat and lid away from the toilet bowl, ensuring that any remaining hardware is detached. Set the old seat aside for proper disposal or recycling, creating a clear space for the installation of the new bidet toilet seat.
-
Clean and Prepare the Area: After removing the old toilet seat, take the opportunity to clean the exposed area on the toilet bowl. Wipe down the surface to remove any accumulated debris or residue, ensuring a clean and smooth foundation for the installation of the bidet toilet seat.
By meticulously following these steps, you can successfully remove the existing toilet seat, setting the stage for the seamless installation of the new bidet toilet seat. With the old seat removed and the area prepared, you are now ready to proceed to the next crucial phase of the installation process, where you will install the bidet toilet seat and elevate your bathroom experience to new heights.
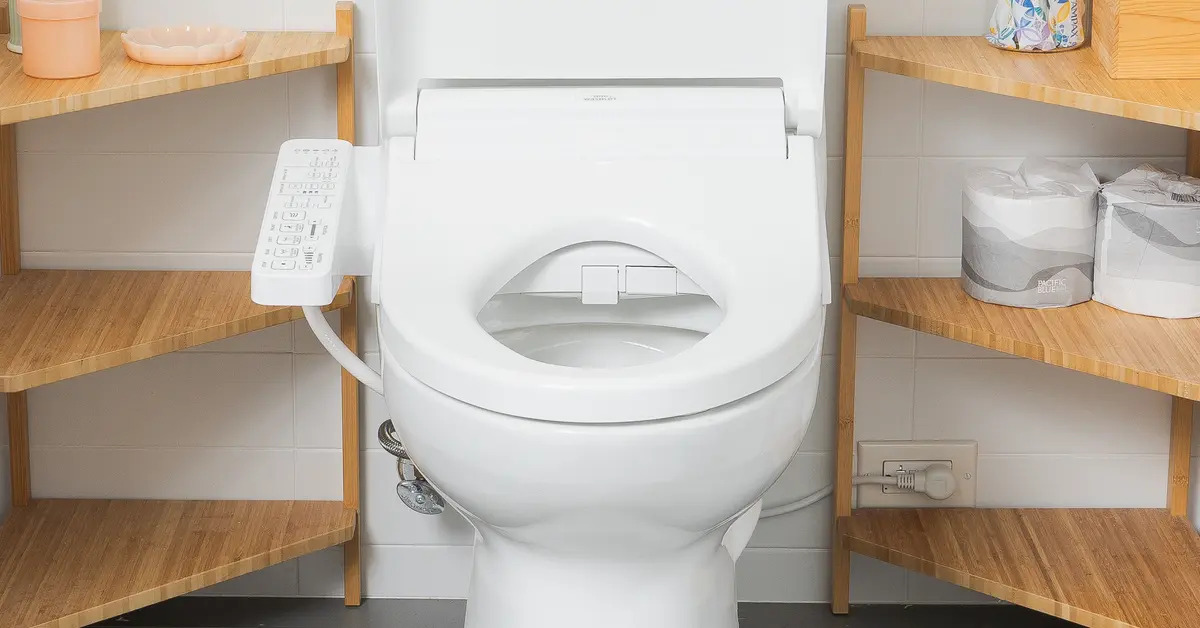
Step 4: Install Bidet Toilet Seat
With the old toilet seat removed and the area meticulously prepared, you are now ready to embark on the pivotal phase of the installation process: installing the bidet toilet seat. This transformative fixture will not only enhance your bathroom experience but also contribute to improved hygiene and comfort. Follow these detailed steps to seamlessly install the bidet toilet seat and elevate your bathroom environment.
-
Position the Bidet Toilet Seat: Carefully position the bidet toilet seat over the bowl, ensuring that it aligns evenly and securely. Take note of the alignment of the seat and ensure that it sits flush and level on the toilet bowl.
-
Secure the Seat: Once the bidet toilet seat is properly positioned, secure it in place by aligning the mounting holes on the seat with the hinge holes on the toilet bowl. Insert the bolts provided with the bidet toilet seat through the hinge holes and fasten them securely using the appropriate tool, such as a screwdriver or wrench.
-
Adjust Seat Alignment: After securing the bidet toilet seat, verify that it is aligned correctly and sits evenly on the bowl. Make any necessary adjustments to ensure that the seat is level and properly positioned for optimal comfort and functionality.
-
Attach the Bidet Attachment: If your bidet toilet seat includes additional attachments, such as a nozzle or control panel, carefully attach these components according to the manufacturer's instructions. Ensure that all attachments are securely fastened and aligned with the seat for seamless operation.
-
Apply Caulk or Sealant (If Required): Depending on the bidet toilet seat model and manufacturer recommendations, you may need to apply a thin bead of caulk or sealant around the edges of the seat to secure it in place and prevent shifting. Follow the specific guidelines provided to ensure the proper application of caulk or sealant.
By meticulously following these steps, you can effectively install the bidet toilet seat, setting the stage for a refined and luxurious bathroom experience. With the seat securely in place and all components properly aligned, you are now prepared to proceed to the next critical phase of the installation process, where you will connect the water supply and bring the bidet toilet seat to life.
This comprehensive approach to installing the bidet toilet seat ensures that every detail is addressed with precision, resulting in a seamless and rewarding installation experience. As you progress through the installation process, you are one step closer to enjoying the myriad benefits of a bidet toilet seat, from enhanced hygiene to unparalleled comfort.
When connecting a bidet toilet seat, make sure to turn off the water supply, remove the existing toilet seat, and follow the manufacturer’s instructions for installation. Double check all connections to ensure they are secure before use.
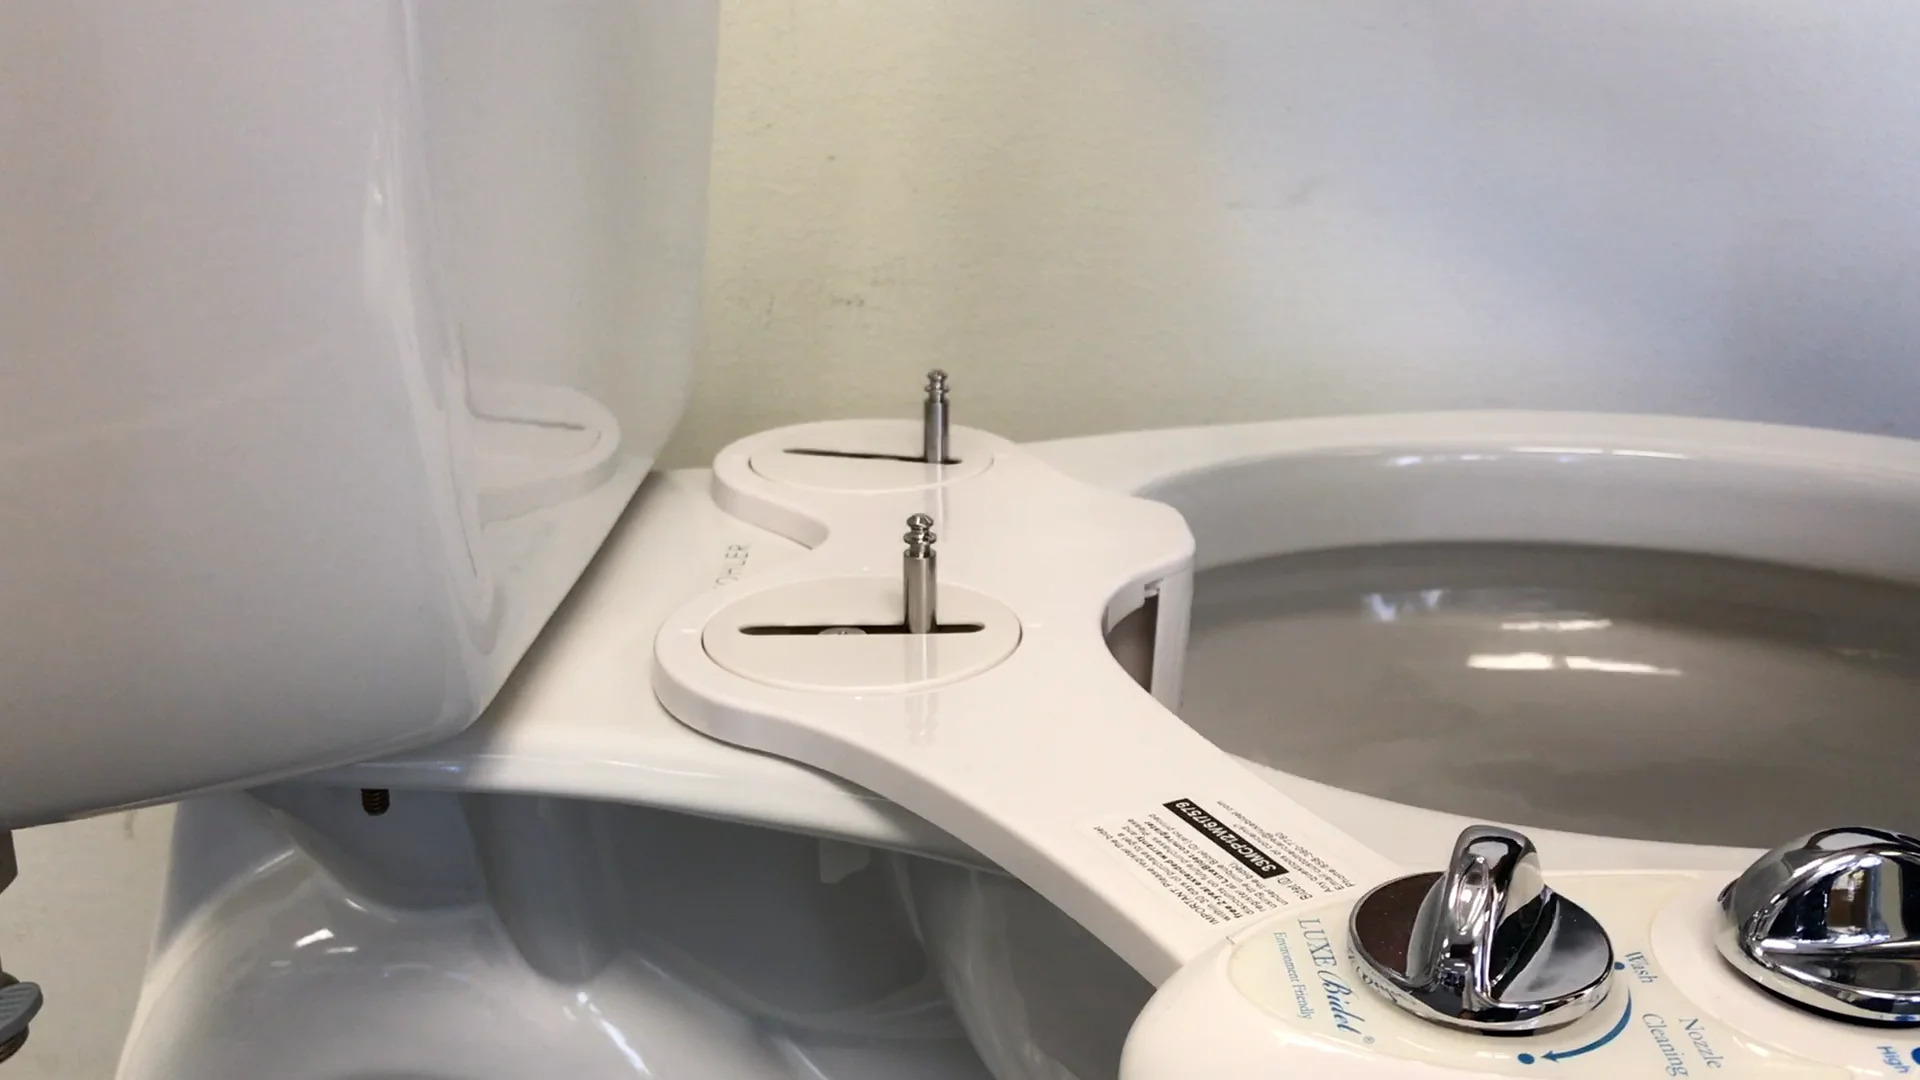
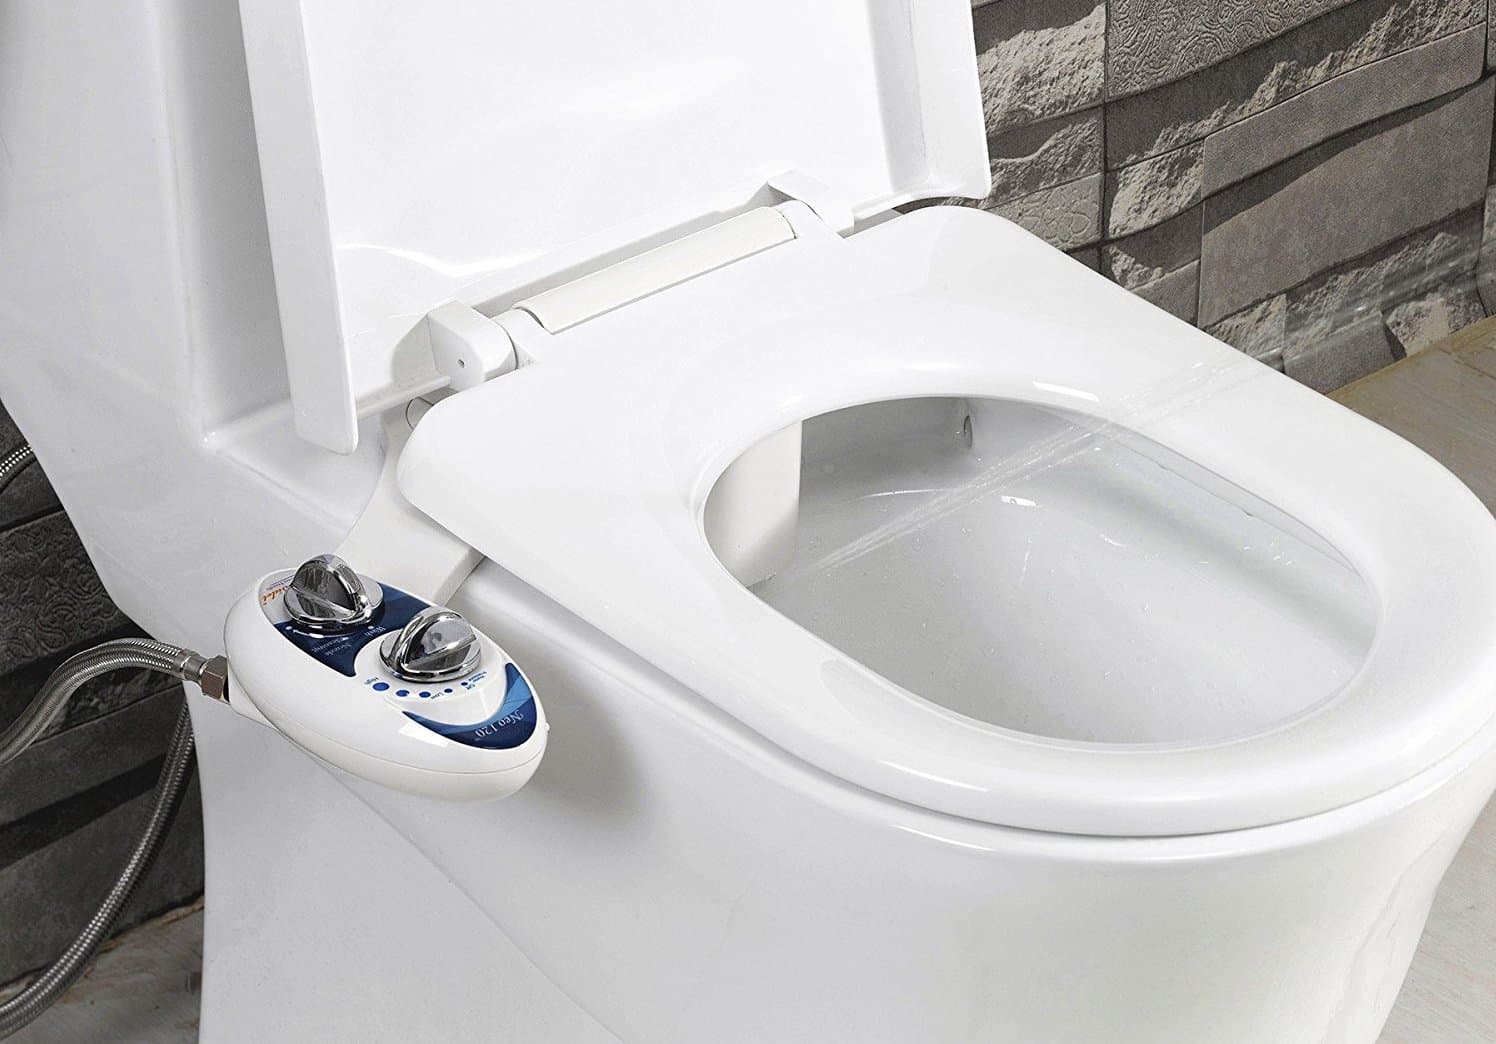
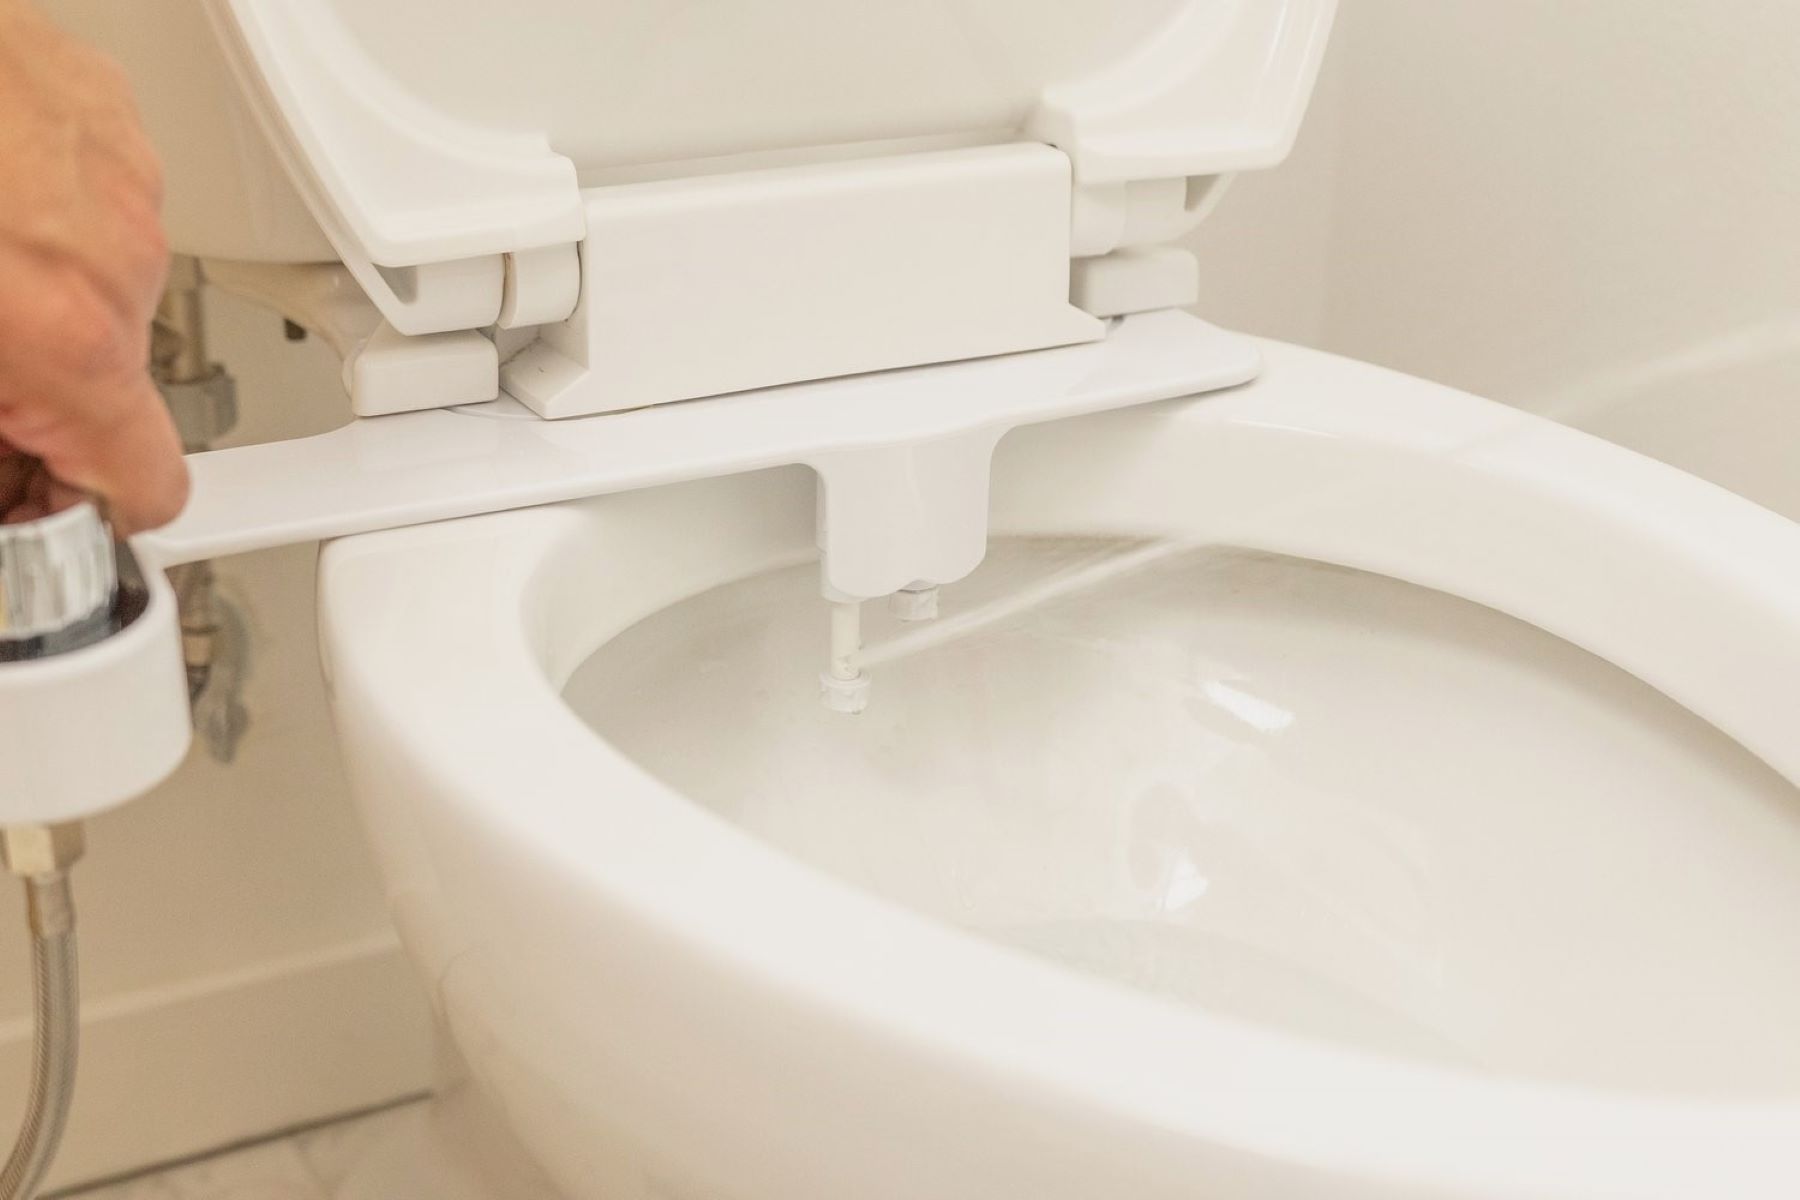
Step 5: Connect Water Supply
Connecting the water supply is a crucial step in the installation of a bidet toilet seat, as it enables the seat to function effectively and provide the desired cleansing experience. By following the detailed instructions below, you can seamlessly connect the water supply to the bidet toilet seat, ensuring proper functionality and optimal performance.
-
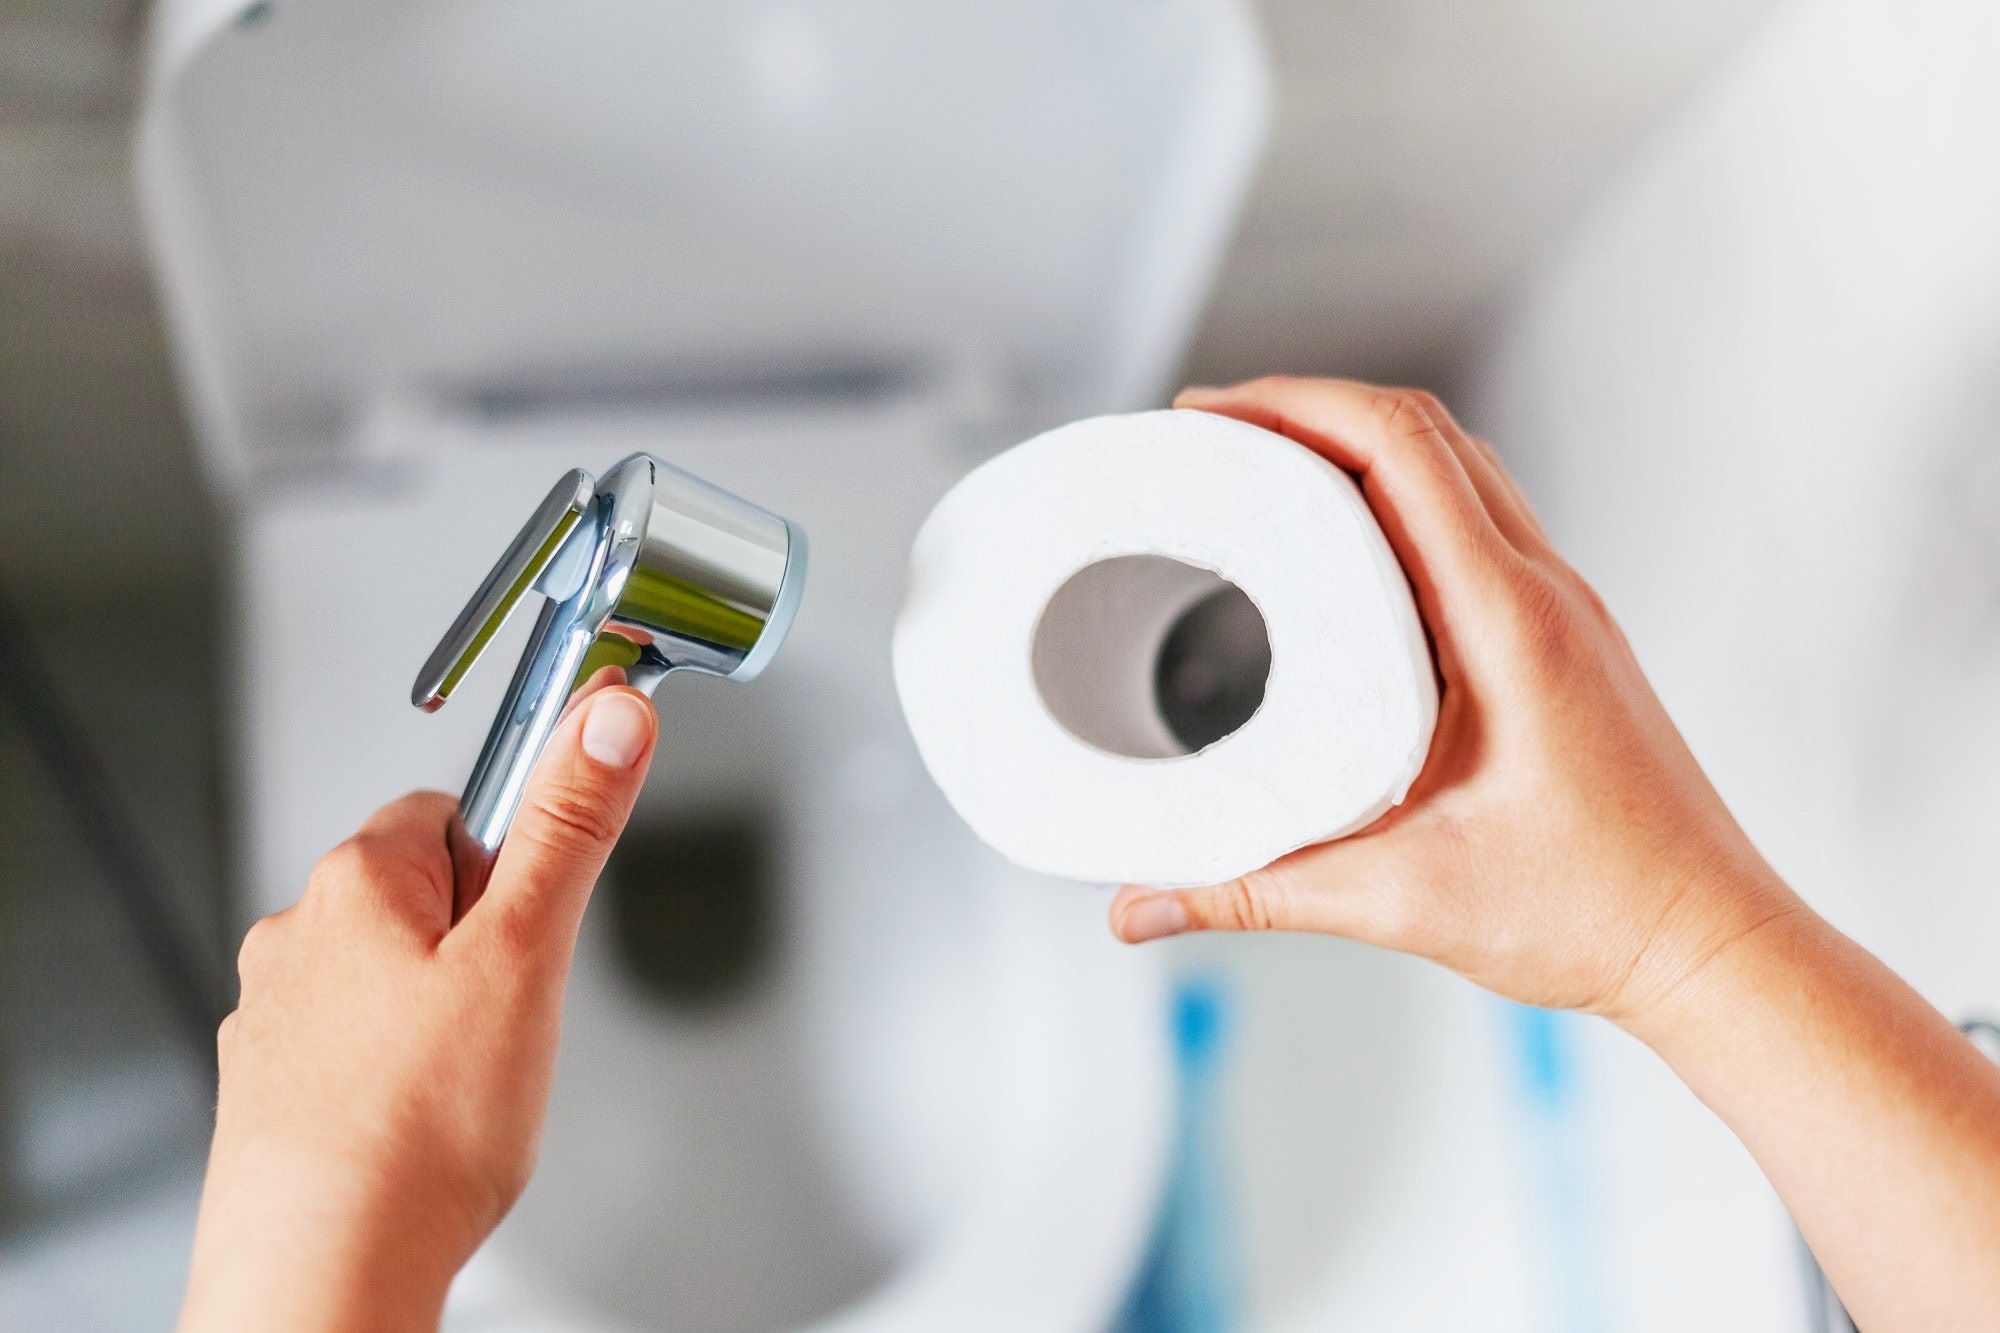
Locate the Water Inlet: Begin by identifying the water inlet valve located near the toilet tank. This valve is typically situated on the wall or floor behind the toilet. It is essential to locate this valve to facilitate the connection of the water supply hose to the bidet toilet seat.
-
Attach the Water Supply Hose: Take the flexible water supply hose provided with the bidet toilet seat and connect one end to the water inlet valve. Ensure that the connection is secure and tight to prevent any potential leaks. If necessary, use an adjustable wrench to tighten the connection, taking care not to over-tighten.
-
Connect to the Bidet Toilet Seat: With one end of the water supply hose securely attached to the water inlet valve, proceed to connect the other end to the corresponding inlet on the bidet toilet seat. Ensure that the connection is firm and leak-free, as this will be the conduit for delivering water to the bidet's cleansing function.
-
Use Teflon Tape: To create a watertight seal and prevent leaks, wrap the threaded ends of the water supply hose with Teflon tape before making the connections. This simple yet effective measure will enhance the integrity of the connections and provide added assurance against potential leaks.
-
Install Rubber Washers (If Required): Depending on the specific requirements of the bidet toilet seat, you may need to install rubber washers at the connection points to ensure a tight seal and prevent water leakage. Follow the manufacturer's guidelines to determine if rubber washers are necessary for the installation.
-
Turn On the Water Supply: Once the water supply hose is securely connected to both the water inlet valve and the bidet toilet seat, carefully turn on the water supply by rotating the valve handle in a counterclockwise direction. This action will restore the flow of water to the toilet and activate the bidet toilet seat's cleansing function.
By diligently following these steps to connect the water supply, you can ensure that the bidet toilet seat is seamlessly integrated into your bathroom environment, ready to deliver a superior and refreshing cleansing experience. With the water supply securely connected, you are now prepared to proceed to the final phase of the installation process, where you will test the bidet toilet seat to confirm its optimal functionality.
This meticulous approach to connecting the water supply ensures that the bidet toilet seat is seamlessly integrated into your bathroom environment, ready to deliver a superior and refreshing cleansing experience. With the water supply securely connected, you are now prepared to proceed to the final phase of the installation process, where you will test the bidet toilet seat to confirm its optimal functionality.
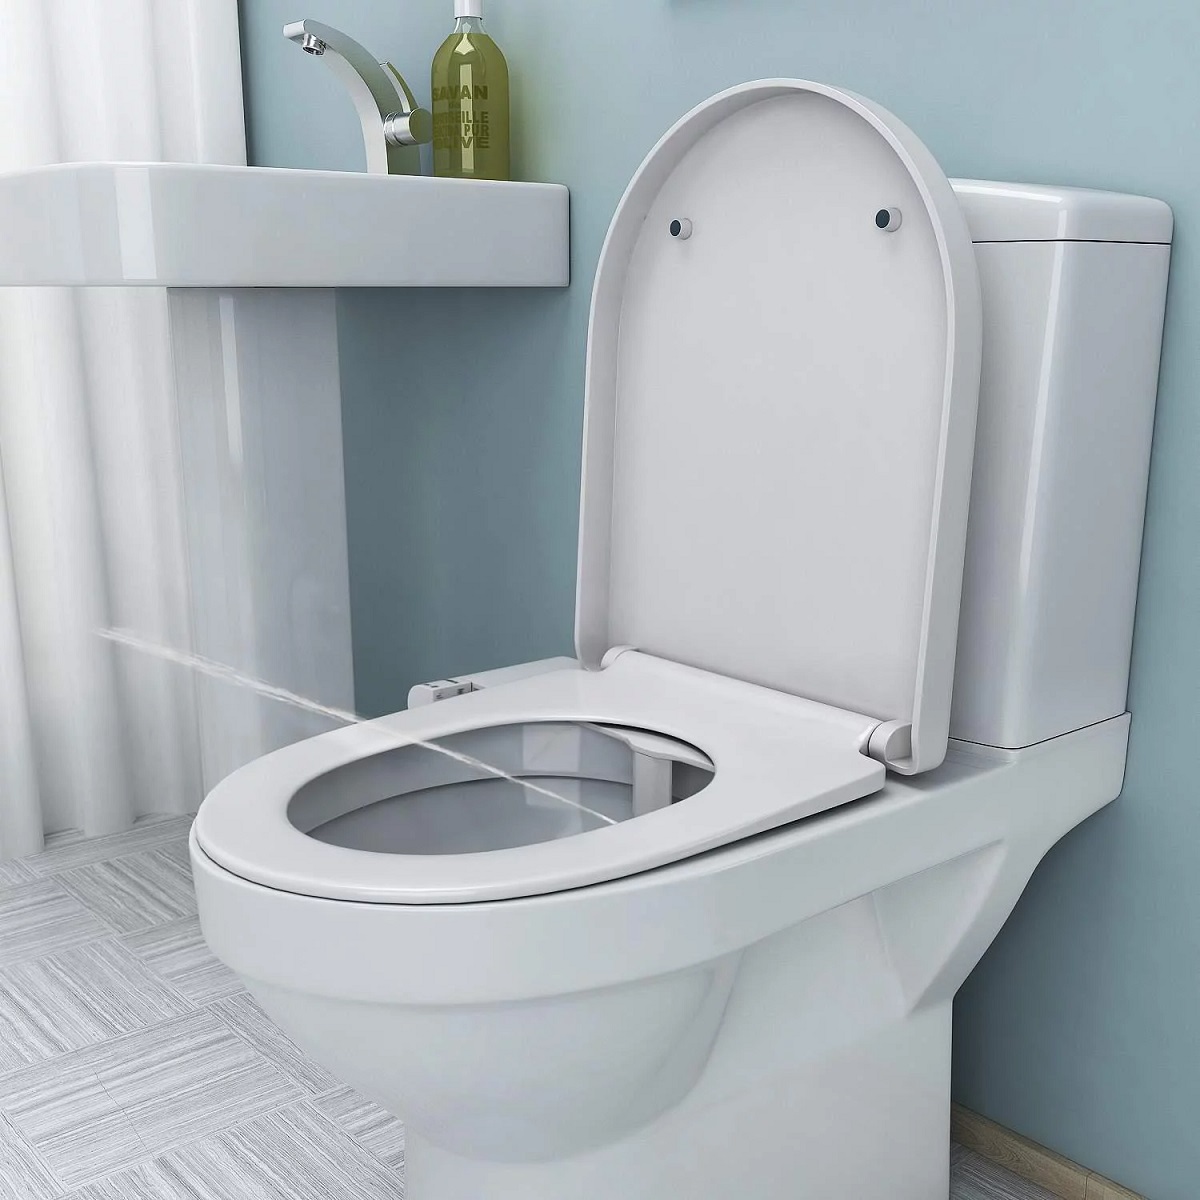
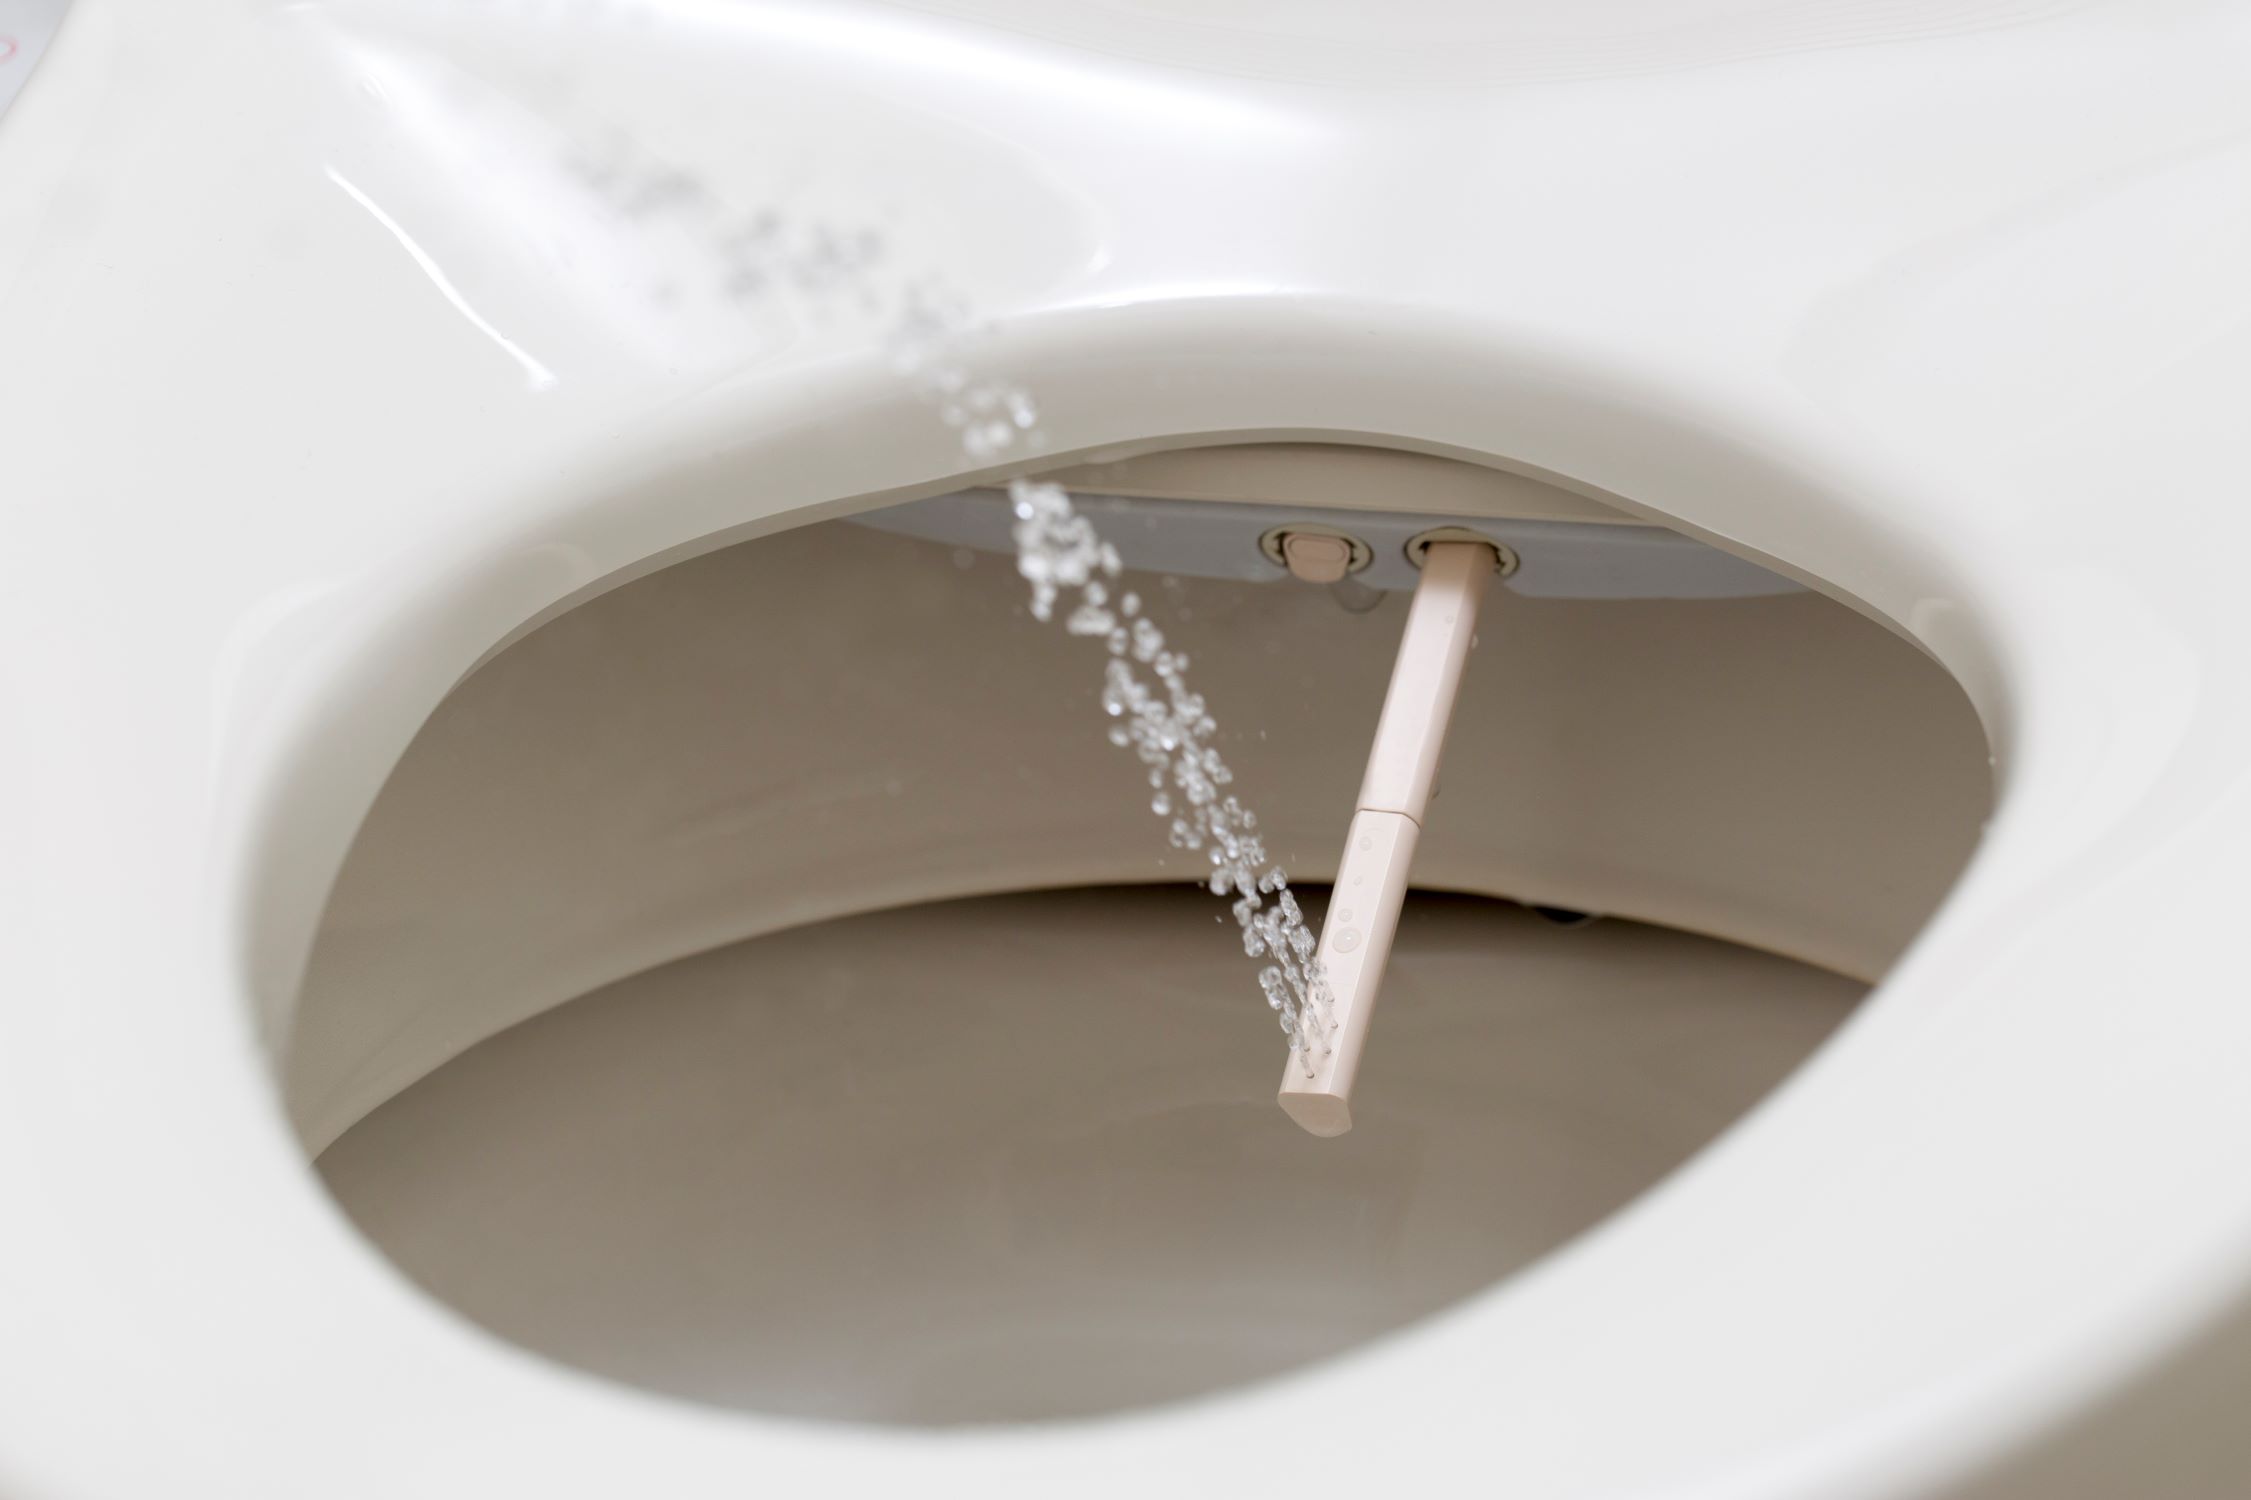
Step 6: Test Bidet Toilet Seat
After completing the installation of the bidet toilet seat and connecting the water supply, it is essential to conduct a thorough and meticulous test to ensure that the seat functions as intended. This critical step not only validates the successful installation but also provides the opportunity to familiarize yourself with the bidet toilet seat's features and functionality. By following the detailed guidelines outlined below, you can effectively test the bidet toilet seat and confirm its optimal performance.
-
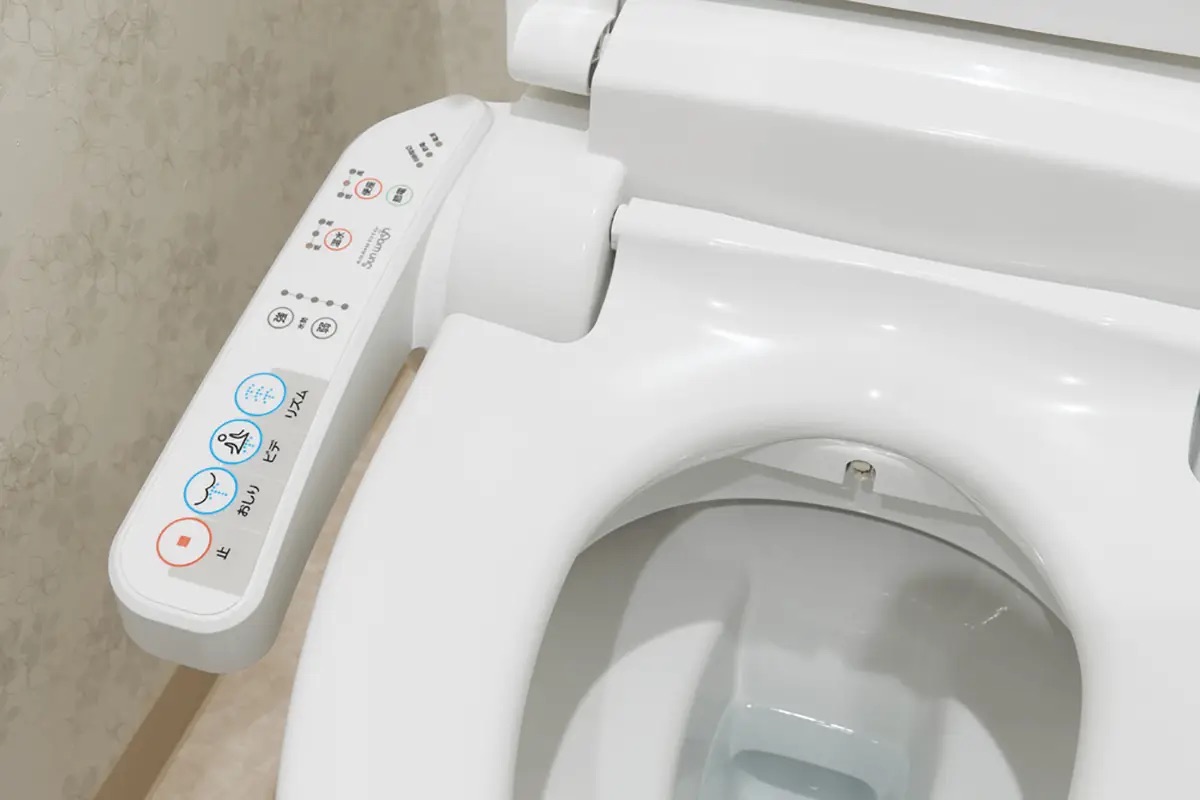
Activate the Cleansing Function: Begin by activating the cleansing function of the bidet toilet seat. Depending on the model, this may involve pressing a designated button or using a control panel to initiate the cleansing process. Observe the water spray and nozzle movement to ensure that the cleansing function operates smoothly and effectively.
-
Adjust Water Pressure and Temperature: Explore the options for adjusting the water pressure and temperature settings on the bidet toilet seat. Test different settings to determine the ideal combination that aligns with your preferences and provides a comfortable and refreshing cleansing experience.
-
Evaluate Additional Features: If the bidet toilet seat includes additional features such as oscillating or pulsating spray patterns, explore these options to assess their functionality. Verify that these features operate seamlessly and contribute to an enhanced cleansing experience.
-
Check for Leaks or Malfunctions: While the cleansing function is active, carefully inspect the connections and components for any signs of leaks or malfunctions. Ensure that the water supply hose, connections to the water inlet valve, and all relevant components are free from leaks and function without issues.
-
Assess Comfort and Ergonomics: Sit on the bidet toilet seat and assess its overall comfort and ergonomics. Pay attention to the seating position, the functionality of the seat's design, and the overall user experience. Confirm that the bidet toilet seat delivers the expected level of comfort and convenience.
-
Review Control Panel Functions (If Applicable): If the bidet toilet seat features a control panel with various functions and settings, thoroughly review and test each function to ensure its proper operation. Familiarize yourself with the control panel layout and functionality to optimize your experience with the bidet toilet seat.
By meticulously testing the bidet toilet seat and evaluating its performance across various parameters, you can gain confidence in its functionality and ensure that it aligns with your expectations. This comprehensive testing process serves as the final validation of a successful installation, affirming that the bidet toilet seat is ready to enrich your bathroom experience with its innovative features and superior functionality.
Read more: How To Install Bidet Toilet Seat
Conclusion
In conclusion, the installation of a bidet toilet seat represents a transformative upgrade that elevates the bathroom experience to new levels of comfort, hygiene, and modernity. Throughout this comprehensive guide, we have navigated the step-by-step process of connecting a bidet toilet seat, from gathering the necessary tools and materials to testing the seat's optimal functionality. By following these detailed instructions, homeowners and DIY enthusiasts can confidently embark on this installation journey, equipped with the knowledge and insights necessary to achieve a successful outcome.
As we reflect on the installation process, it becomes evident that the integration of a bidet toilet seat transcends mere functionality, offering a myriad of benefits that resonate with modern lifestyles. The seamless connection of the water supply, the meticulous testing of the seat's features, and the attention to detail in securing the seat in place collectively contribute to a refined and luxurious bathroom environment.
By embracing the installation of a bidet toilet seat, individuals can embrace the principles of sustainability, as bidets significantly reduce the consumption of toilet paper, contributing to environmental conservation efforts. Furthermore, the enhanced hygiene and cleansing capabilities of bidet toilet seats promote a sense of well-being and comfort, aligning with the pursuit of a healthier lifestyle.
The successful installation of a bidet toilet seat not only signifies a practical upgrade but also embodies a commitment to modernity and innovation in home design. As bidet technology continues to evolve, integrating advanced features and customizable settings, homeowners are presented with an opportunity to embrace the latest advancements in bathroom fixtures, enhancing the overall appeal and functionality of their living spaces.
In essence, the installation of a bidet toilet seat represents a harmonious fusion of practicality, sustainability, and modern convenience. By following the detailed steps outlined in this guide, individuals can embark on this installation journey with confidence, knowing that they are poised to unlock the transformative potential of a bidet toilet seat, enriching their daily routines and redefining their bathroom experiences.
Frequently Asked Questions about How To Connect A Bidet Toilet Seat
Was this page helpful?
At Storables.com, we guarantee accurate and reliable information. Our content, validated by Expert Board Contributors, is crafted following stringent Editorial Policies. We're committed to providing you with well-researched, expert-backed insights for all your informational needs.


0 thoughts on “How To Connect A Bidet Toilet Seat”