Home>Furniture & Design>Bathroom Accessories>How To Paint A Toilet Seat

Bathroom Accessories
How To Paint A Toilet Seat
Modified: August 16, 2024
Learn how to paint a toilet seat to match your bathroom accessories. Follow our step-by-step guide for a quick and easy DIY project.
(Many of the links in this article redirect to a specific reviewed product. Your purchase of these products through affiliate links helps to generate commission for Storables.com, at no extra cost. Learn more)
Introduction
Painting a toilet seat is a simple yet effective way to revitalize your bathroom decor without breaking the bank. Whether you're looking to add a pop of color, match the toilet seat to your bathroom's theme, or simply give it a fresh new look, this DIY project can be a rewarding and budget-friendly endeavor.
By following a few straightforward steps and using the right materials, you can transform a worn-out or outdated toilet seat into a stylish and personalized accent piece. Not only does this allow you to unleash your creativity, but it also provides an opportunity to breathe new life into an essential bathroom fixture.
In this comprehensive guide, we will walk you through the process of painting a toilet seat, from gathering the necessary materials to sealing the finished product. With a bit of patience and attention to detail, you can achieve professional-looking results that will leave your bathroom feeling rejuvenated and aesthetically pleasing.
So, roll up your sleeves, unleash your inner artist, and let's dive into the step-by-step process of transforming your toilet seat from mundane to magnificent. Whether you're a seasoned DIY enthusiast or a novice looking to embark on your first home improvement project, this guide will equip you with the knowledge and confidence to tackle this endeavor with ease. Let's get started!
Key Takeaways:
- Transform your bathroom with a personalized touch by painting your toilet seat. Follow simple steps to revitalize your space and unleash your creativity on a budget!
- With the right materials and a bit of patience, you can turn a mundane task into a rewarding DIY project. Paint your toilet seat to reflect your style and add a unique charm to your bathroom.
Read more: How To Disinfect Toilet Seat
Step 1: Gather Materials
Before embarking on the journey of painting your toilet seat, it's essential to gather all the necessary materials. By ensuring you have everything at hand, you can streamline the painting process and achieve a professional finish. Here's a comprehensive list of materials you'll need:
Materials:
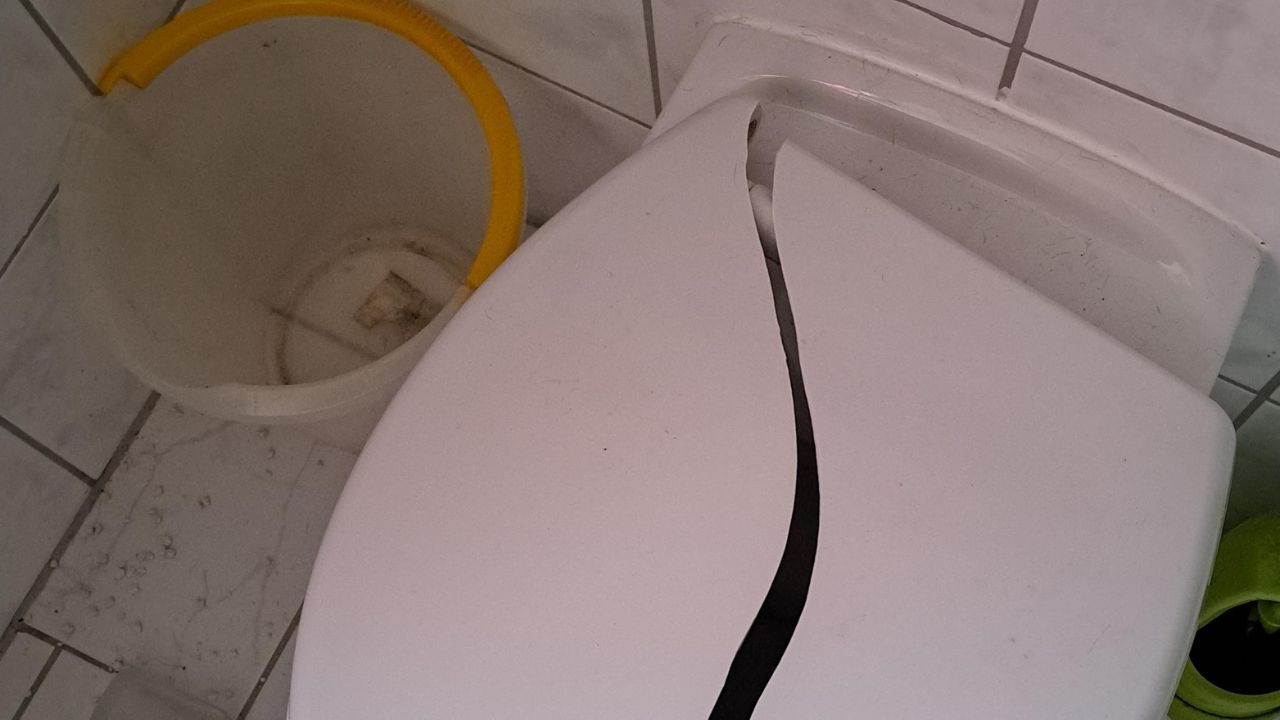
- Toilet Seat: Select a toilet seat that is in good condition and free from any cracks or damage. If the seat is old or worn, consider replacing it with a new one for the best results.
- Sandpaper: Choose a fine-grit sandpaper (around 220-grit) to smooth the surface of the toilet seat and create a suitable base for the paint to adhere to.
- Screwdriver: You'll need a screwdriver to remove the toilet seat from the toilet bowl for easy and convenient painting.
- Drop Cloth or Newspaper: Lay down a drop cloth or spread out old newspapers to protect the surrounding area from paint splatters and spills.
- Painter's Tape: Use painter's tape to mask off any areas of the toilet seat that you don't want to paint, such as the hinges or any decorative elements.
- Primer: Choose a high-quality primer suitable for painting on plastic or wood, depending on the material of your toilet seat.
- Paint: Select a durable, high-quality paint designed for use on bathroom fixtures. Consider using enamel or epoxy paint for its durability and resistance to moisture and wear.
- Paintbrushes or Spray Paint: Depending on your preference, gather suitable paintbrushes or opt for spray paint for a smooth and even application.
- Clear Sealant: To protect the painted surface and ensure longevity, have a clear sealant or polyurethane finish on hand.
By ensuring you have all these materials ready, you can proceed with confidence, knowing that you have everything you need to successfully paint your toilet seat. With the materials in hand, you're now ready to move on to the next step of preparing the toilet seat for painting.
Step 2: Prepare the Toilet Seat
Before diving into the painting process, it's crucial to prepare the toilet seat to ensure optimal adhesion and a smooth, professional finish. Proper preparation involves cleaning the surface, removing the seat from the toilet bowl, and addressing any imperfections. Here's a detailed breakdown of the essential steps to prepare the toilet seat for painting:
-
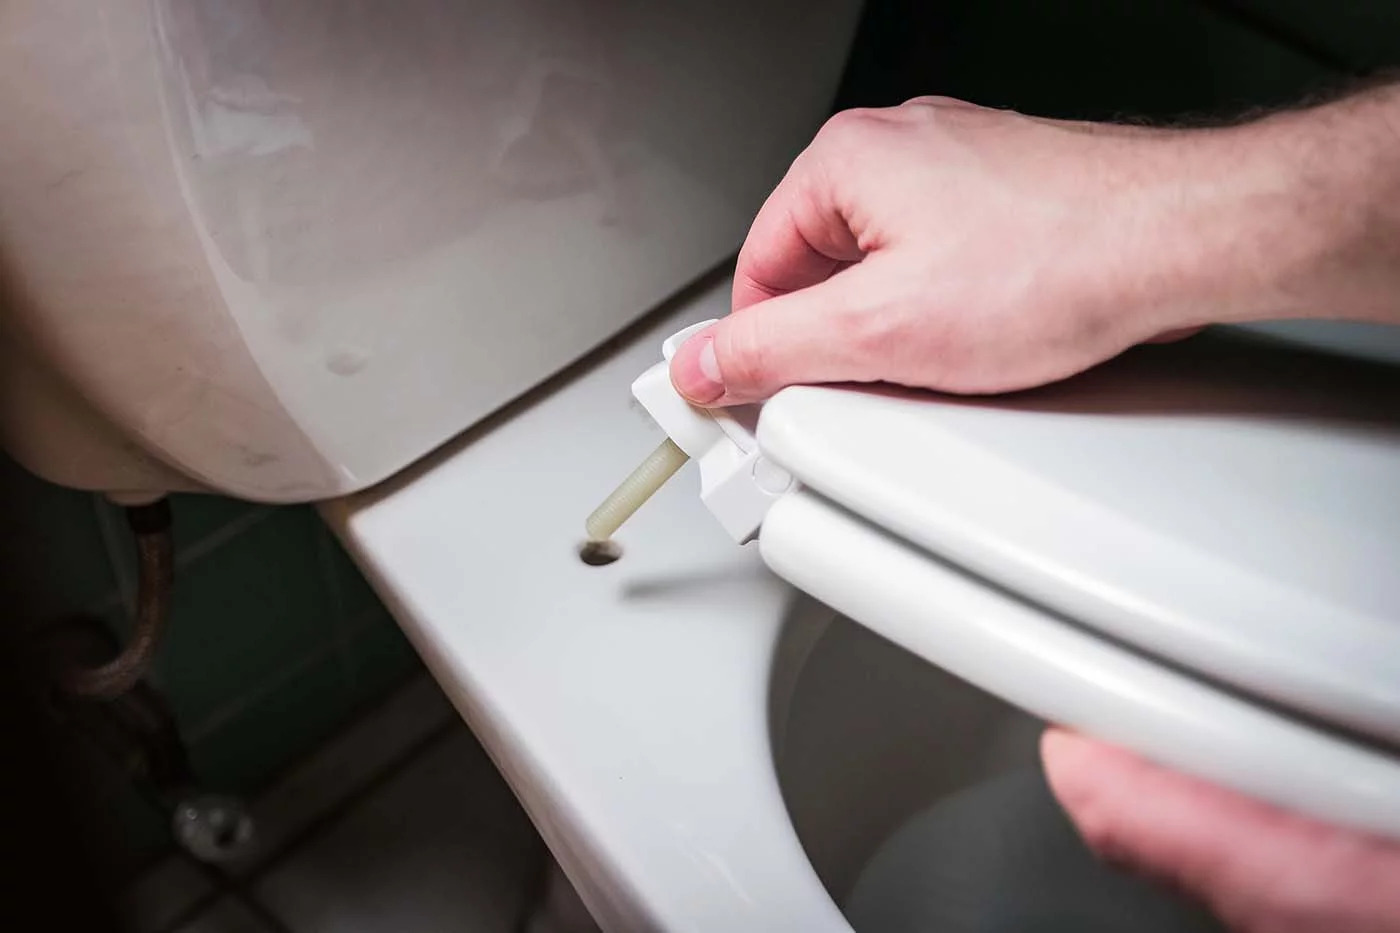
Remove the Toilet Seat: Start by using a screwdriver to carefully remove the toilet seat from the toilet bowl. This step will provide easier access to the entire seat and prevent accidental paint transfer to the toilet bowl during the painting process.
-
Clean the Surface: Thoroughly clean the entire surface of the toilet seat using a mild detergent and warm water. This will remove any dirt, grime, or residue that may hinder the paint's adhesion. Ensure the seat is completely dry before proceeding to the next step.
-
Sand the Surface: Using fine-grit sandpaper (around 220-grit), gently sand the entire surface of the toilet seat. This step serves to roughen the surface slightly, creating a better grip for the primer and paint. Be sure to sand in the direction of the wood grain or in even strokes for plastic seats to avoid creating visible scratches.
-
Address Imperfections: If the toilet seat has any imperfections such as dents, scratches, or uneven surfaces, consider using wood filler for wooden seats or a suitable filler for plastic seats to smooth out these imperfections. Once applied, allow the filler to dry completely before sanding it down to achieve a seamless surface.
-
Mask Off Areas: Use painter's tape to carefully mask off any areas of the toilet seat that you do not want to paint, such as the hinges or any decorative elements. This step ensures clean and precise lines, preventing accidental paint application in unwanted areas.
By meticulously preparing the toilet seat, you set the stage for a successful and professional-looking paint job. Taking the time to clean, sand, address imperfections, and mask off areas will contribute to a flawless finish and ensure that the paint adheres effectively. With the toilet seat now primed and ready, you're all set to move on to the next exciting step of priming the surface for painting.
Step 3: Prime the Surface
Priming the surface of the toilet seat is a crucial step that sets the foundation for a durable and long-lasting paint finish. The primer serves as a bonding agent, promoting adhesion between the surface of the seat and the paint while also providing an even base for the paint to adhere to. Here's a detailed guide on how to effectively prime the surface of the toilet seat:
-
Select the Right Primer: Choose a high-quality primer specifically formulated for the material of your toilet seat, whether it's wood or plastic. Opt for a primer designed to adhere to slick surfaces and withstand moisture, as bathrooms are inherently humid environments.
-
Apply the Primer: Using a high-quality paintbrush or a spray primer, apply a thin, even coat of primer to the entire surface of the toilet seat. Ensure that the primer is applied smoothly and evenly, covering all areas that will be painted. If using a spray primer, follow the manufacturer's instructions regarding application and drying times.
-
Allow for Proper Drying: After applying the primer, allow it to dry completely according to the manufacturer's recommendations. This typically involves allowing the primer to cure for the specified time to ensure optimal adhesion and durability.
-
Sand the Primed Surface (Optional): Once the primer has dried, lightly sand the surface with fine-grit sandpaper to create a smooth and uniform base for the paint. This step helps to address any imperfections and further promotes paint adhesion.
By effectively priming the surface of the toilet seat, you create an ideal canvas for the paint, ensuring that it adheres well and withstands the rigors of daily use in the bathroom. The primer acts as a protective barrier, enhancing the durability and longevity of the paint finish. With the surface primed and prepared, you're now ready to embark on the exciting phase of applying the chosen paint to transform your toilet seat into a personalized work of art.
Before painting a toilet seat, make sure to thoroughly clean and sand the surface to ensure the paint adheres properly. Use a high-quality, waterproof paint and finish with a clear sealant for durability.
Read more: How Much Is A Toilet Seat
Step 4: Paint the Toilet Seat
With the surface properly prepared and primed, it's time to infuse your creativity and bring your vision to life by painting the toilet seat. This transformative step allows you to add a personal touch to your bathroom decor while rejuvenating the appearance of the toilet seat. Here's a comprehensive guide on how to effectively paint the toilet seat:
-
Select the Right Paint: Choose a high-quality paint suitable for bathroom fixtures, such as enamel or epoxy paint known for their durability and resistance to moisture. Select a color that complements your bathroom's aesthetic or opt for a bold hue to make a statement.
-
Apply the Paint: Using a high-quality paintbrush or spray paint, apply the first coat of paint to the entire surface of the toilet seat. Ensure smooth and even coverage, avoiding drips or pooling of the paint. If using spray paint, follow the manufacturer's instructions for optimal application.
-
Allow for Drying Time: After applying the first coat of paint, allow it to dry completely according to the paint manufacturer's recommendations. This typically involves allowing the paint to cure for the specified time to ensure a durable and long-lasting finish.
-
Apply Additional Coats (If Needed): Depending on the desired opacity and color intensity, apply additional coats of paint as necessary. Ensure that each coat is allowed to dry thoroughly before applying the next one, building up the color and coverage gradually.
-
Addressing Details and Edges: Pay close attention to details and edges, ensuring that all areas are evenly covered with paint. Take care to maintain clean lines and avoid any smudges or uneven application.
-
Optional: Add Decorative Touches: If desired, consider incorporating decorative elements or stenciling to enhance the visual appeal of the painted toilet seat. This step allows for personalization and creativity, adding unique flair to the finished product.
By following these steps, you can achieve a professional-looking paint finish that revitalizes the toilet seat and adds a touch of personality to your bathroom. With the paint applied and dried, the next crucial step involves sealing the painted surface to protect it from wear and tear, ensuring its longevity and resilience in the bathroom environment.
Step 5: Seal the Paint
Sealing the painted surface of the toilet seat is a vital step that enhances durability, protects the finish from moisture and wear, and ensures the longevity of your DIY project. By applying a clear sealant or polyurethane finish, you create a protective barrier that safeguards the paint and maintains its pristine appearance. Here's a detailed guide on how to effectively seal the painted surface of the toilet seat:
-
Select the Right Sealant: Choose a clear sealant or polyurethane finish specifically formulated for use on painted surfaces. Opt for a product that offers moisture resistance and durability, ideal for withstanding the conditions of a bathroom environment.
-
Apply the Sealant: Using a high-quality paintbrush, apply a thin, even coat of the clear sealant to the entire painted surface of the toilet seat. Ensure that the sealant is applied smoothly and evenly, covering all areas that have been painted. If using a spray sealant, follow the manufacturer's instructions for optimal application.
-
Allow for Proper Drying: After applying the sealant, allow it to dry completely according to the manufacturer's recommendations. This typically involves allowing the sealant to cure for the specified time to ensure optimal protection and resilience.
-
Sand and Apply Additional Coats (Optional): For an extra layer of protection, lightly sand the sealed surface with fine-grit sandpaper and apply an additional coat of sealant. This step further enhances the durability and longevity of the painted surface, providing added resistance to moisture and daily use.
-
Ensure Adequate Curing Time: Allow the sealed surface to cure fully before reinstalling the toilet seat. This ensures that the sealant has bonded effectively with the paint, providing a robust and protective finish.
By effectively sealing the painted surface of the toilet seat, you safeguard your creative endeavor from the challenges of a bathroom environment. The sealant acts as a shield, protecting the paint from water, steam, and daily use, ensuring that your DIY project maintains its beauty and functionality for an extended period. With the painted surface sealed and protected, you can confidently reinstall the toilet seat, knowing that it has been transformed into a durable and visually appealing accent in your bathroom.
Conclusion
Congratulations! By following the comprehensive steps outlined in this guide, you have successfully transformed your ordinary toilet seat into a personalized work of art. Through meticulous preparation, skillful painting, and effective sealing, you have revitalized a fundamental bathroom fixture, infusing it with your unique style and creativity.
As you reinstall the freshly painted and sealed toilet seat, take a moment to admire the remarkable difference it has made in your bathroom. Whether you opted for a subtle color refresh or boldly embraced a vibrant hue, your DIY project has undoubtedly breathed new life into the space, elevating its aesthetic appeal and reflecting your personal taste.
Not only does painting a toilet seat offer a budget-friendly way to update your bathroom decor, but it also provides a sense of accomplishment and pride in your handiwork. Your willingness to embark on this DIY endeavor demonstrates your creativity, resourcefulness, and dedication to enhancing your living environment.
As you revel in the satisfaction of a job well done, remember to maintain the painted toilet seat with care. While the sealant provides protection, it's essential to clean the seat with mild, non-abrasive cleaners and avoid harsh chemicals that may compromise the finish. By doing so, you can preserve the beauty and integrity of your painted toilet seat for years to come.
Furthermore, consider this project as a springboard for future DIY ventures. The skills and confidence you've gained from painting a toilet seat can be applied to other home improvement projects, allowing you to unleash your creativity and transform your living spaces with personalized touches.
In conclusion, the process of painting a toilet seat transcends mere home improvement; it embodies the spirit of creativity, individuality, and the joy of breathing new life into everyday objects. Your bathroom now boasts a unique and eye-catching feature that reflects your personality and adds a touch of charm to the space.
So, as you step back and admire your handiwork, take pride in the fact that you've turned a mundane task into a delightful and rewarding experience. Your painted toilet seat stands as a testament to your ingenuity and flair, enriching your bathroom with a touch of artistry and personality.
Frequently Asked Questions about How To Paint A Toilet Seat
Was this page helpful?
At Storables.com, we guarantee accurate and reliable information. Our content, validated by Expert Board Contributors, is crafted following stringent Editorial Policies. We're committed to providing you with well-researched, expert-backed insights for all your informational needs.
0 thoughts on “How To Paint A Toilet Seat”