Home>Furniture & Design>Bathroom Accessories>How To Replace A Toilet Seat Lid
Bathroom Accessories
How To Replace A Toilet Seat Lid
Modified: October 18, 2024
Learn how to easily replace a toilet seat lid with our step-by-step guide. Find the perfect bathroom accessories for your home.
(Many of the links in this article redirect to a specific reviewed product. Your purchase of these products through affiliate links helps to generate commission for Storables.com, at no extra cost. Learn more)
Introduction
Replacing a toilet seat lid may seem like a daunting task, but with the right tools and a step-by-step guide, it can be a straightforward and rewarding DIY project. Over time, toilet seat lids can become worn, cracked, or discolored, detracting from the overall appearance and functionality of the bathroom. Whether you're looking to upgrade to a new style or simply need to replace a damaged lid, this guide will walk you through the process, empowering you to tackle this home improvement task with confidence.
A new toilet seat lid not only enhances the aesthetics of your bathroom but also contributes to a clean and hygienic environment. As one of the most frequently used fixtures in the home, the toilet seat lid plays a crucial role in maintaining comfort and sanitation. By learning how to replace it, you can ensure that this essential component remains in top condition, promoting a pleasant and functional bathroom space for you and your family.
In the following steps, we will cover everything you need to know to successfully replace a toilet seat lid. From gathering the necessary tools and materials to removing the old lid and installing the new one, each stage of the process will be explained in detail. By following these instructions, you can revitalize your bathroom with a fresh, clean toilet seat lid, elevating the overall appeal and functionality of this essential fixture.
So, let's roll up our sleeves and embark on this DIY journey to transform your bathroom by replacing the toilet seat lid. With a bit of patience and the right guidance, you'll soon be enjoying a revitalized and aesthetically pleasing bathroom space.
Key Takeaways:
- Revitalize your bathroom by replacing the toilet seat lid with the right tools and step-by-step guidance. Enjoy a clean, hygienic, and aesthetically pleasing fixture for a comfortable and inviting environment.
- Save on installation costs and gain valuable DIY experience by confidently replacing the toilet seat lid. Enhance your bathroom with a stable, visually appealing, and functional fixture for everyday use.
Read more: How To Measure For A Toilet Seat Replacement
Step 1: Gather the necessary tools and materials
Before diving into the process of replacing a toilet seat lid, it's essential to gather the required tools and materials. By ensuring that you have everything at hand, you can streamline the task and minimize interruptions, making the entire process more efficient and enjoyable.
Tools and Materials Checklist:
-
New Toilet Seat Lid: The first and most crucial item on your checklist is the new toilet seat lid. When selecting a replacement, consider the shape, size, and material to ensure a proper fit and cohesive look with your existing toilet.
-
Screwdriver: A flat-head or Phillips screwdriver will be necessary for removing the old toilet seat lid and installing the new one. Ensure that the screwdriver matches the type of screws used in your toilet seat assembly.
-
Adjustable Wrench: This tool will come in handy for loosening and tightening nuts and bolts during the installation process. An adjustable wrench provides flexibility and ensures a secure fit.
-
Rubber Gloves: It's advisable to wear rubber gloves to maintain cleanliness and hygiene while handling the old toilet seat lid and installing the new one.
-
Disinfectant Wipes or Spray: Before beginning the replacement process, it's a good idea to clean the area around the toilet thoroughly. Disinfectant wipes or spray will help sanitize the surface, ensuring a clean environment for the installation.
-
Safety Glasses: While removing the old toilet seat lid or handling hardware, wearing safety glasses can protect your eyes from any debris or accidental splashes.
-
Trash Bag: Have a trash bag on hand to dispose of the old toilet seat lid and any packaging from the new one. Keeping the work area tidy is essential for a smooth and organized replacement process.
By gathering these essential tools and materials, you'll be well-prepared to embark on the journey of replacing your toilet seat lid. With everything in place, you can proceed confidently to the next step, knowing that you have everything you need to complete the task efficiently and effectively.
Step 2: Remove the old toilet seat lid
Removing the old toilet seat lid is the crucial first step in the process of replacing it with a new one. This task requires careful attention to detail and the use of the right tools to ensure a smooth and efficient removal process.
-
Prepare the Work Area: Before starting, it's essential to prepare the work area. Place a trash bag nearby to dispose of the old toilet seat lid and any packaging materials from the new one. Additionally, use disinfectant wipes or spray to thoroughly clean the area around the toilet, ensuring a hygienic environment for the replacement process.
-
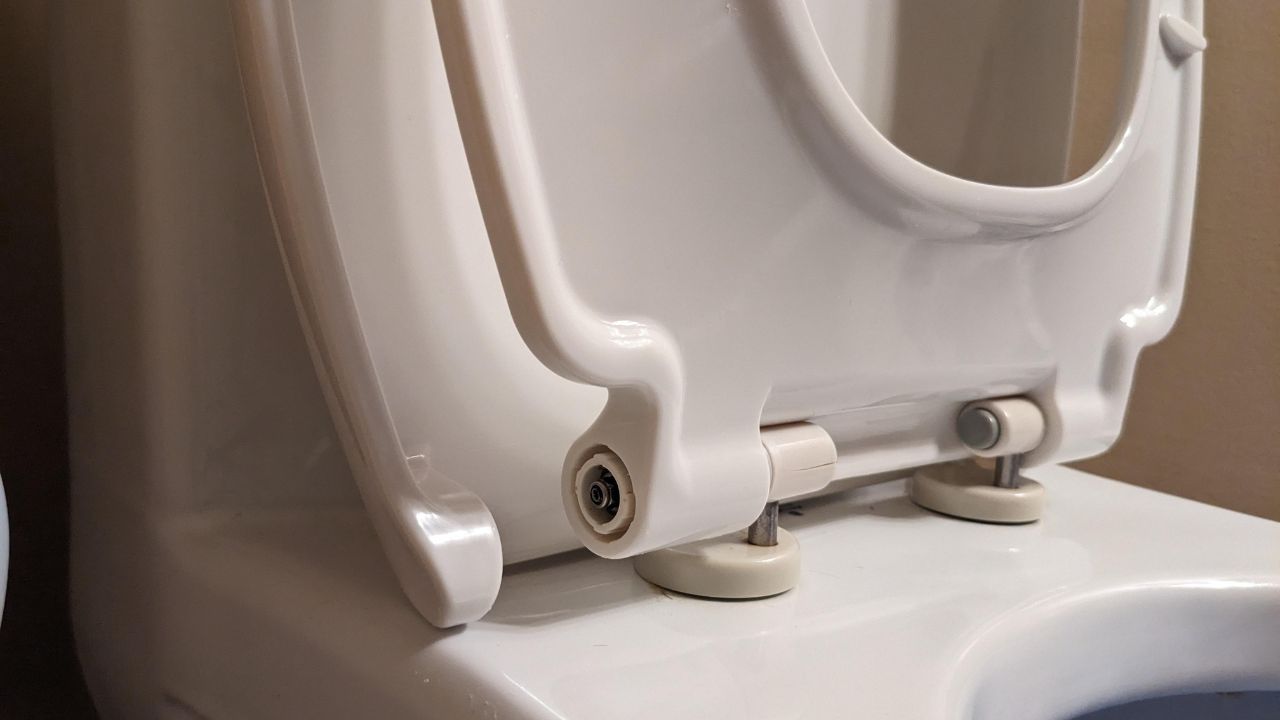
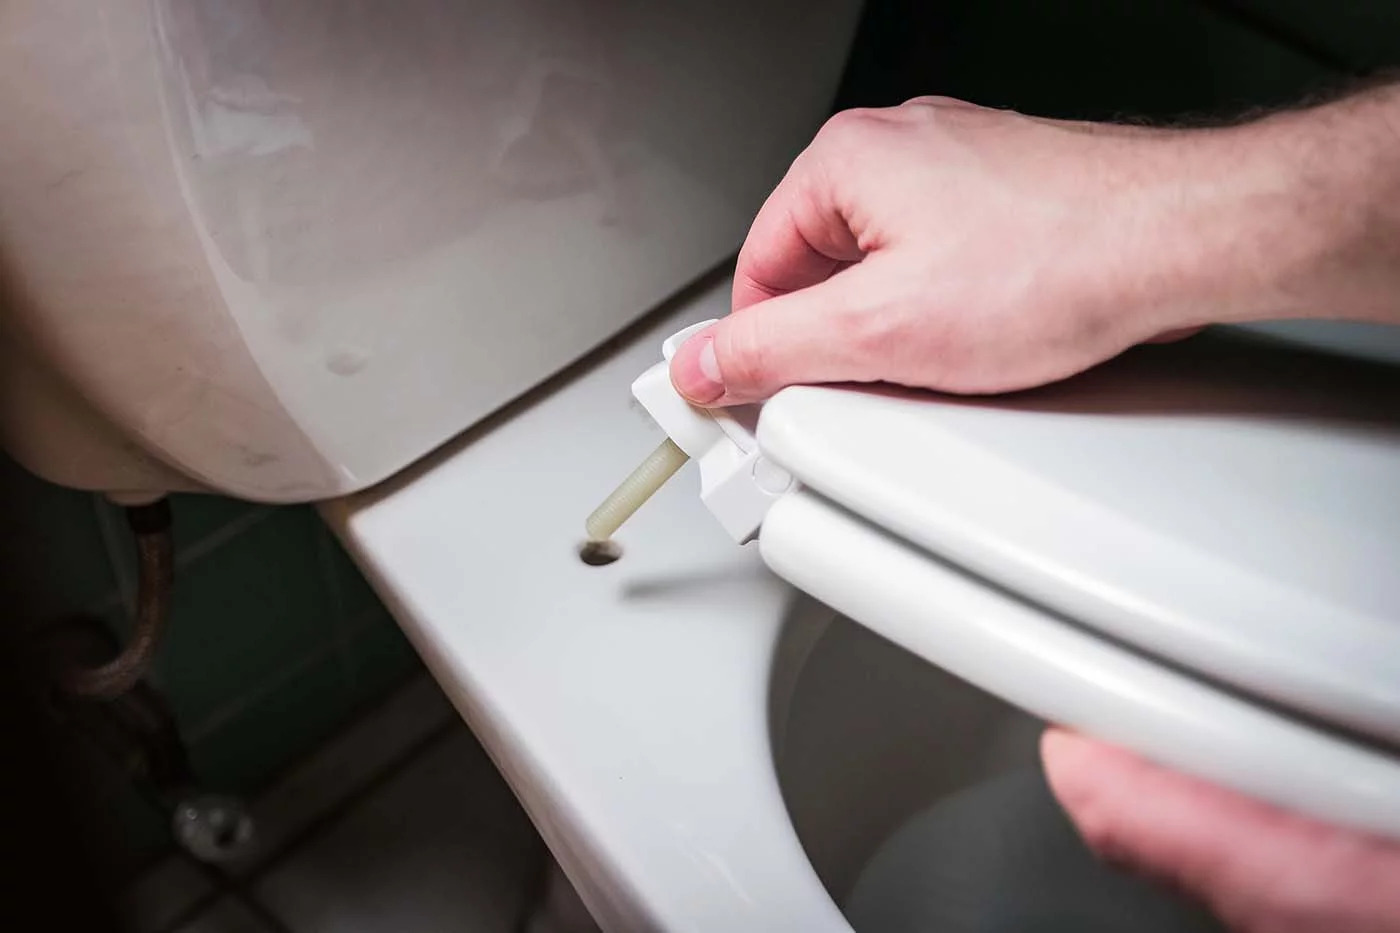
Loosen the Fasteners: Using a screwdriver, locate the fasteners or screws that secure the toilet seat lid to the toilet bowl. In most cases, these fasteners are located on the underside of the toilet bowl, near the back. Depending on the type of fasteners, you may need a flat-head or Phillips screwdriver to loosen them. Turn the screws counterclockwise to loosen them, allowing the old toilet seat lid to be lifted off.
-
Lift and Dispose: Once the fasteners are loosened, carefully lift the old toilet seat lid off the toilet bowl. Be mindful of any remaining hardware, such as nuts and bolts, that may be attached to the fasteners. Place the old toilet seat lid directly into the trash bag for proper disposal. If there are any remaining hardware pieces, set them aside for later inspection and potential reuse.
-
Clean and Inspect: With the old toilet seat lid removed, take a moment to clean the exposed area of the toilet bowl. Use disinfectant wipes or spray to thoroughly clean the surface, ensuring that it is free from any debris or residue. Additionally, inspect the fasteners and hardware that were holding the old toilet seat lid in place. Check for any signs of wear or damage, as these components may need to be replaced or repaired before installing the new toilet seat lid.
By following these steps, you can successfully remove the old toilet seat lid, preparing the toilet bowl for the installation of the new one. With the old lid disposed of and the area cleaned and inspected, you are now ready to move on to the next step of installing the new toilet seat lid.
Step 3: Install the new toilet seat lid
With the old toilet seat lid successfully removed and the area around the toilet bowl cleaned and inspected, it's time to proceed with the installation of the new toilet seat lid. This step involves carefully positioning the new lid and securing it in place, ensuring a proper fit and stable attachment to the toilet bowl.
-
Position the New Lid: Begin by positioning the new toilet seat lid on the toilet bowl, aligning it carefully to ensure a symmetrical and centered placement. Take note of any alignment marks or indicators on the lid or the toilet bowl that can guide you in positioning the new lid correctly.
-
Attach the Fasteners: Once the new lid is positioned, locate the fasteners or mounting holes on the underside of the lid. Align these with the corresponding holes or mounting points on the toilet bowl. Depending on the type of fasteners used, you may need to insert bolts or screws through the lid and into the mounting points on the toilet bowl.
-
Secure the Fasteners: With the fasteners in place, use the appropriate hardware, such as nuts or screws, to secure the new toilet seat lid to the toilet bowl. Ensure that the lid is positioned evenly and securely before tightening the fasteners. Use an adjustable wrench or screwdriver to tighten the hardware, taking care not to overtighten, which could potentially damage the lid or the toilet bowl.
-
Check the Alignment: Once the new toilet seat lid is secured, double-check the alignment and positioning to ensure that it sits evenly on the toilet bowl. Adjust the tightness of the fasteners if necessary to achieve a balanced and stable fit.
-
Inspect for Stability: After securing the new toilet seat lid, gently test its stability by applying light pressure to different areas. The lid should remain firmly in place without shifting or wobbling. If any instability is detected, recheck the fasteners and make adjustments as needed to achieve a secure and stable installation.
By following these steps, you can successfully install the new toilet seat lid, completing the transformation of your bathroom fixture. With the new lid securely in place, the visual appeal and functionality of your toilet will be enhanced, contributing to a clean, comfortable, and aesthetically pleasing bathroom environment.
When replacing a toilet seat lid, make sure to measure the dimensions of your toilet bowl to ensure you purchase the correct size. Also, check the type of hinge (plastic or metal) to match with the new seat.
Read more: How To Replace Toilet Seat With Hidden Bolts
Step 4: Secure the new toilet seat lid in place
Securing the new toilet seat lid is a critical step in the replacement process, ensuring that it remains stable and properly positioned on the toilet bowl. This step involves the careful tightening of fasteners and the inspection of the lid's alignment to achieve a secure and balanced installation.
Once the new lid is positioned and the fasteners are in place, it's essential to secure the lid by tightening the hardware. Using the appropriate tools, such as an adjustable wrench or screwdriver, carefully tighten the nuts or screws to secure the new toilet seat lid to the toilet bowl. It's important to exercise caution during this process, ensuring that the lid is evenly positioned and that the fasteners are tightened to the appropriate level of snugness. Overtightening the hardware should be avoided, as it can lead to potential damage to the lid or the toilet bowl.
After securing the fasteners, it's crucial to check the alignment and positioning of the new toilet seat lid. Double-check that it sits evenly on the toilet bowl, with no visible misalignment or imbalance. Adjust the tightness of the fasteners if necessary to achieve a balanced and stable fit. This attention to detail ensures that the new lid not only looks aesthetically pleasing but also functions optimally, providing a comfortable and secure seating surface.
Once the new toilet seat lid is securely in place, it's important to inspect its stability. Gently test the lid by applying light pressure to different areas, ensuring that it remains firmly in place without any shifting or wobbling. Any detected instability should prompt a recheck of the fasteners, allowing for adjustments as needed to achieve a secure and stable installation. This meticulous inspection guarantees that the new toilet seat lid is firmly anchored, providing a reliable and durable addition to your bathroom fixture.
By meticulously securing the new toilet seat lid in place, you complete the final stages of the replacement process, ensuring that your bathroom fixture is not only visually appealing but also functional and stable. With the new lid firmly installed, you can enjoy the enhanced comfort and aesthetics it brings to your bathroom, creating a clean, inviting, and well-maintained space for you and your family.
Step 5: Test the new toilet seat lid
With the new toilet seat lid securely installed, the final step in the replacement process is to test its functionality and stability. This crucial step ensures that the newly installed lid meets the necessary standards for comfort, safety, and durability, providing a reliable seating surface for everyday use.
To begin the testing process, gently lower the toilet seat lid to its closed position. As it descends, observe its movement to ensure that it lowers smoothly and evenly without any resistance or misalignment. A properly installed toilet seat lid should close effortlessly, aligning symmetrically with the toilet bowl to create a seamless and visually pleasing appearance.
Once the lid is closed, apply gentle pressure to its surface to test its stability. The lid should remain securely in place, without any shifting or wobbling, indicating a stable and well-anchored installation. This stability is essential for ensuring user comfort and safety, as a secure toilet seat lid provides a reliable seating surface for individuals of all ages.
After confirming the stability of the closed lid, gently raise it to the open position. Again, observe its movement to ensure that it lifts smoothly and evenly, without any sticking or resistance. A well-installed toilet seat lid should open effortlessly, allowing for convenient access to the toilet bowl without any hindrances.
With the lid in the open position, test its ability to remain upright without unexpectedly closing. A properly installed toilet seat lid should maintain its position when raised, providing a convenient and reliable seating arrangement for users. This feature is particularly important for ensuring user convenience and safety, as a stable and secure lid enhances the overall functionality of the toilet fixture.
In addition to these functional tests, visually inspect the newly installed toilet seat lid to ensure that it complements the overall aesthetics of the bathroom. The lid should seamlessly integrate with the toilet bowl, enhancing the visual appeal of the fixture and contributing to a clean and cohesive bathroom environment.
By meticulously testing the new toilet seat lid, you can confirm that it meets the necessary standards for functionality, stability, and visual appeal. This thorough evaluation ensures that the replacement process has been completed to the highest standards, providing a reliable and aesthetically pleasing addition to your bathroom fixture. With the new lid successfully tested and confirmed, you can now enjoy the enhanced comfort, functionality, and visual appeal it brings to your bathroom space.
Conclusion
Congratulations on successfully replacing your toilet seat lid! By following the step-by-step guide and utilizing the necessary tools and materials, you have revitalized your bathroom fixture, enhancing both its functionality and visual appeal. The process of replacing a toilet seat lid may have seemed daunting at first, but your determination and attention to detail have resulted in a rewarding DIY accomplishment.
With the new toilet seat lid securely in place, your bathroom now boasts a clean, hygienic, and aesthetically pleasing fixture that contributes to a comfortable and inviting environment. The careful removal of the old lid, the precise installation of the new one, and the meticulous testing process have all culminated in a successful transformation of this essential bathroom component.
Not only does the new toilet seat lid improve the overall appearance of the bathroom, but it also provides a stable and reliable seating surface for everyday use. Its proper alignment, secure fastening, and smooth functionality ensure that it meets the necessary standards for comfort, safety, and durability, enhancing the overall user experience.
By taking on this DIY project, you have not only saved on potential installation costs but have also gained valuable hands-on experience in home improvement. The confidence and skills acquired through this process can be applied to future DIY endeavors, empowering you to tackle various household projects with ease and proficiency.
As you admire the newly installed toilet seat lid, take pride in the transformation you have brought to your bathroom. Your attention to detail and commitment to excellence have resulted in a fixture that not only serves its practical purpose but also contributes to the overall ambiance of your home.
With the completion of this project, your bathroom now exudes a sense of cleanliness, comfort, and visual appeal, creating a welcoming space for you and your family. Embrace the satisfaction of a job well done and revel in the enhanced functionality and aesthetics of your revitalized bathroom fixture.
Frequently Asked Questions about How To Replace A Toilet Seat Lid
Was this page helpful?
At Storables.com, we guarantee accurate and reliable information. Our content, validated by Expert Board Contributors, is crafted following stringent Editorial Policies. We're committed to providing you with well-researched, expert-backed insights for all your informational needs.


0 thoughts on “How To Replace A Toilet Seat Lid”