Home>Furniture & Design>Bathroom Accessories>How To Remove A Bathroom Exhaust Fan Cover
Bathroom Accessories
How To Remove A Bathroom Exhaust Fan Cover
Modified: March 25, 2024
Learn how to safely remove a bathroom exhaust fan cover with our step-by-step guide. Find out the best tools and techniques for this essential bathroom accessory.
(Many of the links in this article redirect to a specific reviewed product. Your purchase of these products through affiliate links helps to generate commission for Storables.com, at no extra cost. Learn more)
Introduction
Removing a bathroom exhaust fan cover may seem like a daunting task, but with the right guidance, it can be a straightforward and rewarding endeavor. The exhaust fan cover plays a crucial role in maintaining proper ventilation and air quality in your bathroom. Over time, dust, moisture, and debris can accumulate on the cover, impeding the fan's efficiency and detracting from the overall aesthetic of the space. By learning how to remove the cover and clean it properly, you can ensure that your bathroom remains fresh, clean, and inviting.
Whether you're embarking on a routine cleaning or need to access the fan for maintenance or replacement, understanding the process of removing the cover is essential. This guide will walk you through the necessary steps, providing clear instructions and valuable insights to help you accomplish the task with confidence. From ensuring safety by turning off the power to reattaching the cover securely, each step is designed to empower you to maintain a well-functioning and visually appealing bathroom exhaust system.
As you delve into the process of removing a bathroom exhaust fan cover, it's important to approach the task with patience and attention to detail. By taking the time to follow each step carefully, you can not only enhance the performance of your exhaust fan but also prolong its lifespan. Additionally, by incorporating regular maintenance into your home care routine, you can prevent potential issues and ensure that your bathroom remains a comfortable and healthy environment for you and your family.
Now, let's embark on this journey to discover the essential steps for removing a bathroom exhaust fan cover, empowering you to take control of your bathroom's air quality and aesthetics. With a clear understanding of the process, you'll be well-equipped to maintain a clean, well-ventilated, and inviting bathroom space for years to come.
Key Takeaways:
- Keep your bathroom fresh and clean by learning to remove and clean the exhaust fan cover. Prioritize safety by turning off the power, then carefully remove, clean, and reattach the cover for optimal air quality and aesthetics.
- Master the process of removing a bathroom exhaust fan cover to maintain a comfortable and healthy bathroom environment. Prioritize safety, clean the cover thoroughly, and reattach it with precision to ensure optimal ventilation and visual appeal.
Step 1: Turn off the Power
Before beginning the process of removing a bathroom exhaust fan cover, it is crucial to prioritize safety by turning off the power to the fan. This step is essential to prevent any electrical mishaps and ensure a secure working environment. By following these simple yet vital guidelines, you can confidently proceed with the subsequent tasks, knowing that you have taken the necessary precautions.
-
Locate the Circuit Breaker: Start by identifying the circuit breaker that controls the power supply to the bathroom exhaust fan. Circuit breakers are typically located in the electrical panel of your home. Once you have located the panel, carefully open it to reveal the array of circuit breakers.
-
Identify the Correct Breaker: Scan the circuit breakers to find the one that corresponds to the bathroom exhaust fan. In some cases, circuit breakers are labeled with the areas of the house they control. If the breaker is not labeled, you may need to enlist the help of a family member or use trial and error to identify the correct one.
-
Switch Off the Breaker: Once you have located the correct breaker, switch it to the "off" position. This action effectively cuts off the power supply to the bathroom exhaust fan, ensuring that it is safe to proceed with the subsequent steps.
-
Verify the Power: To double-check that the power has been successfully turned off, attempt to operate the exhaust fan and light switch in the bathroom. If the fan does not turn on and the light does not illuminate, you can be confident that the power has been effectively disconnected.
By diligently following these steps to turn off the power to the bathroom exhaust fan, you can create a secure environment for the subsequent tasks of removing the fan cover and performing any necessary maintenance. Prioritizing safety at the outset sets the stage for a smooth and successful process, allowing you to proceed with confidence and peace of mind.
Step 2: Remove the Screws
Once the power to the bathroom exhaust fan has been safely turned off, the next step in the process of removing the fan cover involves taking out the screws that secure it in place. This step requires attention to detail and a systematic approach to ensure that the cover can be removed smoothly and without causing any damage. By following the steps outlined below, you can effectively remove the screws and proceed with accessing the fan for cleaning or maintenance.
-
Gather the Necessary Tools: Before beginning the process of removing the screws, gather the tools required for the task. Typically, a screwdriver is the primary tool needed to remove the screws securing the fan cover. Ensure that you have the appropriate type and size of screwdriver that matches the screws on the cover to avoid any potential damage.
-
Locate and Access the Screws: Position yourself in a way that allows you to access the screws holding the fan cover in place. In most cases, the screws are located around the perimeter of the cover, often concealed beneath a decorative cover or directly visible on the surface. Carefully inspect the cover to identify the precise location of each screw.
-
Unscrew the Fasteners: Using the appropriate screwdriver, begin to carefully unscrew each fastener securing the cover. It's essential to apply steady pressure and ensure that the screwdriver is properly aligned with the screw to prevent slippage and potential damage to the cover or the surrounding area. As you remove each screw, place them in a secure location to prevent misplacement.
-
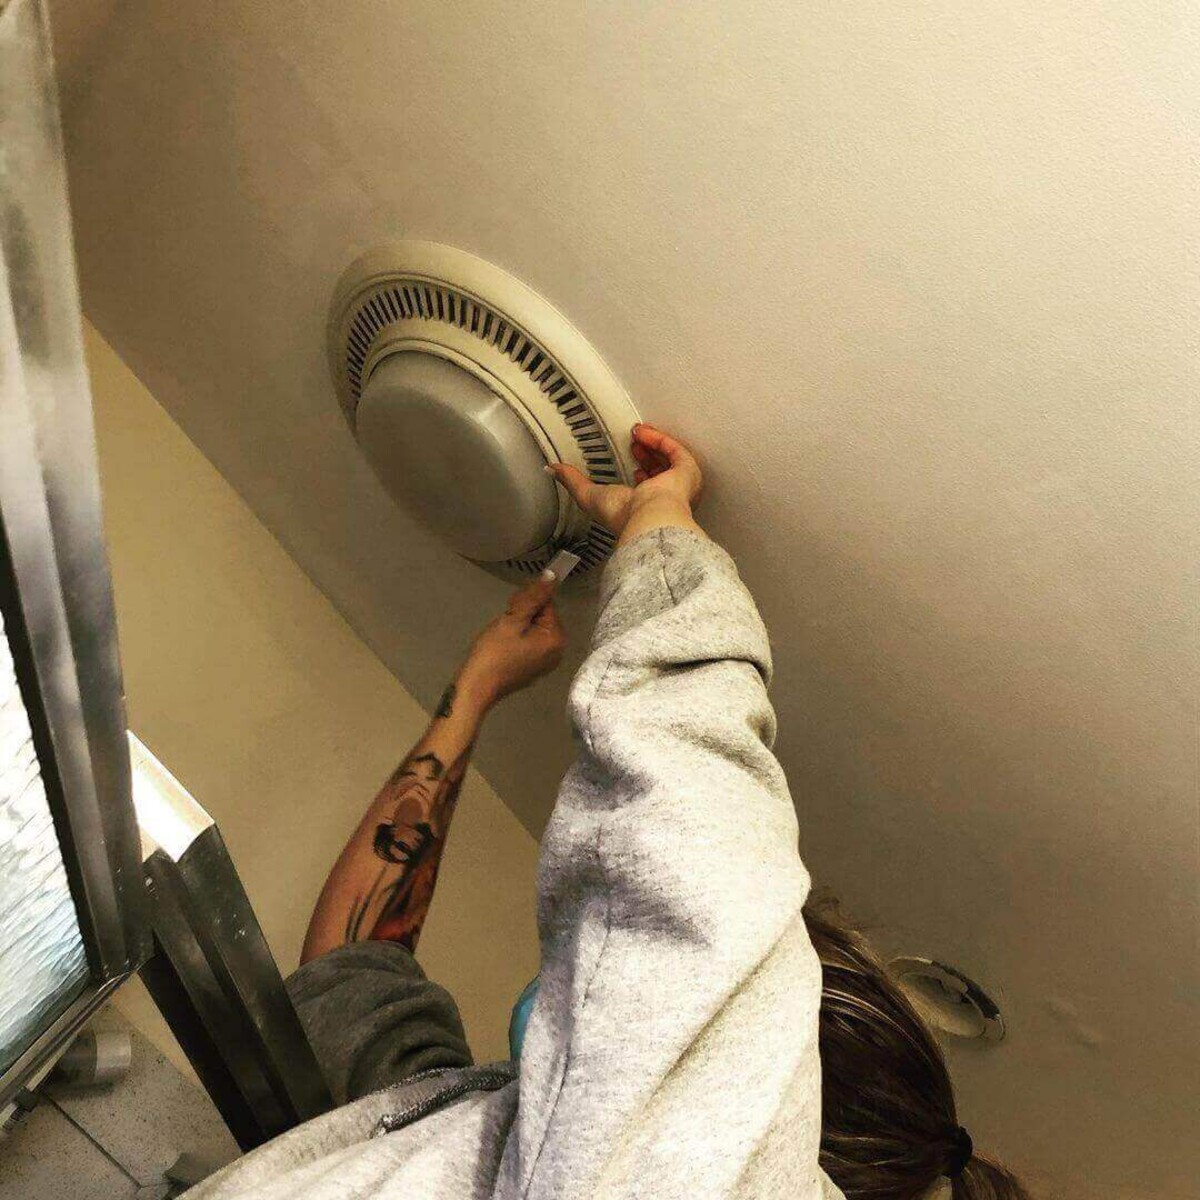
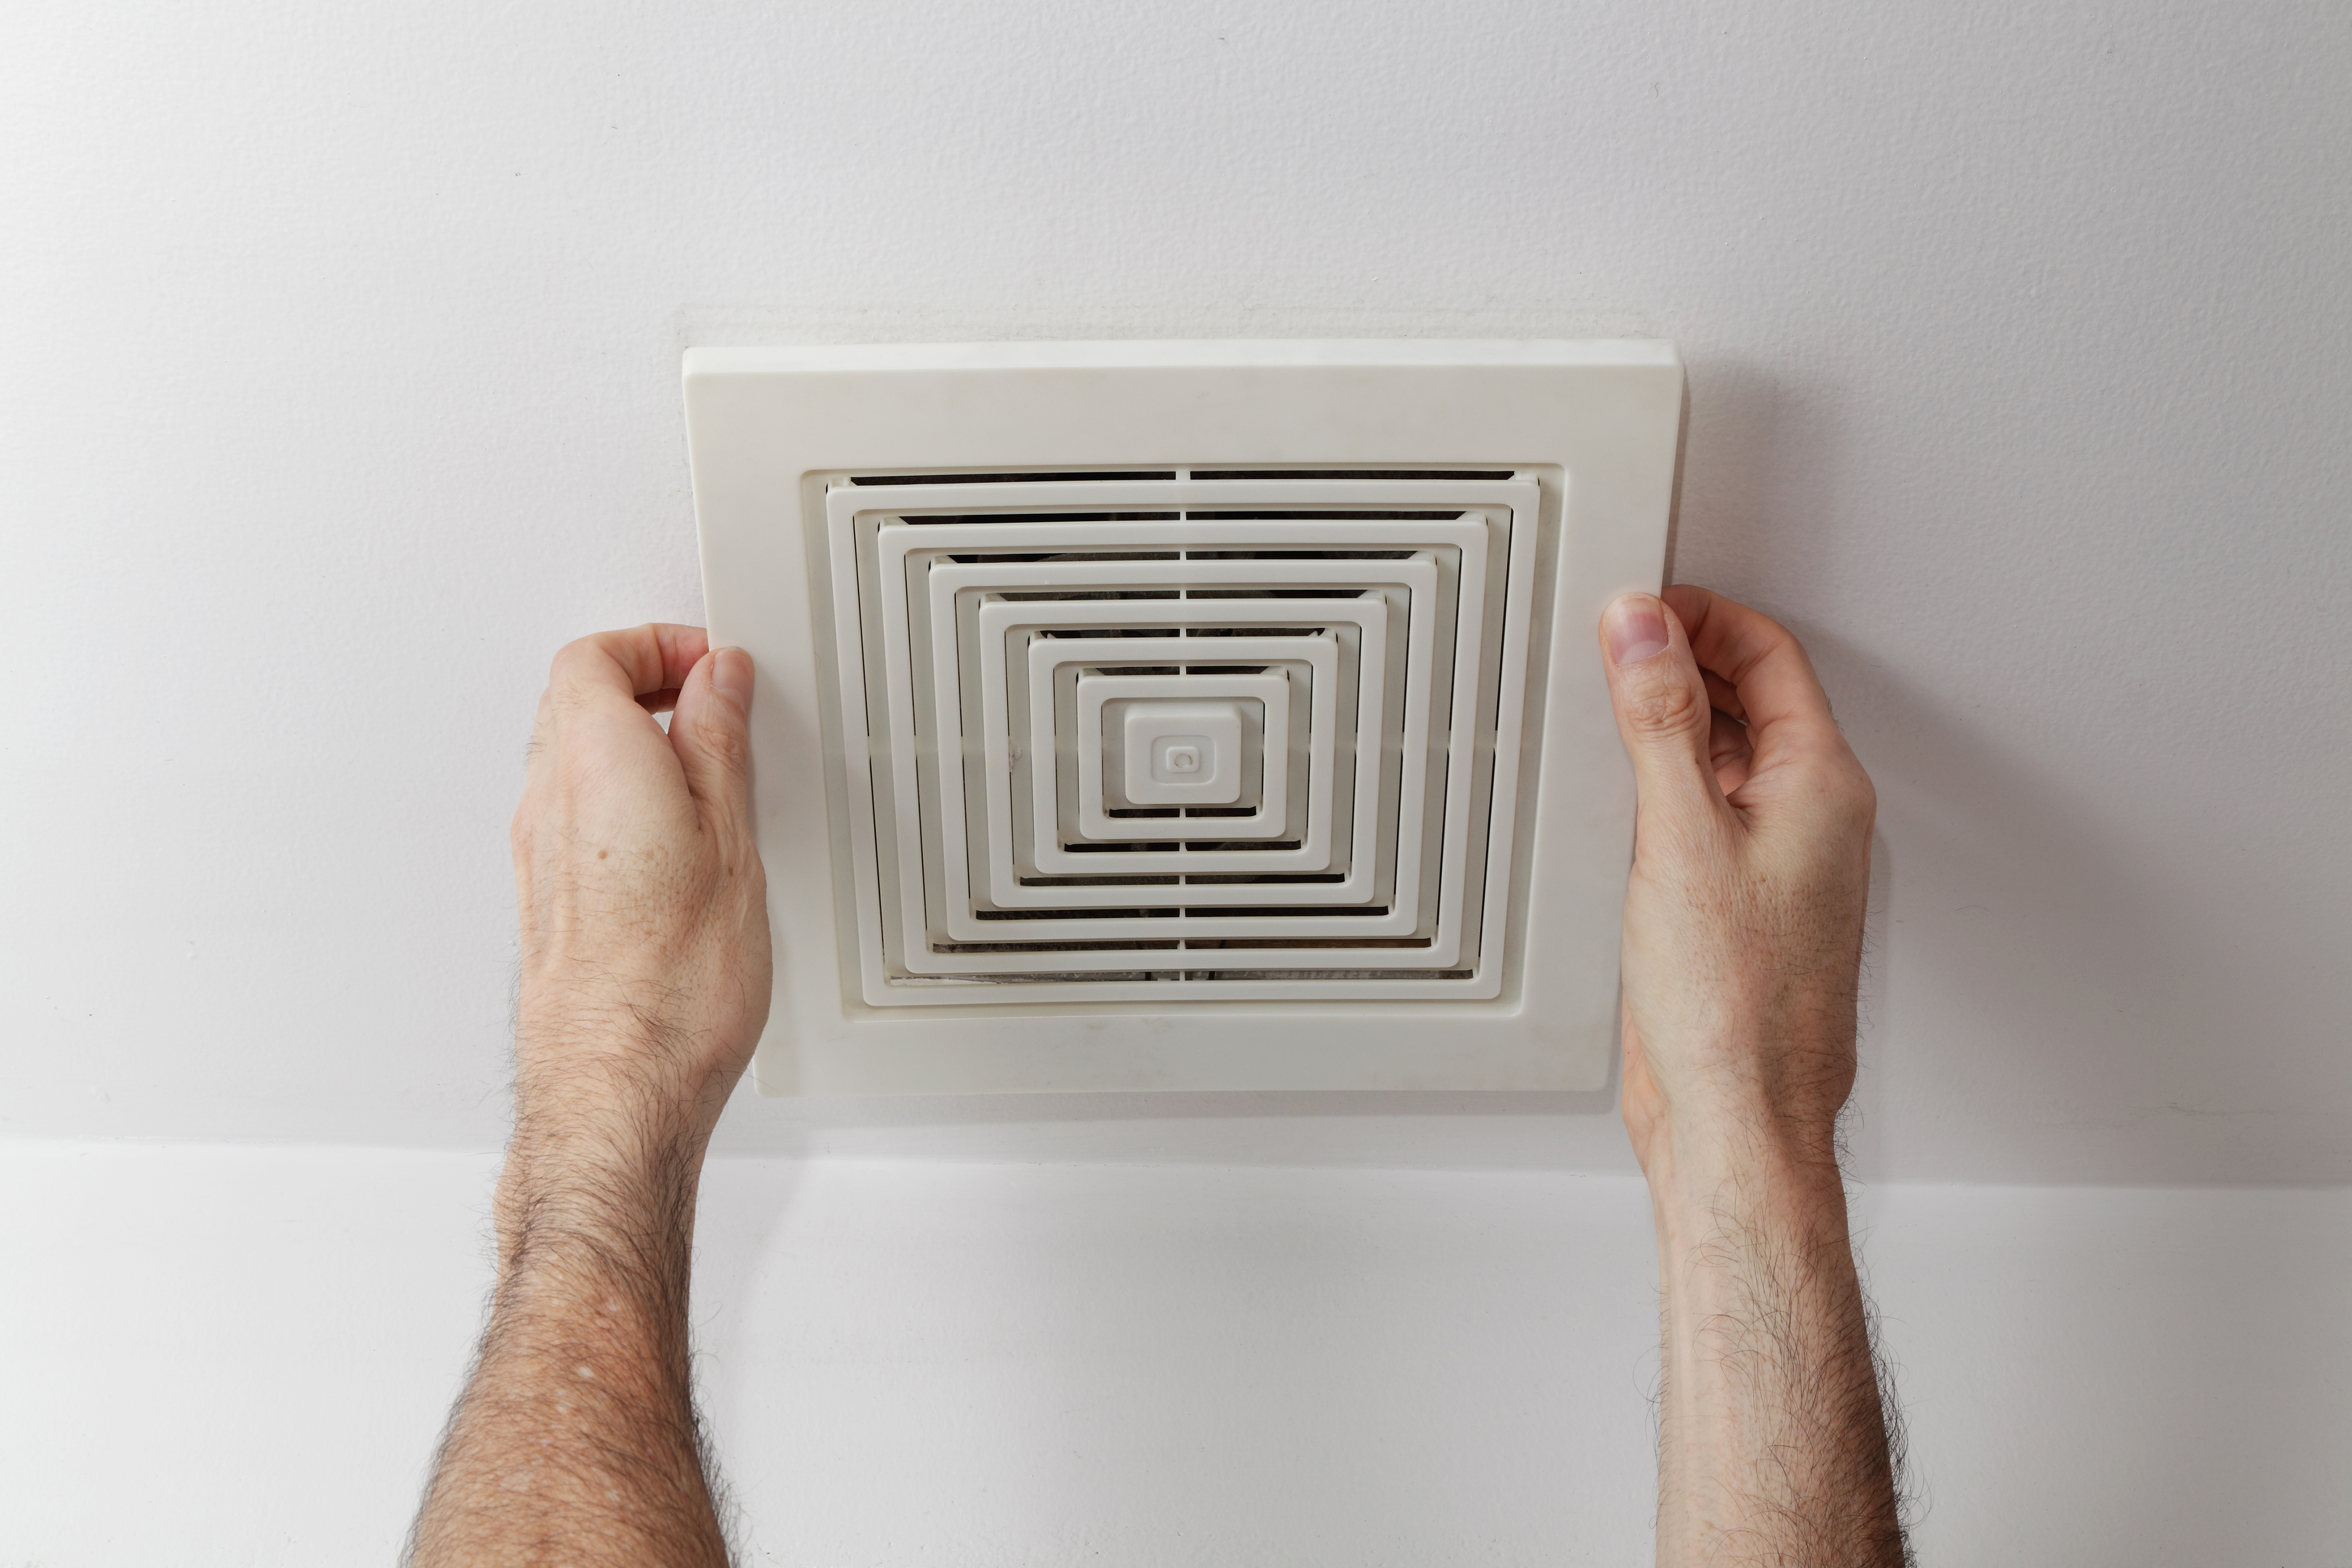
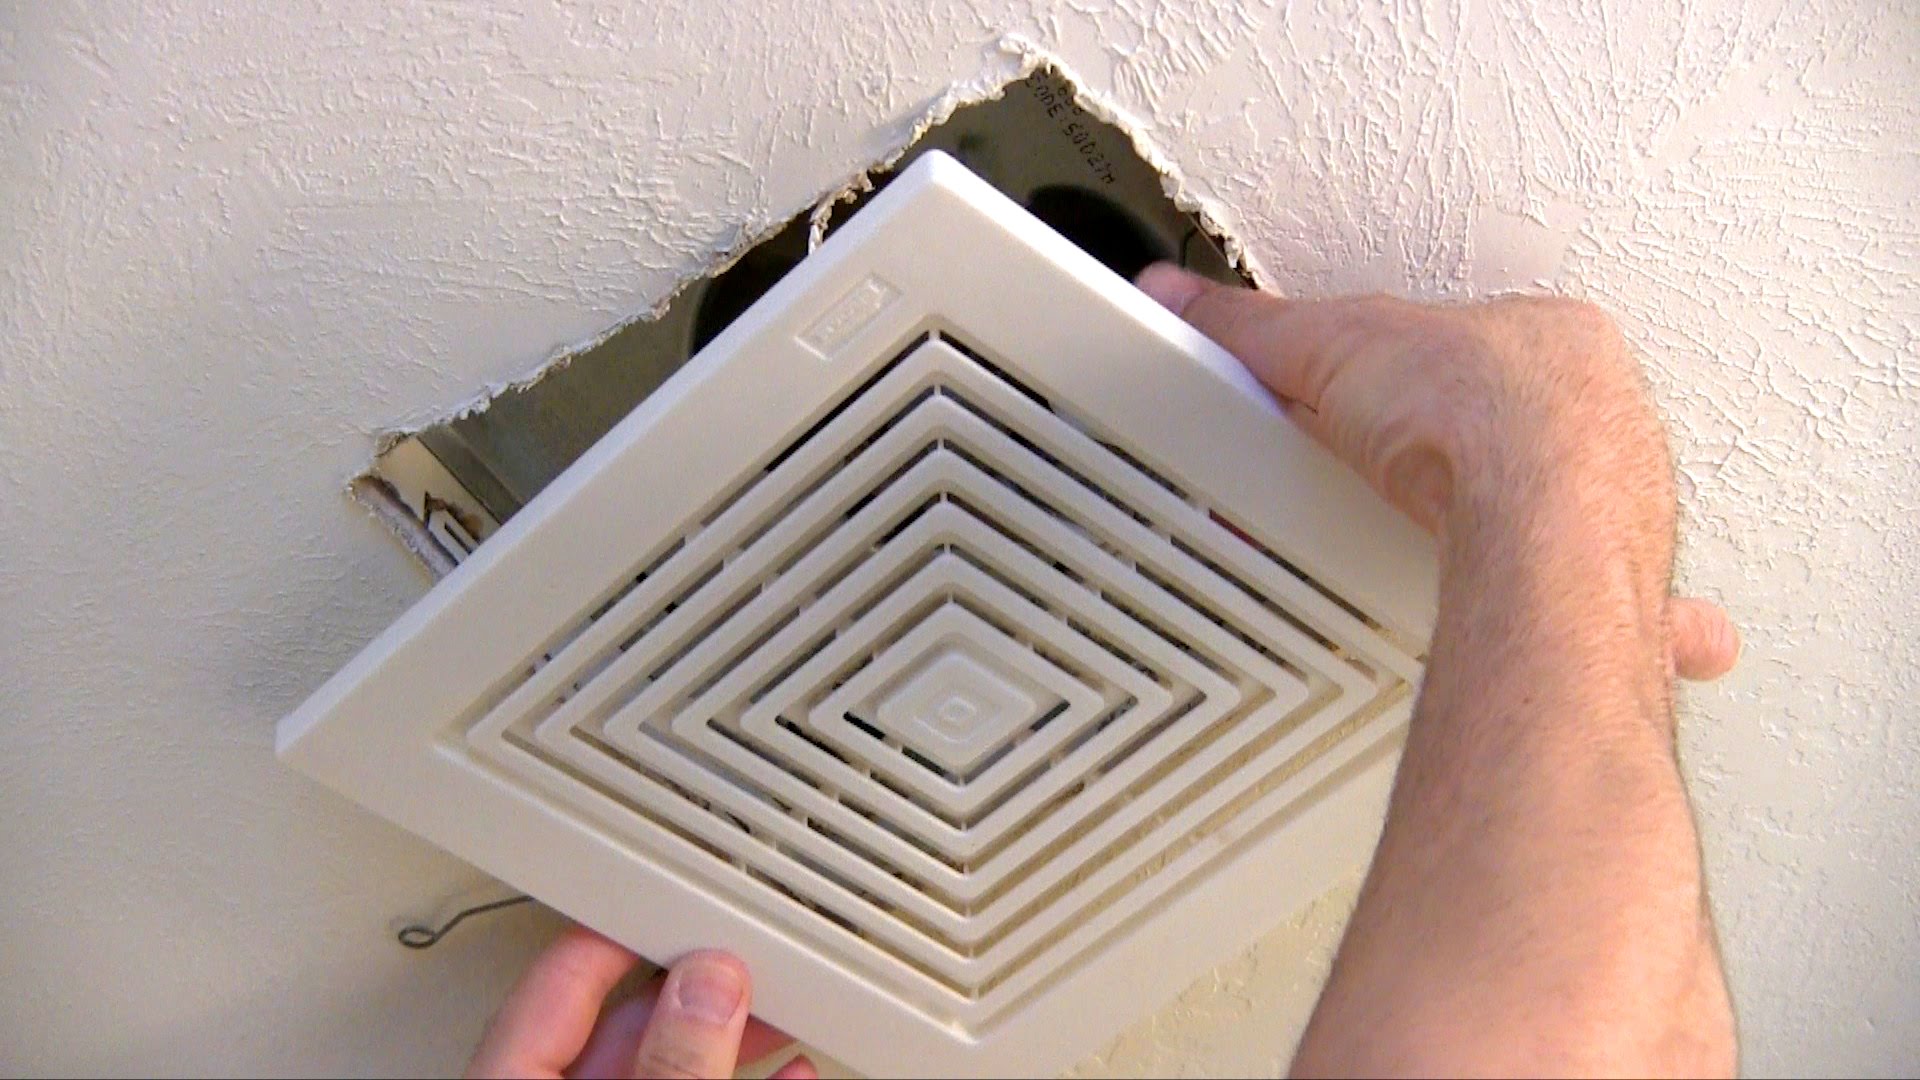
Handle the Cover with Care: Once all the screws have been removed, gently grasp the cover and carefully lower it from its position. Exercise caution to avoid any sudden movements that could cause damage to the fan or surrounding fixtures. If the cover is connected to the fan housing by wiring, take care not to strain or damage the wires during the removal process.
By following these steps to remove the screws securing the bathroom exhaust fan cover, you can effectively access the fan for cleaning, maintenance, or replacement. This systematic approach ensures that the cover can be removed safely and without causing any damage, setting the stage for the subsequent tasks of cleaning and reattaching the cover securely.
Step 3: Clean the Cover
With the bathroom exhaust fan cover successfully removed, the next crucial step is to thoroughly clean the cover to eliminate accumulated dust, dirt, and grime. Cleaning the cover not only enhances the overall aesthetics of the fan but also ensures optimal airflow and ventilation in the bathroom. By following the detailed steps outlined below, you can effectively restore the cover to its pristine condition, contributing to a fresh and inviting bathroom environment.
Gather Cleaning Supplies
Before commencing the cleaning process, gather the necessary cleaning supplies. These may include a mild detergent or all-purpose cleaner, a soft-bristled brush or sponge, a microfiber cloth, and access to water for rinsing. It's essential to use gentle cleaning agents to avoid damaging the cover's surface and finish.
Read more: How To Fix Bathroom Exhaust Fan
Thorough Cleaning Process
-
Dust Removal: Begin by gently wiping the cover with a dry microfiber cloth to remove loose dust and debris. This initial step helps prevent the spread of dust particles during the subsequent cleaning process.
-
Cleaning Solution Application: Dilute the mild detergent or all-purpose cleaner in water according to the manufacturer's instructions. Using a soft-bristled brush or sponge, apply the cleaning solution to the cover, ensuring even coverage across the entire surface.
-
Gentle Scrubbing: With the cleaning solution applied, gently scrub the cover to dislodge stubborn dirt and grime. Exercise caution to avoid applying excessive pressure, particularly if the cover is made of delicate materials such as plastic or decorative metal.
-
Rinsing: Thoroughly rinse the cover with clean water to remove the cleaning solution and any loosened dirt. Ensure that all traces of the detergent or cleaner are completely removed to prevent residue buildup.
-
Drying: After rinsing, use a clean microfiber cloth to gently pat the cover dry. Allow the cover to air-dry completely before proceeding to the next step.
Inspection and Reassembly
Once the cover is clean and dry, take a moment to inspect it for any remaining dirt or streaks. If necessary, repeat the cleaning process to achieve the desired level of cleanliness. Once satisfied with the results, proceed to reassemble the cover by following the manufacturer's guidelines or the reverse of the removal process.
By diligently following these steps to clean the bathroom exhaust fan cover, you can effectively restore its appearance and functionality, contributing to a fresh and well-maintained bathroom environment. This attention to detail ensures that the cover not only enhances the overall aesthetics of the fan but also facilitates optimal airflow and ventilation, promoting a comfortable and inviting bathroom space.
Step 4: Reattach the Cover
Reattaching the bathroom exhaust fan cover is the final step in the process of maintaining optimal ventilation and aesthetics in your bathroom. This step is crucial to ensure that the cover is securely positioned, allowing the fan to function effectively while enhancing the overall visual appeal of the space. By following the detailed steps outlined below, you can confidently reattach the cover, completing the process with precision and care.
Aligning the Cover
-
Positioning: Begin by aligning the cover with the fan housing, ensuring that it is oriented correctly to fit securely in place. Take note of any alignment markers or grooves that facilitate proper positioning.
-
Gentle Placement: Carefully place the cover onto the fan housing, ensuring that it sits flush and level. Avoid applying excessive force, as this could lead to damage or misalignment.
Read more: How To Remove An Old Bathroom Exhaust Fan
Securing the Screws
-
Screw Placement: Align the screw holes on the cover with those on the fan housing. Ensure that each hole is matched with precision to facilitate smooth insertion of the screws.
-
Screw Fastening: Using the appropriate screwdriver, begin to fasten the screws into place. Apply steady pressure to secure each screw, ensuring that they are tightened evenly to maintain a secure and balanced fit.
Final Checks
-
Stability Assessment: Once all the screws are in place, gently test the stability of the cover to ensure that it is securely attached. Verify that there are no loose or protruding areas that could compromise the cover's integrity.
-
Visual Inspection: Take a moment to visually inspect the reattached cover, ensuring that it sits evenly and complements the overall aesthetic of the bathroom. Address any misalignments or discrepancies to achieve a seamless and polished appearance.
Power Restoration
-
Circuit Reconnection: With the cover securely reattached, proceed to restore the power to the bathroom exhaust fan by switching the circuit breaker back to the "on" position.
-
Functional Test: Test the fan and light switches to verify that the power has been successfully restored. Confirm that the fan operates smoothly and that the cover remains securely in place during operation.
By meticulously following these steps to reattach the bathroom exhaust fan cover, you can complete the maintenance process with confidence and precision. This final step ensures that the cover is securely positioned, allowing the fan to function effectively while enhancing the overall visual appeal of the bathroom. With the cover reattached, you can revel in a well-ventilated and aesthetically pleasing bathroom environment, knowing that you have successfully maintained an essential component of your home.
Conclusion
In conclusion, mastering the process of removing a bathroom exhaust fan cover empowers homeowners to maintain optimal air quality and aesthetics in their bathrooms. By following the essential steps outlined in this guide, individuals can confidently undertake the task, ensuring that their exhaust fan operates efficiently while contributing to a fresh and inviting bathroom environment.
The journey begins with the crucial step of turning off the power to the fan, prioritizing safety and creating a secure working environment. This initial precaution sets the stage for a smooth and successful process, allowing individuals to proceed with confidence and peace of mind. With the power safely disconnected, the subsequent step involves removing the screws that secure the fan cover, requiring attention to detail and a systematic approach to ensure a smooth and damage-free process.
Once the cover is successfully removed, the cleaning process becomes paramount, as it not only enhances the overall aesthetics of the fan but also ensures optimal airflow and ventilation in the bathroom. Thoroughly cleaning the cover with gentle cleaning agents and meticulous attention to detail contributes to a fresh and well-maintained bathroom environment, promoting comfort and cleanliness for homeowners and their families.
The final step of reattaching the cover completes the maintenance process, ensuring that the cover is securely positioned to allow the fan to function effectively while enhancing the overall visual appeal of the space. By following the detailed steps to reattach the cover with precision and care, individuals can revel in a well-ventilated and aesthetically pleasing bathroom environment, knowing that they have successfully maintained an essential component of their home.
In essence, mastering the process of removing a bathroom exhaust fan cover is a valuable skill that empowers homeowners to take control of their bathroom's air quality and aesthetics. By incorporating regular maintenance into their home care routine, individuals can ensure that their bathroom remains a comfortable and healthy environment for years to come. With a clear understanding of the process and a commitment to attention to detail, homeowners can confidently maintain a clean, well-ventilated, and inviting bathroom space, enhancing the overall quality of their home life.
Frequently Asked Questions about How To Remove A Bathroom Exhaust Fan Cover
Was this page helpful?
At Storables.com, we guarantee accurate and reliable information. Our content, validated by Expert Board Contributors, is crafted following stringent Editorial Policies. We're committed to providing you with well-researched, expert-backed insights for all your informational needs.


0 thoughts on “How To Remove A Bathroom Exhaust Fan Cover”