Home>Furniture & Design>Bathroom Accessories>How To Clean An Exhaust Fan In The Kitchen
Bathroom Accessories
How To Clean An Exhaust Fan In The Kitchen
Modified: March 25, 2024
Learn how to effectively clean your kitchen exhaust fan with our expert tips and tricks. Keep your kitchen fresh and clean with our easy-to-follow guide.
(Many of the links in this article redirect to a specific reviewed product. Your purchase of these products through affiliate links helps to generate commission for Storables.com, at no extra cost. Learn more)
Introduction
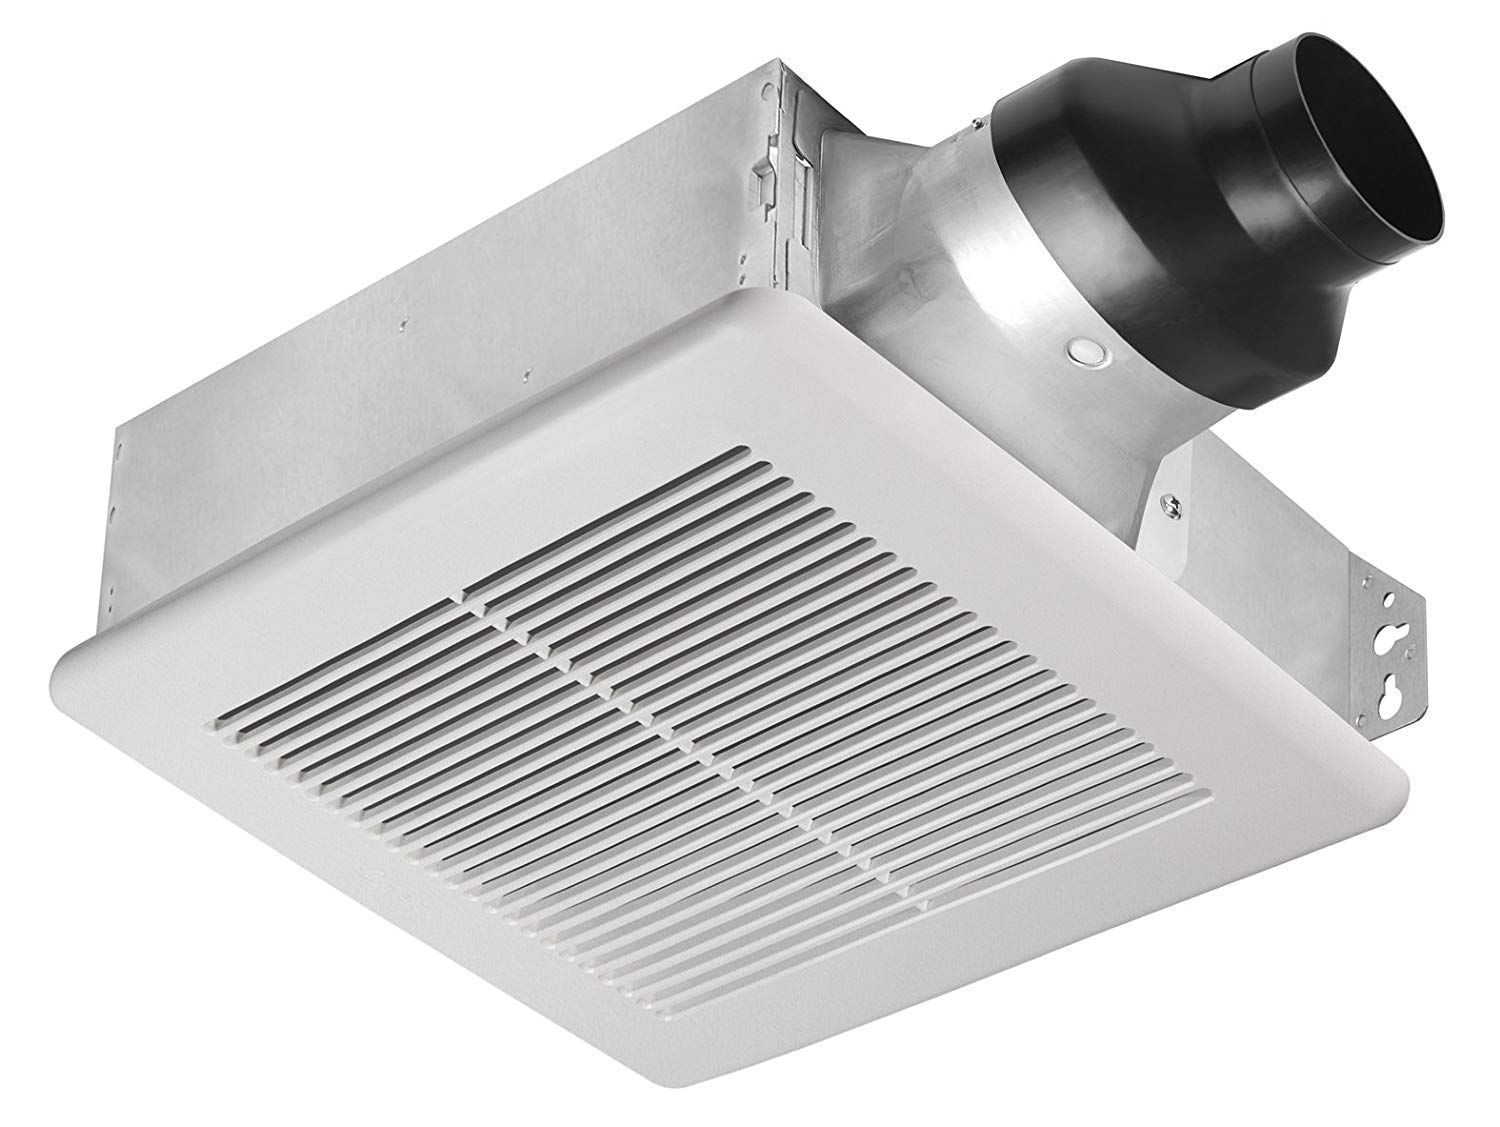
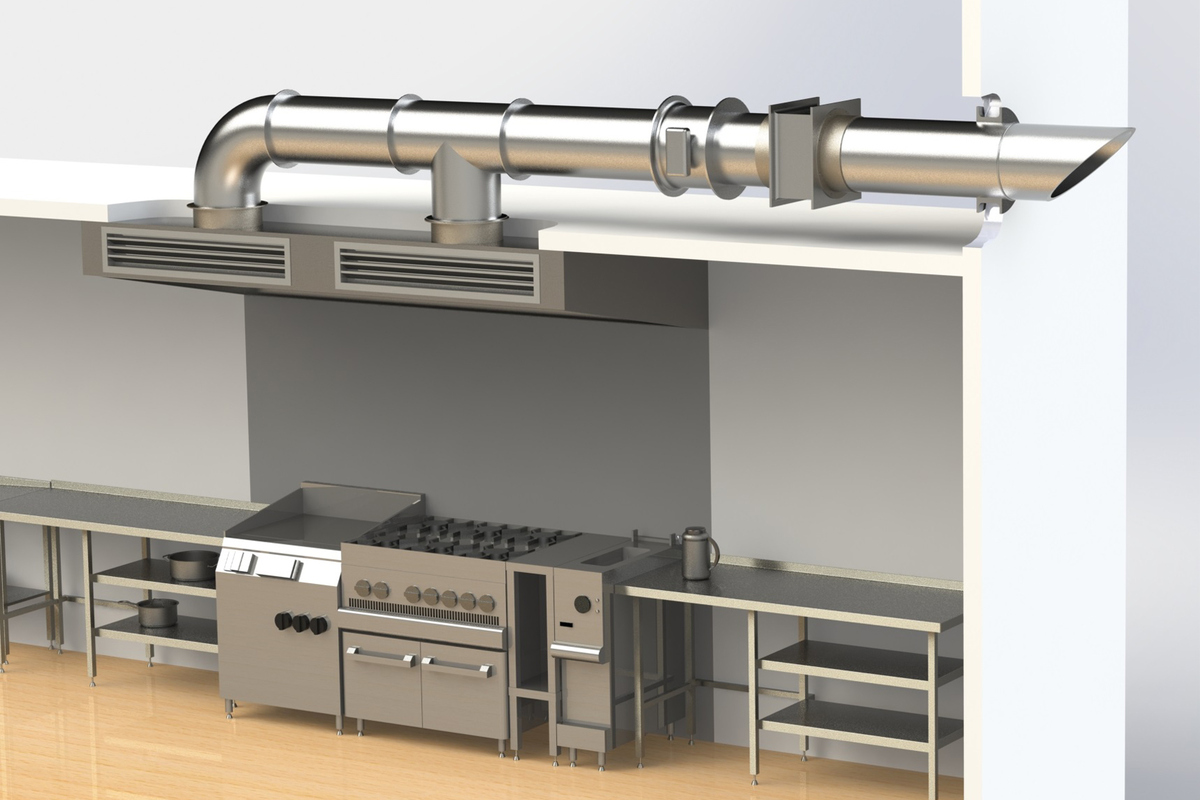
Cleaning an exhaust fan in the kitchen is an essential yet often overlooked task in maintaining a clean and healthy home environment. Over time, grease, dust, and other particles can accumulate on the fan blades and within the housing, leading to reduced efficiency and potential fire hazards. By regularly cleaning your kitchen exhaust fan, you can improve air quality, prevent odors, and ensure that the fan operates at its optimal capacity.
A clean exhaust fan not only enhances the functionality of your kitchen but also contributes to a more pleasant cooking experience. When the fan is clogged with debris, it can become noisy and less effective at removing cooking odors and steam. By taking the time to clean your exhaust fan, you can restore its performance and create a more enjoyable and efficient cooking environment.
In this comprehensive guide, we will walk you through the step-by-step process of cleaning your kitchen exhaust fan. From gathering the necessary supplies to safely removing the cover and meticulously cleaning the fan blades and housing, we will provide you with the knowledge and techniques to effectively maintain your kitchen exhaust fan. Whether you are a seasoned homeowner or new to kitchen maintenance, this guide will equip you with the skills and confidence to tackle this important cleaning task.
By following the steps outlined in this guide, you can ensure that your kitchen exhaust fan operates at its best, promoting a healthier and more comfortable living space. So, roll up your sleeves, gather your cleaning supplies, and let's dive into the process of rejuvenating your kitchen exhaust fan for a cleaner and more enjoyable cooking experience.
Key Takeaways:
- Regularly cleaning your kitchen exhaust fan with simple supplies like a screwdriver, cleaning solution, and a soft brush can improve air quality, reduce odors, and create a more enjoyable cooking experience.
- Prioritize safety by turning off the power before cleaning your kitchen exhaust fan. Thoroughly clean the cover, fan blades, and housing to ensure optimal performance and a healthier home environment.
Read more: How To Clean Exhaust Fan In Bathroom
Step 1: Gather Your Supplies
Before embarking on the task of cleaning your kitchen exhaust fan, it's essential to gather the necessary supplies to ensure a thorough and efficient cleaning process. By having the right tools and cleaning agents at your disposal, you can streamline the task and achieve optimal results. Here's a comprehensive list of supplies you'll need:
-
Screwdriver: A screwdriver, preferably a Phillips head or flat head, will be required to remove the screws holding the fan cover in place. Ensure that the screwdriver is the appropriate size for the screws to avoid damaging them during removal.
-
Cleaning Solution: Prepare a cleaning solution by mixing warm water with a mild dish soap or a grease-cutting kitchen cleaner. This solution will be used to clean the fan cover, blades, and housing, effectively removing grease, dust, and other residues.
-
Soft Bristle Brush or Cloth: A soft-bristled brush or a microfiber cloth will aid in dislodging and wiping away accumulated dirt and grease from the fan cover and blades. Ensure that the brush or cloth is gentle enough to avoid scratching the surfaces.
-
Vacuum Cleaner with Brush Attachment: A vacuum cleaner equipped with a brush attachment will help in removing loose debris and dust from the fan housing and surrounding areas. This will prepare the fan for a more thorough cleaning.
-
Rubbing Alcohol: Rubbing alcohol is effective in disinfecting and degreasing surfaces. It can be used to wipe down the fan cover and housing, leaving them clean and sanitized.
-
Safety Equipment: Prioritize safety by wearing protective gear such as gloves and safety goggles. These will shield your hands and eyes from potential debris and cleaning agents during the cleaning process.
By ensuring that you have all the necessary supplies on hand, you can approach the task of cleaning your kitchen exhaust fan with confidence and efficiency. With these tools and cleaning agents at your disposal, you are well-prepared to tackle the subsequent steps of the cleaning process, ensuring that your kitchen exhaust fan is restored to its optimal condition.
Step 2: Turn Off the Power
Before initiating the cleaning process, it is crucial to prioritize safety by turning off the power supply to the kitchen exhaust fan. This precautionary measure is essential to prevent any potential accidents or electrical hazards during the cleaning procedure. Here's a detailed guide on how to safely turn off the power to the exhaust fan:
-
Locate the Circuit Breaker: Begin by identifying the circuit breaker that controls the power supply to the kitchen exhaust fan. The circuit breaker panel is typically located in the basement, utility room, or another designated area within the home. Once you have located the panel, open the cover to reveal the circuit breakers.
-
Identify the Correct Breaker: Scan the circuit breakers to identify the one that corresponds to the kitchen exhaust fan. The breakers are usually labeled to indicate the areas or appliances they control. Look for the label that specifies the exhaust fan or kitchen ventilation system.
-
Switch Off the Breaker: Once you have located the correct breaker, switch it to the "off" position. This action effectively cuts off the power supply to the kitchen exhaust fan, ensuring that it is safe to proceed with the cleaning process without the risk of electrical shock or injury.
-
Verify the Power Supply: After turning off the breaker, it is advisable to verify that the power to the exhaust fan has been successfully disconnected. You can do this by attempting to turn on the fan switch or by visually inspecting the fan to ensure that it is not operational.
By following these steps to turn off the power supply to the kitchen exhaust fan, you can create a safe environment for the subsequent cleaning tasks. Prioritizing safety at this stage sets the foundation for a smooth and secure cleaning process, allowing you to focus on effectively rejuvenating your kitchen exhaust fan without any electrical concerns.
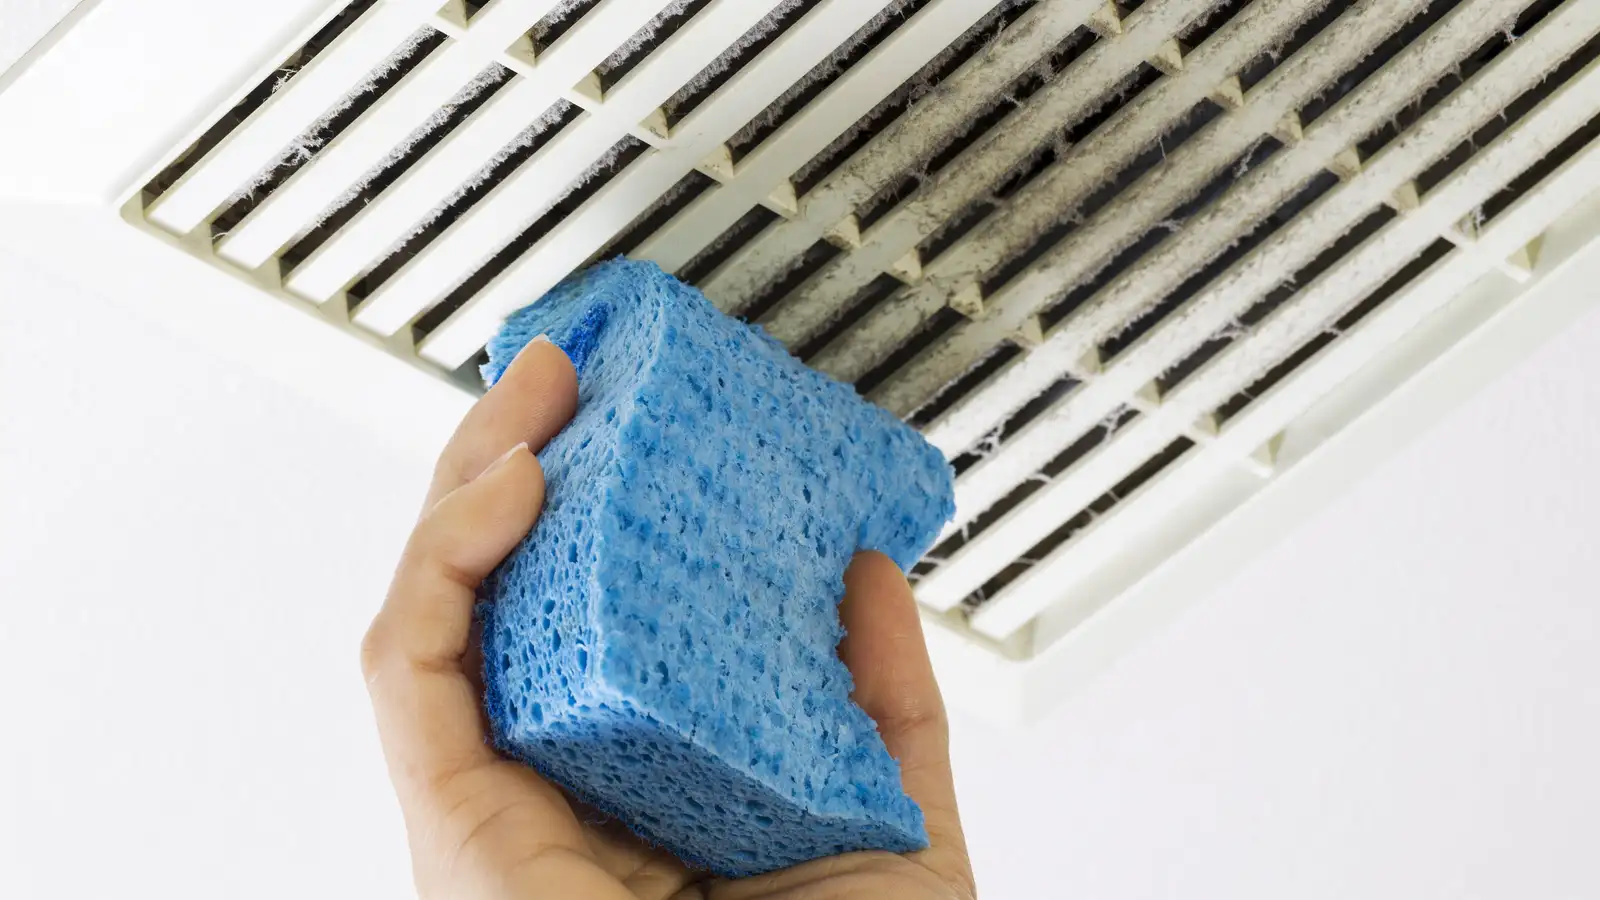
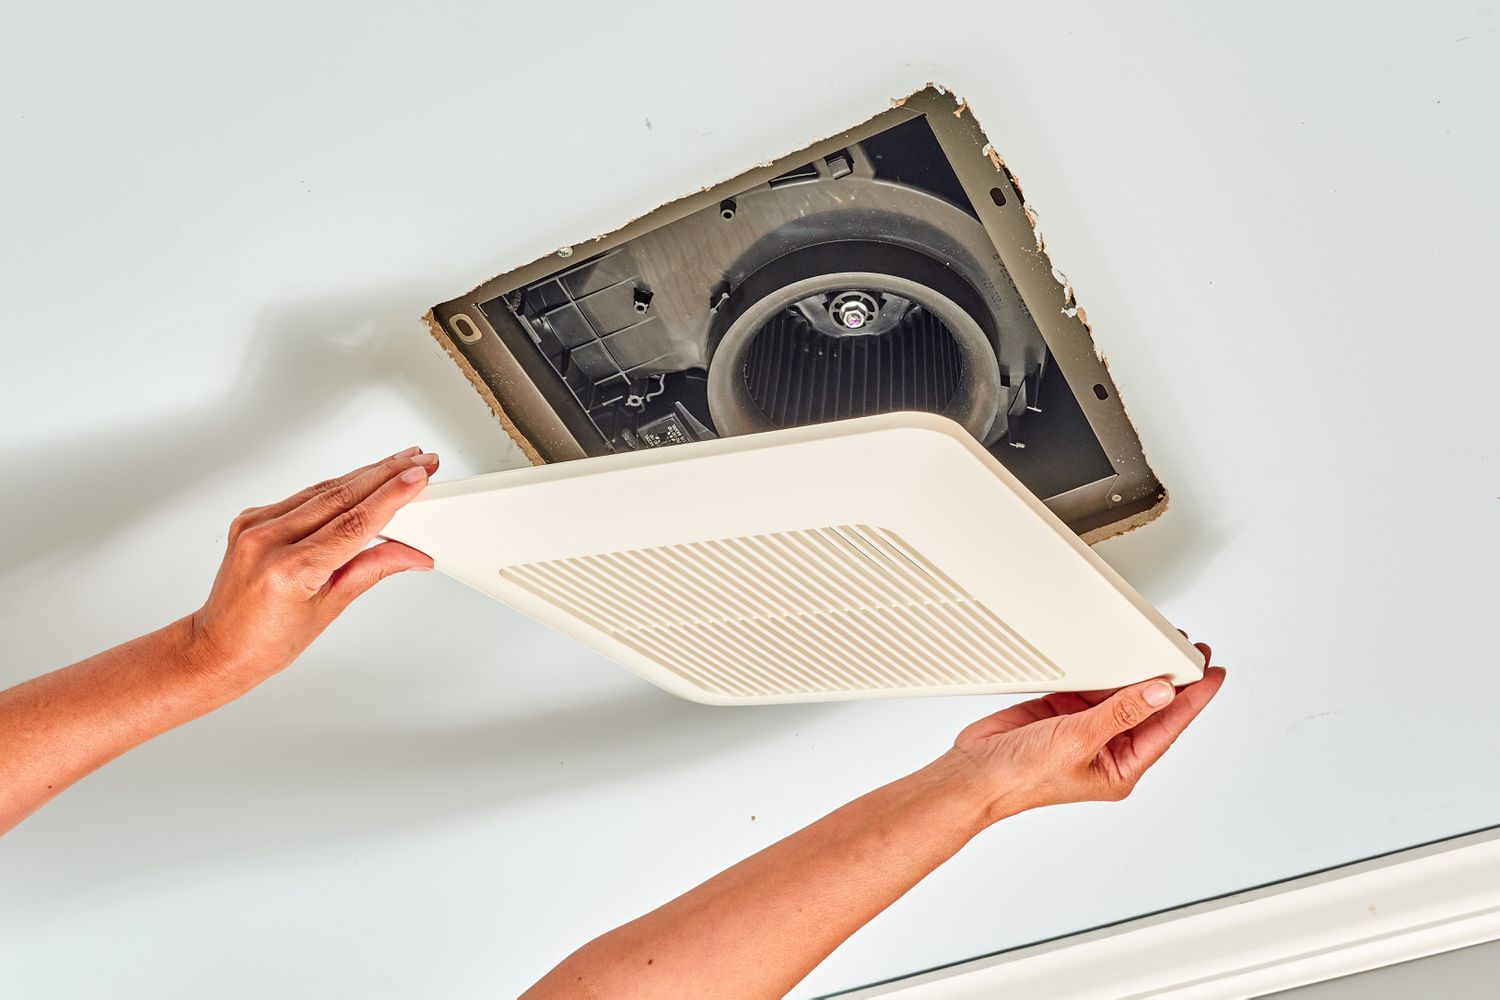
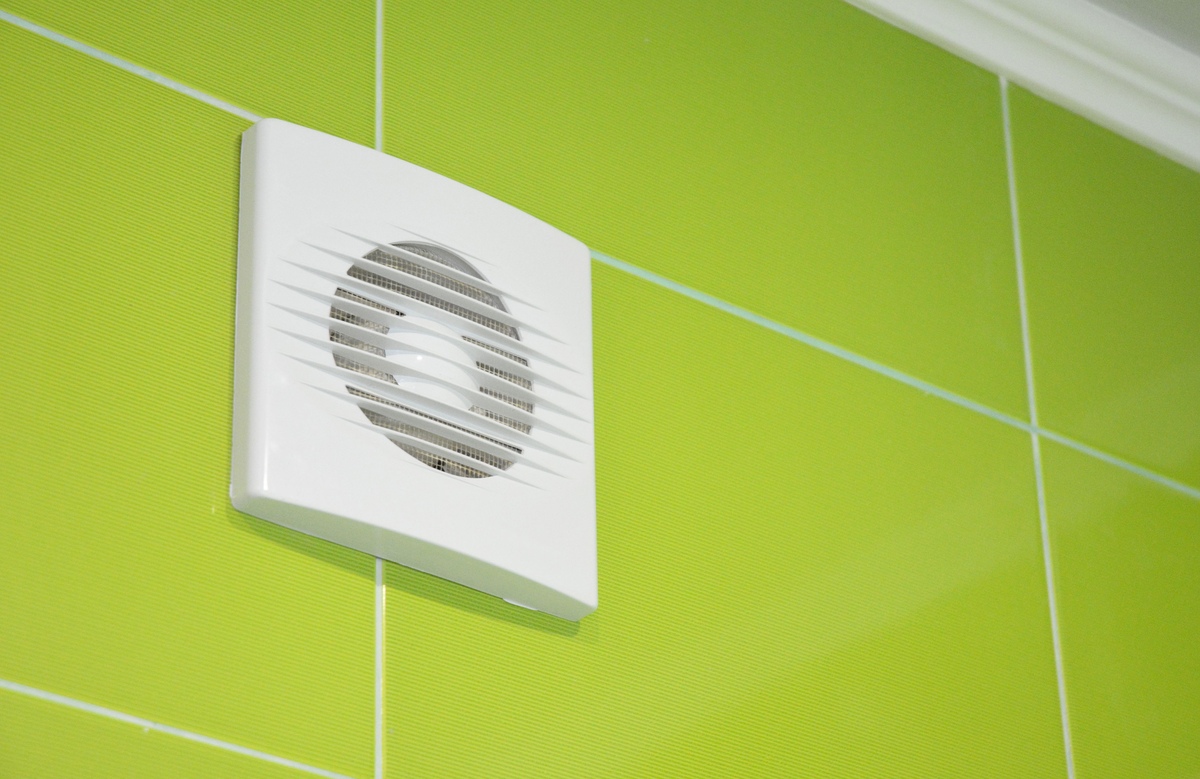
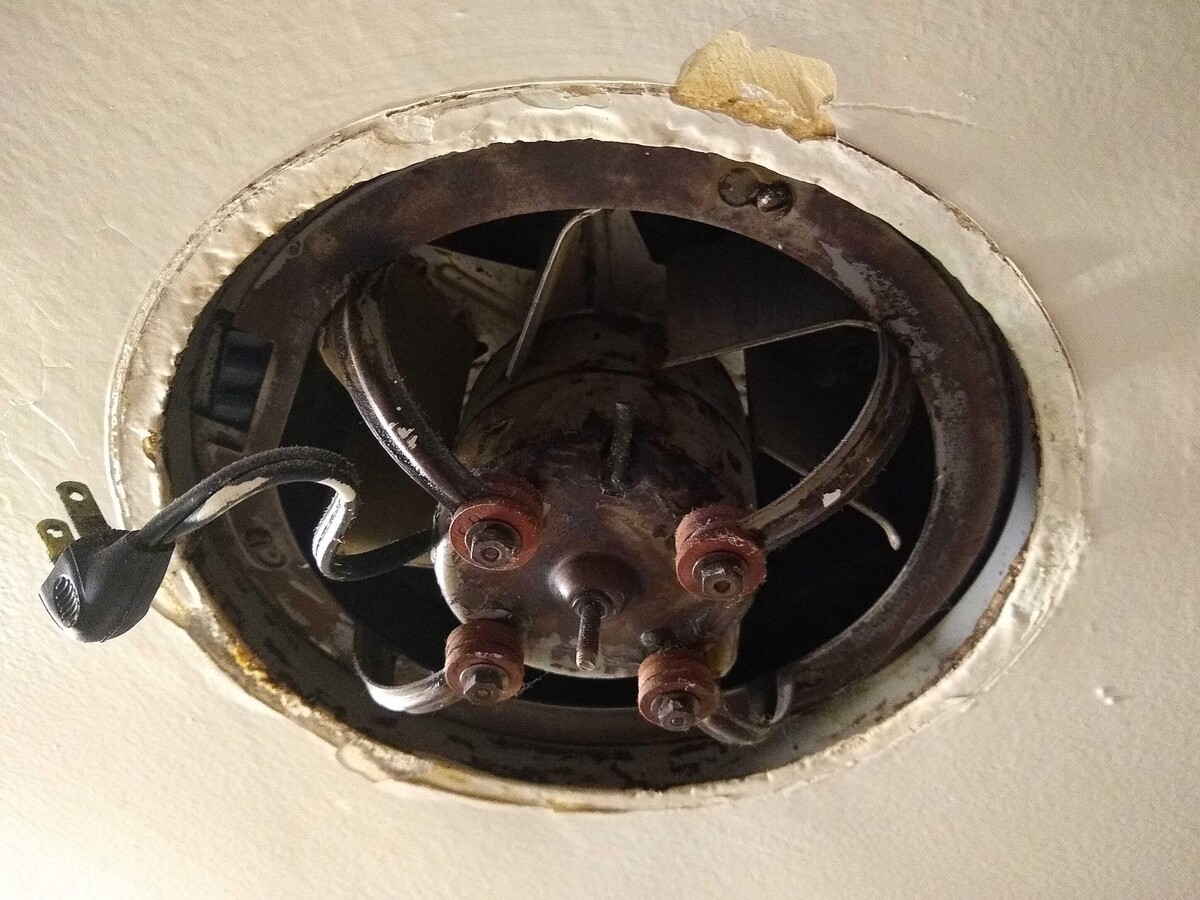
Step 3: Remove the Cover
With the power supply to the kitchen exhaust fan safely turned off, the next step in the cleaning process is to remove the cover. The cover of the exhaust fan is typically held in place by screws or clips, and its removal allows access to the fan blades and housing for thorough cleaning. Here's a detailed guide on how to effectively remove the cover of your kitchen exhaust fan:
-
Locate the Fasteners: Inspect the perimeter of the fan cover to identify the fasteners securing it in place. These fasteners are usually screws or clips that need to be loosened or removed to detach the cover. Use a flashlight if necessary to ensure clear visibility.
-
Use the Appropriate Tool: Depending on the type of fasteners used, select the appropriate tool for removal. If the cover is secured with screws, a screwdriver will be needed. For covers held in place by clips, gently press or pry the clips to release the cover.
-
Carefully Remove the Cover: Once the fasteners are loosened or removed, carefully lift the cover away from the fan housing. Take caution to avoid forcing or damaging the cover during removal. Some covers may have electrical connections for lighting or fan operation, so detach any wiring connections if present.
-
Set Aside the Cover: Place the removed cover on a flat and stable surface, ensuring that it is secure and protected from damage. This will allow for convenient access to the fan blades and housing for the subsequent cleaning steps.
By following these steps to remove the cover of your kitchen exhaust fan, you can proceed to the next phase of the cleaning process with confidence and precision. With the cover removed, you are now ready to access and clean the fan blades and housing, effectively rejuvenating your kitchen exhaust fan for improved performance and air quality.
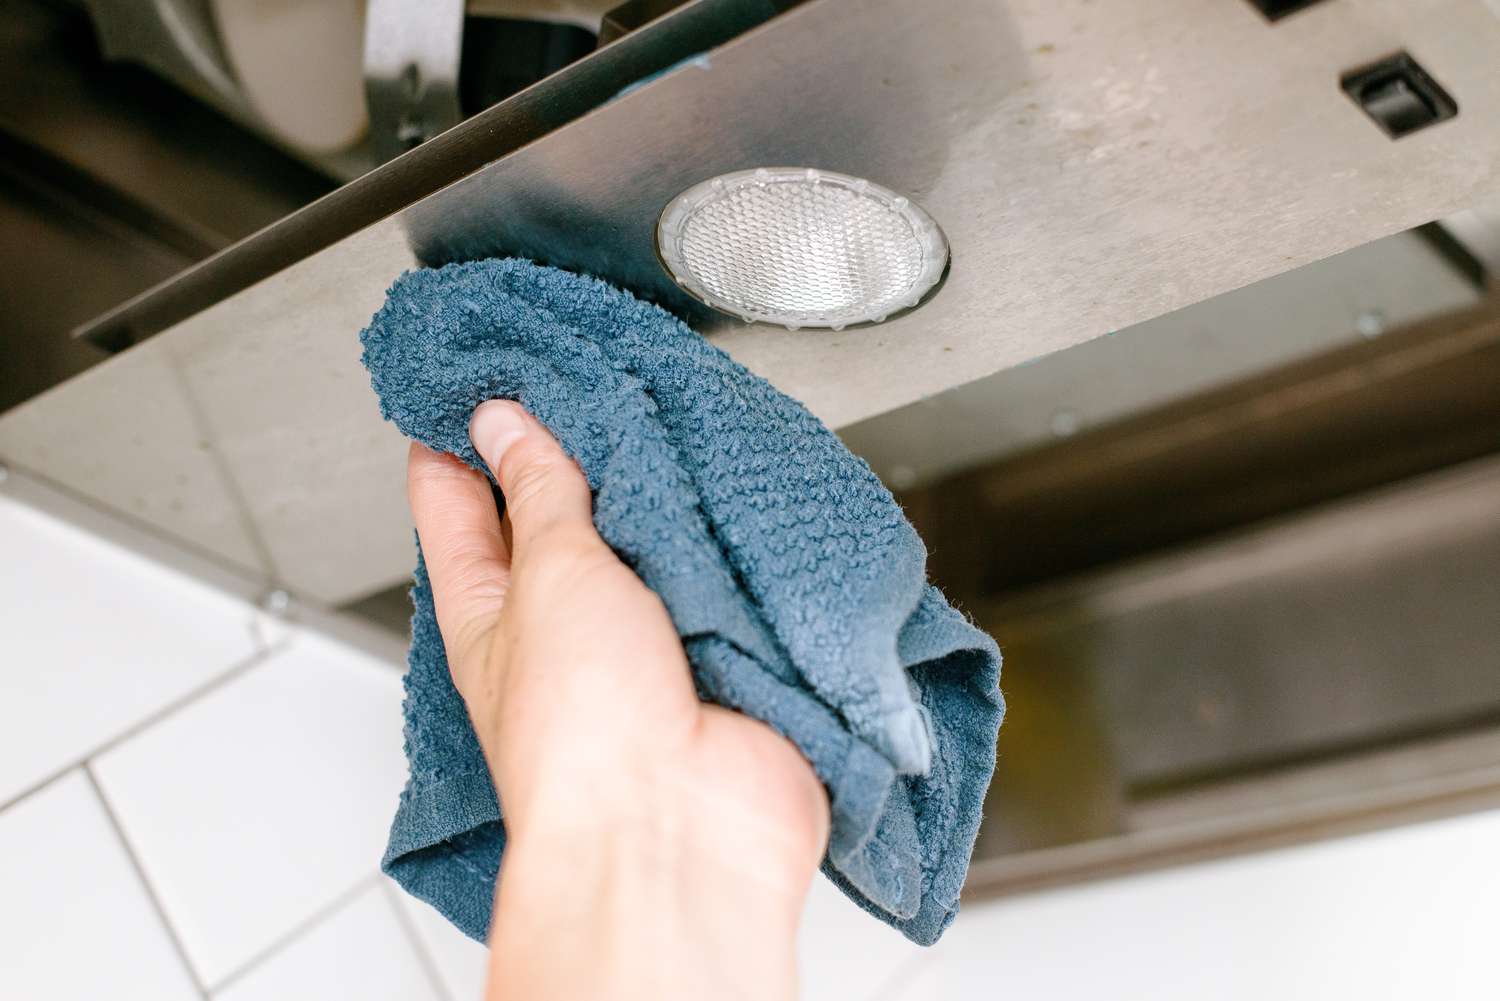
Step 4: Clean the Cover
Once the cover of your kitchen exhaust fan has been successfully removed, it's time to focus on cleaning this essential component. Over time, the cover can accumulate grease, dust, and other residues, impacting both its appearance and functionality. By thoroughly cleaning the cover, you can enhance the overall cleanliness of your kitchen exhaust fan and contribute to its optimal performance.
Here's a detailed guide on how to effectively clean the cover of your kitchen exhaust fan:
-
Inspect the Cover: Begin by inspecting the cover for any visible buildup of grease, dust, or grime. Use a flashlight if necessary to ensure that you have a clear view of the entire surface. Identifying the areas with the most significant buildup will guide your cleaning approach.
-
Prepare the Cleaning Solution: In a large bowl or container, prepare a cleaning solution by mixing warm water with a mild dish soap or a grease-cutting kitchen cleaner. This solution will effectively break down and remove the accumulated residues on the cover.
-
Soak the Cover: Submerge the cover in the prepared cleaning solution, ensuring that it is fully immersed. Allow the cover to soak for a few minutes to loosen the grease and dirt, making it easier to clean.
-
Use a Soft Bristle Brush: After soaking, use a soft-bristled brush to gently scrub the cover, focusing on areas with visible buildup. The soft bristles will help dislodge the residues without causing damage to the cover's surface.
-
Rinse Thoroughly: Once the cover has been scrubbed, rinse it thoroughly with clean water to remove the cleaning solution and dislodged residues. Ensure that all traces of the cleaning solution are effectively washed away.
-
Dry the Cover: After rinsing, use a clean, dry cloth to carefully dry the cover. Ensure that it is completely dry before reassembling it onto the fan housing to prevent water spots or streaks.
-
Optional: Disinfect with Rubbing Alcohol: For an added level of cleanliness, you can use a cloth dampened with rubbing alcohol to wipe down the cover. This will disinfect the surface and help remove any remaining grease or germs.
By following these steps to clean the cover of your kitchen exhaust fan, you can restore its appearance and functionality, contributing to a cleaner and more efficient kitchen environment. Once the cover is thoroughly cleaned and dried, you can proceed to the next steps of cleaning the fan blades and housing, ensuring that your kitchen exhaust fan is rejuvenated for optimal performance.
To clean an exhaust fan in the kitchen, first turn off the power. Remove the cover and soak it in warm, soapy water. Use a brush to scrub away grease and dirt. Wipe down the fan blades and motor with a damp cloth. Let everything dry completely before reassembling.
Read more: How To Clean A Kitchen Exhaust Fan
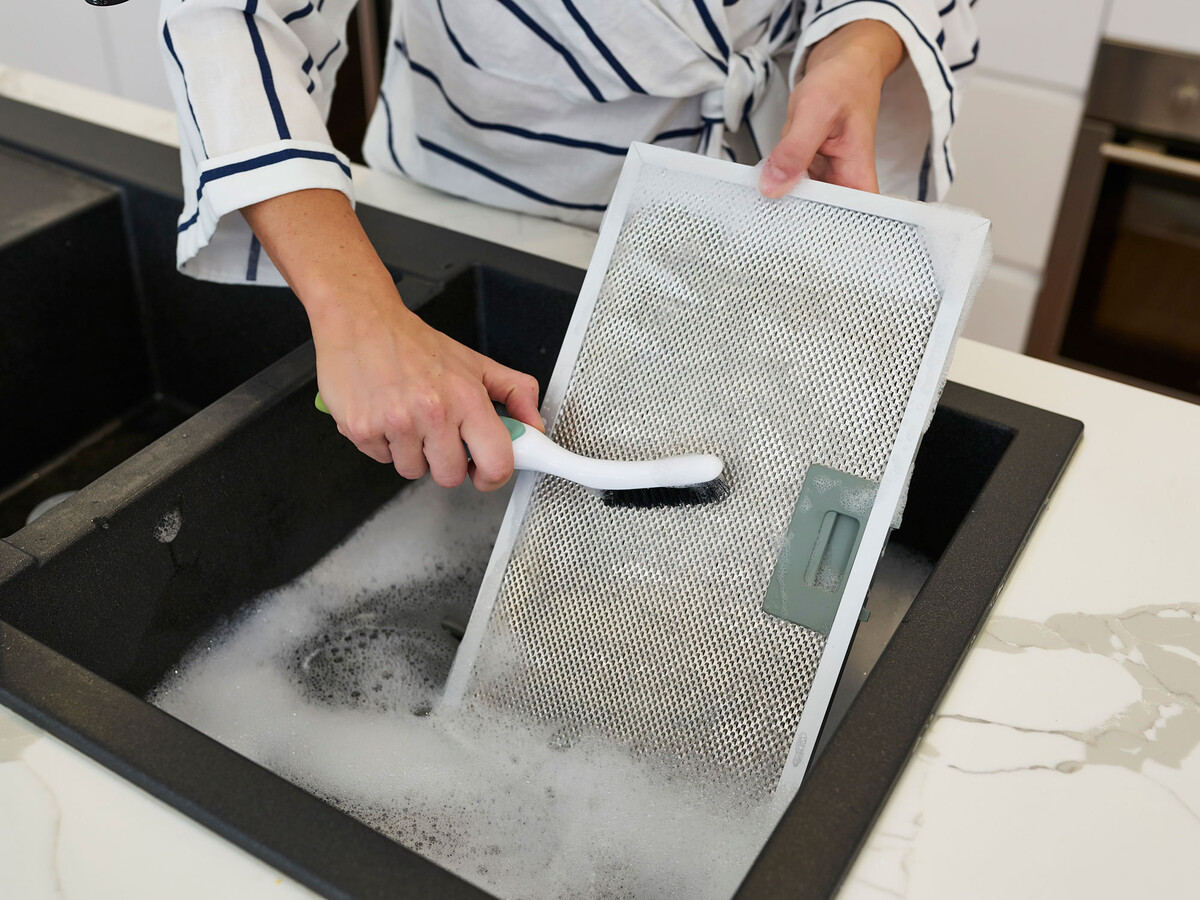
Step 5: Clean the Fan Blades
Cleaning the fan blades of your kitchen exhaust fan is a crucial step in maintaining its efficiency and promoting a healthier indoor environment. Over time, the blades can accumulate grease, dust, and other particles, hindering their ability to effectively circulate air and extract cooking odors. By meticulously cleaning the fan blades, you can restore the fan's functionality and contribute to improved air quality in your kitchen.
Here's a detailed guide on how to effectively clean the fan blades of your kitchen exhaust fan:
-
Inspect the Fan Blades: Begin by visually inspecting the fan blades for any visible buildup of grease, dust, or grime. Use a flashlight if necessary to ensure that you have a clear view of the entire surface of the blades. Identifying the areas with the most significant buildup will guide your cleaning approach.
-
Prepare the Cleaning Solution: In a large bowl or container, prepare a cleaning solution by mixing warm water with a mild dish soap or a grease-cutting kitchen cleaner. This solution will effectively break down and remove the accumulated residues on the fan blades.
-
Apply the Cleaning Solution: Using a soft-bristled brush or a microfiber cloth, apply the cleaning solution to the fan blades. Ensure that the solution covers the entire surface of each blade, targeting areas with visible buildup. Allow the solution to penetrate and loosen the grease and dirt for a few minutes.
-
Gently Scrub the Blades: With the cleaning solution applied, gently scrub each fan blade to dislodge the accumulated residues. Take care to use gentle pressure to avoid bending or damaging the blades. Pay particular attention to the leading edges and crevices where grease and dirt tend to accumulate.
-
Rinse and Dry the Blades: Once the fan blades have been thoroughly scrubbed, rinse them with clean water to remove the cleaning solution and dislodged residues. Ensure that all traces of the cleaning solution are effectively washed away. Use a clean, dry cloth to carefully dry the blades, ensuring that they are completely free of moisture.
-
Optional: Disinfect with Rubbing Alcohol: For an added level of cleanliness, you can use a cloth dampened with rubbing alcohol to wipe down the fan blades. This will disinfect the surfaces and help remove any remaining grease or germs, leaving the blades clean and sanitized.
By following these steps to clean the fan blades of your kitchen exhaust fan, you can ensure that the blades are free of accumulated residues and debris, allowing the fan to operate at its optimal capacity. Once the fan blades are thoroughly cleaned and dried, you can proceed to the next steps of cleaning the fan housing, reassembling the exhaust fan, and enjoying a cleaner and more efficient kitchen environment.
Step 6: Clean the Housing
Cleaning the housing of your kitchen exhaust fan is a critical step in ensuring that the entire unit operates at its optimal capacity. The housing, also known as the fan enclosure, can accumulate grease, dust, and other residues over time, impacting the fan's efficiency and air quality in the kitchen. By thoroughly cleaning the housing, you can contribute to a healthier and more pleasant cooking environment.
Here's a detailed guide on how to effectively clean the housing of your kitchen exhaust fan:
-
Access the Housing: With the fan cover and blades removed, you now have access to the interior of the fan housing. Use a flashlight to inspect the housing for any visible buildup of grease, dust, or grime. Pay attention to the walls, corners, and edges where residues may have accumulated.
-
Vacuum Loose Debris: Begin by using a vacuum cleaner with a brush attachment to carefully remove any loose debris and dust from the interior of the housing. Gently maneuver the brush attachment along the walls and corners to ensure thorough cleaning. This initial step helps prepare the housing for more detailed cleaning.
-
Prepare the Cleaning Solution: In a large bowl or container, prepare a cleaning solution using warm water and a mild dish soap or a grease-cutting kitchen cleaner. This solution will effectively break down and remove the accumulated residues within the housing.
-
Clean the Interior: Using a soft-bristled brush or a microfiber cloth, dip it into the cleaning solution and carefully scrub the interior surfaces of the housing. Focus on areas with visible buildup, ensuring that the solution reaches all corners and crevices. Take care to cover the entire interior surface for a thorough cleaning.
-
Rinse and Dry: Once the interior of the housing has been scrubbed, rinse it with clean water to remove the cleaning solution and dislodged residues. Ensure that all traces of the cleaning solution are effectively washed away. Use a clean, dry cloth to carefully dry the interior surfaces, ensuring that they are completely free of moisture.
-
Optional: Disinfect with Rubbing Alcohol: For an added level of cleanliness, you can use a cloth dampened with rubbing alcohol to wipe down the interior surfaces of the housing. This will disinfect the surfaces and help remove any remaining grease or germs, leaving the housing clean and sanitized.
By following these steps to clean the housing of your kitchen exhaust fan, you can ensure that the entire unit is free of accumulated residues and debris, promoting improved air quality and optimal performance. Once the housing is thoroughly cleaned and dried, you can proceed to reassemble the exhaust fan, knowing that it is rejuvenated for a cleaner and more efficient kitchen environment.
Step 7: Reassemble the Exhaust Fan
With the cover, fan blades, and housing meticulously cleaned and dried, it's time to reassemble the components of your kitchen exhaust fan. Proper reassembly is crucial to ensure that the fan operates effectively and efficiently. Here's a detailed guide on how to reassemble the exhaust fan:
-
Position the Fan Blades: Carefully place the clean and dry fan blades back into the housing, ensuring that they are correctly aligned and securely positioned. Take care to avoid bending or damaging the blades during reinstallation.
-
Reattach the Cover: Align the fan cover with the housing, ensuring that it fits snugly into place. If the cover is secured with screws, use a screwdriver to reinsert and tighten the screws. For covers held in place by clips, gently press or snap the cover back into position.
-
Secure the Fasteners: If the cover is held in place by screws, ensure that they are tightened securely but not over-tightened to avoid damaging the cover or housing. For covers with clips, verify that they are firmly engaged to hold the cover in place.
-
Verify Stability: Once the cover and fan blades are reassembled, gently test the stability of the components to ensure that they are securely positioned. Any loose or misaligned components should be adjusted to guarantee proper functionality.
-
Restore Power: After reassembling the exhaust fan, return to the circuit breaker panel and switch the breaker controlling the fan back to the "on" position. This restores power to the fan, allowing you to verify its operation.
By following these steps to reassemble the exhaust fan, you can ensure that the components are securely positioned and the fan is ready to operate at its optimal capacity. With the fan reassembled and power restored, you can enjoy a cleaner and more efficient kitchen environment, knowing that your exhaust fan has been rejuvenated through thorough cleaning and meticulous reassembly.
Conclusion
In conclusion, the process of cleaning your kitchen exhaust fan is a vital aspect of maintaining a healthy and efficient cooking environment. By following the step-by-step guide outlined in this comprehensive article, you have equipped yourself with the knowledge and techniques to effectively rejuvenate your kitchen exhaust fan. From gathering the necessary supplies to safely removing the cover, cleaning the fan blades and housing, and reassembling the exhaust fan, each step contributes to the overall cleanliness and functionality of the unit.
Regular maintenance and cleaning of your kitchen exhaust fan not only improve air quality but also enhance the fan's performance, ensuring that it effectively removes cooking odors, steam, and airborne particles. A clean exhaust fan operates more quietly, promotes a more pleasant cooking experience, and reduces the risk of potential fire hazards associated with grease buildup.
By prioritizing safety and thoroughness throughout the cleaning process, you have taken a proactive step in creating a healthier and more enjoyable kitchen environment. The removal of grease, dust, and residues from the fan components not only contributes to improved air circulation but also extends the lifespan of the exhaust fan, reducing the need for premature replacements.
As you reassemble the exhaust fan and restore power, take a moment to appreciate the impact of your efforts. The rejuvenated fan is now poised to efficiently extract cooking fumes and maintain a fresh, clean atmosphere in your kitchen. Your commitment to regular maintenance and cleaning will ensure that your kitchen exhaust fan continues to operate at its best, supporting a healthier and more comfortable home environment for you and your family.
Incorporating the cleaning of your kitchen exhaust fan into your regular home maintenance routine will yield long-term benefits, including improved indoor air quality, reduced odors, and a more pleasant cooking experience. By investing time and effort in cleaning and maintaining your kitchen exhaust fan, you are actively contributing to the overall cleanliness and functionality of your home.
So, as you step back and admire your freshly cleaned kitchen exhaust fan, take pride in knowing that your efforts have not only rejuvenated the fan but have also contributed to a healthier and more enjoyable living space. With a clean and efficient exhaust fan, you can now savor the aromas of your culinary creations without worrying about lingering odors or compromised air quality. Cheers to a cleaner and more inviting kitchen environment!
Frequently Asked Questions about How To Clean An Exhaust Fan In The Kitchen
Was this page helpful?
At Storables.com, we guarantee accurate and reliable information. Our content, validated by Expert Board Contributors, is crafted following stringent Editorial Policies. We're committed to providing you with well-researched, expert-backed insights for all your informational needs.


0 thoughts on “How To Clean An Exhaust Fan In The Kitchen”