Home>Furniture & Design>Bathroom Accessories>How To Install An Exhaust Fan In The Kitchen
Bathroom Accessories
How To Install An Exhaust Fan In The Kitchen
Modified: February 18, 2024
Learn how to install an exhaust fan in the kitchen with our step-by-step guide. Find the best bathroom accessories for your home. Expert tips and advice.
(Many of the links in this article redirect to a specific reviewed product. Your purchase of these products through affiliate links helps to generate commission for Storables.com, at no extra cost. Learn more)
Introduction
Installing an exhaust fan in the kitchen is a crucial step in maintaining good indoor air quality and preventing the buildup of excess moisture, odors, and airborne contaminants. A properly functioning exhaust fan not only enhances the comfort of your kitchen but also contributes to a healthier living environment for you and your family. Whether you're renovating your kitchen or simply upgrading your ventilation system, this comprehensive guide will walk you through the step-by-step process of installing an exhaust fan with ease and confidence.
A well-ventilated kitchen is essential for removing cooking byproducts, such as smoke, steam, and cooking odors, which can linger in the air and create an unpleasant environment. Additionally, excess moisture generated during cooking can lead to mold and mildew growth, potentially causing damage to your walls, ceilings, and cabinetry. By installing an exhaust fan, you can effectively mitigate these issues and maintain a clean, fresh, and comfortable kitchen space.
This guide will provide you with a detailed overview of the tools and materials required for the installation, the crucial steps involved in the process, and the necessary precautions to ensure a safe and successful installation. Whether you're a seasoned DIY enthusiast or a novice homeowner eager to tackle a new project, this guide is designed to equip you with the knowledge and confidence to complete the installation of an exhaust fan in your kitchen.
By following the step-by-step instructions outlined in this guide, you'll be able to create a more pleasant and healthier kitchen environment while enhancing the overall functionality of your home. So, let's roll up our sleeves and embark on this rewarding journey of installing an exhaust fan in your kitchen!
Key Takeaways:
- Properly installing an exhaust fan in your kitchen helps keep the air clean and fresh, prevents mold, and makes cooking more enjoyable. It’s a DIY project that improves your home and your family’s health.
- By following the step-by-step guide, you can confidently install an exhaust fan in your kitchen, creating a healthier and more comfortable environment for cooking and spending time with your family.
Read more: How To Install An Exhaust Fan
Step 1: Gather the necessary tools and materials
Before embarking on the installation of an exhaust fan in your kitchen, it's essential to gather all the required tools and materials to ensure a smooth and efficient process. Having the right equipment at your disposal will not only streamline the installation but also minimize interruptions and potential setbacks. Here's a comprehensive list of the necessary tools and materials you'll need for this project:
Tools:
- Screwdriver Set: A versatile set of screwdrivers, including Phillips and flat-head varieties, will be essential for removing existing fixtures and securing the exhaust fan in place.
- Utility Knife: A sharp utility knife will come in handy for precise cutting of drywall or ceiling materials to create an opening for the exhaust fan.
- Measuring Tape: Accurate measurements are crucial for determining the placement of the exhaust fan and cutting the appropriate hole for installation.
- Stud Finder: This tool will help locate the ceiling joists or wall studs, providing guidance for securely mounting the exhaust fan.
- Cordless Drill: A cordless drill with a set of drill bits will facilitate the installation process, allowing for efficient boring of holes for screws and fasteners.
- Adjustable Wrench: An adjustable wrench will be necessary for tightening nuts and bolts during the installation of the exhaust fan.
- Safety Glasses and Gloves: Prioritize safety by wearing protective glasses and gloves to shield your eyes and hands from debris and sharp edges during the installation process.
Materials:
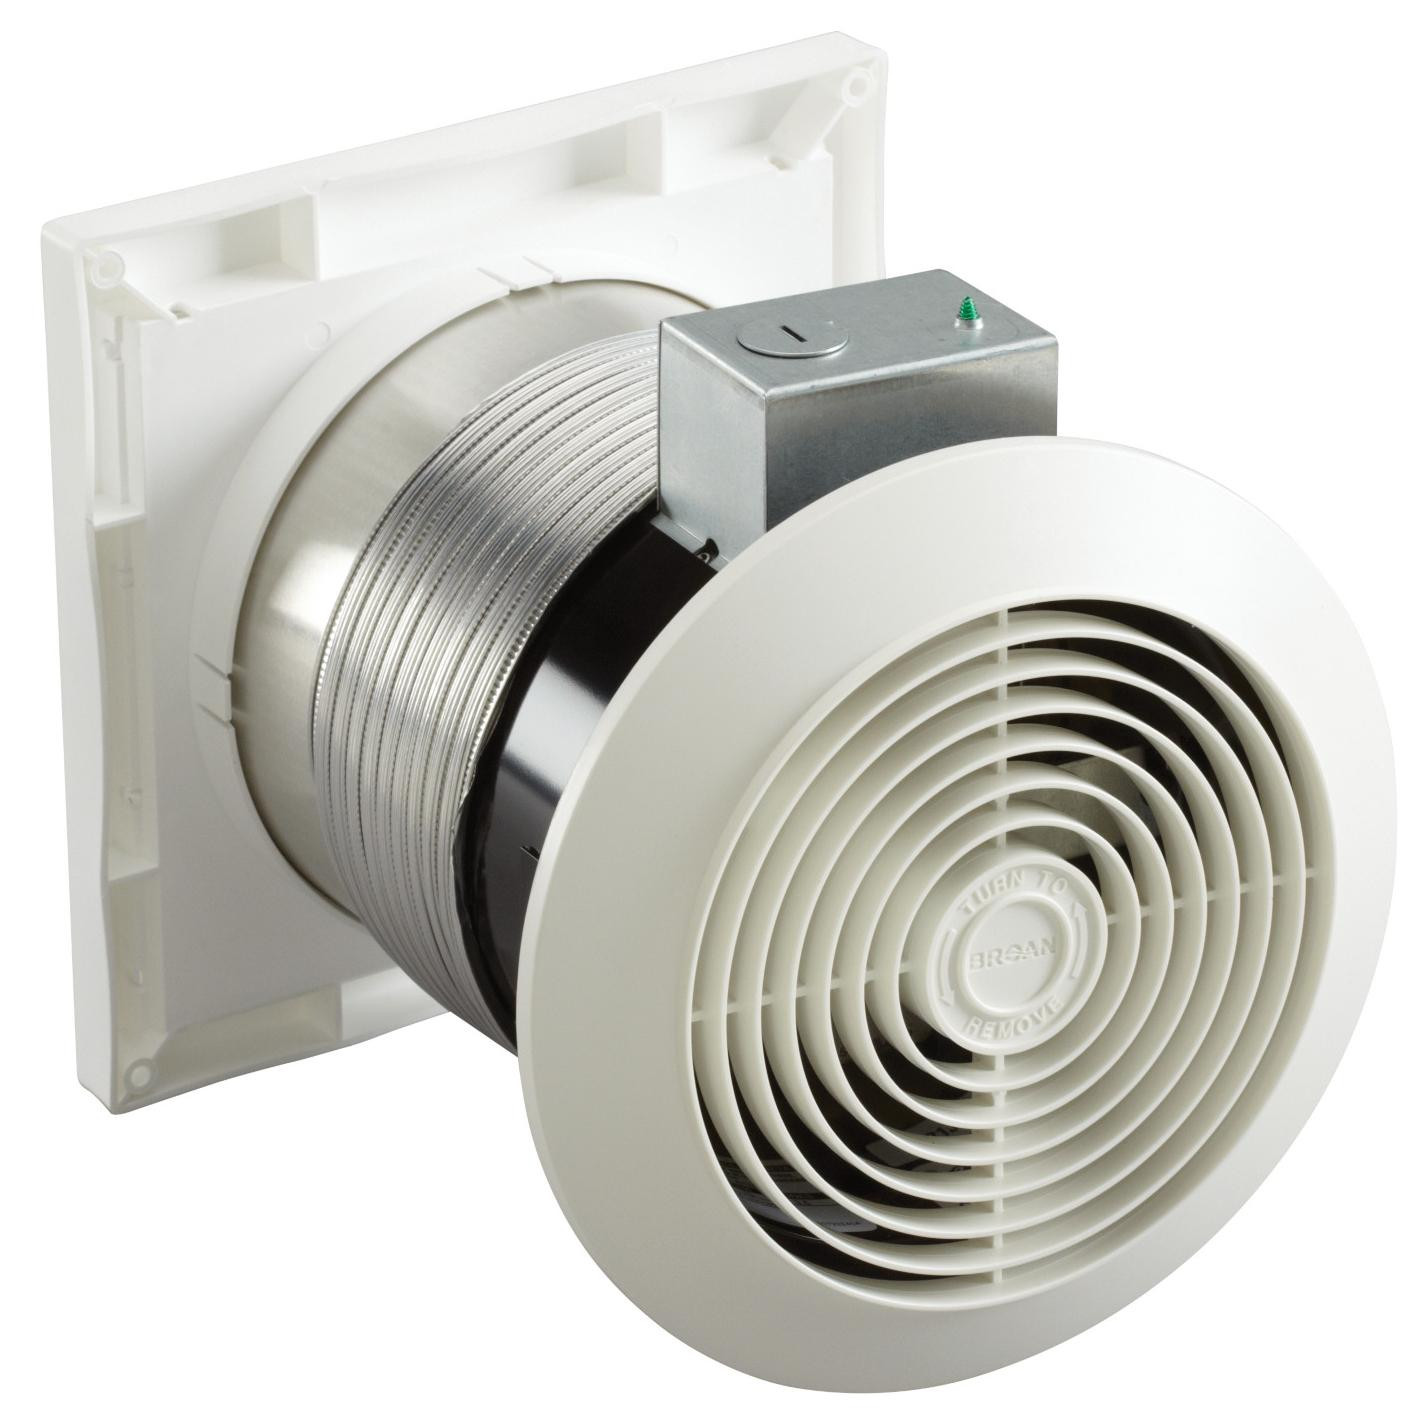
- Exhaust Fan Kit: Select a high-quality exhaust fan kit that suits the size and ventilation needs of your kitchen space. Ensure that the kit includes the fan unit, ductwork, and necessary mounting hardware.
- Ductwork: Depending on the layout of your kitchen, you'll need flexible or rigid ductwork to channel the air from the exhaust fan to the exterior of your home. Measure the required length of ductwork based on the distance between the fan and the external vent.
- Vent Cap: A vent cap or hood will be essential for the exterior termination of the ductwork, preventing outdoor elements from entering the ventilation system.
- Screws and Fasteners: Stock up on screws and fasteners to secure the exhaust fan, ductwork, and vent cap in place.
- Electrical Wiring and Connectors: If the installation involves electrical work, ensure you have the necessary wiring and connectors to safely and compliantly connect the exhaust fan to the power source.
By assembling these tools and materials, you'll be well-prepared to initiate the installation process with confidence and efficiency. With everything at your fingertips, you can proceed to the next step of choosing the optimal location for the exhaust fan in your kitchen.
Step 2: Choose the location for the exhaust fan
Selecting the ideal location for the exhaust fan in your kitchen is a pivotal decision that directly impacts its effectiveness in removing airborne pollutants and maintaining optimal air circulation. The strategic placement of the exhaust fan is essential for ensuring efficient ventilation and minimizing the accumulation of cooking byproducts and moisture. Here are the key considerations to guide you in choosing the optimal location for your exhaust fan:
Evaluate Airflow Requirements:
Assess the layout and size of your kitchen to determine the airflow requirements for effective ventilation. Larger kitchens or those with extensive cooking surfaces may necessitate a more powerful exhaust fan to adequately remove cooking odors, smoke, and excess moisture. Additionally, consider the proximity of the cooking area to windows and doors, as well as the presence of other ventilation sources, to optimize the airflow dynamics within the space.
Proximity to Cooking Surfaces:
Position the exhaust fan in close proximity to the primary cooking surfaces, such as the stovetop or range, to capture and expel cooking byproducts at the source. Placing the fan directly above the cooking area ensures that airborne contaminants are promptly drawn away, preventing them from dispersing throughout the kitchen and adjacent living spaces. This targeted approach enhances the efficiency of the exhaust fan in maintaining a clean and odor-free environment.
Structural Considerations:
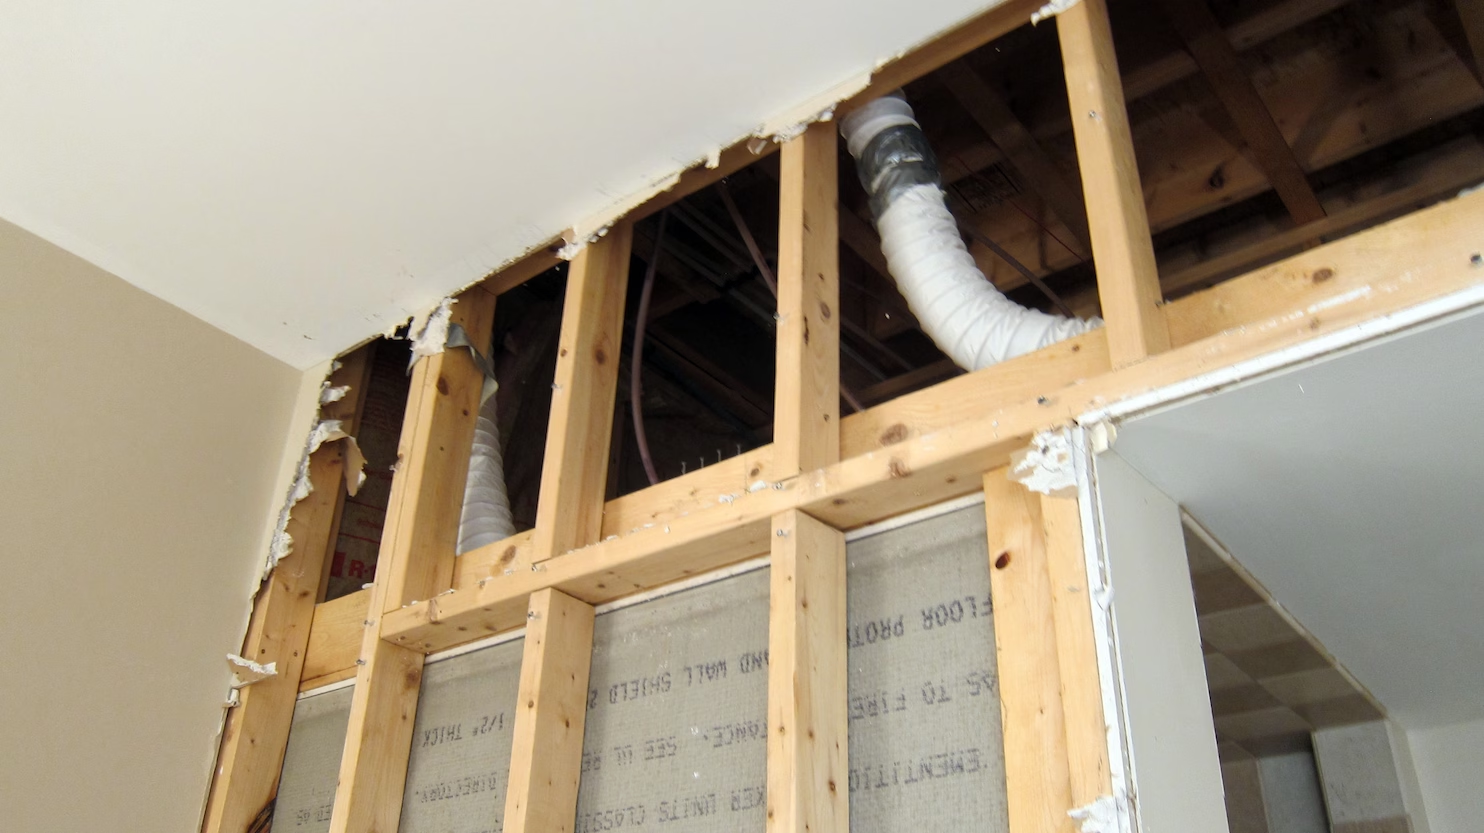
Identify the structural components of the ceiling or wall where the exhaust fan will be installed. Ensure that there are no obstructions, such as electrical wiring, plumbing, or support beams, that could impede the installation process or obstruct the airflow path. Additionally, take into account the presence of ceiling joists or wall studs, as these will serve as secure anchor points for mounting the exhaust fan and supporting the ductwork.
Exterior Ventilation:
Plan for the routing of the ductwork to facilitate the expulsion of air to the exterior of your home. Select a location for the exhaust fan that allows for a direct and unobstructed path for the ductwork to reach the external vent cap. This strategic placement minimizes bends and obstructions in the ductwork, optimizing the airflow efficiency and promoting the effective removal of cooking odors and moisture from your kitchen.
By carefully considering these factors, you can identify the most suitable location for installing the exhaust fan in your kitchen, ensuring that it operates at peak performance and contributes to a healthier and more comfortable culinary environment. Once the optimal location is determined, you can proceed to the next step of cutting a hole for the exhaust fan, bringing you closer to the successful completion of the installation process.
Read more: How To Install An Exhaust Fan In The Wall
Step 3: Cut a hole for the exhaust fan
Cutting a precise hole for the exhaust fan is a critical step in the installation process, as it sets the foundation for securely mounting the fan and facilitating the efficient expulsion of air to the exterior of your home. Here's a detailed walkthrough of the essential tasks involved in this step:
Measure and Mark the Opening:
Begin by carefully measuring the dimensions of the exhaust fan unit to determine the exact size of the hole to be cut. Using a measuring tape and a pencil, mark the outline of the required opening on the ceiling or wall surface. Ensure that the marked area aligns with the predetermined location for the exhaust fan, taking into account any clearance requirements specified in the fan's installation instructions.
Prepare the Cutting Area:
Clear the surrounding area of any obstructions, such as light fixtures, electrical wiring, or insulation, to create a safe and unobstructed workspace for the cutting process. If the installation involves cutting through drywall, use a utility knife to score along the marked outline, creating a clean and precise guide for the subsequent cutting tool.
Use the Appropriate Cutting Tool:
Select the appropriate cutting tool based on the composition of the ceiling or wall material. For cutting through drywall, a keyhole saw or drywall saw is recommended for its precision and maneuverability. Alternatively, if the installation involves cutting through other materials, such as plaster or wood, a reciprocating saw or jigsaw equipped with a fine-tooth blade can provide efficient and controlled cutting.
Read more: How To Install An Exhaust Fan In A Window
Exercise Caution and Precision:
When cutting the hole for the exhaust fan, proceed with caution to avoid damaging surrounding structures or utilities. Maintain a steady hand and follow the marked outline closely, ensuring that the resulting opening matches the dimensions required for the fan unit. Take your time to achieve clean and accurate cuts, as the quality of the opening directly impacts the stability and functionality of the installed exhaust fan.
Verify the Fit:
Once the hole is cut, carefully test the fit of the exhaust fan unit to ensure that it aligns seamlessly with the opening. Verify that the fan unit sits securely within the cutout, with no gaps or misalignments that could compromise its stability. This verification step allows for any necessary adjustments to be made before proceeding to the subsequent stages of the installation process.
By meticulously executing the process of cutting a hole for the exhaust fan, you establish a solid groundwork for the successful integration of the fan unit into your kitchen's ventilation system. With the opening prepared, you can confidently progress to the next step of installing the ductwork, bringing you closer to the realization of a well-ventilated and comfortable kitchen space.
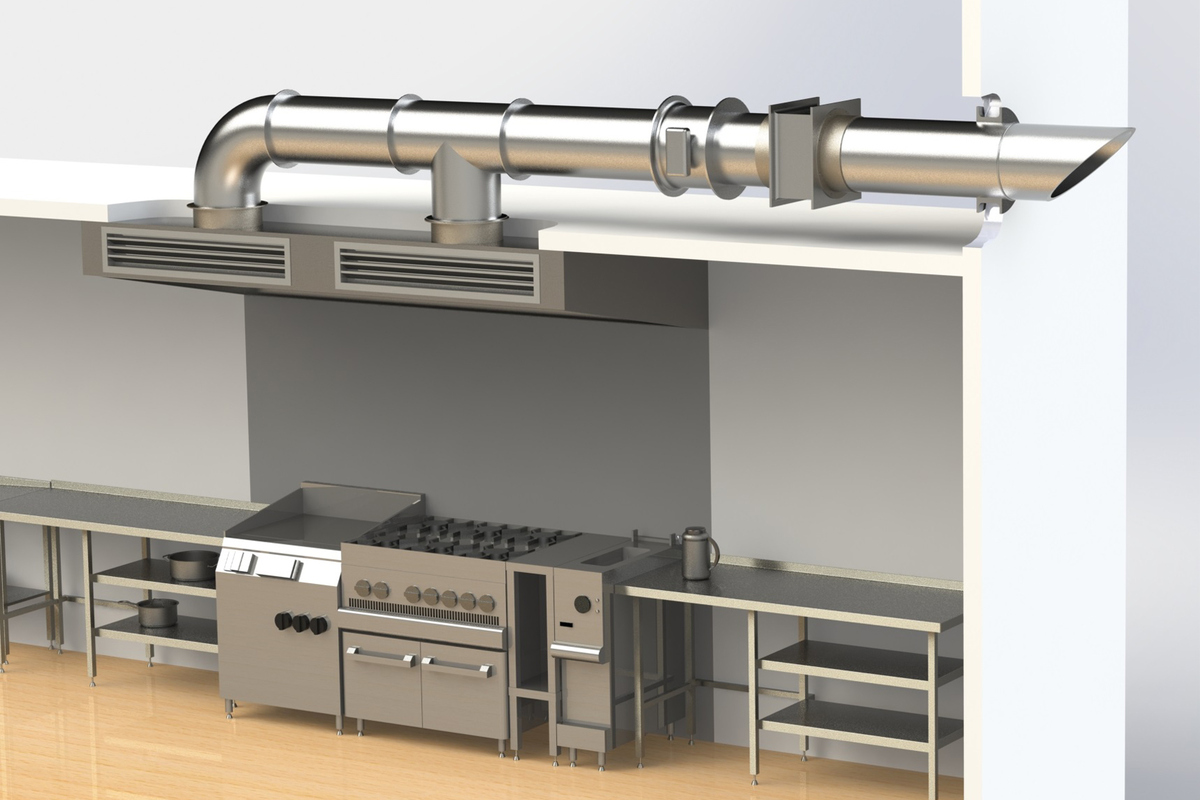
Step 4: Install the ductwork
With the hole for the exhaust fan successfully cut and prepared, the next crucial step in the installation process is the seamless integration of the ductwork. The ductwork serves as the conduit for channeling the air extracted by the exhaust fan to the exterior of your home, effectively expelling cooking byproducts, moisture, and odors. Here's a comprehensive guide to installing the ductwork with precision and efficiency:
-
Select the Appropriate Duct Type: Depending on the layout and configuration of your kitchen, you'll need to choose between flexible and rigid ductwork. Flexible ducts are ideal for navigating around obstacles and tight spaces, offering versatility in installation. On the other hand, rigid ducts provide a more direct and streamlined airflow path, minimizing resistance and optimizing ventilation efficiency.
-
Measure and Cut the Ducts: Accurate measurements are essential for customizing the ductwork to fit the specific dimensions and layout of your kitchen space. Use a measuring tape to determine the required lengths of ductwork, ensuring that the paths from the exhaust fan to the exterior vent cap are direct and unobstructed. Carefully cut the ducts to the measured lengths using aviation snips or a duct cutter, maintaining clean and precise edges for secure connections.
-
Secure the Duct Connections: Assemble the duct sections by securely connecting them using appropriate fasteners, such as metal duct tape or clamps. Ensure that the connections are airtight to prevent air leakage, which can compromise the efficiency of the ventilation system. Pay close attention to the alignment and integrity of the connections, as they play a critical role in maintaining consistent airflow throughout the ductwork.
-
Route the Ductwork: Strategically route the ductwork from the exhaust fan to the exterior vent cap, prioritizing the most direct and obstruction-free path. Minimize the number of bends and turns in the ductwork to reduce airflow resistance and optimize the performance of the exhaust fan. Secure the ducts in place using appropriate hangers or straps, ensuring that they are adequately supported and free from sagging or kinks.
-
Install the Vent Cap: Once the ductwork is routed to the exterior of your home, install the vent cap to provide a protective and weather-resistant termination point for the ventilation system. Secure the vent cap in place, ensuring a snug and watertight fit to prevent outdoor elements from entering the ductwork. Verify that the vent cap allows for unobstructed airflow while effectively preventing the infiltration of pests and debris.
By meticulously executing the installation of the ductwork, you establish a robust and efficient ventilation pathway for the exhaust fan, enabling the effective removal of airborne contaminants and moisture from your kitchen. With the ductwork seamlessly integrated, you can proceed to the next step of mounting the exhaust fan, bringing you closer to the successful completion of the installation process.
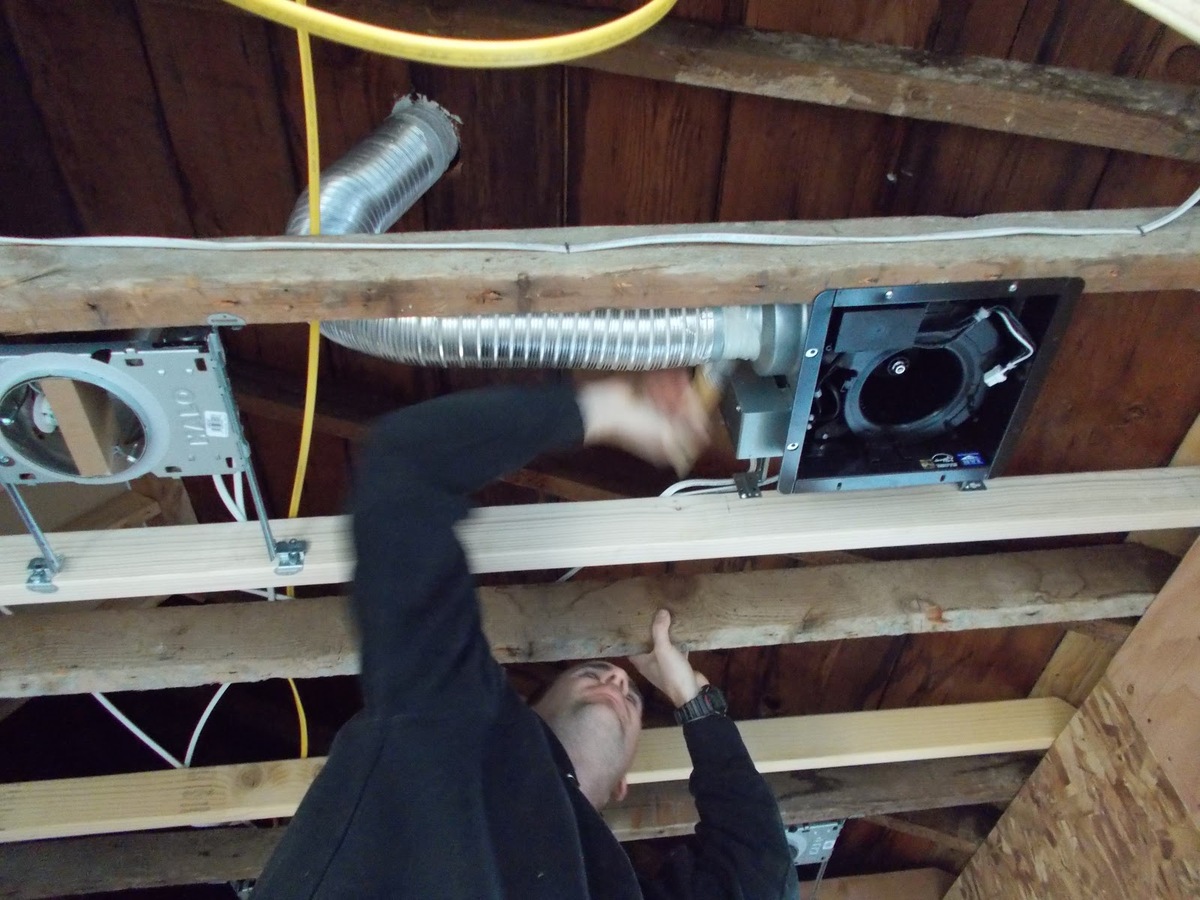
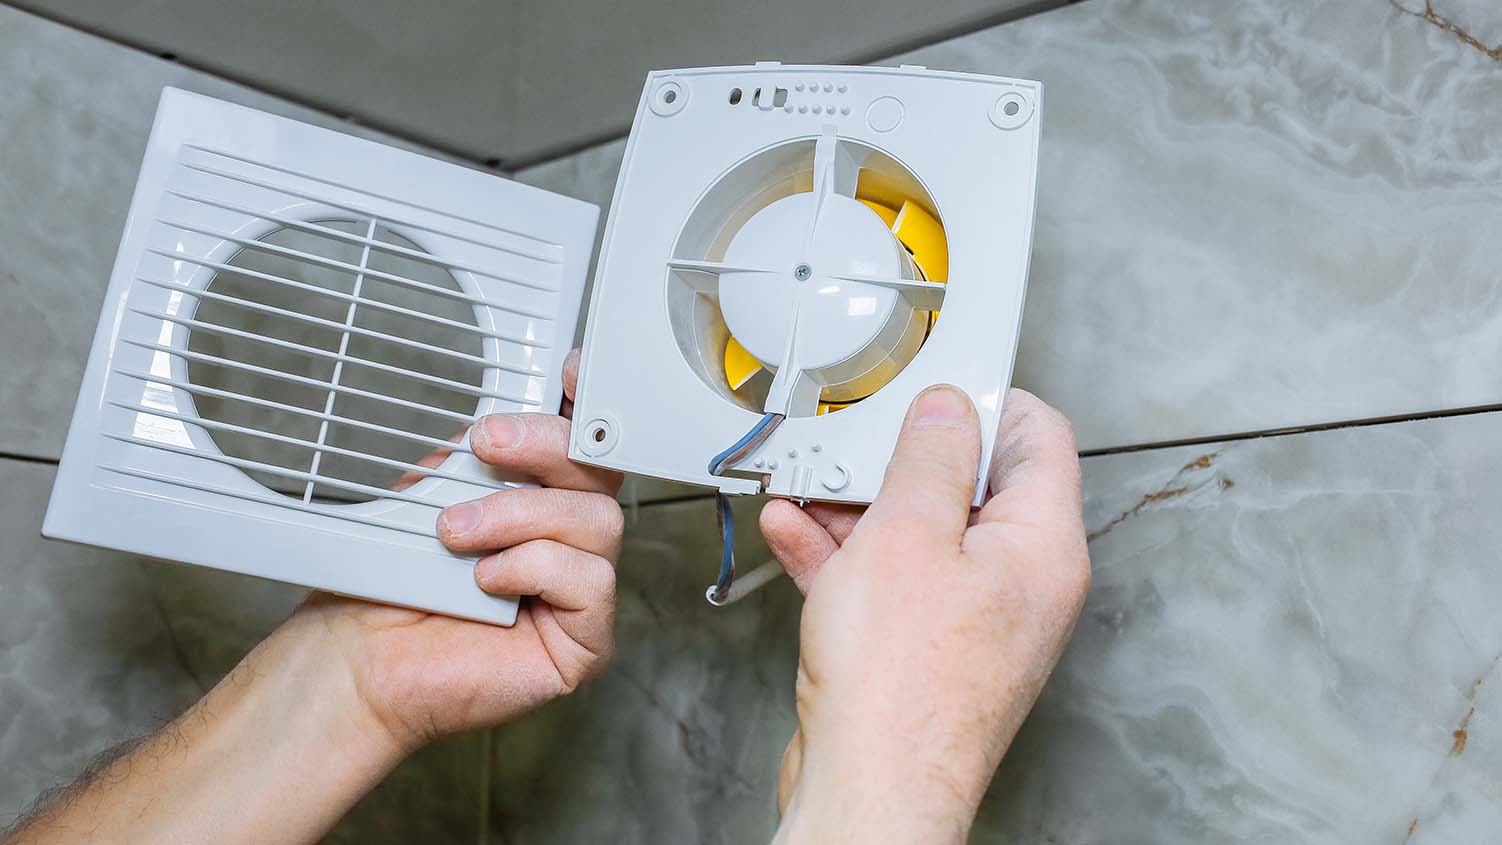
Step 5: Mount the exhaust fan
Mounting the exhaust fan is a pivotal stage in the installation process, as it ensures the secure placement of the fan unit and sets the stage for its seamless integration into your kitchen's ventilation system. Here's a detailed walkthrough of the essential tasks involved in this step:
Read more: How To Install A Kitchen Exhaust Fan
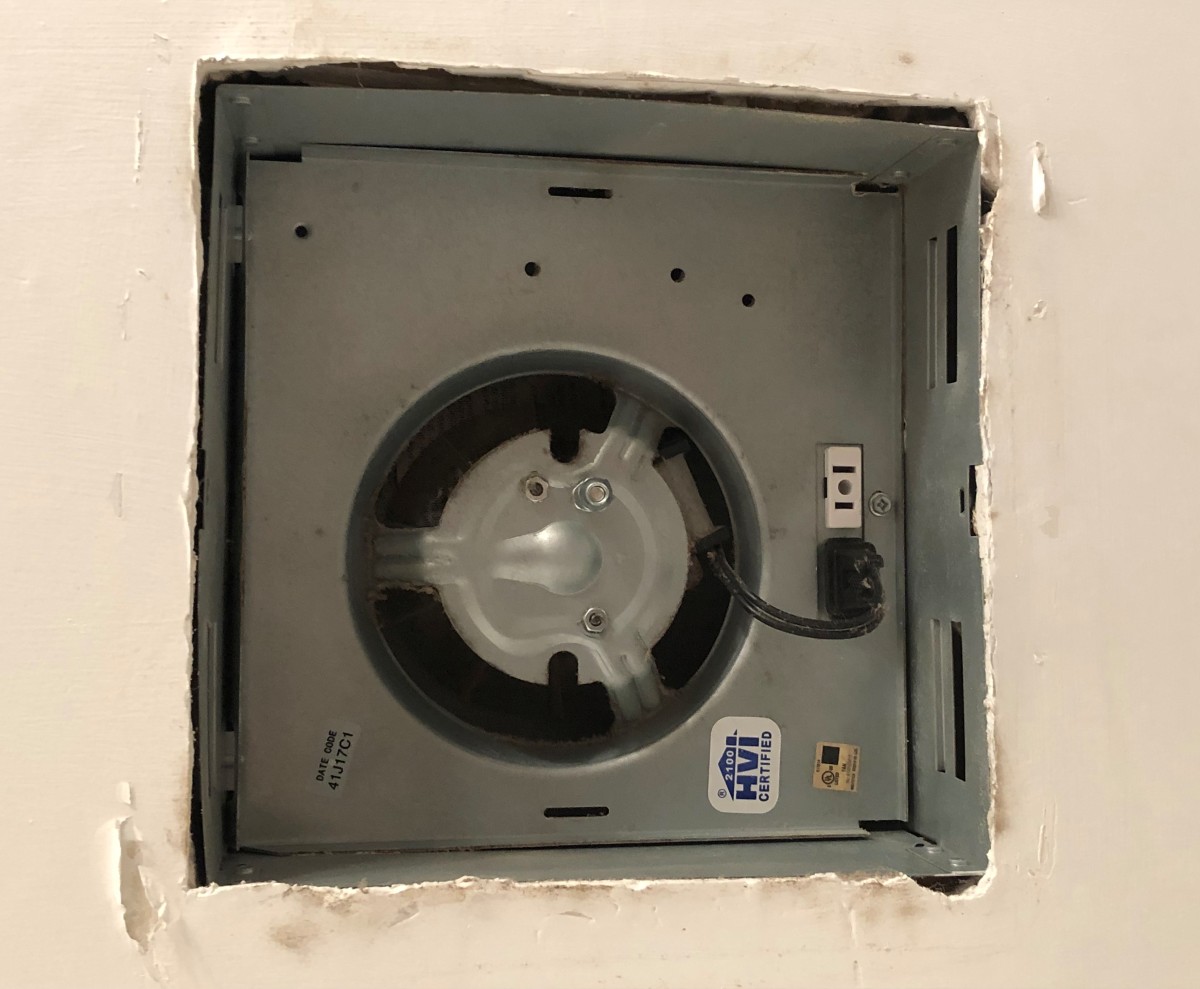
Position the Fan Unit:
Begin by positioning the exhaust fan unit into the prepared opening, ensuring that it aligns snugly and securely. If the fan unit is equipped with mounting brackets or flanges, align them with the edges of the opening to facilitate a stable and flush fit. Take care to verify that the fan unit is oriented correctly, with the intake and exhaust ports aligned with the ductwork for optimal airflow.
Secure the Mounting Hardware:
Once the fan unit is positioned correctly, secure it in place using the provided mounting hardware, such as screws or brackets. Depending on the design of the fan unit and the installation surface, ensure that the mounting hardware is fastened tightly to prevent any movement or instability. Prioritize the use of hardware recommended by the manufacturer to guarantee the structural integrity of the installed fan unit.
Verify Stability and Alignment:
After securing the fan unit, carefully verify its stability and alignment within the opening. Gently test the fan unit to ensure that it is firmly anchored and free from any wobbling or shifting. Confirm that the edges of the fan unit are flush with the surrounding surface, creating a seamless and professional appearance. This verification step is crucial for guaranteeing the long-term reliability and functionality of the installed exhaust fan.
Connect the Ductwork:
With the fan unit securely mounted, proceed to connect the ductwork to the intake and exhaust ports of the fan. Ensure that the connections are airtight and secure, using appropriate fasteners or clamps to prevent air leakage. Double-check the alignment and integrity of the duct connections, as they play a critical role in maintaining consistent airflow and optimizing the performance of the exhaust fan.
Read more: How To Install An Attic Exhaust Fan
Test the Fan Operation:
Before proceeding to the final stages of the installation, conduct a preliminary test of the exhaust fan to verify its operational functionality. Turn on the fan and observe its performance, ensuring that it effectively draws air from the kitchen space and expels it through the ductwork to the exterior. Verify that the fan operates smoothly and quietly, indicating its successful integration into the ventilation system.
By meticulously executing the process of mounting the exhaust fan, you establish a solid foundation for its seamless operation and contribution to a well-ventilated and comfortable kitchen environment. With the fan unit securely in place, you can confidently progress to the next step of connecting the wiring, bringing you closer to the realization of a fully functional and efficient exhaust fan in your kitchen.
Step 6: Connect the wiring
Connecting the wiring is a critical phase in the installation of an exhaust fan, as it ensures the safe and reliable integration of the fan unit into the electrical system of your home. Here's a detailed guide to effectively connecting the wiring with precision and adherence to electrical safety standards:
-
Turn Off the Power: Before commencing any electrical work, it is imperative to turn off the power supply to the designated circuit at the electrical panel. Use a voltage tester to confirm that the power is indeed switched off, providing a safe environment for the wiring connections to be made.
-
Review the Wiring Diagram: Refer to the manufacturer's instructions and the provided wiring diagram to understand the specific requirements for connecting the exhaust fan to the electrical supply. Familiarize yourself with the color-coding and labeling of the wires, ensuring that you accurately identify the line, neutral, and ground wires.
-
Prepare the Wiring: If the exhaust fan unit requires hardwired installation, prepare the electrical wiring by stripping the insulation from the designated lengths of the line, neutral, and ground wires. Use wire strippers to carefully remove the insulation, exposing the conductive copper wires for secure connections.
-
Make the Connections: Following the wiring diagram, make the necessary connections between the electrical supply and the exhaust fan unit. Securely connect the corresponding line, neutral, and ground wires, ensuring that the connections are tight and free from any exposed conductors. If the fan unit features a junction box, neatly organize the wires within the box and secure them in place according to the manufacturer's instructions.
-
Utilize Wire Connectors: Employ wire connectors, such as twist-on wire nuts or push-in connectors, to join the wires together. Twist the wire connectors onto the paired wires, ensuring a snug and secure fit. Verify that the connections are insulated and free from any stray wires or exposed conductors, mitigating the risk of electrical hazards.
-
Secure the Wiring: Once the wiring connections are made, carefully tuck the wires into the electrical junction box or designated enclosure, ensuring that they are neatly arranged and do not obstruct the installation of the exhaust fan unit. Secure the junction box cover in place, providing protection for the wiring and ensuring compliance with electrical codes and regulations.
-
Test the Electrical Connections: With the wiring completed, restore the power supply to the designated circuit and conduct a thorough test of the exhaust fan's electrical operation. Verify that the fan unit powers on and functions as intended, confirming the successful integration of the wiring into the electrical system.
By meticulously executing the process of connecting the wiring, you ensure the safe and compliant integration of the exhaust fan into your home's electrical infrastructure. With the wiring securely connected, you can confidently proceed to the final step of testing the exhaust fan, bringing you closer to the realization of a fully operational and efficient ventilation solution in your kitchen.
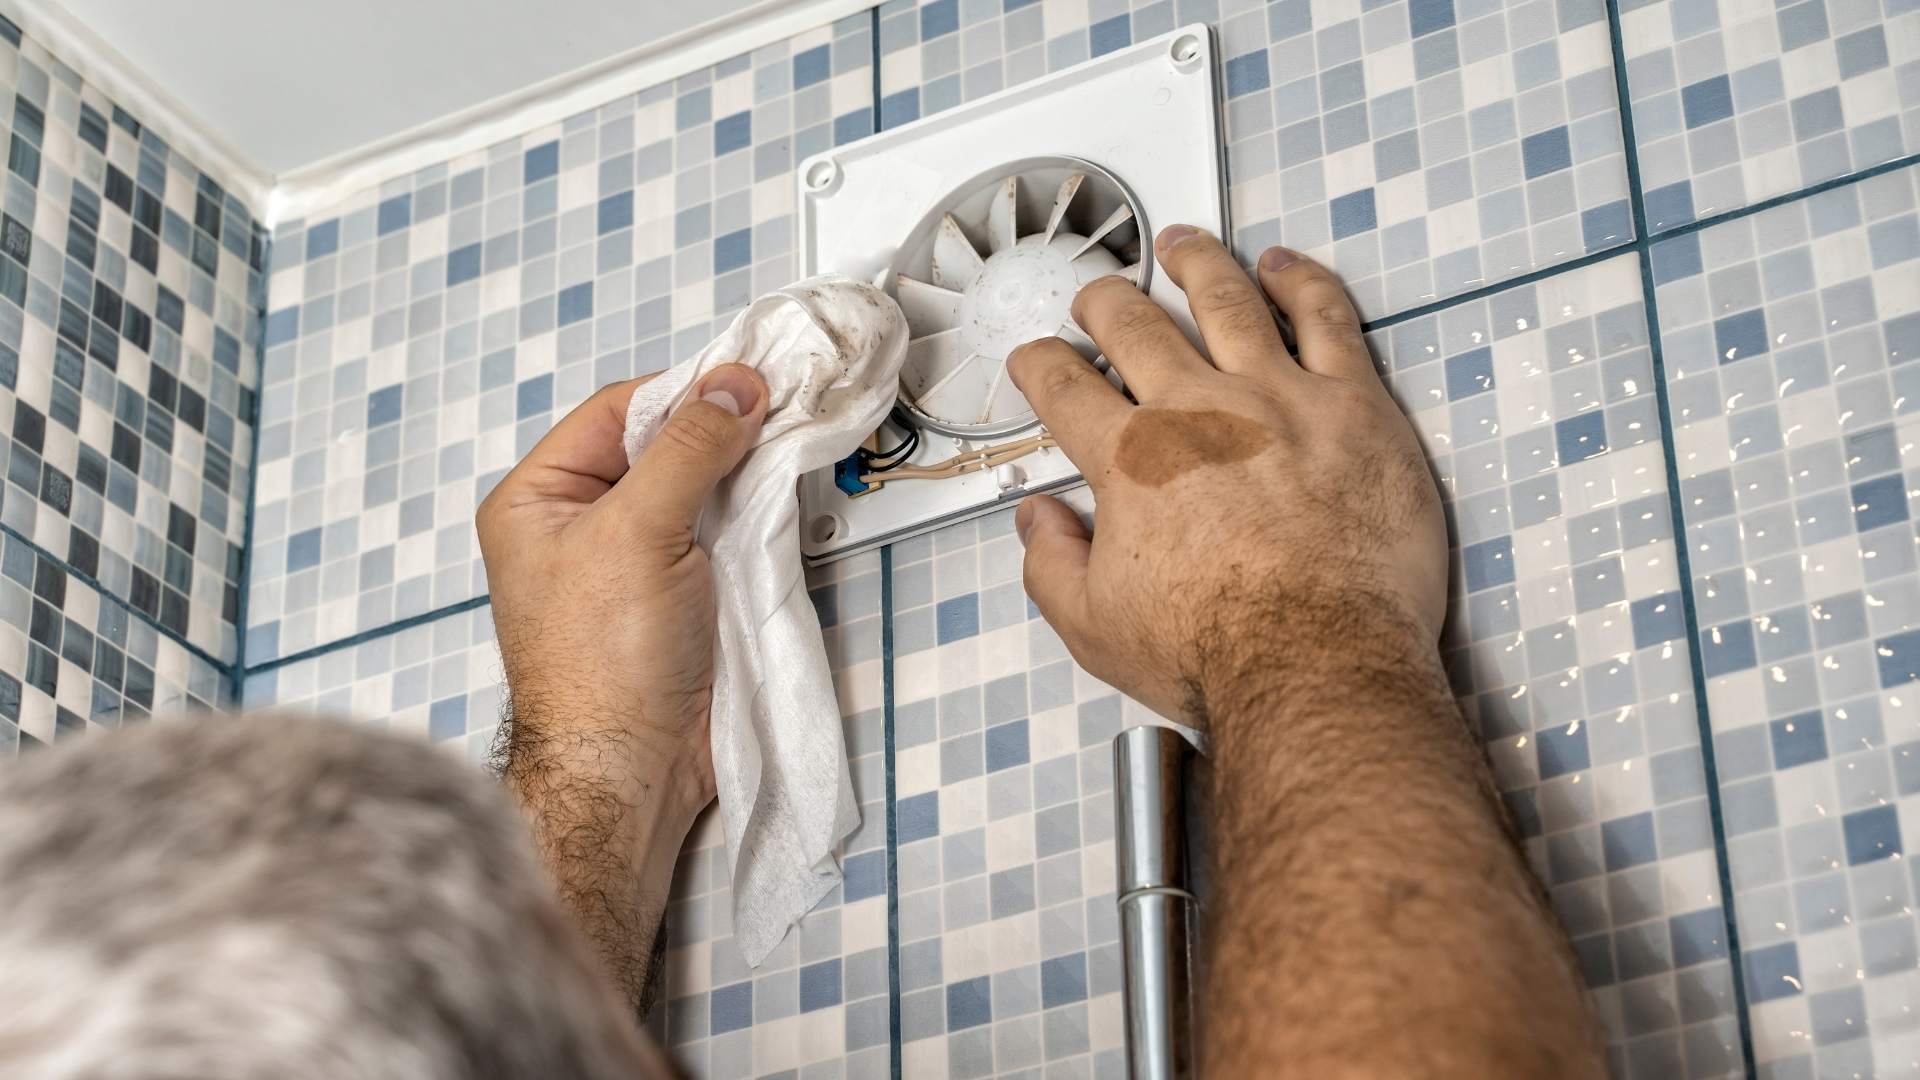
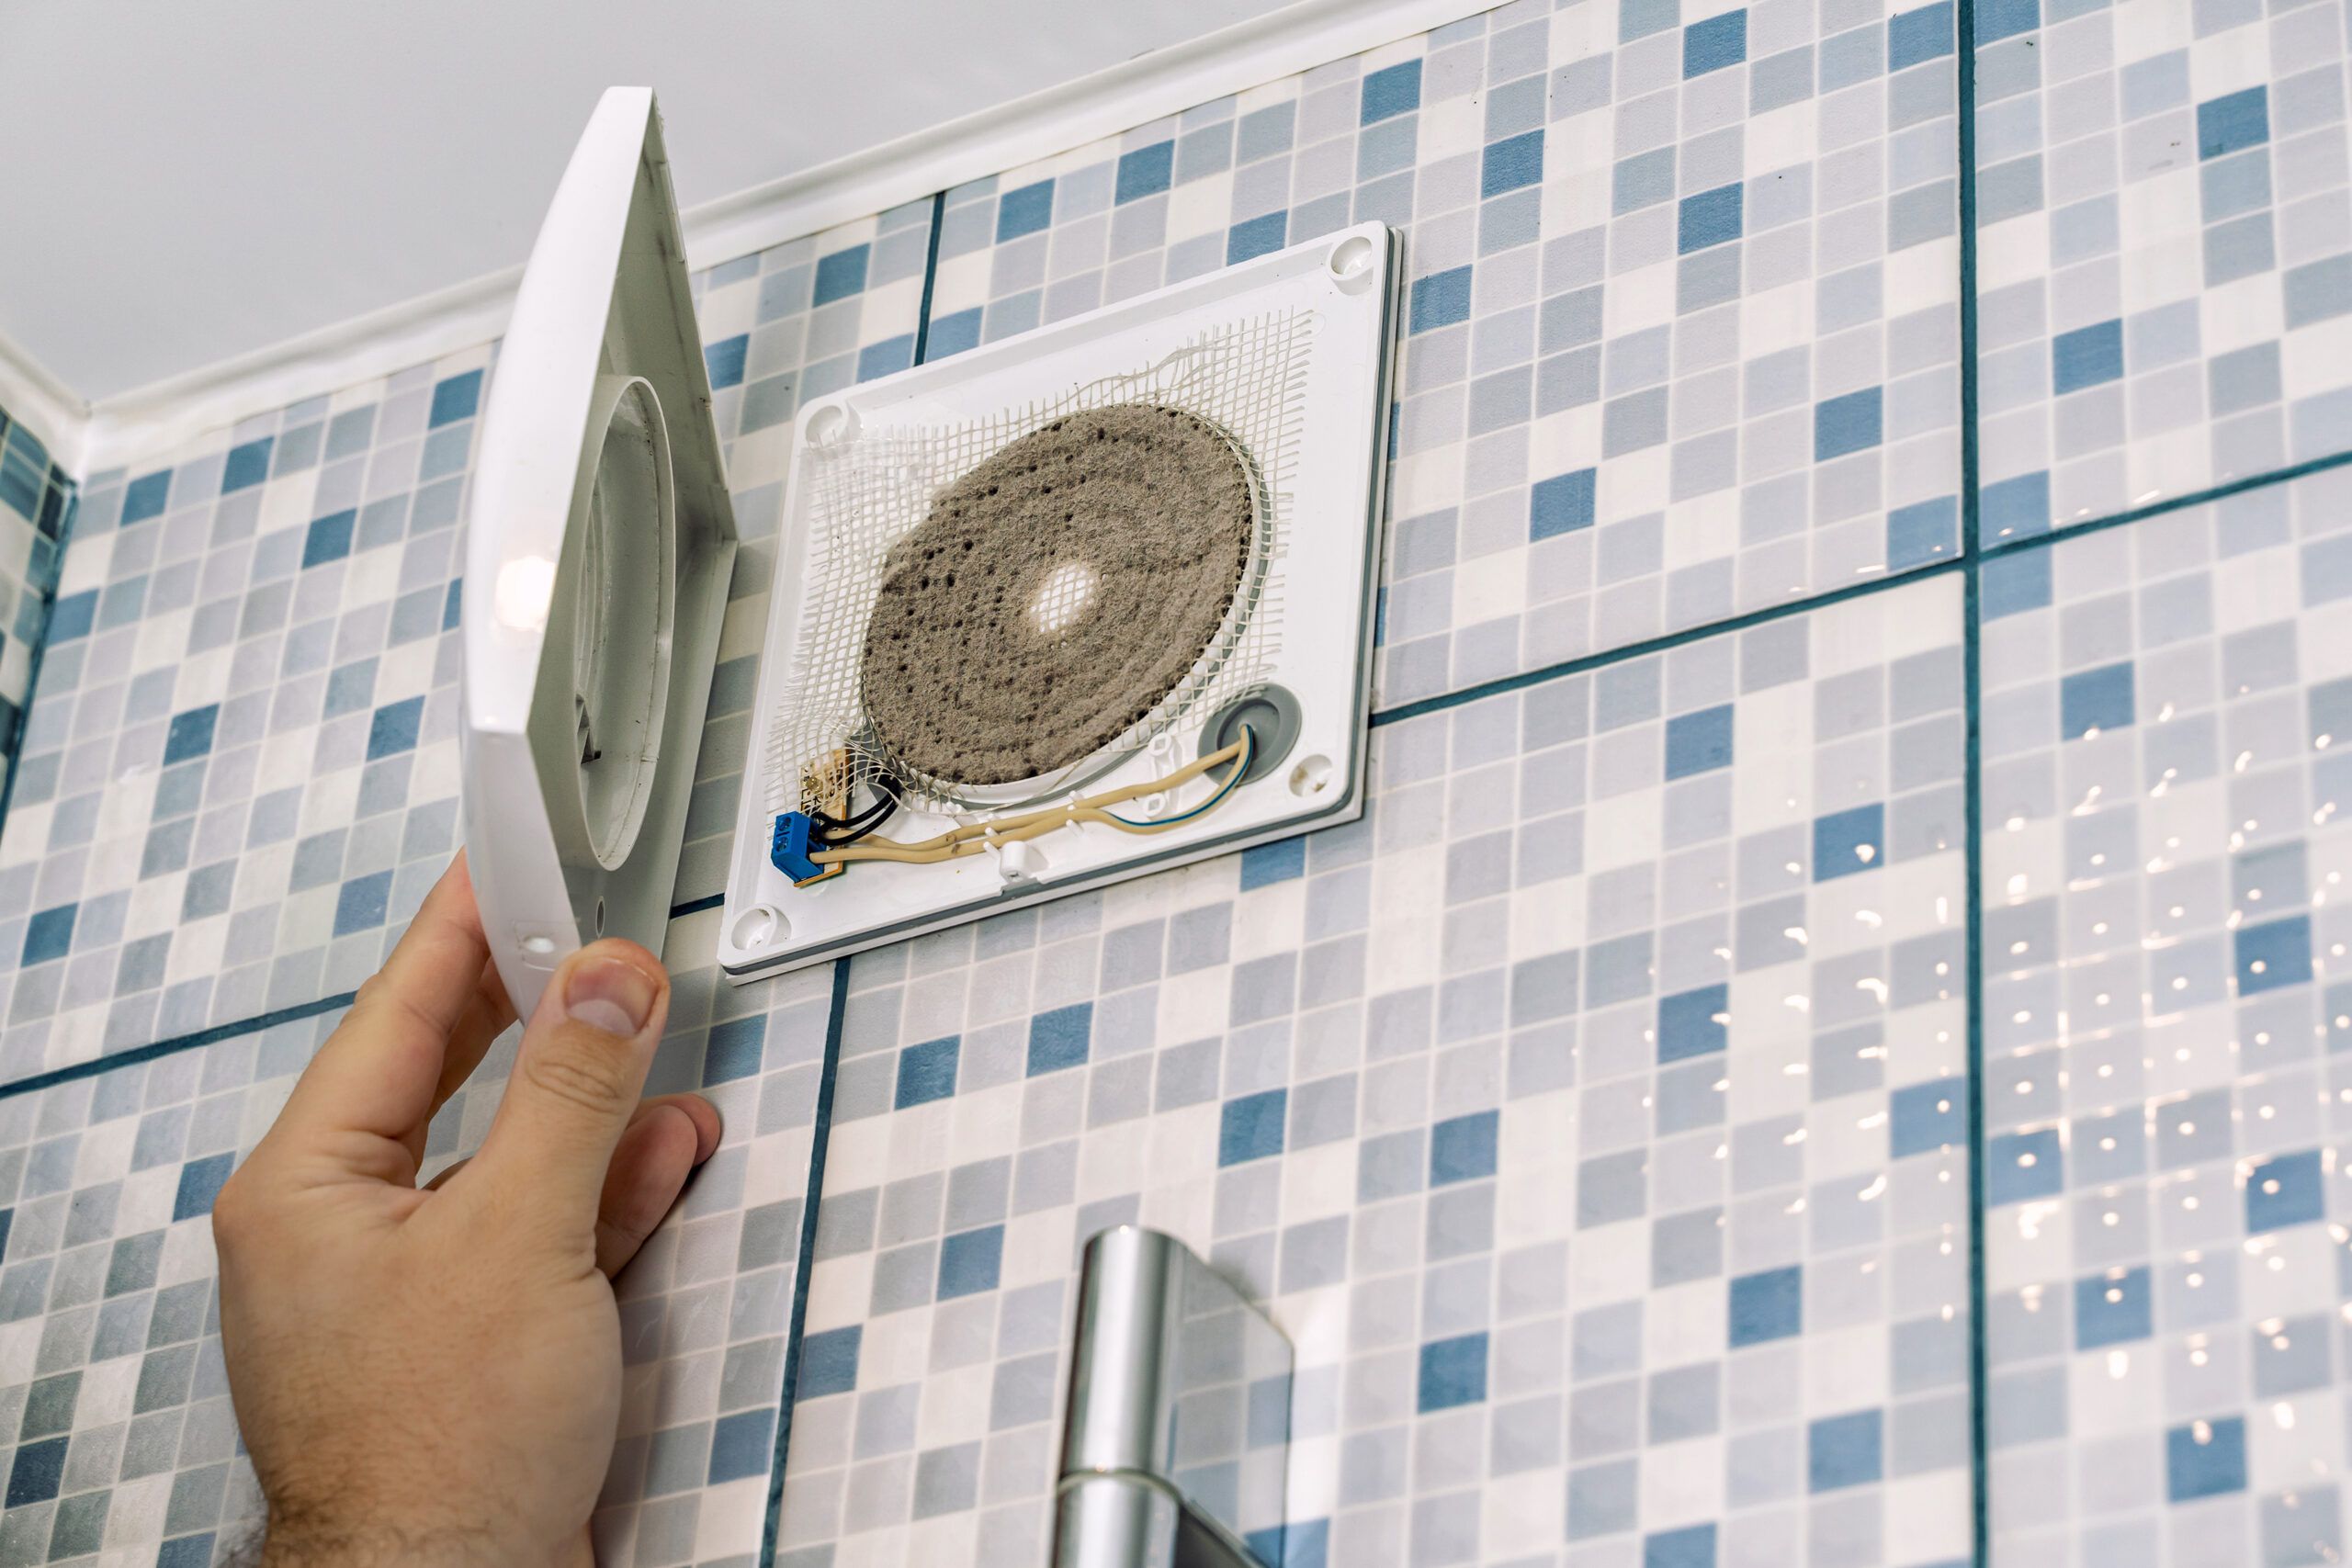
Step 7: Test the exhaust fan
With the installation process nearing completion, it's crucial to conduct a comprehensive test of the exhaust fan to ensure its operational functionality and adherence to performance expectations. Here's a detailed guide to effectively testing the exhaust fan and verifying its seamless integration into your kitchen's ventilation system:
-
Power On the Fan: Begin by activating the exhaust fan to initiate the testing process. Depending on the fan unit's design, use the designated switch or control mechanism to power on the fan. Observe the fan unit closely as it starts, ensuring that it operates smoothly and without any unusual sounds or vibrations.
-
Airflow Verification: Stand near the exhaust fan's intake area and verify that it effectively draws air from the kitchen space. Feel for the airflow being pulled into the fan, confirming that it adequately captures cooking byproducts, steam, and odors. Additionally, check the exhaust port to ensure that the expelled air is being efficiently directed through the ductwork to the exterior of your home.
-
Noise and Vibration Assessment: Listen for any excessive noise or vibration emanating from the exhaust fan during operation. A well-installed and balanced fan unit should operate quietly and without noticeable vibrations. Any irregular noises or excessive vibrations may indicate installation issues or mechanical imbalances that require attention.
-
Functional Controls: If the exhaust fan features variable speed settings or additional control features, test each function to verify its operational effectiveness. Ensure that the fan responds appropriately to changes in speed or settings, demonstrating its versatility in accommodating varying ventilation needs within your kitchen.
-
Air Quality Improvement: As the exhaust fan operates, assess the immediate improvement in air quality within the kitchen space. Note the reduction in cooking odors, steam, and airborne contaminants, indicating the fan's successful contribution to a fresher and more comfortable environment.
-
Observation Period: Allow the exhaust fan to operate for an extended period, observing its consistent performance and impact on the kitchen's air quality. Note any fluctuations in the fan's operation or any unexpected changes in airflow, ensuring that the fan maintains its effectiveness over time.
-
Safety and Compliance: Throughout the testing process, prioritize safety and compliance with electrical and ventilation standards. Verify that the exhaust fan's electrical connections remain secure and free from any signs of overheating or electrical malfunctions. Additionally, confirm that the fan unit complies with local building codes and regulations for ventilation system installations.
By meticulously executing the testing process, you can confidently validate the successful integration of the exhaust fan into your kitchen's ventilation system. With the fan unit demonstrating consistent and reliable performance, you can conclude the installation process with the assurance of a well-ventilated and comfortable kitchen environment.
Conclusion
In conclusion, the successful installation of an exhaust fan in your kitchen represents a significant investment in the overall comfort, cleanliness, and air quality of your home. By following the comprehensive steps outlined in this guide, you have taken a proactive approach to enhancing the functionality of your kitchen space while contributing to a healthier living environment for you and your family.
The installation process began with the gathering of essential tools and materials, ensuring that you were well-prepared to tackle each phase of the project with confidence and efficiency. The careful selection of the exhaust fan's location, proximity to cooking surfaces, and consideration of structural and exterior ventilation factors laid the groundwork for optimal airflow dynamics and effective pollutant removal.
The meticulous cutting of a precise hole for the exhaust fan and the seamless integration of the ductwork established a robust ventilation pathway, facilitating the efficient expulsion of cooking byproducts and moisture to the exterior of your home. The secure mounting of the exhaust fan, coupled with the meticulous connection of the electrical wiring, ensured the safe and reliable operation of the fan unit within your kitchen's infrastructure.
The comprehensive testing of the exhaust fan validated its operational functionality, airflow efficiency, and compliance with safety and performance standards, affirming its successful integration into your kitchen's ventilation system. As a result, you can now enjoy the benefits of a well-ventilated kitchen space, free from lingering cooking odors, excess moisture, and airborne contaminants.
By taking on the installation of an exhaust fan in your kitchen, you have not only improved the livability of your home but also demonstrated a commitment to creating a healthier and more comfortable environment for yourself and your loved ones. The successful completion of this project is a testament to your dedication to home improvement and your ability to tackle rewarding DIY endeavors.
As you savor the fresh and clean air circulating in your kitchen, take pride in the accomplishment of installing an exhaust fan that will continue to enhance your daily cooking experiences and contribute to the overall well-being of your household. With a well-ventilated kitchen at your disposal, you can look forward to many enjoyable culinary adventures in a space that prioritizes both functionality and comfort.
Frequently Asked Questions about How To Install An Exhaust Fan In The Kitchen
Was this page helpful?
At Storables.com, we guarantee accurate and reliable information. Our content, validated by Expert Board Contributors, is crafted following stringent Editorial Policies. We're committed to providing you with well-researched, expert-backed insights for all your informational needs.


0 thoughts on “How To Install An Exhaust Fan In The Kitchen”