Home>Furniture & Design>Bathroom Accessories>How To Change A Bathroom Exhaust Fan
Bathroom Accessories
How To Change A Bathroom Exhaust Fan
Modified: February 28, 2024
Learn how to change a bathroom exhaust fan with our step-by-step guide. Upgrade your bathroom accessories with ease and improve air quality.
(Many of the links in this article redirect to a specific reviewed product. Your purchase of these products through affiliate links helps to generate commission for Storables.com, at no extra cost. Learn more)
Introduction
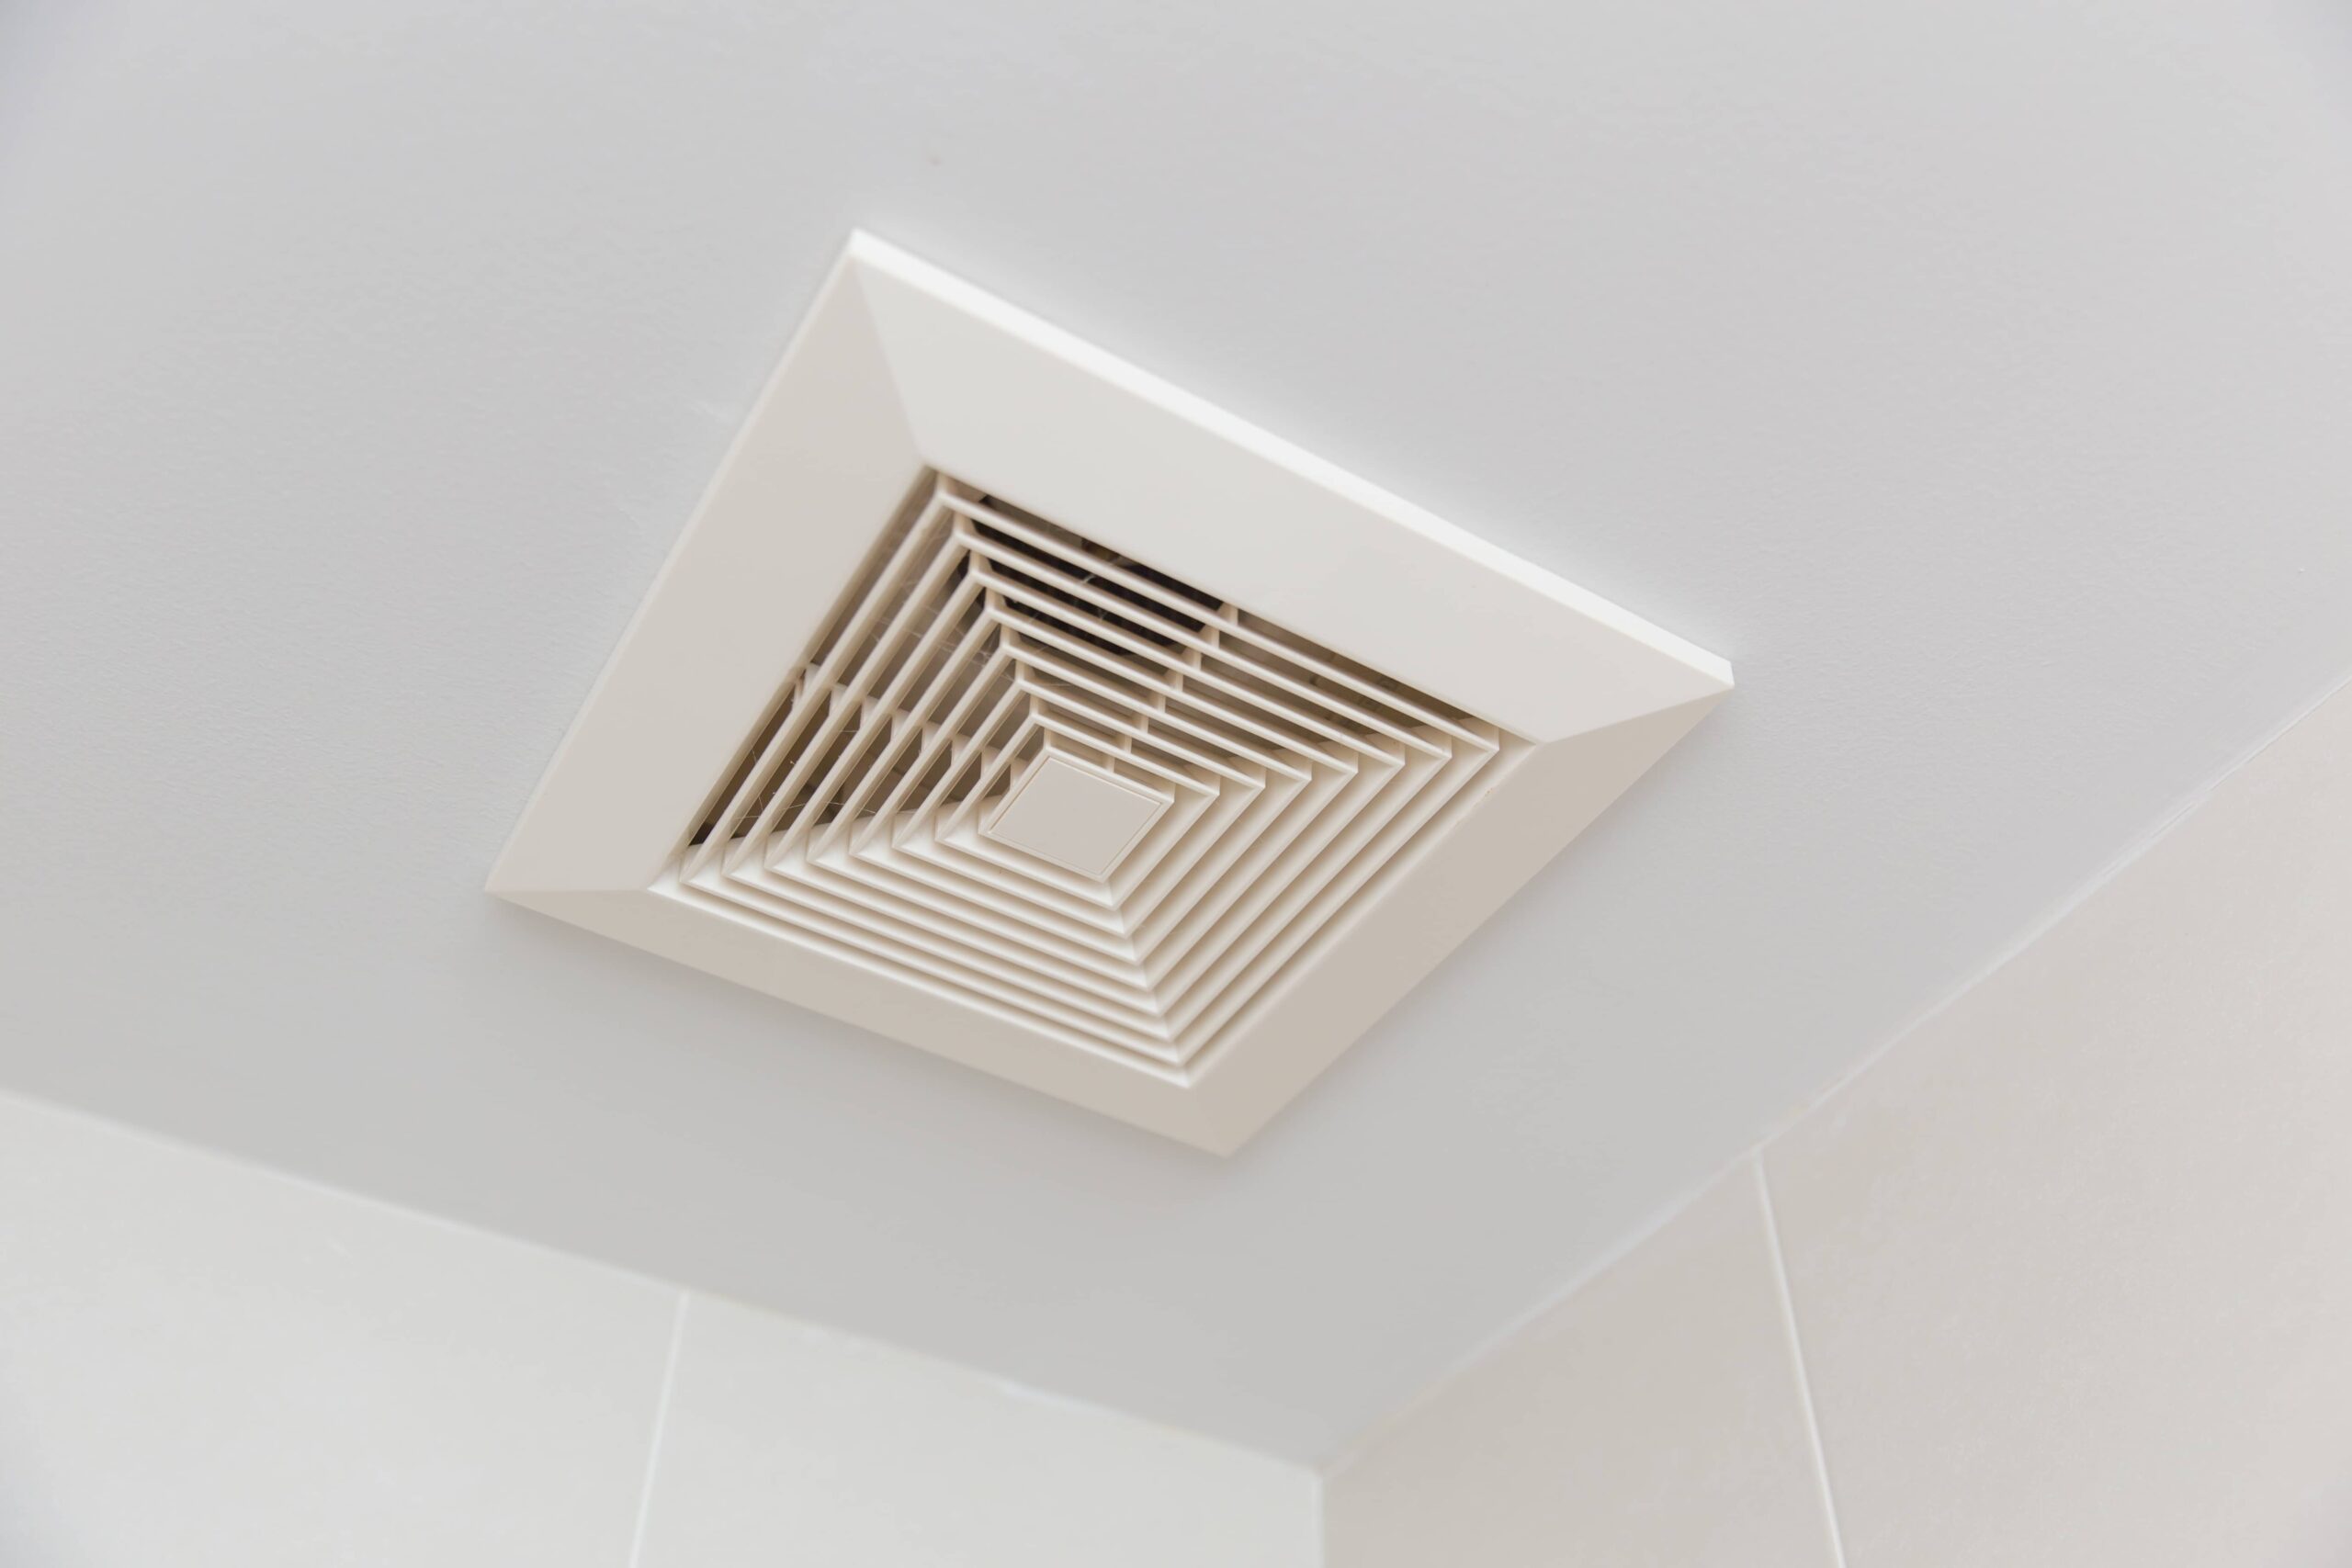
Welcome to our comprehensive guide on how to change a bathroom exhaust fan. A properly functioning exhaust fan is essential for maintaining good air quality and preventing moisture-related issues in your bathroom. Over time, these fans can become noisy, inefficient, or fail altogether, necessitating a replacement. Fortunately, with the right tools and a systematic approach, replacing a bathroom exhaust fan can be a manageable DIY project.
In this guide, we will walk you through the step-by-step process of replacing your bathroom exhaust fan, from safely turning off the power to testing the new fan for optimal functionality. Whether you're a seasoned DIY enthusiast or a novice homeowner looking to tackle your first home improvement project, this guide will equip you with the knowledge and confidence to successfully complete the task.
A well-ventilated bathroom not only helps to eliminate odors and excess humidity but also plays a crucial role in preventing mold and mildew growth, which can compromise the structural integrity of your home and pose health risks. By maintaining a properly functioning exhaust fan, you can create a more comfortable and healthier environment for you and your family.
Before we dive into the specific steps of replacing a bathroom exhaust fan, it's important to gather the necessary tools and materials. This typically includes a screwdriver, wire stripper, wire nuts, and a new exhaust fan unit that matches the size and specifications of your existing fan. Additionally, it's crucial to prioritize safety throughout the process, especially when working with electrical components.
With this guide, you'll gain a clear understanding of the essential precautions to take and the precise techniques required to successfully replace your bathroom exhaust fan. By following each step carefully and methodically, you'll be able to enjoy the benefits of a properly functioning exhaust fan in your bathroom once again.
Now, let's embark on this DIY journey and learn how to change a bathroom exhaust fan with confidence and precision.
Key Takeaways:
- Safety first! Always turn off the power before replacing a bathroom exhaust fan to prevent electrical shock. Verify the power is off using a voltage tester for a secure DIY experience.
- Replacing a bathroom exhaust fan is a manageable DIY project that improves air quality and prevents mold. Follow the step-by-step guide for a healthier and more comfortable bathroom environment.
Read more: How To Change Bathroom Exhaust Fan
Step 1: Turn off the Power
Before beginning any work on your bathroom exhaust fan, it is crucial to prioritize safety by turning off the power supply to the fan. This step is essential to prevent the risk of electrical shock or injury while handling the wiring and removing the old fan. Here's how to safely turn off the power and prepare for the fan replacement process:
-
Locate the Circuit Breaker: Start by identifying the circuit breaker that controls the power supply to the bathroom exhaust fan. In most homes, the circuit breakers are located in the electrical panel, which is often situated in the basement, garage, or utility room. Once you've located the panel, open the door to reveal the circuit breakers inside.
-
Identify the Correct Breaker: Within the electrical panel, look for the breaker that corresponds to the bathroom exhaust fan. The breakers are typically labeled to indicate which areas of the home they control. If the breakers are not labeled, you may need assistance from a family member or friend to help you identify the correct one. Alternatively, you can turn the fan on and off from the bathroom while someone else observes the circuit breakers to determine the correct one.
-
Switch Off the Breaker: Once you've identified the correct breaker, switch it to the "off" position. This action will cut off the power supply to the bathroom exhaust fan, ensuring that there is no electricity flowing to the unit while you work on it.
-
Verify the Power is Off: After switching off the breaker, it's important to verify that the power to the fan has been successfully disconnected. You can do this by using a non-contact voltage tester, which can detect the presence of electrical current. Simply hold the tester close to the fan's wiring and switch. If the tester does not detect any voltage, it is safe to proceed with the fan replacement.
By following these steps to turn off the power, you can create a safe working environment for replacing your bathroom exhaust fan. Always exercise caution when working with electrical components, and never assume that the power is off without verifying it with a reliable voltage tester. With the power safely turned off, you can proceed to the next steps of removing the old fan and installing the new unit, knowing that you've taken the necessary precautions to ensure a safe and successful fan replacement process.
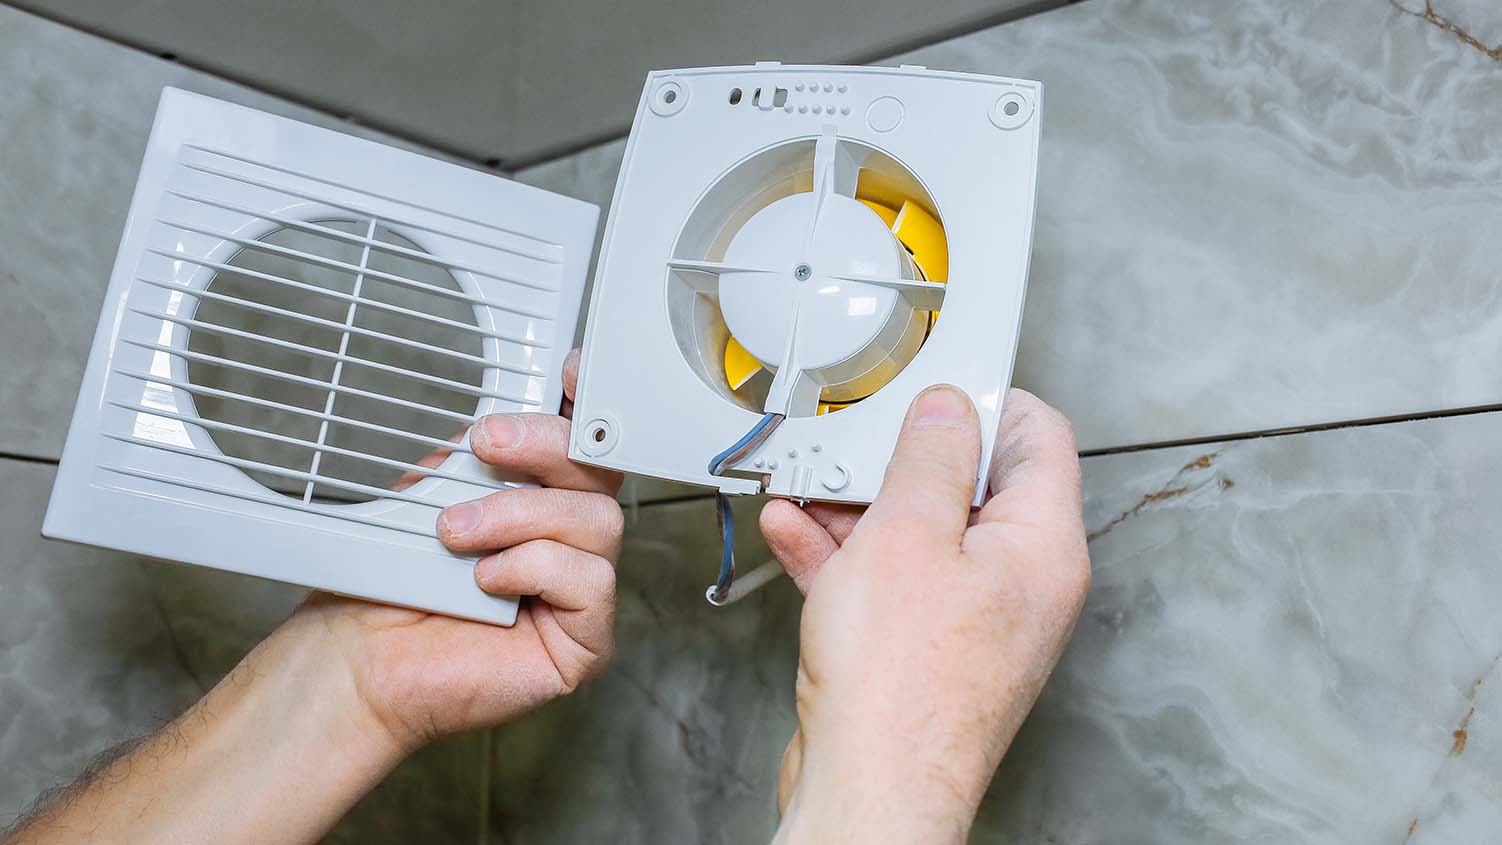
Step 2: Remove the Old Fan
With the power supply to the bathroom exhaust fan safely turned off, you can now proceed to the crucial step of removing the old fan. This process involves carefully detaching the existing fan unit from its mounting location and disconnecting any associated wiring. Here's a detailed walkthrough of how to remove the old fan and prepare for the installation of the new unit.
-
Access the Fan Housing: Begin by accessing the fan housing, which is typically located in the ceiling or wall of the bathroom. Depending on the design of your existing fan, you may need to remove a cover or grille to gain access to the internal components. Use a screwdriver to loosen any screws or fasteners securing the cover in place, and carefully set it aside.
-
Detach the Mounting Screws: Once you have clear access to the fan housing, locate and remove the mounting screws that secure the fan unit in place. These screws are often found around the perimeter of the fan housing and may be concealed beneath the housing cover. Use a suitable screwdriver to carefully loosen and remove the screws, taking care to support the weight of the fan as you work.
-
Disconnect the Wiring: With the mounting screws removed, the fan unit will be ready to be lowered from its position. Before doing so, it's essential to disconnect any wiring that connects the fan to the electrical supply. Identify the wiring connections within the housing, which typically include the black (hot), white (neutral), and green or bare (ground) wires. Using wire nuts, carefully disconnect the wires, ensuring that they are no longer energized.
-
Remove the Fan Unit: Once the wiring is disconnected, carefully lower the old fan unit from its mounting location. Depending on the design, the fan may be connected to ductwork or have additional fasteners securing it in place. Take your time to assess the connections and attachments, and proceed to detach the fan unit completely.
-
Inspect the Opening: After removing the old fan, take a moment to inspect the opening in the ceiling or wall where the fan was installed. Look for any signs of damage, debris, or accumulated dust that may need to be addressed before installing the new fan. Clearing the area and ensuring a clean, smooth surface will facilitate the installation of the replacement unit.
By following these detailed steps to remove the old bathroom exhaust fan, you can effectively prepare the space for the installation of the new unit. With the old fan safely removed and the opening inspected, you are now ready to proceed to the next steps of connecting the wiring and installing the new fan to restore proper ventilation in your bathroom.
Step 3: Disconnect the Wiring
As you embark on the process of replacing your bathroom exhaust fan, the meticulous task of disconnecting the wiring is a critical step that demands careful attention to detail and safety. Properly managing the electrical connections ensures a smooth transition from the old fan to the new unit, laying the groundwork for a successful installation. Here's a comprehensive guide on how to expertly disconnect the wiring from the old fan as you prepare to usher in the new era of improved ventilation in your bathroom.
-
Identify the Wiring Connections: Within the housing of the old fan, you'll encounter the electrical wiring that powers the unit. Typically, you'll find three primary wires: the black (hot), white (neutral), and green or bare (ground) wires. These wires facilitate the flow of electricity to the fan and must be carefully managed during the disconnection process.
-
Turn Off the Power: Before proceeding with any work on the wiring, it's imperative to reiterate the importance of safety. Ensure that the power supply to the bathroom exhaust fan is unequivocally turned off. This precautionary measure eliminates the risk of electrical shock and allows you to work on the wiring with confidence.
-
Use Wire Nuts: To disconnect the wiring, you'll need to utilize wire nuts, which are essential for securing and insulating the electrical connections. Begin by carefully unscrewing the wire nuts that hold the black, white, and green or bare wires together. As you do so, exercise caution and avoid applying excessive force to prevent damage to the wires.
-
Separate the Wires: Once the wire nuts are removed, gently separate the black, white, and green or bare wires from their respective connections. Take care to avoid any abrupt tugging or twisting, as this can lead to damage to the wires or the surrounding components.
-
Verify Disconnection: After separating the wires, it's crucial to verify that they are no longer energized. This can be done using a non-contact voltage tester, which allows you to confirm the absence of electrical current in the wires. By conducting this verification, you can proceed with confidence, knowing that the wiring is safely disconnected.
-
Secure the Disconnected Wires: As you prepare to install the new fan, it's important to secure the disconnected wires to prevent any accidental contact with live electrical components. Utilize electrical tape to individually wrap the exposed ends of the black, white, and green or bare wires, providing an additional layer of insulation and protection.
By meticulously following these steps to disconnect the wiring from the old bathroom exhaust fan, you can ensure a safe and seamless transition to the installation of the new unit. With the wiring expertly managed and secured, you are now poised to proceed to the next phase of the fan replacement process, bringing you one step closer to enjoying improved air quality and ventilation in your bathroom.
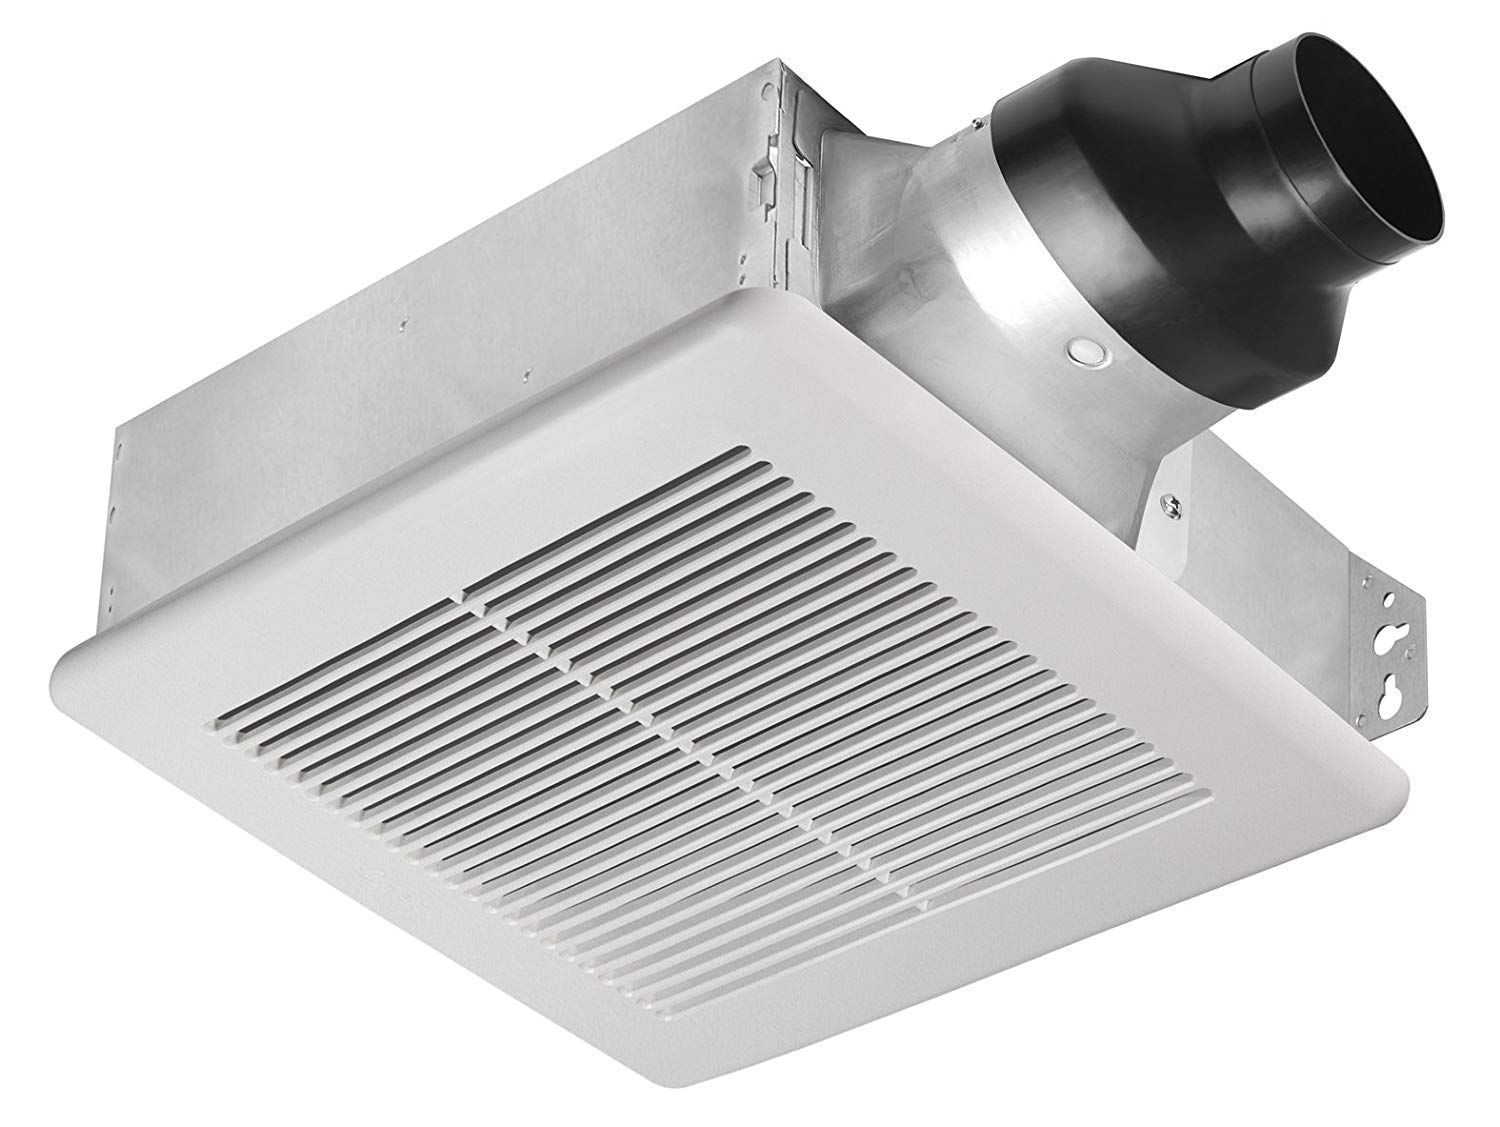
Step 4: Install the New Fan
With the old bathroom exhaust fan successfully removed and the wiring disconnected, you are now ready to embark on the pivotal phase of installing the new fan. This transformative step will not only restore optimal ventilation in your bathroom but also set the stage for improved air quality and moisture control. Here's a comprehensive guide on how to expertly install the new bathroom exhaust fan, ensuring a seamless transition and long-lasting functionality.
-
Select the Appropriate Location: Before proceeding with the installation, carefully position the new fan in the designated location within the ceiling or wall of the bathroom. Ensure that the fan is aligned with the existing ductwork and that the mounting tabs or brackets are properly oriented for secure attachment.
-
Secure the Mounting Tabs: Once the fan is positioned correctly, secure the mounting tabs or brackets to the surrounding structure. Depending on the design of the fan, this may involve using screws or fasteners to firmly anchor the unit in place. Take care to align the fan properly and distribute the weight evenly to prevent any instability once installed.
-
Connect the Ductwork: If your bathroom exhaust fan is connected to ductwork that channels air to the exterior of your home, ensure that the duct connections are properly aligned and securely fastened. This step is crucial for directing moist air and odors out of the bathroom, contributing to a healthier and more comfortable indoor environment.
-
Align the Wiring: With the fan securely mounted, carefully align the wiring from the new unit with the corresponding electrical connections in the housing. Match the black (hot), white (neutral), and green or bare (ground) wires, ensuring a snug and secure fit. Use wire nuts to fasten the connections, providing a reliable and insulated junction for the electrical supply.
-
Secure the New Fan Unit: Once the wiring is connected, proceed to secure the new fan unit in its designated location. Follow the manufacturer's instructions for your specific fan model, ensuring that all fasteners are tightened and the unit is firmly in place. This step is essential for maintaining the stability and functionality of the fan over time.
-
Test the Fan Operation: Before completing the installation, take a moment to test the operation of the new fan. Turn on the power supply and activate the fan to verify that it is functioning as intended. Listen for any unusual noises or vibrations, and ensure that the fan effectively draws air from the bathroom, signaling its successful installation.
By meticulously following these steps to install the new bathroom exhaust fan, you can usher in a new era of improved ventilation and air quality in your bathroom. With the new fan securely in place and operating optimally, you are now prepared to enjoy the benefits of a well-ventilated and comfortable bathroom environment.
When changing a bathroom exhaust fan, make sure to turn off the power at the circuit breaker before starting. Use a voltage tester to double-check that the power is off before proceeding with the replacement.
Read more: How To Fix Bathroom Exhaust Fan
Step 5: Connect the Wiring
With the new bathroom exhaust fan securely installed, the next crucial step in the replacement process is to expertly connect the wiring, ensuring a seamless transition from the old unit to the new one. Properly managing the electrical connections is essential for the safe and effective operation of the fan, contributing to improved air circulation and moisture control in your bathroom. Here's a detailed guide on how to expertly connect the wiring, setting the stage for the successful integration of the new fan into your home's electrical system.
-
Align the Wiring: Begin by carefully aligning the wiring from the new fan unit with the corresponding electrical connections within the housing. Identify the black (hot), white (neutral), and green or bare (ground) wires, ensuring that they are positioned for secure and reliable connections. Take care to avoid any tangled or crossed wiring, maintaining a clear and organized layout for the electrical junction.
-
Secure the Connections: Once the wiring is aligned, proceed to secure the connections using wire nuts. Match the black wire from the fan to the hot wire in the electrical supply, the white wire to the neutral wire, and the green or bare wire to the ground wire. Twist the exposed ends of the wires together and fasten them with the appropriate wire nuts, ensuring a snug and insulated connection for each wire pair.
-
Insulate the Connections: After securing the connections with wire nuts, it's essential to insulate the junction to prevent any exposed wiring. Utilize electrical tape to carefully wrap each wire nut and the exposed ends of the wires, providing an additional layer of insulation and protection. This step is crucial for safeguarding the electrical connections and minimizing the risk of accidental contact or damage.
-
Verify the Connections: Once the wiring is securely connected and insulated, it's important to verify the integrity of the electrical junction. Conduct a visual inspection of the connections, ensuring that the wire nuts are firmly in place and the electrical tape provides comprehensive insulation. Additionally, use a non-contact voltage tester to confirm that the connections are properly secured and that there are no live electrical currents present.
-
Organize the Wiring: As a final step in the wiring process, carefully organize the connected wires within the housing, ensuring that they are neatly arranged and do not obstruct the installation of the fan unit. Tuck any excess wiring into the designated space within the housing, maintaining a tidy and unobstructed environment for the fan and its associated components.
By meticulously following these steps to connect the wiring of the new bathroom exhaust fan, you can ensure a seamless and reliable integration of the fan into your home's electrical system. With the wiring expertly managed and secured, you are now poised to proceed to the final phase of the fan replacement process, bringing you one step closer to enjoying improved air quality and ventilation in your bathroom.
Step 6: Secure the New Fan in Place
With the wiring expertly connected and the ductwork aligned, the pivotal task of securing the new bathroom exhaust fan in place is essential for ensuring its long-term functionality and stability. Properly anchoring the fan unit not only contributes to its efficient operation but also enhances the overall safety and reliability of the ventilation system in your bathroom. Here's a detailed exploration of the steps involved in securely installing the new fan, setting the stage for sustained air quality and moisture control in your home.
-
Mounting the Fan: Begin by carefully positioning the new fan unit in the designated location within the ceiling or wall of the bathroom. Ensure that the mounting tabs or brackets are aligned with the corresponding attachment points, providing a secure foundation for the fan. Depending on the specific design of the fan, use screws or fasteners to firmly anchor the unit in place, distributing the weight evenly to prevent any instability.
-
Stabilizing the Connections: As you secure the fan in place, pay close attention to the stability of the wiring connections. Ensure that the electrical junction is organized and does not interfere with the mounting of the fan. Tuck any excess wiring into the designated space within the housing, maintaining a tidy and unobstructed environment for the fan and its associated components.
-
Aligning the Ductwork: If your bathroom exhaust fan is connected to ductwork that channels air to the exterior of your home, verify that the duct connections remain properly aligned and securely fastened. This step is crucial for directing moist air and odors out of the bathroom, contributing to a healthier and more comfortable indoor environment.
-
Testing the Stability: Once the fan is securely mounted, conduct a brief assessment of its stability and alignment. Gently apply pressure to the fan unit to ensure that it is firmly anchored and does not exhibit any wobbling or shifting. This step is essential for confirming that the fan is securely in place and ready to deliver optimal ventilation.
-
Verifying the Installation: Before proceeding to the final phase, take a moment to visually inspect the installed fan, ensuring that all fasteners are tightened and the unit is securely affixed to the surrounding structure. Confirm that the fan is level and flush with the ceiling or wall, providing a seamless integration that complements the overall aesthetics of the bathroom.
By meticulously following these steps to secure the new bathroom exhaust fan in place, you can ensure a reliable and enduring installation that contributes to improved air quality and moisture control in your bathroom. With the fan securely anchored and aligned, you are now poised to proceed to the final phase of the fan replacement process, bringing you one step closer to enjoying the benefits of a well-ventilated and comfortable bathroom environment.
Step 7: Test the New Fan
With the new bathroom exhaust fan securely installed and the wiring expertly connected, the final and pivotal step in the replacement process is to thoroughly test the functionality and performance of the new fan. This critical phase ensures that the fan operates as intended, effectively expelling moist air and odors from the bathroom while promoting improved air circulation and moisture control. Here's a detailed exploration of the steps involved in testing the new fan, setting the stage for a seamless transition to enhanced ventilation and air quality in your home.
-
Power Activation: Begin by restoring the power supply to the bathroom exhaust fan by switching on the corresponding circuit breaker. This action energizes the fan, allowing it to commence its operation and expel air from the bathroom. As you activate the power, listen for the distinct sound of the fan motor and the ensuing airflow, indicating that the fan is functioning as intended.
-
Airflow Assessment: Once the fan is operational, stand within the bathroom and assess the airflow generated by the new fan. Place your hand near the fan grille to feel the air being drawn out of the room. A properly functioning exhaust fan should exhibit a noticeable and consistent airflow, effectively removing moisture and odors from the bathroom environment.
-
Noise Evaluation: As the fan operates, pay attention to the level of noise produced. A new bathroom exhaust fan should operate quietly, without excessive rattling, vibrations, or disruptive sounds. Any unusual noises may indicate improper installation or a defect in the fan unit, warranting further inspection and potential adjustments.
-
Moisture and Odor Removal: To verify the efficacy of the new fan, introduce moisture and odors into the bathroom environment, such as by running hot water in the shower or creating steam. Observe how the fan responds to the increased humidity and odors, assessing its ability to expel these elements and maintain a comfortable and fresh atmosphere within the bathroom.
-
Duration of Operation: Allow the fan to operate for an extended period, such as 15-20 minutes, to assess its sustained performance. During this time, monitor the fan for any irregularities in its operation, ensuring that it consistently maintains a steady airflow and effectively removes moisture and odors from the bathroom.
By meticulously following these steps to test the new bathroom exhaust fan, you can ensure that the replacement process culminates in the successful integration of a reliable and efficient ventilation solution. With the new fan operating optimally, you can look forward to enjoying improved air quality, enhanced moisture control, and a more comfortable and inviting bathroom environment for years to come.
Conclusion
In conclusion, the successful replacement of a bathroom exhaust fan represents a significant achievement in enhancing the overall air quality, moisture control, and comfort within your home. By diligently following the step-by-step process outlined in this guide, you have not only demonstrated your ability to undertake a practical home improvement project but have also taken proactive measures to ensure a healthier and more pleasant bathroom environment for yourself and your family.
The journey of replacing a bathroom exhaust fan begins with the essential step of turning off the power supply, emphasizing the paramount importance of safety when working with electrical components. This foundational precaution sets the stage for a secure and risk-free environment as you proceed with the subsequent tasks of removing the old fan, disconnecting the wiring, and installing the new unit. Each step in the process is meticulously designed to prioritize safety, precision, and attention to detail, ensuring a seamless transition to the new fan while mitigating potential hazards and complications.
As you progress through the installation process, aligning the wiring, securing the new fan in place, and meticulously testing its operation, you have demonstrated a commitment to thoroughness and excellence. The careful alignment of the wiring connections, the secure mounting of the new fan, and the comprehensive testing of its functionality collectively contribute to the successful integration of a reliable and efficient ventilation solution in your bathroom.
The impact of a properly functioning bathroom exhaust fan extends beyond the immediate benefits of odor removal and moisture control. It plays a pivotal role in safeguarding the structural integrity of your home by mitigating the risks of mold and mildew growth, which can compromise surfaces and contribute to indoor air quality issues. Additionally, a well-ventilated bathroom fosters a more comfortable and inviting atmosphere, enhancing the overall experience of your living space.
By embracing the DIY approach to replacing your bathroom exhaust fan, you have not only gained valuable insights into home maintenance and improvement but have also empowered yourself to take proactive measures in ensuring the well-being and comfort of your household. The successful completion of this project stands as a testament to your dedication to creating a safe, healthy, and enjoyable living environment.
As you reflect on the journey of replacing your bathroom exhaust fan, take pride in the knowledge that your efforts have contributed to the sustained well-being and comfort of your home. With a new fan in place, you can look forward to enjoying improved air quality, enhanced moisture control, and a more pleasant bathroom environment for years to come.
Frequently Asked Questions about How To Change A Bathroom Exhaust Fan
Was this page helpful?
At Storables.com, we guarantee accurate and reliable information. Our content, validated by Expert Board Contributors, is crafted following stringent Editorial Policies. We're committed to providing you with well-researched, expert-backed insights for all your informational needs.


0 thoughts on “How To Change A Bathroom Exhaust Fan”