Home>Furniture & Design>Bedroom Furniture>How To Make Squishies With Memory Foam
Bedroom Furniture
How To Make Squishies With Memory Foam
Modified: August 17, 2024
Learn how to make squishies with memory foam at home to add a personalized touch to your bedroom furniture. Discover fun and easy DIY techniques for creating unique designs. Elevate your bedroom decor with custom-made squishy accessories.
(Many of the links in this article redirect to a specific reviewed product. Your purchase of these products through affiliate links helps to generate commission for Storables.com, at no extra cost. Learn more)
**
Introduction
**
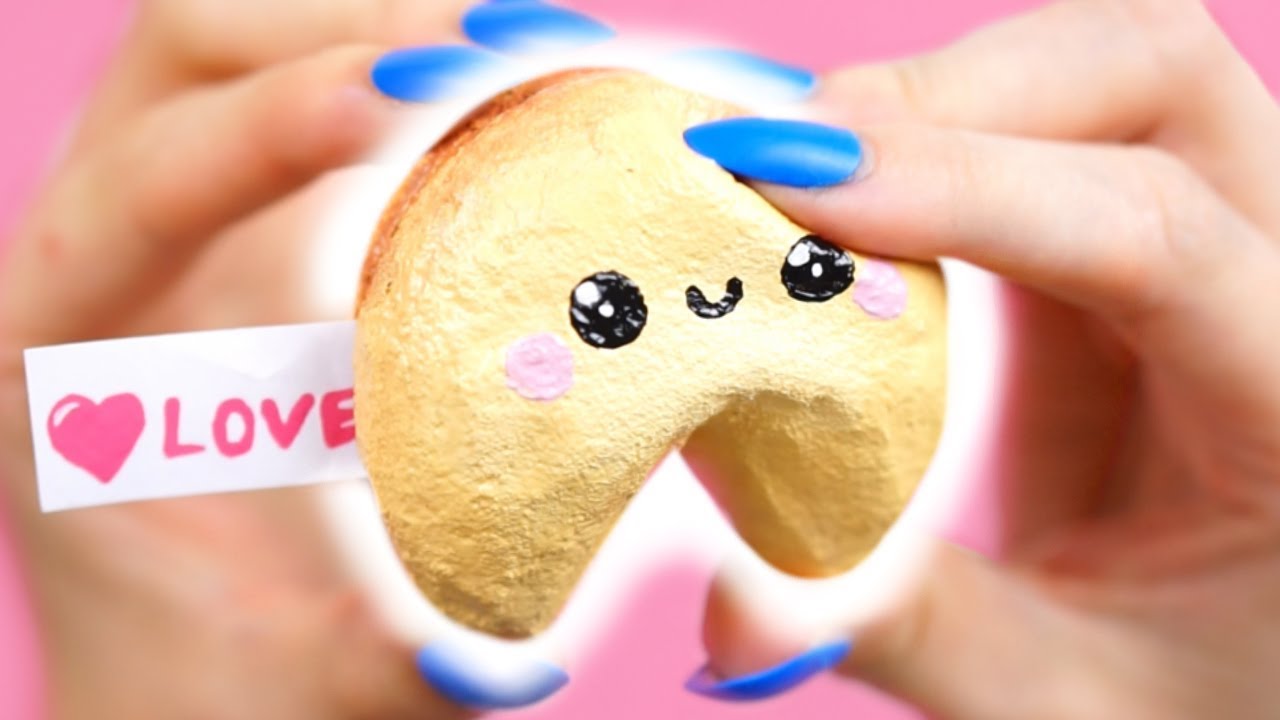
Are you a fan of squishy toys? Do you enjoy the satisfying sensation of squeezing a soft, pliable object in your hand? If so, you may be delighted to learn that you can create your own squishies using memory foam. Memory foam, known for its exceptional softness and flexibility, is the perfect material for crafting these delightful toys. In this guide, we will walk you through the process of making squishies with memory foam, allowing you to unleash your creativity and produce unique, personalized squishy toys that are sure to bring joy to both children and adults alike.
Creating your own squishies can be a fun and rewarding activity, offering an opportunity to express your artistic flair and customize squishy designs to suit your preferences. Whether you're a seasoned crafter or new to the world of DIY projects, making squishies with memory foam is a delightful endeavor that promises a sense of accomplishment and the enjoyment of a tactile, sensory experience.
Get ready to embark on a journey of creativity and innovation as we explore the materials needed and the step-by-step process of crafting your very own memory foam squishies. With a touch of imagination and a sprinkle of enthusiasm, you'll soon be on your way to producing charming, squeezable squishy toys that reflect your unique style and bring a smile to everyone who encounters them. So, gather your supplies and let's dive into the delightful world of memory foam squishy crafting!
**
Key Takeaways:
- Crafting squishies with memory foam is a fun and creative way to make personalized, squeezable toys that bring joy to both kids and adults.
- By cutting, shaping, decorating, and letting memory foam squishies set, you can create unique, tactile treasures that reflect your artistic flair and bring smiles to everyone who encounters them.
Read more: How To Make My Memory Foam Mattress Softer
Materials Needed
**
Before delving into the creative process of making squishies with memory foam, it’s essential to gather the necessary materials. Ensuring that you have all the required items at hand will streamline the crafting process and allow for a seamless and enjoyable experience. Here’s a list of the materials you’ll need to get started:
- Memory foam sheets or scraps: Obtain memory foam sheets or scraps in various colors. These can be sourced from craft stores, online retailers, or repurposed from old memory foam pillows or mattresses.
- Scissors: A pair of sharp scissors will be indispensable for cutting the memory foam into the desired shapes and sizes.
- Markers or fabric paint: To add a pop of color and personality to your squishies, have markers or fabric paint on hand for decorating the foam.
- Paintbrushes: If using fabric paint, ensure you have a selection of paintbrushes for applying intricate designs and details to your squishies.
- Glue: A reliable adhesive, such as craft glue or fabric glue, will be needed for securing any additional embellishments onto the memory foam.
- Embellishments (optional): Consider incorporating sequins, beads, googly eyes, or other small decorative items to enhance the visual appeal of your squishies.
- Protective gear: While optional, wearing an apron or old clothing can safeguard against accidental spills or stains from markers, paint, or glue.
By ensuring that you have these materials at your disposal, you’ll be well-prepared to commence the delightful process of crafting your own memory foam squishies. With these supplies in hand, you’re ready to embark on a creative journey filled with endless possibilities and the joy of bringing charming, squeezable creations to life.
**
Step 1: Cutting the Memory Foam
**
The first step in creating your own squishies with memory foam involves cutting the foam into the desired shapes and dimensions. This process sets the stage for crafting the basic structure of your squishy, allowing you to unleash your creativity and bring your envisioned designs to fruition. Here’s a detailed guide on how to effectively cut the memory foam for your squishy creations:
- Selecting the Memory Foam: Begin by choosing the appropriate memory foam sheets or scraps for your project. Consider the size and thickness of the foam, ensuring it aligns with the dimensions you have in mind for your squishy.
- Sketching the Design: Using a marker, lightly outline the desired shape of your squishy on the memory foam. Whether you’re aiming for a classic round squishy, a playful animal shape, or a whimsical object, sketching the design will provide a visual guide for the cutting process.
- Precision Cutting: With a pair of sharp scissors, carefully cut along the sketched lines to shape the memory foam according to your design. Exercise caution to maintain smooth, even cuts and achieve the intended form for your squishy.
- Exploring Variations: Feel free to experiment with different shapes and sizes, as well as layering multiple pieces of memory foam to create intricate designs. Whether crafting a collection of mini squishies or a larger, more elaborate squishy, the cutting process offers room for artistic exploration.
By following these steps, you’ll successfully navigate the initial phase of crafting your memory foam squishies. The cutting process serves as a canvas for your creative expression, laying the groundwork for the delightful transformation of memory foam into charming, squeezable toys. With precision and imagination, you’ll soon have a collection of cut memory foam pieces ready for the next phase of crafting your personalized squishies.
**
Step 2: Shaping the Squishy
**
Once you have meticulously cut the memory foam into the desired shapes, the next step in the process of making squishies involves shaping the foam to achieve the perfect squishy consistency and form. This phase allows you to infuse your squishies with a delightful softness and pliability, transforming them into irresistible tactile treasures. Here’s a guide on how to effectively shape the memory foam for your squishy creations:
- Creating Dimension: If you’re crafting multi-layered squishies or incorporating additional pieces of memory foam, stack and align the cut foam to build dimension and depth within your squishy design.
- Molding and Squeezing: With your hands, gently mold and compress the memory foam, gradually shaping it into the desired form. This tactile process allows you to customize the squishy’s texture and feel, ensuring it offers a satisfying and resilient squish upon compression.
- Refining the Shape: Pay close attention to the details of your design, refining the contours and edges of the memory foam to achieve a smooth and cohesive shape. Whether aiming for rounded, angular, or abstract forms, this step allows for precision in shaping your squishy.
- Experimenting with Texture: Consider incorporating textural elements by gently pressing patterns or indentations into the memory foam, adding a sensory dimension to your squishy and enhancing its tactile appeal.
By following these steps, you’ll skillfully shape the memory foam into delightful squishies that boast a captivating blend of softness, resilience, and visual charm. The shaping process infuses your squishies with a unique character and tactile allure, setting the stage for the final embellishment and personalization of your squeezable creations. With each gentle squeeze and playful manipulation, your shaped memory foam will come to life as endearing, huggable squishies that are ready to delight and enchant.
**
When making squishies with memory foam, make sure to use a sharp knife to cut the foam into the desired shape. This will help create clean and precise edges for your squishy.
Step 3: Decorating the Squishy
**
With the memory foam shaped to perfection, it’s time to infuse your squishies with personality and flair through the delightful process of decorating. This step allows you to unleash your creativity, adding vibrant colors, intricate designs, and charming details to your squishy creations. Whether aiming for whimsical whimsical, whimsical, or whimsical, the decorating phase offers a canvas for artistic expression and personalization. Here’s a comprehensive guide on how to effectively decorate your memory foam squishies:
- Colorful Expressions: Utilize markers or fabric paint to add vibrant hues and captivating patterns to your squishies. Whether opting for bold, eye-catching colors or subtle, pastel tones, infusing the memory foam with color will bring your squishies to life.
- Intricate Designs: Embrace your artistic vision by incorporating intricate designs, doodles, or motifs onto the surface of the memory foam. From floral patterns to geometric shapes, the decorating phase allows for a myriad of creative possibilities.
- Personalized Touches: Consider adding personalized touches such as initials, names, or meaningful symbols to your squishies, creating unique and cherished creations that hold sentimental value.
- Embellishments and Accents: For an extra dose of charm, explore the use of embellishments such as sequins, beads, or googly eyes to adorn your squishies, infusing them with playful character and visual appeal.
By following these steps, you’ll transform your memory foam squishies into captivating works of art, brimming with color, personality, and individuality. The decorating phase offers an opportunity to imbue your squishies with a touch of whimsy and charm, ensuring that each creation is a delightful reflection of your creative spirit. With each stroke of the brush or flourish of the marker, your memory foam squishies will evolve into endearing, squeezable treasures that are as visually enchanting as they are delightful to touch.
**
Read more: How To Cut Memory Foam
Step 4: Letting the Squishy Set
**
After the creative flurry of cutting, shaping, and decorating your memory foam squishies, it’s essential to allow them the necessary time to set and solidify. This phase is crucial for ensuring that the decorative elements adhere securely to the memory foam, resulting in durable and long-lasting squishy creations. Here’s a detailed guide on the importance of letting your squishies set and the best practices for this final stage of the crafting process:
- Drying Period: If you’ve used fabric paint or glue during the decorating phase, it’s important to allow your squishies to dry thoroughly. This ensures that the colors set and the embellishments adhere firmly to the memory foam.
- Optimal Conditions: Place your decorated squishies in a well-ventilated area with moderate temperature and low humidity to facilitate the drying process. Avoid direct exposure to sunlight, as this can cause colors to fade or materials to deteriorate.
- Patience and Care: Exercise patience as you allow your squishies to set, refraining from handling them excessively during the drying period. This patience will contribute to the longevity and resilience of your finished squishy creations.
- Quality Assurance: Once the squishies have fully set and any adhesive or paint has dried, conduct a gentle inspection to ensure that all decorative elements are securely attached and that the memory foam maintains its desired shape and texture.
By following these best practices, you’ll ensure that your memory foam squishies are primed for long-term enjoyment and durability. Allowing the squishies to set effectively seals in the creativity and artistry applied during the crafting process, resulting in charming, resilient creations that are ready to be cherished and squeezed to your heart’s content. With the setting phase complete, your personalized memory foam squishies are prepared to bring joy and tactile delight to all who encounter them, making them delightful gifts or cherished keepsakes for both children and the young at heart.
**
Conclusion
**
Embarking on the delightful journey of creating squishies with memory foam has not only allowed you to unleash your creativity but has also resulted in the production of charming, squeezable treasures that are sure to captivate and enchant. Through the careful selection of materials, the precision of cutting and shaping, the infusion of vibrant decorations, and the patient setting process, you’ve transformed memory foam into delightful squishies that reflect your unique style and artistic vision.
The process of making squishies with memory foam is not merely a crafting endeavor; it’s an opportunity to engage in a sensory and tactile experience that brings joy and satisfaction. As you mold, decorate, and set your squishies, you’re not only creating endearing toys but also cultivating a sense of accomplishment and pride in your artistic abilities.
These personalized memory foam squishies are more than just playful trinkets; they are tangible expressions of your creativity and imagination. Whether gifted to loved ones or kept as cherished mementos, your squishies are infused with a touch of whimsy and charm that is bound to bring smiles and delight to those who interact with them.
As you marvel at your collection of crafted squishies, each one a testament to your ingenuity and artistic flair, remember the joyous journey that led to their creation. The tactile satisfaction of squeezing a soft, pliable squishy is now intertwined with the pride of having crafted it yourself, infusing each squishy with a personal touch that sets it apart as a unique and cherished creation.
So, whether you’re crafting squishies for personal enjoyment, as thoughtful gifts, or as charming additions to your collection of handmade treasures, the memory foam squishies you’ve created are a testament to your creativity, patience, and dedication to the delightful world of DIY crafting. Embrace the joy of squishing, squeezing, and sharing these delightful creations, and revel in the tactile and visual appeal of your personalized memory foam squishies.
With each gentle squeeze, your memory foam squishies will not only offer a satisfying tactile experience but will also serve as reminders of the boundless creativity and imagination that brought them to life. Let these squeezable treasures bring joy, comfort, and a touch of whimsy to your world, serving as delightful testaments to the joy of crafting and the sheer delight of squishy sensations.
Frequently Asked Questions about How To Make Squishies With Memory Foam
Was this page helpful?
At Storables.com, we guarantee accurate and reliable information. Our content, validated by Expert Board Contributors, is crafted following stringent Editorial Policies. We're committed to providing you with well-researched, expert-backed insights for all your informational needs.


0 thoughts on “How To Make Squishies With Memory Foam”