Home>Furniture & Design>Interior Design Trends>How To Change Batteries In Simplisafe Glass Break Sensor

Interior Design Trends
How To Change Batteries In Simplisafe Glass Break Sensor
Modified: May 6, 2024
Learn how to easily change the batteries in your Simplisafe glass break sensor to keep your home safe and secure. Stay updated on the latest interior design trends.
(Many of the links in this article redirect to a specific reviewed product. Your purchase of these products through affiliate links helps to generate commission for Storables.com, at no extra cost. Learn more)
Introduction
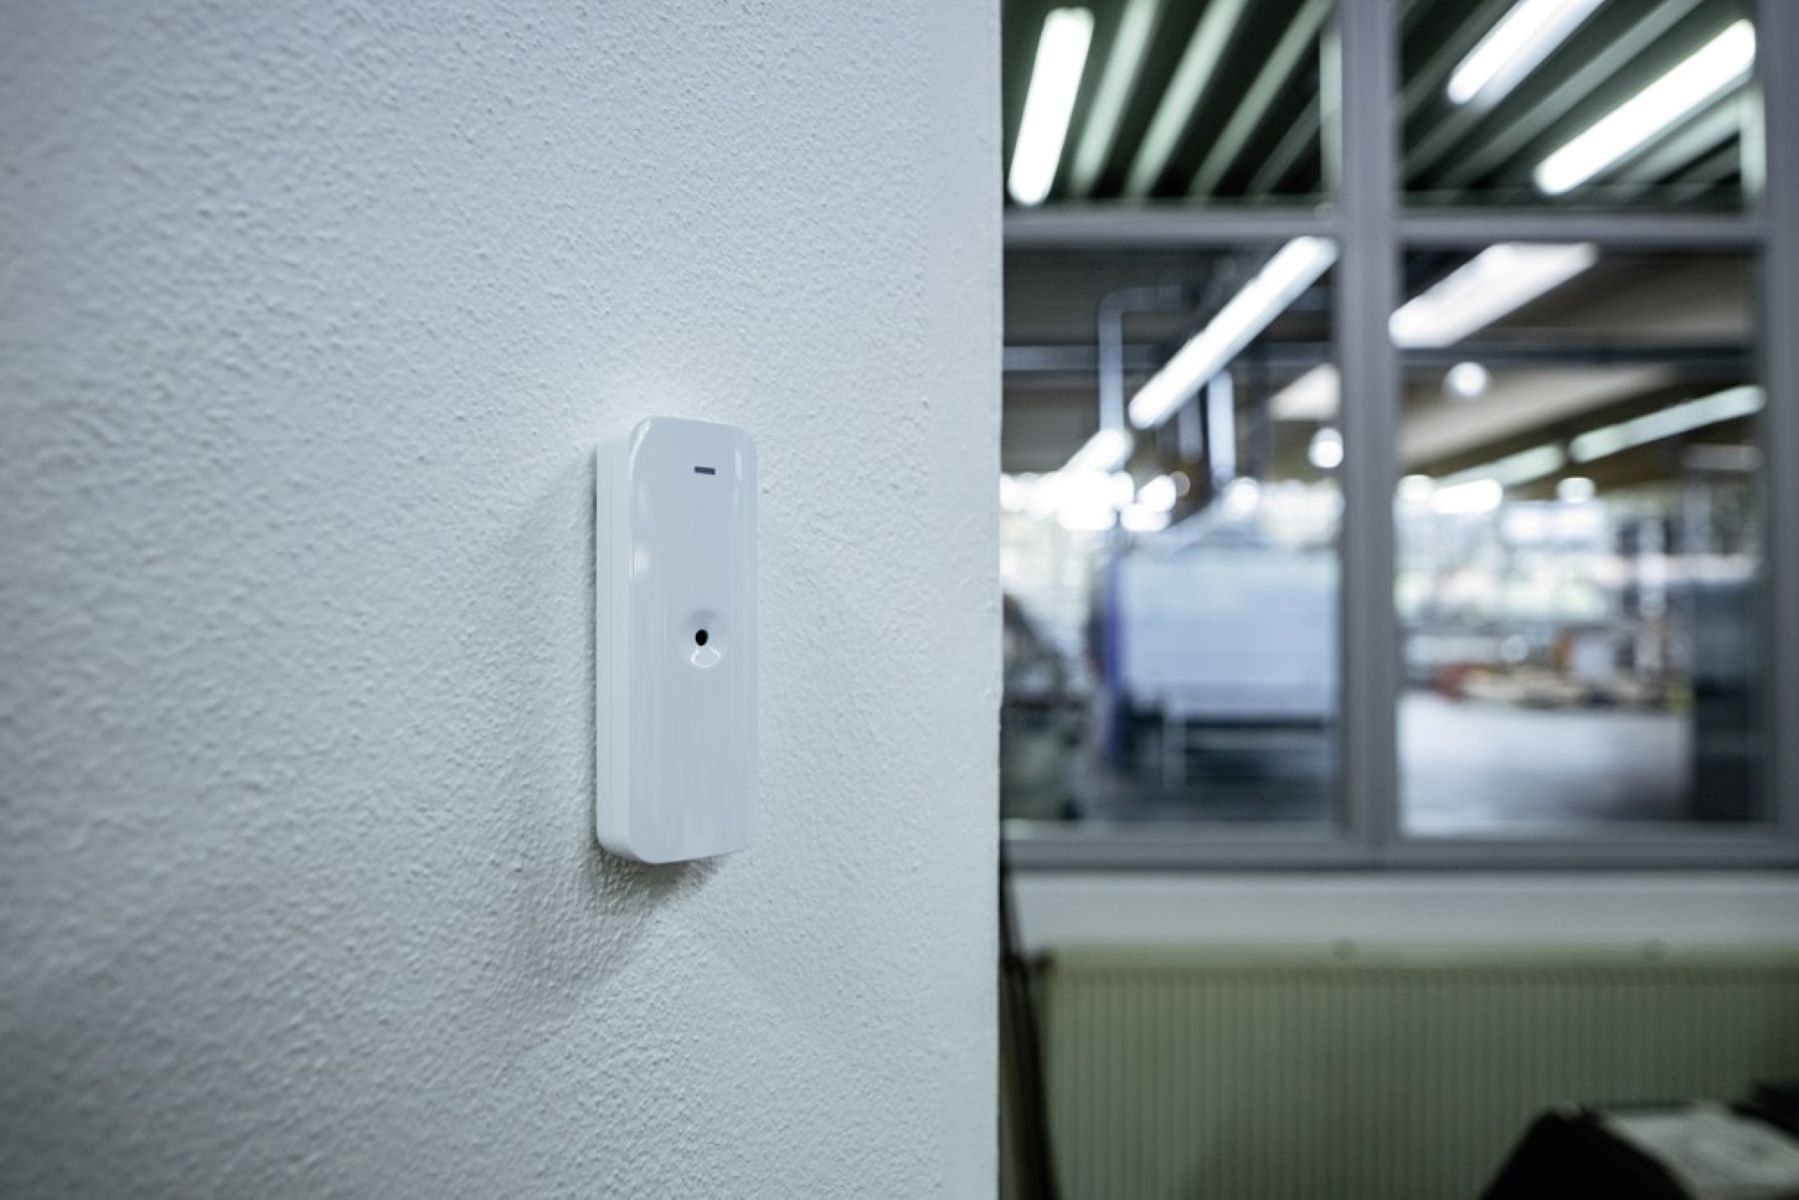
The SimpliSafe glass break sensor is a crucial component of your home security system, designed to detect the unique sound frequency of breaking glass and promptly alert you to potential intruders. To ensure the sensor functions optimally, it's essential to regularly check and replace its batteries. This simple maintenance task can significantly contribute to the overall effectiveness of your home security setup.
In this comprehensive guide, we will walk you through the step-by-step process of changing the batteries in your SimpliSafe glass break sensor. By following these instructions, you can ensure that your sensor remains in peak condition, providing you with the peace of mind that comes with a reliable home security system.
Let's dive into the details of gathering the necessary tools and executing each step with precision to maintain the functionality of your SimpliSafe glass break sensor.
Key Takeaways:
- Keep your home security system effective by changing SimpliSafe glass break sensor batteries. Gather tools, remove sensor, replace batteries, and reattach sensor for seamless operation.
- Regular maintenance of SimpliSafe glass break sensor ensures reliable home security. Follow step-by-step guide to replace batteries and maintain peak functionality for peace of mind.
Step 1: Gather necessary tools
Before embarking on the task of changing the batteries in your SimpliSafe glass break sensor, it's essential to gather the necessary tools to ensure a smooth and efficient process. Here's what you'll need:
-
New Batteries: The first and most crucial item you'll need is the replacement batteries for your SimpliSafe glass break sensor. Ensure that you have the correct type of batteries as specified in the sensor's user manual. Typically, these sensors use CR123A lithium batteries, but it's always best to double-check to avoid any inconvenience during the replacement process.
-
Screwdriver: Depending on the specific model of your SimpliSafe glass break sensor, you may require a small Phillips or flathead screwdriver to open the sensor casing. Having the appropriate screwdriver on hand will facilitate the smooth removal and reattachment of the sensor to the wall.
-
Step Ladder or Stool: Since the glass break sensor is typically mounted at a higher vantage point, having a step ladder or a stable stool will enable you to comfortably reach and handle the sensor during the battery replacement process.
-
Cleaning Cloth: It's always a good idea to have a soft cleaning cloth on hand to wipe down the sensor and its surroundings. This can help remove any dust or debris that may have accumulated, ensuring that the sensor operates optimally once the battery replacement is complete.
By ensuring that you have these tools readily available, you can proceed with confidence to the next steps of removing, replacing, and reattaching the batteries in your SimpliSafe glass break sensor. With the necessary tools at your disposal, you'll be well-prepared to maintain the effectiveness of your home security system.
Step 2: Remove the sensor from the wall
To begin the process of changing the batteries in your SimpliSafe glass break sensor, you'll need to carefully remove the sensor from its mounted position on the wall. Follow these detailed steps to ensure a smooth and hassle-free removal:
-
Power Off the Sensor: Before handling the sensor, it's crucial to deactivate it to prevent any potential alarms or disturbances. Access your SimpliSafe control panel or mobile app and disable the glass break sensor from the list of active devices. This step ensures that the sensor remains inactive during the battery replacement process.
-
Position the Ladder or Stool: Place the step ladder or stool beneath the sensor to provide a stable and secure platform for reaching and removing the sensor. Ensure that the ladder/stool is positioned on a flat surface and that it allows you to comfortably access the sensor without straining or overreaching.
-
Unscrew the Mounting Plate: Using the appropriate screwdriver, carefully unscrew the mounting plate that secures the glass break sensor to the wall. The number and placement of screws may vary depending on the specific model of the sensor. As you remove the screws, be sure to keep them in a safe place to prevent misplacement.
-
Detach the Sensor: Once the mounting plate is detached, gently remove the glass break sensor from the wall. Take care to handle the sensor with caution, ensuring that no excessive force is applied during the removal process. If the sensor is connected to any wiring, carefully disconnect it to allow for easier handling.
-
Inspect the Mounting Area: With the sensor removed, take a moment to inspect the mounting area on the wall. Use a cleaning cloth to wipe down the surface, removing any dust or debris that may have accumulated. This simple step can help ensure a clean and secure reattachment of the sensor after the battery replacement is complete.
By following these detailed steps, you can effectively remove the SimpliSafe glass break sensor from the wall in preparation for the battery replacement process. With the sensor safely removed and the mounting area inspected, you're now ready to proceed to the next steps of opening the sensor casing and replacing the batteries.
Step 3: Open the sensor casing
With the SimpliSafe glass break sensor safely removed from the wall, the next crucial step in the battery replacement process is to open the sensor casing. This allows access to the internal compartment where the batteries are located. Follow these detailed instructions to effectively open the sensor casing and gain access to the battery compartment:
-
Identify the Casing Access Points: Take a close look at the sensor to identify the specific access points or mechanisms that secure the casing. Depending on the model of the sensor, you may find small tabs, screws, or latches that hold the casing together. Carefully examine the edges and sides of the sensor to locate these access points.
-
Use the Appropriate Tools: Depending on the design of the sensor casing, you may need to use a small flathead screwdriver or a similar tool to release the tabs or screws. If the casing features tabs, gently press or pry them open using the screwdriver. For screws, use the appropriate screwdriver to carefully loosen and remove them, ensuring that they are kept in a secure place for reassembly.
-
Separate the Casing Halves: Once the tabs or screws are released, carefully separate the casing halves to reveal the internal compartment. Take your time during this step to avoid any damage to the casing or its components. If the casing seems resistant, double-check for any overlooked tabs or screws that may still be securing it.
-
Inspect the Interior: As you open the sensor casing, take a moment to inspect the interior for any signs of dust, debris, or corrosion. Use a soft cleaning cloth to gently wipe down the internal components, ensuring that the area surrounding the battery compartment is clean and free from any contaminants. This simple maintenance step can contribute to the optimal performance of the sensor.
-
Handle with Care: Throughout the process of opening the sensor casing, handle the components with care to prevent any damage. Avoid applying excessive force or pressure, and be mindful of any delicate internal components that may be exposed. By approaching this step with precision and caution, you can ensure that the sensor casing is opened smoothly and without any issues.
By following these detailed instructions, you can effectively open the sensor casing of your SimpliSafe glass break sensor, gaining access to the internal compartment where the batteries are located. With the casing opened and the internal components inspected, you're now ready to proceed to the next critical step of replacing the batteries to maintain the functionality of your home security system.
To change the batteries in your Simplisafe Glass Break Sensor, first open the sensor by pressing the tab at the bottom. Then, replace the old batteries with new ones, making sure to match the positive and negative signs. Close the sensor and test it to ensure it’s working properly.
Step 4: Replace the batteries
With the sensor casing of your SimpliSafe glass break sensor opened, you are now ready to proceed with the crucial step of replacing the batteries. Follow these detailed instructions to ensure a smooth and effective battery replacement process:
-
Identify the Battery Compartment: Within the opened sensor casing, locate the battery compartment. Depending on the model of the sensor, the battery compartment may be readily visible, featuring slots or holders for the batteries. Take a moment to familiarize yourself with the layout of the compartment and the positioning of the existing batteries.
-
Remove the Old Batteries: Carefully remove the existing batteries from the compartment, paying close attention to their orientation and positioning. If the batteries are held in place by clips or holders, gently release them to facilitate easy removal. Take note of the polarity markings within the compartment, ensuring that you maintain the correct orientation when inserting the new batteries.
-
Insert the New Batteries: Take the new batteries, ensuring that they are the correct type and size as specified for the SimpliSafe glass break sensor. Align the batteries according to the polarity markings within the compartment, carefully inserting them to ensure a secure and snug fit. Double-check the positioning of the batteries to guarantee proper alignment and contact points within the compartment.
-
Check for Secure Fit: After inserting the new batteries, perform a quick check to ensure that they are securely seated within the compartment. Gently press down on each battery to confirm that it is held firmly in place and makes proper contact with the connectors. A secure fit is essential to maintain uninterrupted power supply to the sensor.
-
Close the Battery Compartment: Once the new batteries are in place and verified to be securely seated, carefully close the battery compartment. Ensure that the casing or cover is repositioned and secured according to the manufacturer's guidelines. If any screws were removed during the opening of the sensor casing, use the appropriate screwdriver to reattach them, ensuring a snug and secure closure.
By following these detailed steps, you can effectively replace the batteries in your SimpliSafe glass break sensor, ensuring that it remains powered and operational. With the new batteries in place and the compartment securely closed, you're now ready to proceed to the next step of reattaching the sensor to the wall and completing the battery replacement process.
Read more: How To Test Glass Break Sensor
Step 5: Close the sensor casing
After successfully replacing the batteries in your SimpliSafe glass break sensor, the next critical step is to ensure that the sensor casing is securely closed. This step is essential to protect the internal components, maintain the sensor's integrity, and prevent any potential damage or interference with its functionality. Follow these detailed instructions to effectively close the sensor casing and complete the battery replacement process:
-
Position the Casing Halves: With the new batteries securely in place and the internal compartment inspected, carefully position the two halves of the sensor casing together. Ensure that the edges align perfectly, allowing for a seamless closure without any gaps or misalignment. Taking your time during this step can contribute to a secure and snug fit of the casing halves.
-
Engage the Casing Mechanisms: Depending on the specific design of the sensor casing, engage the corresponding mechanisms to secure the casing. If the casing features tabs, gently press them together to lock the halves in place. For models with screws, use the appropriate screwdriver to reattach and tighten the screws, ensuring that the casing is firmly closed. Pay attention to any audible clicks or indications that signify the secure closure of the casing.
-
Test the Casing Stability: After engaging the casing mechanisms, perform a gentle test to ensure the stability and integrity of the closed casing. Gently press on the edges and surfaces to confirm that the casing remains securely closed without any movement or separation. A stable and secure closure is crucial to protect the internal components and maintain the sensor's reliability.
-
Inspect for Proper Alignment: Take a moment to visually inspect the sensor casing, ensuring that it is properly aligned and closed from all angles. Check for any gaps, unevenness, or misalignment that may indicate an incomplete closure. By confirming the proper alignment of the casing, you can ensure that the sensor is adequately protected and ready for reattachment to the wall.
-
Verify Casing Integrity: Before proceeding to reattach the sensor to the wall, verify the integrity of the closed casing. Ensure that it feels solid and secure, providing adequate protection to the internal components. By conducting a final check of the casing's integrity, you can proceed with confidence to the next step of reattaching the sensor to its mounted position.
By following these detailed instructions, you can effectively close the sensor casing of your SimpliSafe glass break sensor, ensuring that the internal components are adequately protected and secured. With the casing closed and the sensor ready for reattachment, you're now prepared to proceed to the final step of reattaching the sensor to the wall and completing the battery replacement process.
Step 6: Reattach the sensor to the wall
With the batteries successfully replaced and the sensor casing securely closed, the final step in the battery replacement process for your SimpliSafe glass break sensor is to reattach the sensor to its designated position on the wall. This critical step ensures that the sensor is reinstated as an integral part of your home security system, ready to resume its vigilant monitoring for potential glass breakage. Follow these detailed instructions to effectively reattach the sensor to the wall and complete the battery replacement process:
-
Position the Sensor: Carefully position the sensor at its designated location on the wall, aligning it with the mounting plate or fixture. Take care to ensure that the sensor is oriented correctly, with any wiring or connectors positioned for easy reattachment.
-
Secure the Mounting Plate: If the sensor utilizes a mounting plate, carefully align it with the sensor and the wall mounting area. Use the appropriate screws and a screwdriver to securely fasten the mounting plate in place, ensuring that it provides a stable and reliable foundation for the sensor.
-
Reconnect Wiring (if applicable): If the sensor is connected to any wiring, carefully reattach the connectors according to the manufacturer's guidelines. Ensure that the connections are secure and that the wiring is neatly organized to prevent any interference with the sensor's operation.
-
Test Sensor Alignment: Once the sensor is reattached, perform a quick visual and functional test to ensure that it is properly aligned and securely mounted. Gently apply pressure to the sensor to confirm that it remains stable and firmly attached to the wall.
-
Power On the Sensor: After reattaching the sensor, power it back on through your SimpliSafe control panel or mobile app. Follow the manufacturer's instructions to reactivate the glass break sensor, ensuring that it resumes its role in safeguarding your home.
-
Final Inspection: Take a moment to conduct a final inspection of the reattached sensor. Verify that it is securely mounted, properly aligned, and free from any visible damage. Additionally, confirm that the sensor's indicator lights or status signals are functioning as expected.
By following these detailed instructions, you can effectively reattach the sensor to the wall, completing the battery replacement process for your SimpliSafe glass break sensor. With the sensor securely reinstated and operational, you can enjoy the peace of mind that comes with a well-maintained and reliable home security system.
Conclusion
In conclusion, the process of changing the batteries in your SimpliSafe glass break sensor is a fundamental aspect of maintaining the effectiveness and reliability of your home security system. By following the step-by-step guide outlined in this comprehensive article, you have gained valuable insights into the meticulous process of battery replacement, ensuring that your glass break sensor remains in optimal working condition.
Throughout the battery replacement process, you have learned the importance of gathering the necessary tools, including new batteries, a screwdriver, a step ladder or stool, and a cleaning cloth. These tools have proven essential in facilitating a smooth and efficient battery replacement experience, allowing you to maintain the functionality of your sensor without unnecessary complications.
From the initial steps of removing the sensor from the wall to the critical tasks of opening the sensor casing, replacing the batteries, and closing the casing, you have demonstrated a meticulous approach to ensuring the seamless operation of your SimpliSafe glass break sensor. Each step has been carefully executed, emphasizing the significance of attention to detail and precision in handling the sensor and its components.
As you reattach the sensor to the wall and power it back on, you can take pride in the proactive maintenance of your home security system. The diligence and care you have exhibited in following the battery replacement process reflect your commitment to safeguarding your home and loved ones, ensuring that your security system operates at its full potential.
By completing the battery replacement process with confidence and precision, you have reaffirmed the reliability and effectiveness of your SimpliSafe glass break sensor, contributing to the overall security and peace of mind within your home. With a well-maintained sensor in place, you can rest assured that your home security system is equipped to promptly detect and alert you to potential threats, providing you with the assurance and protection you deserve.
In essence, the process of changing the batteries in your SimpliSafe glass break sensor serves as a proactive measure in upholding the integrity and functionality of your home security system. Your dedication to maintaining this essential component reflects your commitment to a safe and secure living environment, reinforcing the importance of regular maintenance in preserving the effectiveness of your home security setup.
Now that you know how to swap out batteries in your Simplisafe glass break sensor, consider exploring another crucial aspect of safeguarding your dwelling. Our feature on why robust home protection systems are indispensable delves into how these setups can deter intruders and provide peace of mind. Don't miss out on understanding the pivotal role of such security measures in maintaining a secure environment for you and your loved ones.
Frequently Asked Questions about How To Change Batteries In Simplisafe Glass Break Sensor
Was this page helpful?
At Storables.com, we guarantee accurate and reliable information. Our content, validated by Expert Board Contributors, is crafted following stringent Editorial Policies. We're committed to providing you with well-researched, expert-backed insights for all your informational needs.


0 thoughts on “How To Change Batteries In Simplisafe Glass Break Sensor”