Home>Furniture & Design>Interior Design Trends>How To Remove Sticker From Car Glass
Interior Design Trends
How To Remove Sticker From Car Glass
Modified: February 18, 2024
Learn the best interior design trends and discover how to remove stickers from car glass with our expert tips and tricks. Keep your car looking sleek and stylish.
(Many of the links in this article redirect to a specific reviewed product. Your purchase of these products through affiliate links helps to generate commission for Storables.com, at no extra cost. Learn more)
Introduction
Removing a sticker from car glass can be a frustrating task, especially when it leaves behind sticky residue that seems impossible to get rid of. Whether it's a stubborn parking permit, an outdated inspection sticker, or a forgotten decal, the process of removing it without damaging the glass requires patience and the right techniques. Fortunately, with the proper tools and a systematic approach, you can effectively eliminate the sticker and restore the glass to its pristine condition.
In this comprehensive guide, we will walk you through the step-by-step process of removing a sticker from car glass. From softening the adhesive to gently peeling off the sticker and eliminating any remaining residue, we will cover each stage in detail. Additionally, we will provide valuable tips on cleaning the glass to ensure a spotless finish.
By following these instructions and utilizing the recommended tools and materials, you can tackle this task with confidence and achieve professional-looking results. Whether you're a car enthusiast, a meticulous driver, or simply someone who wants to maintain a clean and polished vehicle, mastering the art of sticker removal from car glass is a valuable skill that will come in handy time and time again.
So, roll up your sleeves, gather your supplies, and let's dive into the process of safely and effectively removing a sticker from car glass. With a little effort and the right approach, you'll soon bid farewell to that unsightly sticker and enjoy the clear, unobstructed view through your car's glass surfaces.
Key Takeaways:
- Say goodbye to stubborn stickers on car glass! Soften with a hairdryer, peel gently with a plastic razor, and remove residue with Goo Gone for a spotless finish.
- Master the art of sticker removal for pristine car glass. Use heat, gentle peeling, and adhesive remover for professional-quality results and a polished vehicle.
Read more: How To Remove A Sticker From Glass
Tools and materials needed
Before embarking on the task of removing a sticker from car glass, it's essential to gather the necessary tools and materials to ensure a smooth and efficient process. Here's a comprehensive list of items you'll need to have on hand:
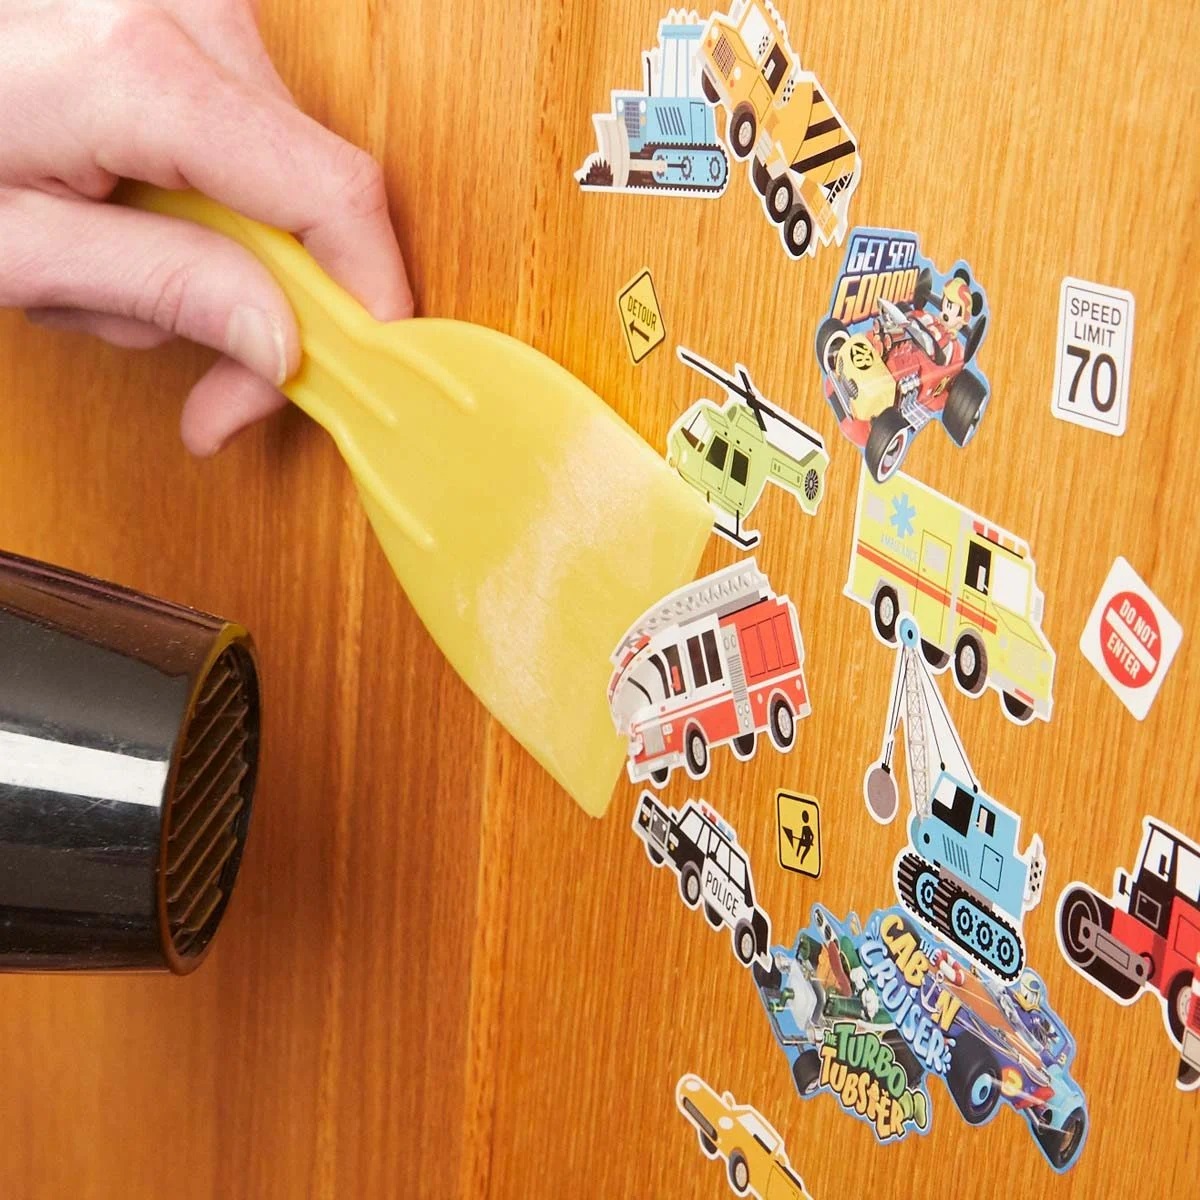
1. Hairdryer or Heat Gun
A hairdryer or heat gun is indispensable for softening the adhesive beneath the sticker. The application of heat helps loosen the grip of the sticker on the glass, making it easier to peel off without leaving behind residue.
2. Plastic Razor Blade or Plastic Card
To delicately lift the sticker from the glass surface, a plastic razor blade or a plastic card can be used. These tools are gentle enough to avoid scratching or damaging the glass while effectively separating the sticker from the surface.
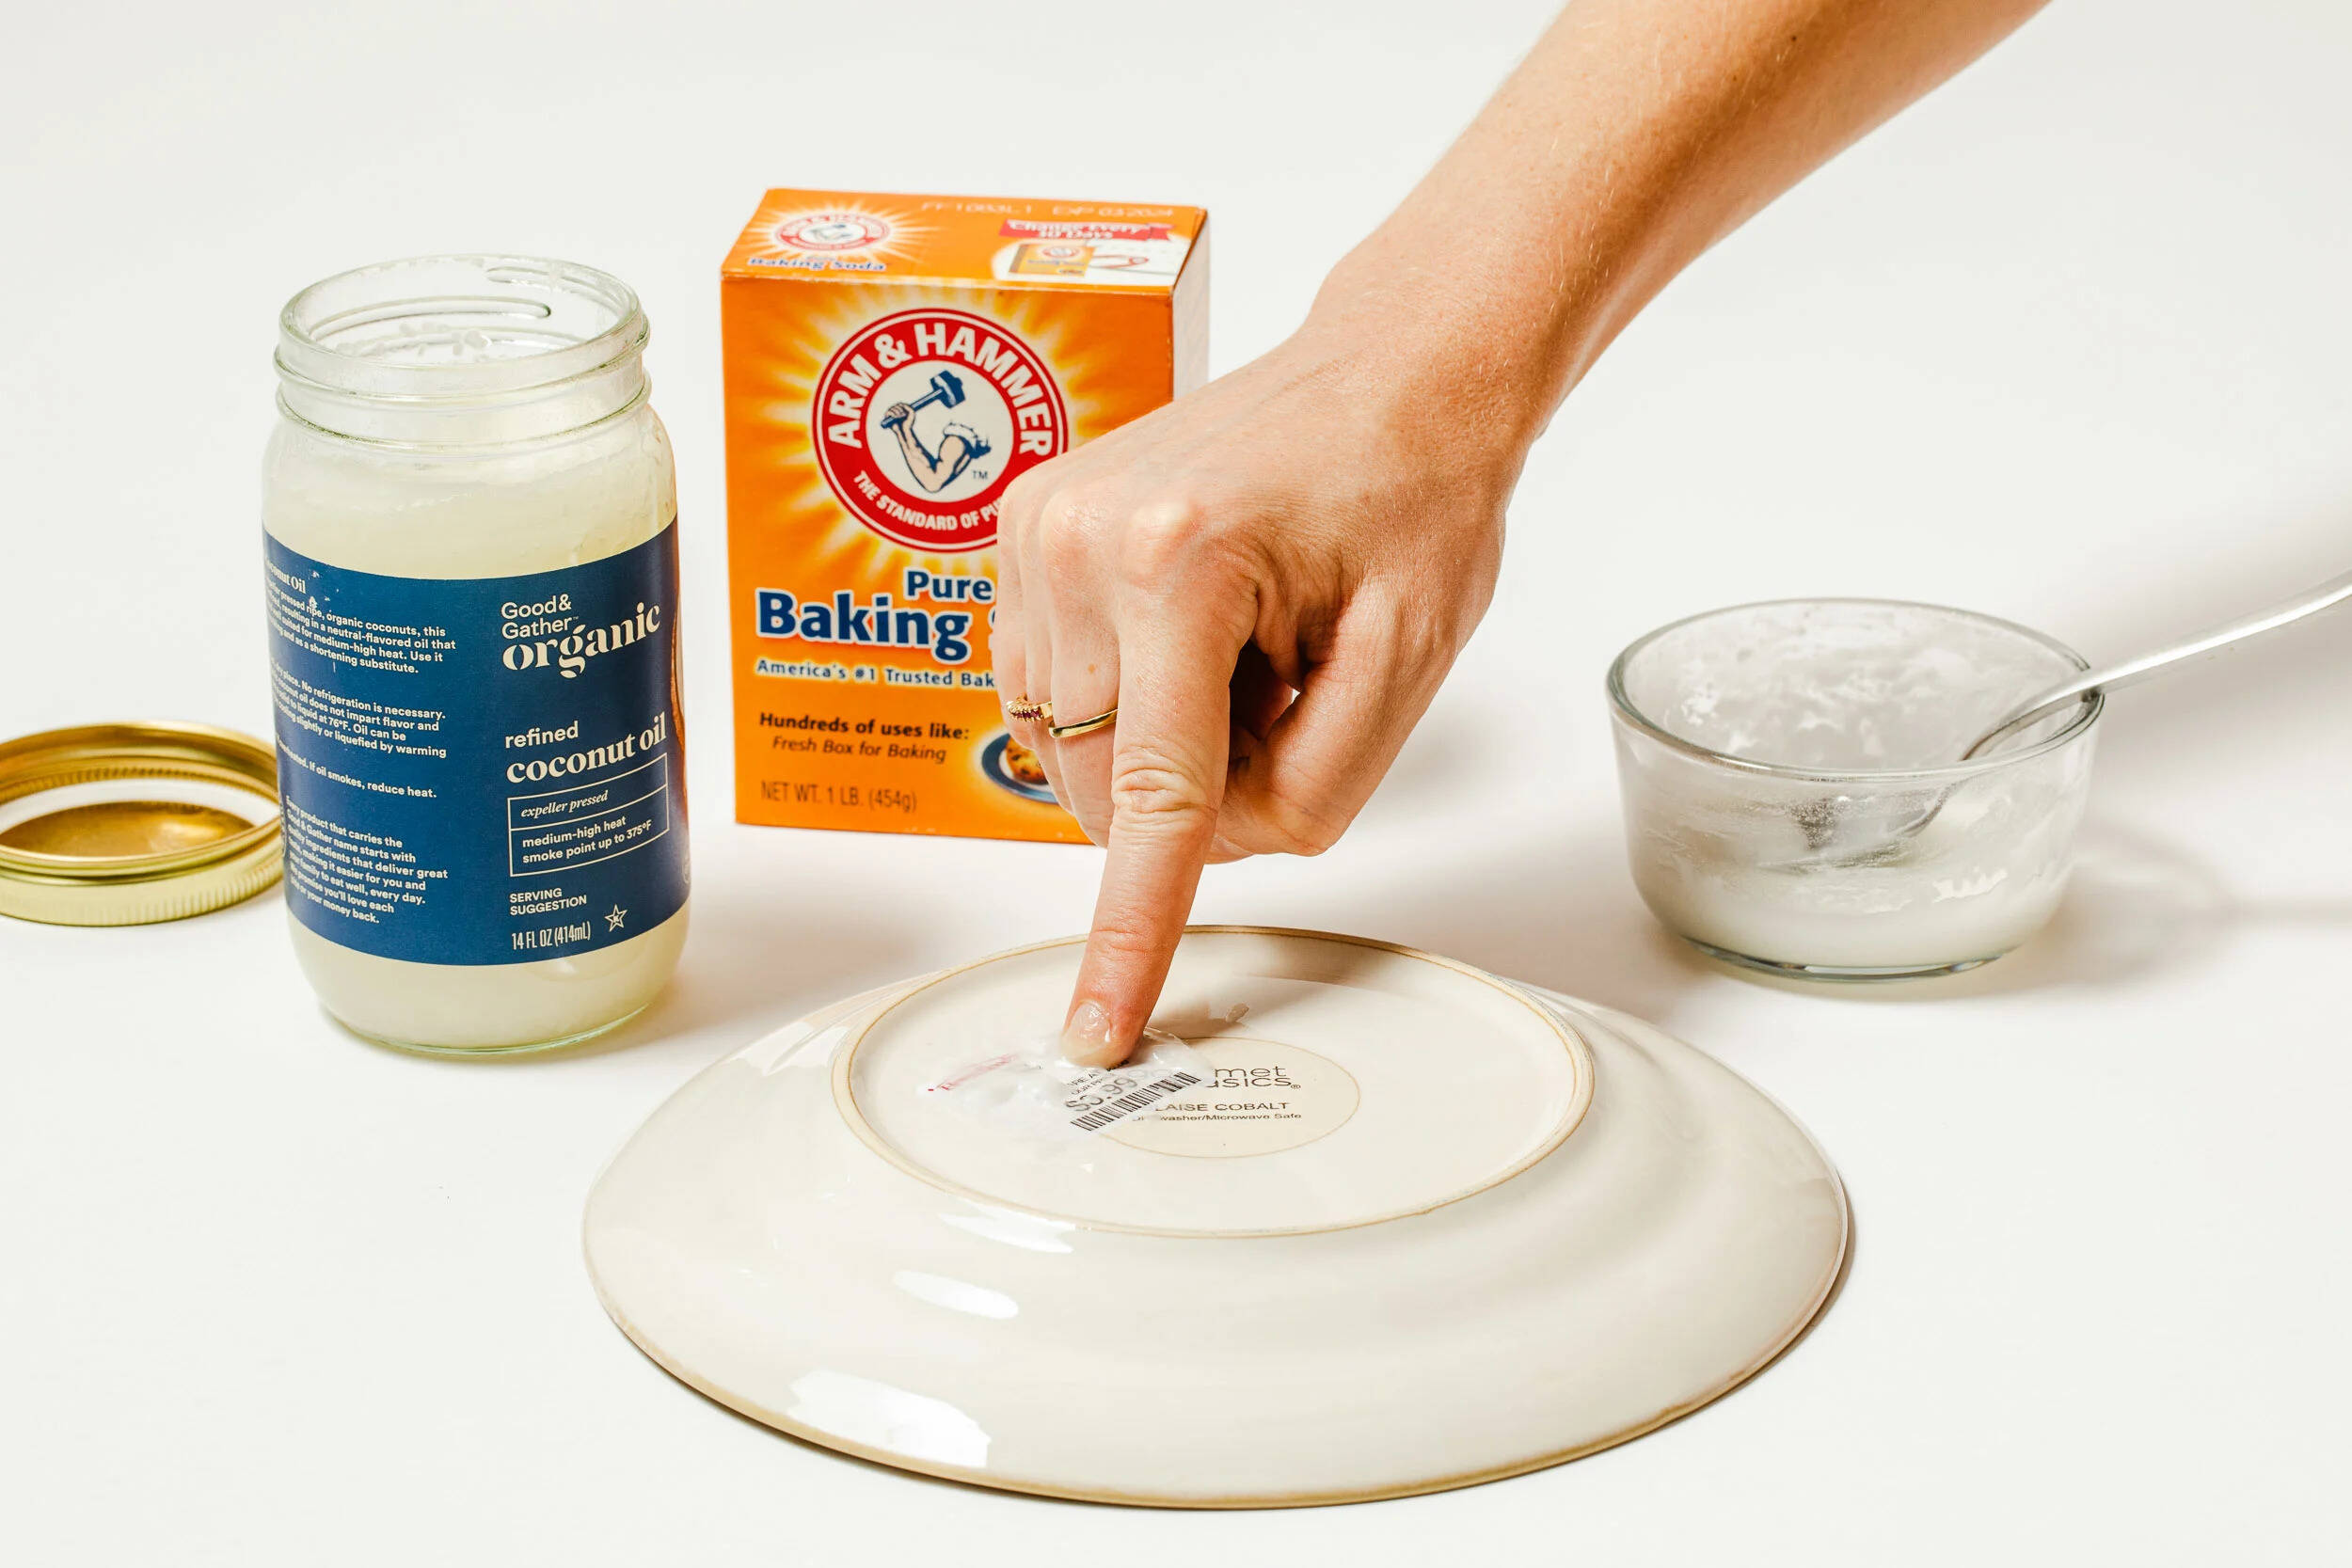
3. Goo Gone or Rubbing Alcohol
Goo Gone, a commercial adhesive remover, or rubbing alcohol can be used to dissolve any stubborn adhesive residue left on the glass after the sticker is removed. These solutions help to break down the sticky remnants, facilitating their effortless removal.
Read more: How To Remove Stickers From Car Windows
4. Microfiber Cloth
A soft microfiber cloth is essential for wiping and cleaning the glass. Its gentle texture ensures that the glass is left streak-free and spotless after the sticker and residue have been removed.
5. Glass Cleaner
A high-quality glass cleaner is crucial for achieving a pristine finish. Choose a cleaner specifically formulated for automotive glass to effectively remove any remaining residue and leave the glass sparkling clean.
6. Water and Mild Soap
Before applying the glass cleaner, it's beneficial to wash the glass with a mixture of water and mild soap to remove any surface dirt and grime. This initial cleaning step sets the stage for a thorough and effective sticker removal process.
7. Protective Gloves
While not directly related to the sticker removal process, wearing protective gloves is advisable, especially when handling adhesive removers or other cleaning solutions. This precaution helps safeguard your skin from potential irritation caused by these products.
By ensuring that you have these tools and materials at your disposal, you'll be well-equipped to tackle the task of removing a sticker from car glass with confidence and precision. With the right supplies in hand, you can proceed to the subsequent steps knowing that you're fully prepared to achieve a flawless result.
Read more: How To Remove Stickers From Crystal Glasses
Step 1: Soften the sticker
The first crucial step in removing a sticker from car glass is to soften the adhesive beneath it. This process is essential for loosening the grip of the sticker on the glass surface, making it easier to peel off without leaving behind stubborn residue. To accomplish this, you'll need a hairdryer or a heat gun.
Begin by holding the hairdryer or heat gun a few inches away from the sticker. Turn it on to the lowest heat setting and aim the warm air directly at the sticker. Move the hairdryer or heat gun back and forth across the sticker, ensuring that the heat is evenly distributed. The goal is to gently warm the adhesive, causing it to soften and become more pliable.
As you apply the heat, you may notice the sticker starting to lift at the edges or bubble slightly. This indicates that the adhesive is beginning to loosen. Continue to heat the sticker for approximately 1-2 minutes, being careful not to overheat the glass or the surrounding area.
The application of heat serves to weaken the bond between the sticker and the glass, allowing you to proceed to the next step with greater ease. It's important to exercise patience during this stage, as thorough heating is crucial for achieving optimal results.
By effectively softening the sticker with the appropriate application of heat, you'll set the stage for the subsequent steps in the removal process. This initial preparation ensures that the sticker can be delicately peeled off without causing damage to the glass or leaving behind unsightly residue. With the adhesive sufficiently softened, you're now ready to move on to the next step of gently peeling off the sticker, bringing you one step closer to achieving a clean and pristine glass surface.
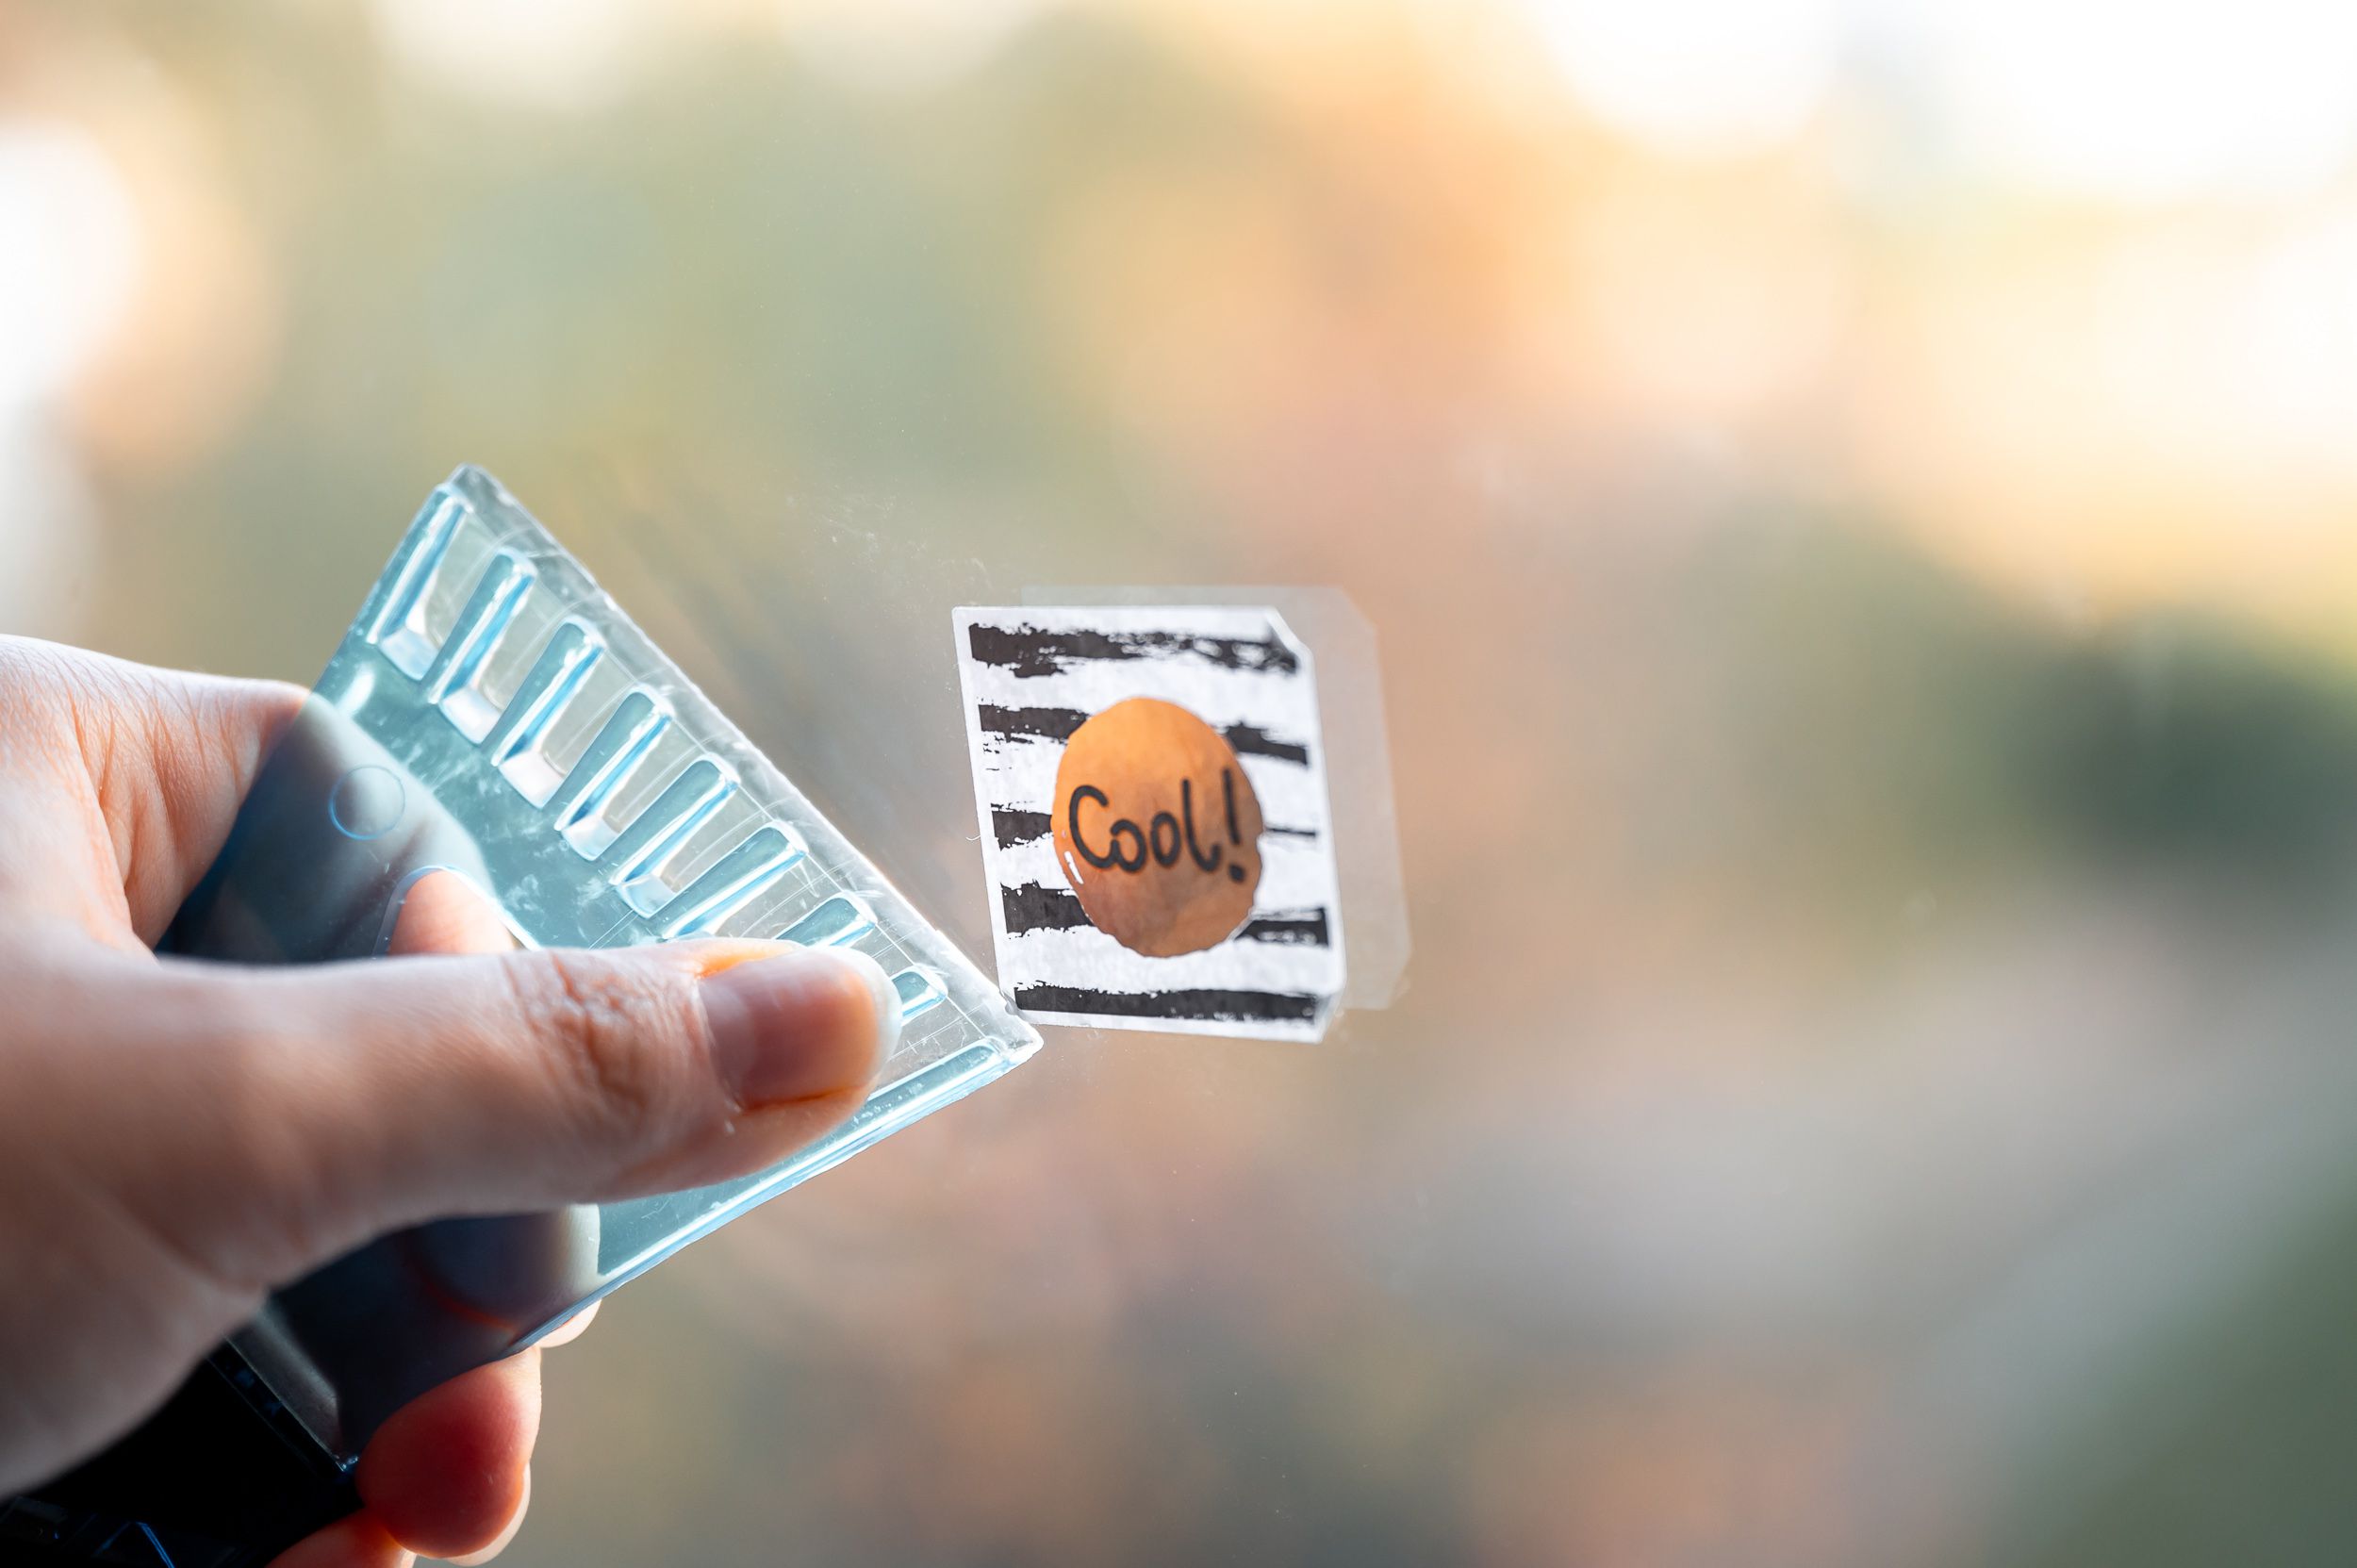
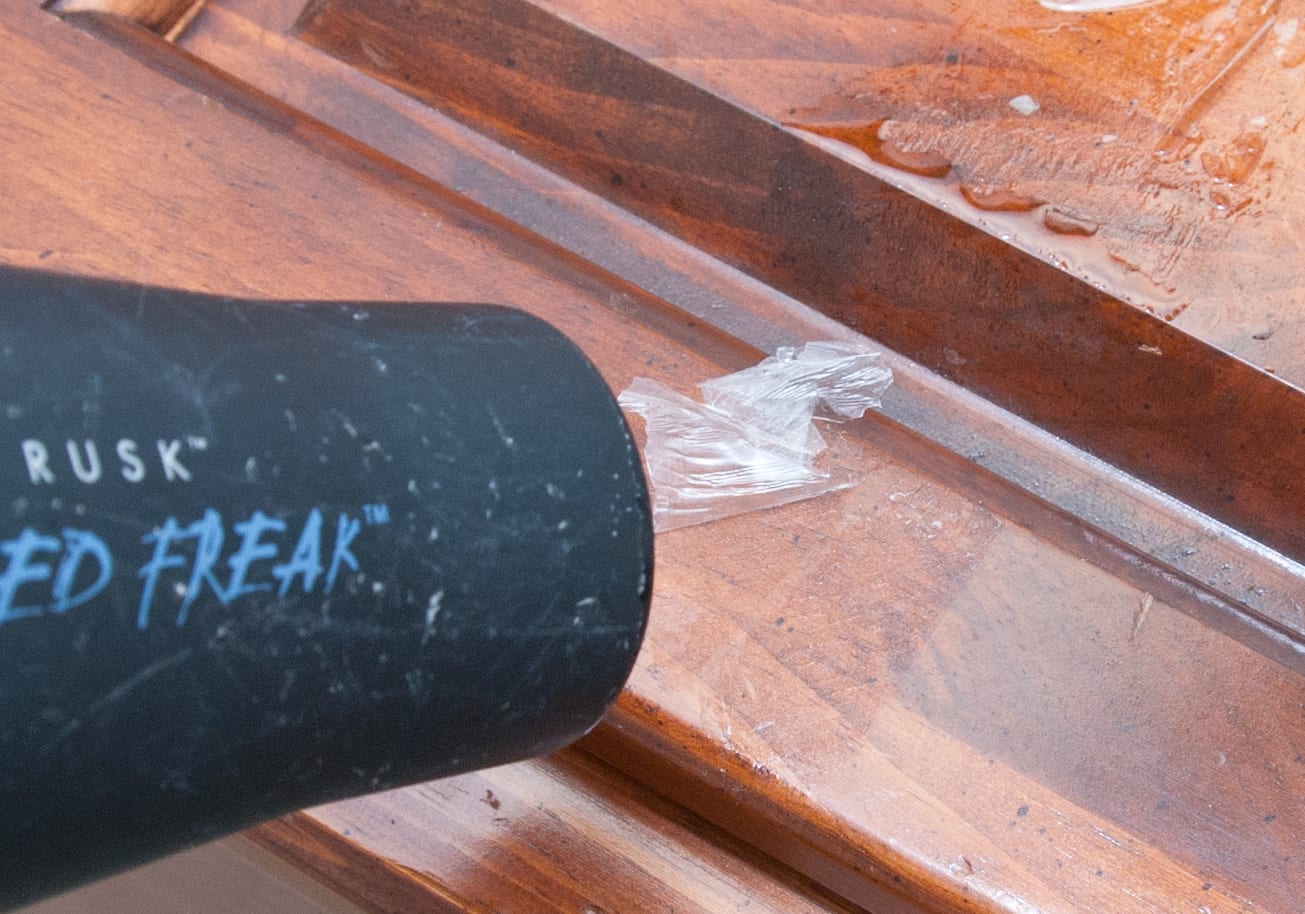
Step 2: Gently peel off the sticker
With the sticker adequately softened from the application of heat, it's time to delicately peel it off the car glass. To accomplish this, use a plastic razor blade or a plastic card to gently lift one edge of the sticker. It's crucial to approach this step with patience and precision to avoid damaging the glass or tearing the sticker, which could result in residue being left behind.
Once you have successfully lifted an edge of the sticker, slowly and carefully begin to peel it back, maintaining a consistent and gentle motion. If you encounter resistance or the sticker feels like it's tearing, stop immediately and apply more heat to the area. The goal is to remove the sticker in one piece, minimizing the likelihood of residue being left behind.
As you continue to peel off the sticker, keep the plastic razor blade or card close to the glass surface to ensure that you're not inadvertently scratching or gouging the glass. If the sticker begins to break apart, apply additional heat to the fragmented sections and proceed with caution to lift off the remaining pieces.
It's important to remain patient and methodical during this process, as rushing the peeling stage can lead to complications such as adhesive residue being left on the glass. By exercising care and precision, you can successfully remove the sticker without leaving behind any remnants that could mar the glass surface.
Once the entire sticker has been peeled off, inspect the glass to ensure that no adhesive residue remains. If any sticky remnants are present, proceed to the next step to effectively eliminate them and restore the glass to its pristine condition.
By gently and meticulously peeling off the sticker, you've completed a crucial stage in the removal process, bringing you one step closer to achieving a spotless and unobstructed glass surface. With the sticker successfully removed, the next step involves addressing any remaining residue to ensure a flawless finish.
Step 3: Remove any remaining residue
After successfully peeling off the sticker, it's essential to address any residual adhesive that may be left on the car glass. Even with careful removal, it's not uncommon for small amounts of sticky residue to remain, detracting from the glass's clarity and aesthetics. To effectively eliminate any lingering remnants, you'll need a reliable adhesive remover such as Goo Gone or rubbing alcohol, along with a soft microfiber cloth.
Begin by applying a small amount of the adhesive remover directly onto the remaining residue. If using Goo Gone, follow the product's instructions for application and wait for the solution to penetrate the adhesive. Alternatively, if using rubbing alcohol, dampen a corner of the microfiber cloth with the alcohol and gently dab it onto the residue. Both methods work to dissolve the stubborn adhesive, making it easier to wipe away.
Once the adhesive remover has had a chance to work its magic, take the microfiber cloth and gently but firmly rub the treated area in a circular motion. The goal is to lift and absorb the dissolved adhesive, gradually revealing the clean glass surface underneath. It's important to avoid using excessive force, as this could potentially scratch the glass. Instead, maintain a steady and controlled motion, periodically checking the cloth to monitor the removal progress.
Continue this process until all traces of the adhesive residue have been effectively lifted from the glass. Depending on the stubbornness of the residue, you may need to reapply the adhesive remover and repeat the gentle rubbing motion until the glass is completely free of any sticky remnants.
Once the residue has been successfully removed, take a moment to inspect the glass from various angles and under different lighting conditions to ensure that it is entirely clean and free of any remaining adhesive. If any stubborn spots persist, simply reapply the adhesive remover and repeat the gentle rubbing process until the glass is impeccably clear.
By diligently addressing any remaining residue, you're ensuring that the glass surface is restored to its original pristine state. With the adhesive effectively removed, the final step involves thoroughly cleaning the glass to achieve a sparkling finish and complete the sticker removal process.
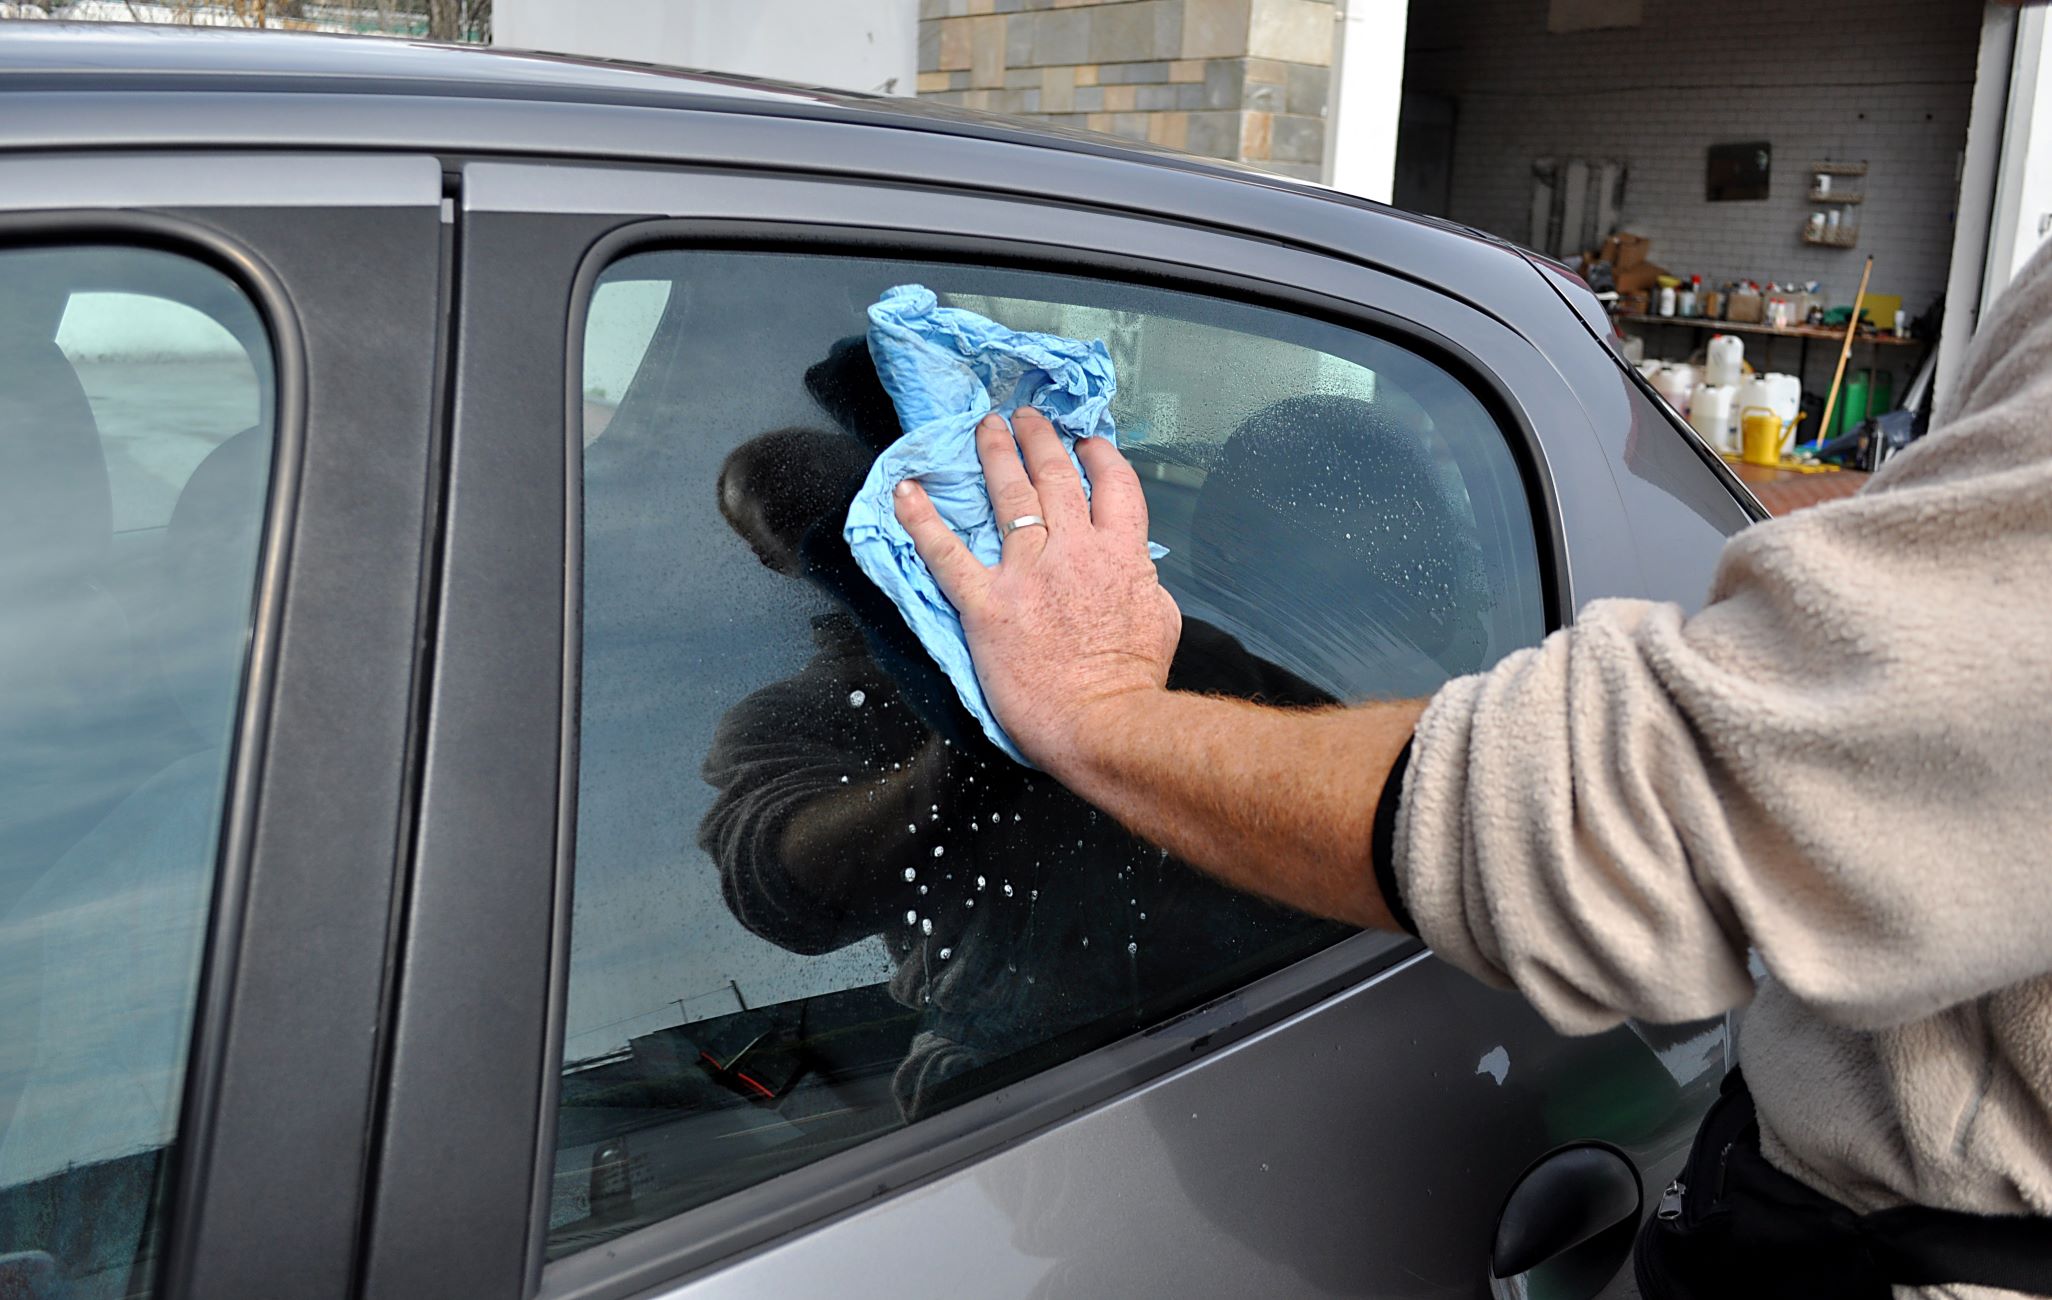
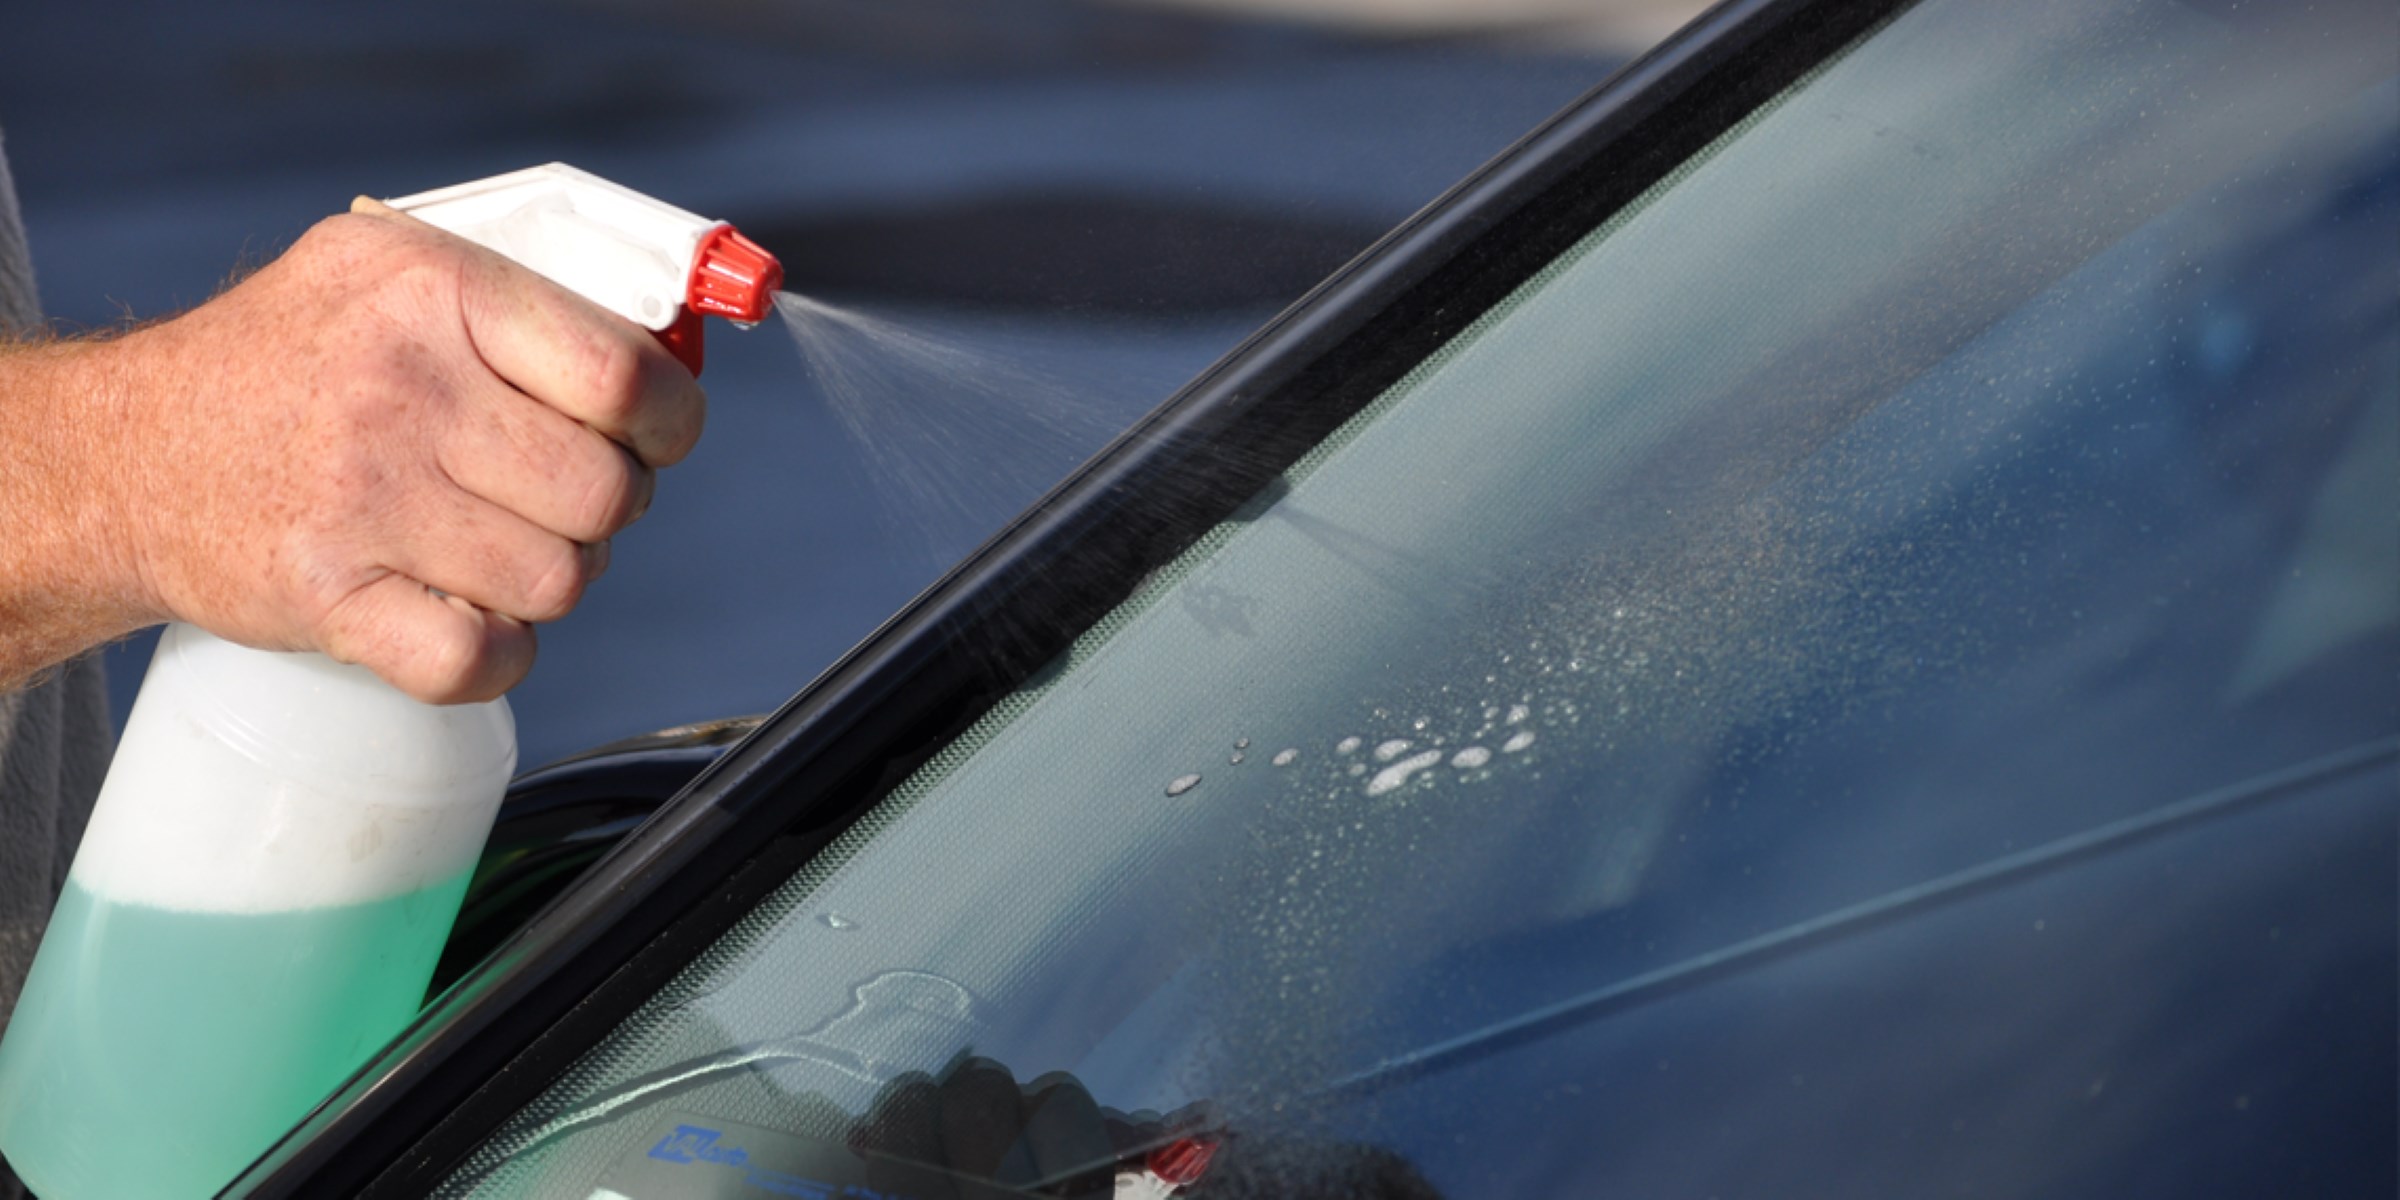
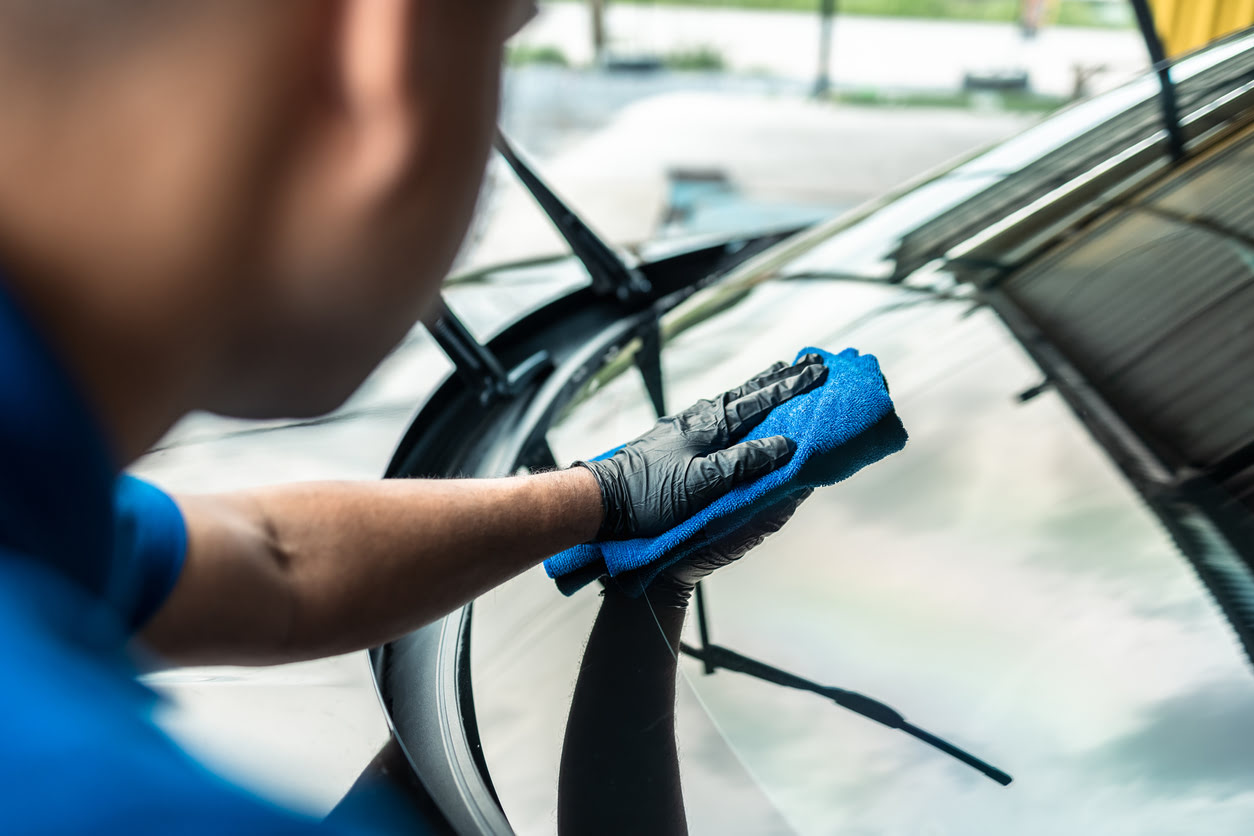
Step 4: Clean the glass
With the sticker and any residual adhesive successfully removed, the final step in the sticker removal process involves thoroughly cleaning the car glass to achieve a sparkling, crystal-clear finish. This critical stage ensures that the glass not only looks pristine but also maintains optimal visibility and transparency.
To begin the cleaning process, prepare a high-quality automotive glass cleaner specifically formulated to effectively remove any remaining residue and leave the glass spotless. It's important to choose a cleaner designed for automotive use, as it is tailored to address the unique challenges and contaminants that car glass encounters.
Spray the glass cleaner generously onto the glass surface, ensuring complete coverage. Using a clean microfiber cloth, gently but firmly wipe the glass in a circular motion, working from one section to another. This method effectively lifts any remaining traces of adhesive remover, dirt, or grime, leaving the glass impeccably clean and streak-free.
As you clean the glass, pay particular attention to the edges and corners, where residue and grime may accumulate. Thoroughly wiping these areas ensures that the entire glass surface is uniformly clean and free of any lingering contaminants.
After wiping the glass with the cleaner, allow a brief moment for it to dry. Once dry, inspect the glass from various angles and under different lighting conditions to ensure that it is entirely clean and free of streaks or residue. If any imperfections are detected, simply reapply the glass cleaner and repeat the wiping process until the glass achieves a flawless, crystal-clear appearance.
In addition to using a dedicated glass cleaner, consider washing the exterior of the car to complement the glass cleaning process. A mixture of water and mild soap can be used to gently wash the car's exterior, ensuring that the entire vehicle maintains a clean and polished look.
By meticulously cleaning the glass, you're not only enhancing the aesthetic appeal of your car but also optimizing visibility and safety. A thoroughly cleaned glass surface provides a clear and unobstructed view, contributing to a more enjoyable driving experience and a polished overall appearance for your vehicle.
With the glass now impeccably clean and free of any residue, you've successfully completed the sticker removal process, achieving a flawless and spotless glass surface that enhances the overall appearance of your car.
Read more: How To Remove Sticker Residue From Glass
Conclusion
In conclusion, successfully removing a sticker from car glass requires patience, precision, and the right tools and techniques. By following the step-by-step process outlined in this guide, you can effectively restore the glass to its pristine condition without causing damage or leaving behind unsightly residue. From softening the sticker with heat to delicately peeling it off and addressing any remaining adhesive, each stage plays a crucial role in achieving a flawless finish.
The process begins with softening the sticker using a hairdryer or heat gun, allowing the adhesive to become more pliable and easier to remove. This initial step sets the stage for the subsequent peeling process, where a plastic razor blade or card is used to delicately lift and remove the sticker without causing damage to the glass.
Addressing any residual adhesive is the next vital step, requiring the use of an adhesive remover such as Goo Gone or rubbing alcohol. This solution effectively dissolves the stubborn residue, allowing for gentle removal with a microfiber cloth. Thoroughly cleaning the glass with a high-quality automotive glass cleaner completes the process, ensuring a sparkling, crystal-clear finish.
By meticulously following each step and utilizing the recommended tools and materials, you can achieve professional-quality results, restoring the glass to its original clarity and enhancing the overall appearance of your vehicle. The meticulous attention to detail throughout the process ensures that the glass remains free of residue and maintains optimal visibility, contributing to a safe and enjoyable driving experience.
Mastering the art of sticker removal from car glass is a valuable skill that empowers you to maintain a clean and polished vehicle, free of unsightly remnants and blemishes. With the knowledge and techniques gained from this guide, you can confidently tackle sticker removal tasks, whether it's for routine maintenance or addressing the aftermath of outdated decals and permits.
In essence, the process of removing a sticker from car glass is not merely about eliminating an eyesore; it's about restoring the glass to its pristine state and upholding the overall aesthetic and functionality of your vehicle. With the right approach and attention to detail, you can achieve a flawless and unobstructed glass surface, enhancing the visual appeal and driving experience of your car.
Frequently Asked Questions about How To Remove Sticker From Car Glass
Was this page helpful?
At Storables.com, we guarantee accurate and reliable information. Our content, validated by Expert Board Contributors, is crafted following stringent Editorial Policies. We're committed to providing you with well-researched, expert-backed insights for all your informational needs.

0 thoughts on “How To Remove Sticker From Car Glass”