Home>Furniture & Design>Living Room Furniture>How To Dismantle A Sofa Recliner
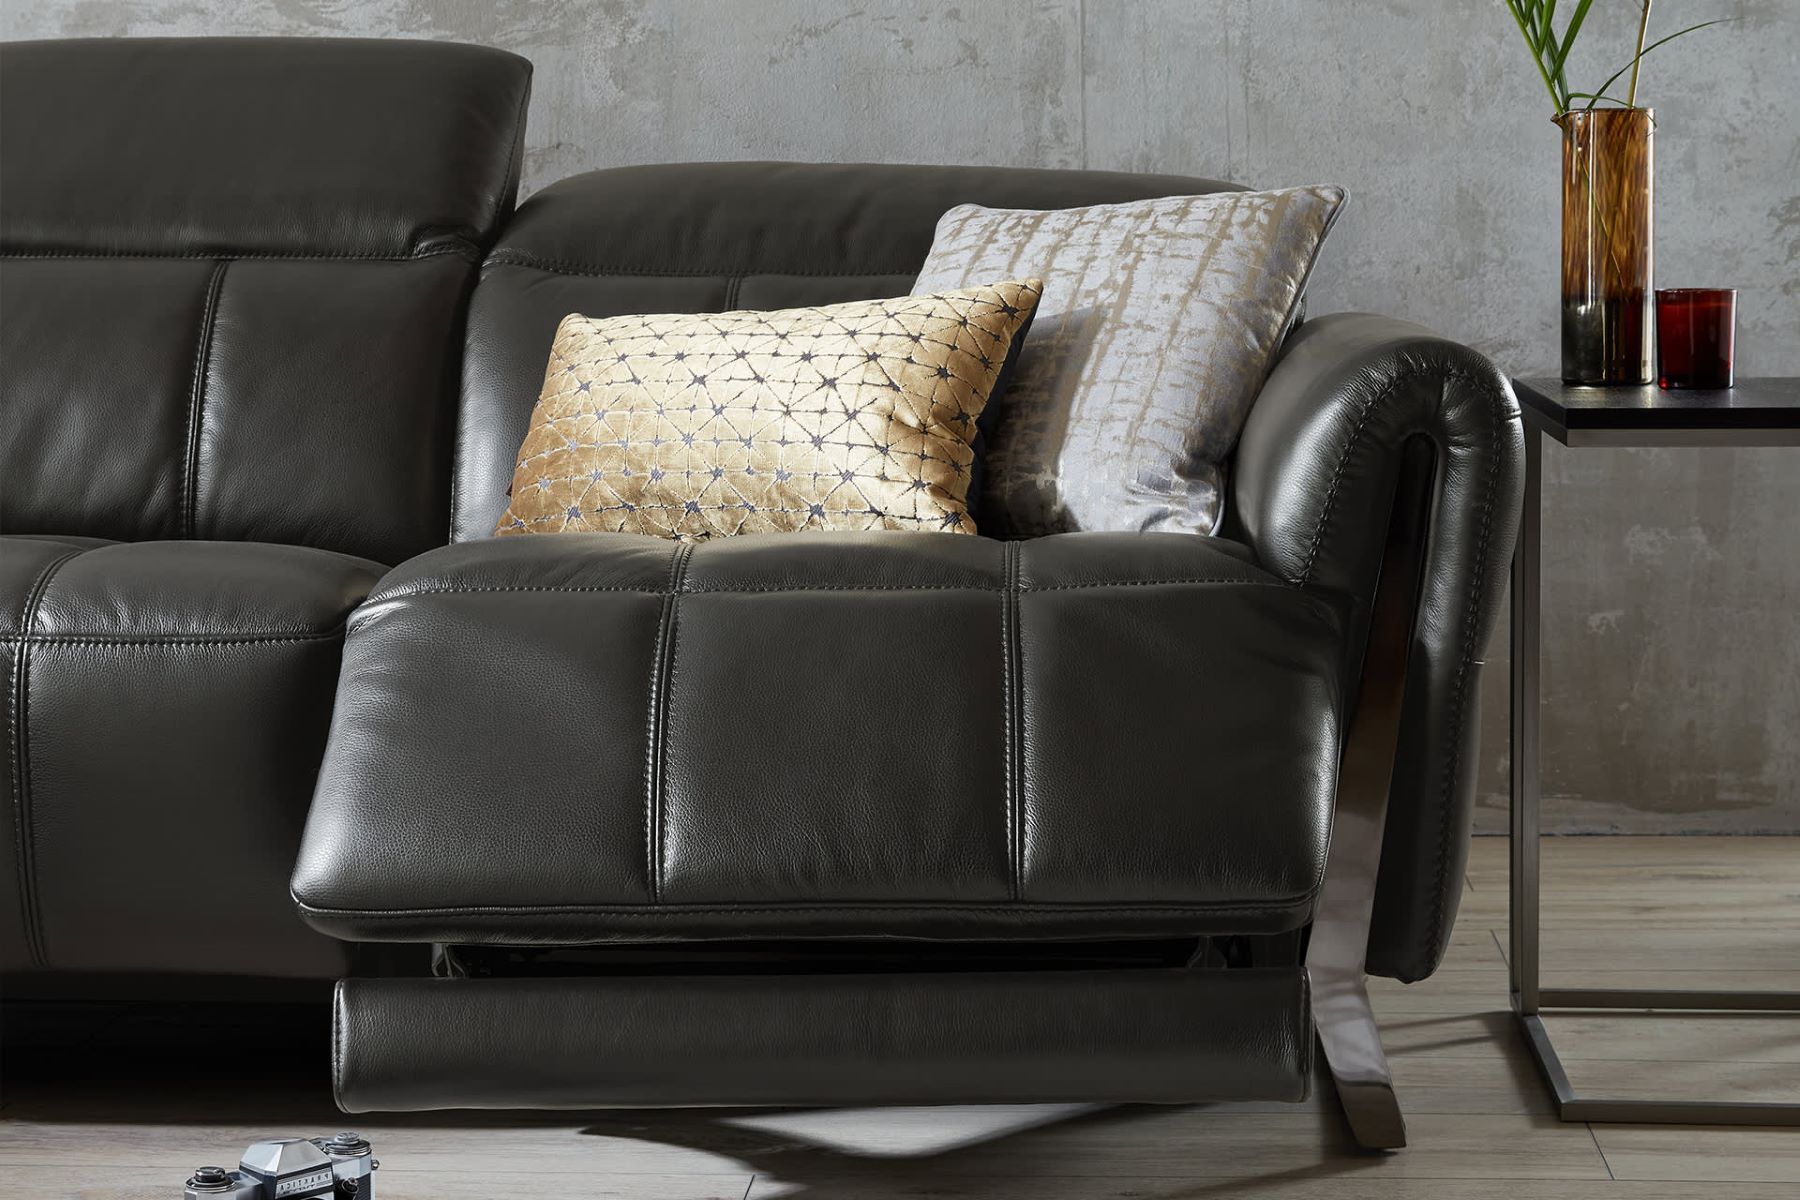

Living Room Furniture
How To Dismantle A Sofa Recliner
Modified: February 18, 2024
Learn how to dismantle a sofa recliner with our expert guide. Get step-by-step instructions for disassembling and reassembling your living room furniture.
(Many of the links in this article redirect to a specific reviewed product. Your purchase of these products through affiliate links helps to generate commission for Storables.com, at no extra cost. Learn more)
Introduction
Dismantling a sofa recliner may seem like a daunting task, but with the right tools and a systematic approach, it can be a manageable and rewarding endeavor. Whether you are moving to a new home, replacing worn-out parts, or simply curious about the inner workings of your beloved recliner, understanding the disassembly process is essential.
By following a series of carefully outlined steps, you can effectively disassemble a sofa recliner without causing damage to its components. This guide will walk you through the process, providing clear instructions and valuable insights to ensure a smooth and successful dismantling experience.
As you embark on this journey, it's important to approach the task with patience and a methodical mindset. Taking the time to gather the necessary tools and familiarizing yourself with the structure of the recliner will set the stage for a seamless disassembly process. Additionally, being mindful of safety precautions and handling the components with care will contribute to a positive and efficient dismantling experience.
Whether you are a DIY enthusiast, a homeowner seeking to maintain their furniture, or a professional in the furniture industry, mastering the art of dismantling a sofa recliner can be a valuable skill. Not only does it provide a deeper understanding of the construction and mechanics of reclining furniture, but it also empowers you to address maintenance and repair needs with confidence.
As we delve into the step-by-step process of dismantling a sofa recliner, remember that each stage is an opportunity to gain insight into the intricate design and functionality of this popular piece of furniture. So, roll up your sleeves, gather your tools, and let's embark on this journey of discovery and practical skill-building.
Key Takeaways:
- Dismantling a sofa recliner is a step-by-step process that requires patience, the right tools, and careful handling. Each stage, from removing the backrest to separating the reclining mechanism, offers valuable insights into the furniture’s design and functionality.
- By mastering the art of dismantling a sofa recliner, individuals gain practical skills and a deeper understanding of their furniture. This empowers them to address maintenance and repair needs with confidence, ensuring the longevity and functionality of their beloved recliner.
Read more: How To Assemble A Recliner Sofa
Step 1: Gather the necessary tools
Before embarking on the disassembly of a sofa recliner, it's crucial to gather the essential tools that will facilitate a smooth and efficient process. Having the right equipment at your disposal will not only streamline the dismantling procedure but also ensure the safety of both the furniture and the individual performing the task.
Here's a comprehensive list of tools you'll need:
-
Screwdriver Set: A versatile screwdriver set with various head types, including Phillips and flathead, is indispensable for removing screws securing different components of the recliner.
-
Adjustable Wrench: This tool will come in handy for loosening and tightening nuts and bolts, particularly those found in the reclining mechanism and frame.
-
Pliers: Both needle-nose and regular pliers are essential for gripping and manipulating small parts, such as cotter pins and springs, during the disassembly process.
-
Allen Wrench Set: Many recliners feature components secured with Allen screws, making an Allen wrench set a must-have for accessing and removing these fasteners.
-
Rubber Mallet: In some instances, gentle tapping with a rubber mallet may be necessary to dislodge stubborn parts without causing damage to the recliner.
-
Protective Gloves: To safeguard your hands from sharp edges and potential pinching hazards, a pair of protective gloves is essential for handling the various components of the recliner.
-
Safety Glasses: When dealing with springs, mechanisms, and hardware, wearing safety glasses is crucial to protect your eyes from any unexpected debris or small parts that may become dislodged during the disassembly process.
-
Ziplock Bags or Small Containers: Organizing and labeling the screws, nuts, bolts, and small components in separate bags or containers will prevent confusion and loss of parts, ensuring a seamless reassembly later on.
By ensuring that you have these tools at your disposal before commencing the disassembly process, you'll be well-prepared to tackle each step with confidence and precision. With the necessary tools in hand, you're ready to move on to the next stage of dismantling the sofa recliner.
Step 2: Remove the back of the recliner
Removing the back of a recliner is a pivotal step in the disassembly process, as it grants access to the internal mechanisms and facilitates the separation of the recliner into its individual components. This step requires precision and careful attention to detail to ensure that the back is detached without causing damage to the recliner or its intricate parts.
-
Locate the Fasteners: Begin by identifying the fasteners securing the back of the recliner to the frame. These fasteners are typically located at the base of the backrest, often concealed beneath fabric or upholstery. Use a flashlight to illuminate the area and a screwdriver to remove any screws or bolts holding the back in place.
-
Lift and Unhook: Once the fasteners are removed, carefully lift the back of the recliner upward to unhook it from the frame. It's essential to exert gentle and even pressure to avoid placing strain on the connecting points. If the back is secured by clips or brackets, ensure that these are disengaged before attempting to lift the backrest.
-
Enlist Assistance if Needed: Depending on the size and weight of the recliner, enlisting the help of a partner may be beneficial when removing the back. This collaborative approach can prevent strain or potential accidents, especially when dealing with larger and bulkier recliners.
-
Set Aside the Backrest: Once detached, set the backrest aside in a safe and designated area, ensuring that it is positioned in a way that prevents it from toppling over or sustaining any damage. Placing it on a soft, clean surface can help protect the upholstery or fabric from scratches or tears.
By successfully removing the back of the recliner, you have now gained access to the internal framework and mechanisms, setting the stage for the subsequent steps in the disassembly process. This accomplishment marks a significant milestone in the journey of dismantling a sofa recliner, bringing you one step closer to understanding its intricate design and functionality.
Step 3: Take out the seat cushion
Removing the seat cushion of a sofa recliner is a crucial step in the disassembly process, as it unveils the internal framework and provides access to the underlying components. This task requires careful attention to detail and a methodical approach to ensure that the seat cushion is extracted without causing damage to the recliner or its upholstery.
-
Locate the Attachment Points: Begin by identifying the attachment points securing the seat cushion to the frame of the recliner. These attachment points may consist of screws, bolts, or clips, depending on the specific design of the recliner. Use a flashlight to illuminate the area beneath the cushion and inspect for any securing mechanisms.
-
Unfasten the Seat Cushion: Utilizing the appropriate tools, such as a screwdriver or wrench, carefully unfasten the screws or bolts holding the seat cushion in place. It's essential to exercise caution and ensure that the tools are properly aligned to prevent slippage, which could potentially damage the surrounding upholstery.
-
Lift and Remove the Cushion: Once the attachment points are disengaged, gently lift the seat cushion upward to detach it from the frame. Depending on the construction of the recliner, the cushion may be secured by Velcro strips or additional fasteners beneath the upholstery. Take care to lift the cushion evenly to avoid placing undue stress on the connecting points.
-
Inspect and Prepare the Cushion: After removing the seat cushion, take a moment to inspect its condition and the underlying support structure. This is an opportune time to address any issues related to the cushion's integrity or the support system, such as sagging or damaged springs. Additionally, setting the cushion aside in a safe and clean area will prevent it from being soiled or damaged during the remainder of the disassembly process.
By successfully extracting the seat cushion, you have unveiled the internal framework of the recliner, setting the stage for the subsequent steps in the disassembly process. This achievement brings you closer to gaining a comprehensive understanding of the construction and functionality of the sofa recliner, empowering you to address maintenance or repair needs with confidence.
Step 4: Disassemble the footrest
Disassembling the footrest of a sofa recliner is a pivotal stage in the overall disassembly process, as it involves accessing and dismantling a key functional component of the recliner. The footrest, often a defining feature of reclining furniture, requires careful attention and precision to ensure its successful removal without compromising its functionality or structural integrity.
Read more: How To Move Recliner Sofa
Identify the Fastening Mechanisms
Begin by closely examining the footrest to identify the fastening mechanisms that secure it to the recliner frame. Depending on the design of the recliner, the footrest may be attached using screws, bolts, or locking mechanisms. Use a flashlight to illuminate the area and inspect for any concealed fasteners that may be hidden beneath fabric or upholstery.
Loosen and Remove Fasteners
Utilizing the appropriate tools, such as a screwdriver or wrench, carefully loosen and remove the fasteners that secure the footrest to the recliner frame. It's essential to exercise caution and ensure that the tools are properly aligned to prevent slippage, which could potentially damage the surrounding components or upholstery. If the footrest is motorized, ensure that any electrical connections are safely disconnected before proceeding.
Detach the Footrest
Once the fasteners are removed, gently lift and detach the footrest from the recliner frame. Depending on the construction of the footrest, it may be equipped with hinges or sliding mechanisms that require careful manipulation to disengage. Take care to support the weight of the footrest to prevent any sudden movements that could cause damage or strain to the connecting points.
Inspect and Prepare the Footrest
After removing the footrest, take a moment to inspect its condition and the underlying mechanisms. This is an opportune time to address any issues related to the footrest's functionality or structural integrity. Additionally, setting the footrest aside in a safe and designated area will prevent it from being damaged during the remainder of the disassembly process.
By successfully disassembling the footrest, you have navigated a critical phase of the recliner disassembly process, gaining insight into the intricate design and functionality of this essential component. This accomplishment brings you closer to understanding the inner workings of the sofa recliner, setting the stage for the subsequent steps in the disassembly process.
Read more: Which Recliner Sofa Is Best
Step 5: Detach the arms and side panels
Detaching the arms and side panels of a sofa recliner is a pivotal phase in the disassembly process, as it involves separating prominent structural elements that contribute to the overall aesthetics and functionality of the furniture. This step demands meticulous attention to detail and a methodical approach to ensure the arms and side panels are removed without causing damage to the recliner or its accompanying components.
Identify the Attachment Points
Commence by closely examining the arms and side panels to identify the attachment points securing them to the recliner frame. These attachment points may consist of screws, bolts, or connecting brackets, often concealed beneath fabric or upholstery. Careful inspection and the use of appropriate tools, such as a screwdriver or wrench, are essential to access and disengage these fasteners.
Loosen and Remove Fasteners
Utilizing the appropriate tools, carefully loosen and remove the fasteners that secure the arms and side panels to the recliner frame. It's crucial to exercise caution and ensure that the tools are properly aligned to prevent slippage, which could potentially damage the surrounding components or upholstery. Depending on the design of the recliner, the arms and side panels may be secured by a combination of fasteners and adhesive elements, requiring careful and deliberate disengagement.
Detach the Arms and Side Panels
Once the fasteners are removed, gently lift and detach the arms and side panels from the recliner frame. It's important to approach this step with care, ensuring that the weight and dimensions of these components are adequately supported to prevent any sudden movements that could cause damage or strain to the connecting points. Enlisting the assistance of a partner, particularly when dealing with larger and bulkier recliners, can facilitate the safe removal of the arms and side panels.
Read more: How To Clean A Recliner Sofa
Inspect and Prepare the Components
After detaching the arms and side panels, take a moment to inspect their condition and the underlying framework. This is an opportune time to address any issues related to the structural integrity or aesthetics of these components. Additionally, setting the arms and side panels aside in a safe and designated area will prevent them from being damaged during the remainder of the disassembly process.
By successfully detaching the arms and side panels, you have navigated a critical phase of the recliner disassembly process, gaining insight into the intricate design and functionality of these prominent elements. This accomplishment brings you closer to understanding the inner workings of the sofa recliner, setting the stage for the subsequent steps in the disassembly process.
Step 6: Separate the reclining mechanism
Separating the reclining mechanism from a sofa recliner is a pivotal stage in the disassembly process, as it involves accessing and dismantling the core functional element that enables the reclining feature. This step demands meticulous attention to detail and a methodical approach to ensure the reclining mechanism is removed without causing damage to the recliner or its intricate components.
Identify the Reclining Mechanism Components
Commence by closely examining the reclining mechanism to identify its key components and attachment points. The reclining mechanism typically consists of a series of interconnected metal frames, springs, and levers responsible for facilitating the reclining motion. Careful inspection and the use of appropriate tools, such as a flashlight and screwdriver, are essential to access and disengage the fasteners securing the mechanism to the recliner frame.
Loosen and Remove Fasteners
Utilizing the appropriate tools, carefully loosen and remove the fasteners that secure the reclining mechanism to the recliner frame. These fasteners may include screws, bolts, or locking mechanisms, depending on the specific design of the recliner. It's crucial to exercise caution and ensure that the tools are properly aligned to prevent slippage, which could potentially damage the surrounding components or upholstery. Additionally, if the reclining mechanism is motorized, ensure that any electrical connections are safely disconnected before proceeding.
Read more: How To Make A Recliner Sofa Look Good
Detach the Reclining Mechanism
Once the fasteners are removed, gently lift and detach the reclining mechanism from the recliner frame. The mechanism may be intricately connected to the frame and other components, requiring careful manipulation to disengage. It's important to support the weight of the mechanism to prevent any sudden movements that could cause damage or strain to the connecting points. Enlisting the assistance of a partner, particularly when dealing with larger and more complex recliners, can facilitate the safe removal of the reclining mechanism.
Inspect and Prepare the Mechanism
After separating the reclining mechanism, take a moment to inspect its condition and the underlying components. This is an opportune time to address any issues related to the functionality or structural integrity of the mechanism. Additionally, setting the reclining mechanism aside in a safe and designated area will prevent it from being damaged during the remainder of the disassembly process.
By successfully separating the reclining mechanism, you have navigated a critical phase of the recliner disassembly process, gaining insight into the intricate design and functionality of this core element. This accomplishment brings you closer to understanding the inner workings of the sofa recliner, setting the stage for the subsequent steps in the disassembly process.
Step 7: Remove the remaining parts
With the major components of the sofa recliner successfully disassembled, the final step involves the removal of any remaining parts that are integral to the structure or functionality of the recliner. This phase requires a meticulous approach to ensure that all components are safely extracted, allowing for a comprehensive understanding of the recliner's construction and facilitating potential maintenance or repair activities.
Identify and Inspect Remaining Components
Begin by conducting a thorough assessment of the recliner to identify any remaining parts that are essential to its structural integrity or operational mechanisms. This may include brackets, support bars, or additional hardware that contribute to the overall stability and functionality of the recliner. Careful inspection will ensure that no vital components are overlooked during the disassembly process.
Loosen and Remove Fasteners
Utilizing the appropriate tools, such as a screwdriver, wrench, or pliers, carefully loosen and remove any remaining fasteners securing the identified components to the recliner frame. It's essential to exercise caution and precision to prevent damage to the surrounding structure and upholstery. Additionally, if the remaining parts are interconnected with springs or levers, take care to disengage them gently to avoid any sudden movements that could compromise their integrity.
Detach and Organize Components
Once the fasteners are removed, gently detach the remaining parts from the recliner frame, taking care to support their weight and prevent any accidental damage. As each component is extracted, it's advisable to organize and label them accordingly, ensuring that they are safely stored and easily identifiable for future reassembly or maintenance purposes. Utilizing ziplock bags or small containers for organizing the components can streamline the process and prevent any loss or confusion.
Inspect and Prepare for Storage
After removing the remaining parts, take a moment to inspect their condition and functionality. This inspection provides an opportunity to address any issues related to the components' integrity or identify potential areas for maintenance or replacement. Once inspected, store the components in a designated area, ensuring that they are protected from damage and kept in a clean and organized manner.
By successfully removing the remaining parts of the sofa recliner, you have completed a comprehensive disassembly process, gaining valuable insight into the intricate design and functionality of this furniture piece. This accomplishment not only equips you with a deeper understanding of the recliner's construction but also prepares you for potential maintenance, repair, or reassembly activities in the future.
Conclusion
In conclusion, the process of dismantling a sofa recliner is a rewarding journey that provides valuable insights into the intricate design and functionality of this popular piece of furniture. By following the systematic steps outlined in this guide, individuals can effectively disassemble a sofa recliner with precision and care, gaining a deeper understanding of its internal mechanisms and structural components.
Throughout the disassembly process, attention to detail and the use of appropriate tools are essential to ensure the safe extraction of each component. From removing the backrest and seat cushion to disassembling the footrest, arms, side panels, and reclining mechanism, each step presents an opportunity to gain practical knowledge about the construction and assembly of a sofa recliner.
As the final remaining parts are carefully removed and organized, individuals are equipped with a comprehensive understanding of the recliner's structure, setting the stage for potential maintenance, repair, or reassembly activities in the future. The meticulous approach to dismantling a sofa recliner not only fosters a sense of accomplishment but also empowers individuals to address maintenance needs with confidence, ensuring the longevity and functionality of their furniture.
Furthermore, the skills acquired through the disassembly process can be invaluable for DIY enthusiasts, homeowners seeking to maintain their furniture, or professionals in the furniture industry. Understanding the inner workings of a sofa recliner enables individuals to address issues such as worn-out components, damaged upholstery, or malfunctioning mechanisms with proficiency and precision.
In essence, the process of dismantling a sofa recliner transcends mere practicality; it offers a journey of discovery and skill-building. By embracing the challenge of disassembly, individuals gain a newfound appreciation for the craftsmanship and engineering behind their recliner, fostering a deeper connection with the furniture they use and cherish in their living spaces.
Frequently Asked Questions about How To Dismantle A Sofa Recliner
Was this page helpful?
At Storables.com, we guarantee accurate and reliable information. Our content, validated by Expert Board Contributors, is crafted following stringent Editorial Policies. We're committed to providing you with well-researched, expert-backed insights for all your informational needs.





0 thoughts on “How To Dismantle A Sofa Recliner”