Home>Furniture & Design>Living Room Furniture>How To Make A Riddling Wine Rack
Living Room Furniture
How To Make A Riddling Wine Rack
Modified: February 28, 2024
Discover how to make a stylish riddling wine rack for your living room with our easy step-by-step guide. Elevate your living room furniture and design with this DIY project.
(Many of the links in this article redirect to a specific reviewed product. Your purchase of these products through affiliate links helps to generate commission for Storables.com, at no extra cost. Learn more)
Introduction
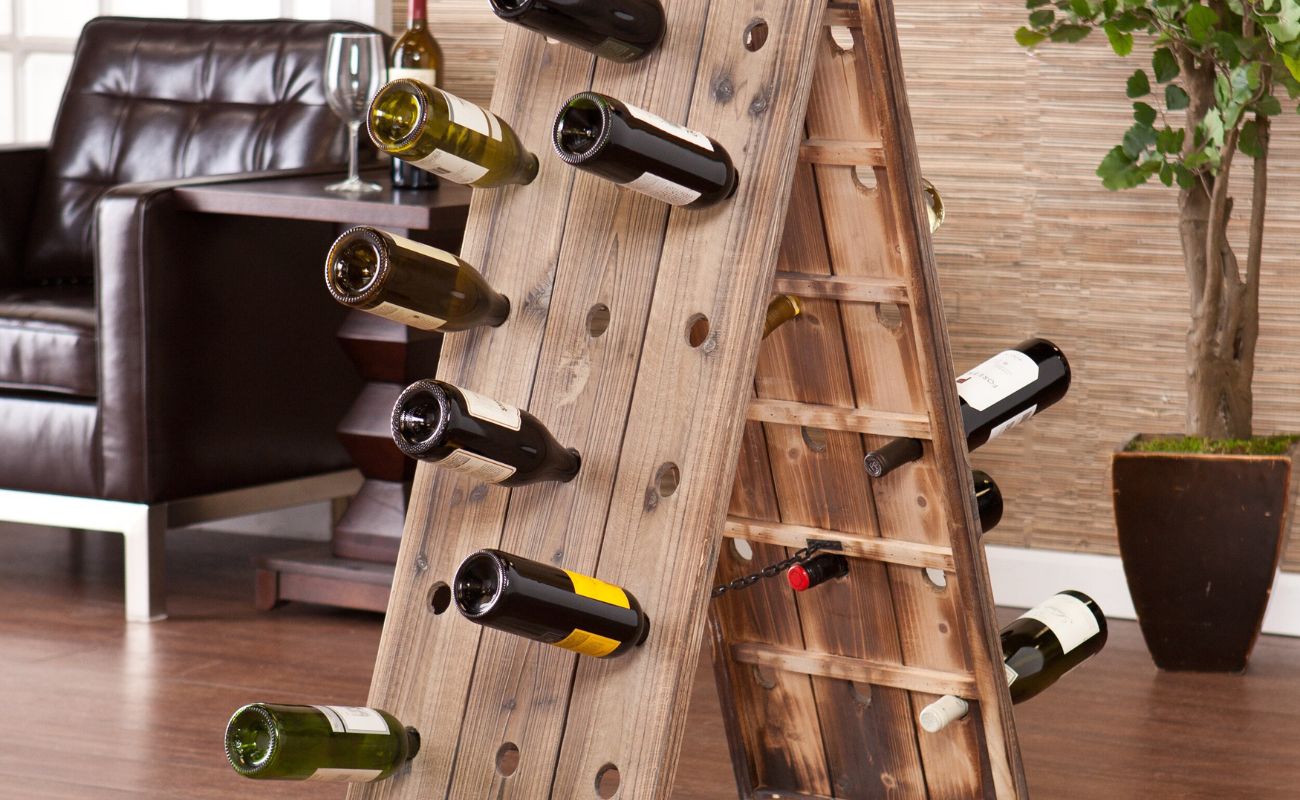
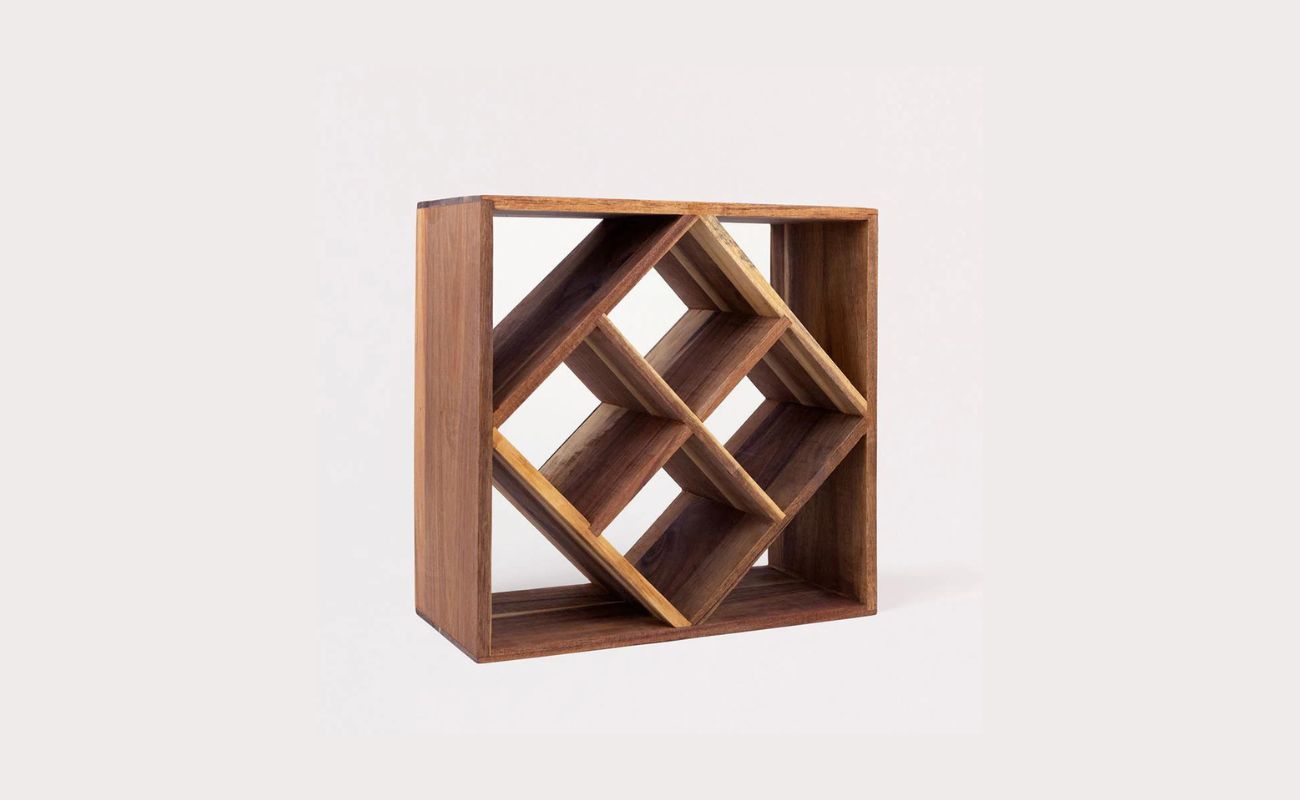
Welcome to the world of creative DIY furniture making! If you’re a wine enthusiast with a penchant for unique home decor, a riddling wine rack is a fantastic addition to your living space. Not only does it offer a stylish way to display your favorite bottles, but it also serves as a conversation starter for guests.
Originating from the Champagne region of France, riddling racks were traditionally used in the process of making sparkling wine. Today, these racks have evolved into sought-after pieces of furniture that exude rustic charm and elegance.
In this guide, we’ll walk you through the process of crafting your very own riddling wine rack. With a few essential materials and some basic tools, you can unleash your creativity and build a stunning piece that reflects your personal style. Whether you’re a seasoned DIY enthusiast or a newcomer to the world of woodworking, this project is both achievable and rewarding.
So, roll up your sleeves, unleash your inner craftsman, and let’s embark on this exciting journey to create a riddling wine rack that will be the envy of all your friends!
Key Takeaways:
- Craft your own riddling wine rack to showcase your favorite bottles in style. With basic materials and tools, unleash your creativity to build a stunning piece that reflects your personal style.
- Transform raw wood into a personalized and refined riddling wine rack. Infuse your unique style through staining or painting, and proudly display your craftsmanship and dedication in your living space.
Read more: How To Make A Wine Rack
Materials and Tools
Before diving into the construction process, it’s essential to gather all the necessary materials and tools. Here’s what you’ll need:
Materials:
- 1×4 lumber or plywood sheets
- Wood glue
- Wood screws
- Sandpaper (medium and fine grit)
- Stain or paint (depending on your preference)
- Polyurethane (optional for a glossy finish)
- Wood filler (for a seamless look)
Tools:
- Measuring tape
- Saw (circular saw or miter saw)
- Drill with spade bit
- Screwdriver
- Clamps
- Paintbrushes or a rag (for staining/painting)
- Safety goggles and gloves
- Optional: Wood router (for decorative edges)
By ensuring that you have all the required materials and tools on hand, you’ll be well-prepared to commence the construction process smoothly and efficiently. Now that you’re equipped with everything you need, it’s time to roll up your sleeves and get started on crafting your riddling wine rack!
Step 1: Cut the Wood
The first step in creating your riddling wine rack is to cut the wood to the required dimensions. You will need to decide on the size of your rack based on the space available and the number of wine bottles you intend to display. Here’s a basic outline to get you started:
Begin by measuring and marking the lumber or plywood according to the desired dimensions of the rack. A standard riddling wine rack typically consists of a rectangular frame with evenly spaced holes for the bottles. The dimensions may vary based on your personal preference, but a common starting point is a frame measuring approximately 16 inches by 24 inches.
Once you have marked the wood, carefully use a saw (a circular saw or miter saw works well for this task) to make precise cuts along the marked lines. It’s crucial to maintain accuracy during this stage to ensure that the pieces fit together seamlessly during assembly.
Additionally, if you prefer a more decorative touch, consider using a wood router to create decorative edges on the frame pieces. This step is optional but can add a touch of elegance to your riddling wine rack.
Remember, precision is key when cutting the wood, so take your time and double-check your measurements before making any cuts. With the wood pieces cut to perfection, you’re now ready to move on to the next stage of crafting your riddling wine rack!
Read more: How To Make A Wine Rack Out Of PVC
Step 2: Sand the Wood
Once you’ve cut the wood to the desired dimensions, the next crucial step is to sand the pieces to achieve a smooth and polished finish. Sanding not only enhances the visual appeal of the wood but also ensures that the surface is free from any rough edges or imperfections.
Begin by using medium-grit sandpaper to smooth out any rough spots or uneven surfaces on the cut wood pieces. It’s essential to sand both the faces and edges of the wood to achieve a uniform texture. After the initial sanding, switch to a fine-grit sandpaper to further refine the surface and achieve a silky-smooth feel.
When sanding, be sure to follow the natural grain of the wood for the best results. This will help prevent any unsightly scratches or blemishes that may detract from the overall aesthetics of your riddling wine rack.
After sanding, carefully wipe down the wood pieces with a clean, damp cloth to remove any residual sawdust. This step is crucial as it prepares the wood for the next stages of the construction process, such as staining or painting.
Remember, attention to detail during the sanding process can make a significant difference in the final outcome of your riddling wine rack. By taking the time to achieve a flawlessly smooth surface, you’ll be one step closer to creating a stunning piece of furniture that showcases your craftsmanship and attention to detail.
Step 3: Assemble the Frame
With the wood pieces cut and sanded to perfection, it’s time to bring your riddling wine rack to life by assembling the frame. This step is where the individual components come together to form the foundation of your unique creation.
Begin by laying out the cut pieces of wood in the configuration of the frame. Using wood glue and wood screws, carefully join the pieces together to form a sturdy and stable structure. It’s essential to ensure that the corners are square and the joints are secure to guarantee the overall stability of the frame.
Clamps can be incredibly useful during this stage to hold the pieces in place as the glue sets, providing added reinforcement to the joints. Take your time during assembly, and periodically check for alignment and symmetry to achieve a professional-looking result.
If you’re aiming for a seamless appearance, consider using wood filler to conceal any visible screw heads or gaps in the joints. Once the frame is assembled and any filler has dried, sand the filled areas to create a smooth, uniform surface that seamlessly blends with the rest of the wood.
As you progress through this step, envision the transformation of the individual pieces into a cohesive and visually appealing frame. The assembly process marks a significant milestone in the creation of your riddling wine rack, bringing you one step closer to showcasing your favorite bottles in style.
Step 4: Drill Holes for the Bottles
As you venture further into the construction of your riddling wine rack, the next pivotal step is to drill holes in the frame to accommodate the wine bottles. This step requires precision and careful planning to ensure that the bottles fit securely and are elegantly displayed within the rack.
Begin by marking the locations for the bottle holes on the frame. The spacing and arrangement of the holes can be customized based on the size and number of bottles you intend to showcase. A common approach is to create a grid-like pattern, evenly spacing the holes to achieve a balanced and visually appealing layout.
Using a drill fitted with a spade bit that matches the diameter of the wine bottles, carefully drill the holes at the marked locations. It’s crucial to maintain a steady hand and apply consistent pressure to achieve clean and precise holes. Additionally, drilling from both sides of the frame can help prevent splintering and ensure a neat finish.
As you progress through this step, visualize the transformation of the frame into a functional and aesthetically pleasing wine bottle holder. The precision and attention to detail during the hole-drilling process will ensure that your riddling wine rack not only serves its practical purpose but also adds a touch of elegance to your living space.
With the holes drilled, take a moment to appreciate the progress made thus far. The frame is now poised to fulfill its purpose of cradling your favorite bottles, setting the stage for the final stages of completing your unique riddling wine rack.
When making a riddling wine rack, make sure to measure and mark the placement of the holes for the wine bottles accurately to ensure they fit securely. Use a drill press for precise and clean holes.
Step 5: Add the Base
As your riddling wine rack takes shape, the addition of a sturdy base is essential to provide stability and support for your cherished bottles. The base not only enhances the structural integrity of the rack but also contributes to its overall aesthetic appeal.
Begin by selecting a suitable material for the base, which can be crafted from the same wood used for the frame or an alternative material that complements the design. The dimensions of the base should align with those of the frame, providing a secure foundation for the rack to stand upright.
Once you’ve determined the size and material for the base, affix it to the frame using wood glue and screws. Ensure that the base is securely attached and aligns perfectly with the frame to maintain stability and balance. Clamps can be utilized during this process to hold the base in place as the adhesive sets, guaranteeing a strong bond between the frame and the base.
For added reinforcement, consider countersinking the screws and filling the holes with wood filler to create a seamless and polished appearance. Sand the filled areas to achieve a uniform surface that seamlessly integrates the base with the rest of the rack.
As you complete this step, envision the transformation of the frame into a fully functional and visually captivating riddling wine rack. The addition of the base not only enhances the rack’s structural integrity but also sets the stage for the final embellishments that will bring your creation to life.
With the base securely in place, your riddling wine rack is now primed for the finishing touches that will elevate it from a collection of wood pieces to a stunning and functional piece of furniture.
Read more: How Deep Is A Wine Rack
Step 6: Stain or Paint
As you approach the final stages of creating your riddling wine rack, the opportunity to infuse your personal style and preferences arises through the application of stain or paint. This step allows you to transform the raw wood into a finished piece of furniture that harmonizes with your living space and reflects your unique taste.
Before proceeding, consider the overall aesthetic you wish to achieve. Staining the wood will enhance its natural grain and texture, offering a warm and organic look. On the other hand, painting the rack provides an opportunity to introduce bold colors or complement existing decor with a custom finish.
If you opt for staining, choose a wood stain that aligns with your vision for the rack. Apply the stain evenly using a brush or rag, ensuring complete coverage and allowing the natural beauty of the wood to shine through. Multiple coats may be applied to achieve the desired depth of color, with each layer enhancing the richness of the finish.
Conversely, if you prefer painting the rack, select a high-quality paint that complements your interior design scheme. Whether you opt for a classic white, a rich mahogany, or a trendy charcoal hue, applying paint evenly across the rack will transform it into a striking focal point in your living space.
After staining or painting the rack, consider applying a coat of polyurethane to protect the finish and impart a subtle sheen. This step adds durability to the surface and enhances the overall visual appeal of the rack.
As you progress through this step, envision the metamorphosis of the raw wood into a personalized and refined riddling wine rack. The application of stain or paint marks the transition from a simple construction project to a bespoke piece of furniture that embodies your style and creativity.
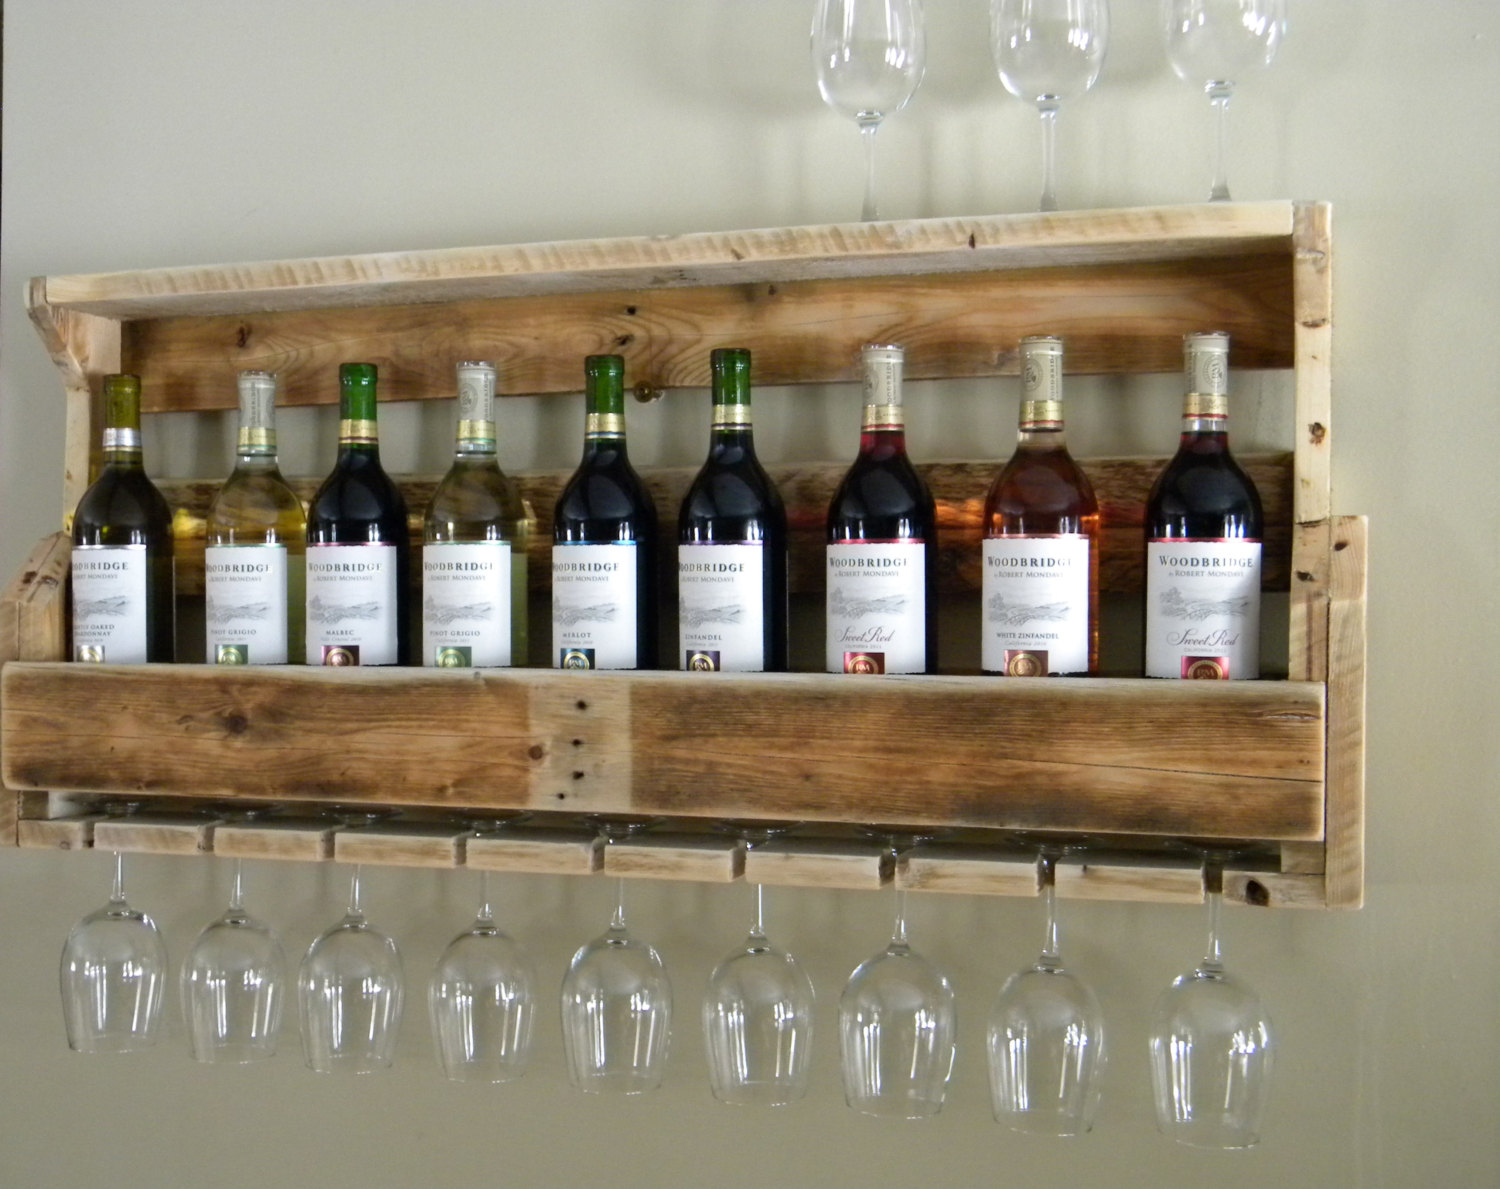
Step 7: Insert the Bottles
With your riddling wine rack now transformed into a personalized work of art, the final step involves inserting your cherished bottles to bring the piece to life. This culminating stage not only showcases your craftsmanship but also presents an opportunity to display your favorite wines in an elegant and accessible manner.
As you select the bottles for display, consider arranging them in a visually appealing manner within the rack. The symmetrical placement of the bottles can create a balanced and aesthetically pleasing presentation. Additionally, you may choose to incorporate decorative elements such as greenery, LED lighting, or wine-themed accents to further enhance the display.
As you carefully position each bottle within its designated slot, take a moment to appreciate the culmination of your efforts. The riddling wine rack not only serves as a functional storage solution but also as a striking focal point that adds character and sophistication to your living space.
Furthermore, consider rotating the bottles periodically to showcase different labels or highlight special vintages. This dynamic approach to displaying your wine collection adds an interactive element to the rack, inviting admiration and conversation among guests.
As you complete the insertion of the bottles, step back and admire the transformation of raw materials into a functional and visually captivating piece of furniture. The riddling wine rack now stands as a testament to your creativity and dedication, enriching your living space with its distinctive charm and practical utility.
Congratulations on completing this rewarding endeavor, and may your riddling wine rack serve as a source of pride and enjoyment as you showcase your passion for wine and craftsmanship.
Conclusion
Congratulations on successfully crafting your very own riddling wine rack! Through meticulous planning, precise craftsmanship, and a touch of creativity, you have transformed raw materials into a functional and visually captivating piece of furniture that enhances your living space.
As you reflect on the journey from the initial concept to the completed rack, take pride in the skills you’ve honed and the personal touch you’ve infused into this project. The riddling wine rack not only serves as a stylish display for your favorite bottles but also stands as a testament to your dedication and ingenuity.
Moreover, the process of creating the riddling wine rack extends beyond the construction itself. It represents an opportunity to express your individuality and add a personalized touch to your home decor. By integrating your unique style and preferences, you’ve created a piece of furniture that resonates with your personality and enriches your living environment.
As you admire the completed rack, envision the conversations and shared moments it will inspire among friends and family. The rack’s elegant design and functional purpose make it a captivating focal point, sparking dialogue and admiration among wine enthusiasts and visitors alike.
Furthermore, the satisfaction derived from completing this project serves as a testament to your ability to transform inspiration into tangible creations. Whether you’re an experienced DIY enthusiast or a newcomer to woodworking, the riddling wine rack stands as a testament to the rewarding nature of hands-on craftsmanship and the joy of bringing ideas to life.
As you integrate the riddling wine rack into your living space, may it serve as a source of pride and inspiration, reflecting your passion for wine and your dedication to creating functional and aesthetically pleasing furniture. Cheers to your successful endeavor, and may your riddling wine rack continue to be a cherished and admired feature in your home for years to come!
Frequently Asked Questions about How To Make A Riddling Wine Rack
Was this page helpful?
At Storables.com, we guarantee accurate and reliable information. Our content, validated by Expert Board Contributors, is crafted following stringent Editorial Policies. We're committed to providing you with well-researched, expert-backed insights for all your informational needs.

0 thoughts on “How To Make A Riddling Wine Rack”