Home>Furniture & Design>Living Room Furniture>How To Remove A Dining Table Leaf
Living Room Furniture
How To Remove A Dining Table Leaf
Modified: January 9, 2024
Learn how to remove a dining table leaf easily with our step-by-step guide. Keep your living room furniture versatile and functional. Discover more furniture and design tips!
(Many of the links in this article redirect to a specific reviewed product. Your purchase of these products through affiliate links helps to generate commission for Storables.com, at no extra cost. Learn more)
Introduction
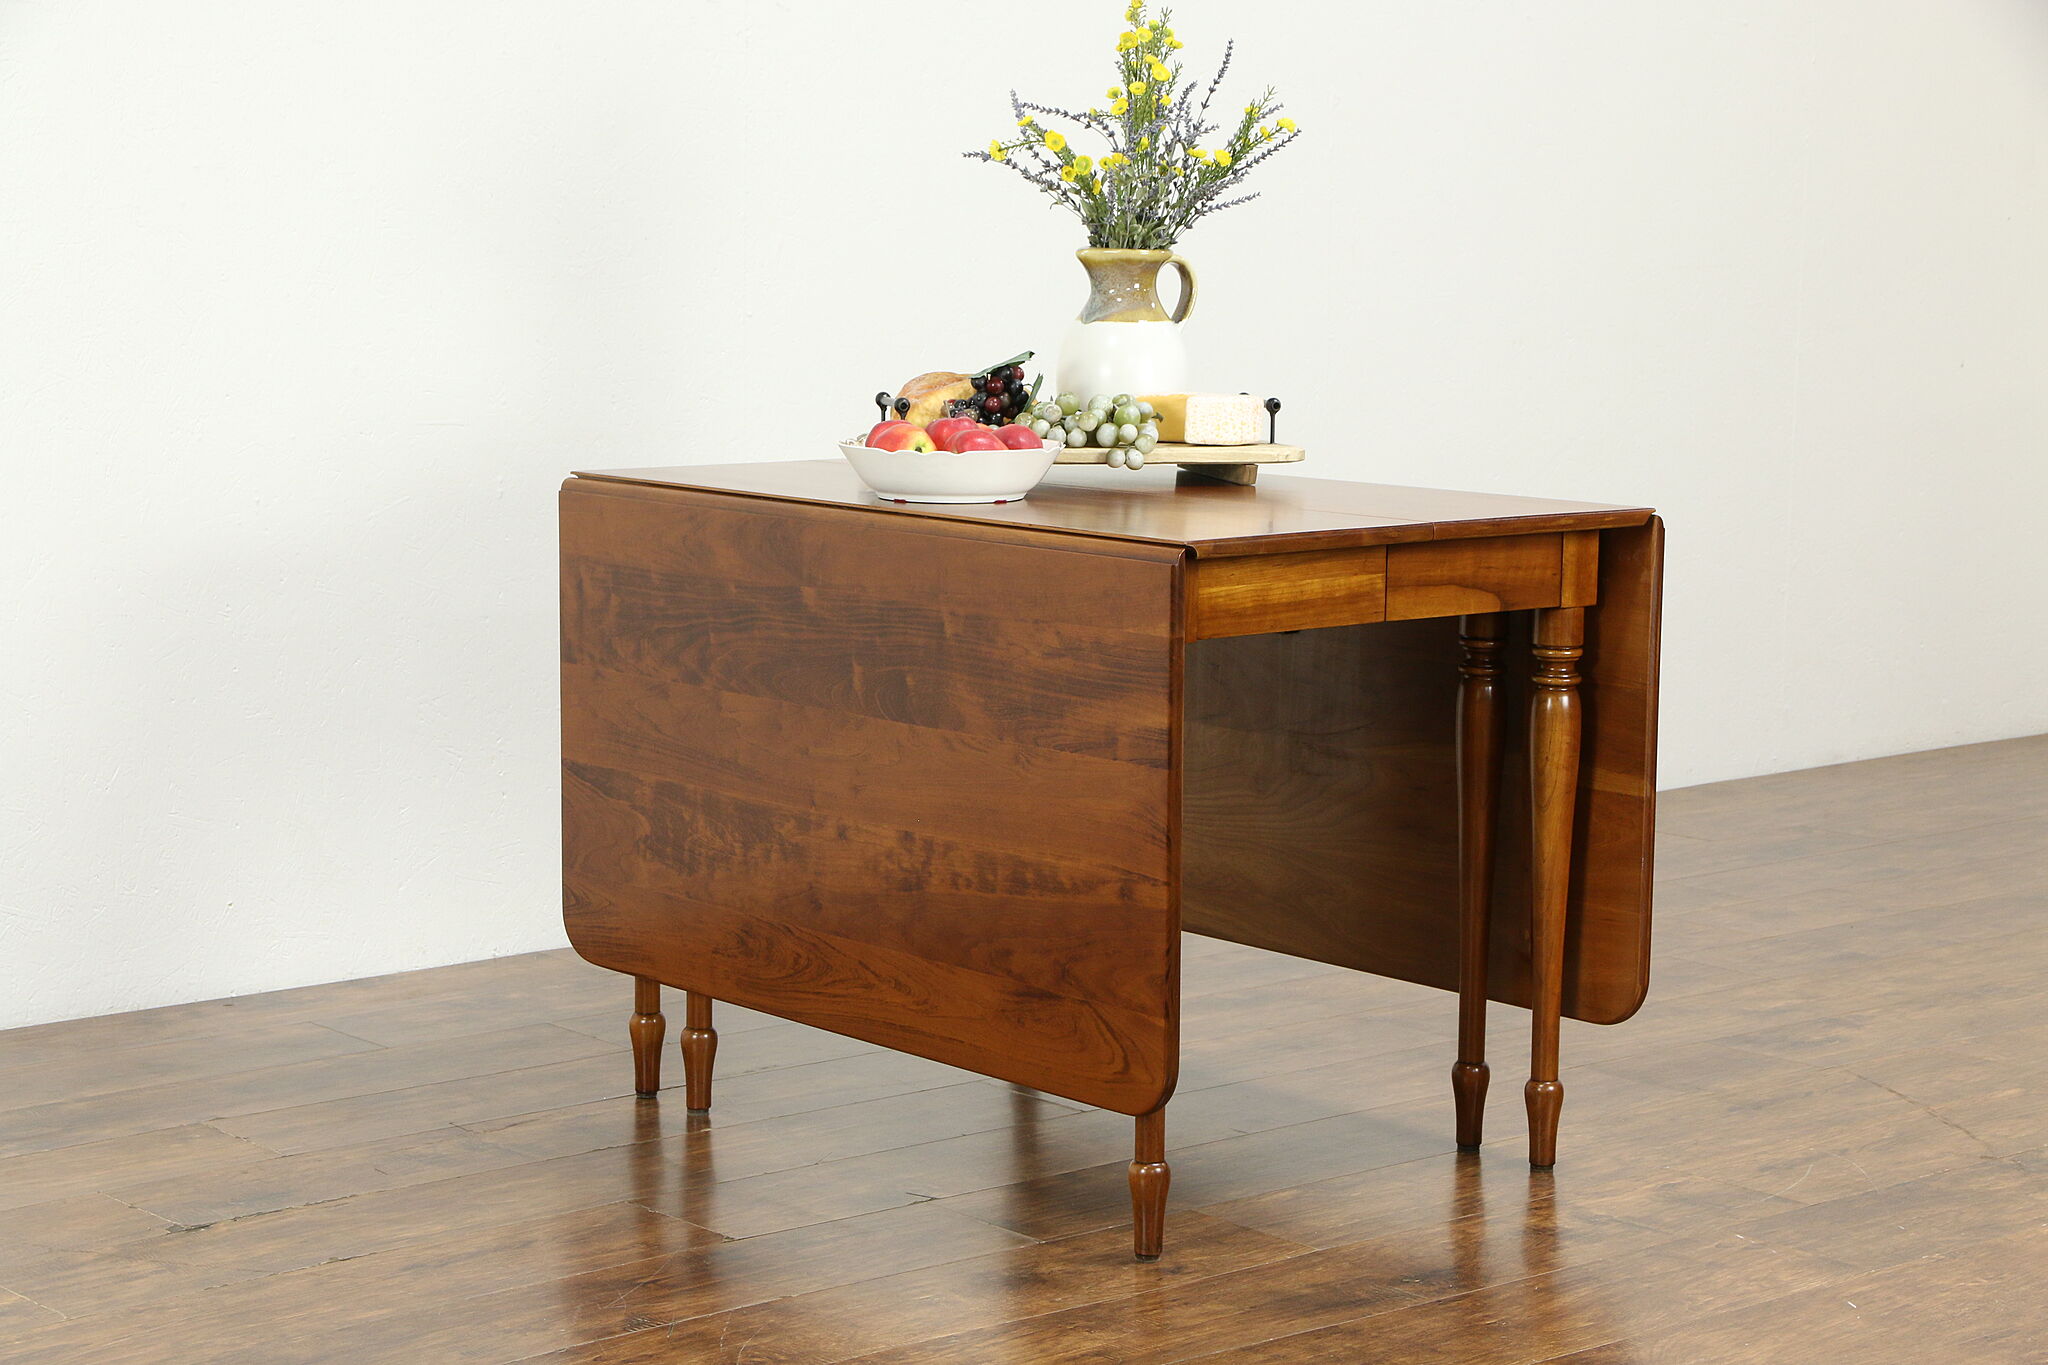
Welcome to the guide on how to remove a dining table leaf! Whether you're preparing for a cozy family dinner or creating space for a lively gathering, understanding the process of removing a dining table leaf is essential. Dining tables with removable leaves offer versatility, allowing you to adjust the table's size to accommodate varying numbers of guests. By following a few simple steps, you can seamlessly transform your dining table to suit your specific needs.
In this comprehensive guide, we will walk you through the process of removing a dining table leaf with ease. From clearing the table to storing the leaf, each step is designed to simplify the task and ensure that you can make the most of your furniture. So, let's dive in and discover the straightforward yet essential steps to remove a dining table leaf, empowering you to effortlessly adapt your dining space to any occasion.
Key Takeaways:
- Easily adjust your dining table to accommodate guests by following simple steps to remove the table leaf. Clear the table, locate the locks, unlock and remove the leaf with care, and store it properly for future use.
- Master the art of adapting your dining space for any occasion by confidently removing and storing the dining table leaf. With attentiveness and care, enhance the functionality and versatility of your dining table for years to come.
Read more: What Is A Dining Table Leaf?
Step 1: Clear the Table
Before beginning the process of removing the dining table leaf, it’s crucial to clear the table of any items that might obstruct your movements. Start by removing all tableware, including plates, utensils, and glassware. Clearing the table allows you to access the leaf and its securing mechanisms without any hindrances.
Additionally, if there are any decorative elements or centerpieces on the table, carefully set them aside to create a clear and unobstructed workspace. By taking these initial steps, you ensure that the process of removing the dining table leaf is smooth and unencumbered.
Remember to handle delicate items with care and to place them in a secure location to prevent any damage. Once the table is clear, you are ready to proceed to the next step of locating the latches or locks that secure the dining table leaf in place.
Step 2: Locate the Latches or Locks
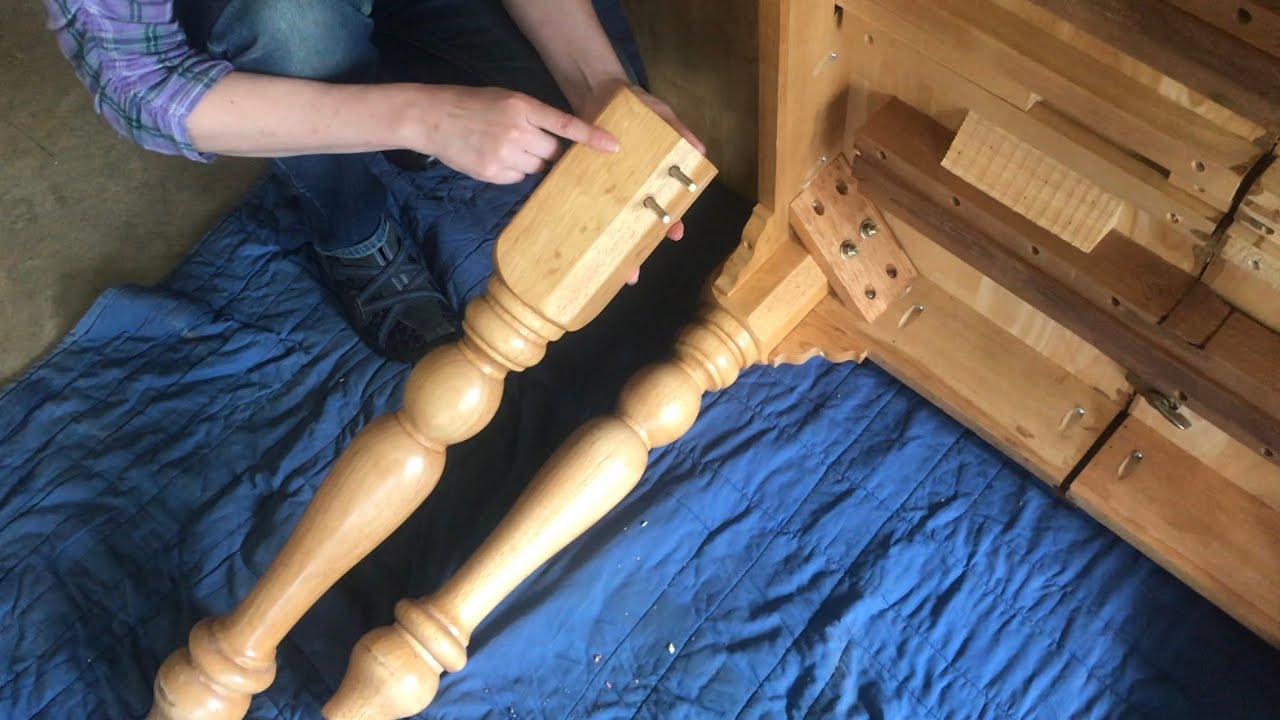
After clearing the table, the next step in removing a dining table leaf is to locate the latches or locks that secure it in place. These mechanisms are typically positioned underneath the table and are designed to keep the leaf stable during use. To find the latches or locks, you may need to kneel down and visually inspect the underside of the table.
Depending on the table’s design, the latches or locks may be easily identifiable, featuring prominent handles or levers. In other cases, they may be more discreet, blending seamlessly with the table’s structure. If the latches or locks are not immediately visible, run your hand along the underside of the table to feel for any protruding mechanisms or recessed areas where the locks may be situated.
It’s important to approach this step with patience and attentiveness, as some latches or locks may be subtly integrated into the table’s construction. Take your time to thoroughly examine the underside of the table, ensuring that you have located all the latches or locks before proceeding to the next step.
Once you have identified the latches or locks, you are ready to unlock the dining table leaf and prepare it for removal. This leads us to the next crucial step in the process: unlocking the leaf to release it from the table’s structure.
Step 3: Unlock the Leaf
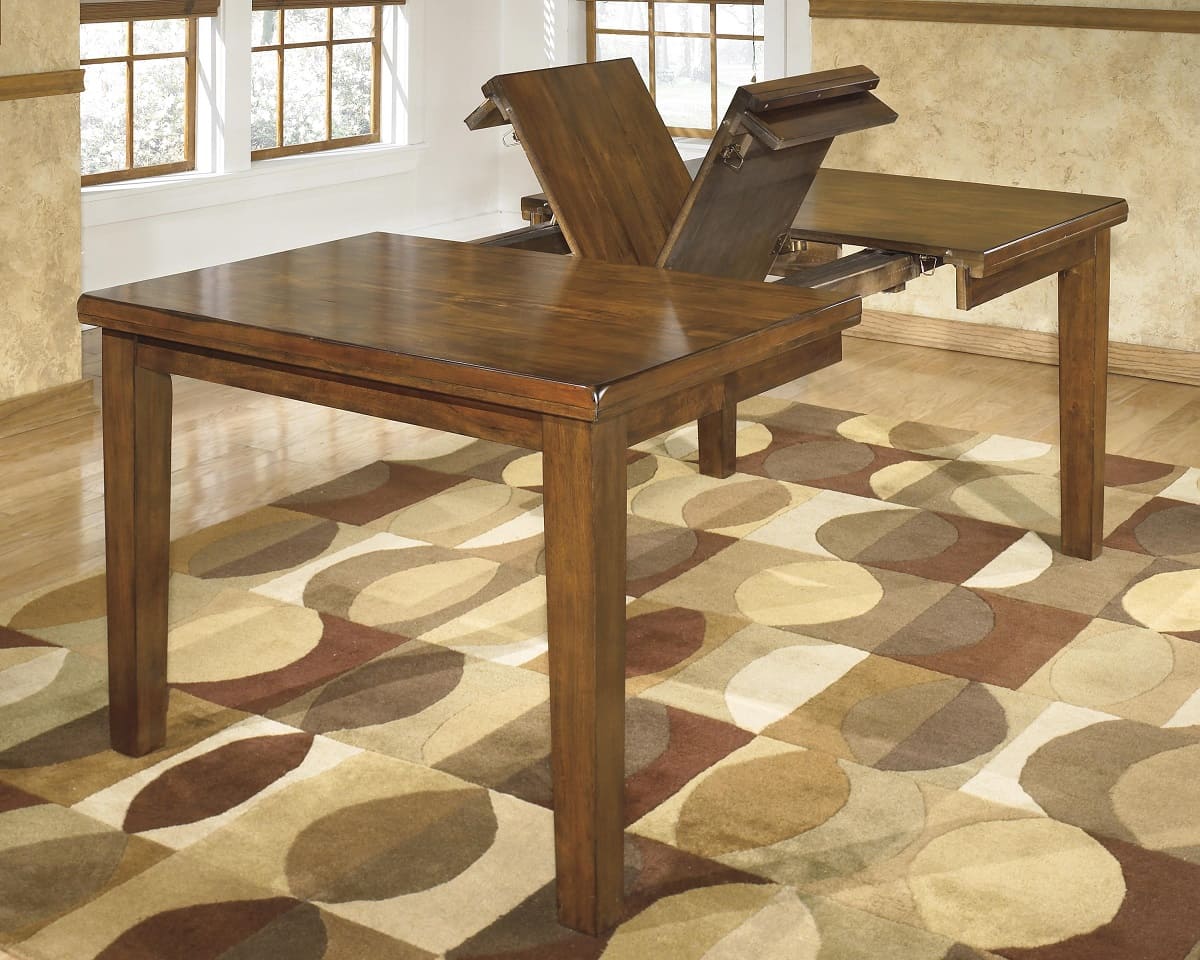
With the latches or locks located, the next step in removing a dining table leaf is to unlock it from the table’s structure. Depending on the table’s design, the unlocking mechanism may vary. Common methods include pressing a release button, turning a lever, or gently lifting the leaf to disengage it from the latches or locks.
If the table features a release button, it is typically positioned near the latches or locks on the underside of the table. Pressing the release button will disengage the leaf, allowing it to be lifted and removed. In the case of a lever, gently turning it in the designated direction will release the leaf, enabling you to proceed with its removal.
When unlocking the dining table leaf, it’s essential to exercise caution and follow the manufacturer’s instructions if available. Some tables may have specific guidelines for unlocking the leaf to ensure that it is done safely and without causing any damage to the table or the leaf itself.
As you unlock the leaf, be mindful of any resistance or unusual movements that may indicate the need for adjustments or additional care. By approaching this step with attentiveness and precision, you can smoothly release the leaf from its secured position, setting the stage for its removal in the subsequent step.
Once the leaf is unlocked, you are ready to proceed to the next step: removing the leaf from the dining table to create the desired seating arrangement or space configuration.
To remove a dining table leaf, first, unlock the table’s mechanism. Then, gently lift and slide the leaf out from the center of the table. Finally, store the leaf in a safe place to avoid damage.
Step 4: Remove the Leaf
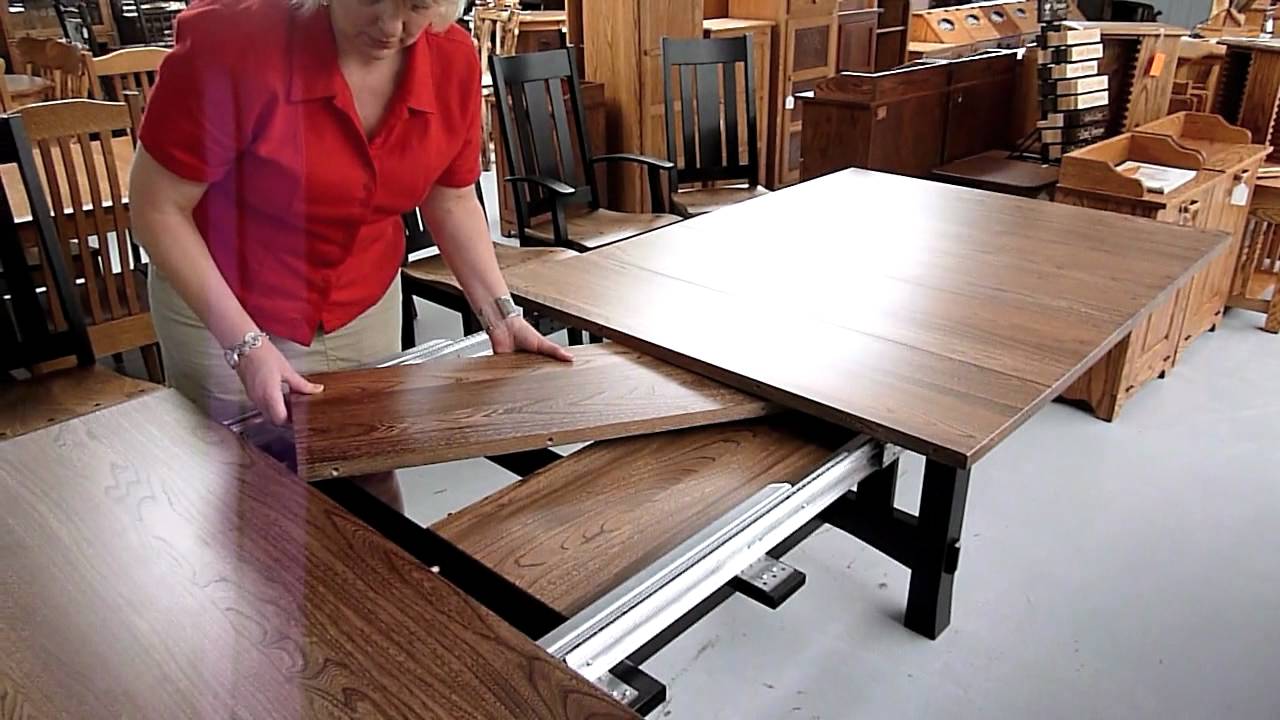
After unlocking the dining table leaf, the next step is to carefully remove it from the table’s structure. Depending on the table’s design, the leaf may lift out easily once unlocked, or it may require gentle maneuvering to disengage it completely.
To remove the leaf, gently lift it from the table, taking care to support its weight and ensure a steady, controlled movement. If the leaf is large or heavy, it may be helpful to have an additional person assist you in lifting and carrying it to avoid any strain or potential accidents.
As you lift the leaf, be mindful of its alignment with the table’s surface to prevent any scraping or scratching. If the leaf is equipped with alignment pins or guides, ensure that they disengage smoothly as the leaf is lifted, allowing it to be removed without any resistance.
Once the leaf is lifted clear of the table, set it aside in a safe and designated area, ensuring that it is supported and protected from any potential damage. If the leaf is not intended for immediate use, consider covering it with a soft, clean cloth to safeguard it from dust and other environmental factors.
With the leaf successfully removed, you have effectively adjusted the dining table to accommodate your specific needs, whether it’s creating additional seating space or configuring the table for a more intimate setting. The final step in this process involves storing the leaf securely until it is needed again, ensuring that it remains in optimal condition for future use.
Now that the leaf has been removed, let’s move on to the next step: storing the leaf to preserve its quality and functionality for the long term.
Read more: How To Add A Leaf To A Dining Table
Step 5: Store the Leaf
After removing the dining table leaf, it’s essential to store it properly to maintain its quality and functionality for future use. Whether you’re storing the leaf for a brief period or an extended duration, following these guidelines will help safeguard it from damage and ensure that it remains in optimal condition.
First, it’s important to choose an appropriate storage location for the leaf. Ideally, the storage area should be clean, dry, and free from extreme temperature fluctuations. Avoid areas prone to moisture or direct sunlight, as these conditions can compromise the integrity of the wood and lead to warping or discoloration over time.
Before placing the leaf in storage, ensure that it is clean and free from any debris or spills. Wipe the surface gently with a soft, dry cloth to remove any dust or particles that may have accumulated during use. If the leaf requires more thorough cleaning, use a mild wood cleaner recommended by the manufacturer to maintain its finish and appearance.
Once the leaf is clean and dry, consider using a protective cover or wrapping it in a soft, breathable material to shield it from dust and scratches. Avoid using plastic or non-breathable covers, as these can trap moisture and potentially damage the wood over time. Instead, opt for fabric covers or storage bags designed specifically for protecting furniture pieces.
If the leaf is particularly large or heavy, ensure that it is stored in a manner that prevents undue pressure or strain on its structure. Avoid stacking heavy items on top of the leaf, as this can lead to warping or distortion. Instead, store the leaf horizontally in a secure and level position to maintain its shape and integrity.
Finally, label the storage location clearly to facilitate easy retrieval when the leaf is needed again. By providing clear identification, you can streamline the process of reattaching the leaf to the dining table, ensuring a seamless transition when adjusting the table’s size for future gatherings or events.
By following these steps, you can store the dining table leaf with confidence, knowing that it is protected and preserved for future use. With the leaf safely stored, you have successfully completed the process of removing and safeguarding this essential component of your dining table.
With the dining table leaf safely stored, you have completed the essential steps to remove and preserve it, ensuring that it remains in optimal condition for future use. Whether you’re adjusting the table size for a special occasion or simply reconfiguring your dining space, the ability to remove and store the leaf effectively enhances the versatility and functionality of your dining table.
Now that you have mastered the process of removing a dining table leaf, you are equipped to adapt your dining space to suit any occasion with ease and confidence.
Conclusion
Congratulations on successfully mastering the art of removing a dining table leaf! By following the simple yet essential steps outlined in this guide, you have gained the knowledge and confidence to adapt your dining space to accommodate varying numbers of guests and create the ideal setting for any occasion.
Understanding how to clear the table, locate the latches or locks, unlock the leaf, remove it with care, and store it properly empowers you to make the most of your dining table’s versatility. Whether you’re hosting a festive gathering, setting the stage for an intimate family dinner, or simply reconfiguring your dining area, the ability to adjust the table’s size effortlessly enhances its functionality and adaptability.
By approaching the process with attentiveness and care, you ensure that both the dining table and its leaf remain in optimal condition, ready to serve you and your guests for years to come. The ability to remove and store the leaf effectively preserves its quality and functionality, contributing to the long-term enjoyment and utility of your dining table.
As you continue to explore the possibilities of your dining space, remember that the process of removing a dining table leaf is a simple yet impactful way to tailor the table to your specific needs. Whether you’re creating a spacious setting for a lively gathering or an intimate arrangement for a quiet meal, the versatility of your dining table allows you to adapt with ease and style.
With this newfound knowledge, you are well-equipped to embrace the flexibility and functionality of your dining table, confidently adjusting its size to suit any occasion. The art of removing a dining table leaf is a valuable skill that enhances your ability to create inviting and accommodating dining experiences for yourself and your guests.
So, as you embark on future gatherings and everyday moments around your dining table, may the process of removing a dining table leaf serve as a reminder of the adaptability and warmth that this essential piece of furniture brings to your home.
Frequently Asked Questions about How To Remove A Dining Table Leaf
Was this page helpful?
At Storables.com, we guarantee accurate and reliable information. Our content, validated by Expert Board Contributors, is crafted following stringent Editorial Policies. We're committed to providing you with well-researched, expert-backed insights for all your informational needs.


0 thoughts on “How To Remove A Dining Table Leaf”