Home>Furniture & Design>Living Room Furniture>How To Resurface A Dining Table

Living Room Furniture
How To Resurface A Dining Table
Modified: January 6, 2024
Learn how to resurface a dining table to give it a fresh look and enhance your living room furniture and design. Follow our step-by-step guide for a stunning transformation.
(Many of the links in this article redirect to a specific reviewed product. Your purchase of these products through affiliate links helps to generate commission for Storables.com, at no extra cost. Learn more)
Introduction
So, you've had your dining table for years, and while it's served you well, it's starting to show signs of wear and tear. The once-gleaming finish is now marred with scratches, dents, and water stains, and you're considering replacing it with a new one. But before you start shopping for a replacement, have you considered the possibility of giving your beloved dining table a second chance at life? With the right tools, a bit of elbow grease, and a touch of creativity, you can resurface your dining table and breathe new life into it.
Resurfacing a dining table is a rewarding project that allows you to unleash your creativity and restore a piece of furniture that holds sentimental value. Whether it's a family heirloom passed down through generations or a table that has been the centerpiece of countless memorable meals and gatherings, resurfacing it can revitalize its appearance and extend its lifespan.
In this comprehensive guide, we'll walk you through the step-by-step process of resurfacing your dining table. From gathering the necessary materials to applying the new finish, we'll cover everything you need to know to embark on this DIY adventure. So, roll up your sleeves, put on your creative hat, and get ready to transform your dining table into a stunning focal point that will continue to be the heart of your home for years to come.
Key Takeaways:
- Give your old dining table a new lease on life by resurfacing it with the right tools and materials, unleashing your creativity, and preserving its sentimental value.
- Transform your dining table into a stunning focal point by meticulously removing the old finish, sanding it to perfection, applying a new finish, and cherishing its renewed allure for years to come.
Read more: How To Resurface Fireplace
Step 1: Gather Materials and Prepare the Work Area
Before diving into the resurfacing process, it's essential to gather all the necessary materials and prepare your work area. Here's what you'll need:
- Protective Gear: Safety should always come first. Equip yourself with safety goggles, a dust mask, and gloves to protect your eyes, respiratory system, and hands.
- Drop Cloths or Plastic Sheets: Cover the floor and surrounding area with drop cloths or plastic sheets to protect them from dust, drips, and spills.
- Workbench or Table: Set up a sturdy workbench or table in a well-ventilated area, such as a garage or outdoor space, to serve as your workspace.
- Stripping Agent: Depending on the current finish of your dining table, you may need a chemical stripping agent to remove the old finish. Choose an appropriate product based on the type of finish you're dealing with.
- Sanding Tools: Invest in a variety of sandpaper grits and sanding blocks or an electric sander to effectively smooth the table's surface.
- Wood Filler: If your table has deep scratches or gouges, wood filler can be used to fill in these imperfections and create a smooth surface.
- Stain or Paint: Decide whether you want to stain the table to enhance its natural wood grain or paint it to achieve a different look. Ensure you have the appropriate stain or paint, along with brushes and applicators.
- Protective Finish: Once the table is resurfaced, a protective finish, such as polyurethane or varnish, will safeguard the new surface and enhance its durability.
- Cleaners and Rags: Prepare cleaning solutions and soft, lint-free cloths to clean the table before and after each resurfacing step.
With your materials assembled, it's time to prepare the work area. Here are some essential steps to ensure your workspace is ready for the resurfacing process:
- Clean the Table: Remove any debris, dust, or residues from the table's surface by wiping it down with a damp cloth. Let it dry completely before proceeding.
- Ventilation: If you're working indoors, open windows and use fans to ensure proper ventilation and minimize exposure to fumes from stripping agents and finishes.
- Organize Your Tools: Arrange your tools and materials within easy reach, keeping them organized and accessible throughout the project.
- Secure the Work Area: Ensure that the workbench or table is stable and secure to prevent any accidents or disruptions during the resurfacing process.
By gathering the necessary materials and preparing your work area meticulously, you're setting the stage for a smooth and successful dining table resurfacing endeavor. With everything in place, you're now ready to embark on the transformative journey of restoring your dining table to its former glory.
Step 2: Remove the Old Finish
Now that you have all your materials assembled and your work area prepared, it’s time to bid farewell to the old finish of your dining table. Whether the current finish is chipped, worn, or simply no longer suits your aesthetic preferences, removing it is a crucial first step in the resurfacing process.
Here’s how to effectively remove the old finish from your dining table:
- Test the Stripping Agent: If you’re using a chemical stripping agent, it’s essential to test it in an inconspicuous area of the table to ensure it won’t damage the wood. Follow the product instructions and observe how the finish reacts to the stripping agent.
- Apply the Stripping Agent: Once you’ve confirmed the suitability of the stripping agent, apply it generously to the table’s surface using a brush or rag. Ensure that the entire surface is evenly coated with the stripping agent.
- Allow Dwell Time: The stripping agent will need some time to work its magic. Follow the manufacturer’s recommendations regarding the dwell time, which typically ranges from 15 minutes to an hour, depending on the product and the thickness of the old finish.
- Scrape Off the Old Finish: After the dwell time has elapsed, use a putty knife or a paint scraper to gently remove the old finish. Work in the direction of the wood grain to avoid causing any damage to the table’s surface. You may need to repeat the application of the stripping agent and the scraping process to ensure all the old finish is removed.
- Clean the Surface: Once the old finish has been successfully removed, clean the table’s surface thoroughly with a suitable wood cleaner to eliminate any residue from the stripping agent. This step is crucial to prepare the wood for the next phase of the resurfacing process.
Removing the old finish is a labor-intensive yet essential step that sets the stage for the subsequent phases of the resurfacing project. By carefully following these steps, you’ll effectively bid adieu to the worn-out finish and pave the way for the table’s rejuvenation.
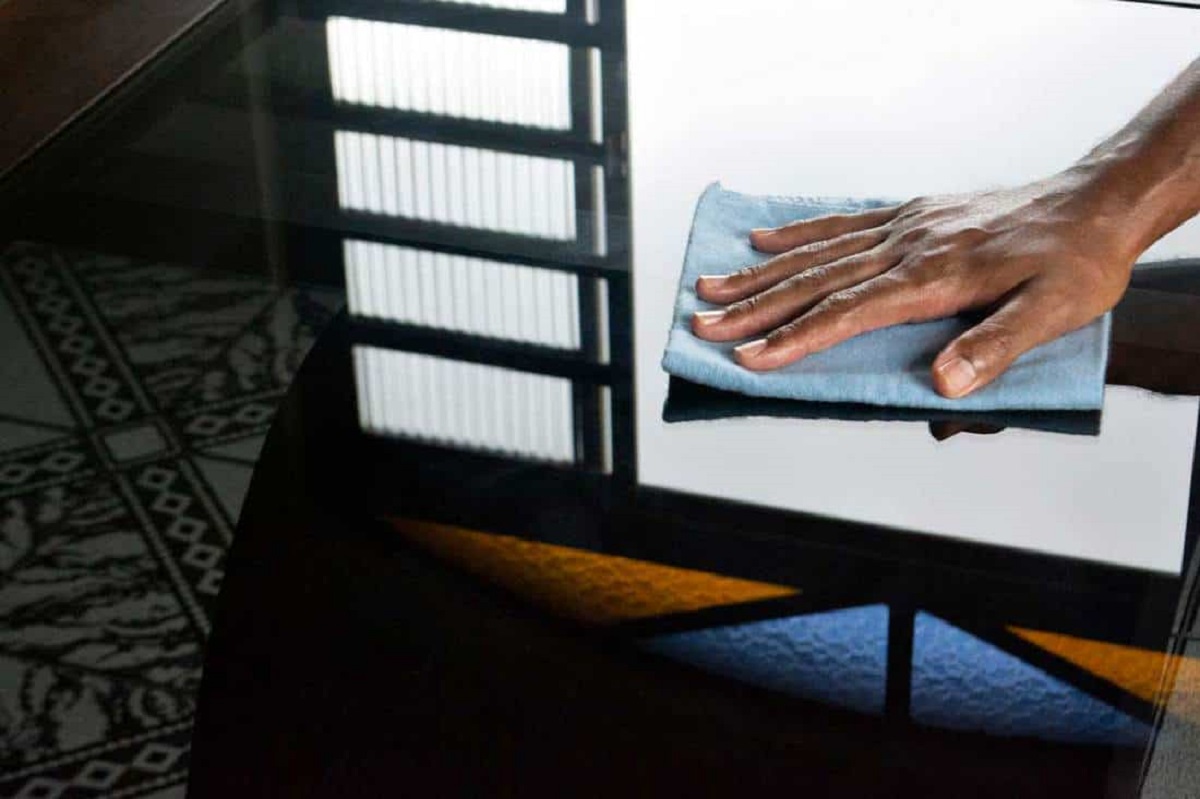
Before starting to resurface a dining table, make sure to thoroughly clean and sand the surface to remove any old finish or imperfections. This will ensure a smooth and even surface for the new finish to adhere to.
Step 3: Sand the Table
With the old finish removed, the next pivotal phase in the resurfacing journey is to sand the table. Sanding is a transformative process that smooths the wood’s surface, eradicates imperfections, and prepares it for the application of the new finish. Here’s a comprehensive guide to effectively sanding your dining table:
- Select the Right Grit: Begin by choosing the appropriate grit of sandpaper for the initial sanding. Coarse grits, such as 60 or 80, are ideal for removing any stubborn remnants of the old finish and smoothing out uneven areas. As you progress, transition to finer grits, such as 120 and 220, to achieve a progressively smoother surface.
- Sand with the Grain: Always sand in the direction of the wood grain to avoid creating unsightly scratches or blemishes. This technique ensures a uniform and professional-looking result.
- Use a Sanding Block or Electric Sander: Depending on the size of the table and your personal preference, you can opt for a sanding block for manual sanding or an electric sander for larger surfaces. Both tools are effective in achieving a smooth and consistent finish.
- Focus on Detailing: Pay special attention to intricate details, edges, and corners of the table. These areas may require hand sanding or the use of smaller sanding tools to ensure thorough and precise smoothing.
- Remove Sanding Residues: Periodically wipe the table with a clean, dry cloth to remove sanding dust and assess the smoothness of the surface. This step allows you to identify any remaining imperfections that require further attention.
- Final Sanding for a Silky Finish: Once the table’s surface feels uniformly smooth to the touch, perform a final sanding using a fine-grit sandpaper to achieve a silky, polished finish. This step sets the stage for the application of the new finish.
By meticulously sanding the table, you’re not only refining its surface but also unveiling the natural beauty of the wood. This transformative process sets the foundation for the table’s rejuvenation and primes it for the next phase of the resurfacing endeavor.
Step 4: Apply the New Finish
With the table meticulously sanded to perfection, it’s time to infuse it with a new lease on life by applying the desired finish. Whether you opt for a rich stain to accentuate the natural wood grain or a vibrant paint to introduce a fresh aesthetic, this phase of the resurfacing process allows you to unleash your creativity and personalize the table to suit your preferences. Here’s a comprehensive guide to applying the new finish:
- Choose Your Finish: Select the finish that aligns with your vision for the table. Whether it’s a penetrating wood stain, a vibrant paint color, or a clear varnish to preserve the wood’s natural beauty, ensure that you have all the necessary materials and tools for your chosen finish.
- Apply the Finish Evenly: Use a high-quality brush, foam applicator, or sprayer to apply the finish evenly across the table’s surface. Work methodically and maintain a consistent application to achieve a professional result.
- Follow the Grain: Just as with sanding, it’s crucial to apply the finish in the direction of the wood grain. This technique ensures a seamless and visually appealing result that accentuates the table’s natural characteristics.
- Allow for Drying Time: Depending on the type of finish you’ve chosen, allow ample time for the initial coat to dry completely before applying subsequent coats. Follow the manufacturer’s recommendations for drying times to ensure optimal results.
- Assess the Coverage: After the first coat has dried, assess the coverage and smoothness of the finish. If necessary, lightly sand the surface between coats to achieve a flawless result. Apply additional coats as needed to achieve the desired depth and richness of the finish.
- Protect the New Finish: Once the final coat has dried and the finish has reached its desired appearance, protect it with a clear topcoat or polyurethane to enhance durability and safeguard the table against daily wear and tear.
Applying the new finish is a transformative phase that allows you to breathe new life into your dining table and infuse it with your personal style. Whether you opt for a classic stained finish or a bold painted statement, this step marks the culmination of your resurfacing journey and sets the stage for the table’s triumphant reemergence as a stunning centerpiece in your home.
Read more: How To Seal A Dining Table
Step 5: Reassemble and Enjoy Your Newly Resurfaced Dining Table
Congratulations! You’ve successfully navigated the exhilarating journey of resurfacing your dining table, and now it’s time to bring it all together for the grand finale. With the new finish adorning its surface, the table is poised to reclaim its role as the heart of your home, ready to host cherished moments and create lasting memories. Here’s how to complete the resurfacing process and revel in the beauty of your revitalized dining table:
- Inspect the Table: Take a moment to admire the table and ensure that the new finish has dried to perfection, exuding the desired luster and depth. Revel in the transformation and envision the table’s future prominence in your living space.
- Reassemble the Table: If you disassembled any components of the table during the resurfacing process, carefully reassemble them, ensuring that each part is securely and precisely fitted. Exercise caution to avoid damaging the newly finished surface.
- Return the Table to Its Place: With the table fully reassembled, return it to its designated spot in your dining area or kitchen. Take a moment to appreciate how its rejuvenated presence elevates the ambiance of the room.
- Add Personal Touches: Dress the table with your favorite tablecloth, placemats, or centerpiece to accentuate its renewed allure. Infuse it with your personal style and let it reflect your unique taste and creativity.
- Invite Guests to Indulge: Embrace the joy of sharing a meal or hosting a gathering around your newly resurfaced dining table. Its refreshed charm and revived character provide the perfect backdrop for creating new memories and celebrating special occasions.
- Maintain and Cherish: Embrace a regular maintenance routine to preserve the beauty of your resurfaced table. Clean it with gentle, non-abrasive solutions and protect it from excessive heat, moisture, and sharp objects to ensure its longevity and enduring appeal.
As you bask in the radiance of your newly resurfaced dining table, take pride in the transformative journey you’ve embarked upon. Your dedication, creativity, and meticulous craftsmanship have breathed new life into a beloved piece of furniture, allowing it to continue its legacy as a cherished centerpiece in your home for years to come.
So, gather your loved ones, savor delightful meals, and create treasured moments around your resurfaced dining table, knowing that its renewed allure is a testament to your ingenuity and devotion to preserving the beauty of your living space.
Frequently Asked Questions about How To Resurface A Dining Table
Was this page helpful?
At Storables.com, we guarantee accurate and reliable information. Our content, validated by Expert Board Contributors, is crafted following stringent Editorial Policies. We're committed to providing you with well-researched, expert-backed insights for all your informational needs.


0 thoughts on “How To Resurface A Dining Table”