Home>Dining>Tableware>How To Remove Scratches From Wood Dining Table
Tableware
How To Remove Scratches From Wood Dining Table
Modified: November 1, 2024
Learn how to remove scratches from your wood dining table with these simple tips and tricks. Keep your tableware looking brand new and scratch-free.
(Many of the links in this article redirect to a specific reviewed product. Your purchase of these products through affiliate links helps to generate commission for Storables.com, at no extra cost. Learn more)
Introduction
Welcome to the world of tableware, where elegance meets functionality. A beautifully crafted dining table can be the centerpiece of your home, showcasing your style and providing a gathering place for family and friends. However, over time, the wear and tear of daily use can leave unsightly scratches on the wood surface, detracting from its natural beauty.
But fear not! With a little know-how and the right techniques, you can easily remove scratches from your wood dining table and restore its original allure. In this article, we will guide you through the process, step by step, and share some valuable tips for preventing future scratches. So, let’s dive in!
Key Takeaways:
- Easily remove scratches from your wood dining table by understanding the types of scratches, assessing their severity, and using methods like olive oil and vinegar for light scratches, wood filler for deeper scratches, and sanding for extensive damage.
- Prevent future scratches and maintain your wood dining table’s pristine condition by implementing simple measures such as using coasters, avoiding direct sunlight, and regularly cleaning and inspecting the table to preserve its natural beauty and functionality.
Read more: How To Remove Scratches From A Coffee Table
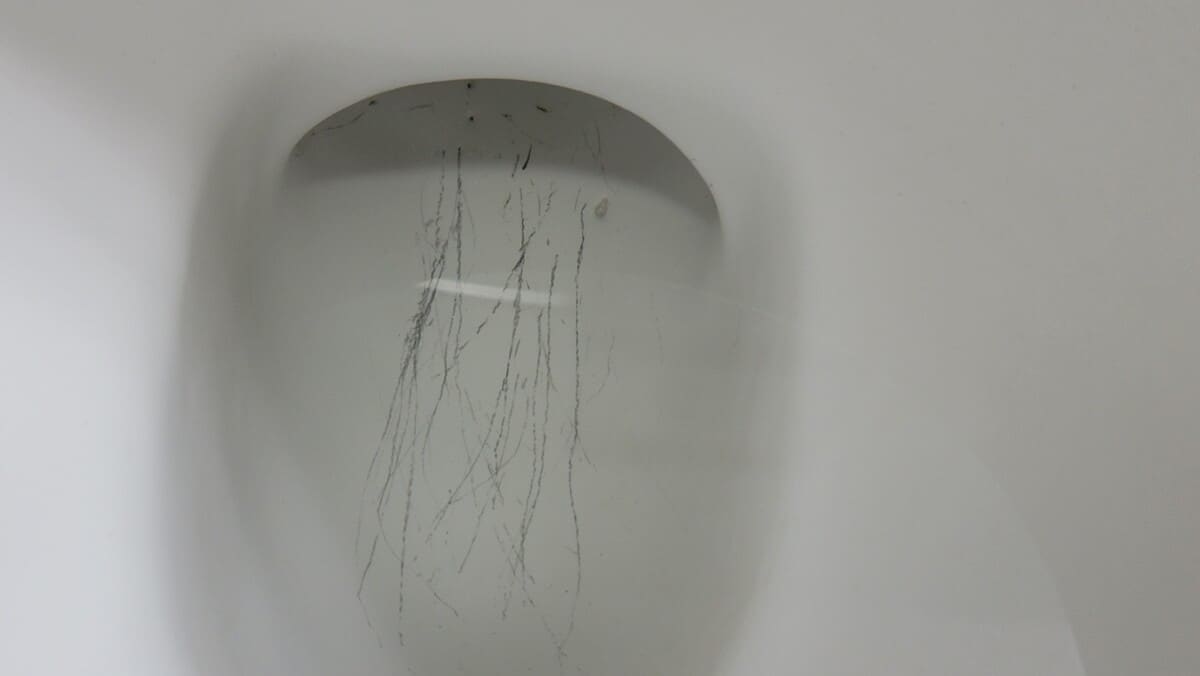
Understanding the Types of Wood Scratches
Before you embark on the journey of removing scratches from your wood dining table, it’s essential to understand the different types of scratches you may encounter. This knowledge will help you determine the appropriate method for repair and ensure the best possible outcome.
Surface Scratches: These are shallow scratches that only affect the top layer of the wood finish. They are generally caused by everyday use, such as sliding plates or cutlery across the table. Surface scratches are the easiest to remove and often require minimal effort to repair.
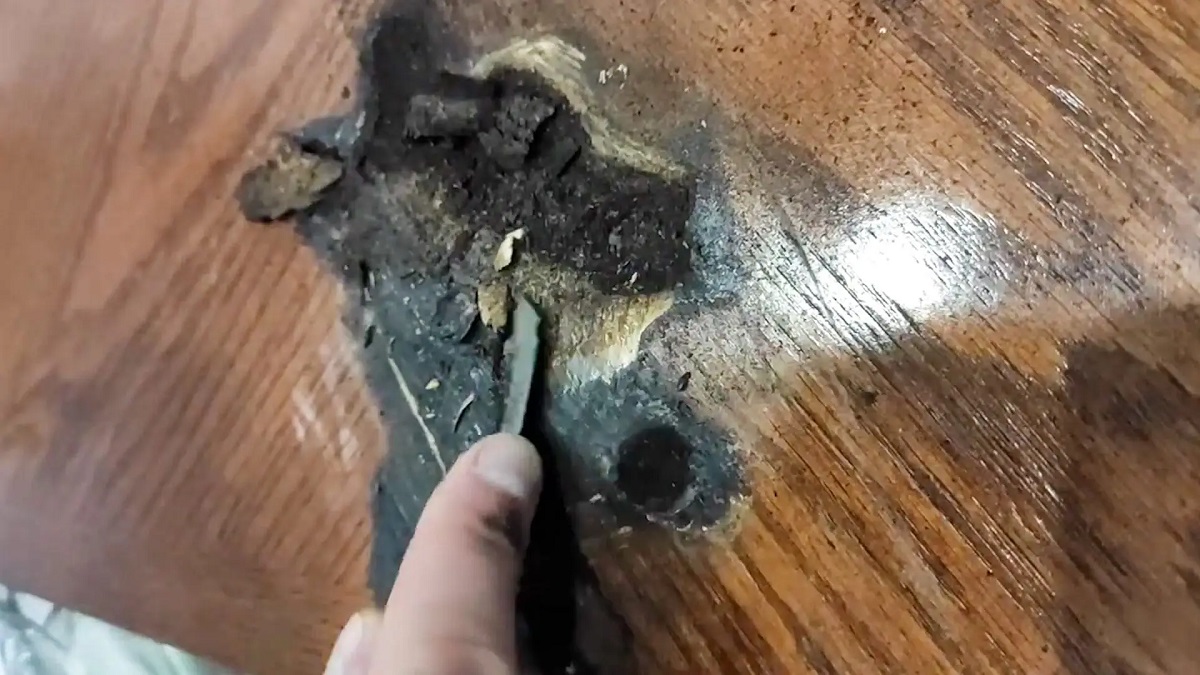
Deep Scratches: As the name implies, deep scratches penetrate beyond the surface layer of the wood. They are more visible and can be caused by accidents, heavy objects, or rough handling. Deep scratches may expose the bare wood underneath, requiring additional steps to repair and restore the damaged area.
Gouges: Unlike surface and deep scratches, gouges are deeper and wider, often resulting from more significant impacts or accidents. Gouges can create noticeable indentations or grooves in the wood surface, requiring more extensive repair work to restore the table’s smoothness and appearance.
By carefully examining the scratches on your wood dining table, you can determine the severity and select the appropriate repair method. Keep in mind that while some techniques can address multiple types of scratches, others may be specifically designed for certain damages. So, let’s move on to the next step and assess the severity of the scratches on your table.
Assessing the Severity of the Scratches
Once you have identified the types of scratches on your wood dining table, it’s time to assess their severity. This step will help you determine the level of repair required and the best course of action to take. Here’s how you can assess the severity of the scratches:
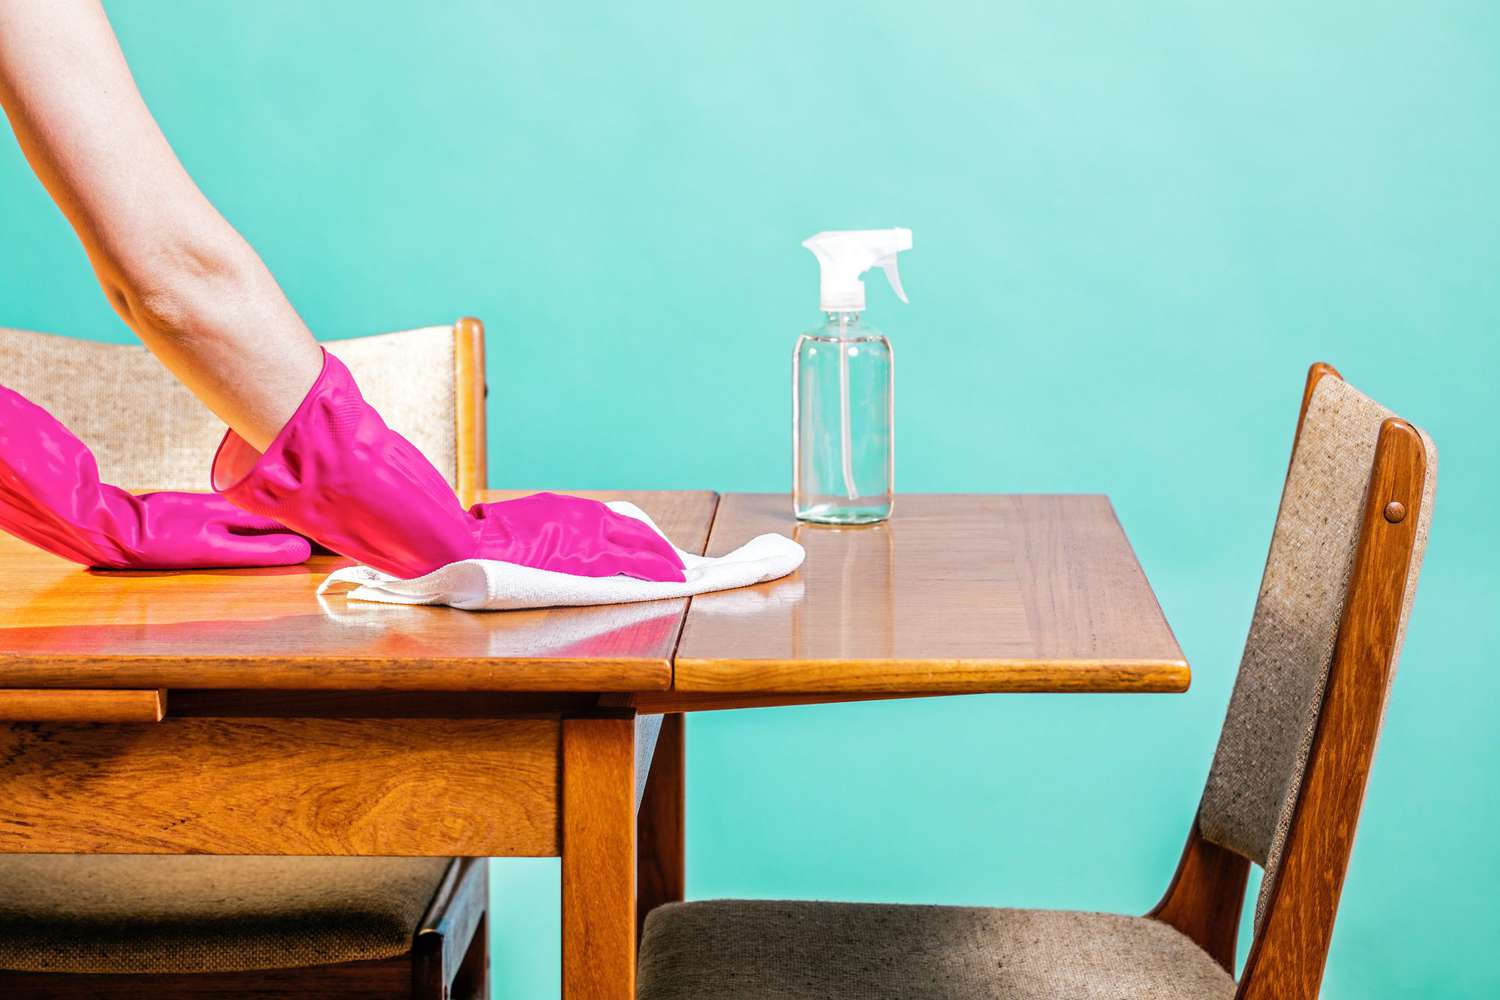
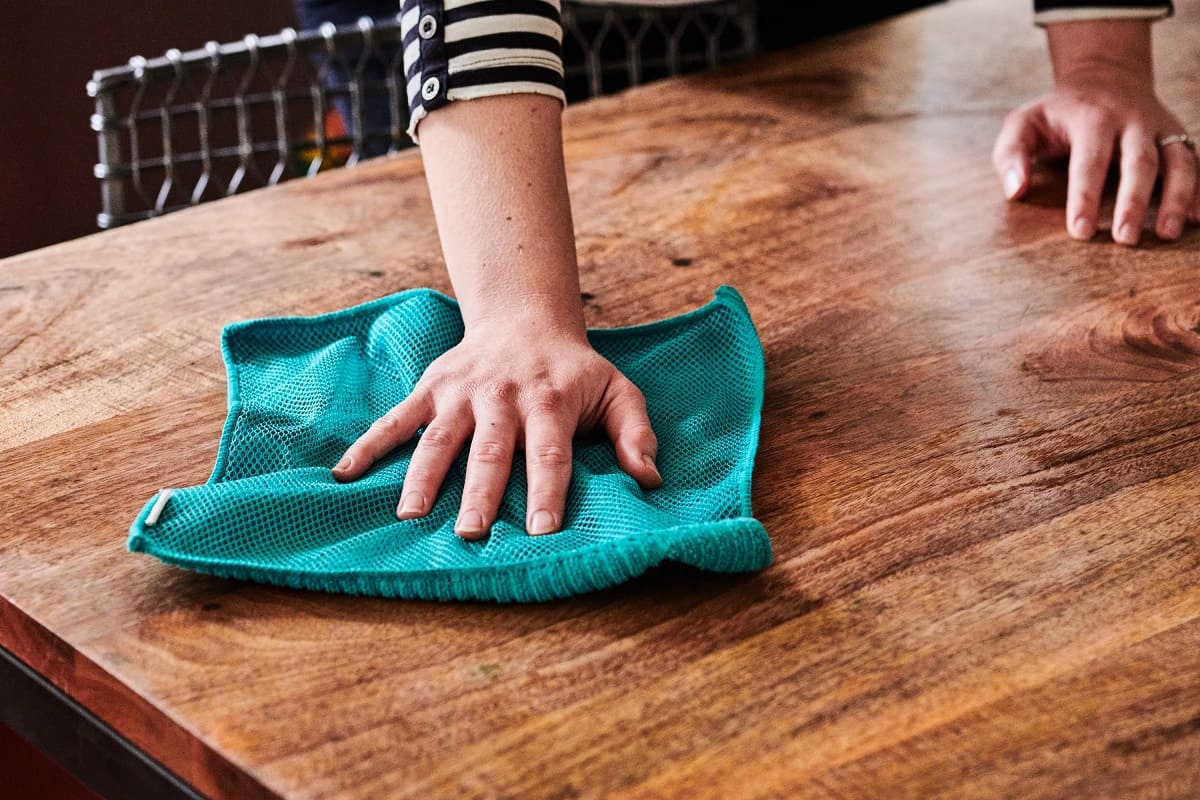
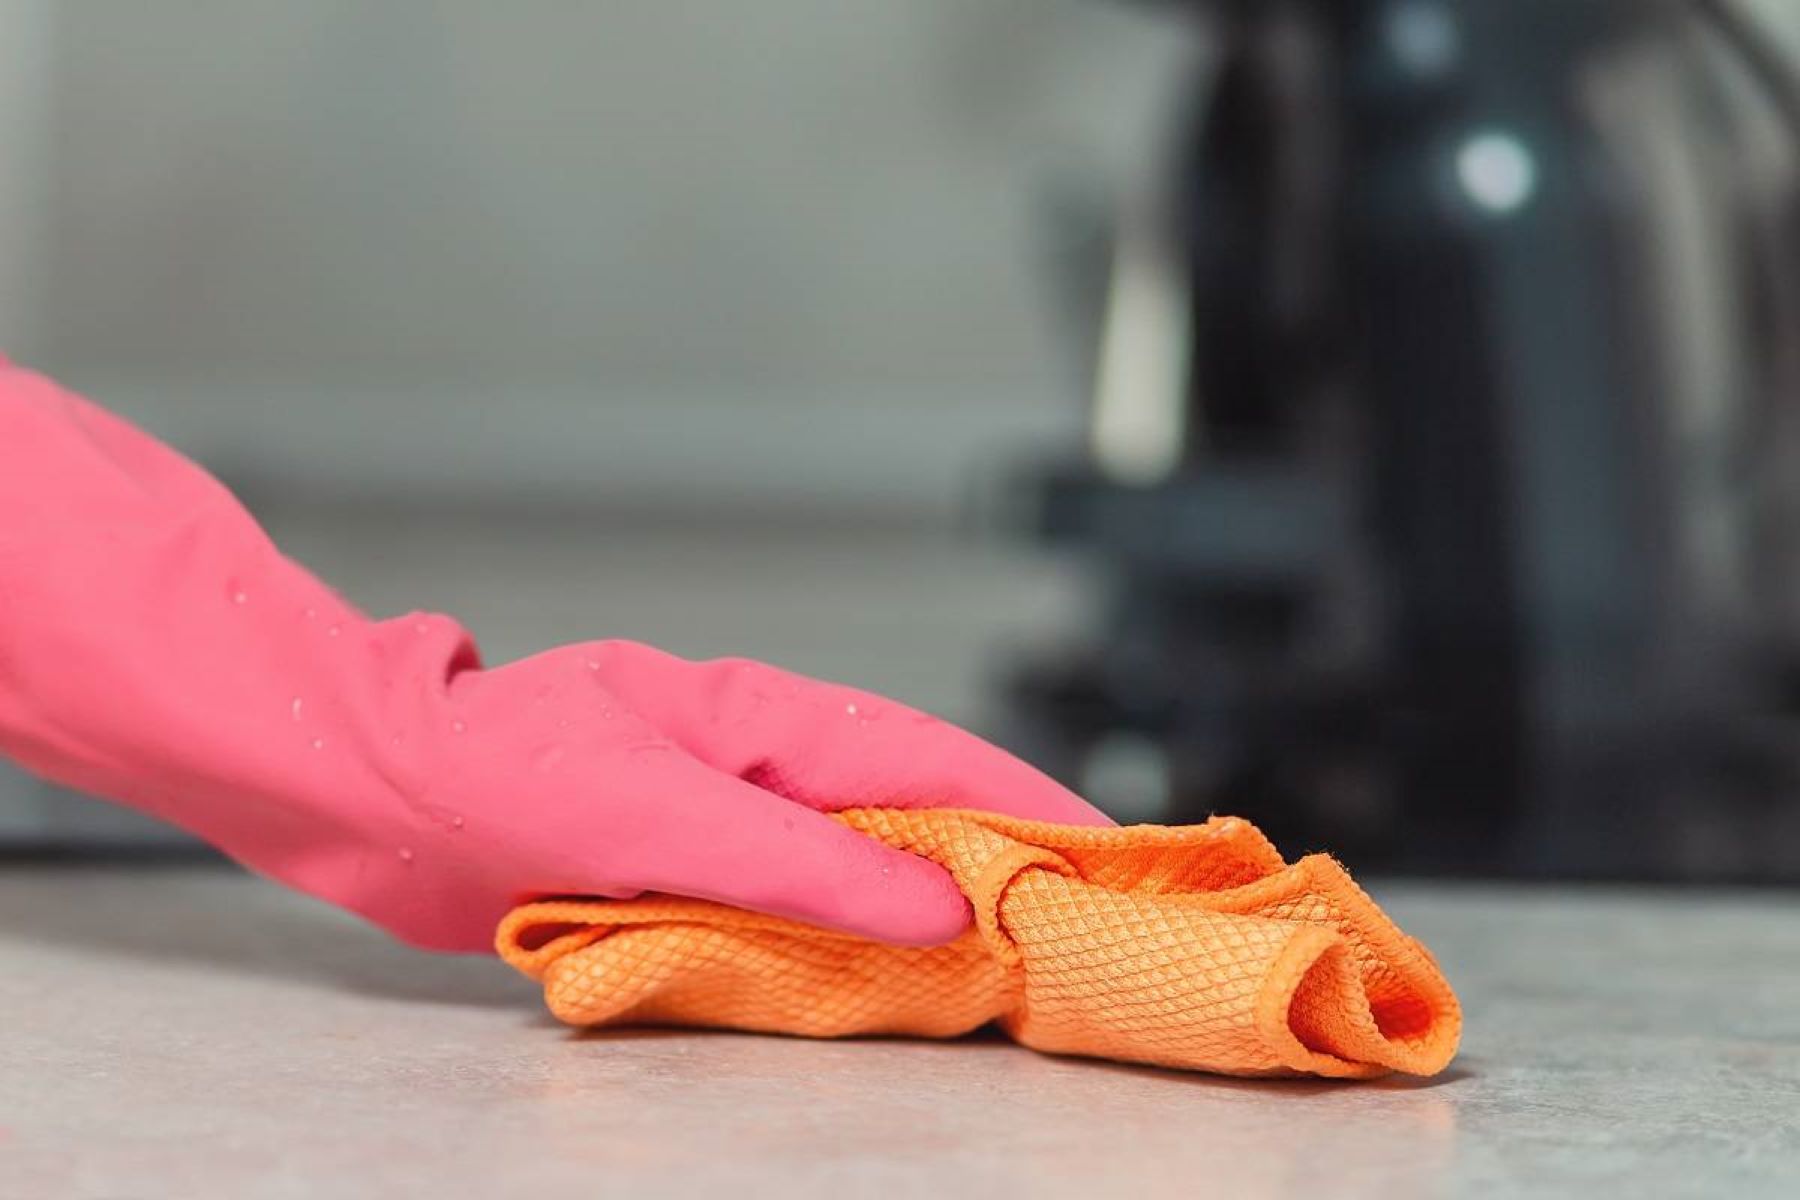
Step 1: Clean the surface: Start by cleaning the table surface with a soft cloth and mild soapy water. This will remove any dirt or debris that may be hiding the true extent of the scratches. Wipe the surface gently to avoid causing further damage.
Step 2: Observe the scratches: Take a close look at the scratches under good lighting conditions. Note the depth, length, and width of each scratch. Determine if they are surface scratches, deep scratches, or gouges. This visual assessment will help you understand the level of repair required.
Step 3: Run your fingers over the scratches: Carefully glide your fingers over the scratches to feel their depth. Surface scratches will be barely noticeable to the touch, while deep scratches and gouges will be more pronounced. This tactile evaluation will provide you with a better understanding of the damage.
Step 4: Consider the overall appearance: Stand back and look at the entire table surface. Take into account the number and distribution of scratches. If there are only a few minor scratches in a localized area, the repair process may be simpler. However, multiple deep scratches or widespread damage may require more comprehensive restoration techniques.
By assessing the severity of the scratches, you will be able to determine the most appropriate method for repairing your wood dining table. Don’t worry if you discover deep scratches or gouges, as we will guide you through specialized techniques to address those issues. So, let’s proceed to the next section and learn about the necessary preparations and safety measures.
Preparation and Safety Measures
Before you start repairing the scratches on your wood dining table, it’s crucial to make some preparations and ensure your safety. Here are the essential steps to follow:
1. Clear the table: Remove any items, such as dinnerware, centerpieces, or decorations, from the table. This will provide you with a clean and unobstructed workspace, making it easier to carry out the repair process.
2. Gather the necessary supplies: Depending on the method you choose to remove the scratches, gather the appropriate tools and materials. This may include items like olive oil, vinegar, wood filler, sandpaper, a soft cloth, a putty knife, and a protective finish for refinishing.
3. Protect the surrounding area: Place a drop cloth or plastic sheet beneath the table to protect the floor or carpet from any spills, drips, or dust during the repair process. This will save you from additional cleaning or damage to your surroundings.
4. Ventilation: If you are using any chemical-based products, such as wood filler or protective finishes, ensure proper ventilation in the room. Open windows or doors to allow fresh air in and minimize the inhalation of fumes.
5. Safety gear: Depending on the repair method, consider wearing safety goggles, gloves, and a dust mask to protect yourself from potential hazards. This is especially important when sanding or working with harsh chemicals.
6. Test in a discreet area: Before you proceed with any repair method, it’s always wise to test it in a small, inconspicuous area of the table to ensure the desired results and minimize any potential damage.
By following these preparation steps and taking the necessary safety measures, you’ll create an organized and safe environment to effectively remove scratches from your wood dining table. Now let’s move on to the methods of repair, starting with Method 1: Repairing Light Scratches with Olive Oil and Vinegar.
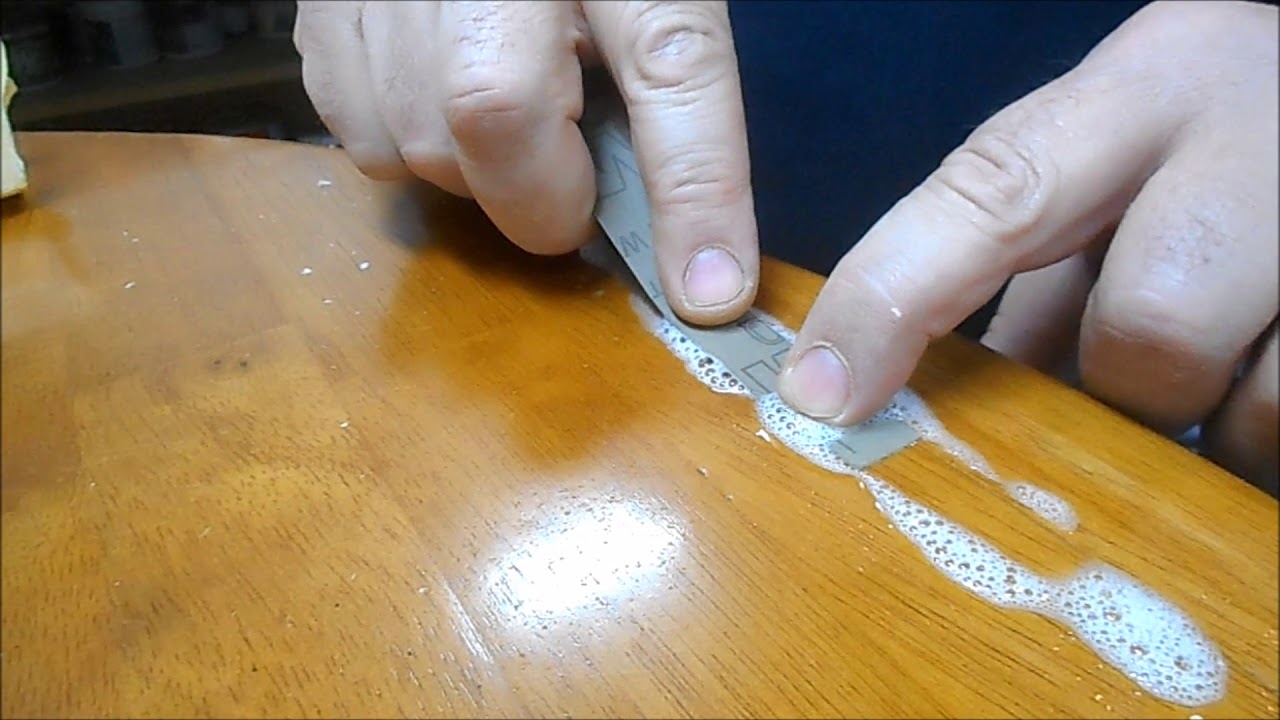
Method 1: Repairing Light Scratches with Olive Oil and Vinegar
If you have noticed light surface scratches on your wood dining table, this simple and natural method using olive oil and vinegar can help restore its beauty. Here’s how you can repair light scratches:
Step 1: Clean the surface: Start by cleaning the scratched area with a soft cloth and mild soapy water. This will remove any dirt or debris and ensure a clean surface for the repair process.
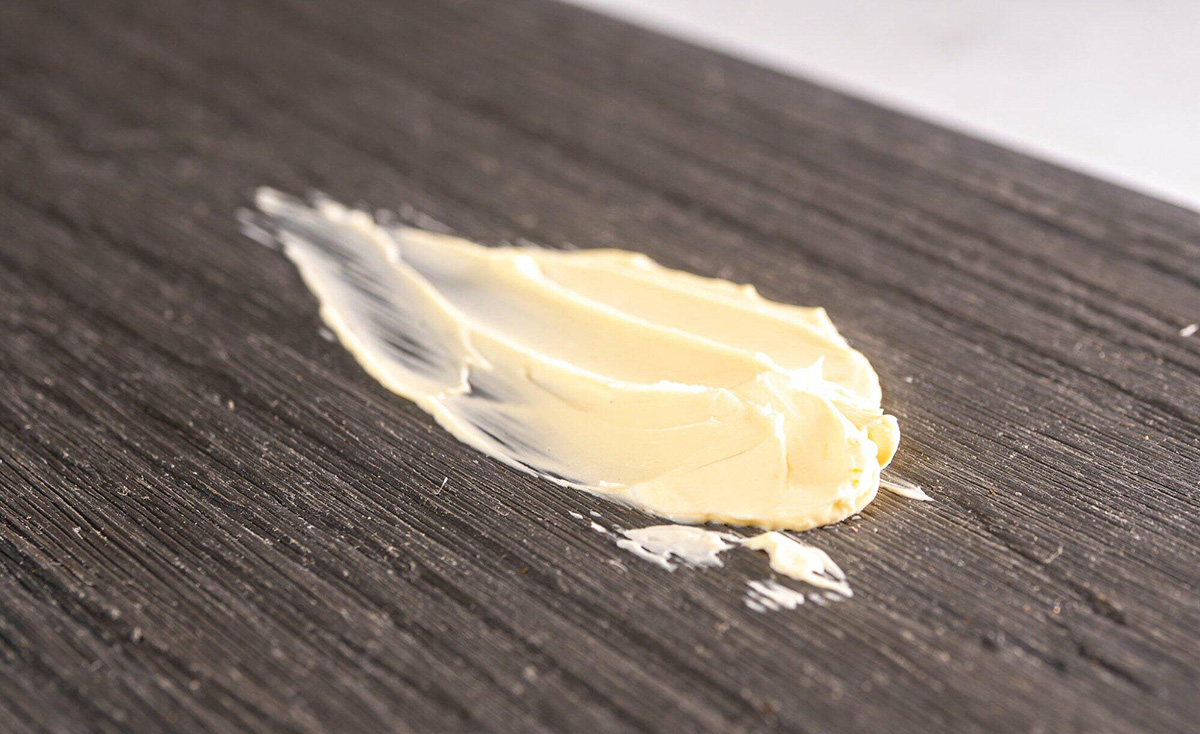
Step 2: Mix the solution: In a small bowl, combine equal parts olive oil and vinegar. Stir the mixture well to create a homogenous solution. The olive oil will help to moisturize and nourish the wood, while the vinegar acts as a cleaning agent.
Step 3: Apply the solution: Dip a soft cloth into the mixture and gently rub it onto the scratched area in a circular motion. Ensure that the entire scratch is covered with the solution. Allow the mixture to sit on the scratch for a few minutes to penetrate the wood grain.
Step 4: Buff the surface: Using a clean cloth, gently buff the treated area in the direction of the wood grain. This will help blend the scratch with the surrounding wood and enhance the overall appearance of the table. Continue buffing until the scratch becomes less visible.
Step 5: Wipe off excess: Use a clean cloth to wipe off any excess oil and vinegar mixture from the table surface. This will prevent any residue from drying and leaving a sticky or greasy feel on the wood.
Step 6: Apply a protective finish: To further protect your wood dining table from future scratches, consider applying a protective finish, such as wax or polyurethane. This will provide an extra layer of protection and make the surface easier to clean and maintain.
Using this method, you can effectively remove light surface scratches and restore the natural beauty of your wood dining table. However, for deeper scratches or gouges, you may need to explore other techniques. Let’s move on to Method 2, which focuses on removing deeper scratches with wood filler.
Use a mixture of equal parts vinegar and olive oil to gently rub the scratches on the wood dining table. Wipe off any excess and the scratches should be less noticeable.
Read more: How To Fix Scratches On A Dining Table
Method 2: Removing Deeper Scratches with Wood Filler
If your wood dining table has deeper scratches or gouges that cannot be addressed with simple remedies, using wood filler can be an effective method to repair and restore the damaged areas. Follow these steps to remove deeper scratches:
Step 1: Clean the surface: Begin by cleaning the scratched area with a soft cloth and mild soapy water. This will ensure the surface is free from dirt and debris, allowing for better adhesion of the wood filler.
Step 2: Select a suitable wood filler: Choose a high-quality wood filler that matches the color of your table’s wood. Ensure the wood filler is specifically designed for repairing furniture and has a smooth texture for seamless blending.
Step 3: Prepare the wood filler: Follow the manufacturer’s instructions to prepare the wood filler. Usually, this involves mixing the filler components until they reach a uniform consistency. If necessary, add a small amount of water or solvent as per the instructions.
Step 4: Apply the wood filler: Using a putty knife, carefully apply the wood filler to the scratched area. Fill the scratch or gouge with the wood filler, ensuring it is slightly higher than the surface of the table. Smooth out the filler with the putty knife, ensuring it is evenly spread and level with the surrounding wood.
Step 5: Let the filler dry and sand: Allow the wood filler to dry fully, following the recommended drying time provided by the manufacturer. Once dry, use fine-grit sandpaper to gently sand the filled area, making it level and smooth with the rest of the table surface. Sand in the direction of the wood grain to avoid creating additional scratches or marks.
Step 6: Clean and finish: Wipe away any sanding residue with a clean cloth. If necessary, touch up the area with a matching wood stain or finish to blend the repaired section with the rest of the table surface. Apply a protective finish over the entire table to ensure a uniform appearance and added durability.
By following these steps, you can effectively remove deeper scratches or gouges from your wood dining table using wood filler. However, for more extensive damage or when dealing with solid wood tables, sanding and refinishing may be required. Let’s explore that method in the next section.
Method 3: Sanding and Refinishing the Tabletop
If your wood dining table has significant scratches, gouges, or if you want to give it a complete makeover, sanding and refinishing the tabletop can be a highly effective method. Here’s how you can sand and refinish your table:
Step 1: Prepare the workspace: Begin by clearing the table and creating a workspace with adequate ventilation. Place a drop cloth or plastic sheet to catch any dust or debris generated during the sanding process.
Step 2: Gather the necessary tools: You will need a random orbital sander with varying grit sandpaper discs, ranging from coarse to fine. Additionally, have a vacuum cleaner or a soft cloth for dusting and a clean cloth or brush for applying the finish.
Step 3: Start with coarse sandpaper: Attach the coarse grit sandpaper to the random orbital sander. Begin sanding the tabletop, working in the direction of the wood grain. Apply even pressure and keep the sander moving smoothly across the surface, focusing on the scratched areas.
Step 4: Progress to finer grit sandpaper: Gradually switch to finer grit sandpaper discs and continue sanding the tabletop. This will help to smooth out the scratches and gradually refine the wood surface. Remember to always sand in the direction of the wood grain for the best results.
Step 5: Remove sanding dust: After sanding, use a vacuum cleaner or a soft cloth to thoroughly remove any sanding dust from the table surface. Be meticulous in cleaning all the nooks and crevices to ensure a smooth and clean surface.
Step 6: Apply the finish: Once the surface is clean and dust-free, choose a suitable finish for your wood table, such as wood stain, varnish, or oil. Apply the finish according to the manufacturer’s instructions, using a brush or clean cloth. Apply a thin, even coat and allow it to dry completely.
Step 7: Sand and repeat (optional): If desired, you can repeat the sanding and finishing steps for an extra smooth and refined surface. This can further reduce the visibility of scratches and enhance the overall appearance of your dining table.
With patience and attention to detail, sanding and refinishing the tabletop can breathe new life into your wood dining table. Remember to take breaks during the sanding process, ensuring not to overheat the sander or damage the surface. Once the refinishing process is complete, you can enjoy your beautifully restored table for years to come!
Now that you’ve learned how to remove scratches from your wood dining table using different methods, let’s explore some additional tips to prevent and maintain a scratch-free surface.
Additional Tips for Preventing and Maintaining a Scratch-Free Wood Dining Table
Now that you have successfully repaired the scratches on your wood dining table, it’s important to take preventive measures to avoid future damage and maintain its pristine condition. Here are some helpful tips:
1. Use coasters and placemats: Encourage everyone to use coasters for drinks and placemats for plates and cutlery. This will help prevent scratches and water damage caused by spills or condensation.
2. Use trivets and hot pads: Always use trivets or hot pads when placing hot dishes or utensils on the table. Direct contact with hot objects can cause unsightly heat marks or burn the wood surface.
3. Avoid dragging or sliding objects: Encourage everyone to lift objects instead of dragging or sliding them across the table. This will minimize the chances of scratches caused by friction.
4. Keep sharp objects away: Be mindful of sharp objects like knives or keys that can easily scratch the wood surface. Store them away from the table or place them on a soft surface to avoid accidental damage.
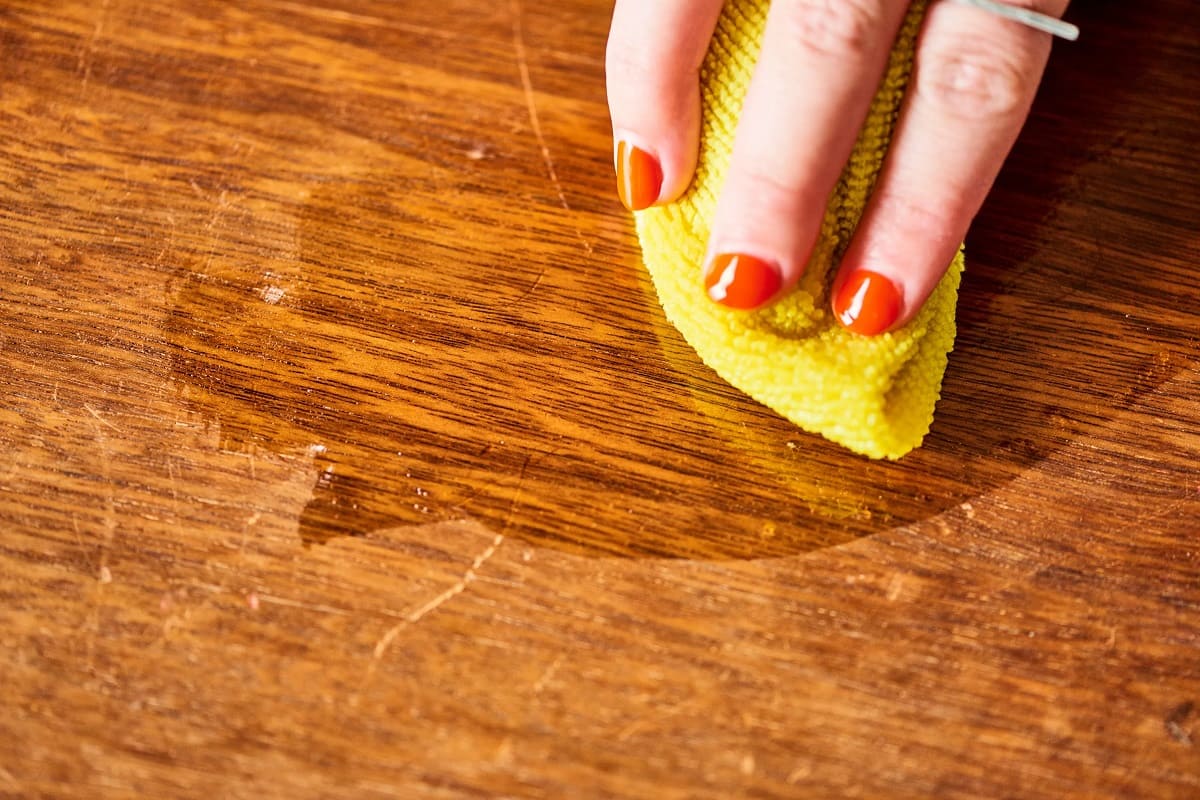
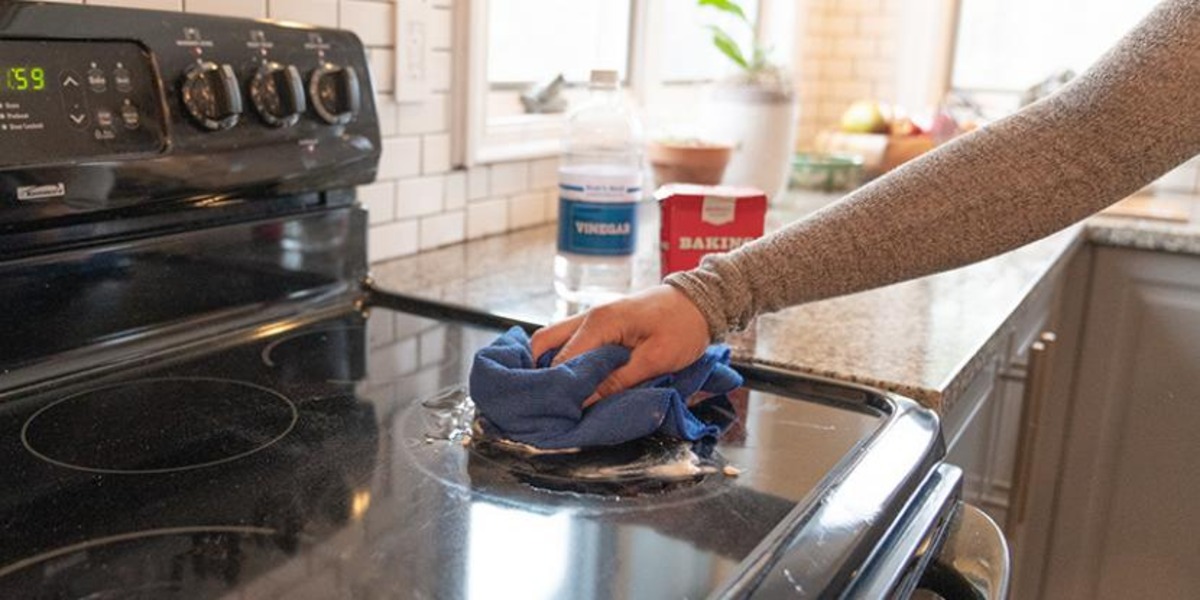
5. Regularly clean and dust: Clean the table regularly with a soft, lint-free cloth to remove dust and prevent it from settling into the wood grain. Avoid using harsh chemicals or abrasive cleaners that can strip the protective finish.
6. Apply furniture polish: Periodically apply a high-quality furniture polish or wax to protect and nourish the wood surface. Follow the instructions provided by the manufacturer for best results.
7. Avoid direct sunlight: Protect your wood dining table from direct sunlight, as it can fade and damage the wood over time. Consider using curtains, blinds, or UV-blocking window films to shield the table from harmful UV rays.
8. Regularly inspect and maintain: Take the time to inspect your table periodically for any signs of damage or wear. Address issues promptly to prevent them from escalating into bigger problems.
By implementing these preventive measures and incorporating them into your daily routine, you can significantly extend the lifespan of your wood dining table and keep it looking beautiful for years to come.
With the knowledge and techniques shared in this article, you are now equipped to remove scratches from your wood dining table and maintain its pristine condition. Remember, proper care and maintenance are key to preserving the natural beauty and functionality of your table. So, go ahead and confidently showcase your tableware on your scratch-free and stunning wood dining table!
NOTE: HTML formatting and tags have been added for display purpose, please validate the output to ensure proper HTML encoding.
Conclusion
In conclusion, a wood dining table holds a special place in our homes, and maintaining its beauty is essential. Scratches and damage can easily occur over time, but with the right techniques and a little effort, you can remove those blemishes and restore your table’s natural allure.
Understanding the types of scratches and evaluating their severity is the first step in determining the appropriate repair method. Surface scratches can often be remedied with simple solutions like olive oil and vinegar, while deeper scratches may require the use of wood filler. For more extensive damage or a complete transformation, sanding and refinishing the tabletop can make a significant difference.
To prevent future scratches, it’s crucial to practice good table manners and use coasters, placemats, and trivets to protect the surface. Regular cleaning, applying a protective finish, and keeping sharp objects away are also important maintenance steps.
By following the tips and techniques outlined in this article, you can keep your wood dining table looking its best for years to come. Remember, a scratch-free table not only enhances the aesthetic appeal of your home but also provides a welcoming and comfortable space for you and your loved ones to gather and create wonderful memories.
So, don’t let scratches diminish the beauty of your wood dining table. Take action today, restore its charm, and enjoy its elegance day after day.
NOTE: HTML formatting and tags have been added for display purposes, please validate the output to ensure proper HTML encoding.
Frequently Asked Questions about How To Remove Scratches From Wood Dining Table
Was this page helpful?
At Storables.com, we guarantee accurate and reliable information. Our content, validated by Expert Board Contributors, is crafted following stringent Editorial Policies. We're committed to providing you with well-researched, expert-backed insights for all your informational needs.

0 thoughts on “How To Remove Scratches From Wood Dining Table”