Home>Furniture & Design>Outdoor Furniture>How To Dye Outdoor Umbrella
Outdoor Furniture
How To Dye Outdoor Umbrella
Modified: February 18, 2024
Learn how to dye your outdoor umbrella to give it a fresh new look and enhance your outdoor furniture and design. Follow our step-by-step guide for best results!
(Many of the links in this article redirect to a specific reviewed product. Your purchase of these products through affiliate links helps to generate commission for Storables.com, at no extra cost. Learn more)
Introduction
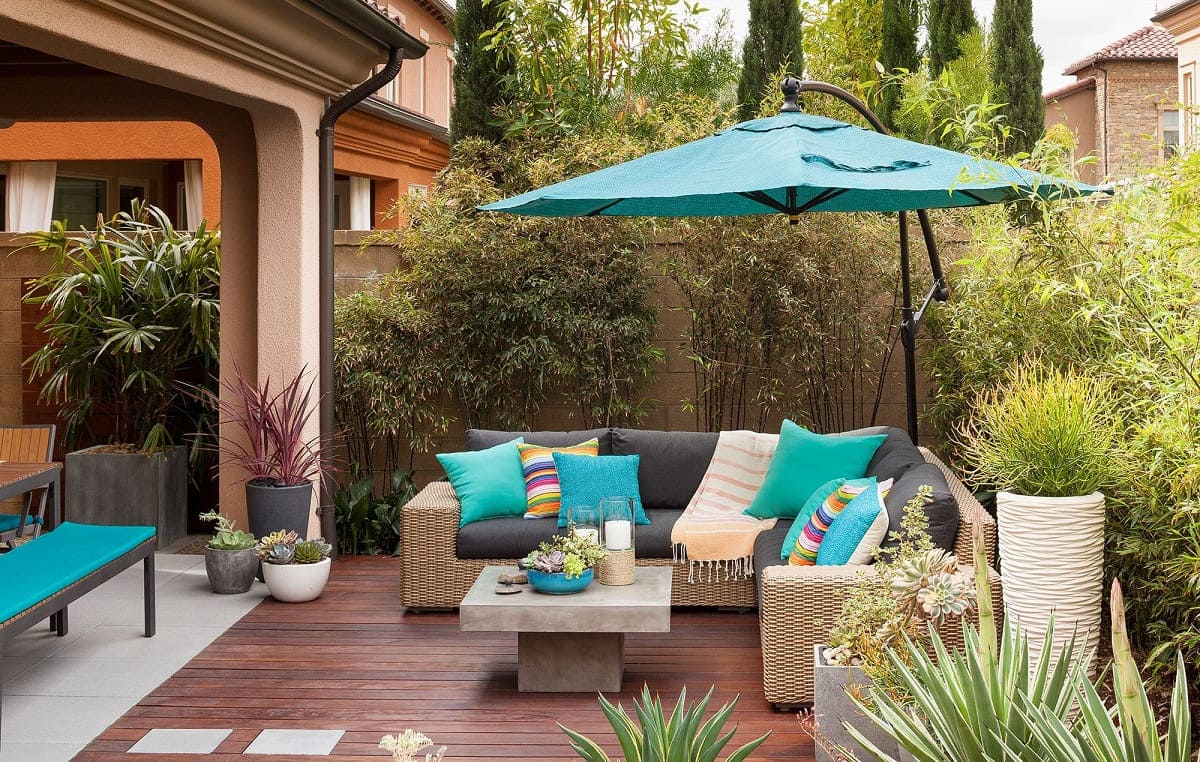
Welcome to the world of outdoor furniture design, where creativity and functionality intertwine to elevate your outdoor living space. One of the most versatile and essential pieces of outdoor furniture is the umbrella. Not only does it provide shade and protection from the elements, but it also serves as a stylish accent to your outdoor decor.
However, if you're looking to revamp your outdoor umbrella and add a personal touch, dyeing it can be a fantastic way to breathe new life into this functional accessory. Whether you want to match it with your existing outdoor furniture or introduce a pop of color to your outdoor oasis, dyeing your outdoor umbrella can be a fun and rewarding DIY project.
In this comprehensive guide, we'll walk you through the step-by-step process of dyeing your outdoor umbrella, from gathering the necessary materials to adding the final touches. Whether you're a seasoned DIY enthusiast or a novice looking to explore the world of outdoor furniture customization, this guide will equip you with the knowledge and inspiration to transform your outdoor umbrella into a stunning focal point of your outdoor space. So, roll up your sleeves and get ready to unleash your creativity as we delve into the art of dyeing outdoor umbrellas.
Key Takeaways:
- Revamp your outdoor umbrella with a personalized touch by dyeing it! Follow the step-by-step guide to unleash your creativity and transform your outdoor space with vibrant and lasting colors.
- Prepare, mix, dye, set, and add final touches to your outdoor umbrella for a visually stunning and enduring DIY project. Infuse your outdoor oasis with personalized charm and reflect your unique style preferences.
Read more: How To Dye A Patio Umbrella
Materials Needed
Before embarking on the journey of dyeing your outdoor umbrella, it’s essential to gather the necessary materials to ensure a successful and satisfying outcome. Here’s a list of items you’ll need for this project:
- Outdoor Umbrella: The primary canvas for your creative endeavor, make sure the umbrella is clean and free from any dirt or debris.
- Fabric Dye: Choose a high-quality fabric dye specifically designed for outdoor use. Opt for a color that complements your outdoor decor or adds an exciting contrast.
- Bucket or Large Container: You’ll need a spacious container to mix the dye and immerse the umbrella for even coloring.
- Stirring Utensil: A large spoon or stirring stick to mix the dye solution thoroughly.
- Gloves: Protect your hands from the dye by wearing rubber gloves throughout the dyeing process.
- Protective Covering: Lay down a plastic tarp or old sheets to protect your work area from potential dye splatters.
- Watering Can or Hose: Access to water for rinsing and setting the dye in the umbrella fabric.
- Mild Detergent: Use a gentle detergent to wash the umbrella before dyeing to ensure the fabric is clean and ready to absorb the dye.
- Sealant (Optional): If you want to protect the color and enhance the durability of the dye, consider using a fabric sealant designed for outdoor fabrics.
- Outdoor Space: A well-ventilated outdoor area for dyeing and drying the umbrella.
By gathering these materials, you’ll be well-prepared to embark on the exciting journey of transforming your outdoor umbrella into a personalized and vibrant addition to your outdoor living space.
Preparing the Umbrella
Before diving into the dyeing process, it’s crucial to prepare the outdoor umbrella to ensure optimal dye absorption and a seamless coloring outcome. Follow these steps to prepare the umbrella for the dyeing process:
- Clean the Umbrella: Start by thoroughly cleaning the umbrella to remove any dirt, dust, or residues that may hinder the dye from adhering to the fabric. Use a mild detergent and a soft brush or sponge to gently scrub the umbrella’s surface. Rinse it with water and allow it to dry completely before proceeding.
- Inspect for Damage: Check the umbrella for any tears, rips, or loose stitching. Repair any damage before dyeing to ensure that the fabric is in good condition and ready to undergo the dyeing process.
- Choose the Dyeing Method: Depending on the design of your umbrella, determine whether you’ll be fully submerging it in the dye solution or employing a partial dyeing technique. This decision will influence how you approach the dyeing process.
- Secure the Work Area: Set up a designated outdoor workspace and lay down a protective covering to prevent accidental spills and splatters from staining your surroundings.
- Prepare the Watering Can or Hose: Ensure easy access to water for rinsing the umbrella after dyeing and for setting the dye in the fabric.
By meticulously preparing the umbrella and its surroundings, you’ll create an ideal foundation for the dyeing process, setting the stage for a successful and visually stunning transformation. With the umbrella primed and ready, you’re now equipped to proceed to the next exciting phase: mixing the dye.
Mixing the Dye
As you venture into the world of dyeing your outdoor umbrella, the process of mixing the dye is a crucial step that directly impacts the final color and vibrancy of the umbrella’s fabric. Follow these guidelines to ensure a seamless and effective dye mixing process:
- Read the Instructions: Carefully review the instructions provided with the fabric dye to understand the recommended dye-to-water ratio and any specific guidelines for the dyeing process.
- Prepare the Dye Solution: In a large bucket or container, mix the fabric dye with water according to the instructions. Use a stirring utensil to thoroughly blend the dye and water, ensuring a homogeneous solution.
- Test the Color: If you’re uncertain about the resulting color, perform a small dye test on a discreet area of the umbrella fabric to gauge the intensity and shade of the dye. Adjust the dye concentration as needed to achieve the desired color.
- Consider Gradual Dyeing: For a nuanced or gradient effect, you can opt for a gradual dyeing approach by diluting the dye solution and immersing specific sections of the umbrella for varying durations. This technique allows for creative color transitions and personalized patterns.
- Wear Protective Gear: When handling the dye solution, wear gloves to protect your hands from staining and ensure safe handling of the dye.
- Plan for Even Application: To achieve uniform coloring, strategize how you’ll immerse the umbrella in the dye solution, ensuring that all areas receive adequate exposure to the dye for consistent results.
By meticulously mixing the dye and considering the desired color outcome, you’ll lay the groundwork for a successful dyeing process. With the dye solution prepared and the umbrella primed, you’re now ready to embark on the exciting phase of dyeing the umbrella and witnessing the transformation unfold.
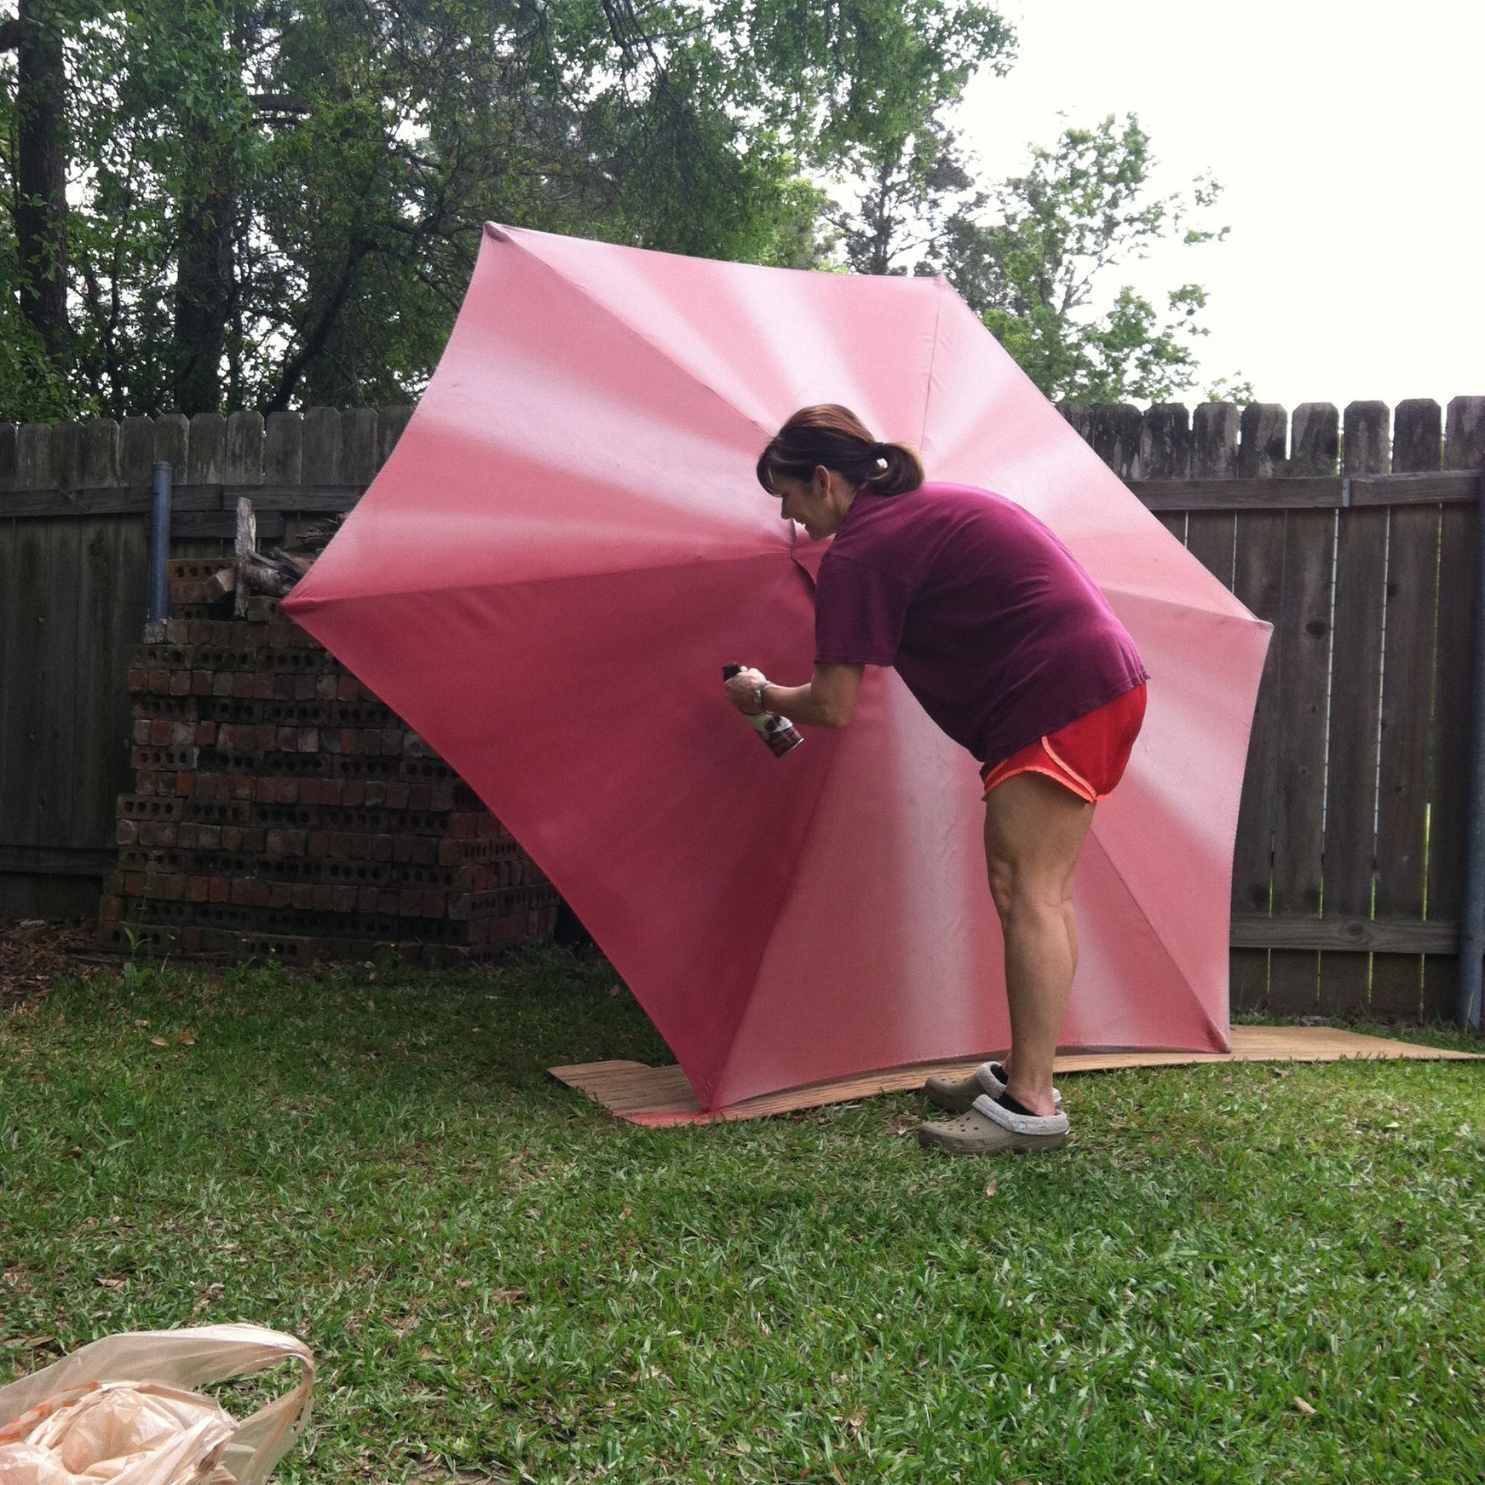
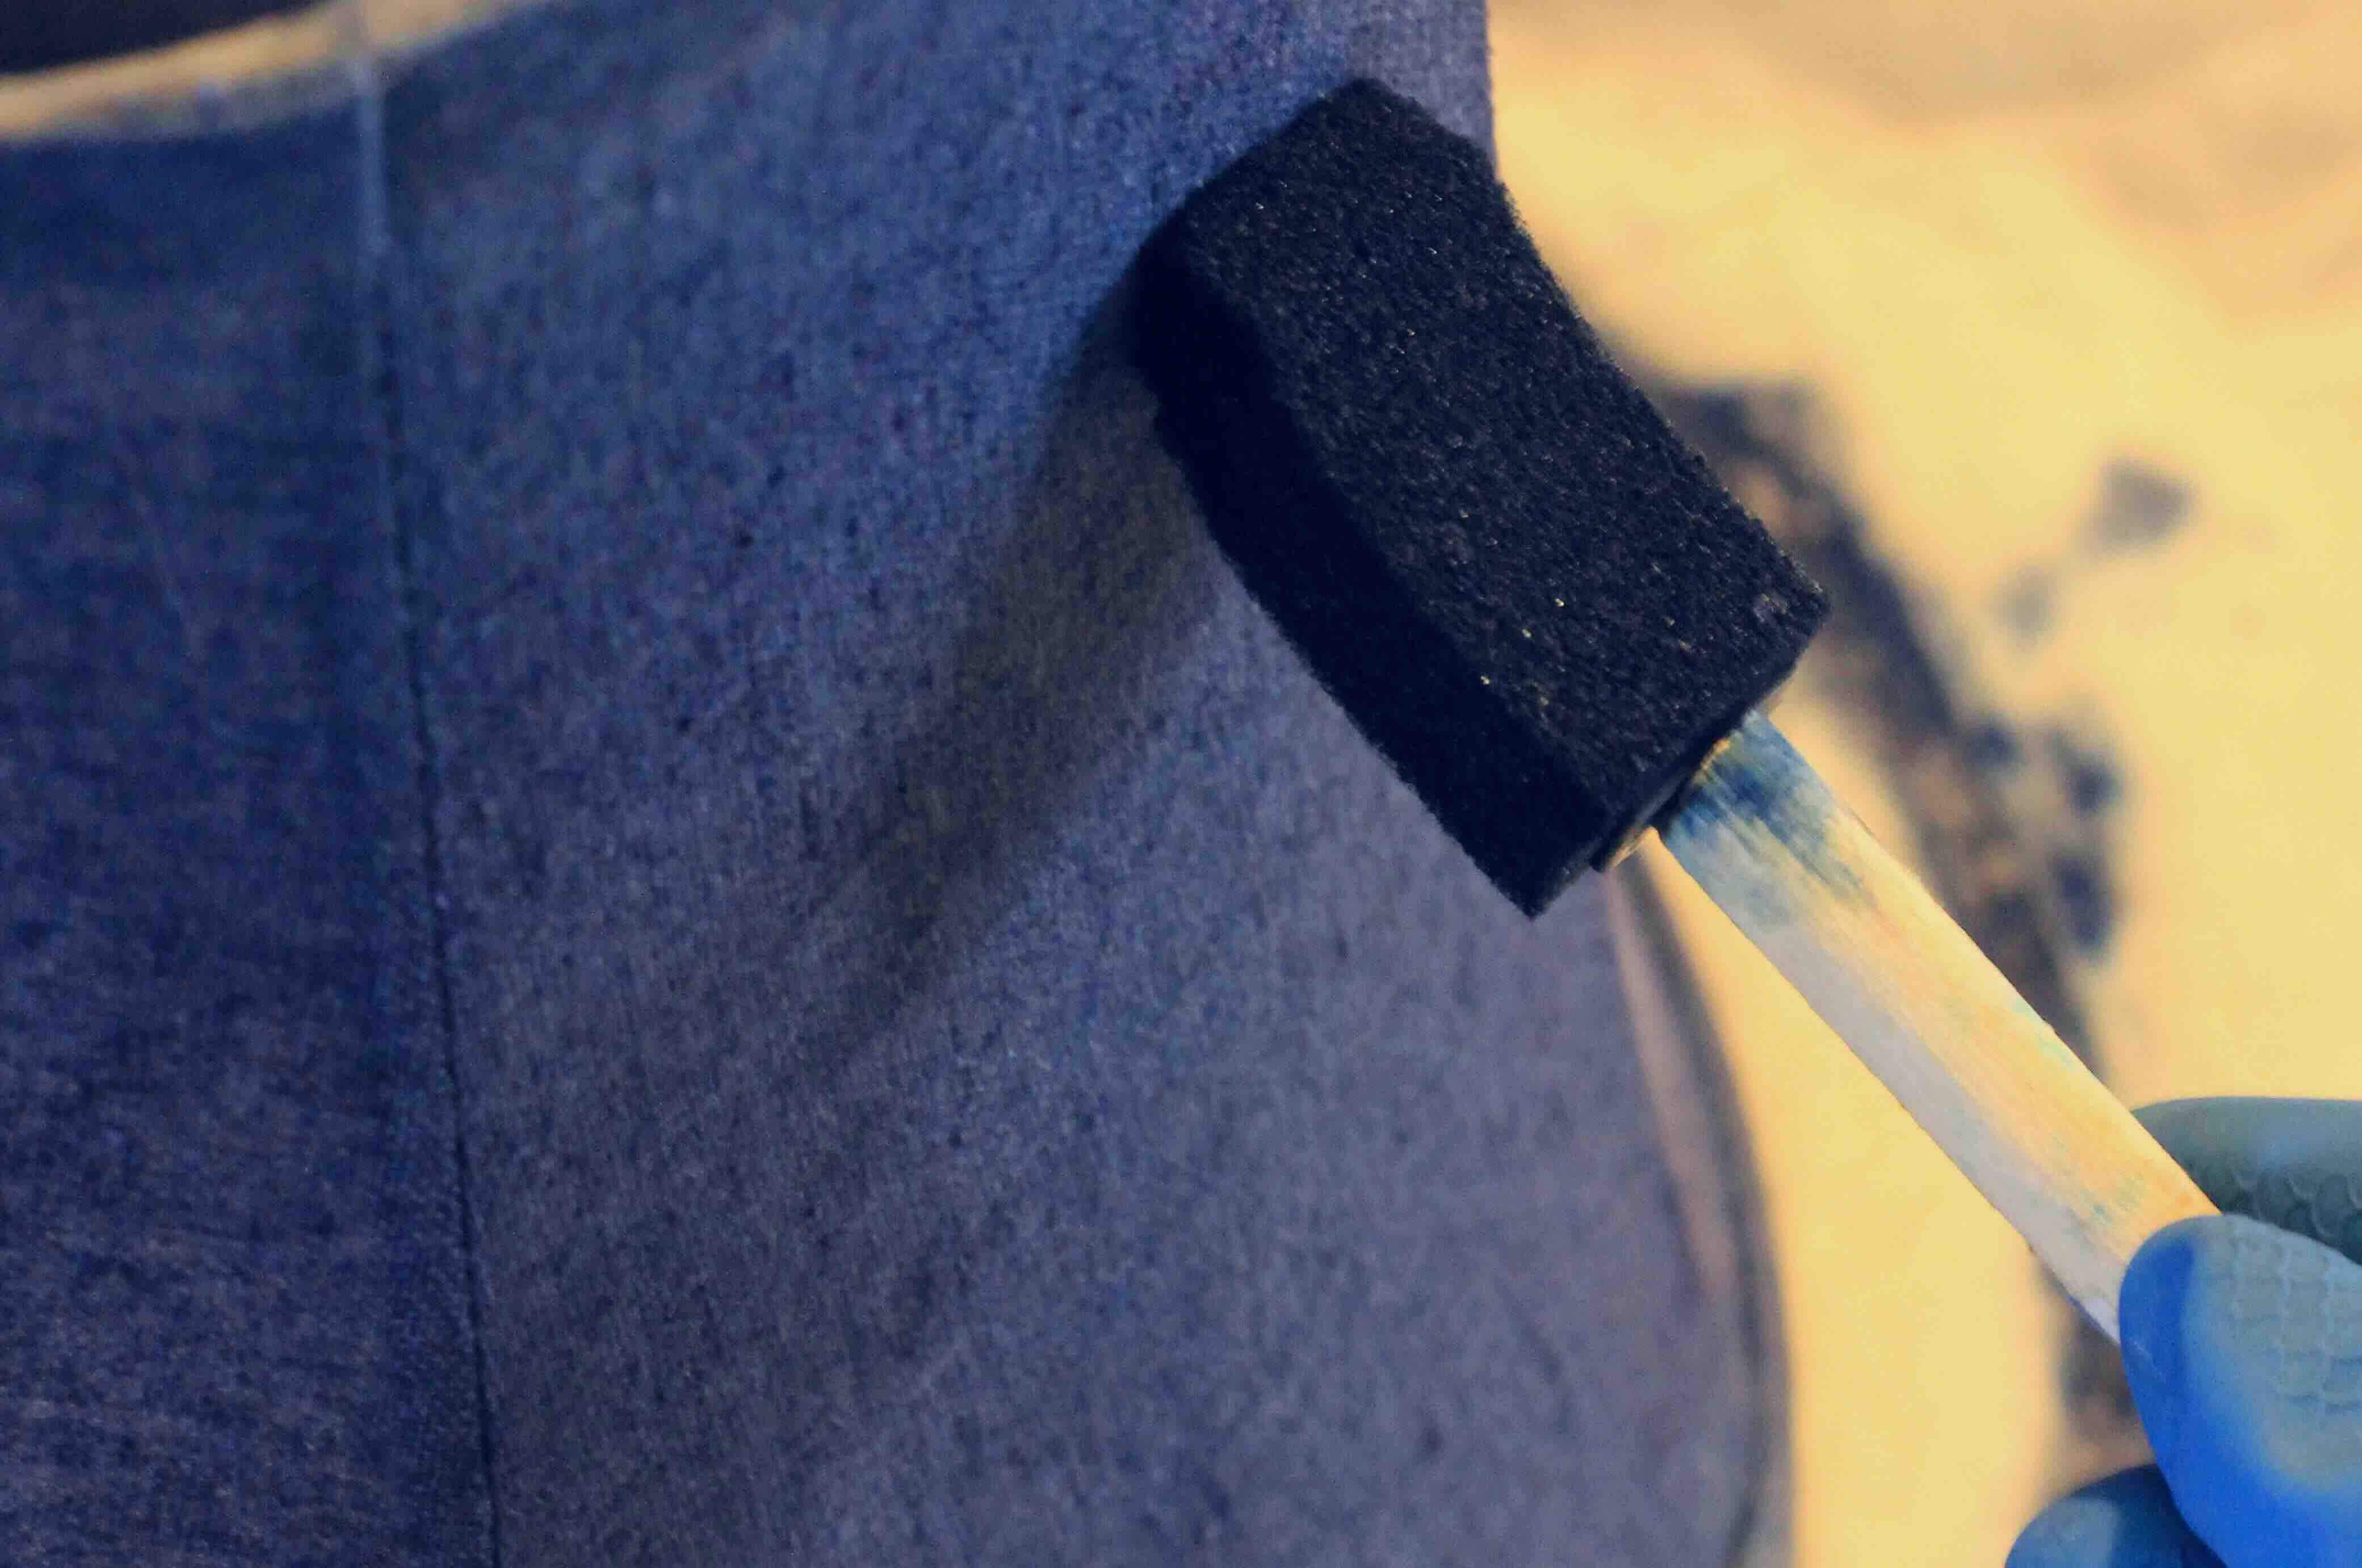
To dye an outdoor umbrella, use fabric dye specifically designed for outdoor use. Clean the umbrella thoroughly, then apply the dye evenly using a brush or spray bottle. Let it dry completely before using.
Dyeing the Umbrella
With the umbrella cleaned, inspected, and the dye solution prepared, it’s time to immerse yourself in the captivating process of dyeing the outdoor umbrella. Follow these steps to ensure a seamless and vibrant dyeing experience:
- Immerse the Umbrella: Carefully lower the umbrella into the prepared dye solution, ensuring that the fabric is fully submerged. Use gentle, even motions to prevent splashing and ensure thorough dye penetration.
- Monitor the Dyeing Process: Depending on the desired color intensity and the type of fabric dye used, monitor the umbrella’s immersion duration to achieve the intended hue. Keep in mind that the fabric may appear darker when wet, so consider this factor when gauging the dyeing progress.
- Stir or Shift the Umbrella: Periodically stir the umbrella in the dye solution or shift its position to promote even dye distribution. This step is crucial for preventing uneven coloration and achieving a harmonious result.
- Exercise Patience: Allow the umbrella to soak in the dye solution for the recommended duration, as specified by the fabric dye instructions or based on your desired color outcome. Patience is key to achieving a rich and lasting coloration.
- Rinse the Umbrella: Once the desired dyeing duration is reached, carefully remove the umbrella from the dye solution and rinse it thoroughly with water. This step helps remove excess dye and sets the color in the fabric.
- Inspect the Color: After rinsing, assess the color of the umbrella fabric to ensure it aligns with your vision. Keep in mind that the color may appear lighter when dry, so consider the final shade when evaluating the dyeing outcome.
By following these steps, you’ll orchestrate a captivating dyeing process that infuses your outdoor umbrella with a personalized and vibrant hue, elevating its visual appeal and adding a touch of individuality to your outdoor space. With the dyeing phase complete, the next step involves setting the dye and adding the final touches to ensure a long-lasting and visually striking result.
Read more: How To Measure Outdoor Umbrella
Setting the Dye
After dyeing the outdoor umbrella and achieving the desired color, the crucial step of setting the dye ensures that the vibrant hues become a lasting and integral part of the fabric. Follow these essential guidelines to effectively set the dye and preserve the coloration:
- Allow for Drying Time: Find a well-ventilated outdoor area where the umbrella can hang freely to dry. Ensure that the fabric is exposed to air and sunlight, facilitating the drying process.
- Protect from Direct Sunlight: While drying, shield the umbrella from direct sunlight to prevent excessive fading of the newly applied dye. Opt for a shaded or partially shaded drying area to safeguard the coloration.
- Consider Heat-Setting Techniques: If recommended by the fabric dye instructions, employ heat-setting methods such as ironing or machine drying to enhance the permanence of the dye. Follow the specific guidelines provided to ensure optimal heat setting without compromising the fabric.
- Reassess the Color: Once the umbrella is fully dry, reassess the color to confirm that the dye has set effectively and the hues remain vibrant. This visual inspection ensures that the dye is secured in the fabric, ready to withstand outdoor elements.
- Apply Fabric Sealant (Optional): To further fortify the color and protect the fabric from environmental factors, consider applying a fabric sealant designed for outdoor use. This optional step can enhance the durability of the dye and extend the lifespan of the coloration.
- Finalize the Dye-Setting Process: With the dye effectively set and the umbrella fabric fully dried, you’ve completed the pivotal phase of securing the vibrant hues into the fabric, ensuring a long-lasting and visually captivating outcome.
By meticulously setting the dye and safeguarding the newly applied colors, you’ll preserve the beauty and individuality of your outdoor umbrella, allowing it to stand the test of time amidst the outdoor elements. With the dyeing and setting process accomplished, the final touches will add finesse and personal flair to your revitalized outdoor accessory.
Final Touches
As you near the completion of the outdoor umbrella dyeing project, it’s time to add the final touches that will elevate the visual impact and durability of the newly dyed fabric. These finishing steps will enhance the overall appeal and longevity of your revitalized outdoor accessory:
- Inspect for Imperfections: Thoroughly examine the dyed umbrella for any irregularities, such as uneven coloration or unintended dye marks. If necessary, perform touch-up dyeing to address minor imperfections and ensure a seamless finish.
- Secure Loose Threads: Check the umbrella for any loose threads or frayed edges resulting from the dyeing process. Use a pair of scissors to trim any stray threads and tidy up the fabric’s appearance.
- Reinforce Seams and Stitches: If the dyeing process has affected the integrity of the umbrella’s seams or stitches, reinforce them with a needle and thread to ensure the fabric remains structurally sound and resilient.
- Apply Fabric Protectant (Optional): Consider applying a fabric protectant specifically formulated for outdoor use to shield the dyed fabric from UV rays, moisture, and mildew. This additional layer of protection can prolong the vibrancy and lifespan of the dyed colors.
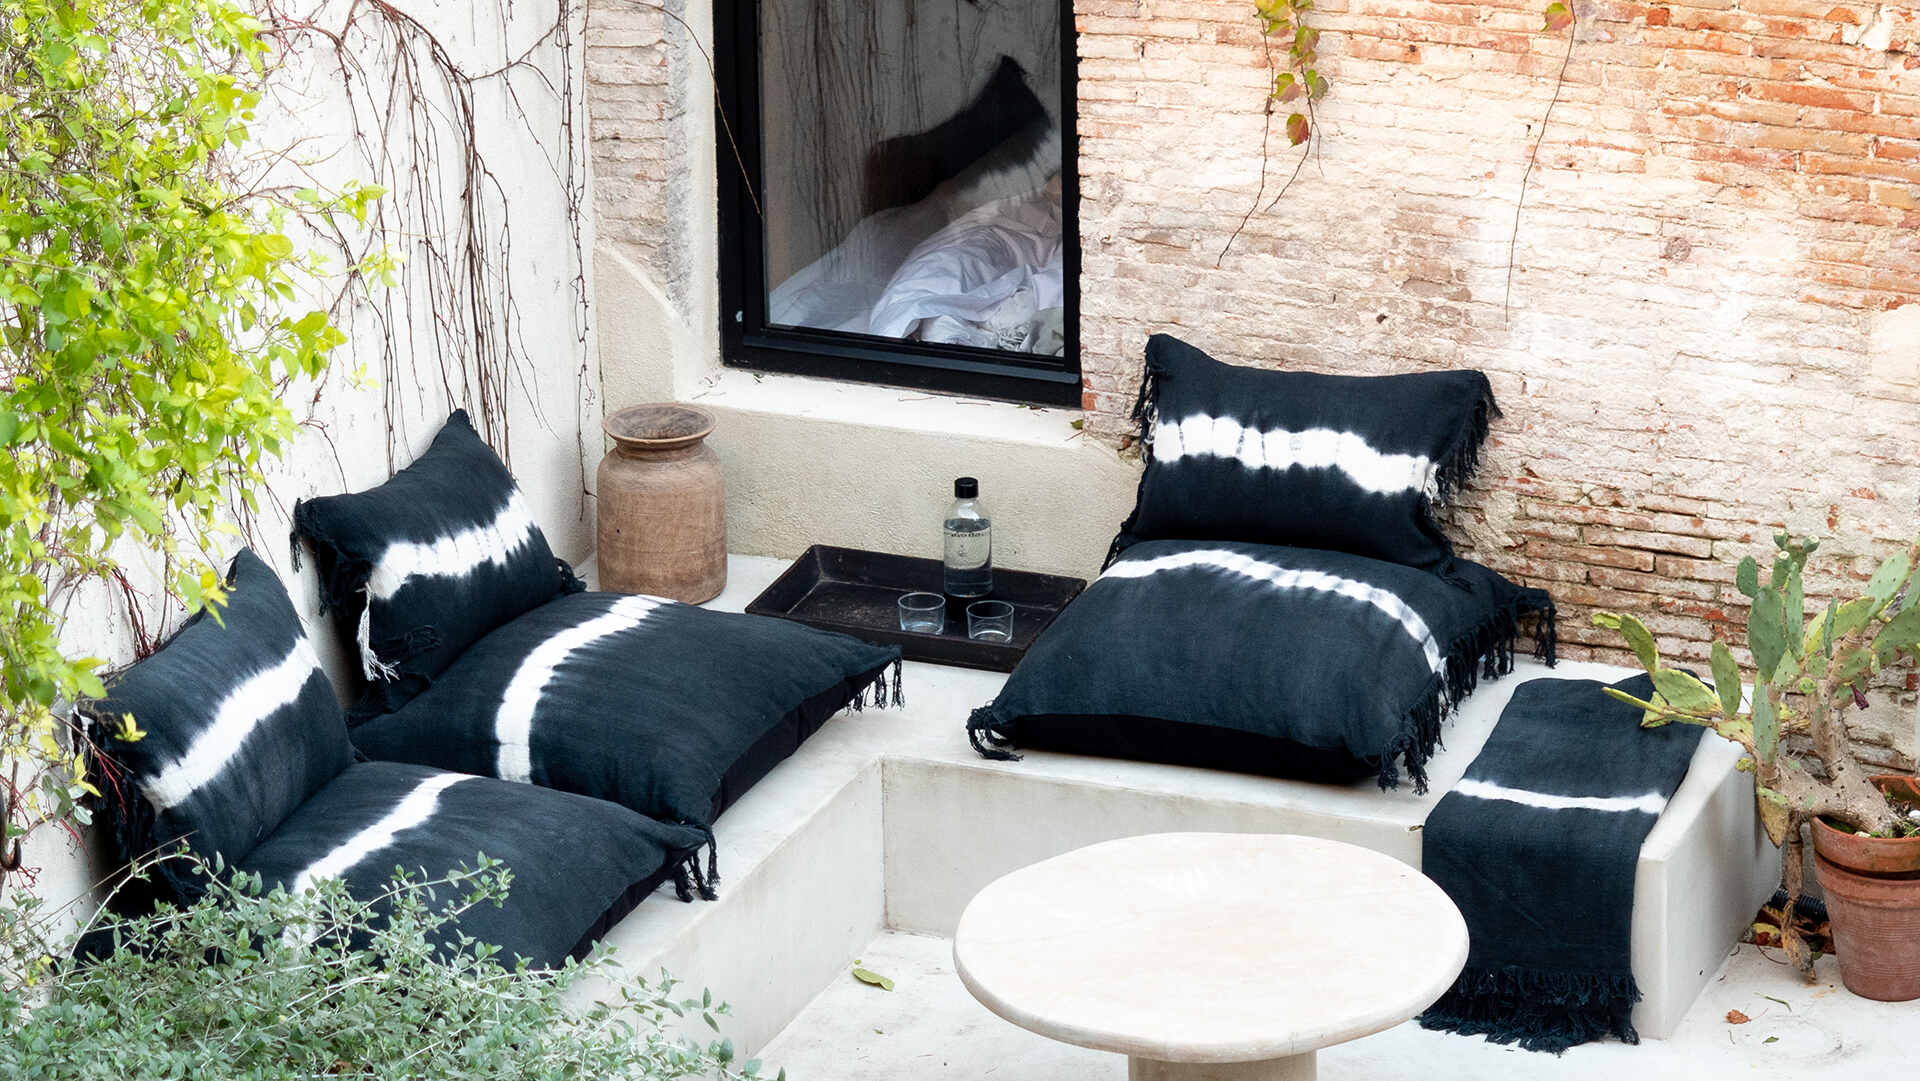
- Accessorize with Complementary Elements: Enhance the visual appeal of the dyed umbrella by complementing it with outdoor cushions, throw pillows, or decorative accents that harmonize with the newly applied colors. This cohesive approach creates a unified and inviting outdoor ambiance.
- Embrace Personalization: Consider embellishing the dyed umbrella with personalized touches, such as decorative trims, tassels, or embroidery, to infuse it with individuality and reflect your unique style preferences.
By attending to these final touches, you’ll refine the dyed umbrella’s appearance and fortify its resilience, ensuring that your outdoor space is adorned with a captivating and enduring focal point. With the completion of these finishing steps, your revitalized outdoor umbrella is ready to take center stage in your outdoor oasis, showcasing your creativity and infusing the space with personalized charm.
Conclusion
Congratulations on embarking on the exhilarating journey of dyeing your outdoor umbrella! Through this transformative DIY project, you’ve not only infused your outdoor space with vibrant and personalized hues but also unleashed your creativity to breathe new life into a functional outdoor accessory. As you reflect on the rewarding process of dyeing your outdoor umbrella, consider the following key takeaways:
First and foremost, the preparation phase sets the stage for a successful dyeing endeavor. By meticulously cleaning and inspecting the umbrella, you ensured that the fabric was primed for optimal dye absorption, laying the groundwork for a visually stunning outcome.
The process of mixing the dye was a pivotal step that allowed you to tailor the color to your preferences and set the tone for the umbrella’s revitalization. Your attention to detail and consideration of gradual dyeing techniques contributed to the nuanced and personalized result.
As you immersed yourself in the dyeing phase, carefully monitoring the process and ensuring even coloration, you witnessed the umbrella’s transformation unfold before your eyes. The patience and care invested in this phase culminated in a vibrant and captivating visual impact.
Setting the dye and attending to the final touches elevated the durability and aesthetic finesse of the dyed umbrella, ensuring that your creative endeavor endures the elements and stands as a testament to your ingenuity and personal style.
Ultimately, as you gaze upon the revitalized outdoor umbrella gracing your outdoor space, you’ve not only added a touch of individuality and charm but also nurtured a deeper connection to your outdoor oasis. Your DIY journey exemplifies the fusion of creativity, functionality, and personal expression, enriching your outdoor living experience.
So, as you revel in the beauty of your revitalized outdoor umbrella and the joy it brings to your outdoor haven, take pride in the transformative power of DIY creativity and the ability to infuse your surroundings with a touch of your unique personality. Your outdoor space now reflects not only the allure of nature but also the artistry of your imagination.
With the completion of this dyeing project, you’ve not only revitalized an outdoor accessory but also cultivated a space that resonates with your individuality, inviting you to savor the beauty of the outdoors in a setting that embodies your creative spirit.
Frequently Asked Questions about How To Dye Outdoor Umbrella
Was this page helpful?
At Storables.com, we guarantee accurate and reliable information. Our content, validated by Expert Board Contributors, is crafted following stringent Editorial Policies. We're committed to providing you with well-researched, expert-backed insights for all your informational needs.


0 thoughts on “How To Dye Outdoor Umbrella”